# Avail Documentation
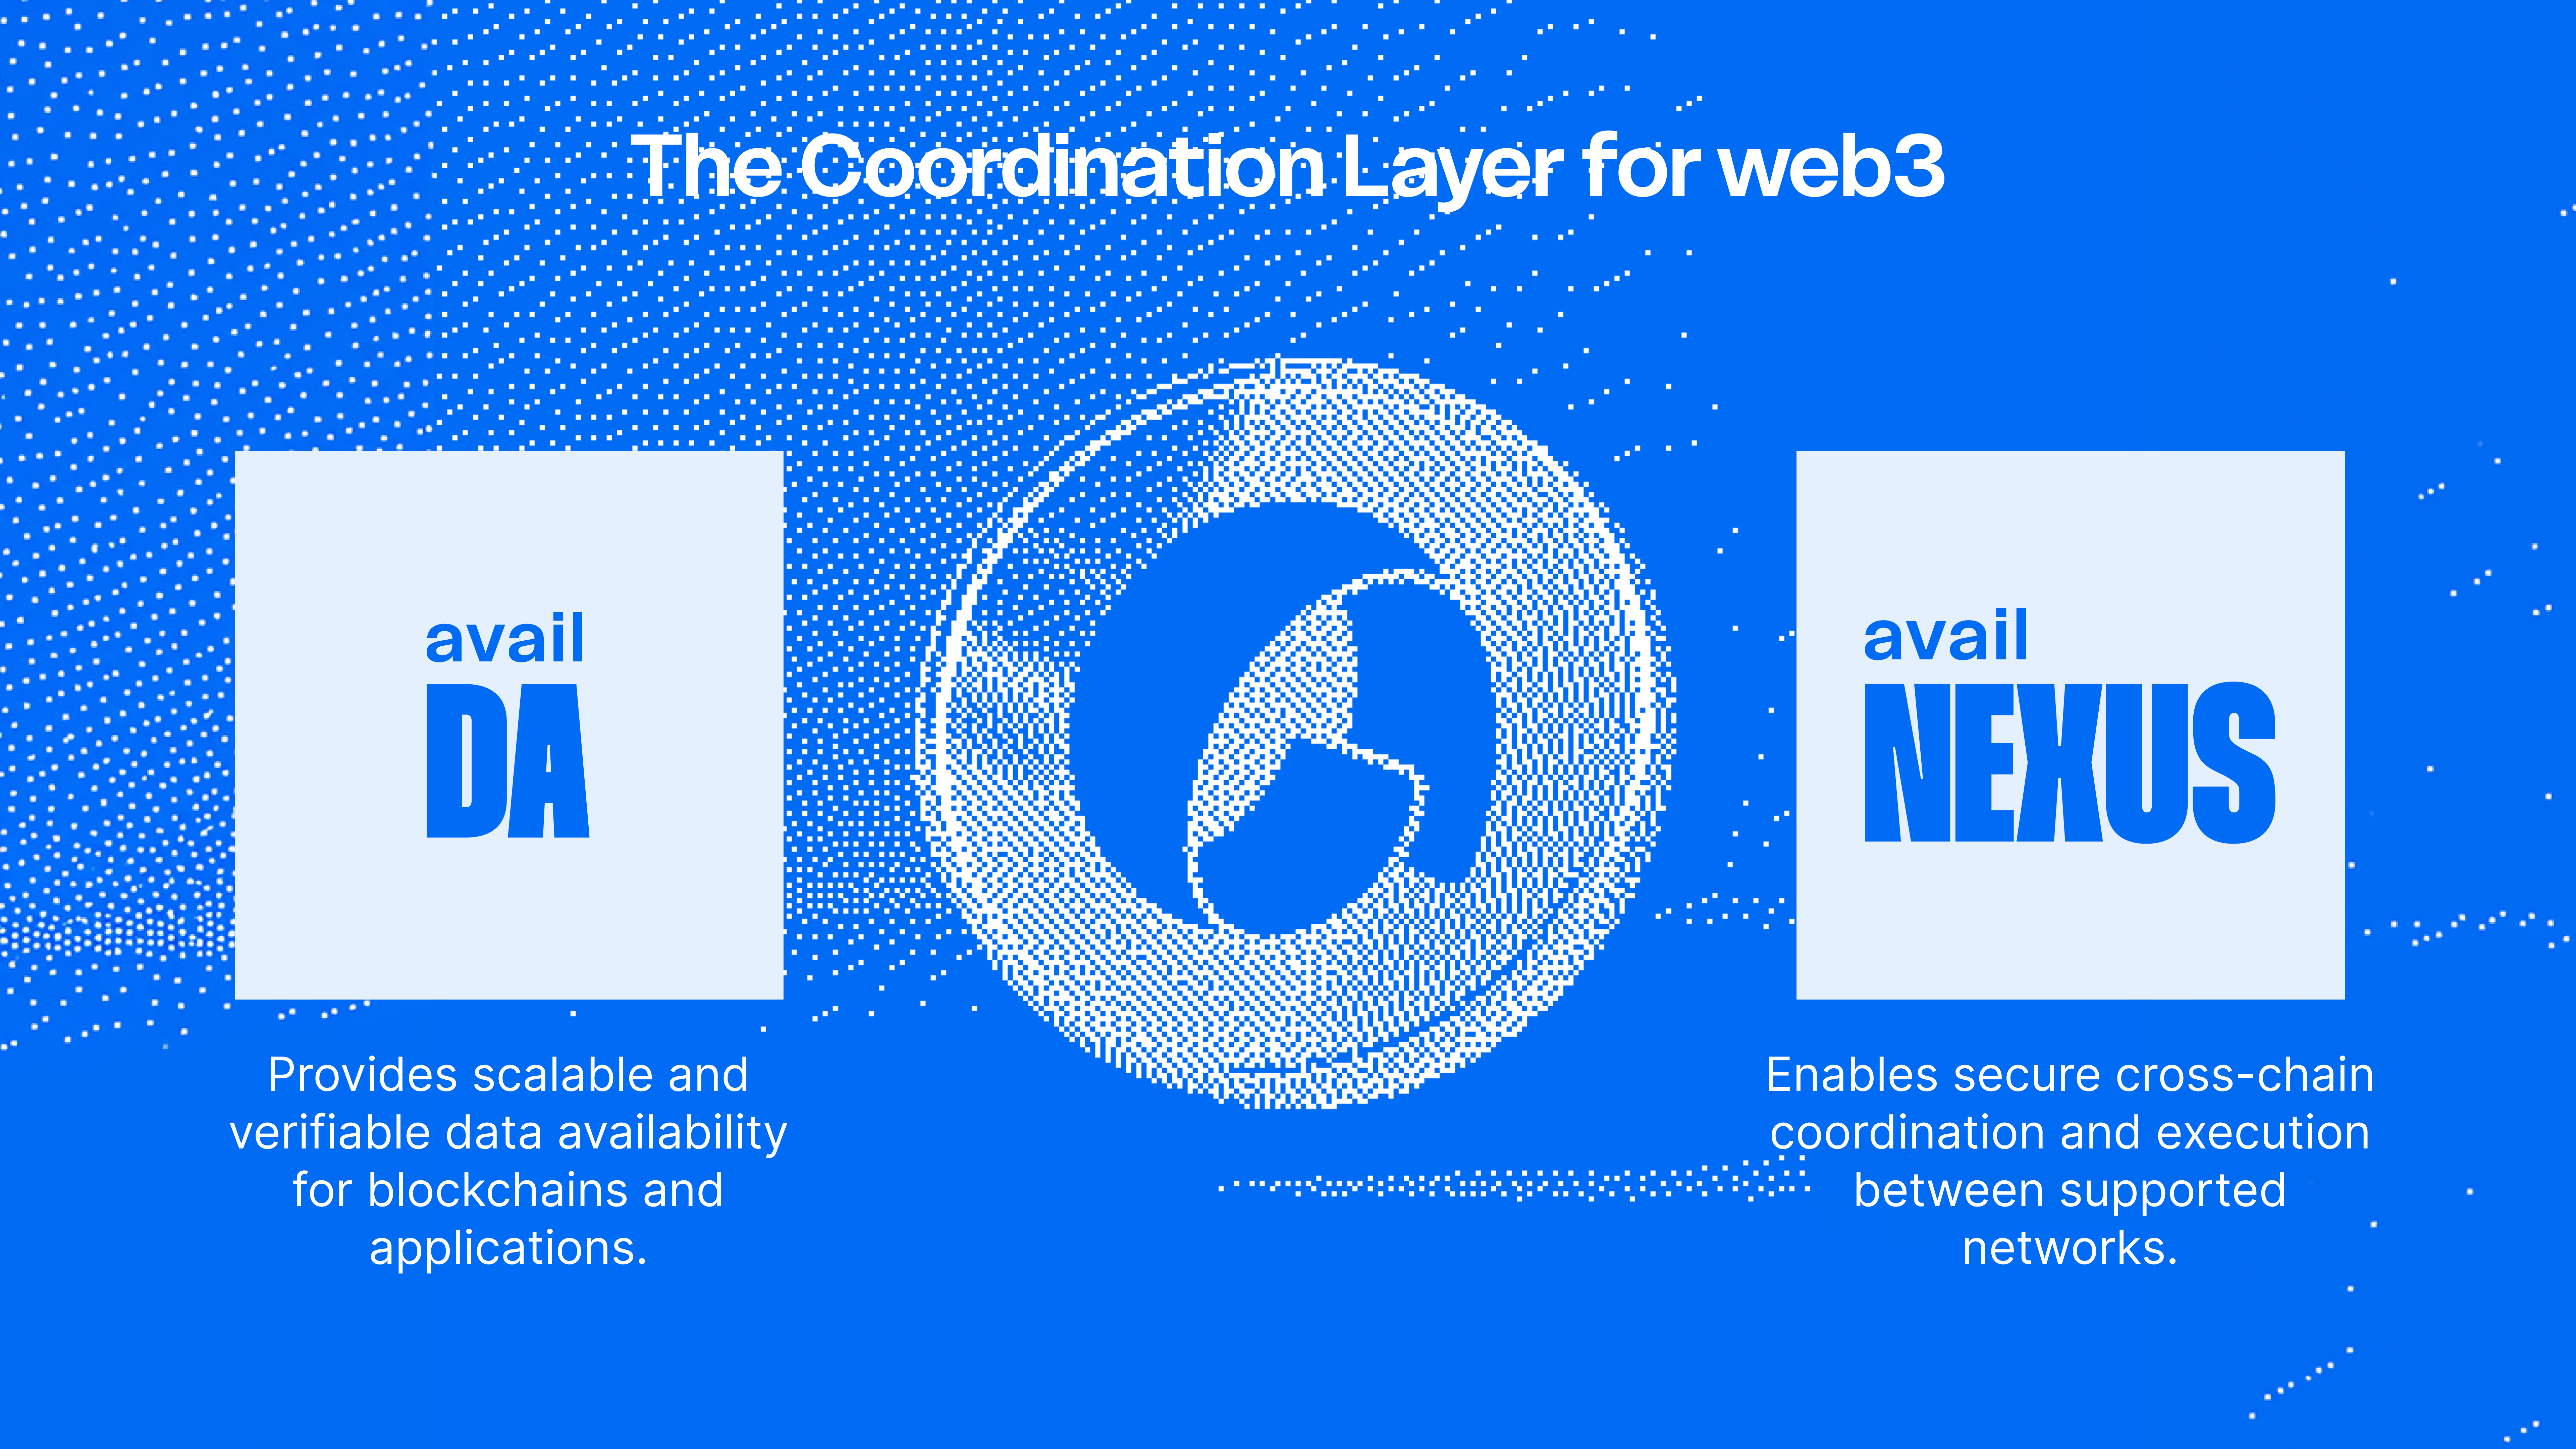
> Avail is a modular blockchain focused on data availability and cross-chain interoperability. This documentation covers Avail DA (data availability layer) and Avail Nexus (cross-chain unification).
## Avail DA
### Get Started
Welcome to the Avail documentation. Avail is a modular blockchain focused on data availability, enabling scalable and secure rollups and applications.
## Explore the Documentation
- [**Avail DA**](/docs/da) — Learn about Avail's data availability layer - the foundation for scalable blockchain applications
- [**Avail Nexus**](/docs/nexus) — Discover cross-chain interoperability and how to connect different blockchain ecosystems
- [**User Guides**](/docs/da/user-guides) — Step-by-step guides for accounts, staking, bridging, and more
## Quick Links
* **New to Avail?** Start with the [Introduction to Avail DA](/docs/da/get-started)
* **Want to build?** Check out [Build](/docs/da/build)
* **Running a node?** See [Operate](/docs/da/operate)
* **Using Avail?** Browse the [User Guides](/docs/da/user-guides)
### Avail DA
Welcome to the Avail DA documentation. Avail DA is the data availability layer that powers the Avail ecosystem.
- [**Get Started**](/docs/da/get-started) — An overview of Avail DA and quick links to get up and running.
- [**Concepts**](/docs/da/concepts) — Understand how Avail DA works — data availability, consensus, App IDs, and pricing.
- [**Build**](/docs/da/build) — Integrate your rollup, post data, and connect to Avail DA.
- [**Operate**](/docs/da/operate) — Run a light client, full node, or become a validator on the Avail network.
- [**User Guides**](/docs/da/user-guides) — Accounts, staking, bridging, Ledger setup, and more.
- [**API Reference**](/docs/da/api-reference) — Node API, light client API, bridge API, and Turbo DA API reference.
### Concepts
Key concepts you need to know before you start building with Avail DA.
- [**What is Avail DA?**](/docs/da/concepts/what-is-avail-da) — A modular data availability layer purpose-built for rollups — scalable, verifiable DA without execution overhead.
- [**How Avail DA Works**](/docs/da/concepts/how-avail-da-works) — Erasure coding, KZG commitments, data availability sampling, and how blocks are finalized.
- [**What are App IDs?**](/docs/da/concepts/app-ids) — Unique identifiers that separate and filter data submissions on Avail DA by application.
- [**Using the Explorer**](/docs/da/concepts/explorer) — Browse blocks, transactions, and validators on Avail DA using the network explorers.
- [**How Transaction Pricing Works**](/docs/da/concepts/tx-pricing) — How AVAIL token fees are calculated based on compute and storage requirements.
### Bug Bounty
If you discover security vulnerabilities, **please report it responsibly** to help us keep the Avail ecosystem secure.
## Bug Bounty Program with Immunefi
We offer rewards of upto $500,000 for valid security disclosures through our bug bounty program on Immunefi.
🔗 [View detailed information about the bug bounty on Immunefi](https://immunefi.com/bug-bounty/avail/information/)
### Contact us
If your vulnerability is not in scope of the Immunefi program or you need to contact the team urgently, please email us at:
📨 **[security@availproject.org](mailto:security@availproject.org)**
We appreciate your help in keeping Avail safe and reliable!
### API Reference
> **Warning**
>
> 1. This section is dedicated towards providing a detailed API reference for all of Avail's APIs and SDKs.
> 2. If you are working with older versions of Avail's SDKs, please refer to the menu next to the search bar to access the old API docs.
This entire section is dedicated towards providing a detailed API reference for all of Avail's dev tooling.
We currently document the following APIs:
- [**Avail node API**](/docs/da/api-reference/avail-node-api)
- [**Avail light client API**](/docs/da/api-reference/avail-lc-api)
- [**Avail bridge API**](/docs/da/api-reference/avail-bridge-api)
- [**Turbo DA API**](/docs/da/api-reference/avail-turbo-da-api)
Questions? Errors? Something missing?
Feel free to reach out to us on [our Discord server](https://discord.gg/AvailProject).
### Build
Choose how to integrate with Avail DA. Start with [Interact](/docs/da/build/interact) to post and read data directly, or pick a rollup framework if you're deploying a chain.
- [**Interact**](/docs/da/build/interact) — Post data, create App IDs, and query balances using the SDK or API.
- [**Rollups**](/docs/da/build/rollups) — Deploy a rollup on Avail DA — OP Stack, Arbitrum Nitro, Polygon CDK, and more.
- [**Turbo DA**](/docs/da/build/turbo-da) — High-throughput data submission optimized for production workloads.
- [**Bridge**](/docs/da/build/vectorx) — Bridge tokens and data between Avail and other chains using VectorX.
### FAQs
## What problem does Avail solve?
Avail is solving fundamental scaling and user experience problems.
Cross-ecosystem transactions are cumbersome and difficult, driving more fragmentation throughout an already fragmented ecosystem and this makes it hard for app developers to onboard new users and liquidity.
Avail addresses these issues from first principles, solving scalability with the first DA layer to anchor modular blockchains using cutting-edge
zero knowledge technology to ensure responsive and reliable data availability.
Avail Nexus is a general purpose interoperability protocol, that will leverage Avail DA as the root of trust.
App developers can use Avail Nexus to quickly onboard users and liquidity into their new apps. Blockchain developers can use Avail DA to build hyper-scalable and cost efficient blockchain solutions.
## How can I get involved?
* [Use Avail DA](https://docs.availproject.org/) for your chain
* Run a [Validator](https://docs.availproject.org/da/operate-a-node/become-a-validator)
* Run a [light client](https://docs.availproject.org/da/operate-a-node/run-a-light-client)
* Join [Discord](https://discord.gg/AvailProject)
* Follow us on [X](https://x.com/AvailProject)
* Join the [Avail Uncharted](https://github.com/availproject/avail-uncharted) Technical Contributor's program
## How do I get in touch if I have questions?
* Business → [business@availproject.org](mailto:business@availproject.org)
* Technical questions → [Discord](https://discord.gg/AvailProject) or [Forum](https://forum.availproject.org/)
## I found a bug/vulnerability. Where do I report it?
We have a bug bounty program where you can report the vulnerability. Please check out the [Bug Bounty](/docs/da/bug-bounty) page for detailed information on how to responsibly report it.
## What is a popular use case of a light client?
There are many use-cases which today rely on an intermediary to maintain a full node, such that end users of a blockchain do not communicate directly with the blockchain but instead through the intermediary. Light clients have until now not been a suitable replacement for this architecture because they lacked data availability guarantees. Avail solves this issue, thus enabling more applications to directly participate on the blockchain network without intermediaries. Although Avail does support full nodes, we expect most applications will not need to run one, or will need to run fewer.
## What is data availability sampling (DAS)?
Avail DA light clients, like other light clients, only download the headers of the blockchain. However, they additionally perform data availability sampling: a technique that randomly samples small sections of the block data and verifies they are correct. When combined with erasure coding and KZG polynomial commitments, light clients are able to provide strong (nearly 100%) guarantees of availability without relying on fraud proofs, and with only a small constant number of queries.
## How is erasure coding used to increase data availability guarantees?
Erasure coding is a technique that encodes data in a way that spreads out the information over multiple 'shards', such that the loss of some number of those shards can be tolerated. That is, the information can be reconstructed from the other shards. Applied to the blockchain, this means that we effectively increase the size of each block, but we prevent a malicious actor from being able to hide any part of a block up to the redundant shard size. Since a malicious actor needs to hide a large part of the block in order to attempt to hide even a single transaction, it makes it much more likely that random sampling would catch the large gaps in the data. Effectively, erasure coding makes the data availability sampling technique much more powerful.
## What are KZG commitments?
KZG commitments, introduced by Aniket Kate, Gregory M. Zaverucha, and Ian Goldberg in 2010, provide a way to commit to polynomials in a succinct manner. Recently, polynomial commitments came to the forefront, being primarily used as commitments in PLONK-like zero knowledge constructions.
In our construction, we use KZG commitments for the following reasons:
* It allows us to commit to values in a succinct manner to be kept inside the block header.
* Short openings are possible which helps a light client verify availability.
* The cryptographic binding property helps us avoid fraud proofs by making it computationally infeasible to produce incorrect commitments.
In the future, we might use other polynomial commitment schemes, if that gives us better bounds or guarantees.
## Since Avail is used by multiple applications, does that mean chains have to download transactions from other chains?
No. Avail headers contain an index that allows a given application to determine and download only the sections of a block that have data for that application. Thus, they are largely unaffected by other chains using Avail at the same time or by block sizes.
The only exception is data availability sampling. In order to verify that data is available (and due to the nature of erasure coding), clients sample small parts of the block at random, including possibly sections that contain data for other applications.
## Who is behind Avail?
Avail is led by former Polygon co-founder [Anurag Arjun](https://x.com/anuragarjun) and former Polygon research lead [Prabal Banerjee](https://x.com/prabalbanerjee).
The [Avail team](https://availproject.org/aboutus) consists of more than 40 professionals with solid experience in their areas of expertise ranging from marketing to blockchain design and programming.
Many have proven track records in the Web3 space and a diverse background that forms the foundation of a solid team.
### Glossary
## App-Chain
An appchain is an independent blockchain tailored to a specific application's needs, providing dedicated performance and scalability without the constraints of a shared chain. Avail enables modular appchain architectures based on different layer 2 or 3 scaling solutions.
## AVAIL
AVAIL is the native token of the Avail network. The AVAIL token is live on Mainnet; [learn more about the AVAIL token here](/docs/da/user-guides/staking-governance/overview).
## Avail JS Apps
The Avail JS Apps UI is a forked version of [Polkadot JS Apps UI](https://polkadot.js.org/apps/) used for visualizing and interacting with the Avail network.
## BABE
BABE (Blind Assignment for Blockchain Extension), part of the Substrate framework, is the block production mechanism that Avail uses. Refer to the [Polkadot Wiki](https://wiki.polkadot.network/docs/learn-consensus#block-production-babe) for more details.
## Bonding
Bonding is the process of locking tokens to participate in network operations such as consensus and security.
## Chilling
Chilling is the act of withdrawing from nominating or validating roles, effective in the subsequent era. It can also refer to a validator being excluded from the active set by peers, making them ineligible for the next consensus cycle.
## Commission
Validators set a commission rate that is deducted from their block production rewards. The remaining rewards are distributed to nominators backing that validator.
## Consensus
Consensus is the mechanism by which nodes agree on what blockchain data is valid. Avail uses [NPoS](#nominated-proof-of-stake) as its consensus protocol.
## Controller Account
The controller account manages staking activities — nominating validators, bonding/unbonding funds, and paying transaction fees. It is used more frequently than the stash account for day-to-day operations.
## Data Attestation
Data attestation confirms the authenticity and accessibility of on-chain data. Avail block headers include KZG polynomial commitments for data and a Merkle tree root with data blobs as leaves. A supermajority of validators finalize headers using the [GRANDPA](#grandpa) protocol.
## Data Availability Committee (DAC)
A DAC is a group of nodes that preserves copies of off-chain data and ensures its accessibility on demand. Unlike DACs, which typically serve specific L2 solutions, Avail is a general-purpose data availability layer that operates as an autonomous chain.
## Data Availability Sampling (DAS)
DAS allows light clients to confirm data availability without downloading full blocks. Light clients randomly sample small chunks of block data across multiple rounds, with confidence growing after each successful round until a set threshold is reached.
## DHT (Distributed Hash Table)
A DHT is a decentralized lookup system that holds key-value pairs, enabling peers to quickly find data. In Avail, the DHT facilitates sharing data cells for random sampling and proof verification, connecting nodes for efficient cell discovery and access.
## Decoupling
Decoupling in blockchain refers to separating distinct functionalities into independent modules or layers. This modular approach allows each component to specialize, evolve, and scale independently.
## Equivocation
Equivocation is when a validator signs two or more conflicting blocks or messages. This can be done intentionally or unintentionally.
## Era
An era in Avail is a predefined number of [sessions](#session) during which the validator set is determined and rewards are distributed. At each era boundary, validators are selected for the active set based on stake amount and prior performance.
## Epoch
An epoch is a designated time frame during which a specific group of validators verifies transactions and appends them to the blockchain. Epoch duration varies across networks.
## Execution
In traditional blockchains, execution is how nodes process transactions to transition state. Avail does not have a general-purpose execution layer — execution occurs in other layers (such as rollups), and the resulting data is posted to Avail in raw form.
Avail validators do not execute transactions to attest to block validity. They primarily attest to the correct packaging of published data, which is why Avail can accommodate larger block sizes with reduced per-block overhead.
## Finality Gadget
A finality gadget ensures blockchain state finality by requiring validators to commit through signed messages. Once sufficiently validated, the state is finalized and secure from modification.
## Fraud Proofs
Fraud proofs are cryptographic proofs used to challenge the legitimacy of a transaction or state transition. Any node can generate and share a fraud proof across the P2P network for app clients to assess.
## GRANDPA
GRANDPA (GHOST-based Recursive Ancestor Deriving Prefix Agreement), part of the Substrate framework, is the finality gadget Avail uses. Refer to [the GRANDPA paper](https://github.com/w3f/consensus/blob/master/pdf/grandpa.pdf) for the full protocol description.
## KZG Commitments
KZG commitments, introduced by Kate, Zaverucha, and Goldberg in 2010, are a concise method for committing to polynomials. Avail uses KZG commitments because they enable succinct commitments for block headers, support brief openings for light client verification, and provide strong cryptographic binding that prevents fraudulent commitments.
## Kademlia DHT (Kad-DHT)
Kad-DHT is a DHT variant that organizes nodes on a chord ring ordered by ID. Avail uses Kad-DHT to store data cells and locate which peer holds a particular data segment, with matrix data cells uniquely mapped to Peer IDs.
## libp2p
[libp2p](https://libp2p.io/) is an open-source modular network stack for building P2P applications. Avail integrates libp2p to establish a decentralized network for data availability, ensuring transaction data is efficiently stored and disseminated to validators and full nodes.
## Light Client
Light clients allow users to interact with a blockchain without syncing the full chain, typically retrieving only block headers. Avail light clients enhance this with Data Availability Sampling, downloading and verifying random block segments to confirm content availability.
## Mainnet
A mainnet is the fully operational, public "production" version of a blockchain network where real transactions and applications run. See the ["Mainnet is Live!" blog post](https://blog.availproject.org/road-to-mainnet-september-2023/) for details on Avail's mainnet.
## Modular Blockchain
A modular blockchain specializes in specific tasks while delegating other responsibilities to distinct layers or components.
## Monolithic Blockchain
A monolithic blockchain handles all core functionalities (execution, settlement, ordering, data availability) within a single structure.
## Nominated Proof of Stake
Nominated Proof of Stake (NPoS) is a consensus algorithm where users nominate validators to produce blocks on their behalf. Validators receive rewards in native tokens and share a portion with nominators based on a set commission rate. Avail uses NPoS as implemented within Substrate.
## Oversubscribed
Oversubscribed refers to when the number of nominators wishing to participate exceeds the available slots.
## Scalability
Scalability in Avail refers to increasing the volume of data the chain can disseminate without degrading participant experience. Avail achieves this through a modular approach that moves DA off-chain, allowing each component to scale independently.
## Session
A session is a specific duration during which a fixed set of validators operate. Validators can enter or exit the set only at session boundaries.
## Settlement
Settlement is the process by which modular layers agree on the correct execution outcome of transaction data. Avail receives and stores raw transaction data without executing it — actual execution and validation occur in other layers, with results settled through mechanisms like validity proofs on Ethereum.
## Slashing
Slashing is a penalty imposed on validators who misbehave (e.g., equivocation). It can result in the loss of a portion of the validator's stake.
## Sovereign Rollup
A sovereign rollup publishes transactions to another blockchain for ordering and data availability but handles its own settlement. It maintains its own canonical chain and validity rules without relying on an external settlement layer.
## Stash Account
The stash account holds the tokens you wish to stake/bond. It functions as cold storage and is used for bonding, unbonding, and designating the controller account.
## Testnet
A testnet is a simulated blockchain network used to test and debug applications before mainnet deployment. Testnets are typically open to public participation.
## Validium
A validium stores transaction data off the primary L1 (e.g., Ethereum) and can leverage Avail's scalable DA module. Rather than directing data to a [DAC](#data-availability-committee-dac) or other alternatives, validiums can commit data to Avail. Essentially, a validium is a rollup with off-chain data availability.
## Validator
An Avail validator is a full node responsible for verifying transactions and adding them to the blockchain.
## Volition
A volition is an advanced form of zero-knowledge rollup that lets developers choose whether to store transaction data on-chain or off-chain. Volitions can leverage Avail's DA layer to keep off-chain data accessible and verifiable, optimizing for both cost and availability.
### Network Information
> **Note**
>
> As of now, **Turing** is the only supported testnet on Avail. **Kate** & **Goldberg** have been decommissioned.
> We will keep this page updated with the latest information on new networks.
**The Turing Testnet is the latest test network of the Avail Project.**
| | **Mainnet** | **Turing Testnet** |
| ------------------------ | --------------------------------------------------------------------------------------------------------------------------------------------------------------------------------------- | ------------------------------------------------------------------------------------------------------------------------------------------------------------------------------------ |
| **Status** | **Active** | **Active** |
| **Subscan Explorer** | [avail.subscan.io](https://avail.subscan.io/) | [avail-turing.subscan.io](https://avail-turing.subscan.io/) |
| **AvailApps Explorer** | [mainnet.explorer.availproject.org](https://explorer.availproject.org/?rpc=wss%3A%2F%2Fmainnet-rpc.avail.so%2Fws\&light=https%3A%2F%2Fapi.lightclient.mainnet.avail.so%2Fv1) | [turing.explorer.availproject.org](https://explorer.availproject.org/?rpc=wss%3A%2F%2Fturing-rpc.avail.so%2Fws\&light=https%3A%2F%2Fapi.lightclient.turing.avail.so%2Fv1) |
| **Chain Spec** | [chainspec.raw.json](https://raw.githubusercontent.com/availproject/avail/main/misc/genesis/mainnet.chain.spec.raw.json) | [chainspec.raw.json](https://github.com/availproject/avail/blob/main/misc/genesis/testnet.turing.chain.spec.raw.json) |
| **Node Version** | [Latest release](https://github.com/availproject/avail/releases) | [Latest release](https://github.com/availproject/avail/releases) |
| **Light Client Version** | [Latest release](https://github.com/availproject/avail-light/releases) | [Latest release](https://github.com/availproject/avail-light/releases) |
## Avail DA - Ethereum Bridge
### For end users
You can use the official [Avail bridge UI](https://bridge.availproject.org/) to bridge AVAIL between the two networks.
You can find detailed instructions [in our docs here](/docs/da/user-guides/bridge-avail/avail-ethereum).
### For devs
The following tables contains a list of endpoints and contract addresses for all relevant
deployments of the VectorX bridge.
#### VectorX Bridge
| **Category** | **Mainnet** | **Testnet** |
| -------------------- | --------------------------------------------------------------------------------------------------------------------- | ----------------------------------------------------------------------------------------------------------------------------- |
| **Bridge API** | [https://bridge-api.avail.so/](https://bridge-api.avail.so/) | [https://turing-bridge-api.avail.so/](https://turing-bridge-api.avail.so/) |
| **VectorX Contract** | [0x02993cdC11213985b9B13224f3aF289F03bf298d](https://etherscan.io/address/0x02993cdC11213985b9B13224f3aF289F03bf298d) | [0xe542db219a7e2b29c7aeaeace242c9a2cd528f96](https://sepolia.etherscan.io/address/0xe542db219a7e2b29c7aeaeace242c9a2cd528f96) |
| **Bridge Contract** | [0x054fd961708d8e2b9c10a63f6157c74458889f0a](https://etherscan.io/address/0x054fd961708d8e2b9c10a63f6157c74458889f0a) | [0x967F7DdC4ec508462231849AE81eeaa68Ad01389](https://sepolia.etherscan.io/address/0x967F7DdC4ec508462231849AE81eeaa68Ad01389) |
#### AVAIL Token
#### Ethereum
| **Network** | **Token Address** |
| -------------------- | ----------------------------------------------------------------------------------------------------------------------------- |
| **Ethereum Mainnet** | [0xEeB4d8400AEefafC1B2953e0094134A887C76Bd8](https://etherscan.io/token/0xEeB4d8400AEefafC1B2953e0094134A887C76Bd8) |
| **Sepolia Testnet** | [0xb1c3cb9b5e598d4e95a85870e7812b99f350982d](https://sepolia.etherscan.io/address/0xb1c3cb9b5e598d4e95a85870e7812b99f350982d) |
#### Base
| **Network** | **Token Address** |
| ------------------------ | ----------------------------------------------------------------------------------------------------------------------------- |
| **Base Mainnet** | [0xd89d90d26b48940fa8f58385fe84625d468e057a](https://basescan.org/address/0xd89d90d26b48940fa8f58385fe84625d468e057a) |
| **Base-Sepolia Testnet** | [0xf50F2B4D58ce2A24b62e480d795A974eD0f77A58](https://sepolia.basescan.org/address/0xf50F2B4D58ce2A24b62e480d795A974eD0f77A58) |
#### Other deployments
##### Timelock
| **Network** | **Timelock Contract Address** |
| -------------------- | --------------------------------------------------------------------------------------------------------------------- |
| **Ethereum Mainnet** | [0x45828180bbE489350D621d002968A0585406d487](https://etherscan.io/address/0x45828180bbE489350D621d002968A0585406d487) |
##### Governance
| **Network** | **Governance Contract Address** |
| -------------------- | --------------------------------------------------------------------------------------------------------------------- |
| **Ethereum Mainnet** | [0x7f2f87b0efc66fea0b7c30c61654e53c37993666](https://etherscan.io/address/0x7f2f87b0efc66fea0b7c30c61654e53c37993666) |
{/* | **Bridge Indexer** | [zeref-bridge-indexer.fra.avail.so](https://zeref-bridge-indexer.fra.avail.so) | [turing-bridge-indexer.fra.avail.so](https://turing-bridge-indexer.fra.avail.so/) | */}
{/* | **Operator** | Deployed | Deployed | */}
## Alternate Endpoints
We at Avail have teamed up with some external partners to provide alternate endpoints for
people to connect to Avail DA. We will keep this table updated as we onboard more partners.
### Mainnet
| **Partner** | **RPC Endpoint (Mainnet)** | **WSS Endpoint (Mainnet)** |
| --------------- | ----------------------------------------------------------------------------------------------------------- | --------------------------------------------------------------------------------------------------- |
| **OnFinality** | [https://avail.api.onfinality.io/public](https://avail.api.onfinality.io/public) | [wss://avail.api.onfinality.io/public-ws](wss://avail.api.onfinality.io/public-ws) |
| **Ankr** | [https://mainnet.avail-rpc.com/](https://mainnet.avail-rpc.com/) | [wss://mainnet.avail-rpc.com/](wss://mainnet.avail-rpc.com/) |
| **All Nodes** | [https://avail-rpc.publicnode.com/](https://avail-rpc.publicnode.com/) | [wss://avail-rpc.publicnode.com/](wss://avail-rpc.publicnode.com/) |
| **VitWit** | [https://avail.rpc.vitwit.com/](https://avail.rpc.vitwit.com/) | [wss://avail.rpc.vitwit.com/](wss://avail.rpc.vitwit.com/) |
| **GlobalStake** | [https://rpc-avail.globalstake.io](https://rpc-avail.globalstake.io) | [wss://rpc-avail.globalstake.io](wss://rpc-avail.globalstake.io) |
| **RadiumBlock** | [https://avail.public.curie.radiumblock.co/http](https://avail.public.curie.radiumblock.co/http) | [wss://avail.public.curie.radiumblock.co/ws](wss://avail.public.curie.radiumblock.co/ws) |
| **StakePool** | [https://rpc.avail.stakepool.dev.br/rpc](https://rpc.avail.stakepool.dev.br/rpc) | [wss://rpc.avail.stakepool.dev.br/ws](wss://rpc.avail.stakepool.dev.br/ws) |
### Turing Testnet
| **Partner** | **RPC Endpoint (Turing)** | **WSS Endpoint (Turing)** |
| --------------- | ------------------------------------------------------------------------------------------------------------- | ----------------------------------------------------------------------------------------------------------- |
| **OnFinality** | [https://avail-turing.api.onfinality.io/public](https://avail-turing.api.onfinality.io/public) | [wss://avail-turing.api.onfinality.io/public-ws](wss://avail-turing.api.onfinality.io/public-ws) |
| **Ankr** | [https://rpc.ankr.com/avail\_turing\_testnet](https://rpc.ankr.com/avail_turing_testnet) | [wss://turing-testnet.avail-rpc.com](wss://turing-testnet.avail-rpc.com) |
| **AllNodes** | [https://avail-turing-rpc.publicnode.com](https://avail-turing-rpc.publicnode.com) | [wss://avail-turing-rpc.publicnode.com](wss://avail-turing-rpc.publicnode.com) |
| **RadiumBlock** | [https://turing.public.curie.radiumblock.co/http](https://turing.public.curie.radiumblock.co/http) | [wss://turing.public.curie.radiumblock.co/ws](wss://turing.public.curie.radiumblock.co/ws) |
### Operate
Run Avail DA infrastructure. Start with [Node Types](/docs/da/operate/node-types) to understand the options, or jump straight to the setup guide for your target role.
- [**Node Types**](/docs/da/operate/node-types) — Compare light clients, full nodes, and validators — requirements, trade-offs, and use cases.
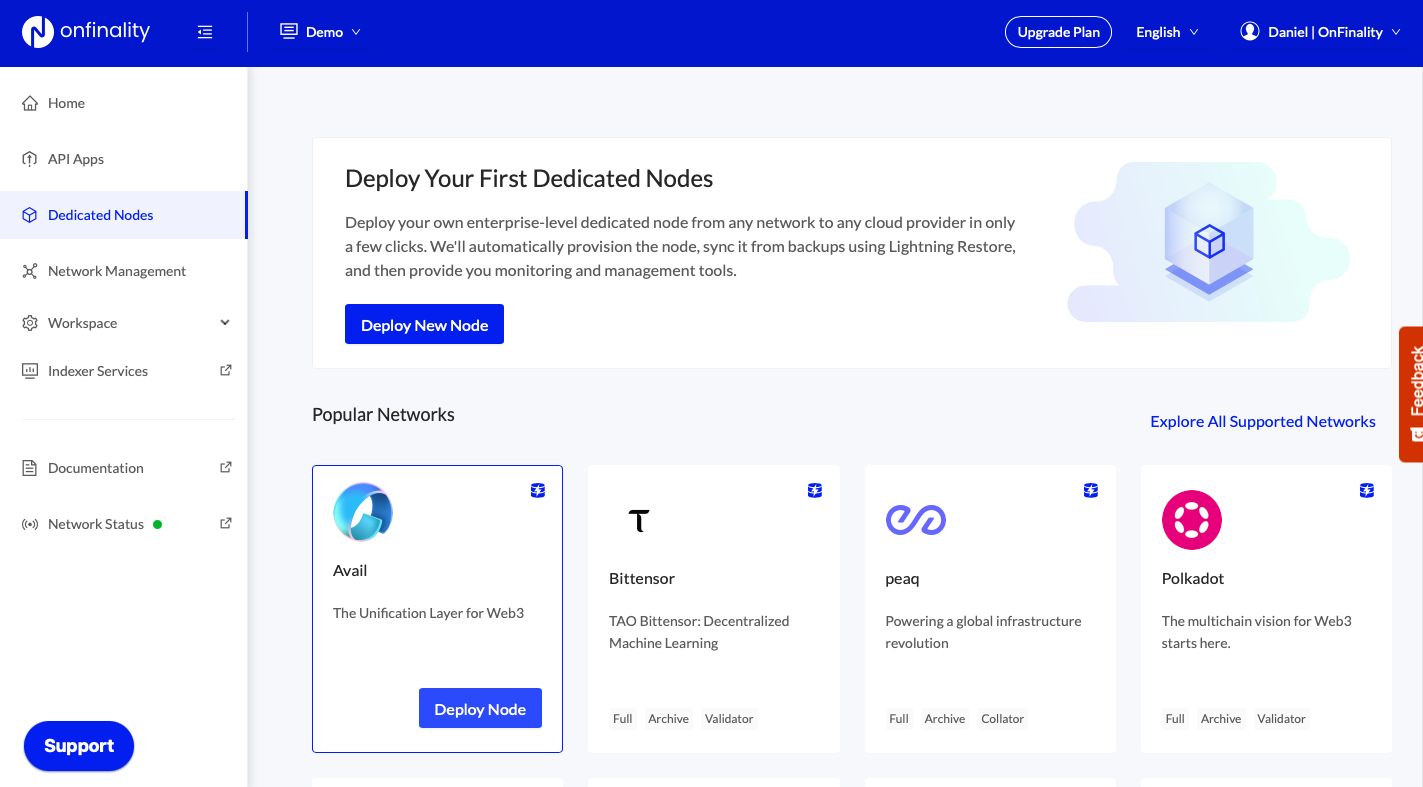
- [**Hosted Deployments**](/docs/da/operate/deployment-options) — Deploy Avail nodes using third-party infrastructure providers.
- [**Light Client**](/docs/da/operate/run-a-light-client) — Verify data availability through sampling without storing full blocks.
- [**Full Node**](/docs/da/operate/run-a-full-node) — Store complete block data and serve the network.
- [**Validator**](/docs/da/operate/become-a-validator) — Produce blocks, validate transactions, and earn staking rewards.
### User Guides
Step-by-step guides for interacting with the Avail network as an end user.
## Getting Started
- [**Accounts**](/docs/da/user-guides/accounts) — Create and manage your Avail wallet accounts.
- [**Using the Explorer**](/docs/da/user-guides/explorer) — Browse blocks, transactions, and validators using the network explorers.
- [**Identity**](/docs/da/user-guides/identity) — Set an on-chain identity on the Avail network.
## Staking & Governance
- [**Staking & Governance**](/docs/da/user-guides/staking-governance) — Stake AVAIL tokens, nominate validators, and participate in on-chain governance.
- [**Bridge AVAIL**](/docs/da/user-guides/bridge-avail) — Bridge AVAIL tokens between Avail and other chains.
## Security & Advanced
- [**Ledger**](/docs/da/user-guides/ledger-avail) — Use a Ledger hardware wallet to manage your AVAIL tokens securely.
- [**Fund Recovery**](/docs/da/user-guides/avail-funds-recovery) — Recover funds from a Polkadot-derived Ledger address on the Avail network.
- [**MetaMask Snap**](/docs/da/user-guides/avail-snap) — Interact with Avail DA directly from MetaMask using the Avail Snap.
- [**Multisig**](/docs/da/user-guides/avail-multisig) — Create and manage multisig accounts for shared control of funds.
- [**Proxies**](/docs/da/user-guides/proxies-on-avail) — Set up proxy accounts to delegate specific actions without exposing your main keys.
### Get Started with Avail DA
Avail DA is a modular data availability layer purpose-built so rollups can post, verify, and retrieve data without running a full node. Rollup teams across the ecosystem use Avail DA to scale throughput while keeping verification light and decentralized. On this page you'll install an SDK, submit data to the Turing testnet, and read it back — in under 5 minutes.
## Quick Look — Submit & Read Data
#### TypeScript
```typescript
import { Account, SDK, Block } from "avail-js-sdk";
const sdk = await SDK.New("wss://turing-rpc.avail.so/ws");
const account = Account.new("YOUR_SEED_PHRASE");
// Step 1: Submit data
const tx = sdk.tx.dataAvailability.submitData("Hello, Avail!");
const res = await tx.executeWaitForInclusion(account, { app_id: 89 });
console.log(`Block: ${res.blockHash} | Tx: ${res.txHash}`);
// Step 2: Read it back
const block = await Block.New(sdk.client, res.blockHash);
const blobs = block.dataSubmissions({ txHash: res.txHash });
console.log(blobs[0].toAscii()); // "Hello, Avail!"
```
#### Rust
```rust
use avail_rust::prelude::*;
let sdk = SDK::new("wss://turing-rpc.avail.so/ws").await?;
let account = account::from_secret_uri("YOUR_SEED_PHRASE")?;
// Step 1: Submit data
let data = String::from("Hello, Avail!").into_bytes();
let tx = sdk.tx.data_availability.submit_data(data);
let options = Options::new().app_id(89);
let res = tx.execute_and_watch_inclusion(&account, options).await?;
println!("Block: {:?} | Tx: {:?}", res.block_hash, res.tx_hash);
// Step 2: Read it back
let block = Block::new(&sdk.client, res.block_hash).await?;
let blobs = block.data_submissions(Filter::new().tx_hash(res.tx_hash));
println!("{:?}", blobs[0].to_ascii().unwrap()); // "Hello, Avail!"
```
#### Go
```go
sdk, _ := SDK.NewSDK("https://turing-rpc.avail.so/rpc")
acc, _ := SDK.Account.NewKeyPair("YOUR_SEED_PHRASE")
// Step 1: Submit data
tx := sdk.Tx.DataAvailability.SubmitData([]byte("Hello, Avail!"))
res, _ := tx.ExecuteAndWatchInclusion(acc, SDK.NewTransactionOptions().WithAppId(89))
fmt.Println("Block:", res.BlockHash.ToHexWith0x(), "| Tx:", res.TxHash.ToHexWith0x())
// Step 2: Read it back
block, _ := SDK.NewBlock(sdk.Client, res.BlockHash)
blobs := block.DataSubmissions(SDK.Filter{}.WTxHash(res.TxHash))
fmt.Println(string(blobs[0].Data)) // "Hello, Avail!"
```
For complete examples with error handling, see the [full Read & Write guide](/docs/da/build/interact/read-write-on-avail).
> **Note**
>
> **Prerequisites:** Before running the code above, you'll need:
>
> * [Testnet AVAIL tokens](/docs/da/build/interact/faucet) — free from the faucet
> * [An App ID](/docs/da/build/interact/app-id) — identifies your data namespace
> * An SDK installed: `pnpm add avail-js-sdk` · `cargo add avail-rust` · `go get github.com/availproject/avail-go-sdk`
## Choose Your Path
- [**Post Data to Avail**](/docs/da/build/interact/read-write-on-avail) — Full read & write tutorial with TypeScript, Rust, and Go SDKs. ~15 min.
- [**Deploy a Rollup**](/docs/da/build/rollups) — Launch an OP Stack, Arbitrum Nitro, or Polygon CDK rollup on Avail DA.
- [**Run a Light Client**](/docs/da/operate/run-a-light-client) — Verify data availability by sampling — no full node needed. ~10 min.
- [**Run a Validator**](/docs/da/operate/become-a-validator) — Operate a full validator node on the Avail network.
## Next Steps
- [**Explore Concepts**](/docs/da/concepts) — What is Avail DA, how it works, App IDs, and transaction pricing.
- [**API Reference**](/docs/da/api-reference) — Node API, Light Client API, Bridge API, and Turbo DA API.
- [**Networks & Endpoints**](/docs/da/networks) — Mainnet and Turing testnet RPC/WS endpoints and explorers.
### What are App IDs?
## Introduction
As a general-purpose base layer, Avail is designed to support many
modular chains at the same time, providing consensus and data
availability to all of them simultaneously.
How does this work? Avail headers contain an index that allows a given
modular chain (or "application" in Avail terminology) to determine and
download *only* the sections of a block that have data for that
particular application.
This has significant benefits, including:
* Modular applications are mainly unaffected by other uses of the
base layer at the same time.
* Block sizes can increase without requiring applications to fetch
more data because they don't need to fetch the whole block, only what's
relevant to them. \
This filtering is done using the "application id" (AppId).
Data availability sampling is still done on the entire block,
however--this is the process where clients sample tiny parts of
the block at random to verify availability.
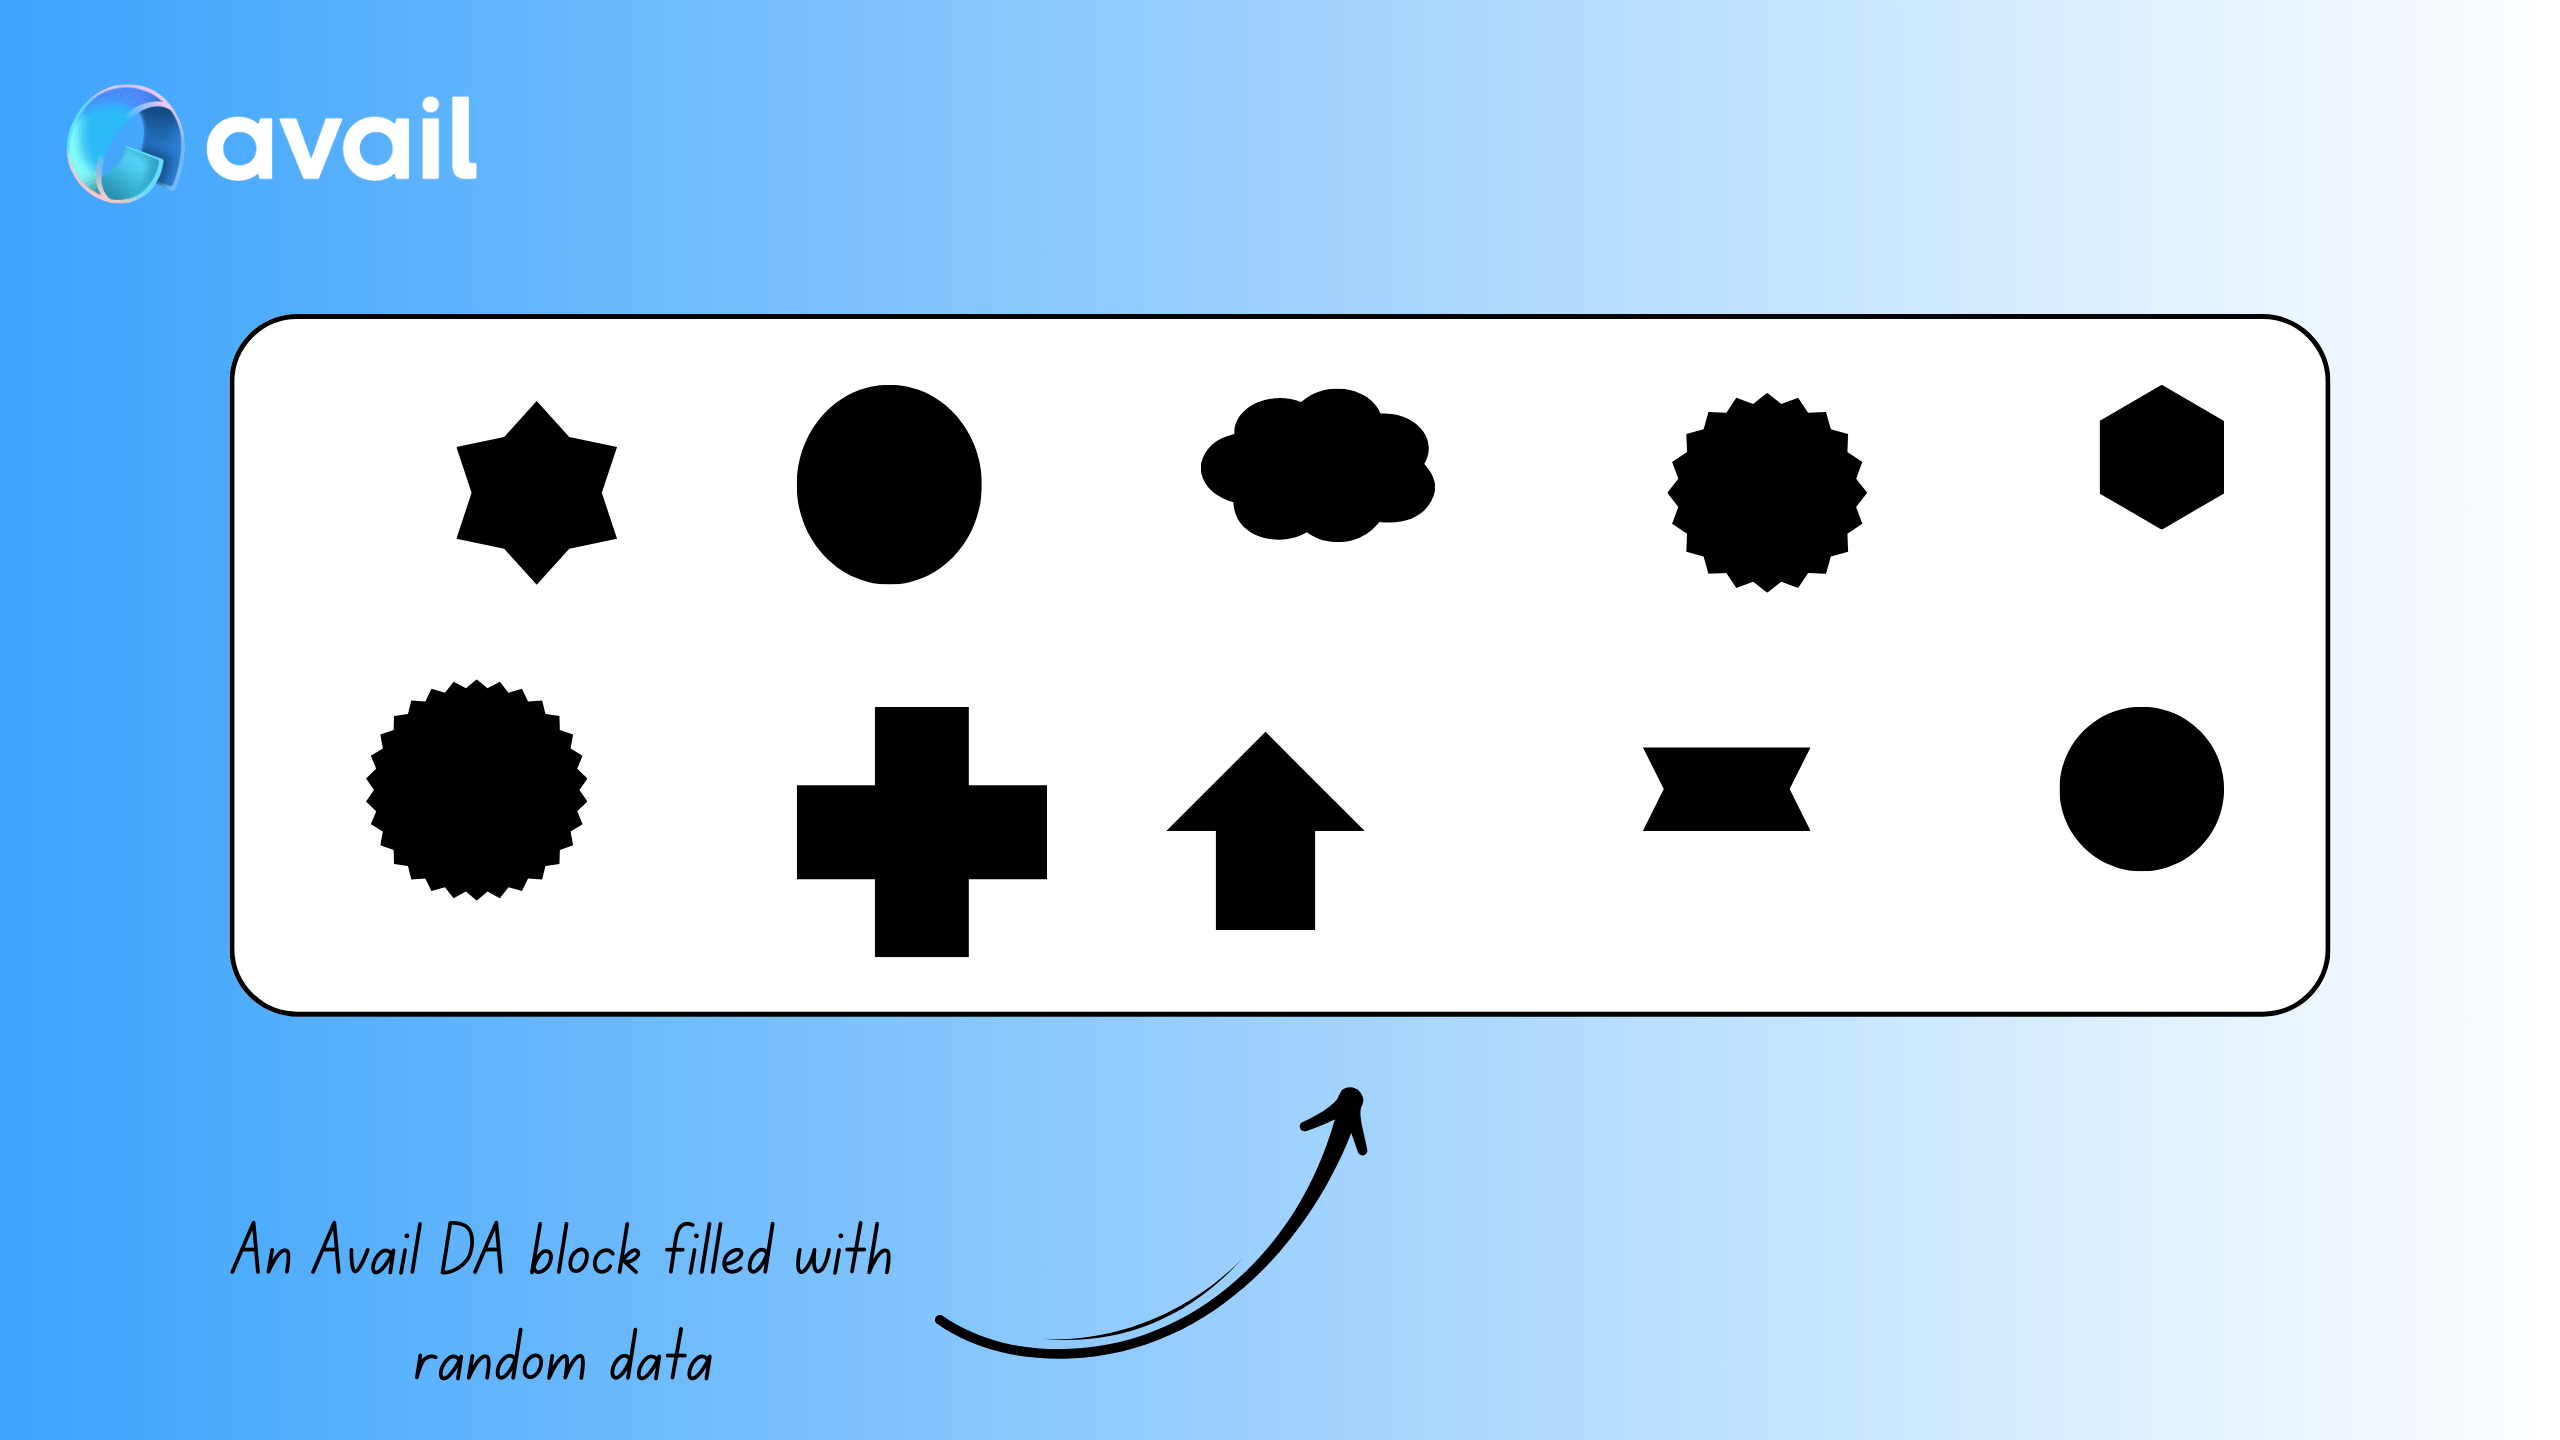
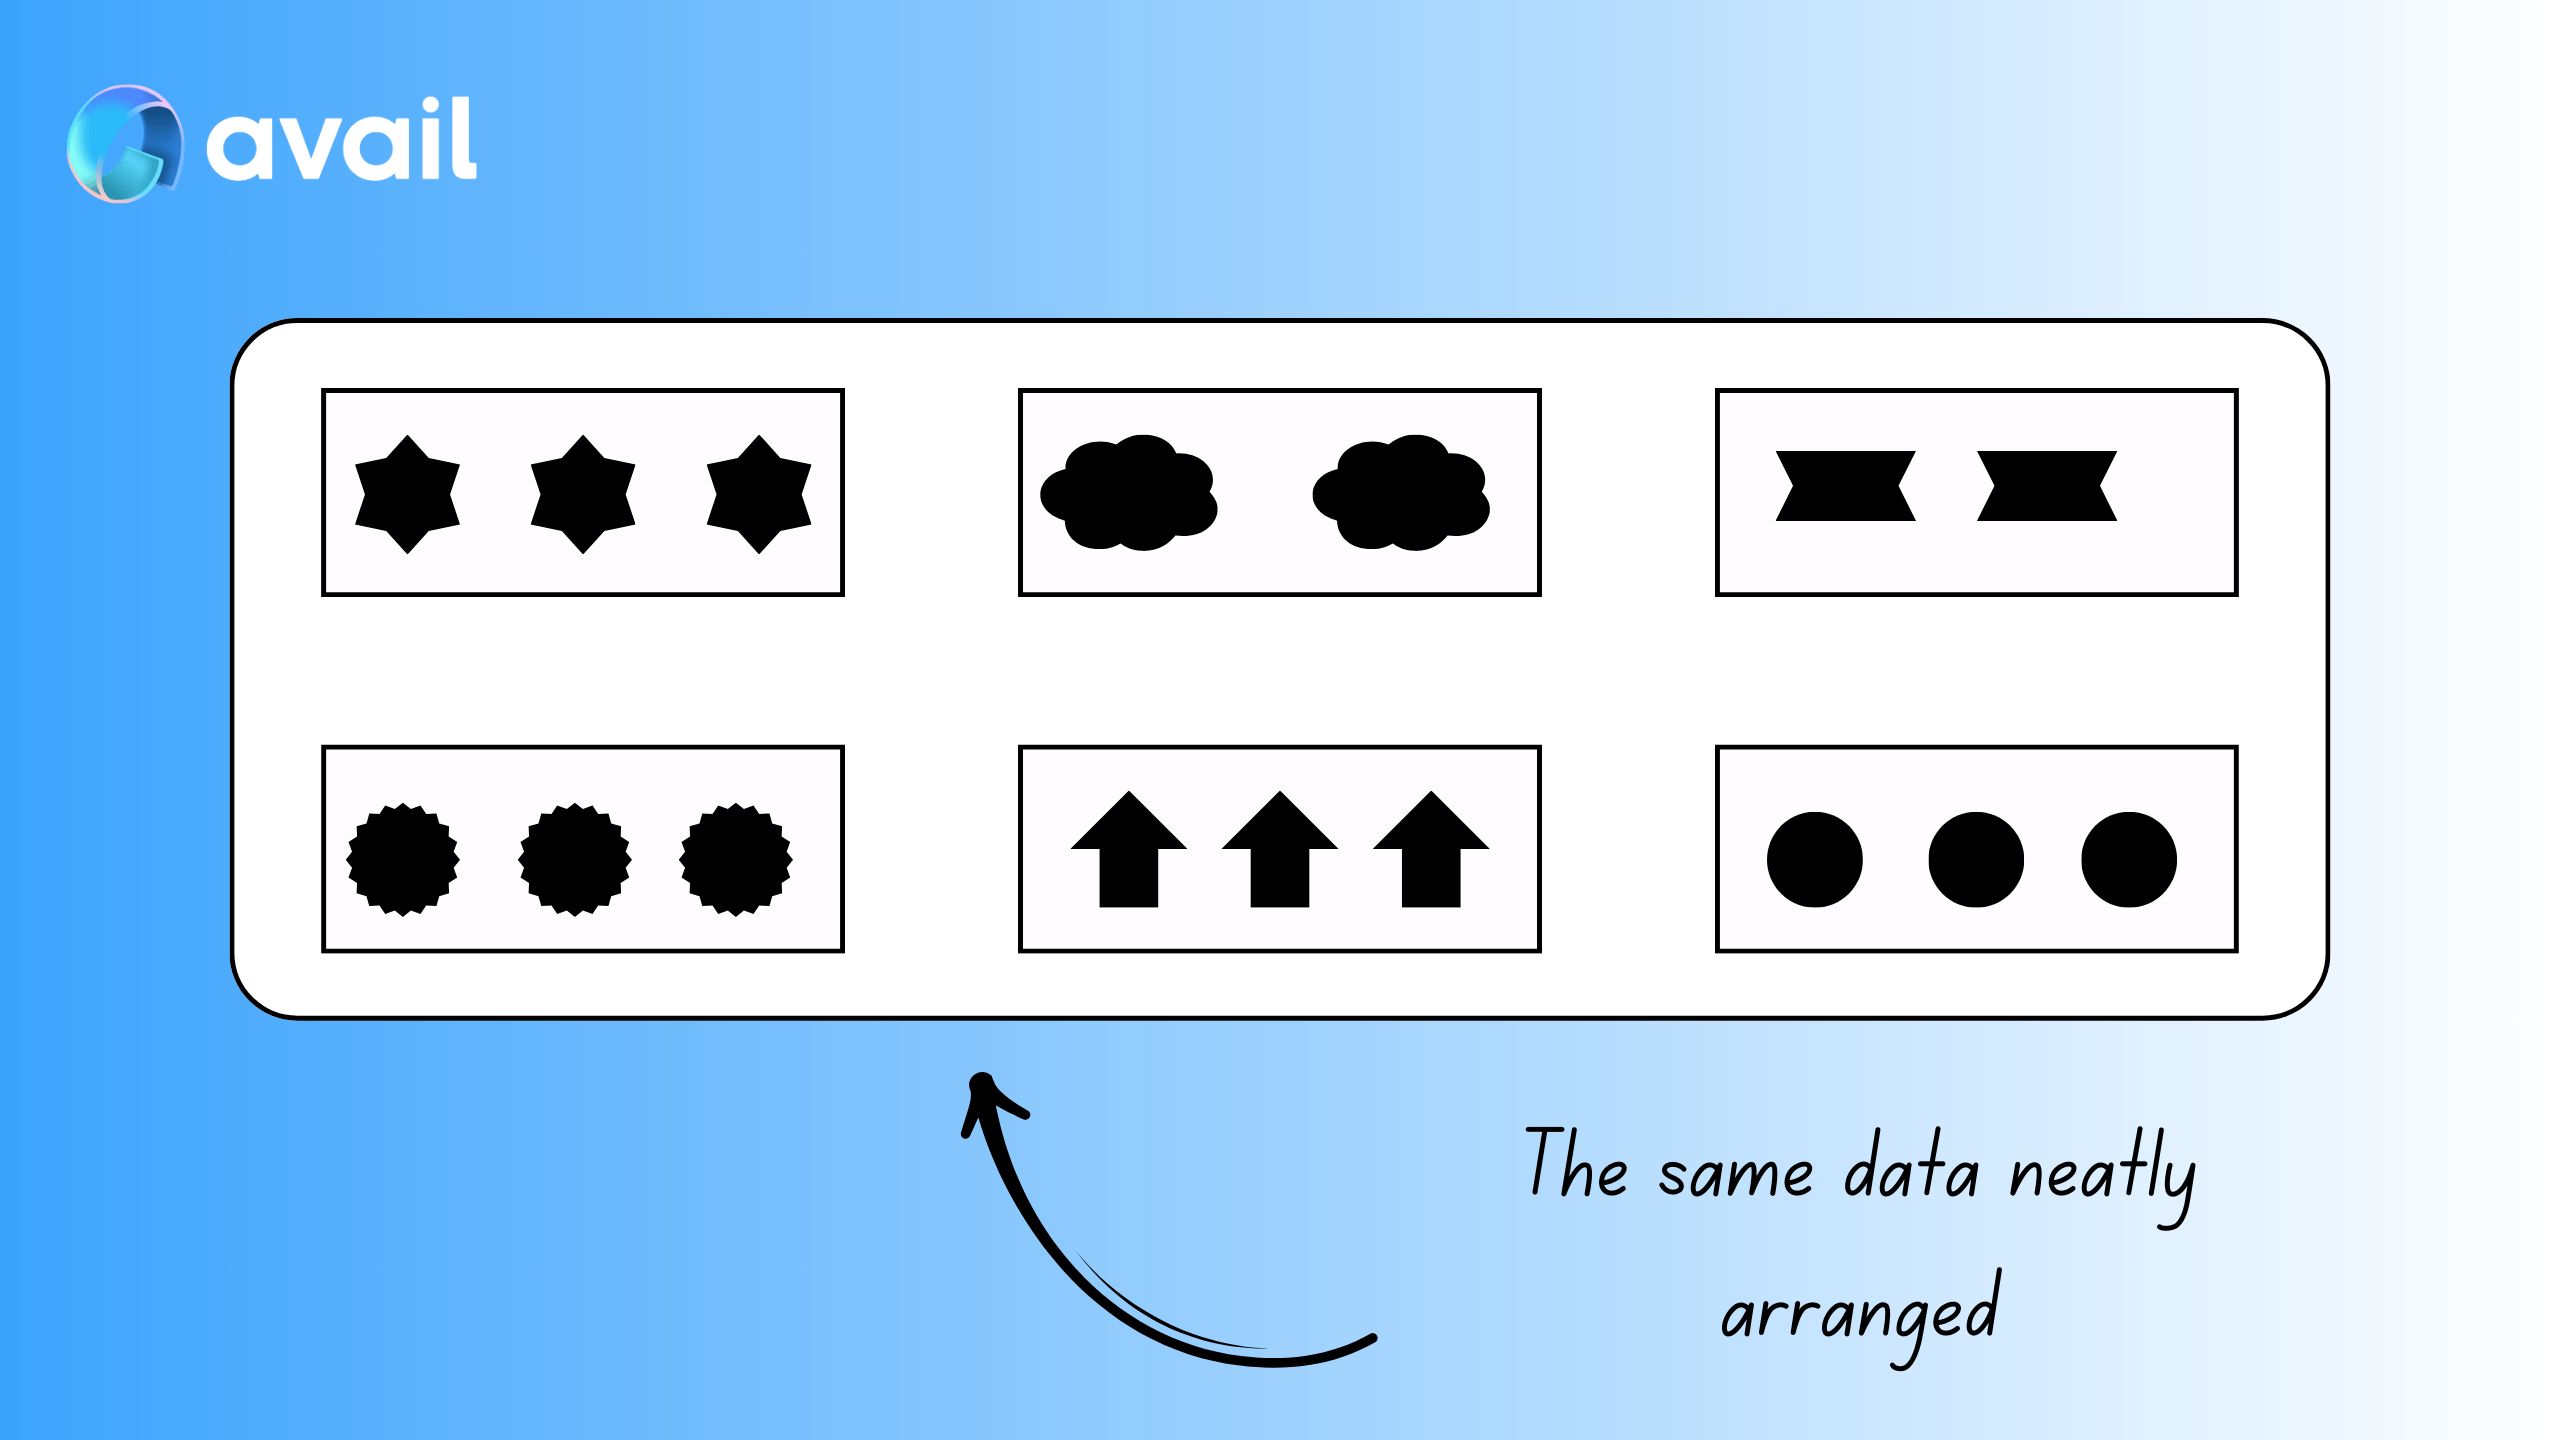
### Consider a random block on Avail DA
It might contain data blobs from a variety of different rollups pertaining to their different execution environments.
Think of the EVM, the SVM, Stackr, ZKsync chains, OP stack, and many more. \
If all of this data is randomly strewn about in a block, it would be tedious for a rollup to parse through all of it
just to fetch the data it needs.
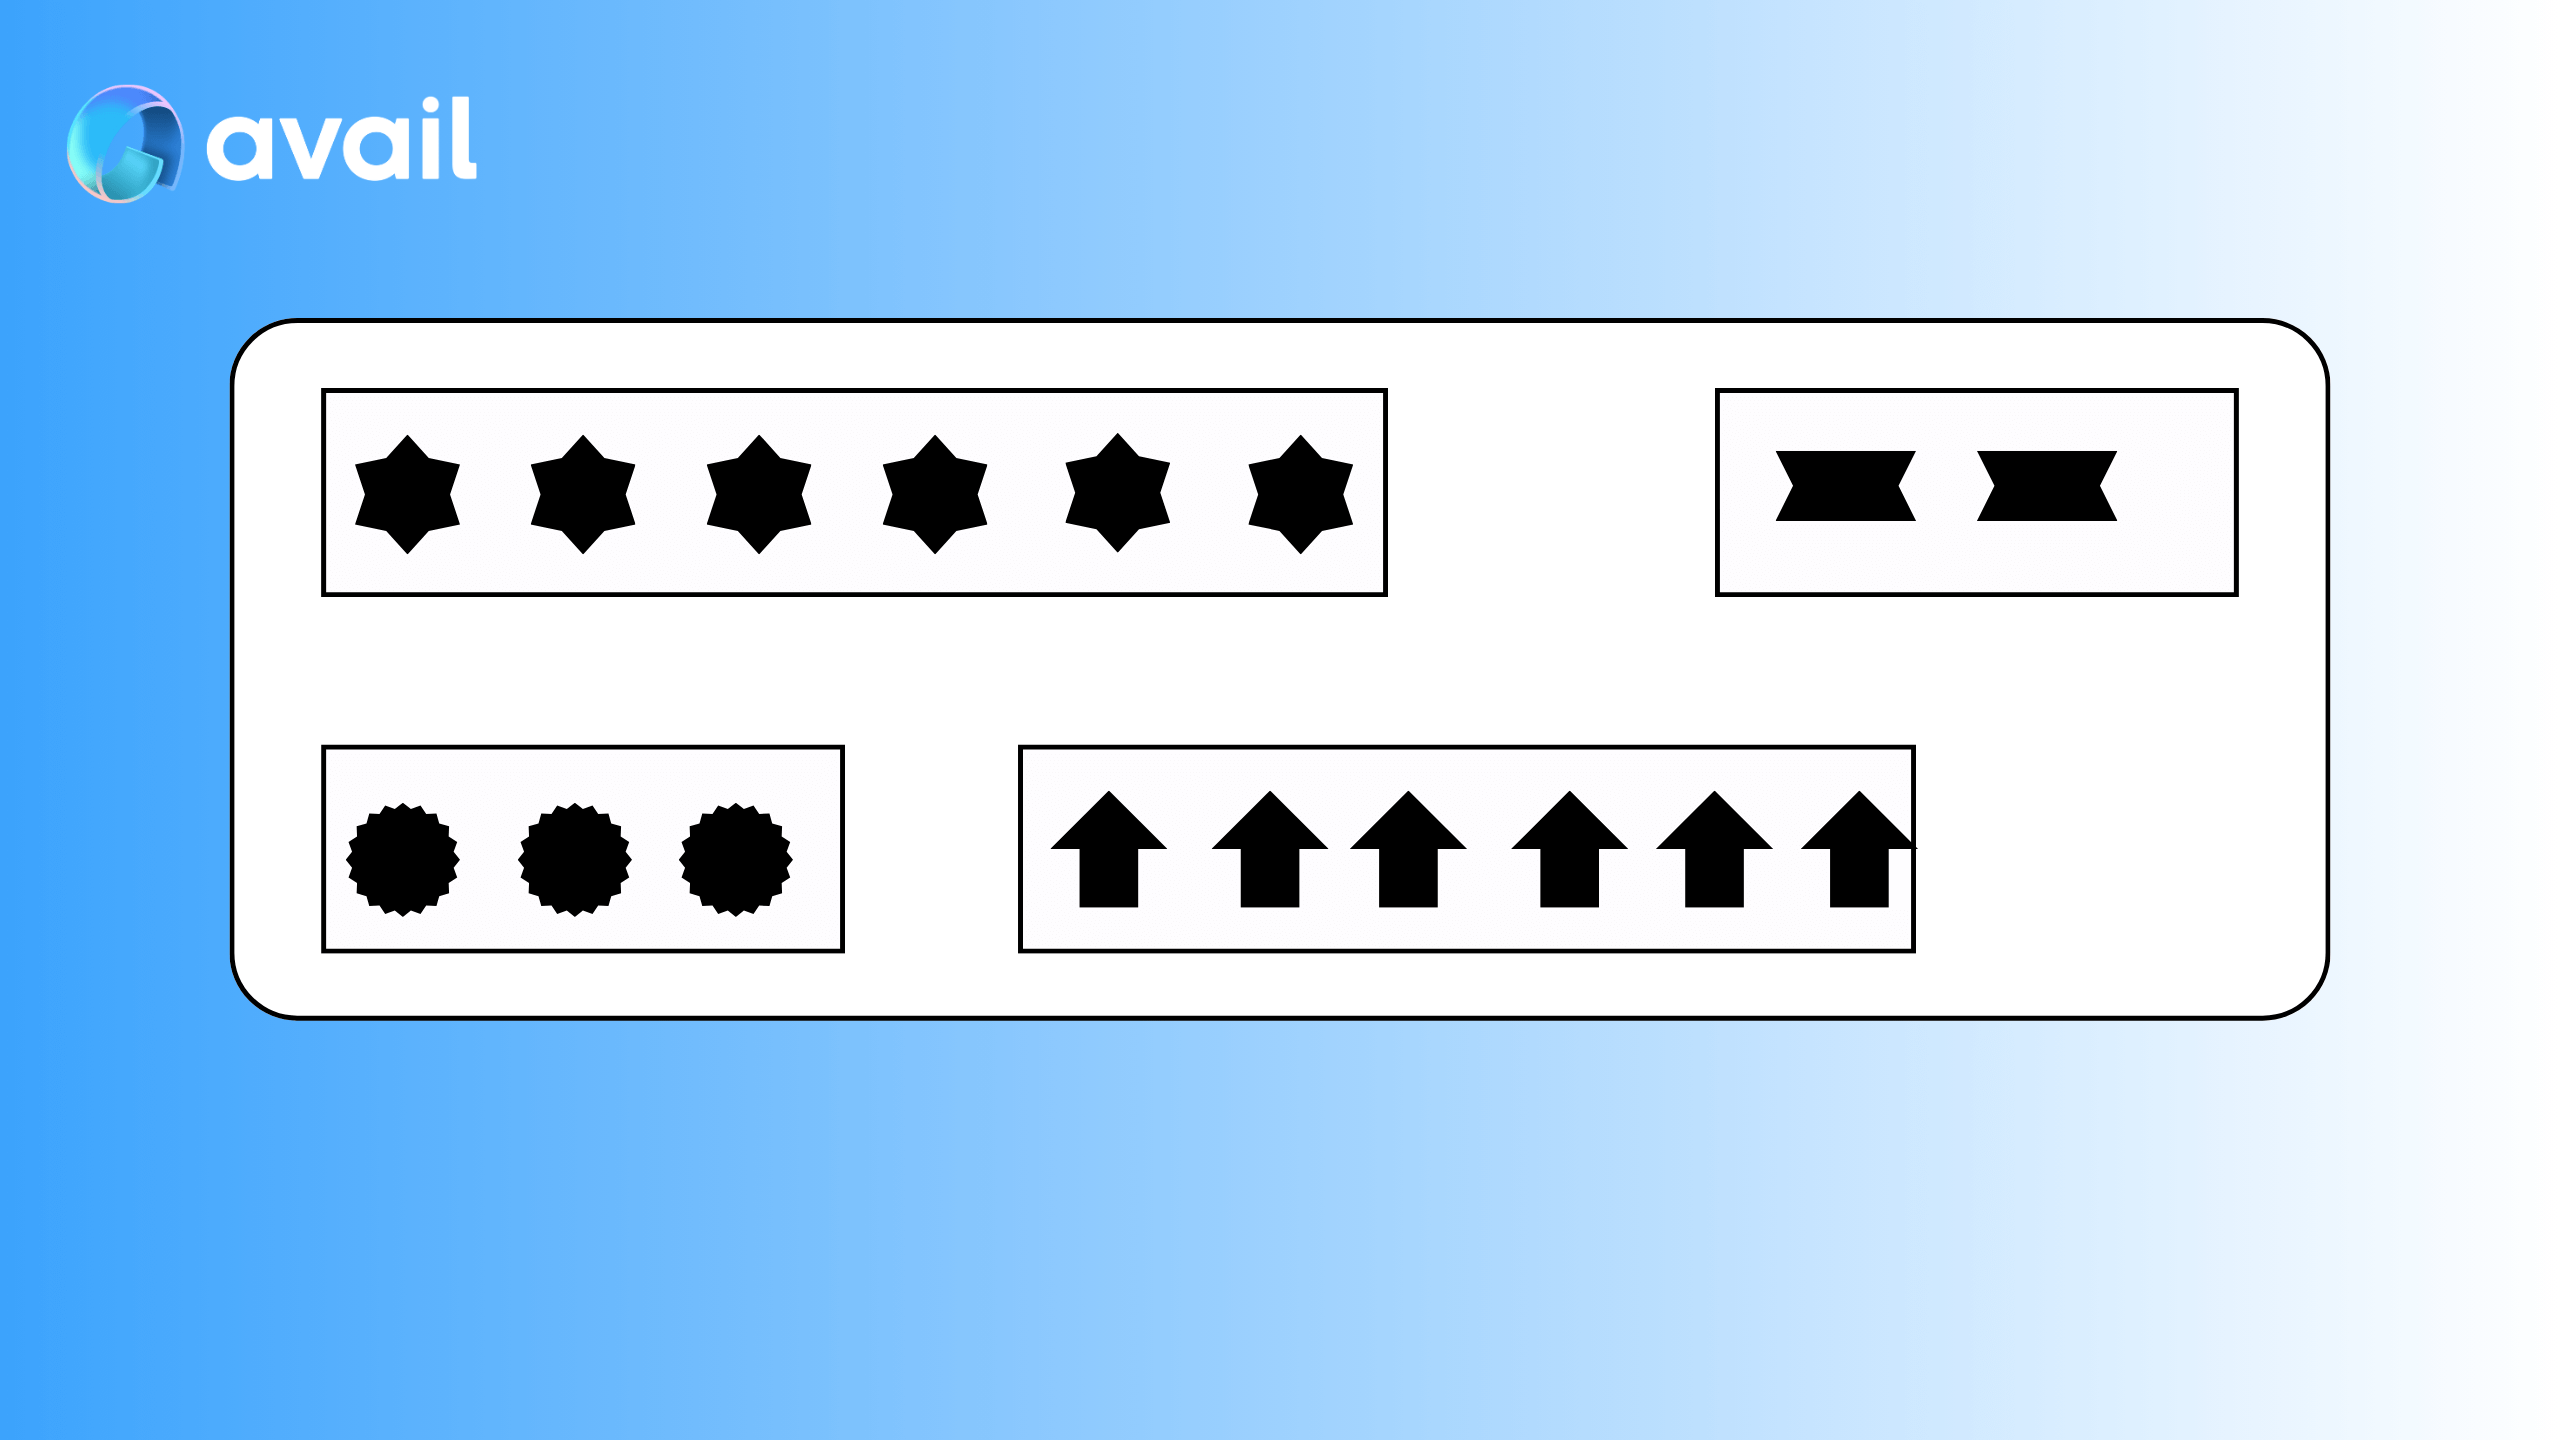
### Now think of the same data neatly arranged into its own sections
But what if all of that same data in the same block was organised into different sections,
stored alongside its peers. Each of these *'sections'* would be identified by an `AppID`. \
A developer now does not need to parse through the entire block to find the data they need, they can simply query data from the `AppID` they are interested in.
### These *'sections'* are flexible
All of the rollups running on Avail DA probably won't submit data in all of the blocks. Thus, it is likely some `AppIDs` will be empty in some blocks. \
On the flipside, some rollups might need to submit more data than usual in a particular block. \
None of this is an issue on Avail DA, the individual block builds as needed in the moment.
## Structure of an App ID
Each `appID` consists of 3 fields:
* `key`: A string that is the name of the `appID`. Each `appID` should have a unique name.
* `owner`: The address of the account that created the `appID`. A single address can create multiple `AppIDs`.
* `id`: The unique integer index of the `appID`. It is incremented by 1 every time a new `appID` is created and is automatically assigned.
## Spam and security
* The `key` and `id` fields of every `appID` are unique. If you try to create an `appID` with the same `key` as an existing one, the operation will fail.
* **Anyone can submit any sort of data to any `appID` regardless of whether or not they created it.** \
This is not an attack vector. Avail DA is a DA layer, not an execution environment --
it is not concerned with the validity of the data being submitted, only with its availability.
Any app or execution layer building on top of Avail DA can set up rules to filter out unwanted data submissions.
For example, they could require that only data submitted with a particular signature is accepted, treating all other submissions as spam.
> **Note**
>
> **Ready to create your own App ID?**
>
> * **Via the explorer:** Follow our [explorer guide](/docs/da/user-guides/explorer#how-to-register-my-own-appid) to create one through the UI.
> * **Programmatically:** Use our [SDK](/docs/da/build/interact/app-id) for programmatic App ID creation.
> * **API reference:** See the [createApplicationKey](/docs/da/api-reference/avail-node-api/da-create-application-key) API docs.
>
> Data submissions to App IDs incur fees -- learn more about [how transaction pricing works](/docs/da/concepts/tx-pricing).
### How Avail DA Works
Avail DA's core job is to guarantee that data posted by rollups is available for anyone to retrieve and verify. It achieves this through a pipeline of cryptographic techniques and a consensus mechanism designed specifically for this purpose.
## Block data lifecycle
When a rollup submits data to Avail, it goes through this pipeline:
1. **Data submission** — The rollup posts transaction data via a `submitData` extrinsic, tagged with its [App ID](/docs/da/concepts/app-ids).
2. **Matrix construction** — The block data is chunked and arranged into a 2D matrix of equal-sized cells.
3. **Erasure coding** — Each row of the matrix is extended using Reed-Solomon erasure codes, adding redundancy.
4. **KZG commitments** — Each row is committed to using KZG polynomial commitments. These commitments are included in the block header.
5. **Consensus** — Validators attest to the block header (which contains the commitments), finalizing it.
6. **Data availability sampling** — Light clients randomly sample cells from the matrix to verify the data is available.
## Erasure coding
Erasure coding spreads data across redundant "shards" so that the original data can be reconstructed even if some shards are missing. In Avail, each row of the block data matrix is erasure-coded, effectively doubling its size.
This matters because a malicious block producer trying to hide even a single transaction would need to withhold a large portion of the block. Random sampling by light clients becomes far more likely to catch the gap. Without erasure coding, a bad actor could hide a small piece of data that sampling might miss. With it, any attempt to hide data requires withholding so much that it's nearly impossible to evade detection.
## KZG polynomial commitments
Each row of the erasure-coded matrix is committed to using KZG commitments. These are compact cryptographic proofs included in every block header that provide two guarantees:
1. **Binding** — It's computationally infeasible to produce a commitment that matches incorrect data. If the commitment is valid, the data is correct.
2. **Efficient verification** — A light client can verify that any individual cell belongs to the committed row without downloading the full row. This is what makes cell-level sampling practical.
Together with erasure coding, KZG commitments mean that verifying a single cell proves both that the cell data is correct and that it belongs to the committed block data.
## Data availability sampling (DAS)
DAS is how light clients verify that block data is available without downloading entire blocks. The process works like this:
1. A light client receives a new finalized block header containing KZG commitments.
2. It randomly selects a set of cells from the block's data matrix.
3. It retrieves those cells — first from the peer-to-peer DHT network, then via RPC if needed.
4. It verifies each cell against the KZG commitment in the header.
5. It calculates a **confidence score** — the probability that the full block data is available given the number of cells successfully verified.
With enough samples (a small constant number), a light client achieves near-100% confidence that the entire block is available. This is a key property of Avail: **you don't need a full node to verify data availability**. A light client running on consumer hardware can do it.
> **Note**
>
> Light clients that verify cells also re-share them on the peer-to-peer network, increasing overall data availability for the network. The more light clients sampling, the stronger the DA guarantee becomes.
## Consensus: how blocks are finalized
Avail uses **Nominated Proof of Stake (NPoS)** for validator selection, combined with two Substrate-based protocols for block production and finality:
| Protocol | Role |
| ---------------------------------------------------------------------- | ------------------------------------------------------------------ |
| **BABE** (Blind Assignment for Blockchain Extension) | Block production — validators are assigned slots to produce blocks |
| **GRANDPA** (GHOST-based Recursive Ancestor Deriving Prefix Agreement) | Finality — validators vote to finalize chains of blocks |
Validators in Avail don't execute transactions. They attest that data has been correctly packaged into blocks with valid KZG commitments. This is a lighter workload than execution-based chains, which is why Avail can support larger block sizes without proportionally increasing validator requirements.
A supermajority of validators must sign off on a block header (which includes the KZG commitments and a Merkle root of the data) for it to be finalized via GRANDPA. Once finalized, the data is considered available and immutable.
> **Note**
>
> **Next steps**
>
> * Understand how rollup data is organized with [App IDs](/docs/da/concepts/app-ids).
> * Learn how [transaction pricing](/docs/da/concepts/tx-pricing) works for data submissions.
> * Run your own [light client](/docs/da/operate/run-a-light-client) to participate in DAS.
> * Become a [validator](/docs/da/operate/become-a-validator) on the Avail network.
### Using the Explorer
Avail DA has two block explorers that let you inspect on-chain activity — blocks, extrinsics (transactions), validators, staking, and data submissions. Each is suited to different needs.
## Explorers at a glance
| | **Subscan** | **Avail Apps (AvailApps)** |
| ------------------ | ----------------------------------------------------------- | ------------------------------------------------------------------------------- |
| **Best for** | Browsing blocks, transactions, accounts, and staking data | Interacting with the chain — submitting extrinsics, querying state, governance |
| **Mainnet** | [avail.subscan.io](https://avail.subscan.io/) | [mainnet.explorer.availproject.org](https://mainnet.explorer.availproject.org/) |
| **Turing Testnet** | [avail-turing.subscan.io](https://avail-turing.subscan.io/) | [turing.explorer.availproject.org](https://turing.explorer.availproject.org/) |
| **Interface** | Polished read-only explorer with search and filtering | Polkadot JS-based UI with full chain interaction |
### When to use Subscan
Subscan is the best starting point for most users. Use it to:
* Look up a specific block, extrinsic, or account
* View validator performance and staking distributions
* Track data submission transactions by App ID
* Get a quick overview of network activity
### When to use Avail Apps
Avail Apps (a fork of Polkadot JS Apps) gives you direct access to the chain's runtime. Use it to:
* Submit extrinsics (transactions) directly from the UI
* Query chain state and storage
* Participate in governance
* Register an [App ID](/docs/da/concepts/app-ids)
* Inspect the `submitDataFeeModifier` and other runtime constants
## What you can look up
* **Blocks** — View block contents, including which App IDs have data in a given block
* **Extrinsics** — Inspect individual transactions, their parameters, and results
* **Data submissions** — See the raw data blobs submitted by rollups under each App ID
* **Validators** — Check the active validator set, their commission rates, and performance
* **Accounts** — Look up balances, staking info, and transaction history
> **Note**
>
> **Want a hands-on walkthrough?**
>
> See the [Explorer user guide](/docs/da/user-guides/explorer) for step-by-step instructions on common tasks like looking up transactions, registering App IDs, and checking validator status.
### What is Avail DA?
Rollups need somewhere to post their transaction data so that anyone can verify it's available. Traditionally this means posting to Ethereum L1, but that's expensive and doesn't scale — every byte of calldata competes for the same limited block space.
Avail DA is a purpose-built data availability layer that solves this. Instead of piggybacking on a general-purpose L1, rollups post their data to Avail, where it's ordered, committed to with cryptographic proofs, and made available for verification — all without Avail needing to execute any of it.
## How Avail fits in the modular stack
A modular blockchain separates its core functions into specialized layers:
| Layer | Responsibility | Example |
| --------------------- | ---------------------------------------------------------------- | ------------------------------------------------------- |
| **Execution** | Process transactions and update state | Your rollup (OP Stack, Arbitrum Orbit, ZK chains, etc.) |
| **Settlement** | Verify execution proofs and resolve disputes | Ethereum |
| **Data Availability** | Guarantee that transaction data was published and is retrievable | **Avail DA** |
Avail sits at the DA layer. It doesn't execute transactions, validate state transitions, or handle settlement. It does one thing — ensures the data your rollup posts is available — and it does it well.
## What makes Avail DA different
### No execution overhead
Avail validators don't re-execute your transactions. They attest that data has been correctly published and committed to. This means Avail can support much larger blocks than chains where validators must process every transaction.
### Validity proofs, not just attestations
Avail uses **KZG polynomial commitments** to generate validity proofs for block data. These proofs are included in every block header, allowing anyone to verify data correctness without downloading the entire block.
### Data availability sampling (DAS)
Light clients on Avail randomly sample small portions of each block to probabilistically verify that the full data is available. Combined with erasure coding, this gives near-100% confidence with minimal bandwidth. This means even devices with limited resources can verify DA without trusting a full node.
### App IDs for data isolation
Each application on Avail gets its own [App ID](/docs/da/concepts/app-ids). Your rollup only needs to download the data posted under its App ID — not the entire block. Other chains using Avail at the same time don't affect your throughput or costs.
## Who uses Avail DA
Avail DA is designed for **rollup developers and infrastructure teams** who need:
* A scalable DA layer that won't bottleneck their rollup's throughput
* Cryptographic guarantees (not just committee attestations) that data is available
* A chain-agnostic solution that works with any execution environment — EVM, SVM, custom VMs
Rollup frameworks like OP Stack, Arbitrum Orbit, ZKsync, Madara, and others can integrate Avail DA as their data availability backend.
> **Note**
>
> **Next steps**
>
> * Learn [how Avail DA works](/docs/da/concepts/how-avail-da-works) under the hood — DAS, erasure coding, and consensus.
> * Ready to build? Jump to the [Build section](/docs/da/build) to integrate your rollup with Avail DA.
> * See [Networks & Endpoints](/docs/da/networks) for RPC URLs and contract addresses.
### Bridge API
> **Warning**
>
> **DIRECT BRIDGE CALLS ONLY**
>
> Avail-to-Ethereum bridge sends must be submitted as direct `vector.sendMessage` / `vector_sendMessage` transactions.
>
> Wrapped bridge sends are rejected during transaction validation. Do not submit bridge sends through `proxy`, `multisig`, `scheduler`, `utility.batch`, `utility.batchAll`, or any other call wrapper.
>
> This restriction only applies to bridge send transactions. Normal non-bridge proxy, multisig, scheduler, and batch transactions continue to work as expected.
> **Note**
>
> **BEFORE WE START**
>
> 1. The Avail VectorX bridge can be used to pass messages and tokens between \
> Avail DA Turing - Ethereum Sepolia (testnet bridge),
> and between Avail DA mainnet - Ethereum mainnet (mainnet bridge).
> 2. You can check out a complete list of endpoints required to use the bridge API in the [networks page](/docs/da/networks#for-devs).
> **Note**
>
> **TWO WAYS OF USING THE BRIDGE API**
>
> 1. You can build and run the bridge API locally using the instructions outlined in this repo:
> [availproject/bridge-api](https://github.com/availproject/bridge-api)
> 2. We have included two public endpoints for the bridge API in the [networks page](/docs/da/networks#for-devs) that you can use.
> For the sake of simplicity that is what we will be using in this guide.
> 3. For the sake of simplicity, we will use the Turing testnet bridge API in this guide.
## Setting up the dev environment
#### CURL
1. To use the Avail bridge API with `curl`, you just need to have `curl` installed on your system.
You can check if it is installed by running:
```bash filename="CURL"
curl --version
```
2. If this does not work, go to [curl's website](https://curl.se/) to install it on your system.
#### avail-rust
1. Make sure `rust` and cargo are installed on your system. You can refer to [Rustlang's docs](https://www.rust-lang.org/tools/install) for the same.
2. Create a new Rust project by running `cargo init`.
3. Paste the following into your `Cargo.toml` file:
```toml
[package]
name = "avail_bridge_tools"
version = "0.1.0"
edition = "2021"
# See more keys and their definitions at https://doc.rust-lang.org/cargo/reference/manifest.html
[dependencies]
avail-rust = { git = "https://github.com/availproject/avail" }
tokio = { version = "1.35", features = ["full"] }
codec = { package = "parity-scale-codec", version = "3", default-features = false, features = [
"derive",
"full",
"bit-vec",
] }
serde = { version = "1.0", features = ["derive"] }
serde_json = "1.0.127"
sp-core = { version = "21.0.0" }
hex = "0.4"
hex-literal = "0.3.4"
anyhow = "1.0.79"
reqwest = { version = "0.11.24", features = ["json"] }
ringbuffer = { version = "0.15.0", features = ["alloc"] }
secp256k1 = "0.28"
tracing = "0.1.40"
tracing-subscriber = { version = "0.3.18", features = ["json", "env-filter"] }
chrono = "0.4.34"
confy = "0.6"
tokio-test = "0.4"
alloy-sol-types = { version = "0.7.4", features = ["json"] }
alloy-sol-macro = { version = "0.7.4", features = ["json"] }
alloy = { git = "https://github.com/alloy-rs/alloy", version = "0.2.1" }
alloy-contract = { git = "https://github.com/alloy-rs/alloy", version = "0.2.1" }
alloy-provider = { git = "https://github.com/alloy-rs/alloy", version = "0.2.1" }
alloy-network = { git = "https://github.com/alloy-rs/alloy", version = "0.2.1" }
# alloy-primitives = { git = "https://github.com/alloy-rs/alloy", version = "0.2.1" }
alloy-signer = { git = "https://github.com/alloy-rs/alloy", version = "0.2.1" }
alloy-signer-local = { git = "https://github.com/alloy-rs/alloy", version = "0.2.1" }
toml = "0.8.19"
[profile.release]
panic = 'abort'
```
4. Create a `config.toml` file in the root of your project and paste the following:
```toml
avail_rpc_url="wss://turing-rpc.avail.so/ws"
avail_mnemonic = "A seed phrase for an Avail DA wallet"
ethereum_mnemonic = "A seed phrase for an Ethereum wallet"
# testnet bridge API
bridge_api_url="https://turing-bridge-api.avail.so/"
# Ethereum sepolia public node URL
ethereum_url="https://ethereum-sepolia.publicnode.com"
# Sepolia bridge contract address
contract_address= "967F7DdC4ec508462231849AE81eeaa68Ad01389"
message_data= "Random data to send"
amount_to_send= 1000000
# Enter a Sepolia recipient address
recipient="AfF84d35f9c784cE972A7Ff3e3E243E5eb6EF37D000000000000000000000000"
receive_message_contract_address="29190B4d80C409A3DaF743F57379e0453D31C26b"
```
### Light Client API
> **Note**
>
> **BEFORE WE START**
>
> 1. The Avail light client(Avail LC) can run in two modes: `Light-client` or `App-client`. We internally maintain
> a light client instance available for public use running in the `Light-client` mode. Thus, for all methods that can
> be called via an LC running in the `Light-client` mode, devs can use our public endpoint.
> 2. For methods that require an LC running in the `App-client` mode, you will need to run a local instance of the Avail LC.
> 3. You can check out or docs for [instructions on running your own instance
> of the Avail light client](/docs/da/operate/run-a-light-client/light-client)
> 4. The LC API is exposed by default through `localhost:7007` by default.
## Setting up the dev environment
Set up your dev environment with `curl` and `Rust`:
#### CURL
1. To use the Avail light client API with `curl`, you just need to have `curl` installed on your system.
You can check if it is installed by running:
```bash filename="CURL"
curl --version
```
2. If this does not work, go to [curl's website](https://curl.se/) to install it on your system.
#### Rust
How to run the Rust code snippets:
1. Make sure you have [Rust](https://www.rust-lang.org) and [Cargo](https://crates.io/) installed on your system before moving forward. You can check that by running:
```sh
rustc --version && cargo --version
```
If either of these don't work, you can check out [Rust's official installation guide](https://www.rust-lang.org/tools/install).
2. Create a new Rust project:
```sh
cargo new
```
3. Add these dependencies to the `Cargo.toml` file:
```toml
[dependencies]
reqwest = { version = "0.12", features = ["json"] }
serde = { version = "1.0", features = ["derive"] }
serde_json = "1.0"
tokio = { version = "1.36", features = ["full"] }
base64 = "0.22"
```
4. Paste the code snippets into the `main.rs` file, and run the project with `cargo run`.
### Node API
> **Note**
>
> **BEFORE WE START**
>
> 1. The Avail node supports an extensive list of extrinsics and various other types of calls that you can
> [try out in our explorer](https://explorer.availproject.org/#/extrinsics).
> 2. This API reference currently documents only the most widely used extrinsics, but will be iterated upon
> to eventually be an exhaustive resource for the Avail node API.
## Setting up the dev environment
#### avail-js
1. Make sure `Node-js` is installed on your system by running the following command in your terminal:
```bash filename="terminal" name="cmd1"
node --version
```
If not installed, you can refer to [Node-js docs](https://nodejs.org/en/download/package-manager) for the same.
2. Create a new Node-js project by running the following command in a directory of your choice:
```bash filename="terminal" name="cmd2"
pnpm init
```
3. To install the `avail-js-sdk` run the following command:
```bash filename="terminal" name="cmd3"
pnpm add avail-js-sdk@0.4.1
```
4. Make sure to install the `ts-node` package if you haven't already:
```bash filename="terminal" name="cmd4"
pnpm add -g ts-node
```
5. Create a `tsconfig.json` file in the root of your project by running:
```bash filename="terminal" name="cmd5"
touch tsconfig.json
```
6. Populate your `tsconfig.json` with the following configuration:
```json showLineNumbers filename="tsconfig.json" name="cmd6"
{
"compilerOptions": {
"target": "es2016",
"module": "commonjs",
"outDir": "build",
"declaration": true,
"esModuleInterop": true,
"forceConsistentCasingInFileNames": true,
"strict": true,
"skipLibCheck": true,
"noUnusedParameters": true
},
"include": ["**/*.ts", "**/*.js"],
"exclude": ["node_modules", "build"]
}
```
7. Create a `.env` file in the root of your project by running:
```bash filename="terminal" name="cmd7"
pnpm add dotenv && touch .env
```
8. Put in the Seed Phrase of the account you want to use into the `.env` file:
```bash showLineNumbers filename=".env" name="cmd8"
SEED="This is a random seed phrase please replace with your own"
```
> **Error**
>
> **IMPORTANT**
>
> 1. Please be **VERY CAREFUL** with your seed phrase.
> 2. Make sure to add your `.env` file to your `.gitignore` so that it doesn't get pushed anywhere.
> 3. While it is good enough to use an `env` file while testing, try to use better practices while deploying to production.
#### avail-deno
> **Warning**
>
> **AVAIL-DENO HAS BEEN SUNSET**
>
> 1. The `avail-deno` SDK has been sunset and will not be maintained or upgraded in the future.
>
> 2. We recommend you switch to `avail-js`. The SDK will work with `deno` out of the box. \
> Just run `deno run --allow-net your-file-name.ts` to run your `avail-js` code with `deno`.
1. Make sure `avail-deno` is installed on your system. You can refer to [Deno's docs](https://docs.deno.com/runtime/manual/) for the same.
2. Create a new Deno JS project by running `deno init` in a directory of your choice, and create a new file named `your-file-name.ts`
in the project.
3. The examples in this reference will interact with the Turing testnet of Avail DA, and will use the correspponding endpoint.
You can use the [networks page](/docs/da/networks) to find endpoints for mainnet if you need to.
#### avail-rust
1. Make sure `rust` and cargo are installed on your system. You can refer to [Rustlang's docs](https://www.rust-lang.org/tools/install) for the same.
2. Create a new Rust project by running:
```bash filename="terminal" name="cmd9"
cargo init
```
3. Paste the following into your `Cargo.toml` file:
```toml showLineNumbers filename="Cargo.toml" name="cmd10"
[workspace]
[package]
name = "your-project-name"
edition = "2021"
[dependencies]
# Use avail-rust v0.1.9 from the `avail-rust` repo
avail-rust = { git = "https://github.com/availproject/avail-rust", tag = "v0.1.9" }
# Tokio
tokio = { version = "1.38.0", features = ["full"] }
# dotenvy
dotenvy = "0.15.7"
```
> **Warning**
>
> **Check your rust version**
>
> 1. Run `rustc --version` to check the version of rust installed on your system.
> 2. Some features of the `avail-rust` SDK may not work with older versions of rust.
> 3. You can update the Rust version on your system by running `rustup update`.
4. Create a `.env` file in the root of your project by running the following command:
```bash filename="terminal" name="cmd11"
touch .env
```
5. Put in the Seed Phrase of the account you want to use into the `.env` file:
```bash showLineNumbers filename=".env" name="cmd12"
SEED="This is a random seed phrase please replace with your own"
```
> **Error**
>
> **IMPORTANT**
>
> 1. Please be **VERY CAREFUL** with your seed phrase.
> 2. Make sure to add your `.env` file to your `.gitignore` so that it doesn't get pushed anywhere.
> 3. While it is good enough to use an `env` file while testing, try to use better practices while deploying to production.
#### avail-go
1. Make sure `go` is installed on your system by running the following command in your terminal:
```bash filename="terminal" name="cmd13"
go version
```
If not installed, you can refer to [Go's docs](https://golang.org/doc/install) for the same.
2. Create a new Go project by initializing a Go module in a directory of your choice. Run the following command:
```bash filename="terminal" name="cmd14"
go mod init your-project-name
```
3. To install the avail-go-sdk, use the following command to add it to your project:
```bash filename="terminal" name="cmd15"
go get github.com/availproject/avail-go-sdk@v0.2.7
```
4. To install the `godotenv` package, use the following command:
```bash filename="terminal" name="cmd16"
go get github.com/joho/godotenv
```
> **Warning**
>
> **CHECK YOUR GO VERSION**
>
> 1. Run `go version` to check the version of go installed on your system.
> 2. Some features of the `avail-go-sdk` may not work with older versions of go.
> 3. Refer to [Golang's docs](https://go.dev/doc/install) for any questions.
5. Create a `.env` file in the root of your project by running the following command:
```bash filename="terminal" name="cmd17"
touch .env
```
6. Put in the Seed Phrase of the account you want to use into the `.env` file:
```bash showLineNumbers filename=".env" name="cmd18"
SEED="This is a random seed phrase please replace with your own"
```
> **Error**
>
> **IMPORTANT**
>
> 1. Please be **VERY CAREFUL** with your seed phrase.
> 2. Make sure to add your `.env` file to your `.gitignore` so that it doesn't get pushed anywhere.
> 3. While it is good enough to use an `env` file while testing, try to use better practices while deploying to production.
### Gas Relay Deprecated
> **Warning**
>
> **Gas Relay has been deprecated.**
> This service has been replaced by Turbo DA. Gas Relay endpoints are no longer available.
## What replaced it
[Turbo DA](/docs/da/build/turbo-da) is a gasless transaction submission service that provides sub-250ms pre-confirmations for data posted to Avail DA. It replaces the Gas Relay with a credit-based model where you purchase data credits (measured in KB/MB) instead of paying gas fees per transaction.
## How to migrate
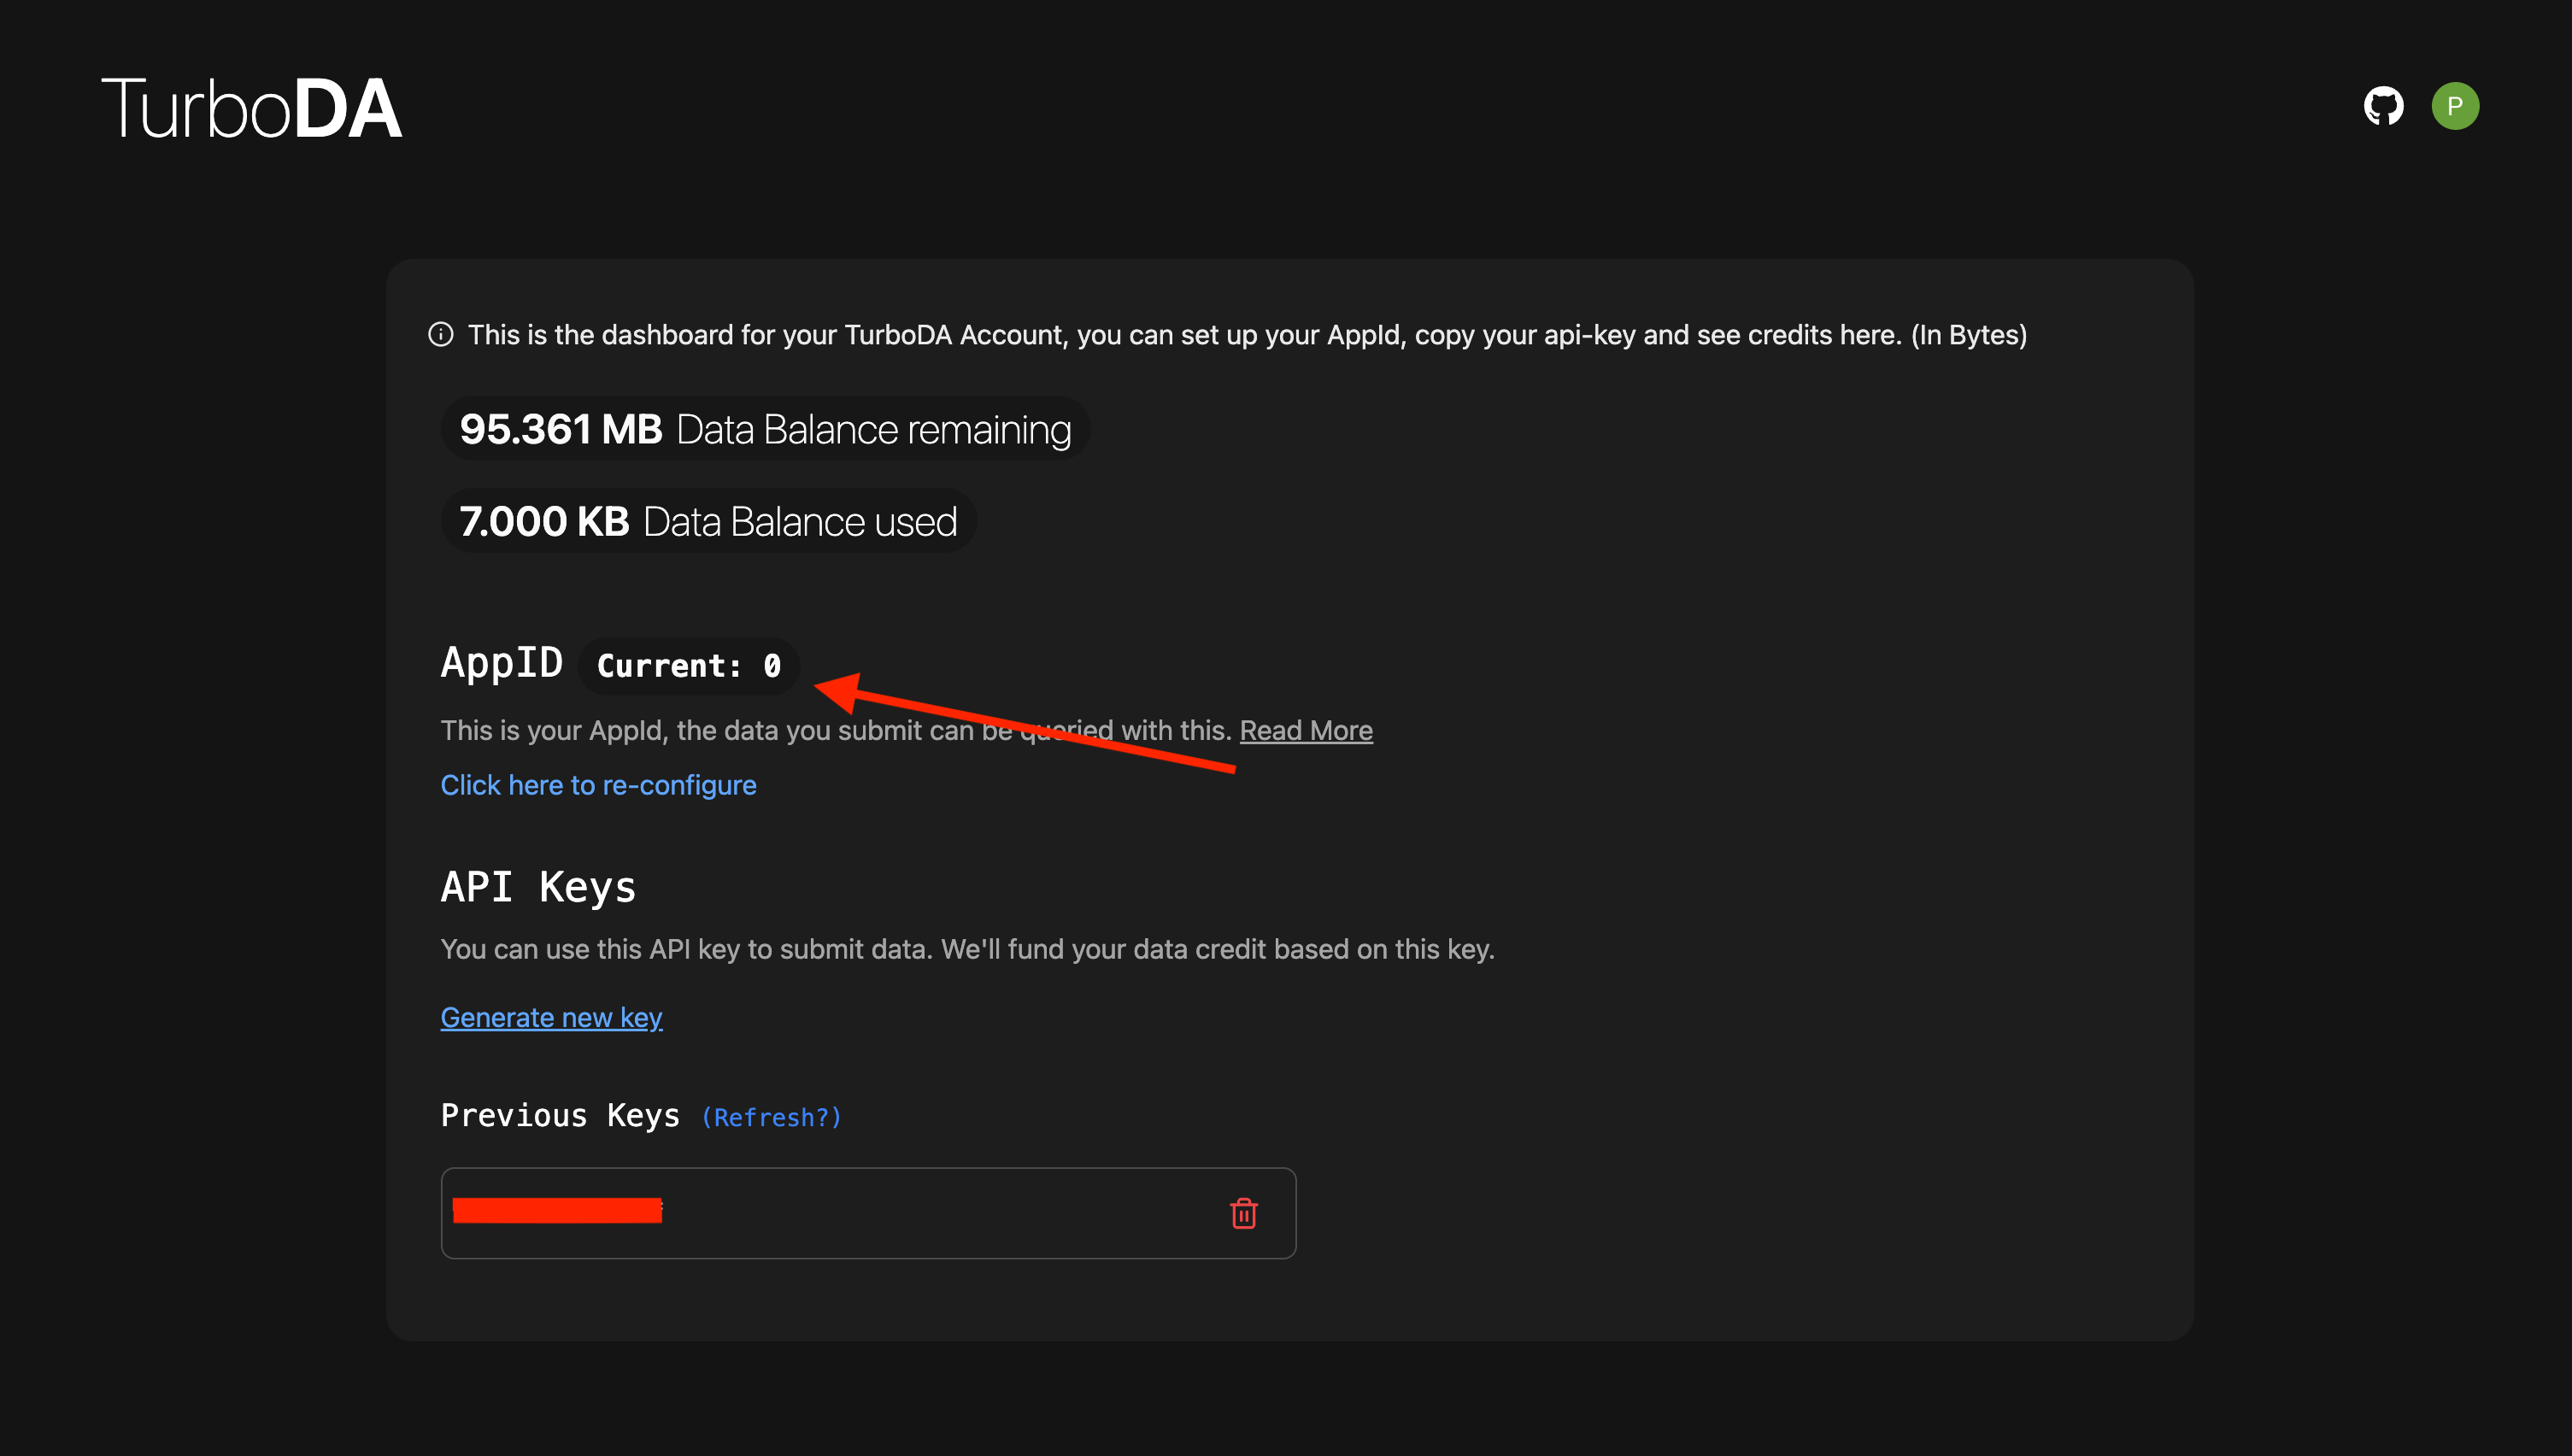
1. **Get a Turbo DA account** — sign in at the Turbo DA dashboard and configure your AppID:
| | Mainnet | Turing Testnet |
| ------------- | ----------------------------------------------------------------- | --------------------------------------------------------------------------------- |
| **Dashboard** | [turbo.availproject.org](https://turbo.availproject.org/) | [staging.turbo.availproject.org](https://staging.turbo.availproject.org/) |
| **API** | [turbo-api.availproject.org](https://turbo-api.availproject.org/) | [staging.turbo-api.availproject.org](https://staging.turbo-api.availproject.org/) |
2. **Generate an API key** — from the dashboard, click "Generate new key" and save it securely. Keys are only shown once.
3. **Update your integration** — replace Gas Relay calls with the Turbo DA API. See the [Turbo DA guide](/docs/da/build/turbo-da) for a step-by-step walkthrough or the [Turbo DA API reference](/docs/da/api-reference/avail-turbo-da-api) for endpoint details.
### How Transaction Pricing Works
Every extrinsic (transaction) executed on Avail costs a certain amount of `AVAIL` tokens. These fees vary for different
extrinsics and are determined primarily by two considerations:
1. The amount of processing power required to include the transaction in the chain.
2. The amount of storage required to store the transaction on-chain.
Avail's pricing formula is designed to keep transacting on-chain feasible while also making it expensive to spam the network.
## Terms you need to know
1. **Base fee**: The minimum base amount attached to every single transaction. This is the constant whose current
value is currently `0.124 AVAIL`.
2. **Weight fee**: This fee is proportional to the amount of computation required to add the transaction to the network.
3. **Length fee**: This fee is proportional to the encoded length of the transaction, essentially the amount of space it consumes in the block.
4. **Congestion fee**: A multiplier applied to the Weight fee based on block fullness of previous blocks (Notice blocks not block, because `fee_multiplier`
is a function of both the current fee multiplier and the fullness of the preceding block. A kind of guard against sudden rise/fall of fee).
5. **Tip (optional)**: This is an optional fee that can be attached to a transaction to incentivize validators.
## Fees calculation for non-DA transactions
The formula for the final transaction fee for most transactions looks like this:
```
Weight fee = [Congestion multiplier * Weight of transaction]
Final fee = Base fee + Length fee + Weight fee + Tip(optional)
```
Most transactions like balance transfers and proxy creation have predictable fees — transferring `1` AVAIL requires the same computation as transferring `1000` AVAIL, so the Weight fee stays constant.
This changes for transactions that post new data to the network, where the size of the data directly affects the cost.
## Fees calculation for DA transactions
The formula for the final transaction fee for data availability transactions looks like this:
```
Weight fee = [Congestion multiplier * Weight of transaction]*[submitDataFeeModifier]
Final fee = Base fee + Length fee + Weight fee + Tip(optional)
```
### What's different?
#### `submitDataFeeModifier`
Posting new data to the chain is a core component of the Avail network. To ensure the fees for doing so remain
viable, the `submitDataFeeModifier` can be adjusted when needed after going through
[Avail's governance process](/docs/da/user-guides/staking-governance/governance-on-avail).
This multiplier is used to adjust the `Weight fee` component of the final fee for all `dataAvailability_submitData` transactions.
> **Note**
>
> To query the current value of the `submitDataFeeModifier`:
>
> 1. Go to the [chainstate page of the Avail explorer](https://explorer.availproject.org/#/chainstate).
> 2. Query the `dataAvailability_submitDataFeeModifier` method.
#### Significance of the data input
For most extrinsics on Avail, the raw size of the input parameters doesn't matter much. DA transactions are different — the size of the data being posted has a direct impact on both fee components:
The **Length fee** scales with the encoded size of the data, since larger submissions consume more block space. The **Weight fee** also increases because generating KZG commitments for the data requires more computation as the data grows.
In short, larger data submissions cost more in both dimensions — storage and compute.
#### Worked example
Consider a `submitData` transaction posting a 512-byte data blob under normal network conditions (no congestion):
```
Base fee: 0.124 AVAIL (constant)
Length fee: proportional to ~512 bytes of encoded data
Weight fee: [1.0 * weight] * submitDataFeeModifier
Tip: 0 (optional)
```
The exact fee depends on the current `submitDataFeeModifier` and congestion multiplier, both of which can be queried on-chain. Under low congestion with a neutral modifier, a 512-byte submission typically costs a fraction of an AVAIL token. Larger submissions (e.g. 128 KB) cost proportionally more due to the increased length and commitment generation weight.
> **Note**
>
> **Related concepts**
>
> * Learn about [App IDs](/docs/da/concepts/app-ids), which are used to organize data submissions on the network.
> * Understand [how Avail DA works](/docs/da/concepts/how-avail-da-works) — including KZG commitments that drive the Weight fee.
> * See [Networks & Endpoints](/docs/da/networks) for network details and contract addresses.
### Turbo DA API
> **Note**
>
> **NEED AN API KEY? OR ANY OTHER HELP TO GET STARTED?**
> Please go through [this page in our docs](/docs/da/build/turbo-da) to get started with Turbo DA
> before you get started with the API.
## Turbo DA endpoints
| | **Mainnet** | **Turing Testnet** |
| ----------------- | ----------------------------------------------------------------- | --------------------------------------------------------------------------------- |
| **Frontend** | [turbo.availproject.org](https://turbo.availproject.org/) | [staging.turbo.availproject.org](https://staging.turbo.availproject.org/) |
| **API Endpoints** | [turbo-api.availproject.org](https://turbo-api.availproject.org/) | [staging.turbo-api.availproject.org](https://staging.turbo-api.availproject.org/) |
## Setting up the dev environment
1. To use the Turbo DA API as documented in the following pages, you just need to have `curl` installed on your system.
You can check if it is installed by running:
```bash filename="CURL"
curl --version
```
2. If this does not work, go to [curl's website](https://curl.se/) to install it on your system.
### Interact with DA
Interact with Avail DA directly. Start by [getting testnet tokens](/docs/da/build/interact/faucet), then [create an App ID](/docs/da/build/interact/app-id) to begin posting data.
- [**Get Testnet Tokens**](/docs/da/build/interact/faucet) — Get AVAIL tokens on the Turing testnet to start experimenting.
- [**Create an AppID**](/docs/da/build/interact/app-id) — Register a unique App ID to separate your data submissions on Avail DA.
- [**Read & Write Data**](/docs/da/build/interact/read-write-on-avail) — Submit data blobs and read them back using the SDK.
- [**Query Balances**](/docs/da/build/interact/query-balances) — Check AVAIL token balances for any account.
- [**Transfer Balances**](/docs/da/build/interact/transfer-balances) — Send AVAIL tokens between accounts.
### Rollups
Choose a rollup framework and deploy on Avail DA for data availability.
## Optimium
- [**OP Stack**](/docs/da/build/rollups/op-stack) — Deploy an OP Stack rollup using Avail DA.
- [**Arbitrum Nitro**](/docs/da/build/rollups/arbitrum-nitro) — Deploy an Arbitrum Nitro rollup using Avail DA.
## Validium
- [**Polygon zkEVM**](/docs/da/build/rollups/zkevm) — Deploy a Polygon zkEVM validium with Avail DA.
- [**Polygon CDK**](/docs/da/build/rollups/cdk) — Deploy a Polygon CDK chain with Avail DA.
- [**Madara**](/docs/da/build/rollups/madara) — Deploy a Madara (Starknet) appchain with Avail DA.
- [**zkSync**](/docs/da/build/rollups/zksync) — Deploy a zkSync validium with Avail DA.
## Sovereign
- [**Cosmos**](/docs/da/build/rollups/cosmos) — Use the Avail DA module for Cosmos SDK chains.
### VectorX DA verification
VectorX is the implementation of Avail's data attestation bridge that is used to bridge
data from Avail to the EVM compatible chains in form of data roots commitments. It is implemented as a set of
zero-knowledge proof circuits in SP1. \
SP1 is the most feature completed zero-knowledge virtual machine
that can prove execution of arbitrary Rust and any other LLVM compiled languages.
## Verify data availability on Ethereum
In order to verify data availability on Ethereum it is necessary
to first submit data to Avail DA as a data submission(DA) transaction. Data
submitted this way will be included in Avail DA's blocks, but not
interpreted or executed in any way.
You can submit data to Avail DA in a variety of ways, but we recommend using our dedicated SDKs.
> **Note**
>
> You can check out examples on how to submit new data to Avail DA in our [API reference](/docs/da/api-reference/avail-node-api/da-submit-data). \
> You can check out a complete example on submitting data and verifying the data blob inclusion [on our github](https://github.com/availproject/avail/blob/main/avail-js/examples/node-examples/src/validium.ts).
### Submit data to Avail DA
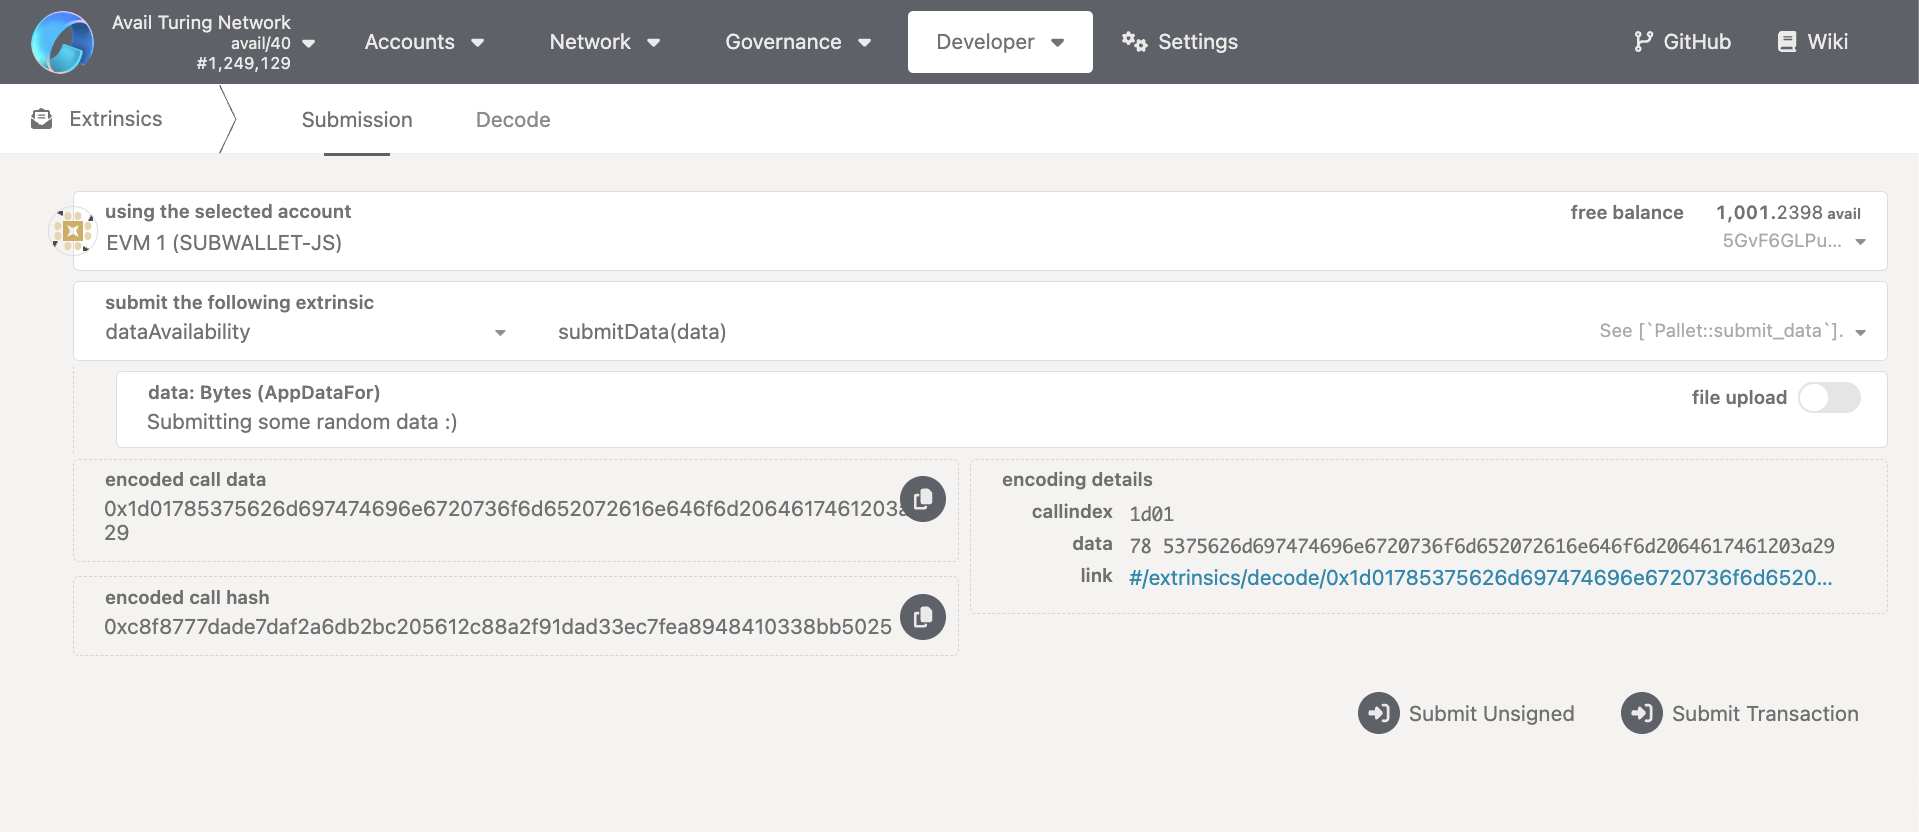
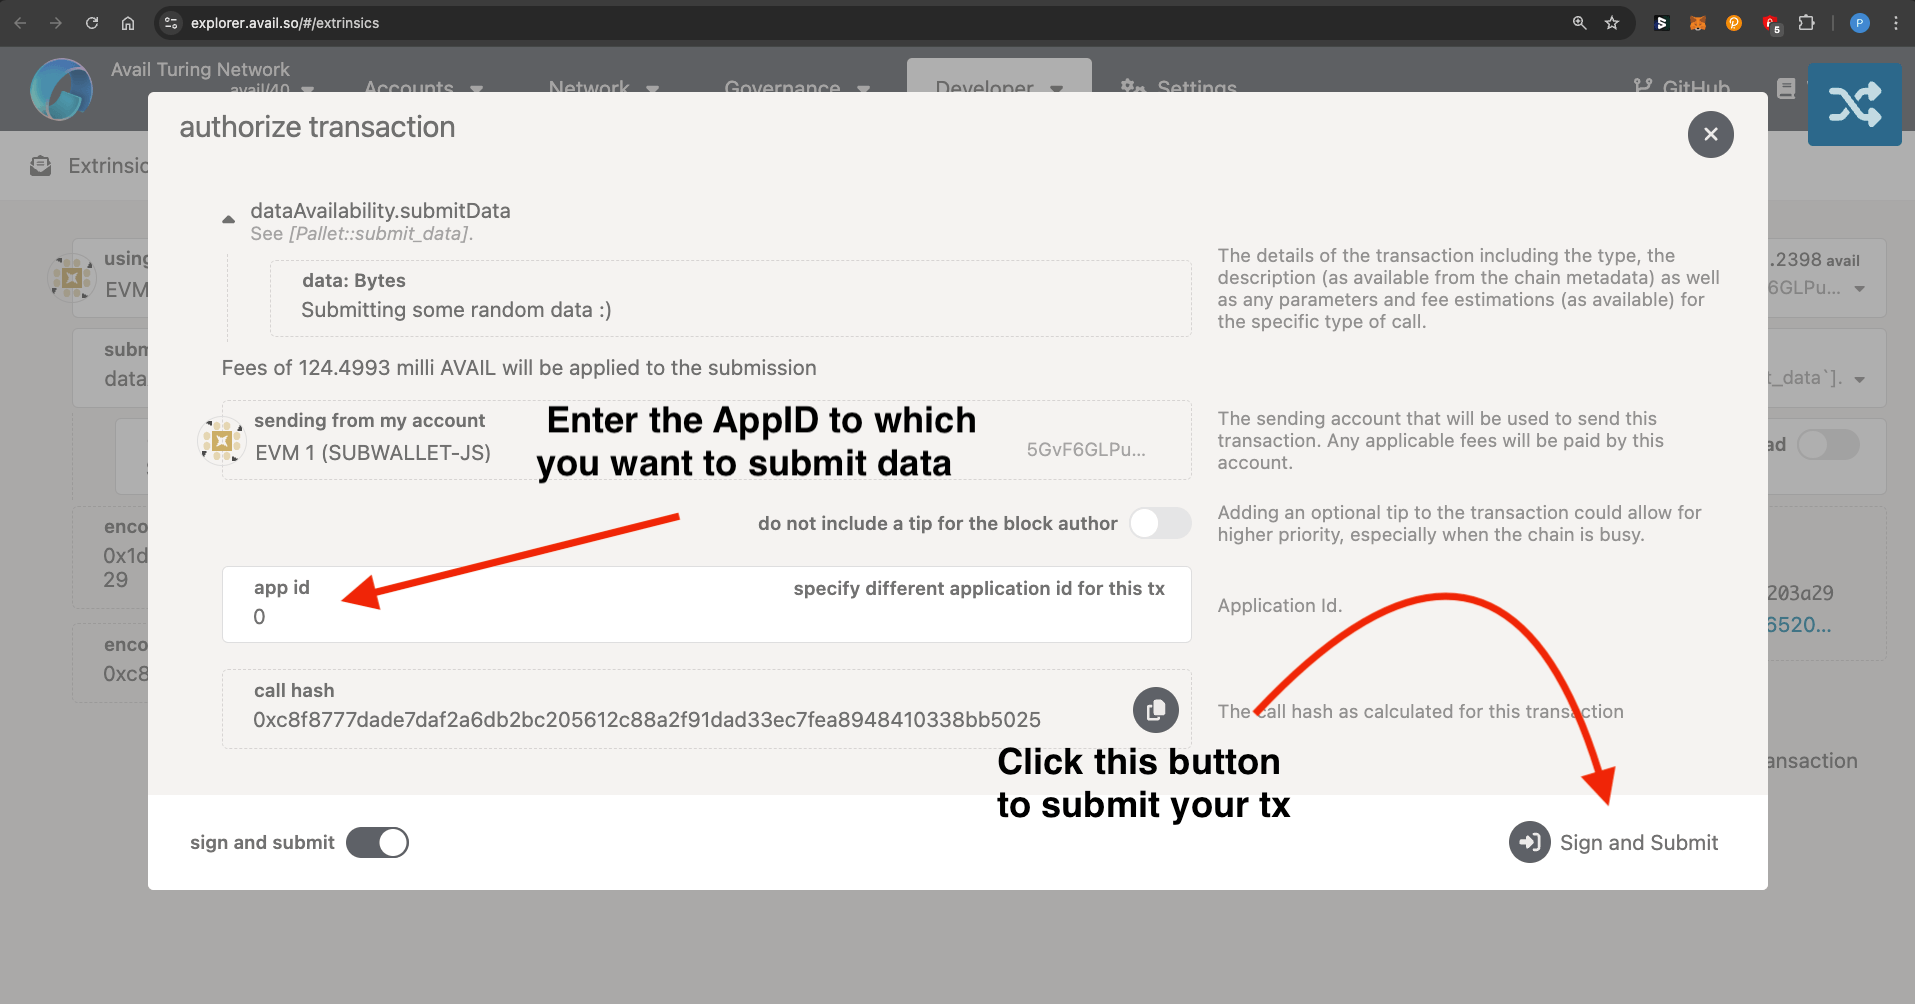
To submit new data to Avail DA, you need to sign the extrinsic `dataAvailability.submitData(data)` with the `data` being passed as a param.
Once the transaction is included in an Avail DA block and that block is finalized, a `data root` is generated for the entire block, ready to be bridged to
Ethereum.
### Bridge data to Ethereum
This way your DA transaction becomes a part of the Avail's block `data-root` and it's inclusion can thus be verified.
The data submitted to Avail DA is bridged to Ethereum every 360 Avail blocks and the commitment is included in the VectorX contract.
VectorX is an implementation of zero-knowledge proof circuits for Vector, Avail's Data Attestation Bridge in [SP1](https://github.com/succinctlabs/sp1-vector).
> **Note**
>
> Deployed VectorX contract for Turing testnet on the Sepolia testnet: [`0xe542db219a7e2b29c7aeaeace242c9a2cd528f96`](https://sepolia.etherscan.io/address/0xe542db219a7e2b29c7aeaeace242c9a2cd528f96). \
> Deployed VectorX contract for Avail mainnet on the Ethereum network: [`0x02993cdC11213985b9B13224f3aF289F03bf298d`](https://etherscan.io/address/0x02993cdC11213985b9B13224f3aF289F03bf298d). \
> Deployed VectorX contract for the Holesky network [`0x8a48b5184dEc29E7276BF74d1C1d30d032F31e19`](https://holesky.etherscan.io/address/0x8a48b5184dEc29E7276BF74d1C1d30d032F31e19)
### Verify data availability on Ethereum
When the data root is bridged to the Ethereum network, it is possible to query for the inclusion proof(Merkle proof) using the `bridge-api`
deployed for Turing testnet.
> **Note**
>
> You can find detailed documentation on our `bridge-API` in our [API reference](/docs/da/api-reference/avail-bridge-api).
> **Note**
>
> By submitting a Merkle proof to the verification contract it is possible to verify if a piece of data is available on Avail DA.
>
> A merkle proof is a list of hashes that can be used to prove that the given leaf is a member of the Merkle tree. An example of submitting a proof to the bridge verification contract
> deployed on Sepolia network for Turing ([`0x967F7DdC4ec508462231849AE81eeaa68Ad01389`](https://sepolia.etherscan.io/address/0x967F7DdC4ec508462231849AE81eeaa68Ad01389))
> and Ethereum mainnet ([`0x054fd961708d8e2b9c10a63f6157c74458889f0a`](https://etherscan.io/address/0x054fd961708d8e2b9c10a63f6157c74458889f0a))
> can be done by calling `verifyBlobLeaf` function.
> This will call deployed contracts function `verificationContract.verifyBlobLeaf(merkleProofInput)`
> and return `true` or `false` depending on the provided proof.
### Turbo DA
> **Warning**
>
> **TURBO DA IS CURRENTLY IN PRIVATE BETA**
> Access to Turbo DA is currently limited only to whitelisted users.
> If your team is interested in using Turbo DA, please reach out to us at [business@availproject.org](mailto:business@availproject.org)
## Introduction
Avail DA today has a block time of 20 seconds, and a finalization time of 2-3 blocks,
which is to say about 60 seconds in most cases. While this is more than enough for most use cases, some applications require a faster finality process to power their
use cases.
Turbo DA is a solution to this problem. With Turbo DA, you can simply post your data to the Turbo DA API, and the service will give you a lightning-fast pre-confirmation in less than 250 milliseconds.
Following this, we will make sure your data is eventually posted to Avail DA, with you not needing to do anything else.
## How to get started
1. Every account on Turbo DA needs to buy '*credits*', measured in `KBs/MBs` of data which is the amount of data they can submit to Turbo DA.
2. Turbo DA is a highly versatile service, and allows you to buy credits in exchange for a wide variety of ERC-20 tokens.
3. Follow the steps below to get started:
### Step 1: Reach out to us (This step is only needed while the service is in private beta)
If your team is interested in using Turbo DA, please reach out to us at [business@availproject.org](mailto:business@availproject.org)
### Step 2: Sign in to the Turbo DA dashboard
Go to the the following dashboard and sign in with your whitelisted account:
| | **Mainnet** | **Turing Testnet** |
| ------------ | --------------------------------------------------------- | ------------------------------------------------------------------------- |
| **Frontend** | [turbo.availproject.org](https://turbo.availproject.org/) | [staging.turbo.availproject.org](https://staging.turbo.availproject.org/) |
### Step 3: Configure your AppID
1. We expect developers building on top of Avail DA to have a specific AppID for their application.
2. Configure this `AppID` in the dashboard, and this is where your data will eventually be posted.
> **Note**
>
> **NOT FAMILIAR WITH APPIDS?**
> `AppIDs` are a core concept every developer building on top of Avail DA should be familiar with.
> You can go through [this page in our docs for the same](/docs/da/concepts/app-ids).
### Step 4: Get your API key
Click on the `Generate new key` button to generate a new API key.
> **Warning**
>
> **IMPORTANT**
>
> 1. Every API key will only be shown once on the dashboard, so make sure to copy and save it securely.
> 2. You can always delete an existing API key, or generate a new one.
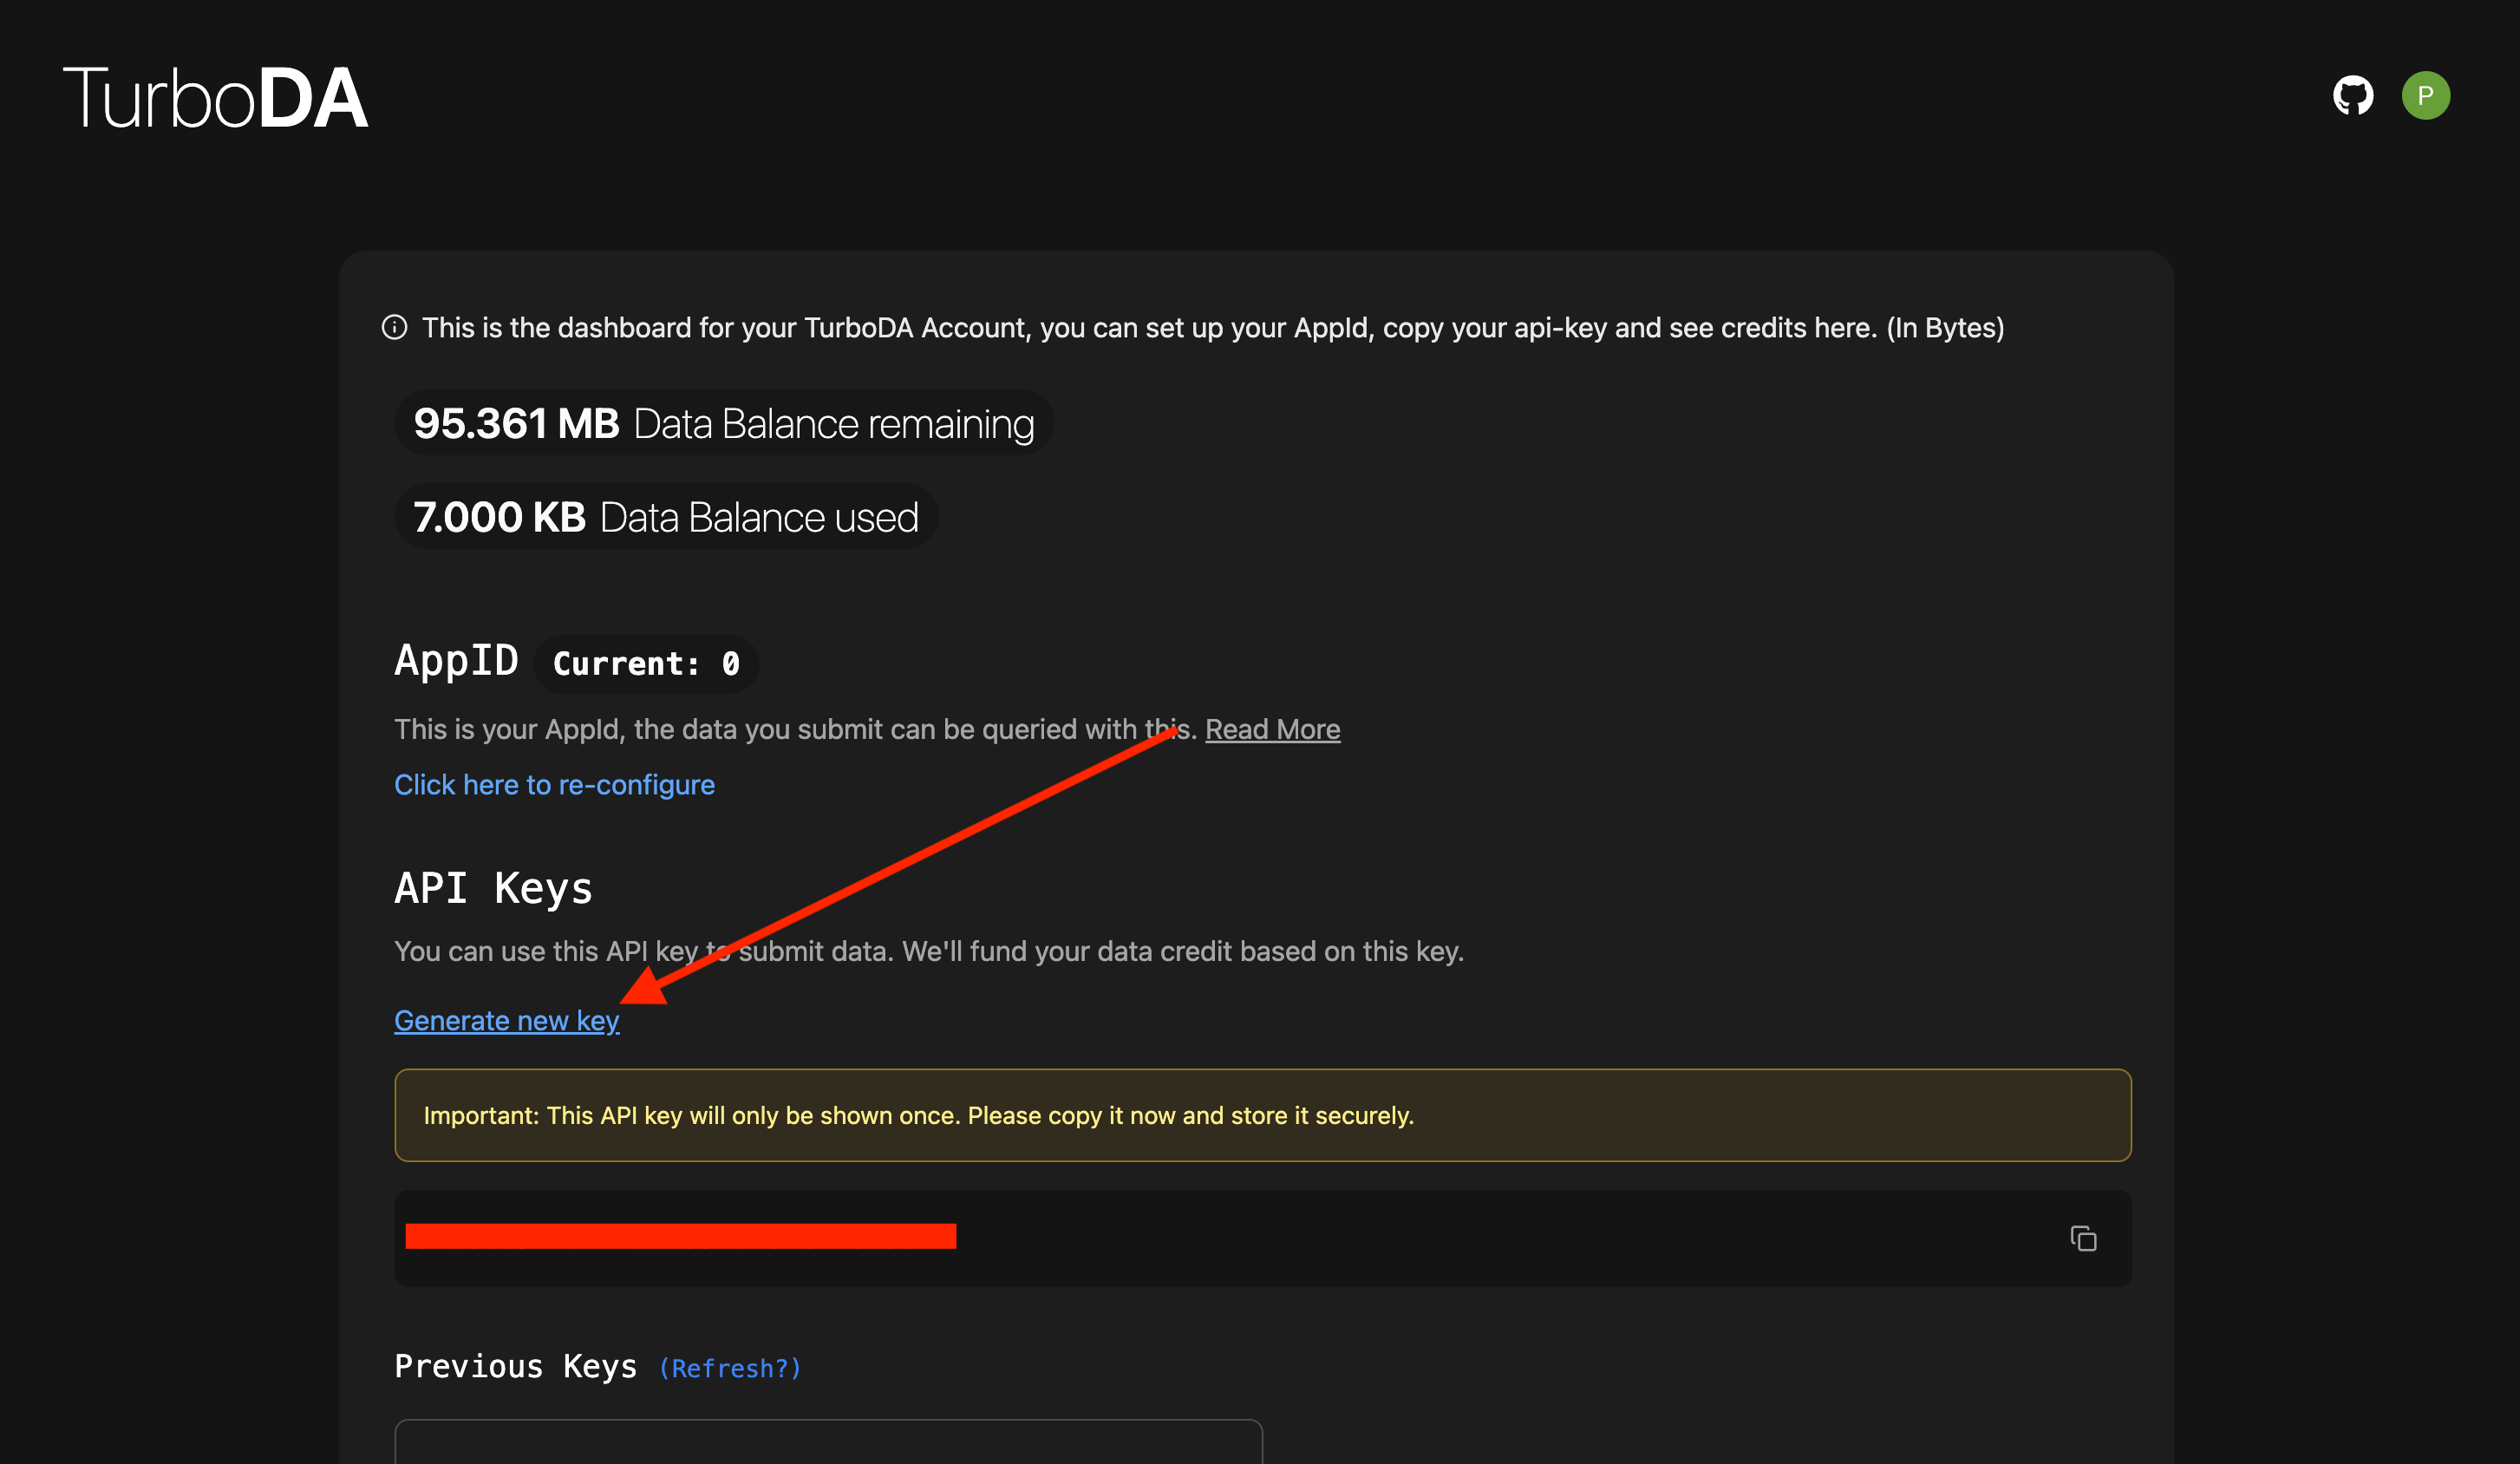
### Step 5: Use the API key to submit data
Once you have your API key, feel free to head on over to our
[API reference](/docs/da/api-reference/avail-turbo-da-api) to start leveraging the power of Turbo DA.
### Node Types
## Introduction
While Avail diverges from conventional blockchain frameworks to concentrate on modular solutions tailored for data availability, it continues to utilize a diverse array of node types. These nodes differ in their functions, storage needs, and levels of engagement within the network.
## Node Types Comparison
**Note:** Infrastructure providers can host all types of Avail nodes.
| Node Type | Storage Requirement | Network Role | Special Features | Use Case | Typically Hosted By |
| --------------- | ------------------- | ------------ | ---------------- | ---------------------------------------- | ------------------------------------------------------------- |
| Light Clients | Low | Interaction | Minimal Storage | Quick Queries, Low-resource Environments | End users in low-resource environments |
| Full Nodes | Moderate | Core | Network Access | Transaction Verification, Data Retrieval | Regular network participants, those involved in verification |
| Validator Nodes | Moderate | Core | Block Production | Network Security, Governance | Trusted entities, elected participants, staked node providers |
| RPC Nodes | Moderate | Gateway | API Exposure | Development, Remote Access | Developers, entities requiring remote network access |
## Overview of Node Types
### Light Clients
Light clients allow users to interact with the blockchain without downloading the entire transaction history. They rely on a trusted set of nodes for the data needed to engage with the network.
### Full Nodes
Full nodes maintain the blockchain's current state but do not store its entire history. Optimized for quick access to current data, they are ideal for tasks like transaction verification.
### Validator Nodes
Validator nodes are specialized full nodes that participate in block production and network governance. They are staked to ensure network security and integrity.
### RPC Nodes
RPC nodes expose an API for remote interactions, serving as a gateway for developers and external clients to engage with the Avail network.
## Next Steps
Now that you have a comprehensive understanding of the various node types within the Avail network, it's recommended to take your first step by setting up a Light Client. Before you begin, make sure to review the [System Requirements guide](/docs/da/operate/run-a-full-node/overview). Once you're ready, you can proceed to the [Light Client Deployment guide](/docs/da/operate/run-a-light-client/light-client) to get started.
> Light Clients provide an accessible entry point to the Avail network, enabling quick interactions without storing the full blockchain. Ideal for newcomers, they play an integral role in maintaining a robust data availability layer.
### Full Node
Run a full Avail node for complete block storage and network participation. Read the overview for requirements, then follow the setup guide.
- [**Overview**](/docs/da/operate/run-a-full-node/overview) — Architecture, hardware requirements, and what a full node does on the network.
- [**Run an Avail Node**](/docs/da/operate/run-a-full-node/full-node) — Step-by-step guide to install and run a full Avail node.
### Deployment Options
Different service providers offer hosted deployment options for Avail. These platforms simplify the management of blockchain infrastructure by providing cloud-based services and comprehensive support for network deployment and maintenance.
| Service | Description | Deployment Type | Documentation |
| ------- | --------------------------------------------------------------------------------------------------------------------- | --------------- | ---------------------------------------------------------------------------------------------------------------------------------------------- |
| Spheron | Cloud-based, decentralized, infrastructure services for blockchain applications, offering simplicity and scalability. | Hosted | [Deploy and Operate an Avail Testnet Validator](https://blog.spheron.network/deploy-an-avail-node-in-minutes-using-spheron-compute) |
### Become a Validator
Become an Avail DA validator. These guides walk you through the full lifecycle — follow them in order from Basics through Monitoring.
- [**Basics**](/docs/da/operate/become-a-validator/basics) — Requirements, economics, and what it means to validate on Avail DA.
- [**Simple Deployment**](/docs/da/operate/become-a-validator/deployment) — Deploy your validator node with a straightforward setup.
- [**Session Keys**](/docs/da/operate/become-a-validator/session-keys) — Generate and set session keys for block production.
- [**Stake Your Validator**](/docs/da/operate/become-a-validator/stake-your-validator) — Bond AVAIL tokens and register your validator on-chain.
- [**Backup Your Validator**](/docs/da/operate/become-a-validator/backup-your-validator) — Back up keys and state to protect against data loss.
- [**Upgrade Your Validator**](/docs/da/operate/become-a-validator/upgrade-your-validator) — Upgrade your node software without downtime.
- [**Monitor Your Validator**](/docs/da/operate/become-a-validator/monitor-your-validator) — Track performance, uptime, and on-chain status.
- [**Chill Your Validator**](/docs/da/operate/become-a-validator/chill-your-validator) — Temporarily take your validator offline without unbonding.
### Accounts
## Introduction
This guide will walk you through two different ways of creating an account on Avail, while also providing insights into the account specifications and formats.
### Seed Phrases
Before creating an account, it's essential to understand [seed phrases](https://en.wikipedia.org/wiki/Cryptocurrency_wallet). During the account creation process, you'll receive a seed phrase—a series of words that can be used to recover your account.
> **Error**
>
> SEED PHRASE SECURITY
>
> NEVER EVER share your seed phrase with anyone and keep it in a secure location. Anyone with access to your seed phrase can gain control of your account.
## Creating an Account on Avail DA
In this guide, we will walk you through two different ways of creating an account on Avail DA.
1. **Using a compatible wallet**: You can create an account by using wallets like
[SubWallet](https://www.subwallet.app/), [Talisman](https://www.talisman.xyz/), [PolkadotJS](https://polkadot.js.org/), [Nova Wallet](https://novawallet.io/) and others.
This guide will be using Subwallet as an example.
2. **Using the Explorer**: Advanced users can also create an account straight from the explorer.
#### Subwallet
1. Go to [Subwallet.app](https://www.subwallet.app/) and install their browser extension. Once installed,
you should se a few different options to get started. We will create an account from scratch, although you can import
existing accounts too.
2. Subwallet will prompt you to set up a password to secure access to the accounts in the wallet. Please note that this password
**DOES NOT** control the actual on-chain account, and is merely used to open the wallet extension.
3. Next, read through and agree with all of Subwallet's conditions to get the Seed Phrase of your Avail account.
4. You will be shown your seed phrase. **Make sure to write it down and store it in a safe place**.
> **Warning**
>
> Please note that this seed phrase is exposed only one time at the time of account creation by Subwallet.
> Make sure to store it in a safe place as it is the only way to recover your account.
5. Open the `networks` menu from the top-right. You can configure which networks you want displayed by Subwallet from here.
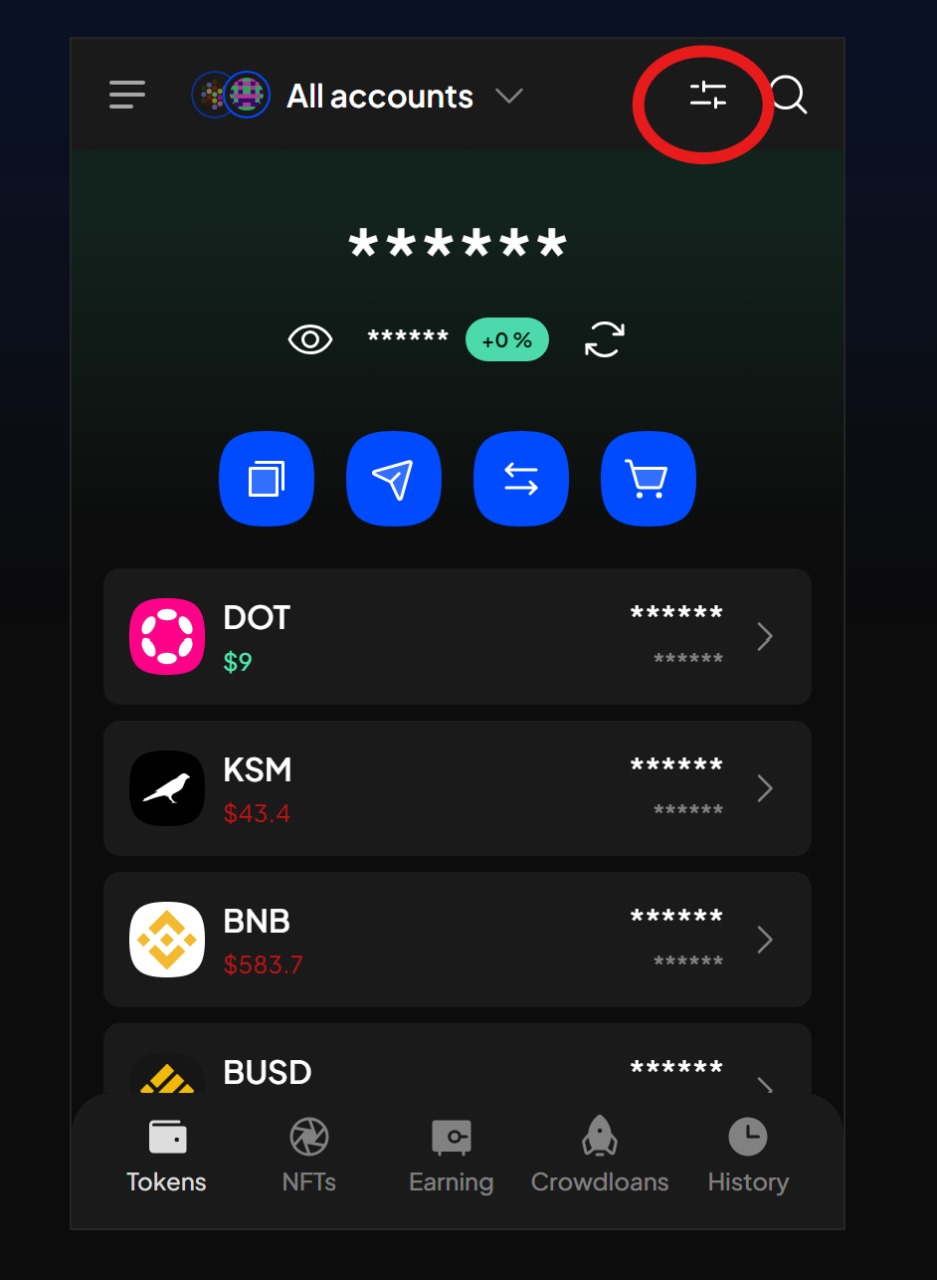
6. Search for Avail testnets either by name or by token symbol. Make sure the network is toggled on.
> **Note**
>
> Please note `Avail` is short-hand for Avail DA mainnet, while the other option connects you to the Turing testnet.
> You can choose if you want to connect to one or both of them.
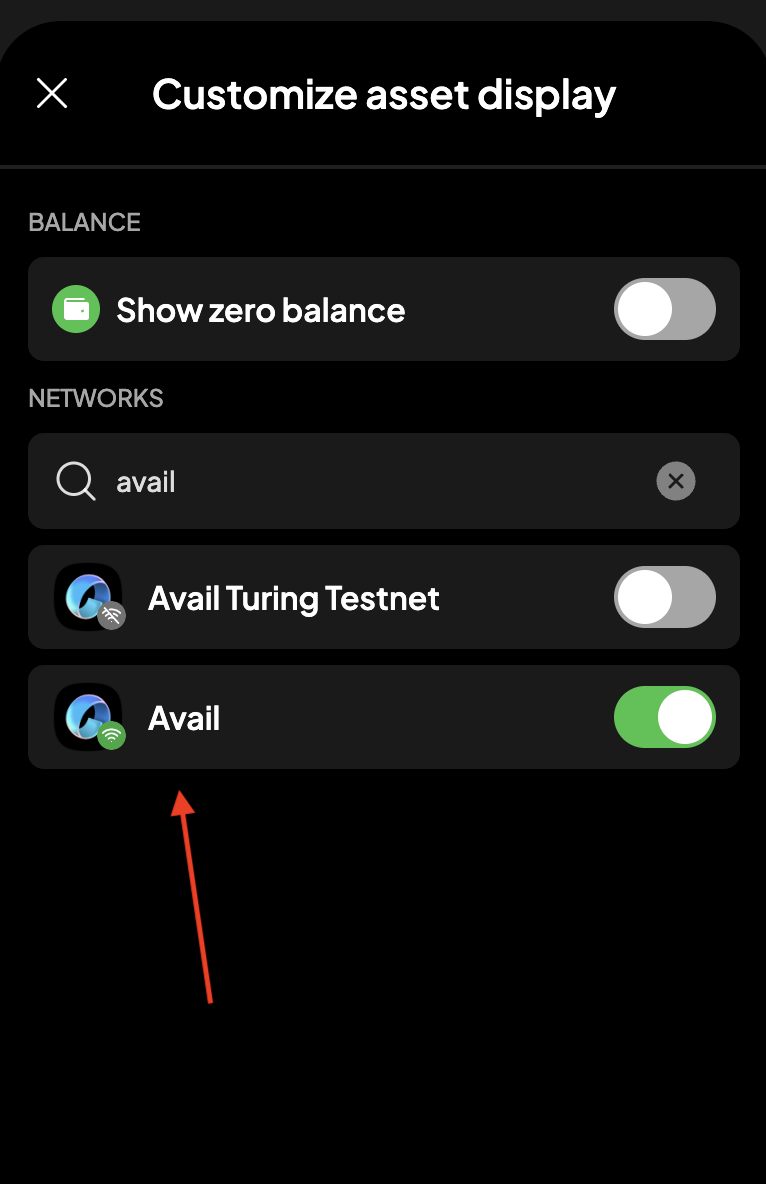
7. Next go to your extension's homepage and click on the `Get address` button.
Again, search for Avail testnets by name or token symbol, and click on the `copy address` button.
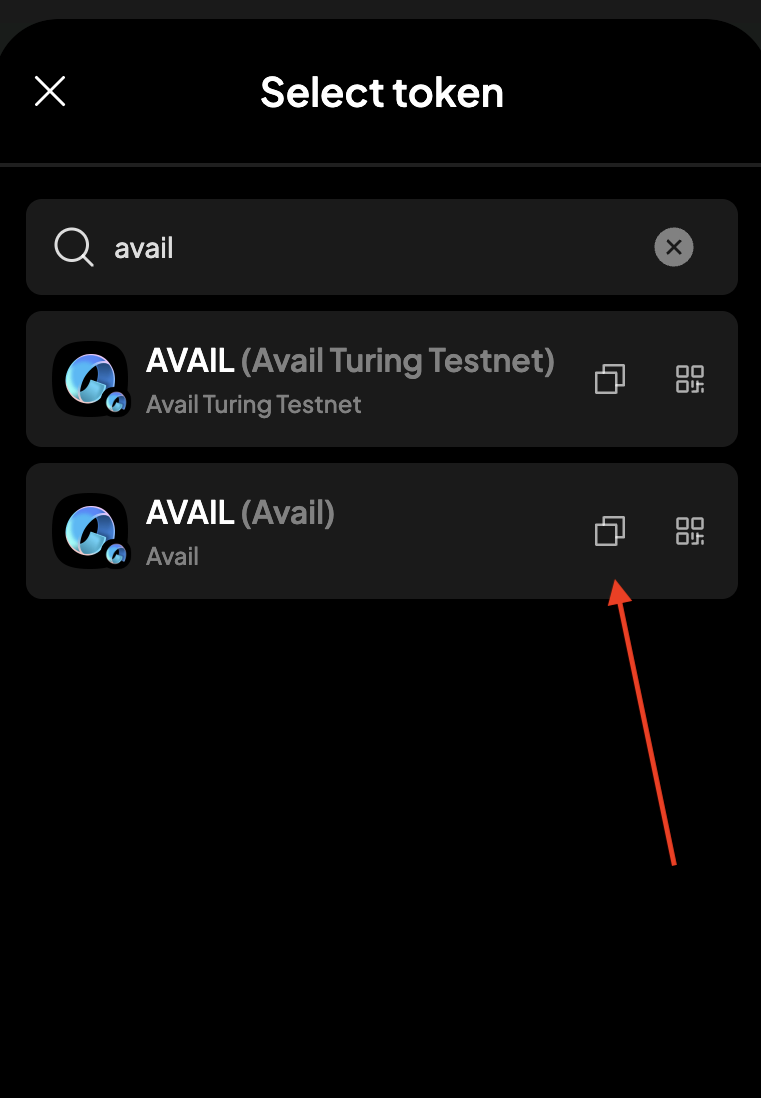
#### PolkadotJS or Talisman
1. To start with setting up your PolkadotJS wallet, you can go to the [PolkadotJS extension homepage](https://polkadot.js.org/extension/) to get started.
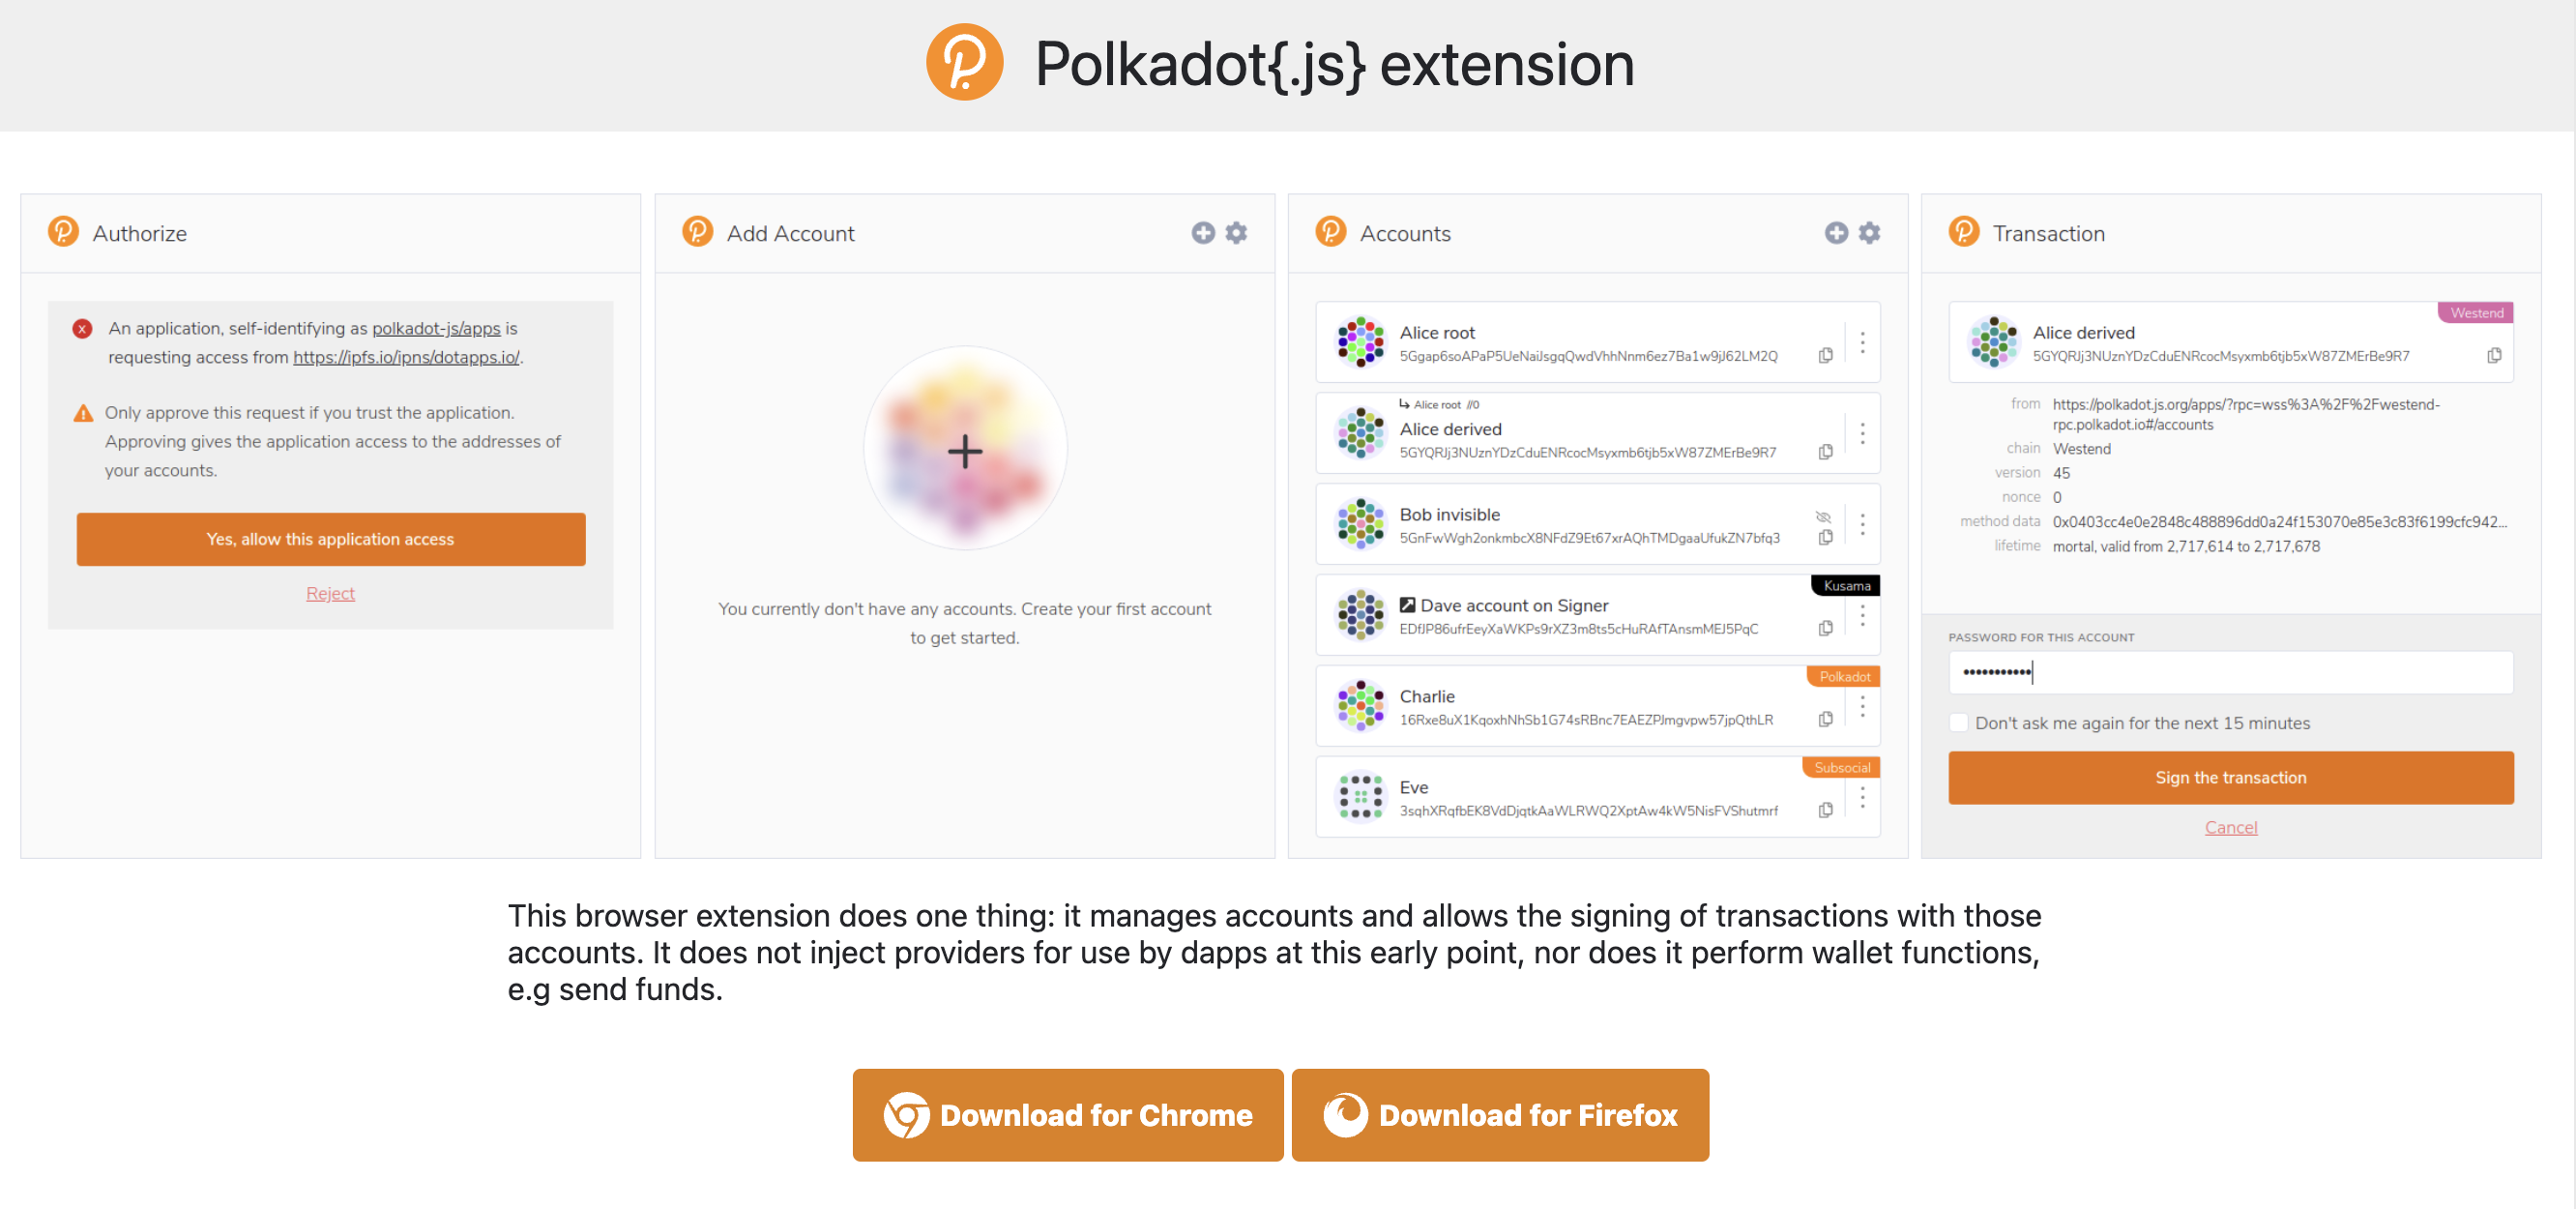
2. To get started with Talisman, you can go to [Talisman's docs page](https://docs.talisman.xyz/talisman/start/installing-talisman) that will show you how to set
up a wallet with Talisman.
#### Klever Wallet
1. Go to the [Apple Store](https://apps.apple.com/tt/app/klever-wallet-bitcoin-crypto/id1615064243), [Google Play](https://play.google.com/store/apps/details?id=finance.klever.bitcoin.wallet\&pcampaignid=web_share) or Huawei Store and install the Klever Wallet app. Once installed, you should see two different options to get started. We will create a new wallet from scratch, although you can restore an existing wallet too.
2. Klever Wallet will prompt you to set up a PIN to secure access to the accounts in the wallet. First you will need to set the PIN and you will need to confirm the PIN.
3. You can make your wallet even more secure by activating biometric/faceID authentication.
4. Done! Your wallet is created. You can choose to backup your seeds now or later. We’ll do it now like Klever recommended.
5. Read the security warnings and by clicking on the I Agree button you’ll see your seeds. It’s really important to write your seeds in exactly the same order as shown and keep them in a safe place.
6. Now you can write your seeds that you have written before in exactly the same order.
7. In your portfolio, click on + Tokens button and search for Avail. You just need to activate it and you’ll be able to use the Avail blockchain inside Klever Wallet.
#### Nova Wallet
1. Go to [novawallet.io](https://novawallet.io/) and install the application from either the Google Play or Apple App Store. Once installed, you will see a few different options to either create a new account, import an existing account, or connect a hardware wallet. In this case, let’s create a new account.
2. Select “Create a new wallet”.
3. Input your wallet’s nickname and select “Continue”.
4. Review the pop-up alert and then select “I understand”.
5. Make a copy of your Mnemonic Passphrase. Make sure to write it down and store it in a safe place, then select “Continue”.
6. Input your Mnemonic Passphrase in the correct order and then select “Continue”.
7. You have now created your wallet in Nova Wallet and can access the Avail ecosystem!
#### Using the explorer
> **Warning**
>
> Please note that you won't be able to use the account created on the explorer to claim your rewards.
1. Navigate to the [Avail Explorer](https://explorer.availproject.org/).
2. Once on the explorer, go to `Accounts -> Accounts` in the navigation bar.
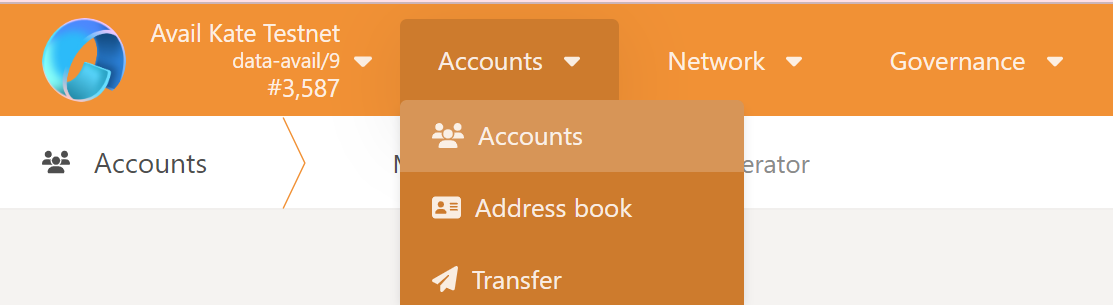
3. Click on the `+Account` button on the right-hand side to initiate the account creation process.
4. Follow the on-screen instructions to complete the account creation process. Make sure to securely store your seed phrase for future reference.
5. Upon completion, a JSON file containing your account information will be downloaded to your file system. You may be prompted to grant browser permissions for the download.
#### What is the JSON File?
The JSON file serves as a backup for your account and contains all the necessary information to recover it. It is encrypted with a password that you set during the account creation process.
> Backup and Recovery
> Always keep your JSON file in a secure and offline location. Losing this file and your password could result in the loss of your assets.
> **Warning**
>
> Please note that Avail DA is a modular blockchain built on top of the Substrate framework. due to how Substrate works,
> the exact on-chain address of your account may vary from one chain to another.
> Make sure to always double-check the address you are using. Avail addresses, for example will always begin with the number **`5`**.
> **Warning**
>
> UPDATE METADATA
> Sometimes when the chain undergoes upgrades, the underlying metadata within your wallets/extensions may become outdated.
> Not updating them might result in transaction signatures failing.
> You can update your metadata, if needed, using the [AvailApps explorer](https://explorer.availproject.org/#/settings/metadata).
## Next Steps
Congratulations on successfully creating and managing your Avail account! Remember to always safeguard your account details, JSON file, and seed phrase to ensure the security of your assets.
Ready to explore further? Navigate to the next guide to learn [how to use the Avail Explorer](/docs/da/user-guides/explorer) and get hands-on experience with the network.
### Light Client
Run an Avail light client — the easiest way to verify data availability without storing full blocks. Read the overview first, then follow the setup guide.
- [**Overview**](/docs/da/operate/run-a-light-client/overview) — How light clients sample and verify data availability on Avail DA.
- [**Run a Light Client**](/docs/da/operate/run-a-light-client/light-client) — Step-by-step guide to install and run an Avail light client.
### Ledger Fund Recovery
## What's the problem?
1. The `Avail` ledger app derives a different set of addresses as compared to the `Polkadot` ledger app for the same seed phrase.
2. This means while the addresses derived on the `Polkadot` ledger app will work on `Avail`, the `Polkadot` ledger app will not allow users to sign transactions on the `Avail` network.
3. To solve this problem we have created the `Avail recovery` app for ledger devices.
4. This new app will derive the same set of addresses as the `Polkadot-ledger` app and allows users to sign transactions on the `Avail` network, thus giving users access to these funds.
> **Note**
>
> **LOOKING FOR INSTRUCTIONS WITH DIFFERENT WALLETS?**
>
> 1. The following set of instructions are written using subwallet.
> 2. But you can use any other wallet that supports ledger devices just as well.
> 3. We also have a guide for [setting up a ledger account with Talisman in our docs here](/docs/da/user-guides/ledger-avail#add-your-ledger-account-to-an-extension-wallet)
## How to use the `Avail recovery` app?
### Make sure the `Avail recovery` app on your ledger device using the Ledger live app.
> **Note**
>
> **NOTE:**
> The `Avail recovery` app is available on the ledger live app only in the `Developer mode`.
>
> 1. Go to `My Ledger` section, and find the settings ⚙️ icon on the top right section.
> 2. Head to `Experimental Features` and switch on `Developer Mode`.
> 3. Move back to `My Ledger`, and search `Avail Recovery` in the search bar.
### Click on the accounts dropdown in your wallet extension
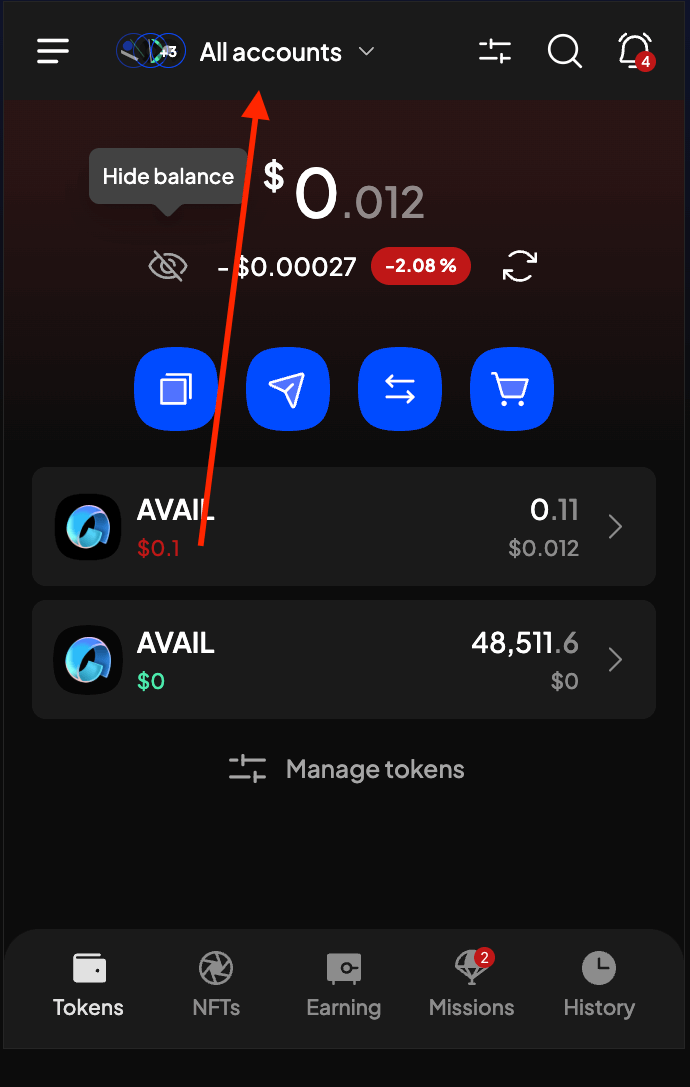
### Click on `Attach account`
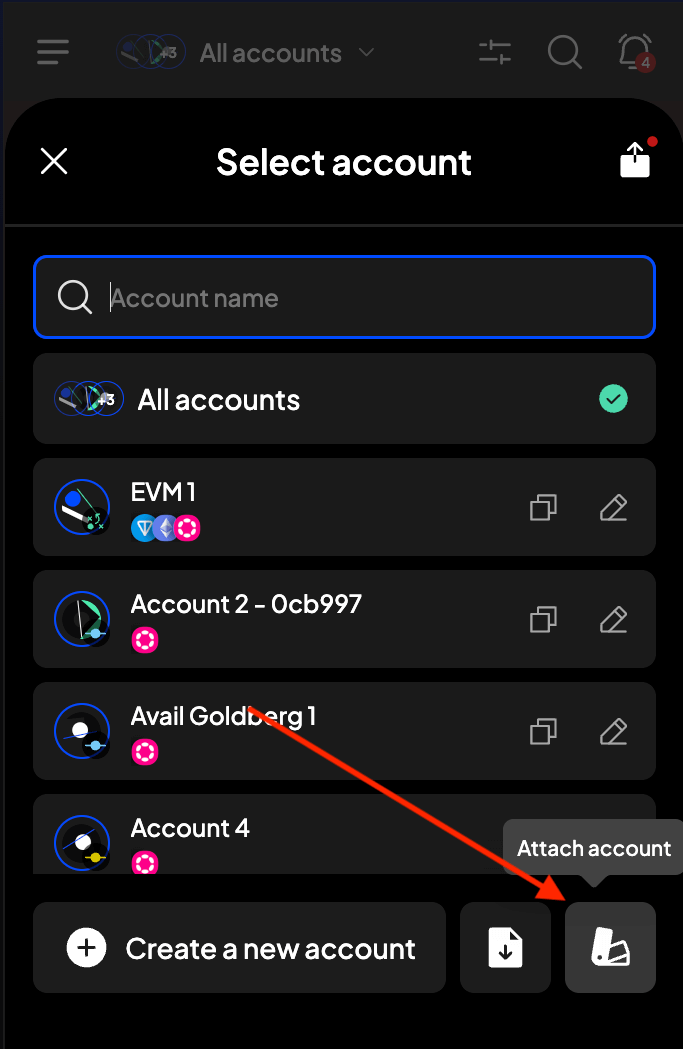
### Select the `Connect a ledger device` option
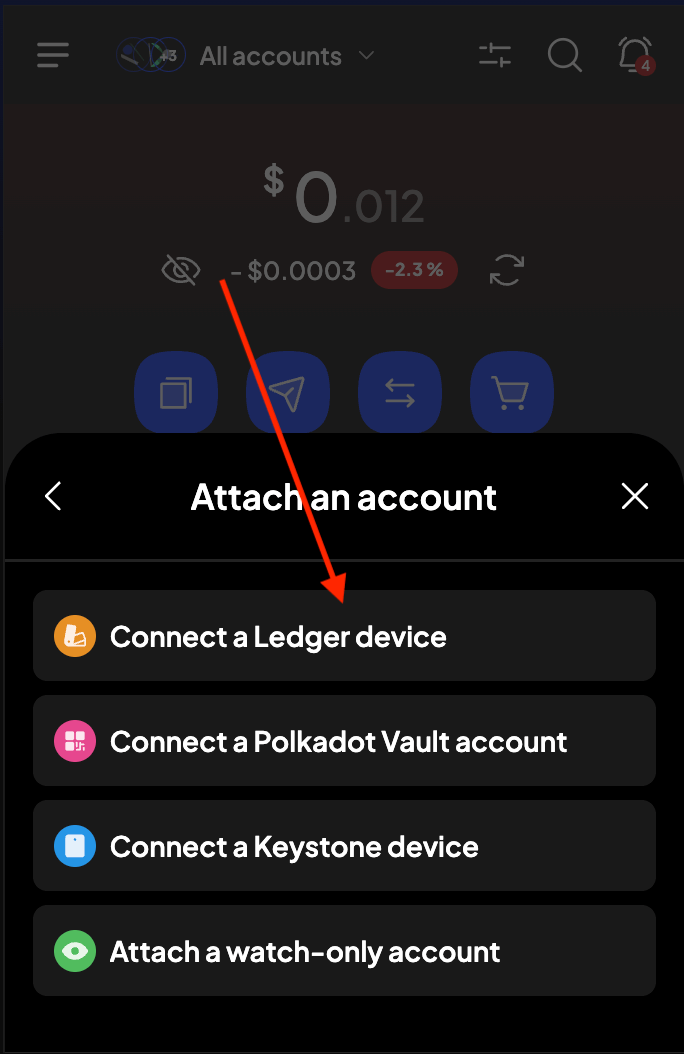
### Search for the `Avail recovery` app and click on `Connect`
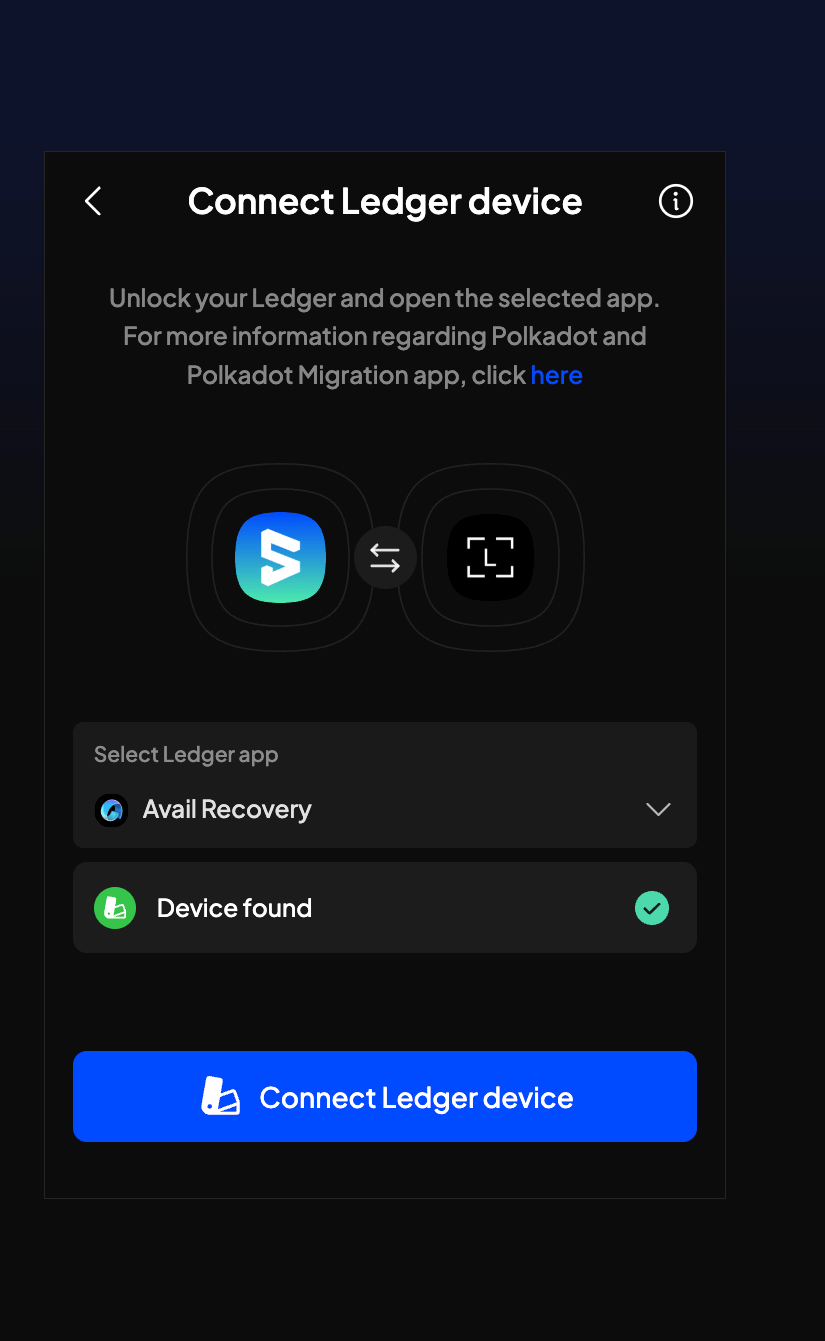
### You can now select as many or as few of your ledger accounts to your Subwallet extension wallet
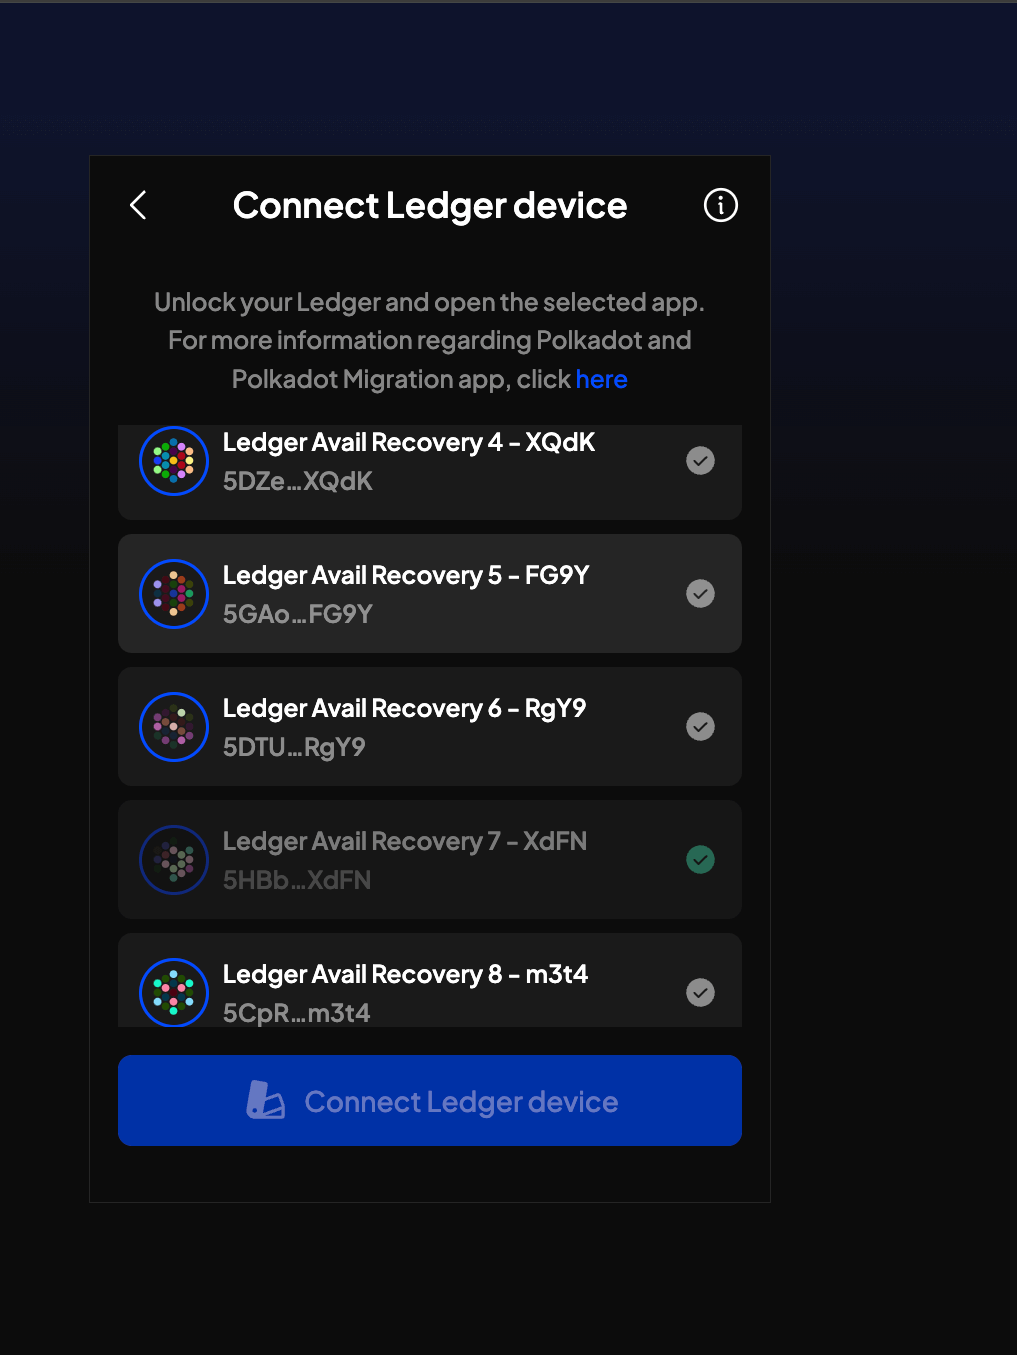
> **Note**
>
> **NOT ABLE TO SELECT YOUR ACCOUNTS?**
>
> 1. It is important to remember that the `Avail recovery` app will derive the same set of addresses as the `Polkadot` ledger app to give you access to your funds.
> 2. This means if your wallet already has that same ledger address connected via the `polkadot` ledger app, you will not be able to import it once again via the `avail recovery` app.
> 3. To get around this, you can temporarily delete the polkadot ledger address from your wallet and then re-add it via the `avail recovery` app.
> 4. This does not remove the address from your ledger device, just disconnects it from your wallet.
> 5. Now you should be able to import the same address via the `avail recovery` app.
### Multisigs
You can use the [avail-apps](https://explorer.availproject.org/#/accounts) explorer to set up and start using a multisig wallet on Avail DA.
This guide will show you how to do so.
> **Note**
>
> **PREREQUISITES**
> The only prerequisite is that you have access to one or more Avail DA accounts.
> Refer to our docs on [setting up an Avail wallet](/docs/da/user-guides/accounts) for more details if needed
## Create a multisig wallet on Avail DA
### Import the signatory accounts
You need to import into the explorer all the accounts you want added as signatories to the multisig.
There are two ways to do this:
#### Via address book
1. Go to the [`addresses`](https://explorer.availproject.org/#/addresses) page of the explorer.
2. Click on `Add contact` and save any addresses you want.
#### Import a json file
1. Create a json file with all the Avail DA addresses you want to import.
The syntax is as follows:
```json
[
"add1",
"add2",
"add3"
]
```
2. Save the file. This will be of use later.
> **Note**
>
> This method is suitable if you have a large number of addresses to import.
### Start setting up the multisig
Go to the [accounts page of the avail-apps explorer](https://explorer.availproject.org/#/accounts), and click on `Multisig`. This will give you a UI interface
that will allow you to configure your multisig wallet.
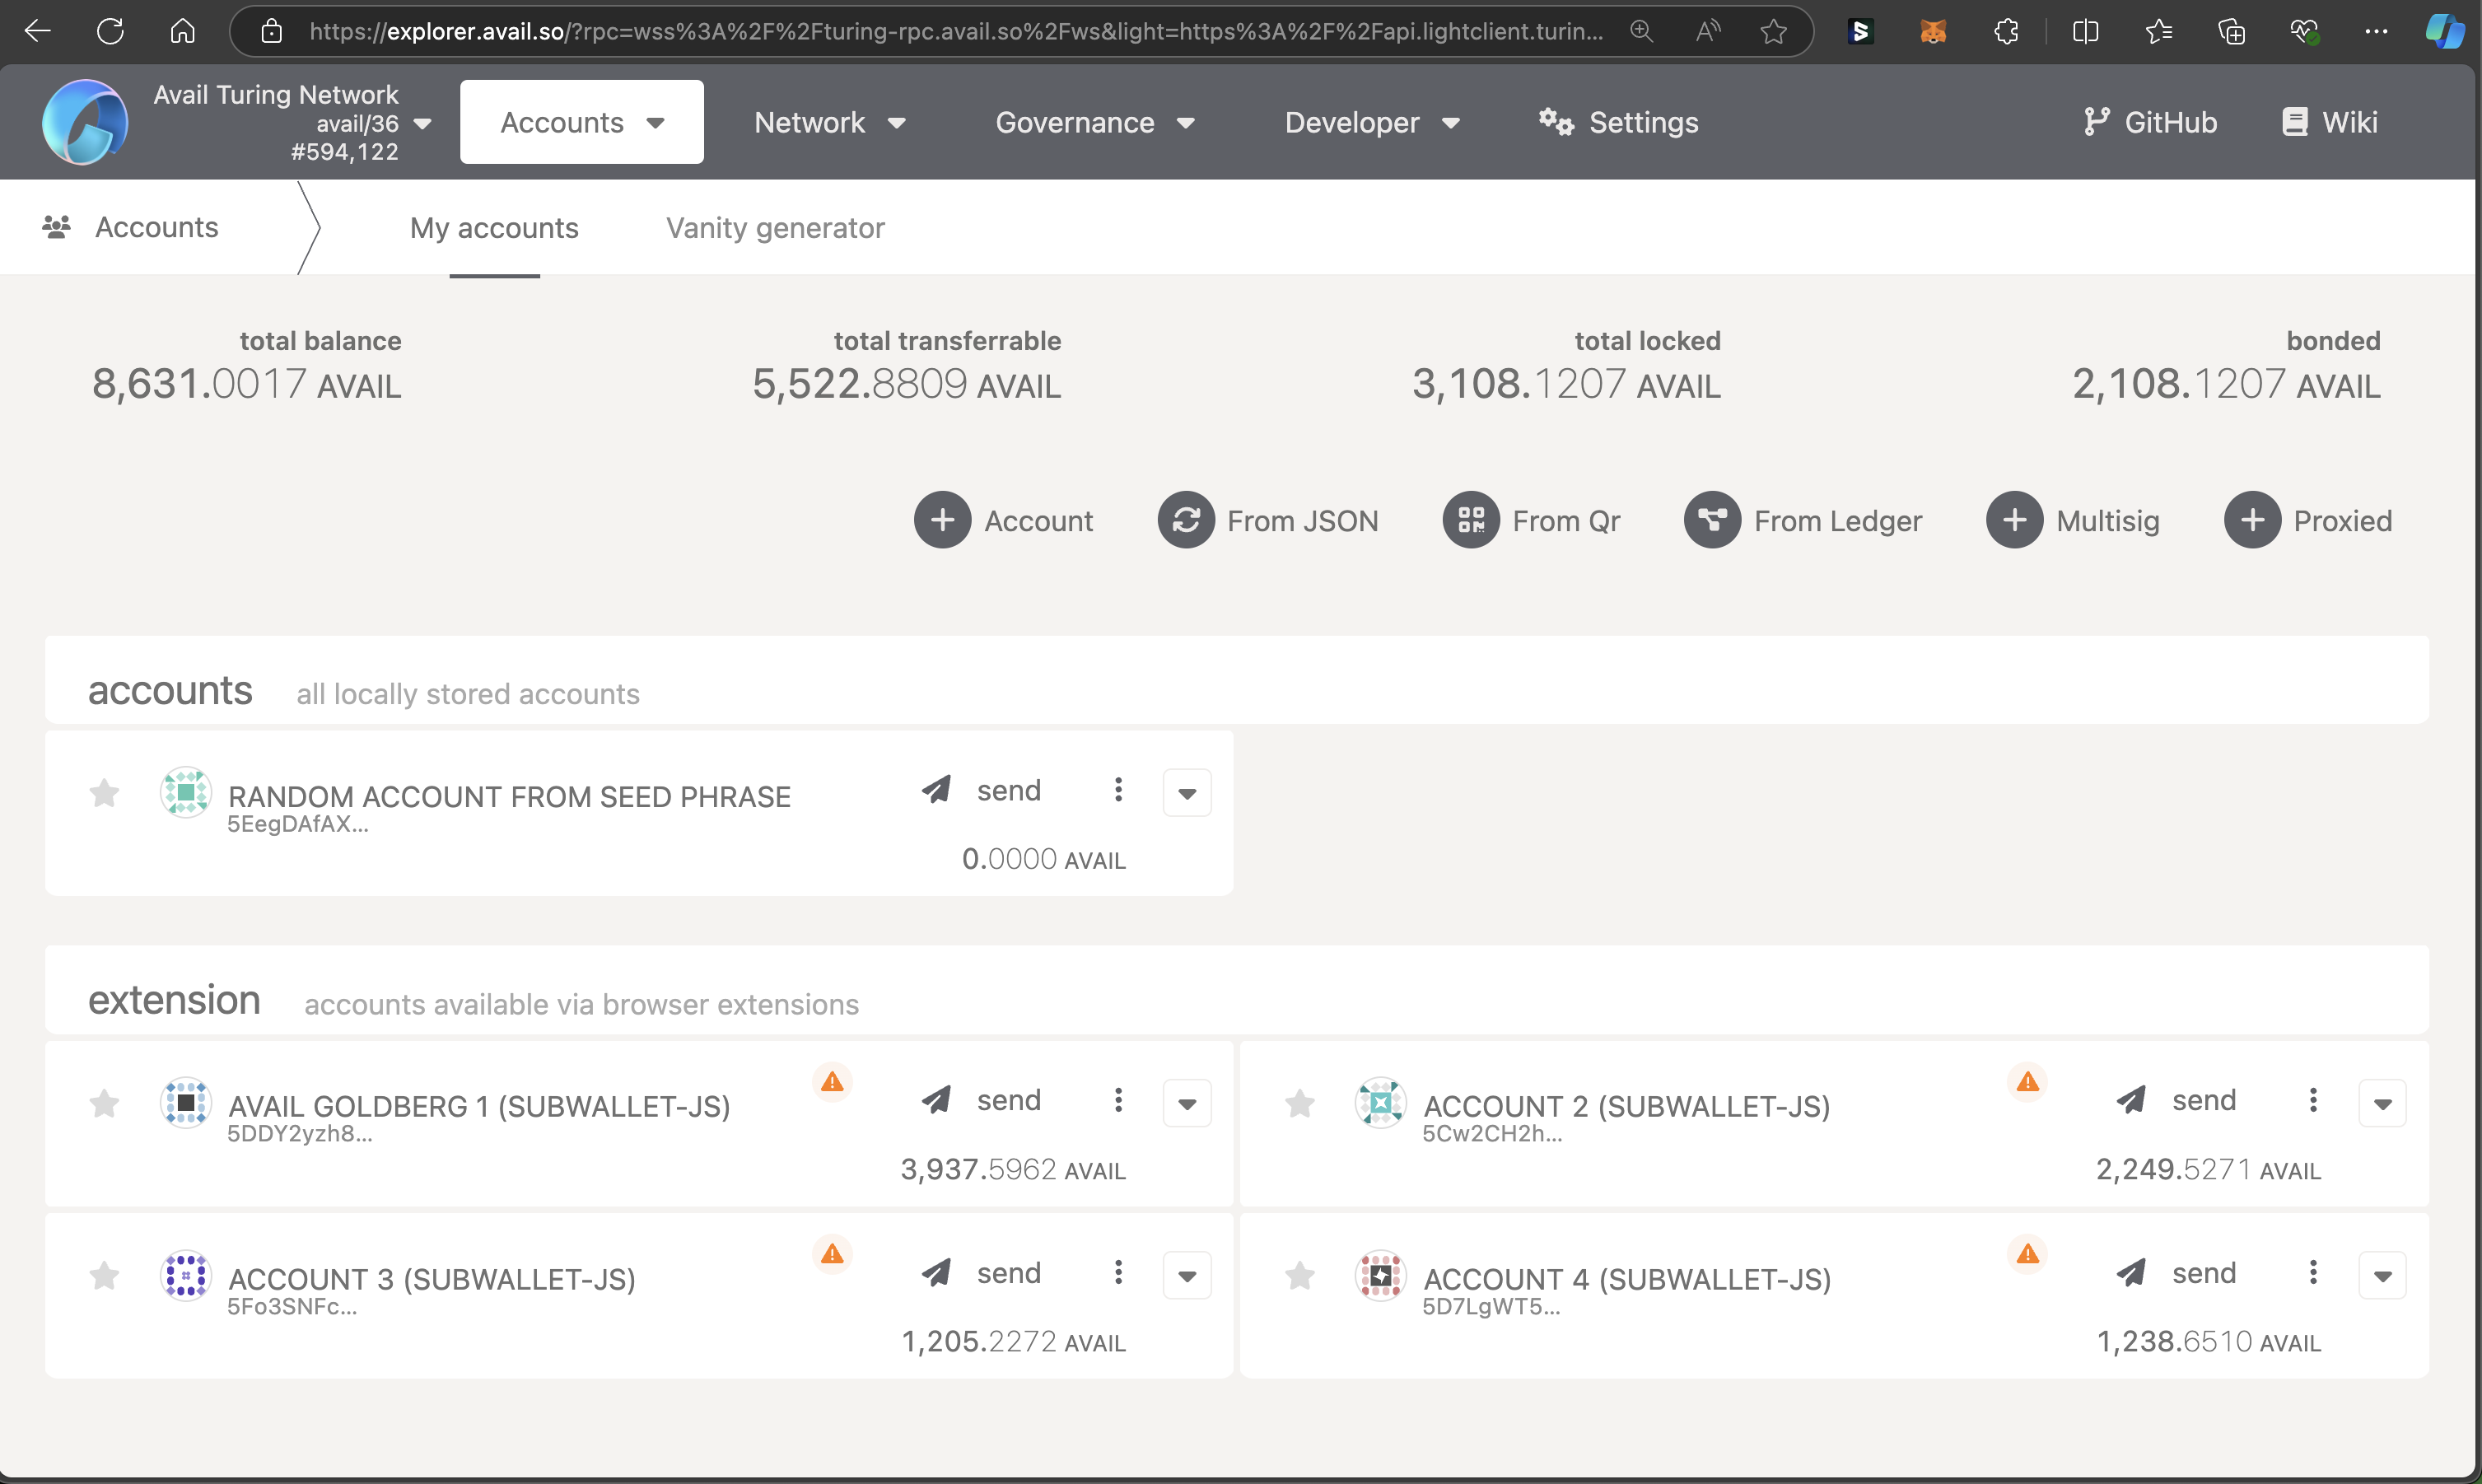
> **Note**
>
> DOUBLE CHECK
> Please note that a multisig account created on one network won't be created automatically on another. This
> tutorial is based on he Turing testnet, but will work just as well for Avail DA mainnet too.
### Configure the multisig
1. Select all the signatories you want to include in the multisig wallet.
You can do so either by:
* Importing addresses from your address book, or,
* by uploading the json file outlined in `step 1`.
2. Select the `threshold` value for the multisig. It represents the minimum number of addresses that need to approve a transaction
for it to be executed. A `threshold` value of `2` in our case would mean that any `2` of the `3` signatories can perform
a transaction from the multisig.
3. Choose an appropriate name for the multisig.
4. Click on `Create`.
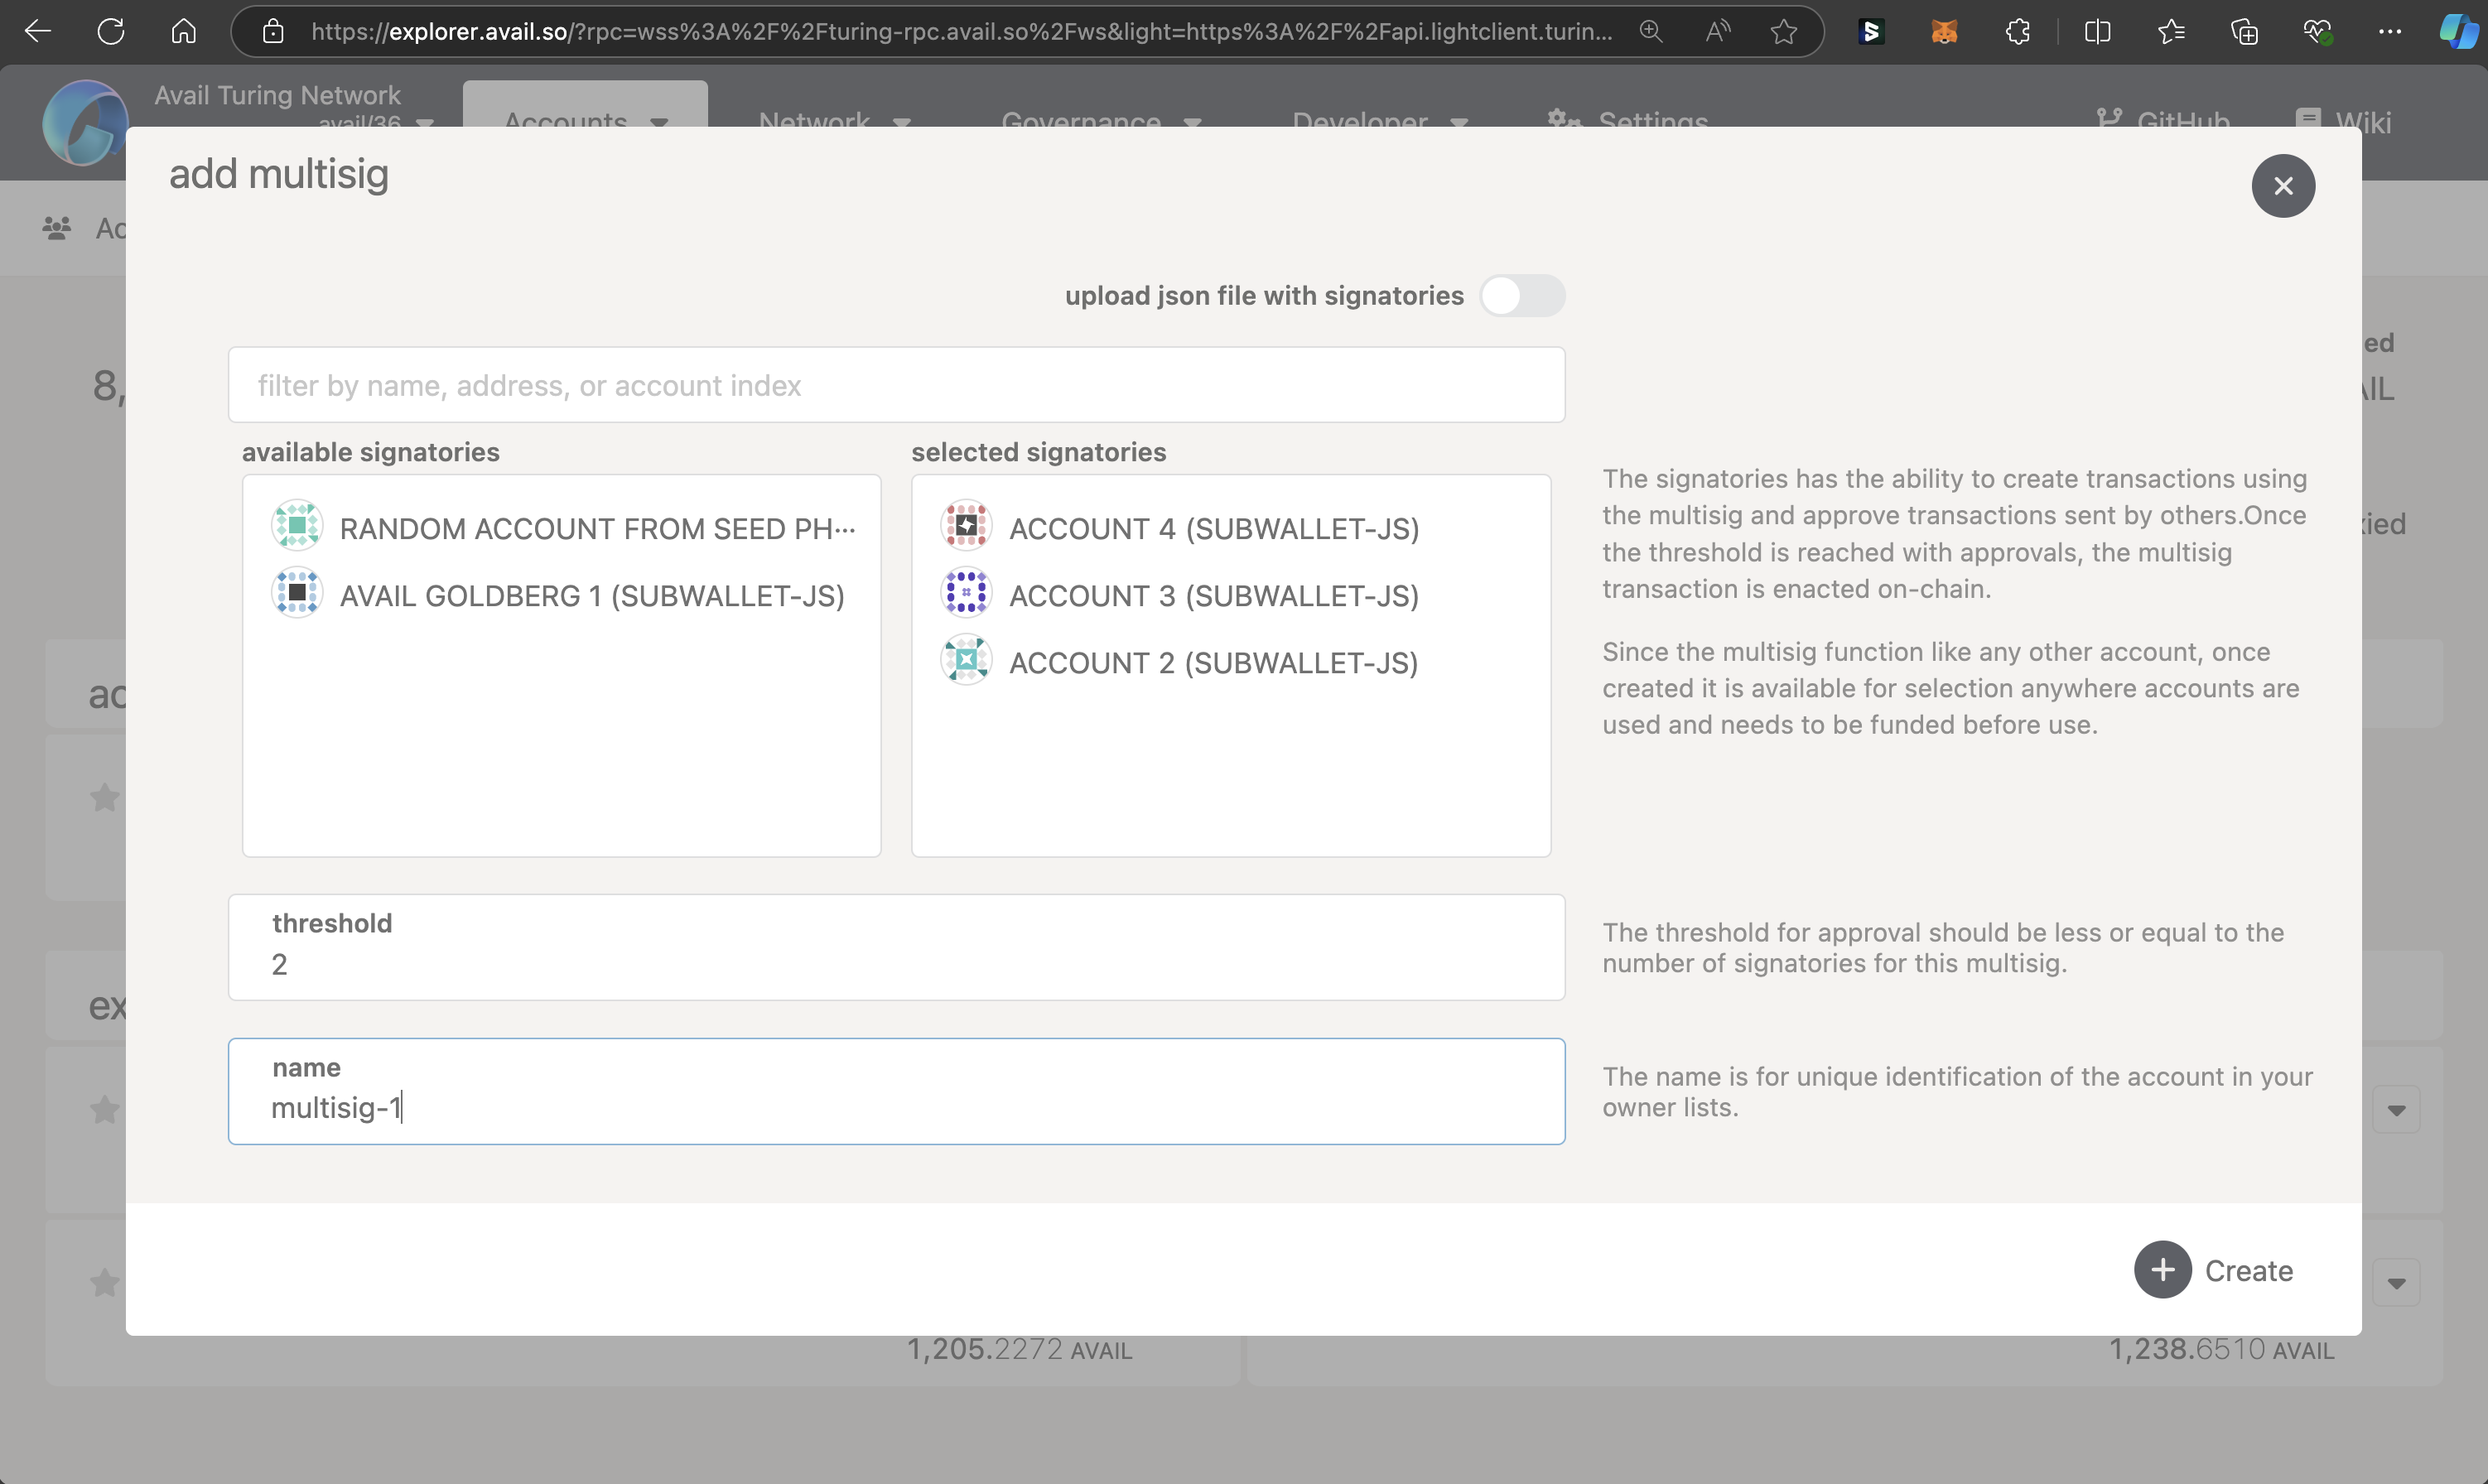
> **Note**
>
> **BUT WHAT OF OTHER SIGNATORIES?**
> An obvious question that pops up is how will other signatories import the multisig wallet into the avail-apps
> explorer on their own machine?
> Due to the way the `multisig` pallet works on Avail DA, a multisig derived from the same set of addresses and the same `threshold` value
> will always have the same address.
> Thus, all signatories can simply create a multisig on their machine with addresses of all the other signatories along with a constant `threshold value` to derive the same '*multisig address*'.
> Alternatively, a single json file with all signatories can be created and shared among all signatories.
> **Note**
>
> The next steps will take you through using your multisig wallet for the first time. Please send some tokens to
> the multisig's address before proceeding.
> **Warning**
>
> Do not use multisig calls for Avail-to-Ethereum bridge sends. Bridge sends must be submitted directly with `vector_sendMessage`; wrapped bridge sends are rejected.
## Use a multisig wallet on Avail DA
### Create a transaction to transfer funds
You should now be able to see your new multisig account created under a seperate category on the
[accounts page](https://explorer.availproject.org/#/accounts). Click on `send` to start creating a new transaction.
Enter the recipient and the amount to transfer, and click on `Make Transfer`.
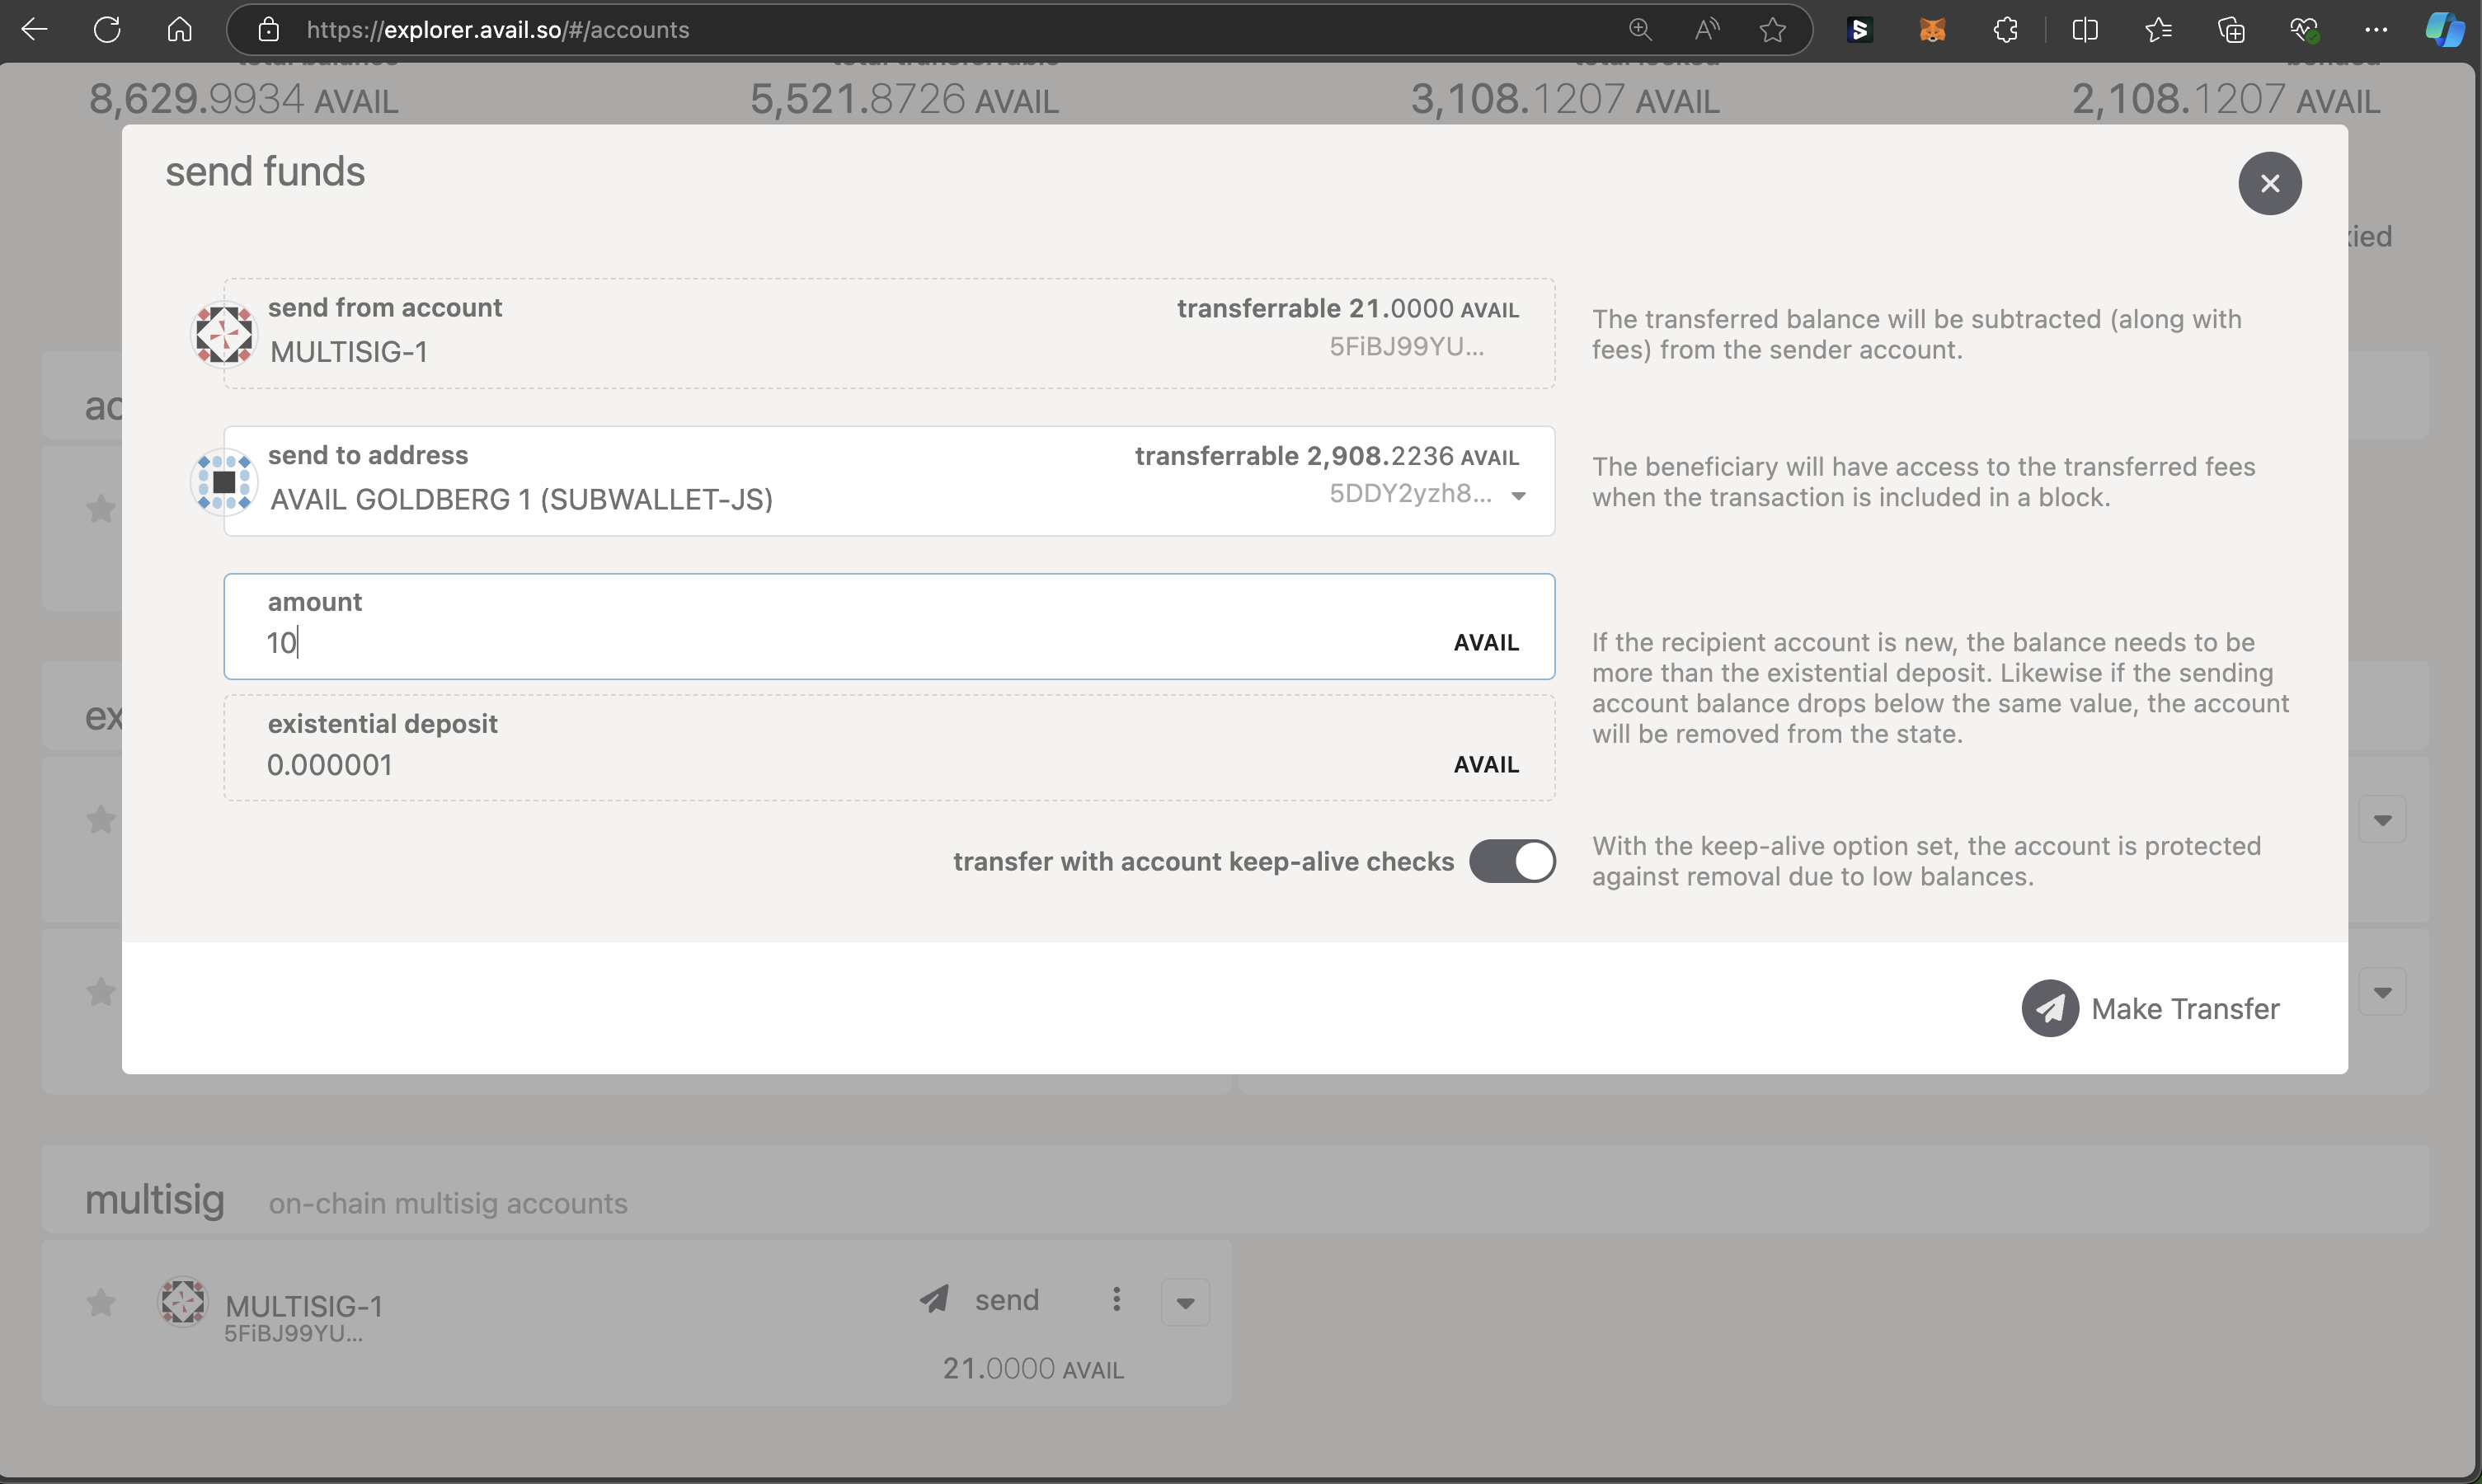
### Sign and submit the transaction
You will now be able to sign a `balances.transferKeepAlive` transaction from the multisig account.
This extrinsic allows you to transfer funds from one account to another.
1. A transaction for a multisig can only be created via an approved signatory. Choose one from the `multisig signatory`
dropdown.
> **Warning**
>
> PLEASE NOTE
> You can only sign a transaction for the multisig from the signatory accounts you have access to.
> If you don't have access to an authorised signatory, you can't create, approve, or reject a transaction
> for the multisig.
2. Copy the hexadecimal value of the `multisig call data`. This value will be needed later on.
3. Make sure that the `sign and submit` on the bottom-left option is checked. Finally, click on the `Sign and Submit`
button on the bottom right.
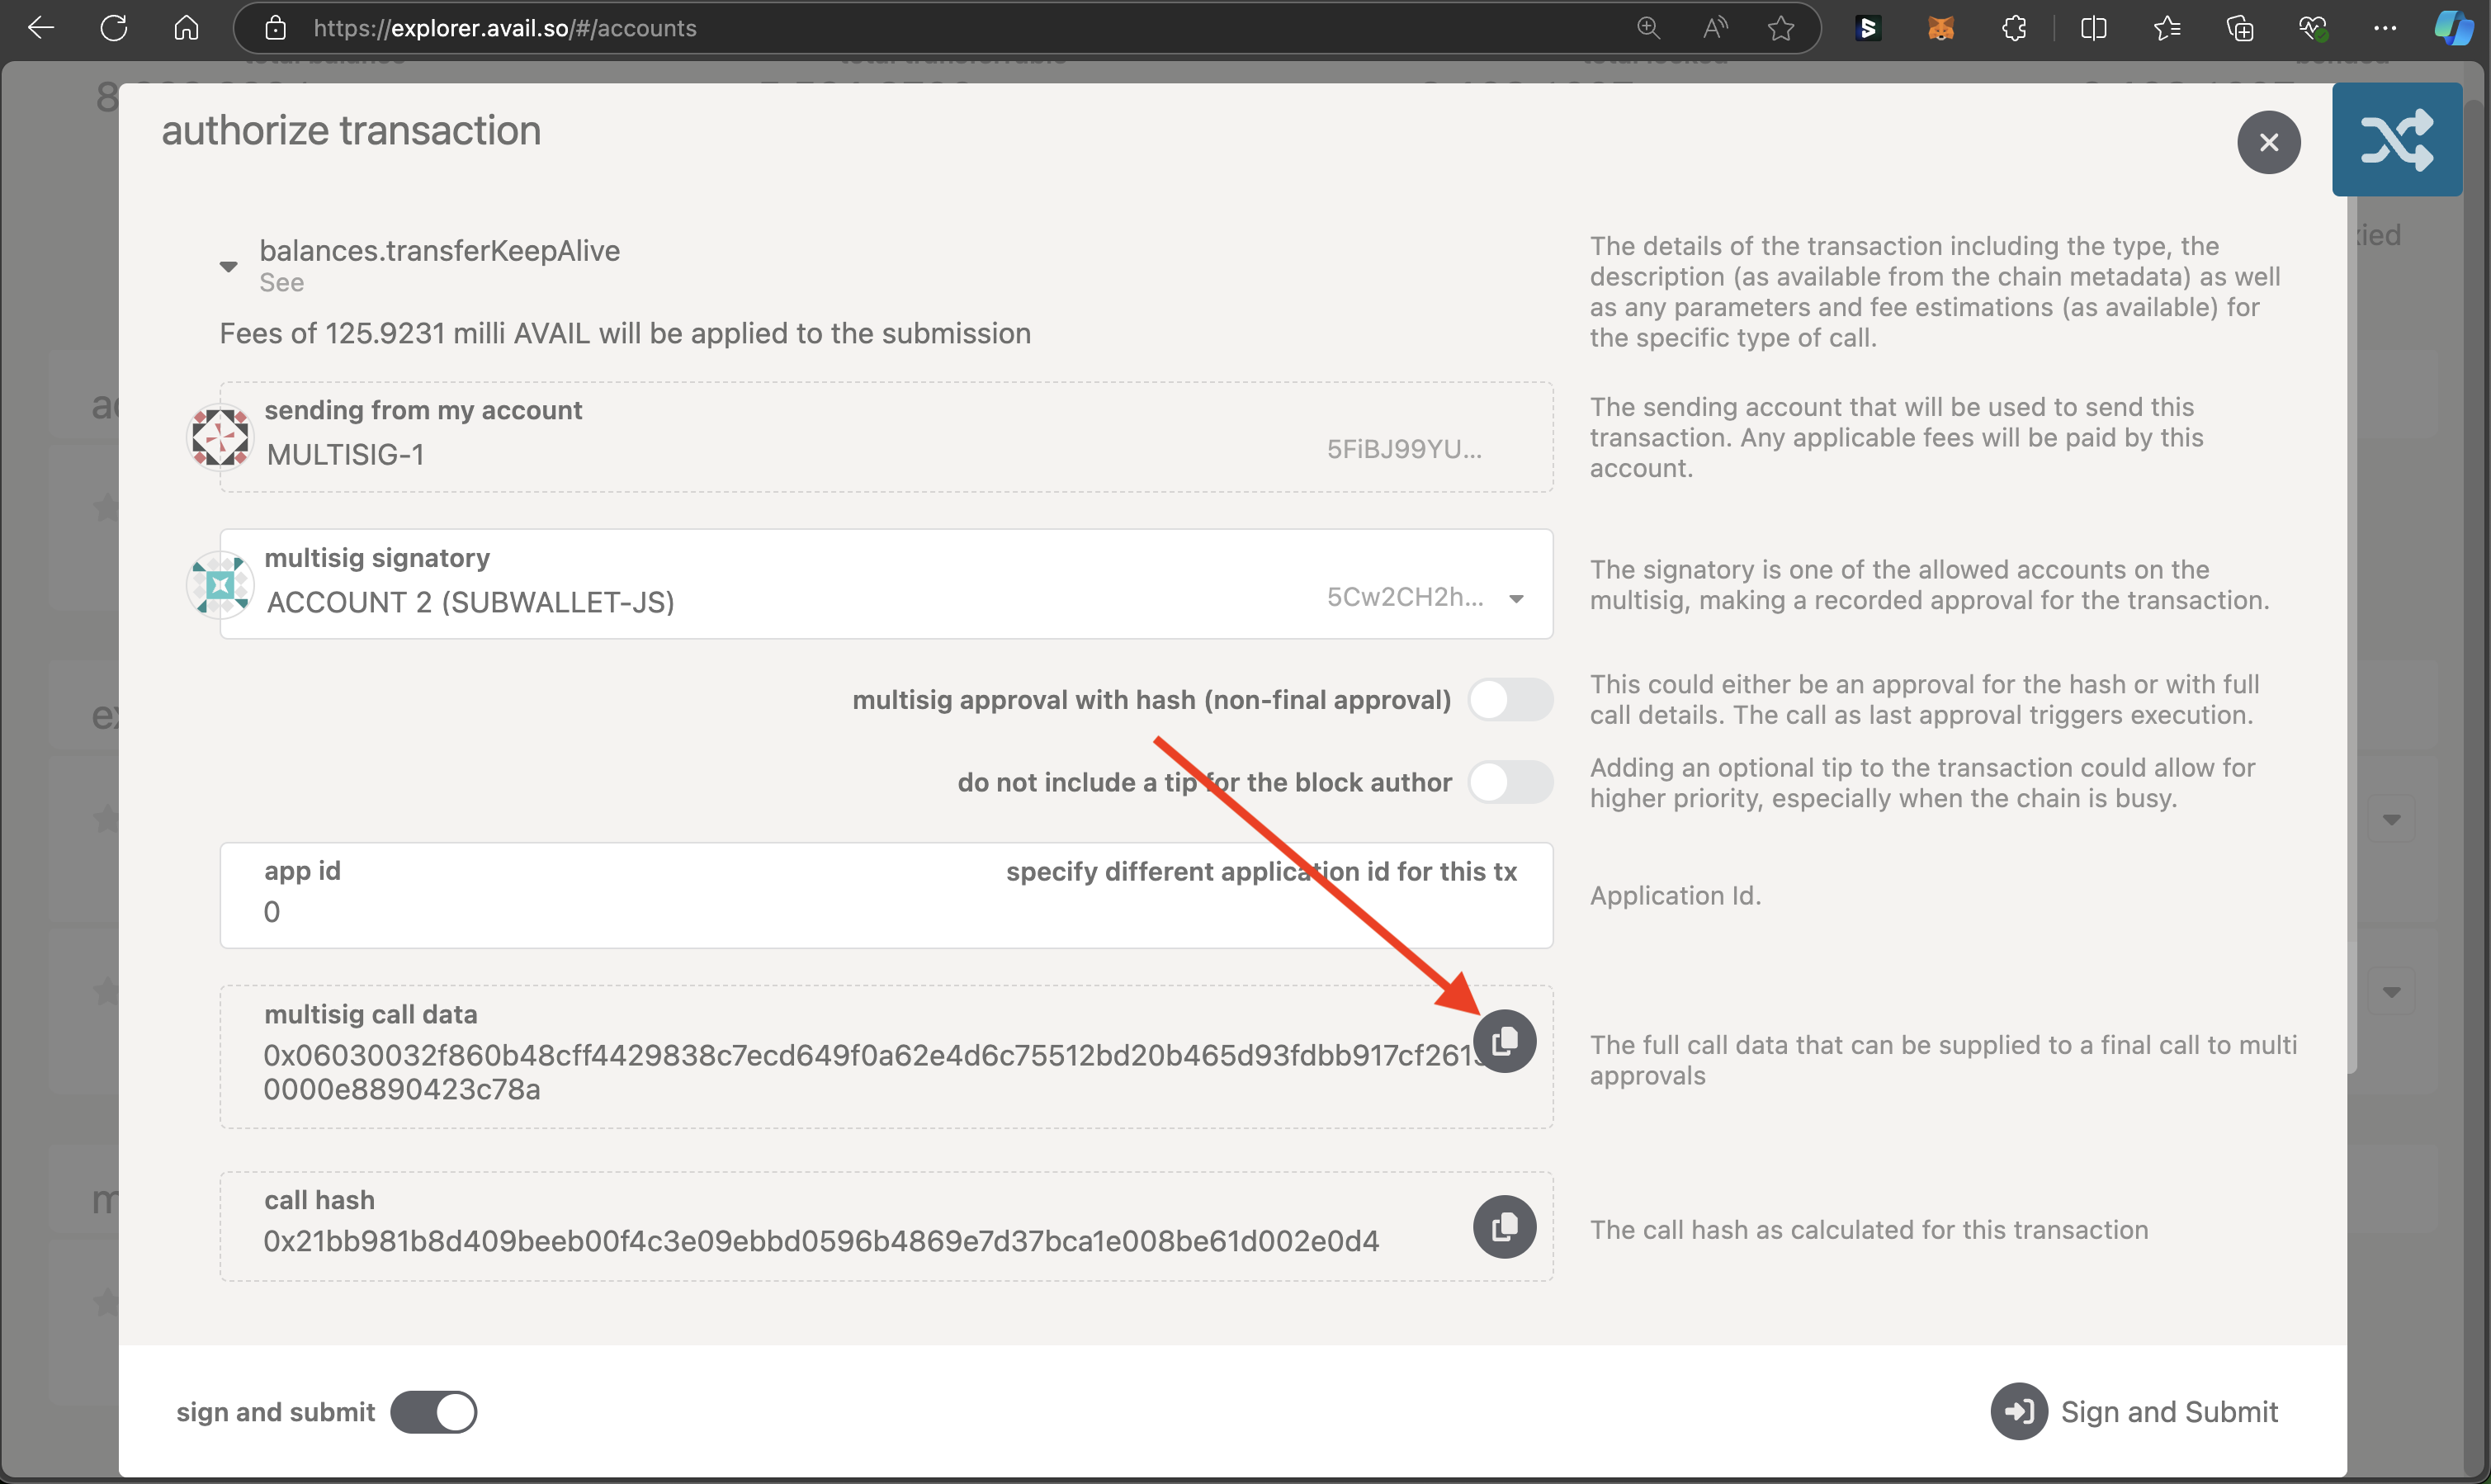
### Approve and/or execute the transaction
Now that a transaction has been created, other signatories have the choice to either:
1. Approve the transaction, or,
2. Reject the transaction.
You will see a pink icon next to your multisig wallet that indicates a pending transaction. Click on 'View Pending Transactions' to take a look.
Click on `approval type` to simply approve or reject the transaction.
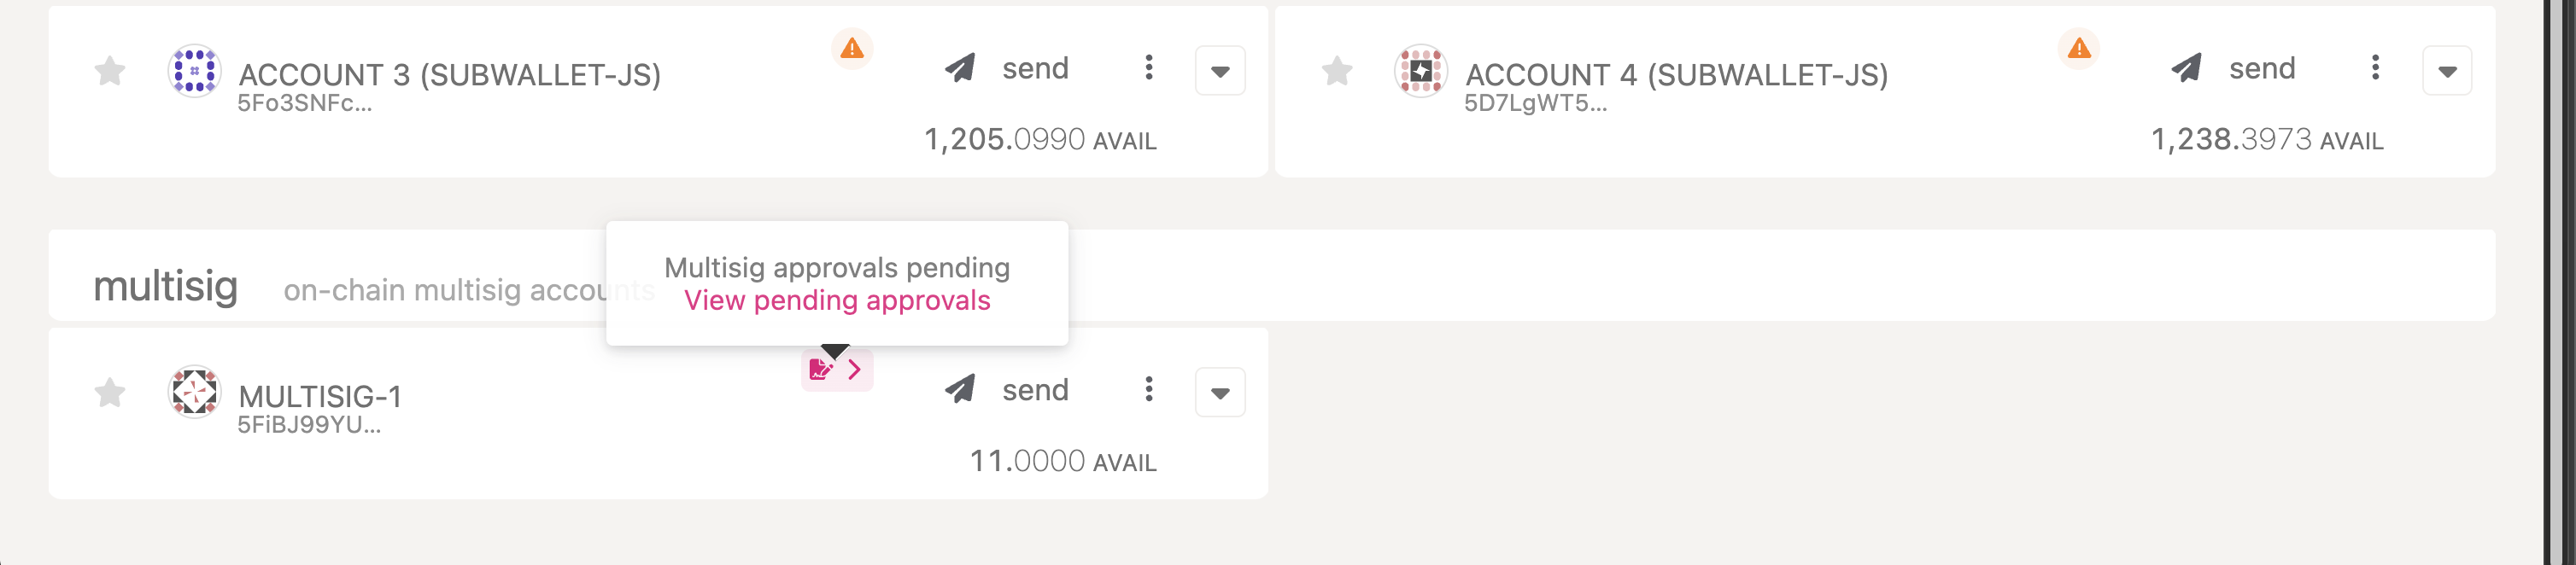
1. Our `threshold` value was set at `2`, and we already have one approval in form of the signatory that originally created
the transaction.
2. Thus, an approval by just one more authorised signatory will execute the transaction that will
transfer
`10 AVAIL` to the recipient.
But what if you simply want to approve the transaction without executing it? Avail DA's multisig implementation
allows for this functionality too.
Let us say you are the final signatory whose approval will mean the transaction has enough approvals
to be executed.
But you don't want to execute the transaction just yet.
*You only want to approve it, and let some other signatory execute it later on.*
#### Approve
1. If a signatory wants to approve the transaction without executing it, they don't need the `multisig call data` value.
2. Make sure the `multisig message with call` button is unchecked, and click on `Approve`.
3. Then, click on `Sign and Submit` and execute the transaction.
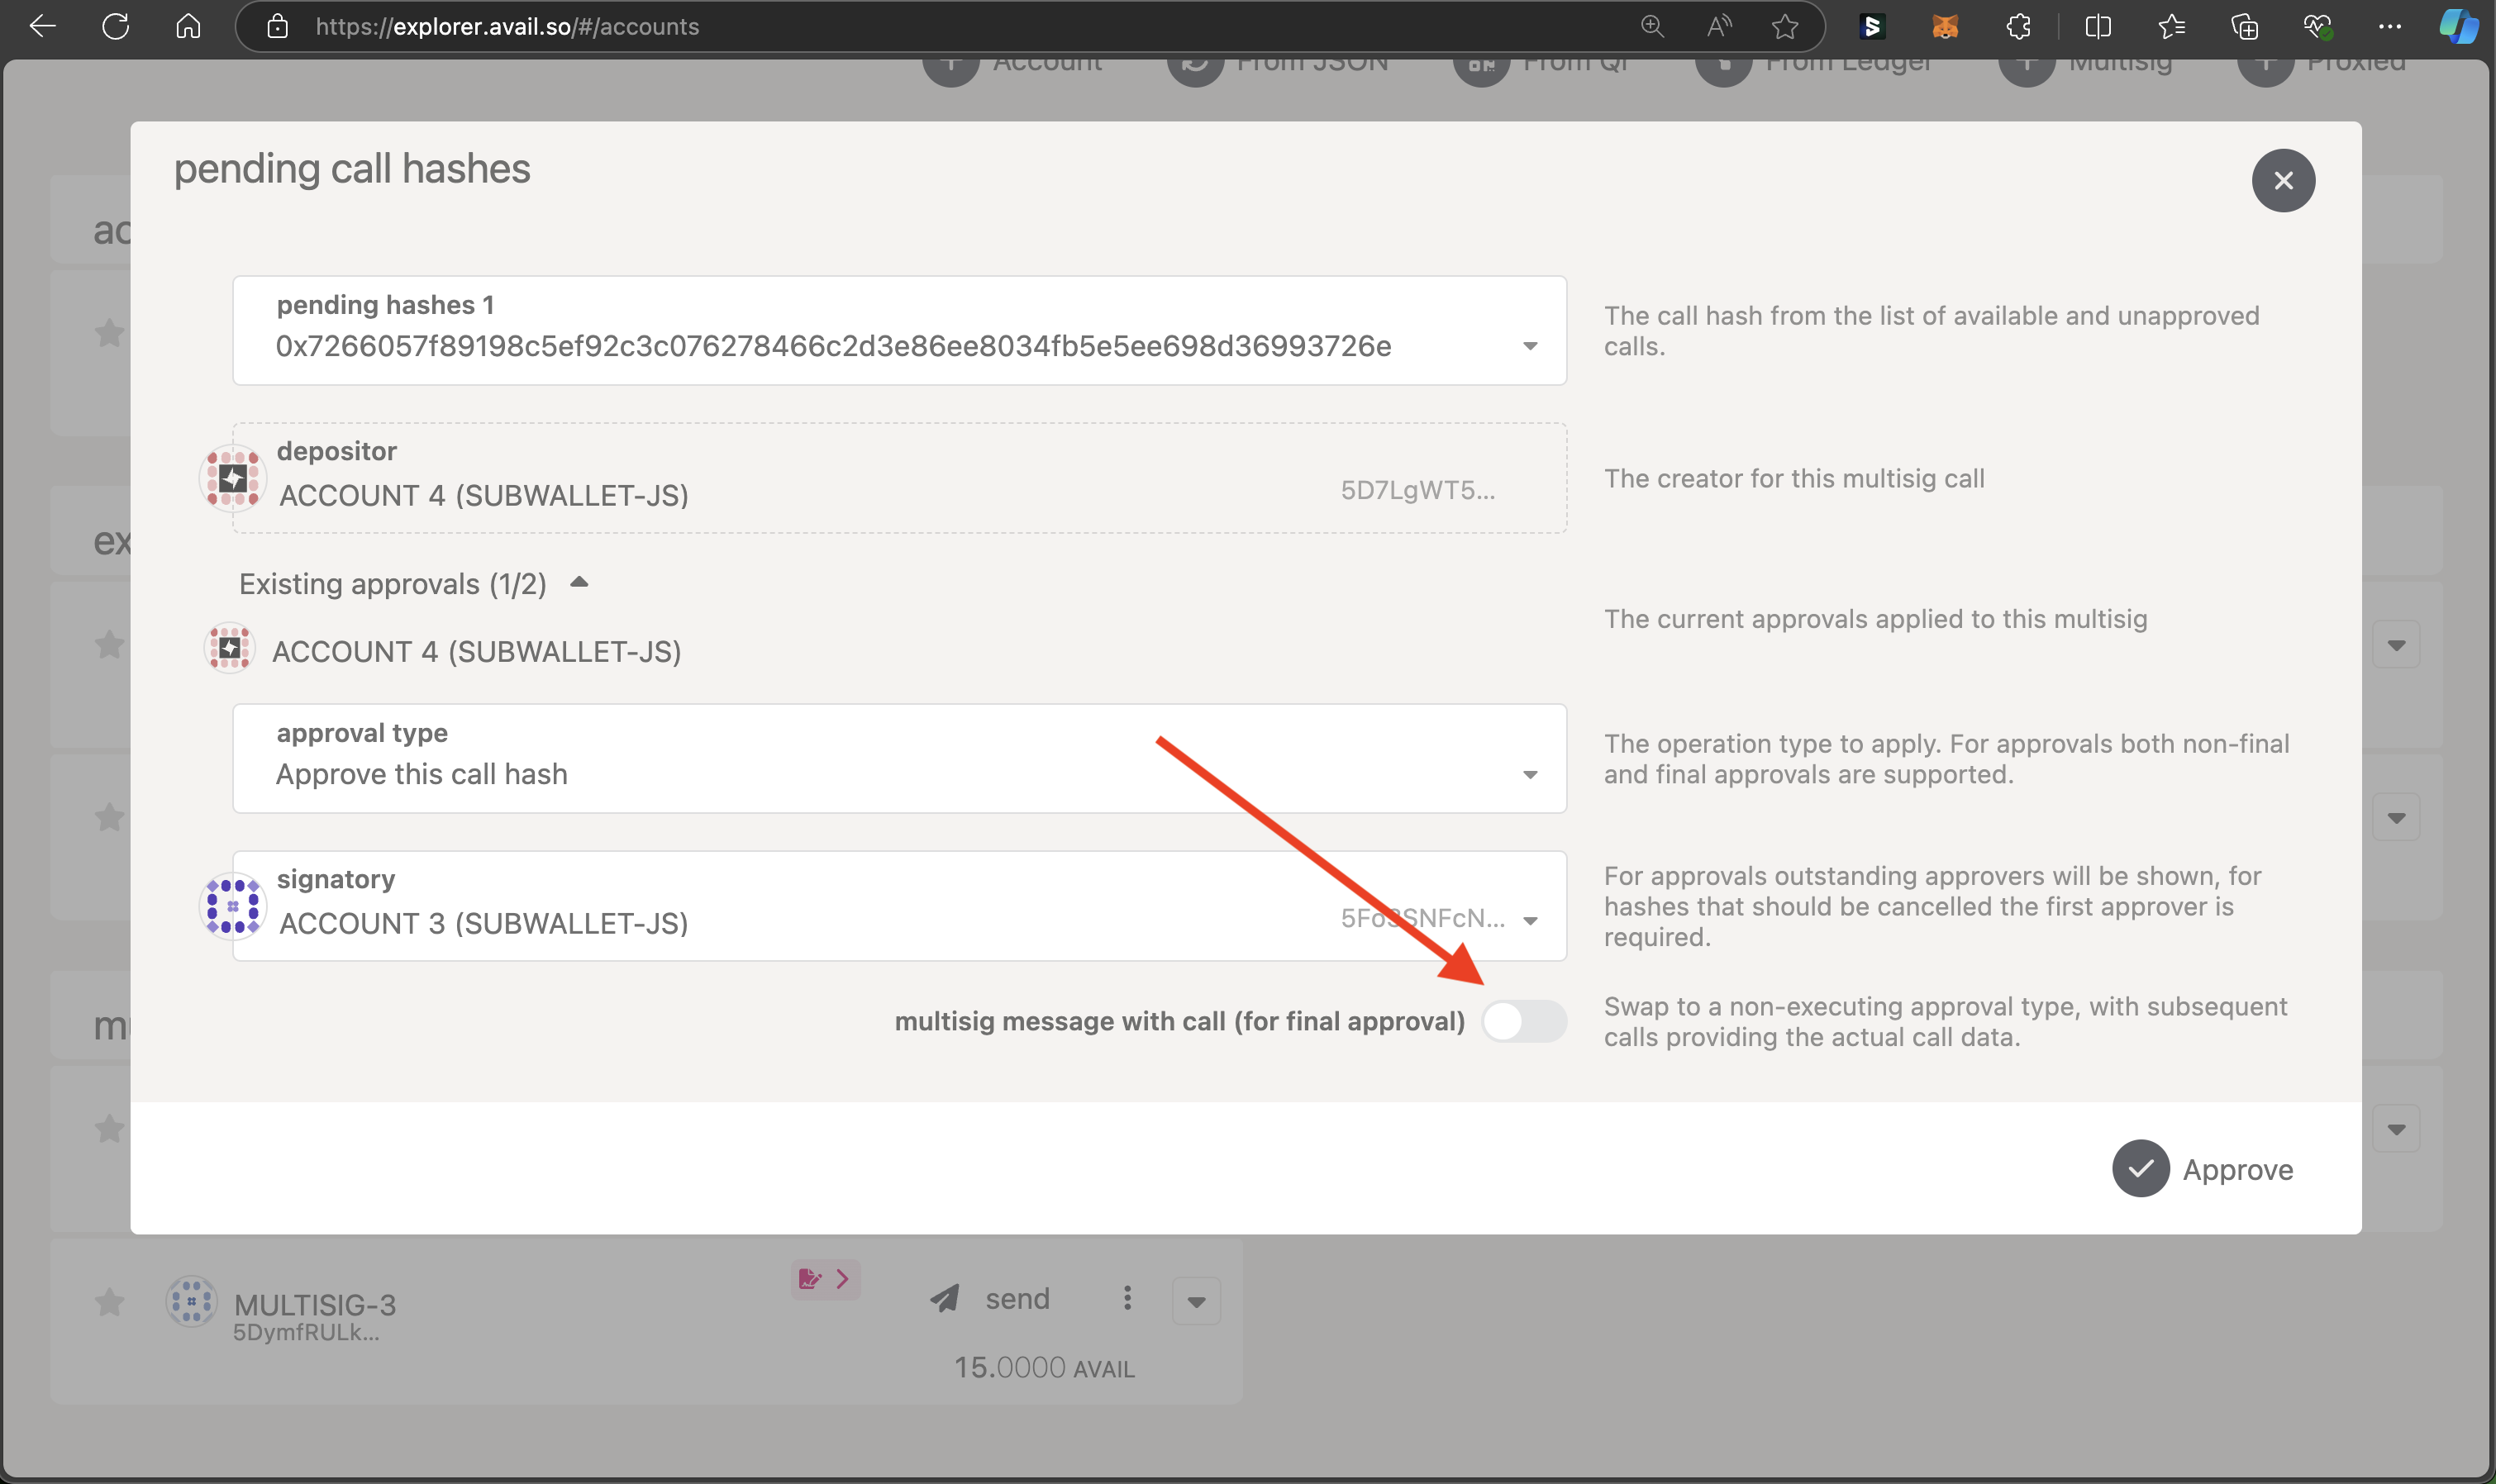
> **Note**
>
> **POINTS TO NOTE**
>
> 1. After the `threshold` value of minimum number of approvals has been met, any signatory can execute the transaction.
> 2. You cannot execute the transaction without the `multisig call data` value.
#### Approve and Execute
3. Paste the `multisig call data` you copied in the second step into the empty column.
4. Click on `Approve`.
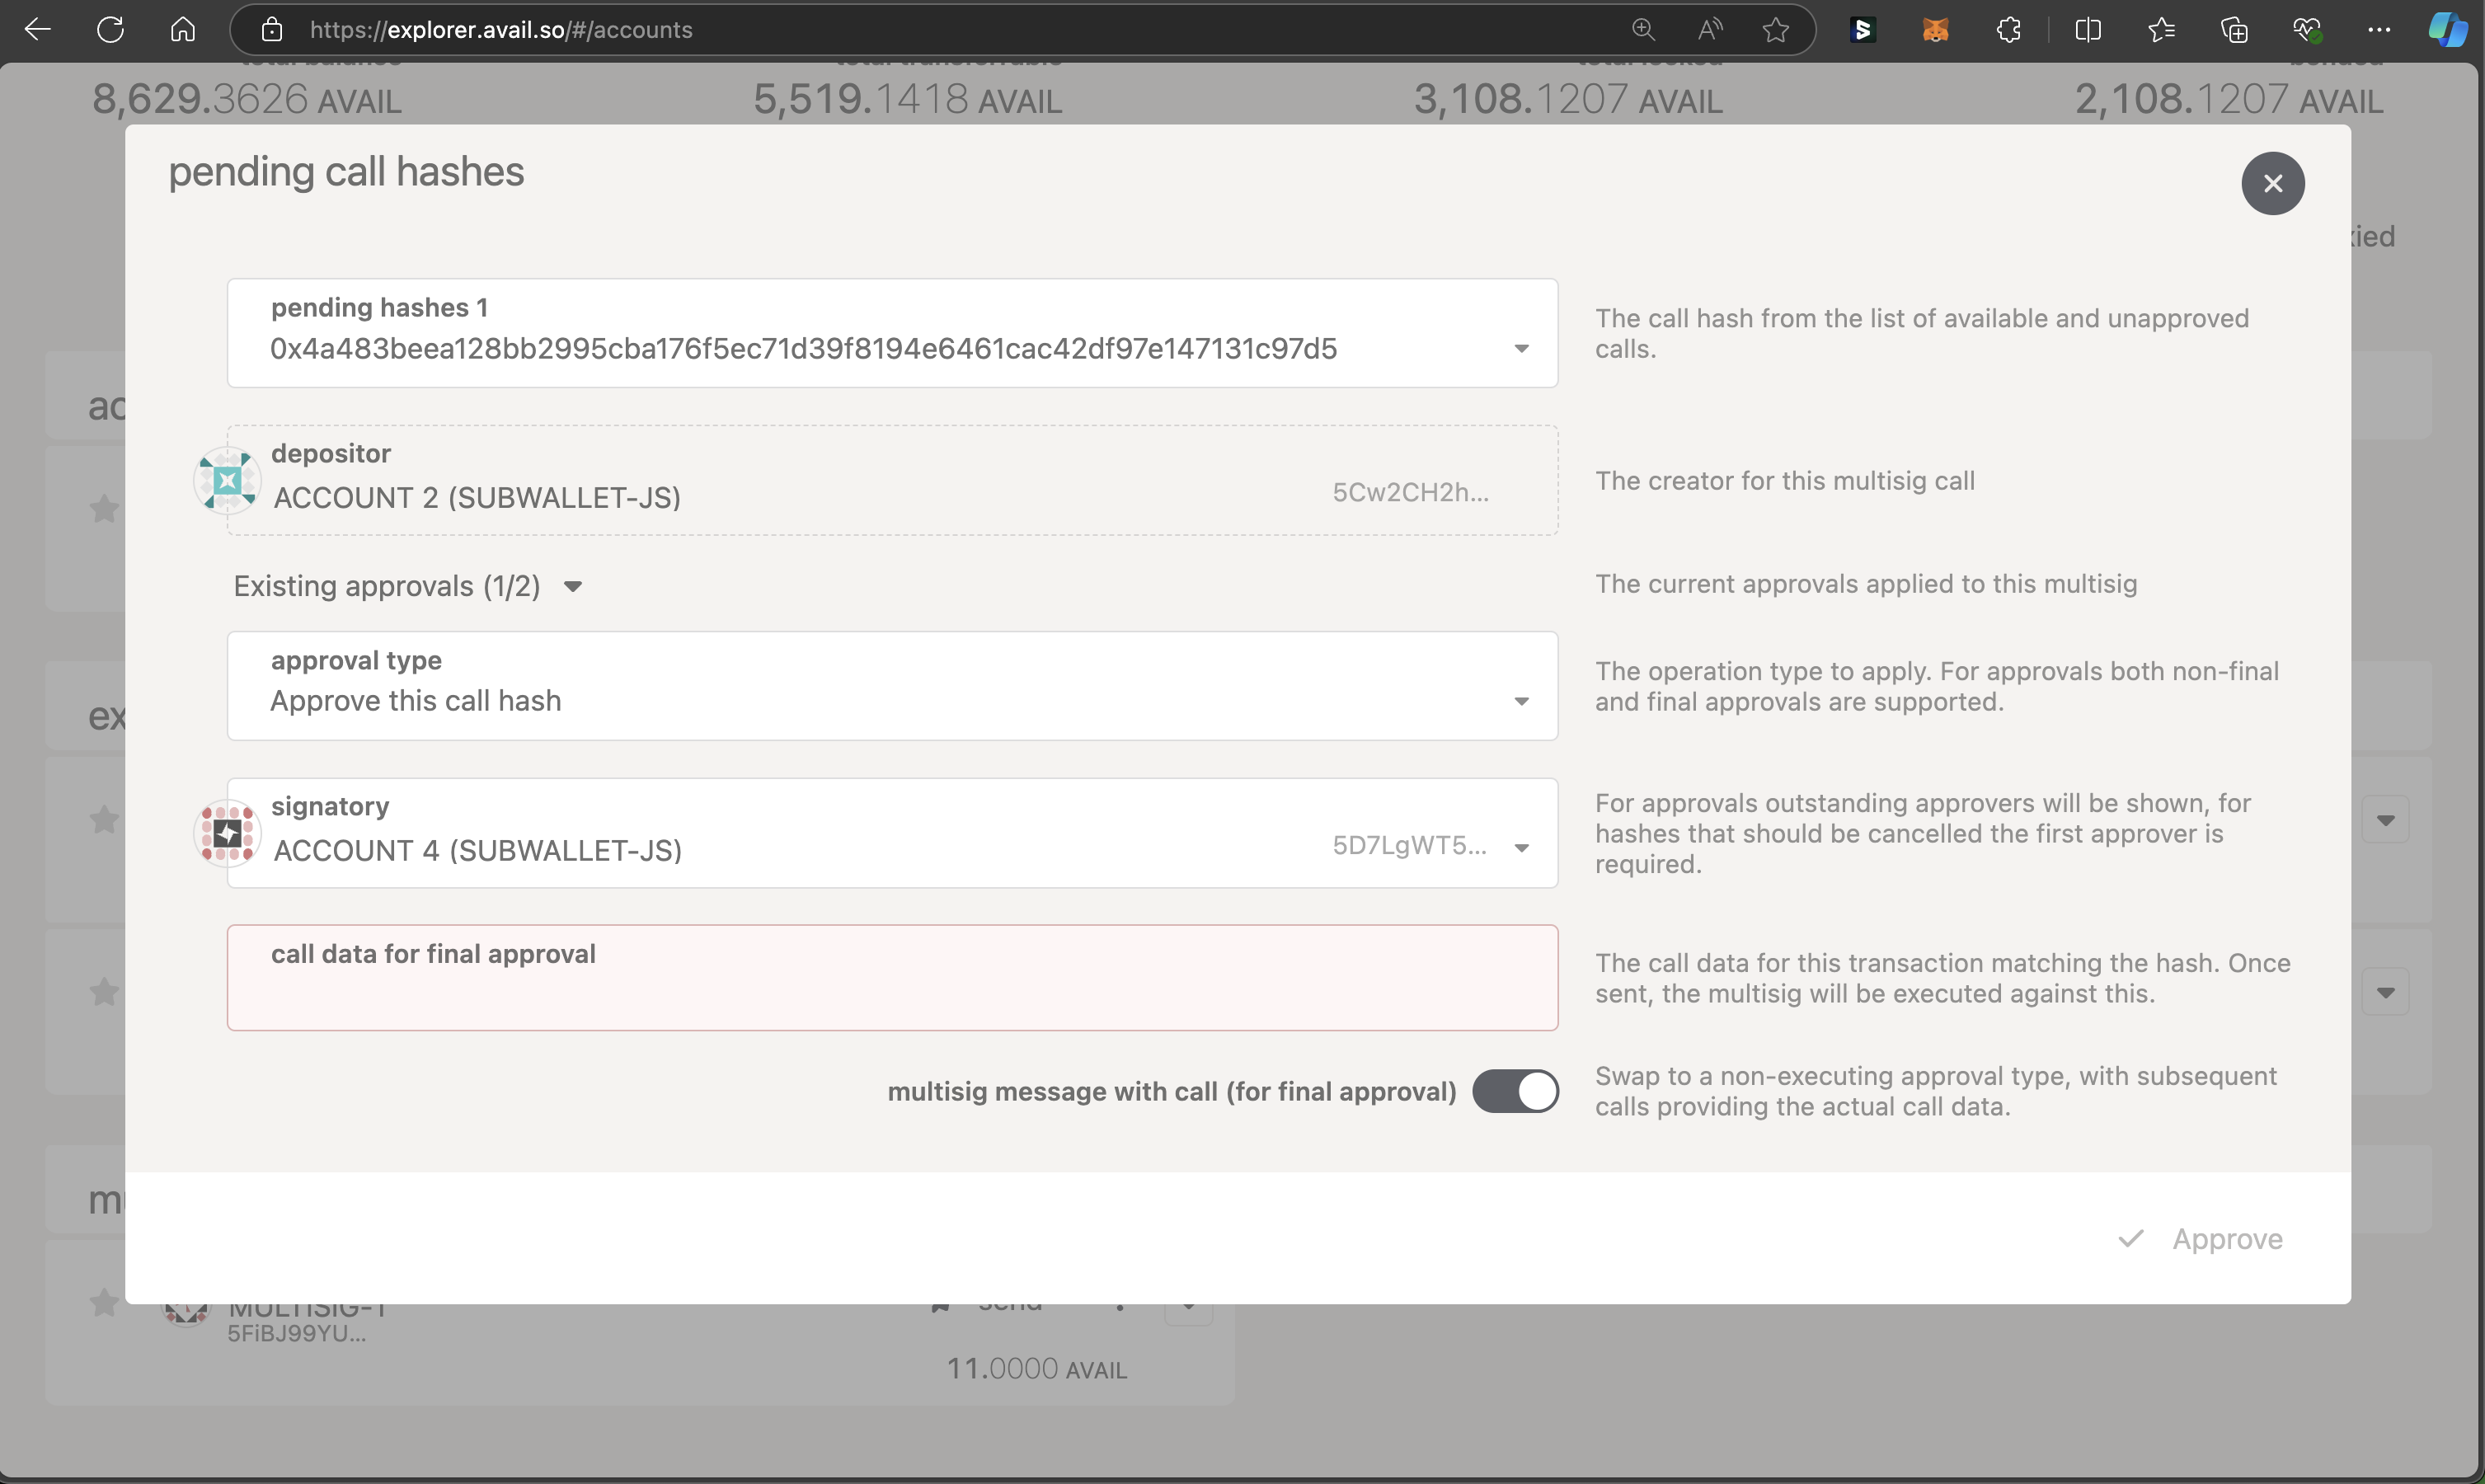
5. Click on `Sign and Submit`.
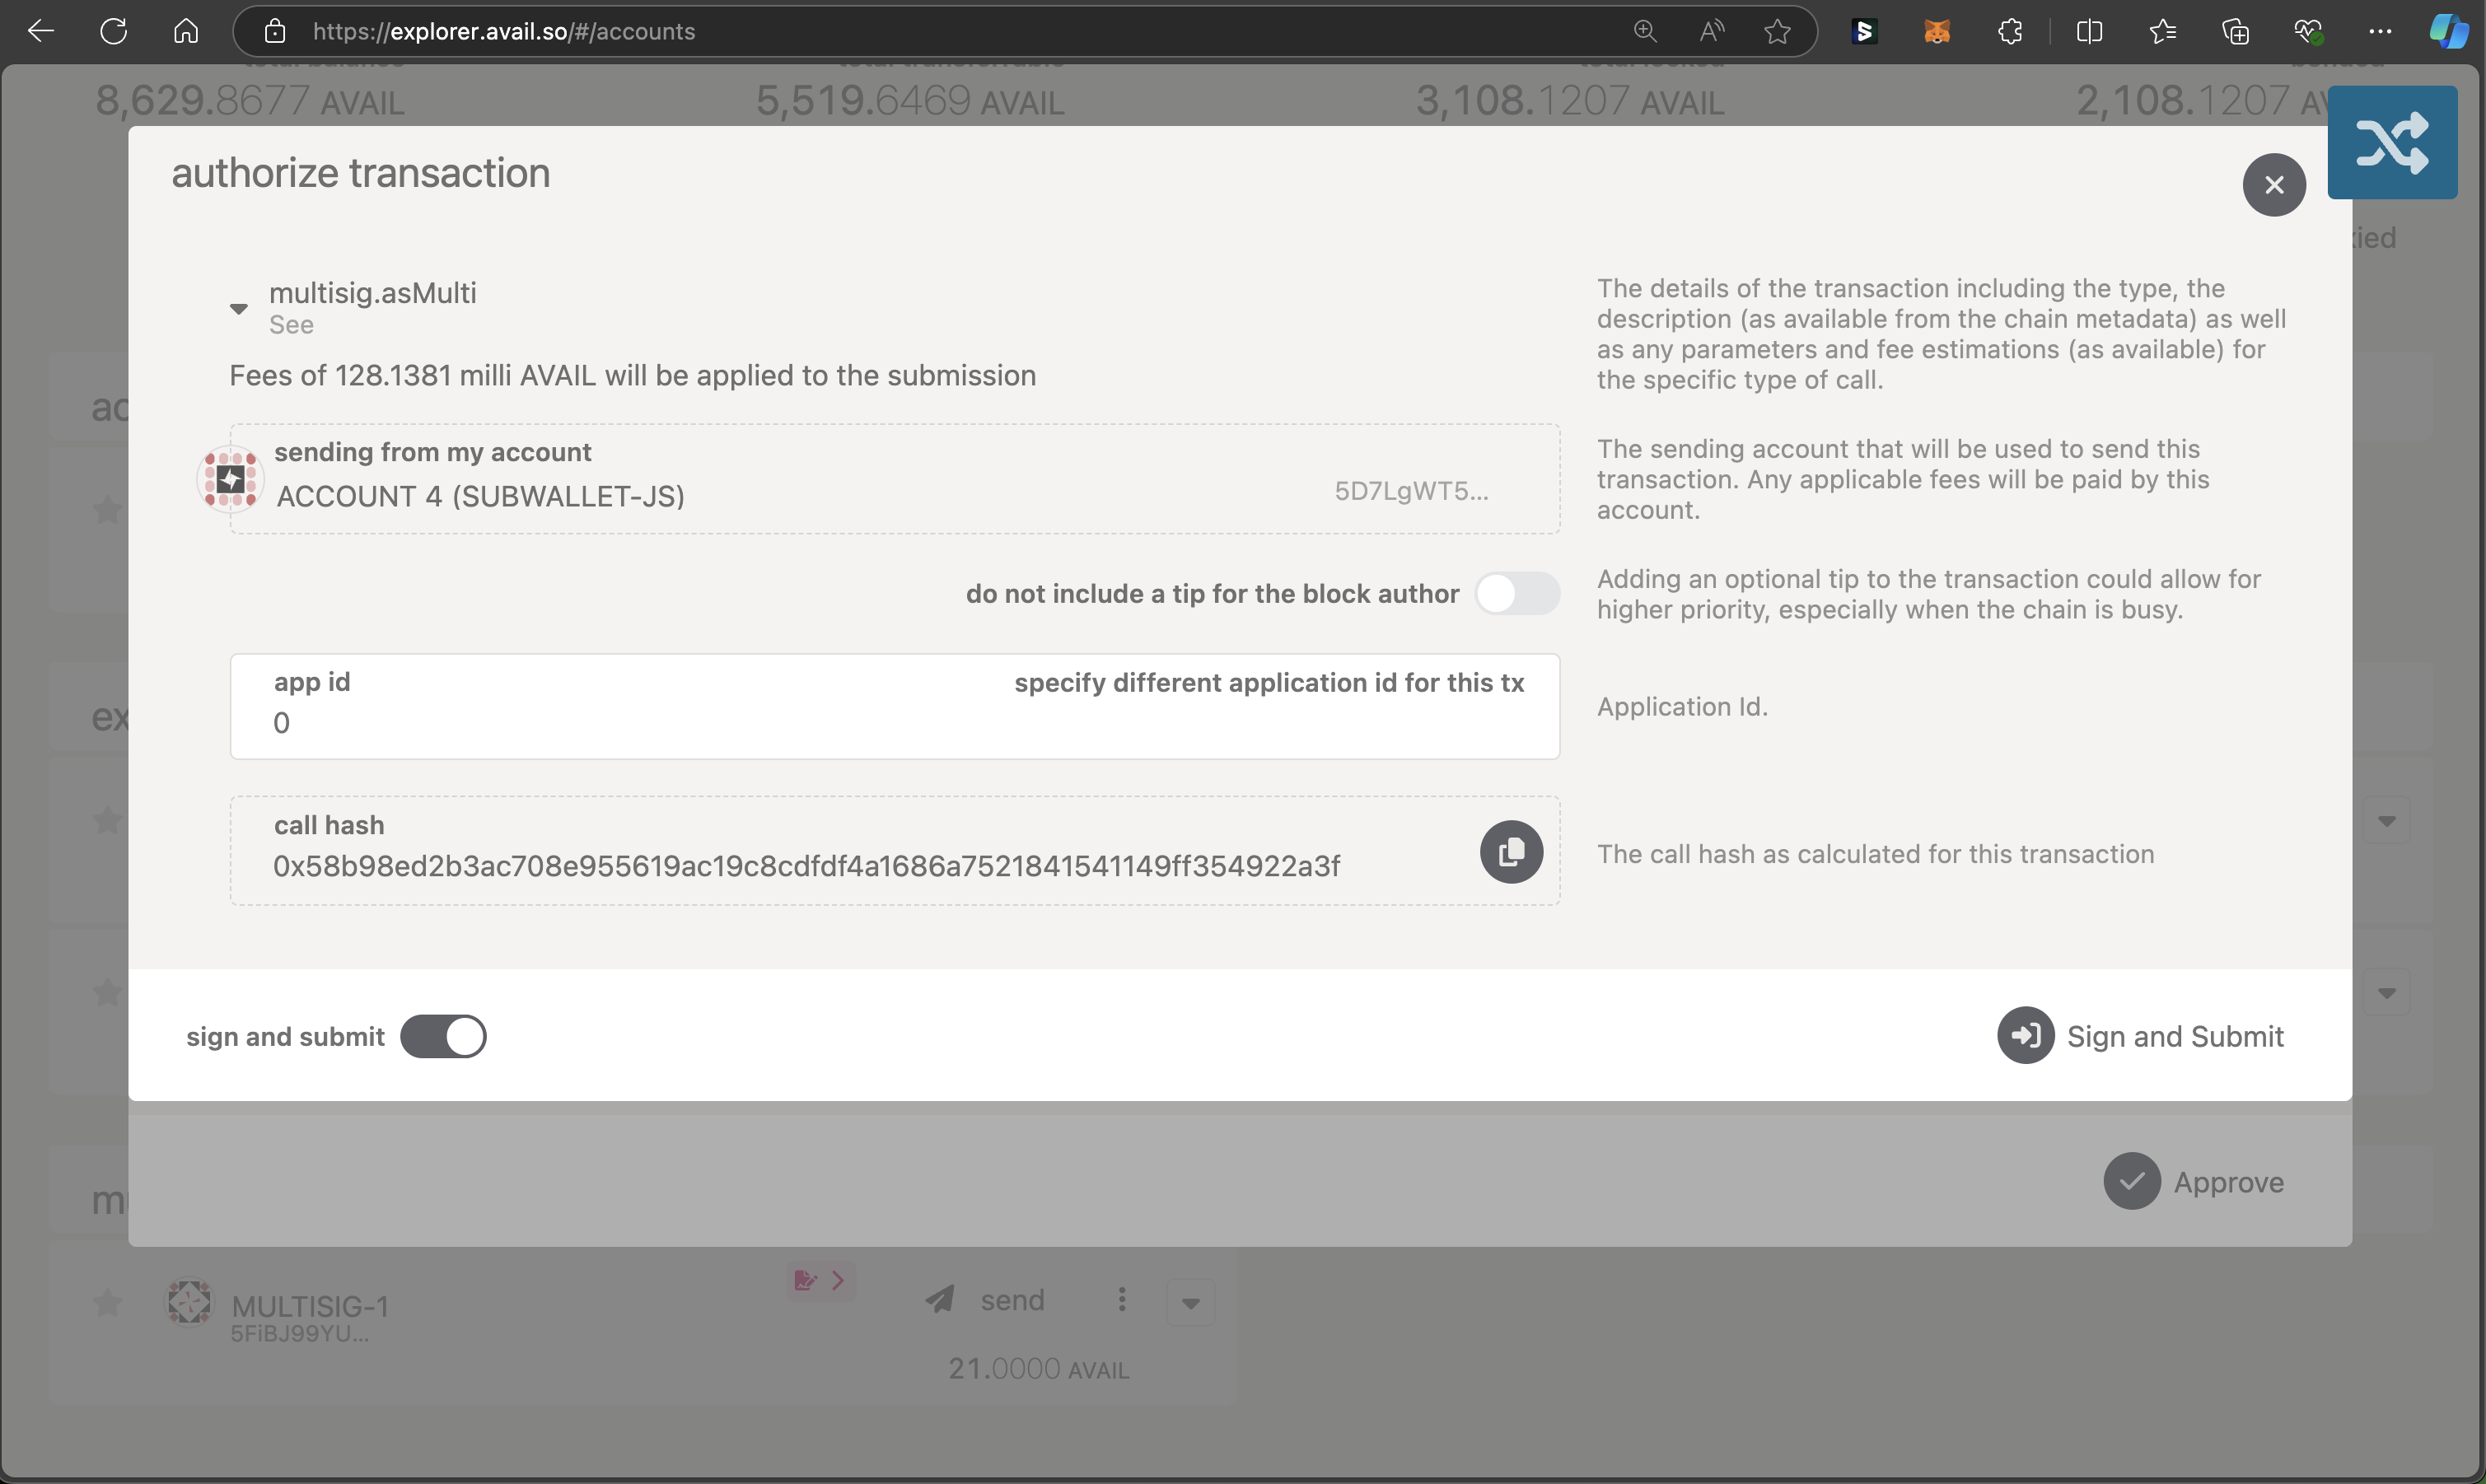
6. Depending on how you have connected the signatory account to the `avail-apps` UI (ledger seed phrase, wallet extension),
you might have different transaction approval interfaces. But once you approve it, funds should be successfully transferred from the multisig wallet.
> **Note**
>
> Needless to say, you will, as a signatory, be able to execute the transaction only if you are the last signatory required to meet the `threshold` value.
{/*
## 2nd way to use a multisig wallet on Avail DA (for advanced users)
Let us go through the same process as before, i.e., executing a transaction from our multisig wallet
to transfer funds, but using the `extrinsics` tab instead. */}
### MetaMask Snap
## Introduction
MetaMask is one of the most popular wallets for Ethereum and other EVM-compatible blockchains out there.
MetaMask Snaps is an open source system that allows developers to create a custom '*Snap*'
that can be installed into a user's MetaMask wallet to extend it's functionality for different chains.
You can check out [MetaMask website](https://metamask.io/snaps) and [MetaMask docs](https://docs.metamask.io/snaps/) for more information.
The Avail snap will allow you to easily interact with Avail DA from within your MetaMask wallet.
We are actively working on adding more features to the Avail Snap, so stay tuned for updates.
## Using the Avail Snap
### Install the Avail Snap
Go to [the official MetaMask snaps store](https://snaps.metamask.io/snap/npm/avail-project/avail-snap/),
and click on '*Add to MetaMask*'.
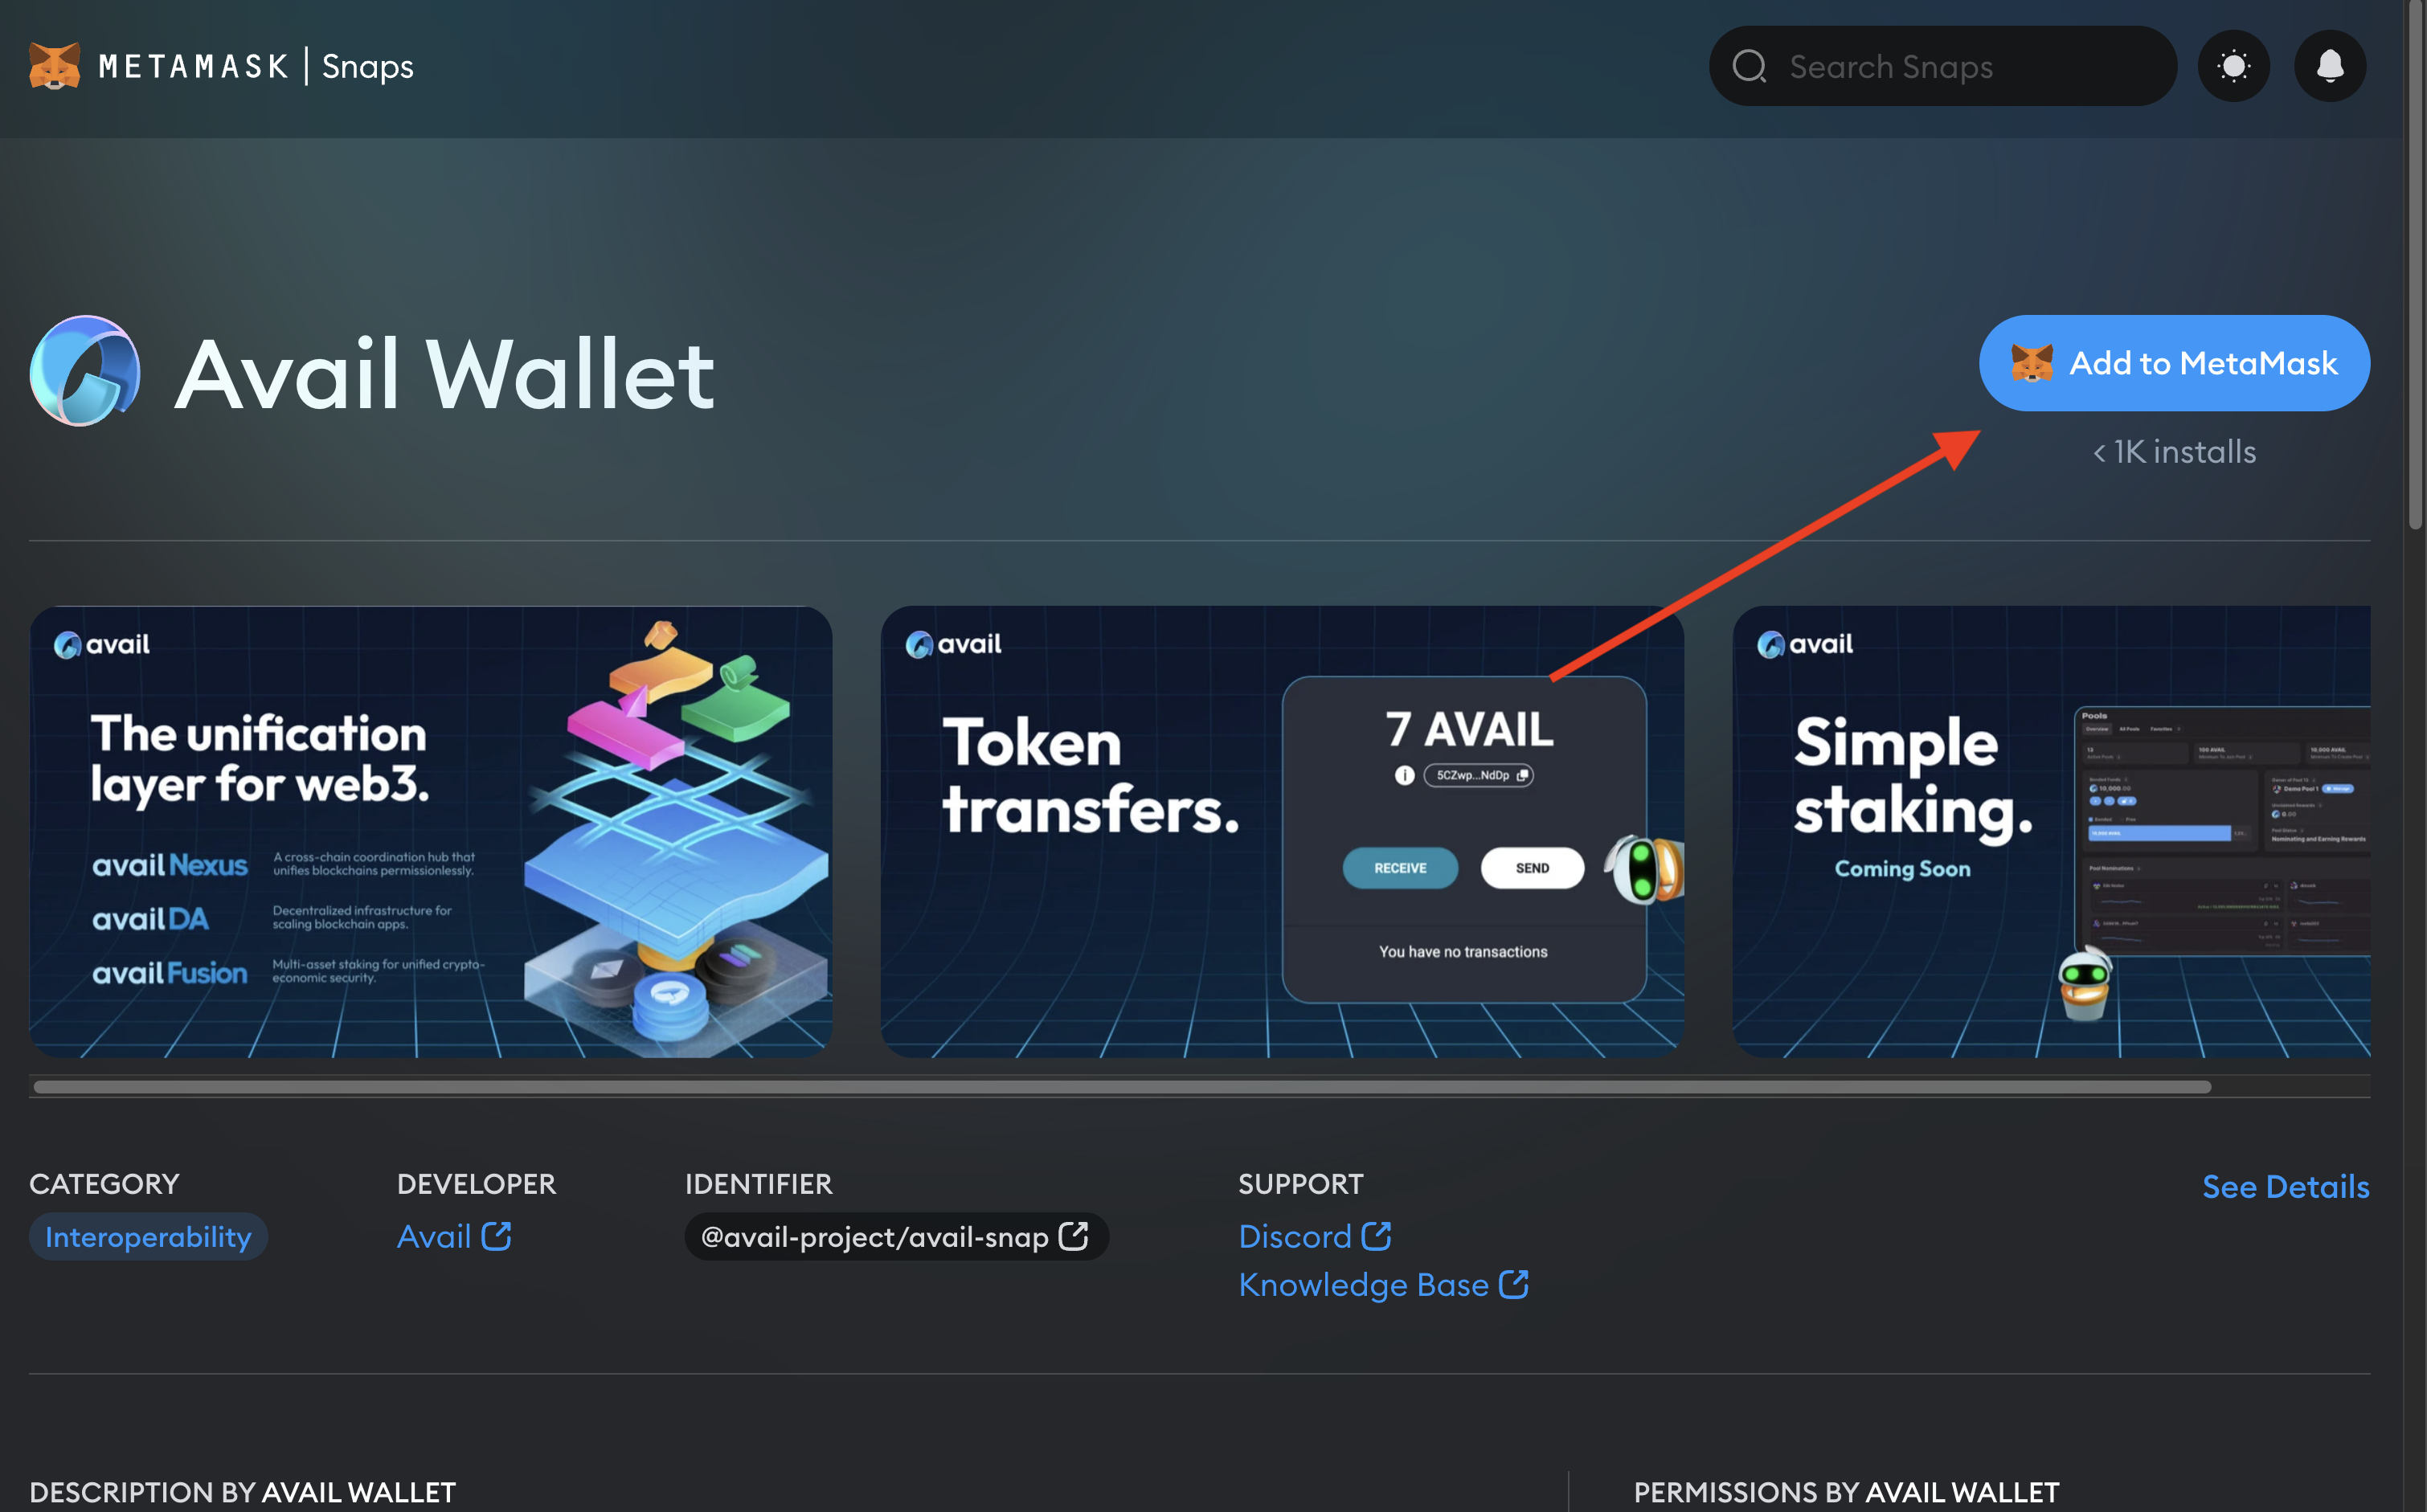
Grant the required permissions to the Avail Snap to complete the installation process. Once the installation is complete,
your screen should look like this:
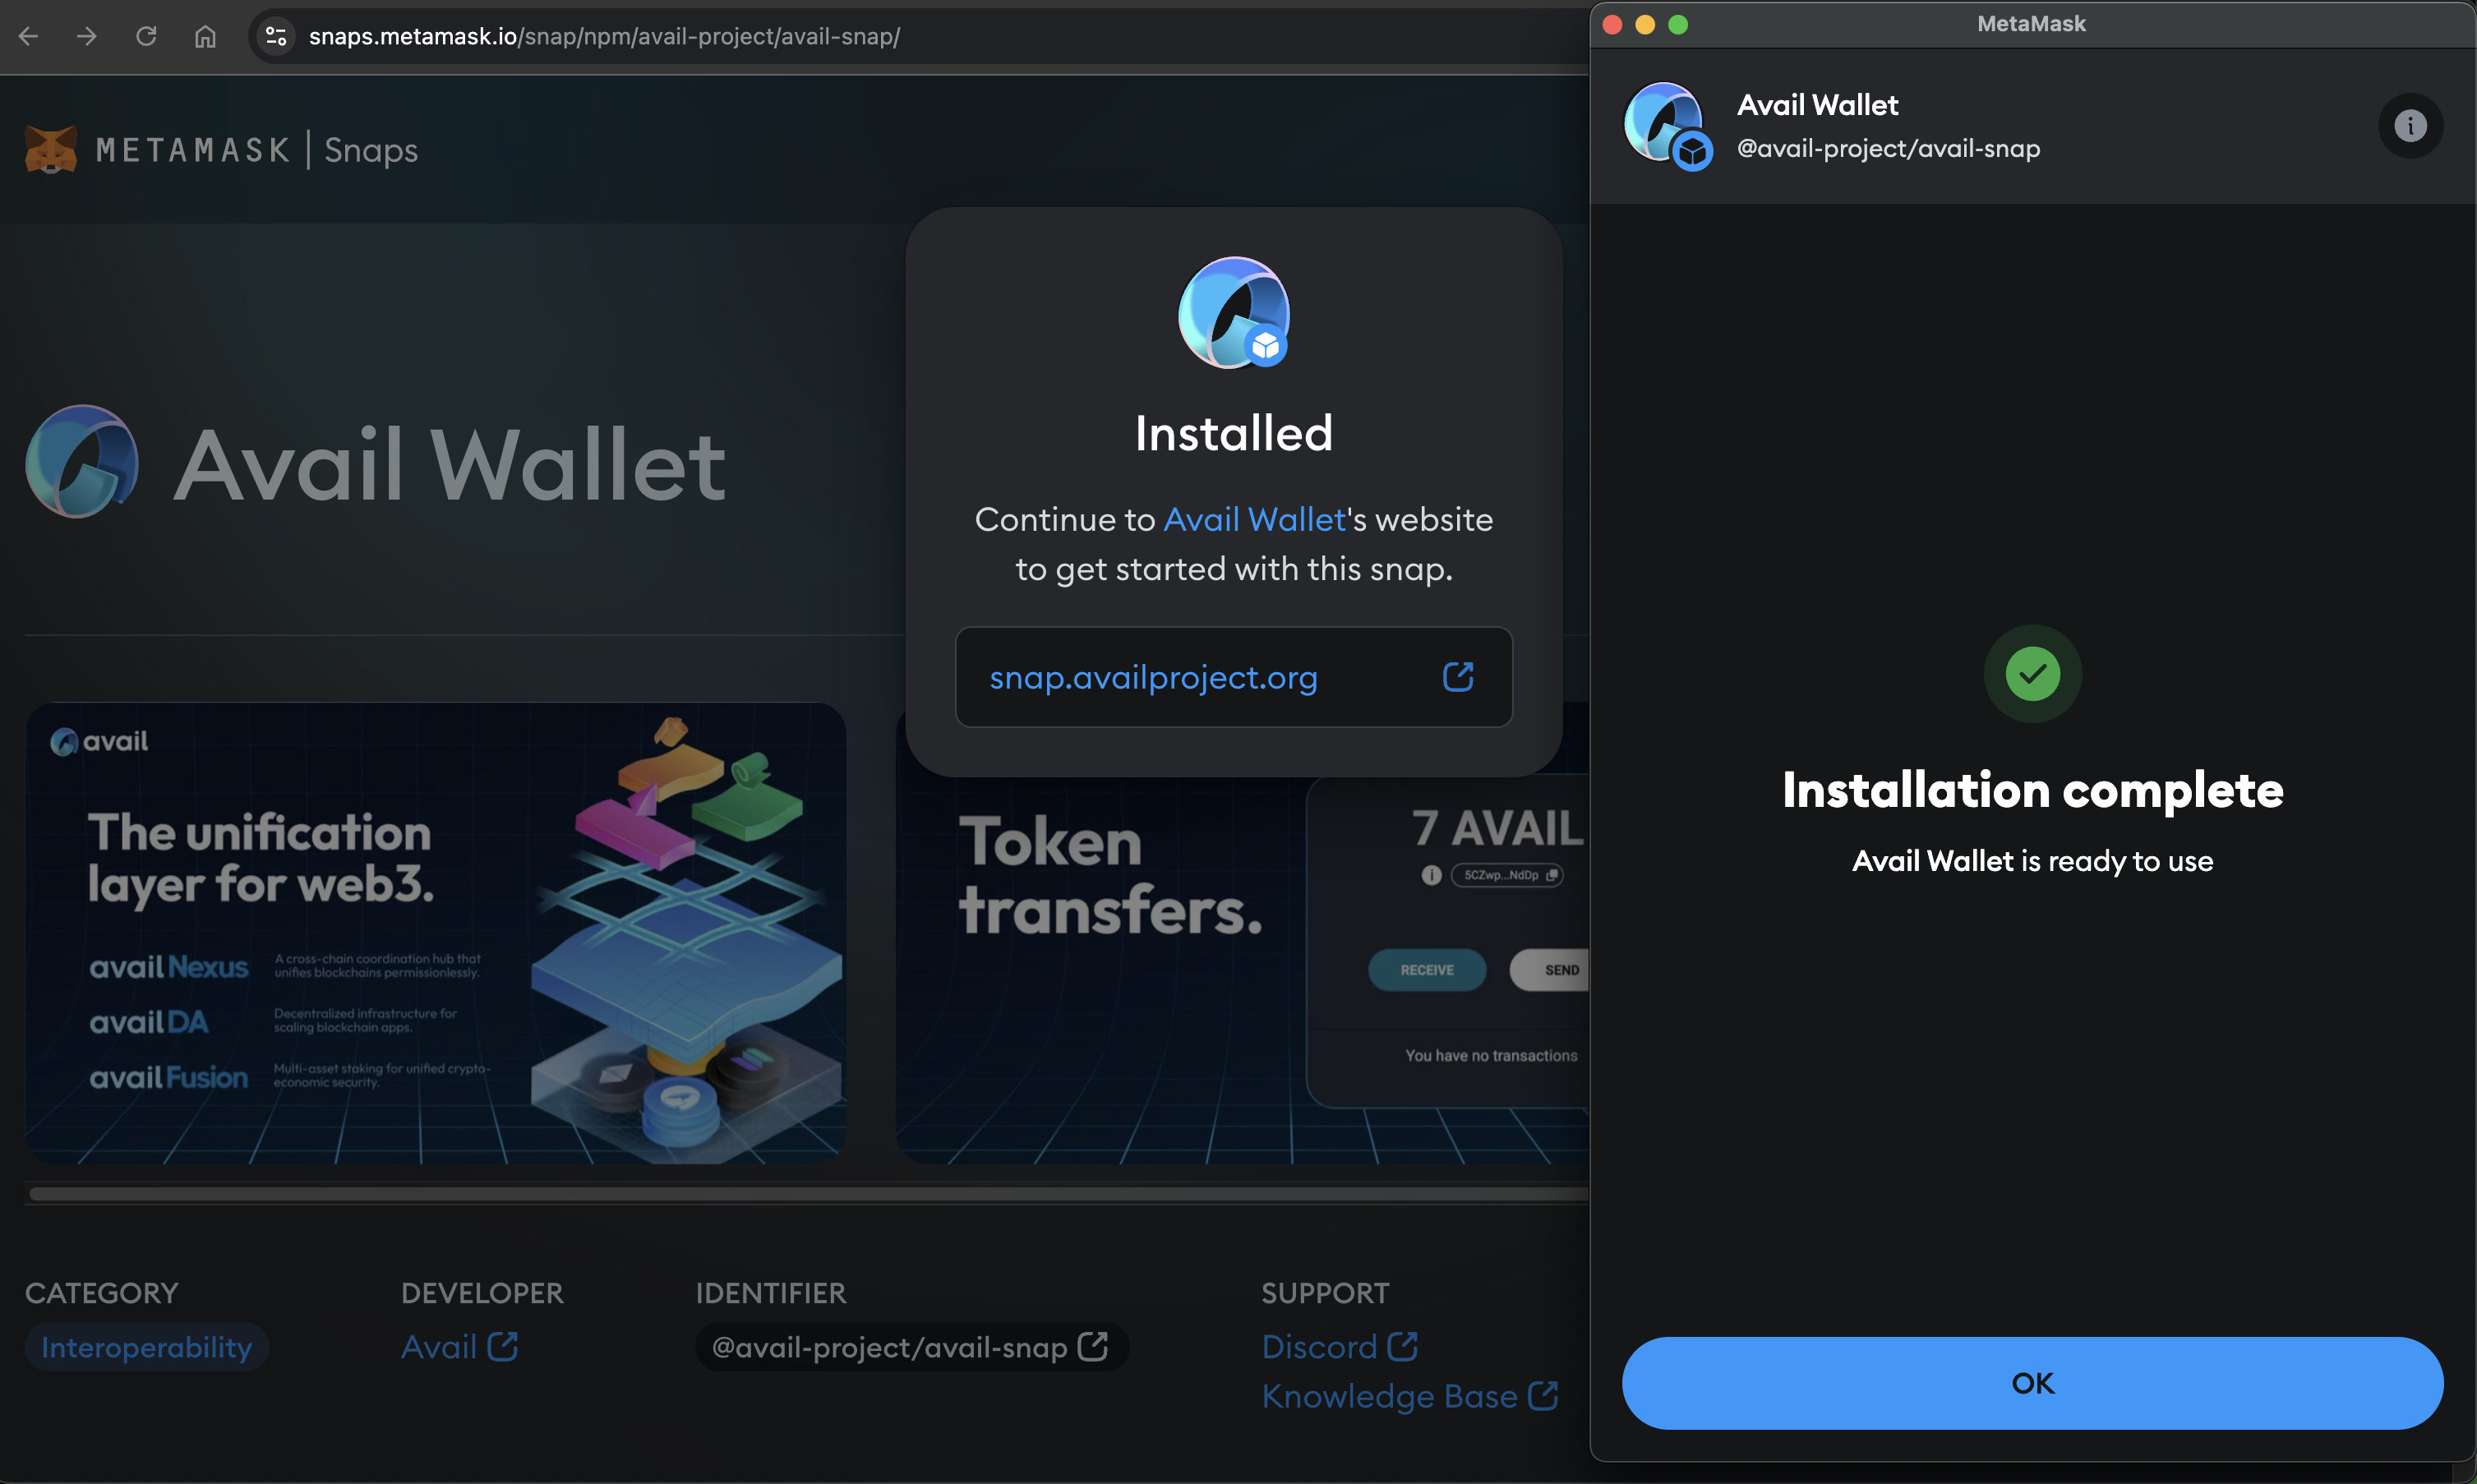
### Use the Avail Snap
> **Note**
>
> The Avail Snap generates an address for you based on the seed phrase embedded into your
> MetaMask wallet. Thus, if you transfer the same wallet to a new system and install
> the Avail Snap again, you will derive the same address.
Go to [snap.availproject.org](https://snap.availproject.org/), which is a UI interface that
allows you to conveniently use the Avail Snap.
Connect your metamask extension to this webpage by clicking on '*Connect with MetaMask*'.
Once connected, you will see your derived address and its balance on screen:
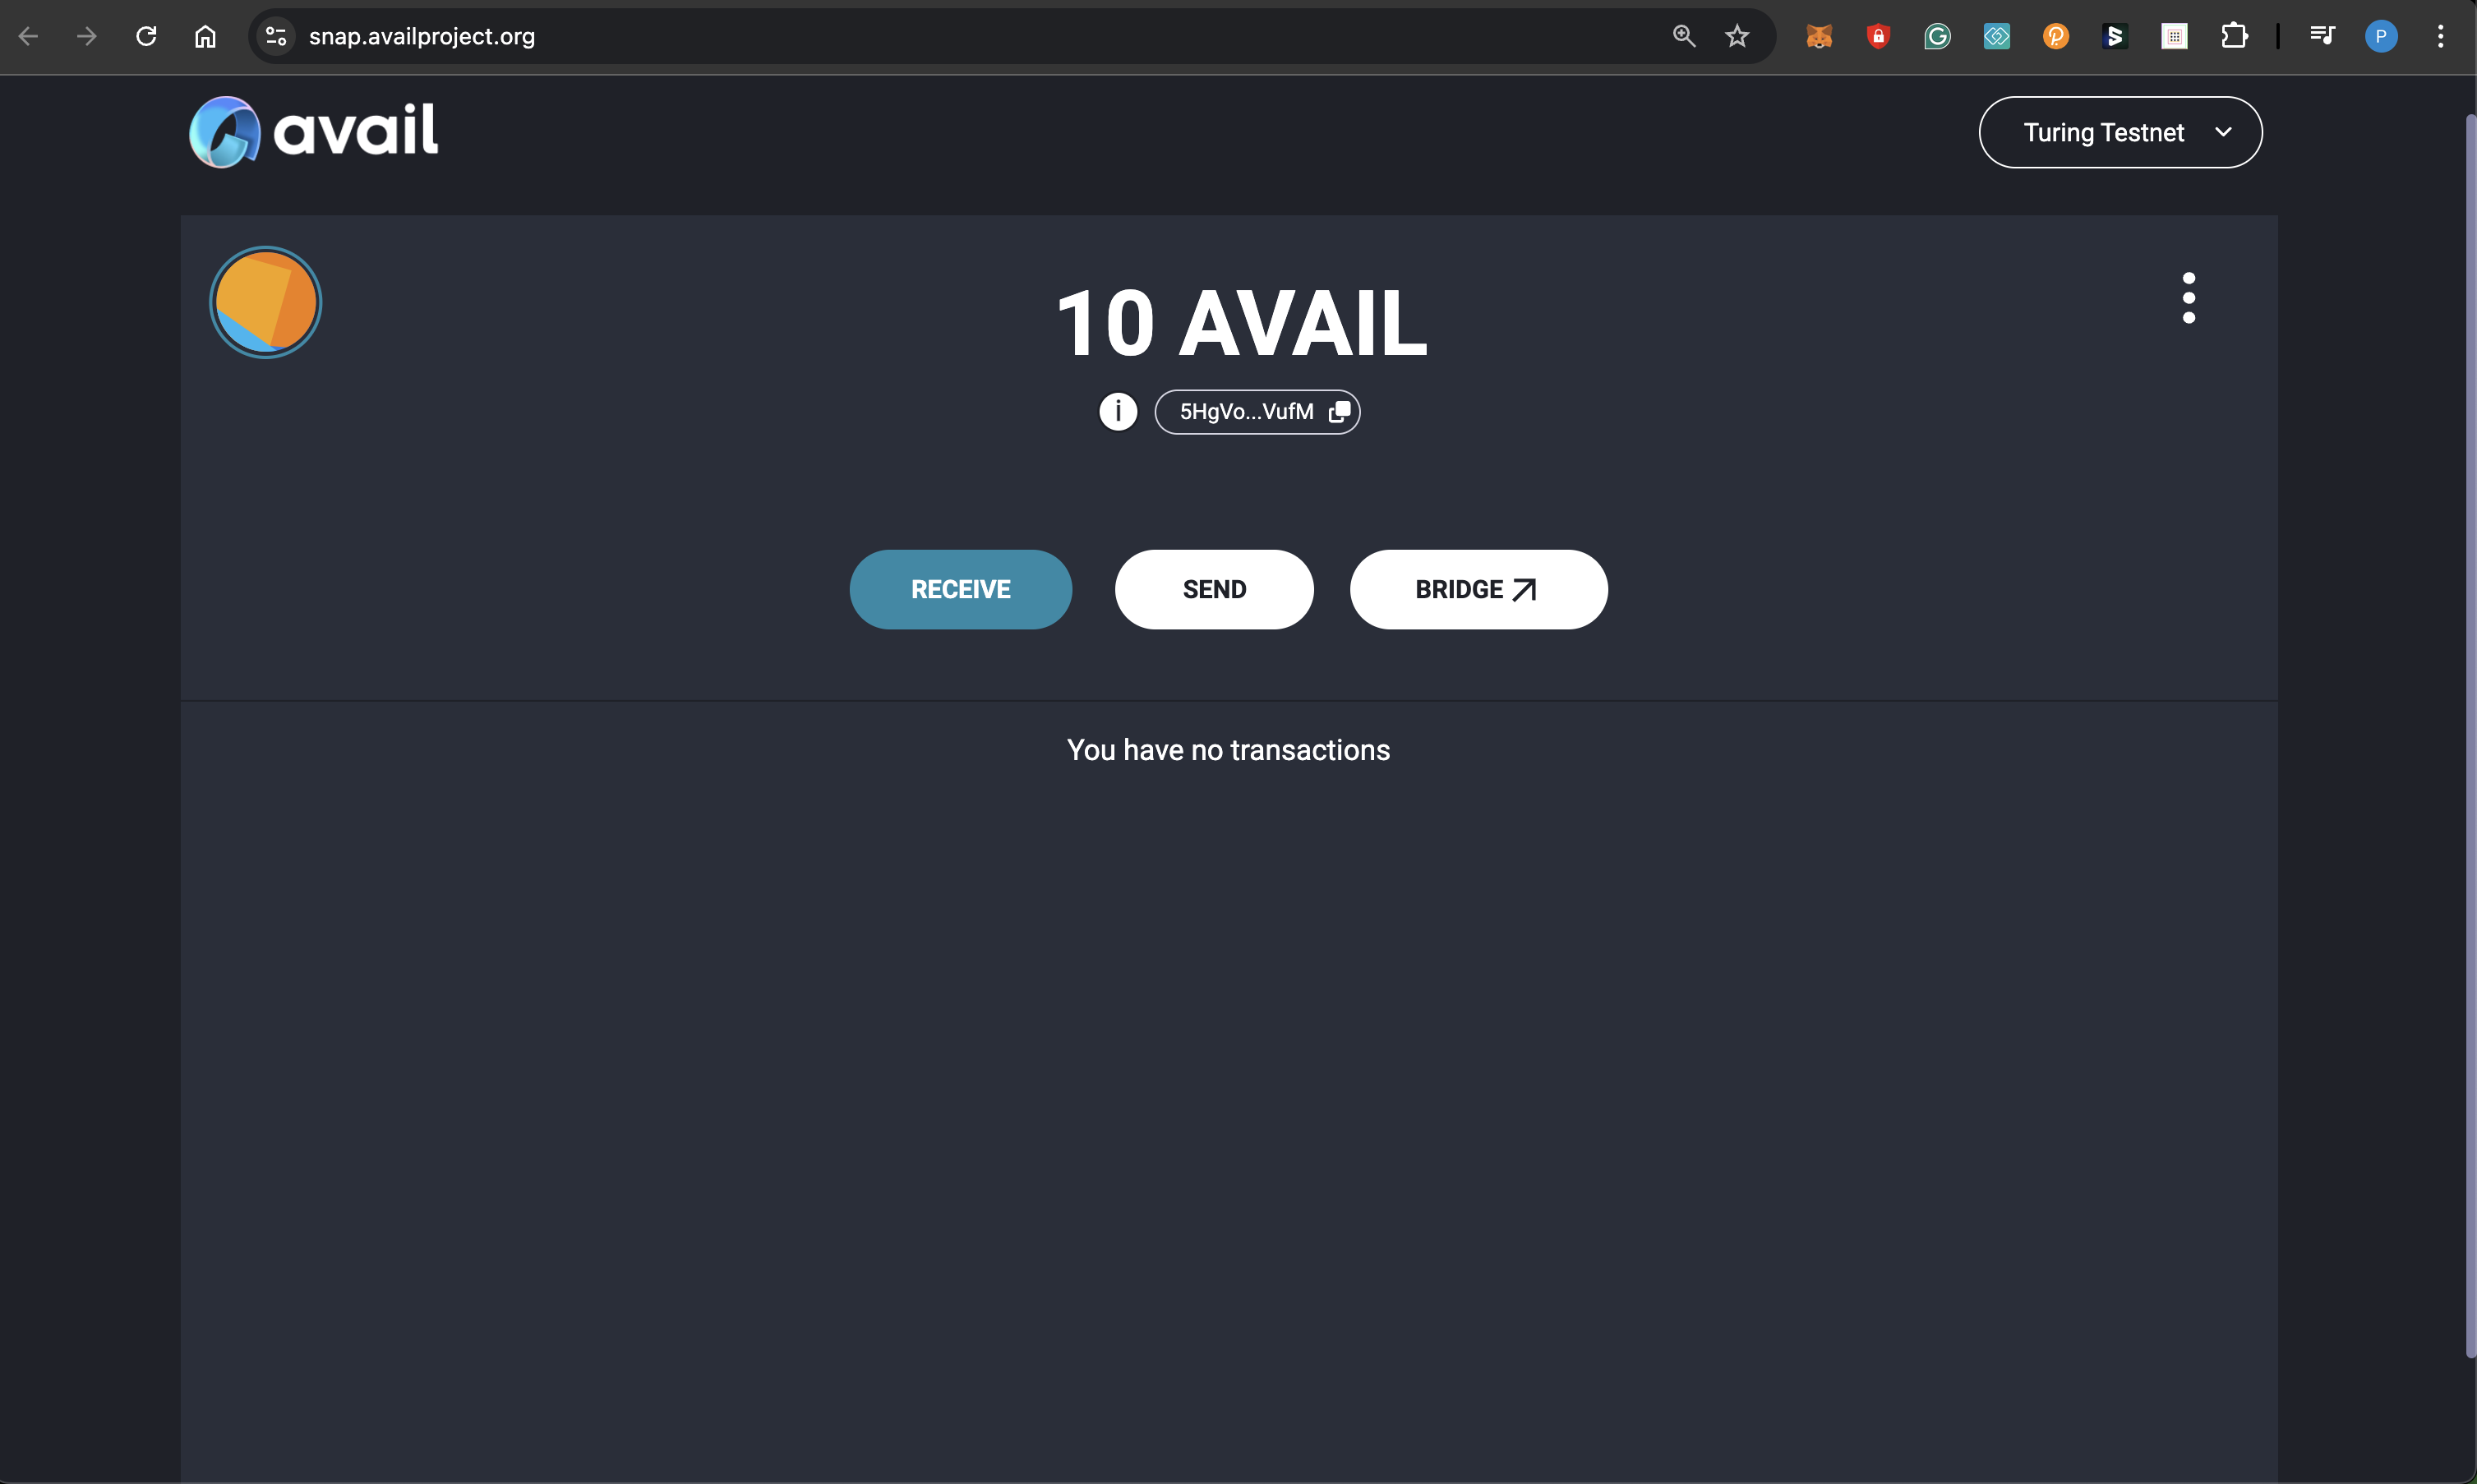
> **Note**
>
> **PLEASE NOTE**
>
> 1. You will need to send some AVAIL tokens to your new address before being able to make a transaction with it.
> 2. You can toggle between Avail DA testnet and mainnet by using the dropdown on the top right. Make sure to select the correct network.
### Make a transaction
Click on *'send'* , enter an amount and a recipient, then approve a transaction on Avail DA from within your MetaMask wallet.
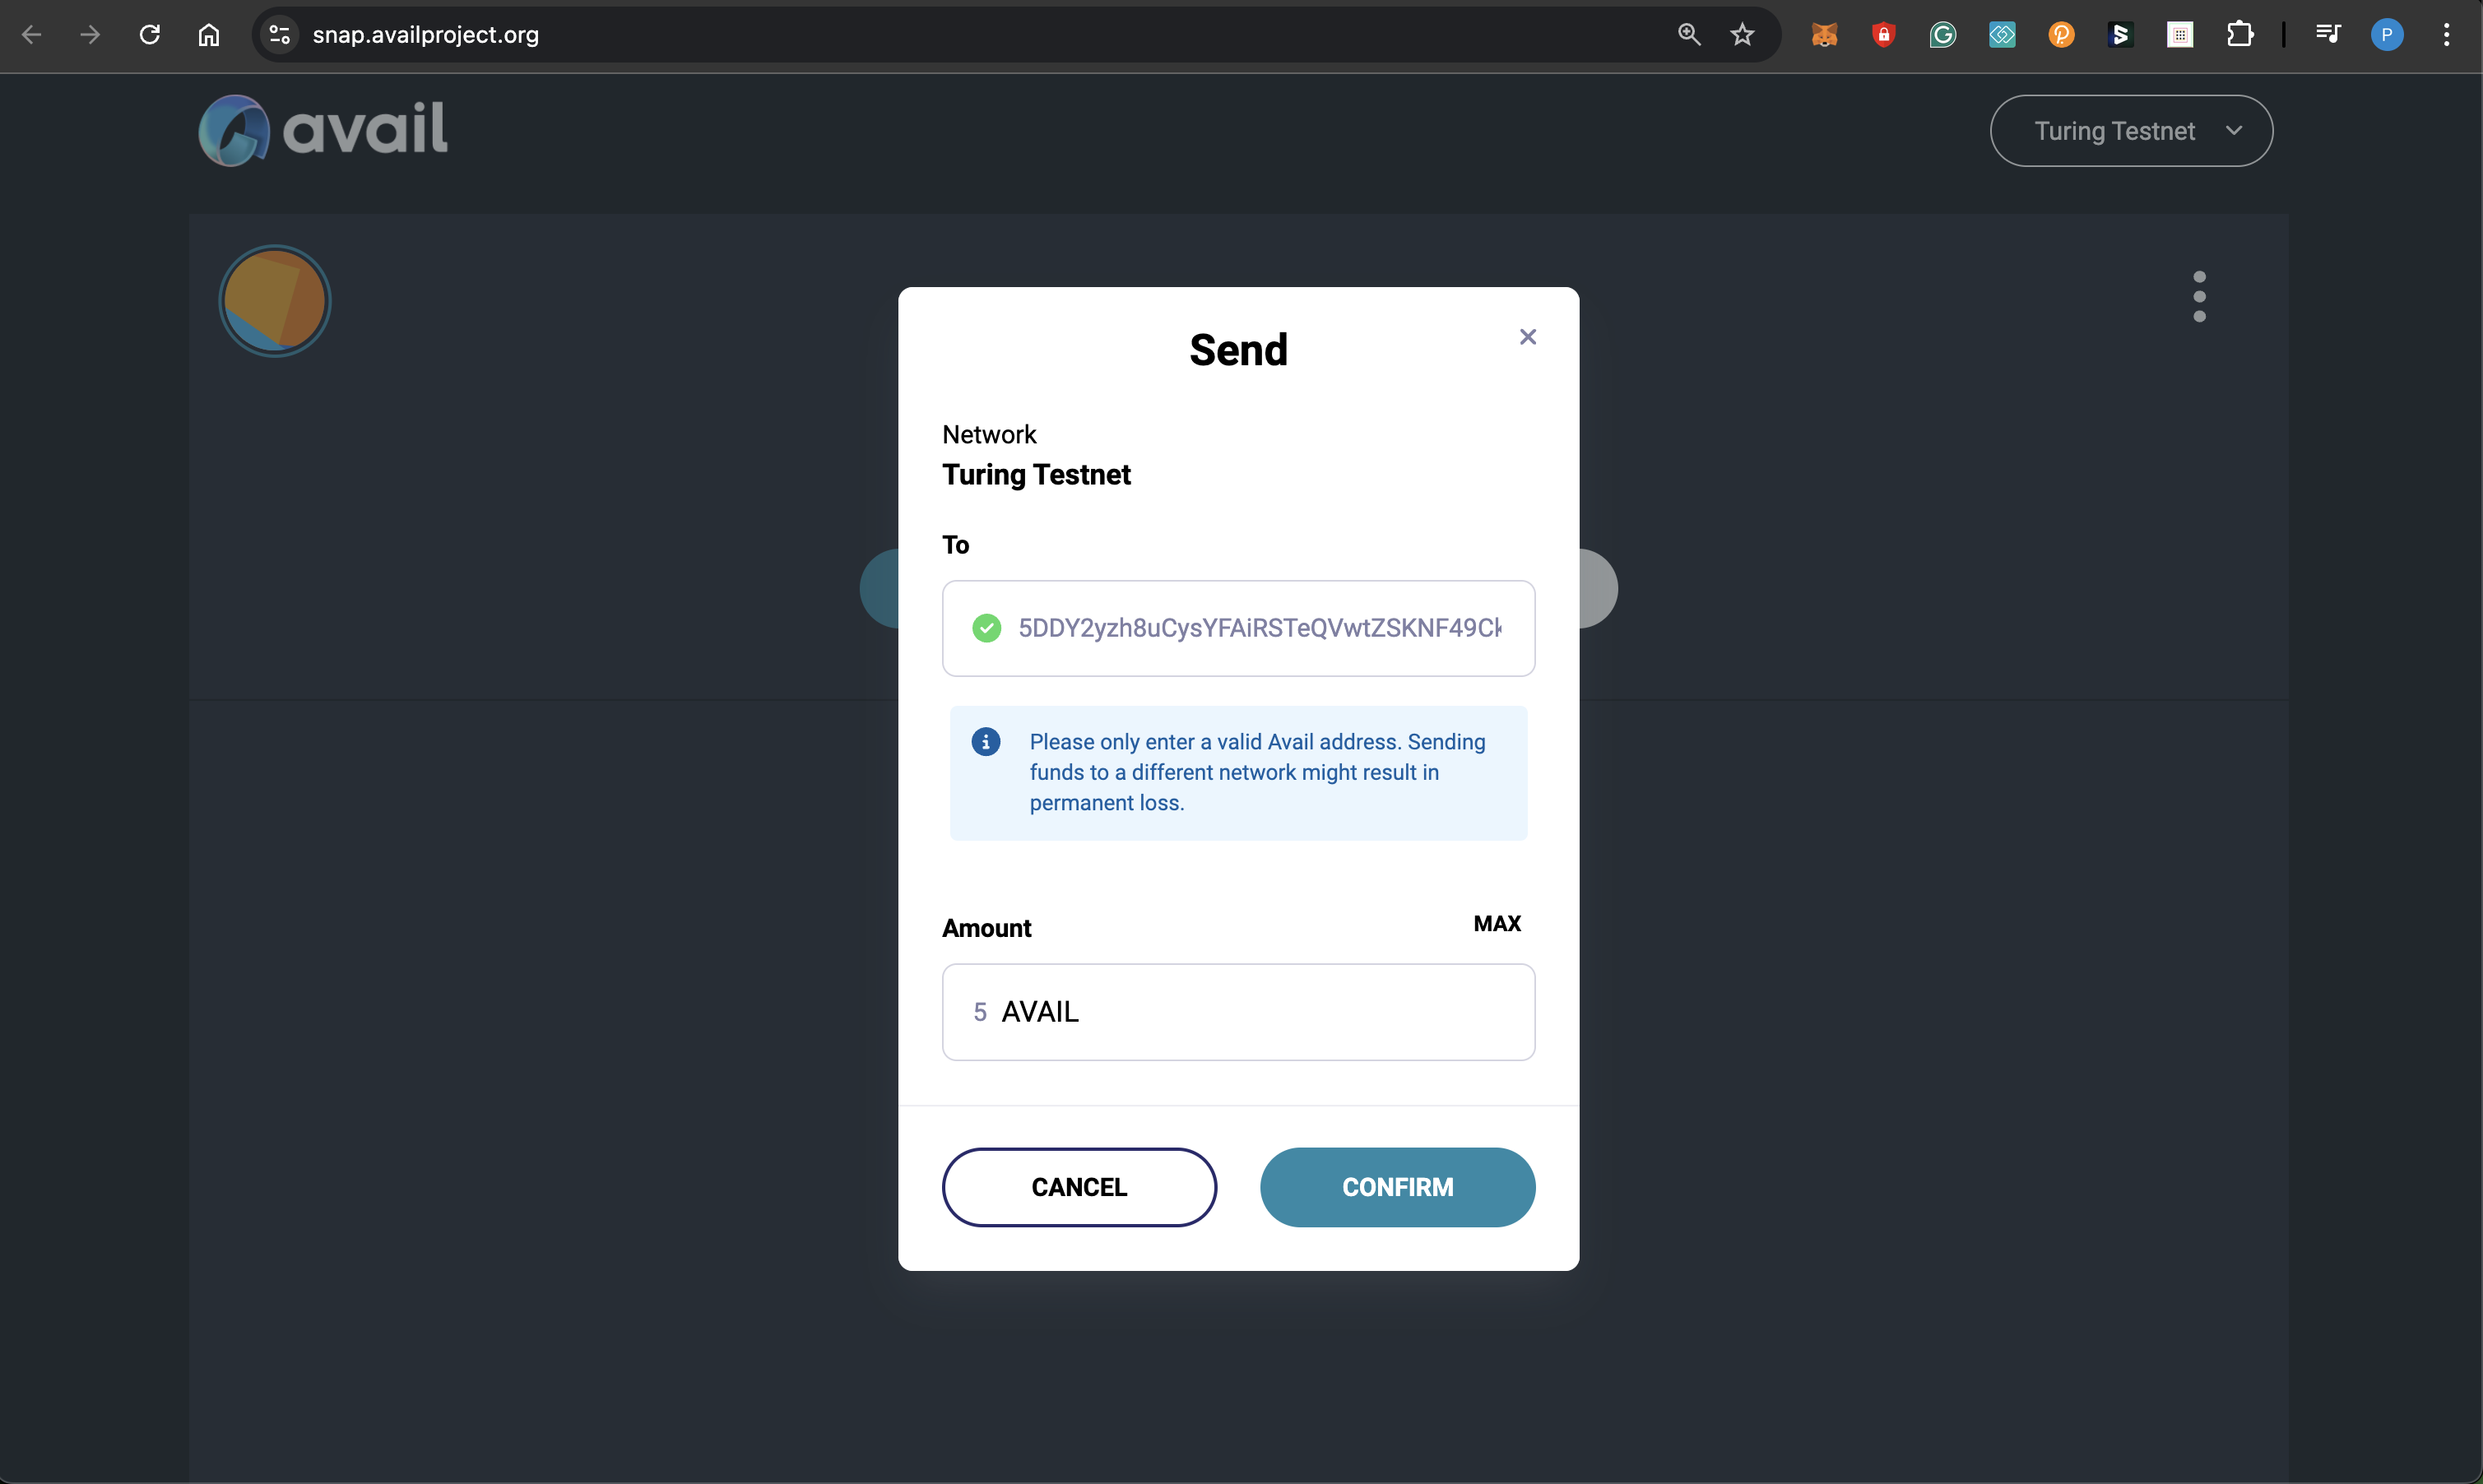
> **Note**
>
> THE BRIDGE UI
> Please note that the `bridge` button takes you to a different interface that you can
> use to transfer tokens between Avail DA and Ethereum.
> The bridge UI does not yet support the Avail Snap.
## FAQs
### Why should I use the Avail Snap at all?
MetaMask is an EVM-compatible wallet that supports 20-byte hexadecimal addresses derived from seed phrases and/or private keys.
Avail DA meanwhile uses the [SS58 address format](https://docs.substrate.io/learn/accounts-addresses-keys/#address-encoding-and-chain-specific-addresses).
The Avail Snap makes it possible for you to conveniently interact with Avail DA from within your MetaMask wallet.
### How does the Avail Snap work?
[MetaMask Snaps](https://metamask.io/snaps/) is an open source solution designed to extend MetaMask's functionality.
The Avail Snap derives an SS58 address using your MetaMask credentials and allows you to sign transactions
on Avail DA through an easy-to-use UI interface.
### What if I switch to a new system?
The Avail Snap generates an address for you based on the secret recovery phrase in your MetaMask wallet.
Thus, if you transfer the same wallet to a new system and install the Avail Snap again, you will derive the same
address.
### Are my keys safe with the Avail Snap?
Please note that the Avail Snap does not store your private keys.
### Has the Avail Snap been audited?
Yes, the Avail Snap has been audited by [SayFer](https://sayfer.io/).
### How do I reach out to the Avail team if I have any questions related to the Avail Snap?
We are always happy to help out our users. You can reach out to us on [Discord](https://discord.gg/AvailProject).
### Bridging
- [**Bridge b/w Avail & Ethereum**](/docs/da/user-guides/bridge-avail/avail-ethereum)
- [**Bridge b/w Avail & Base**](/docs/da/user-guides/bridge-avail/avail-base)
- [**Bridge b/w Ethereum & Base**](/docs/da/user-guides/bridge-avail/ethereum-base)
### Using the Explorer
> **Note**
>
> The Avail network has two main explorers that can be used to browse the network:
>
> 1. [Avail Apps explorer](https://explorer.avail.so/): A dev-focussed explorer with powerful tools to work with the network.
> 2. [Subscan explorer](https://avail-turing.subscan.io/): A simpler, and recommended way to explore the network for most users.
>
> This tutorial will focus on helping advanced users and devs get started with the Avail Apps Explorer.
## Switch networks
#### AvailApps Explorer
> **Note**
>
> The Avail Apps explorer currently supports [Avail mainnet](https://mainnet.explorer.availproject.org/) and [Avail Turing testnet](https://turing.explorer.availproject.org/).
To switch networks:
1. Click on the `Network name` on the top-left.
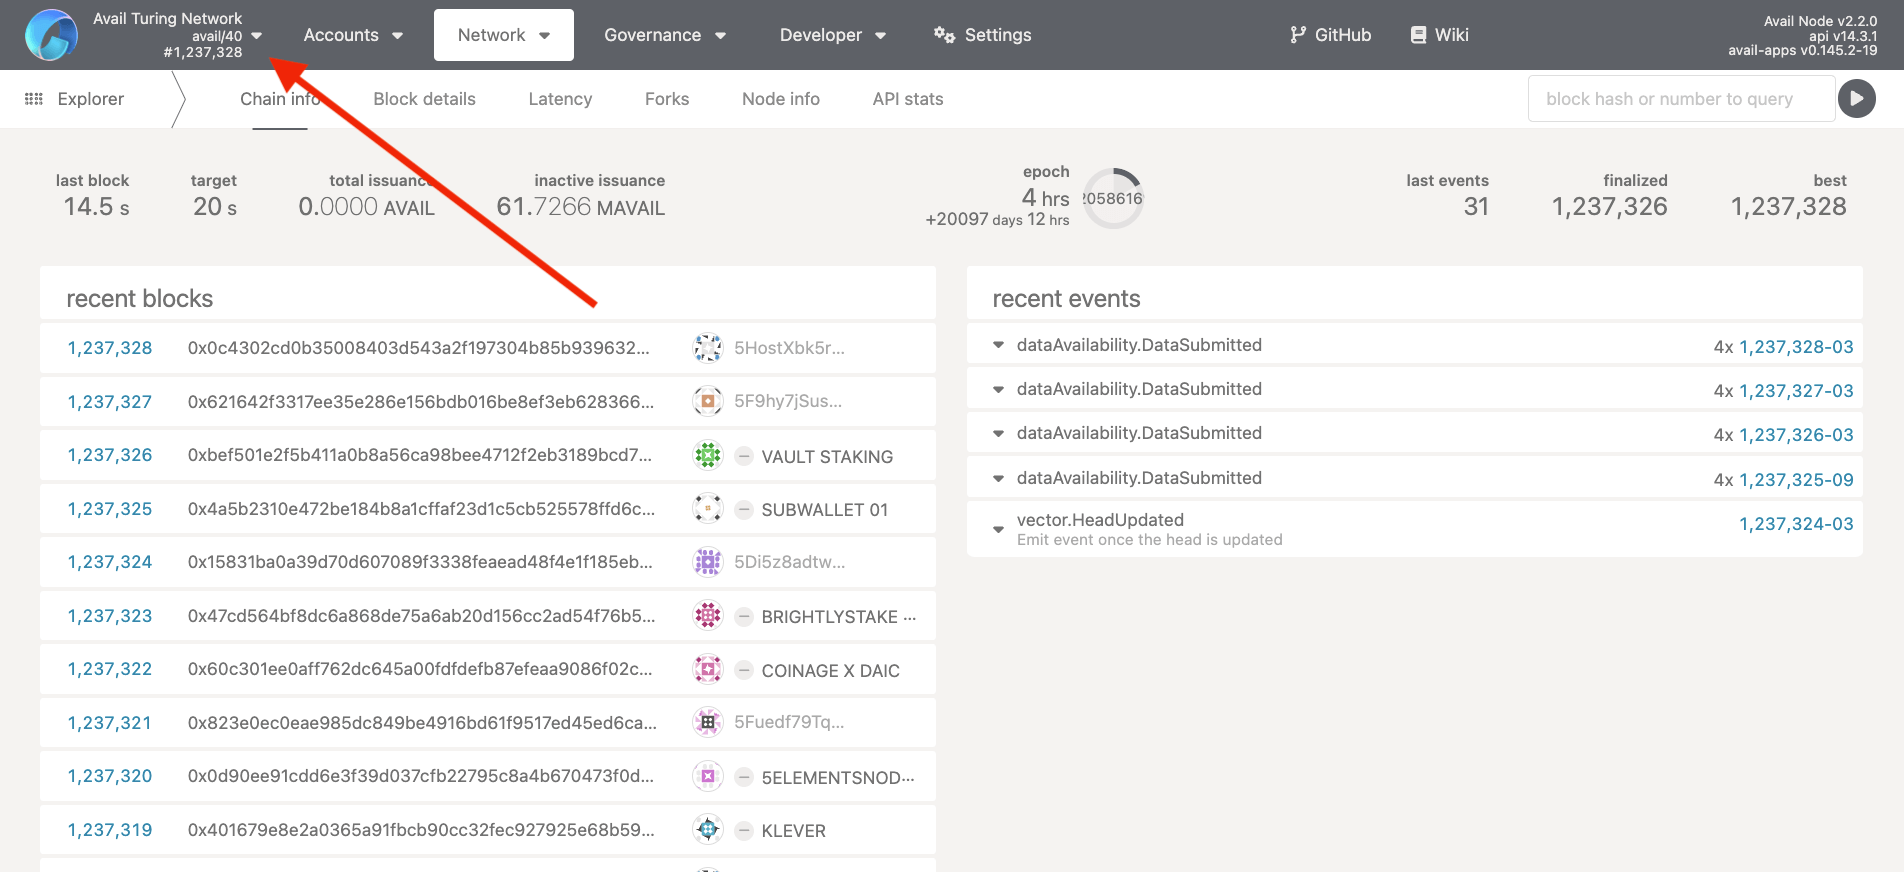
2. Depending on the network you are on, click on `live networks -> Avail DA network`, or `test network -> Avail Turing testnet`.
3. Click on `Switch`.
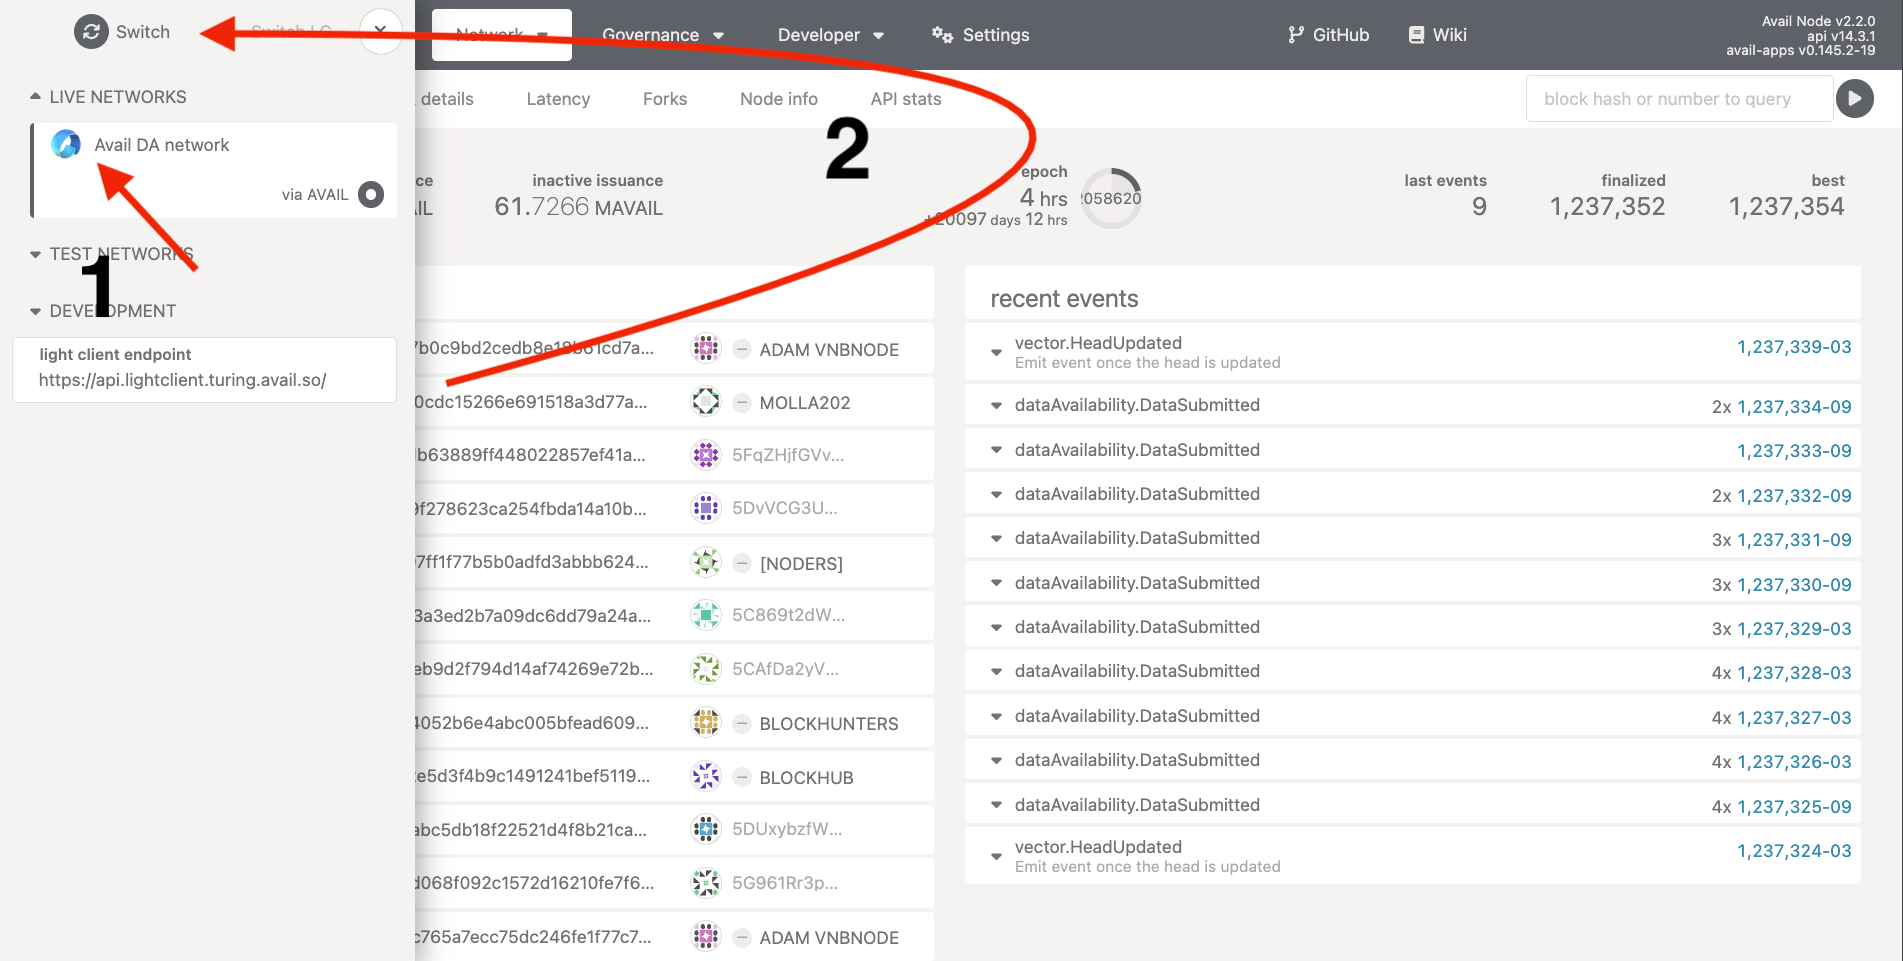
#### Subscan Explorer
> **Note**
>
> The Subscan explorer currently supports [Avail mainnet](https://avail.subscan.io/) and [Avail Turing testnet](https://avail-turing.subscan.io/).
To switch networks:
1. Click on the drop-down near the top-right.
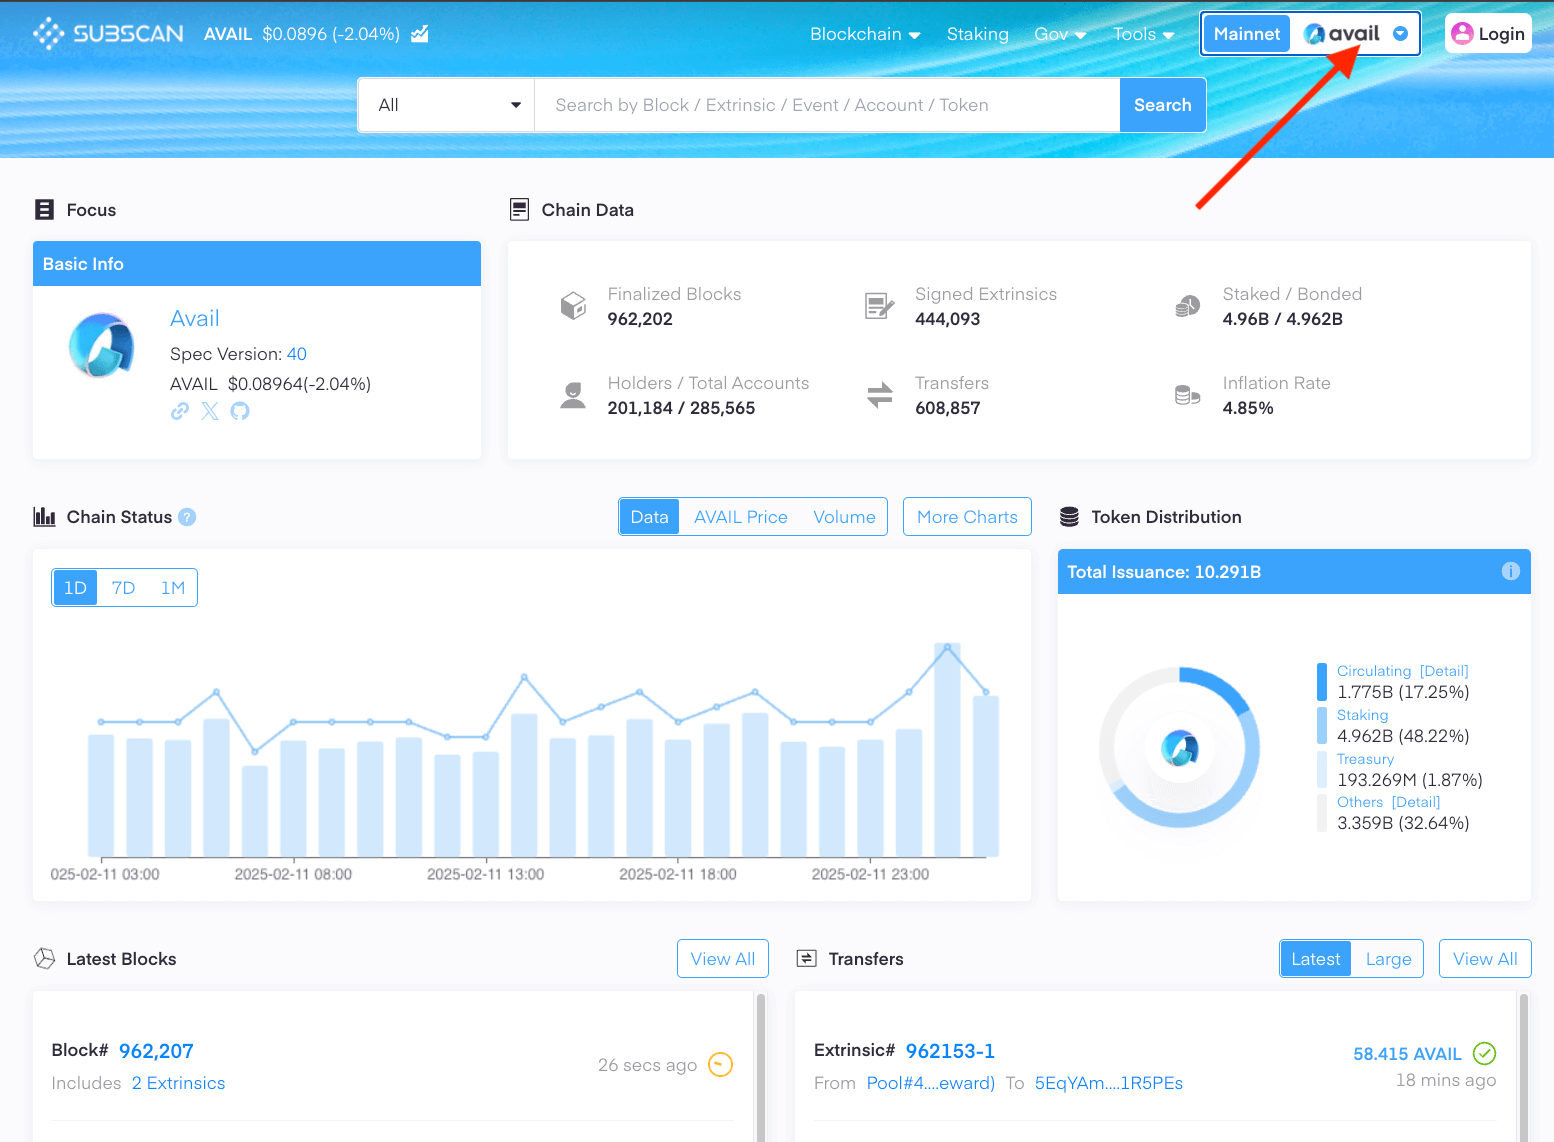
2. Click on the network you want to switch to.
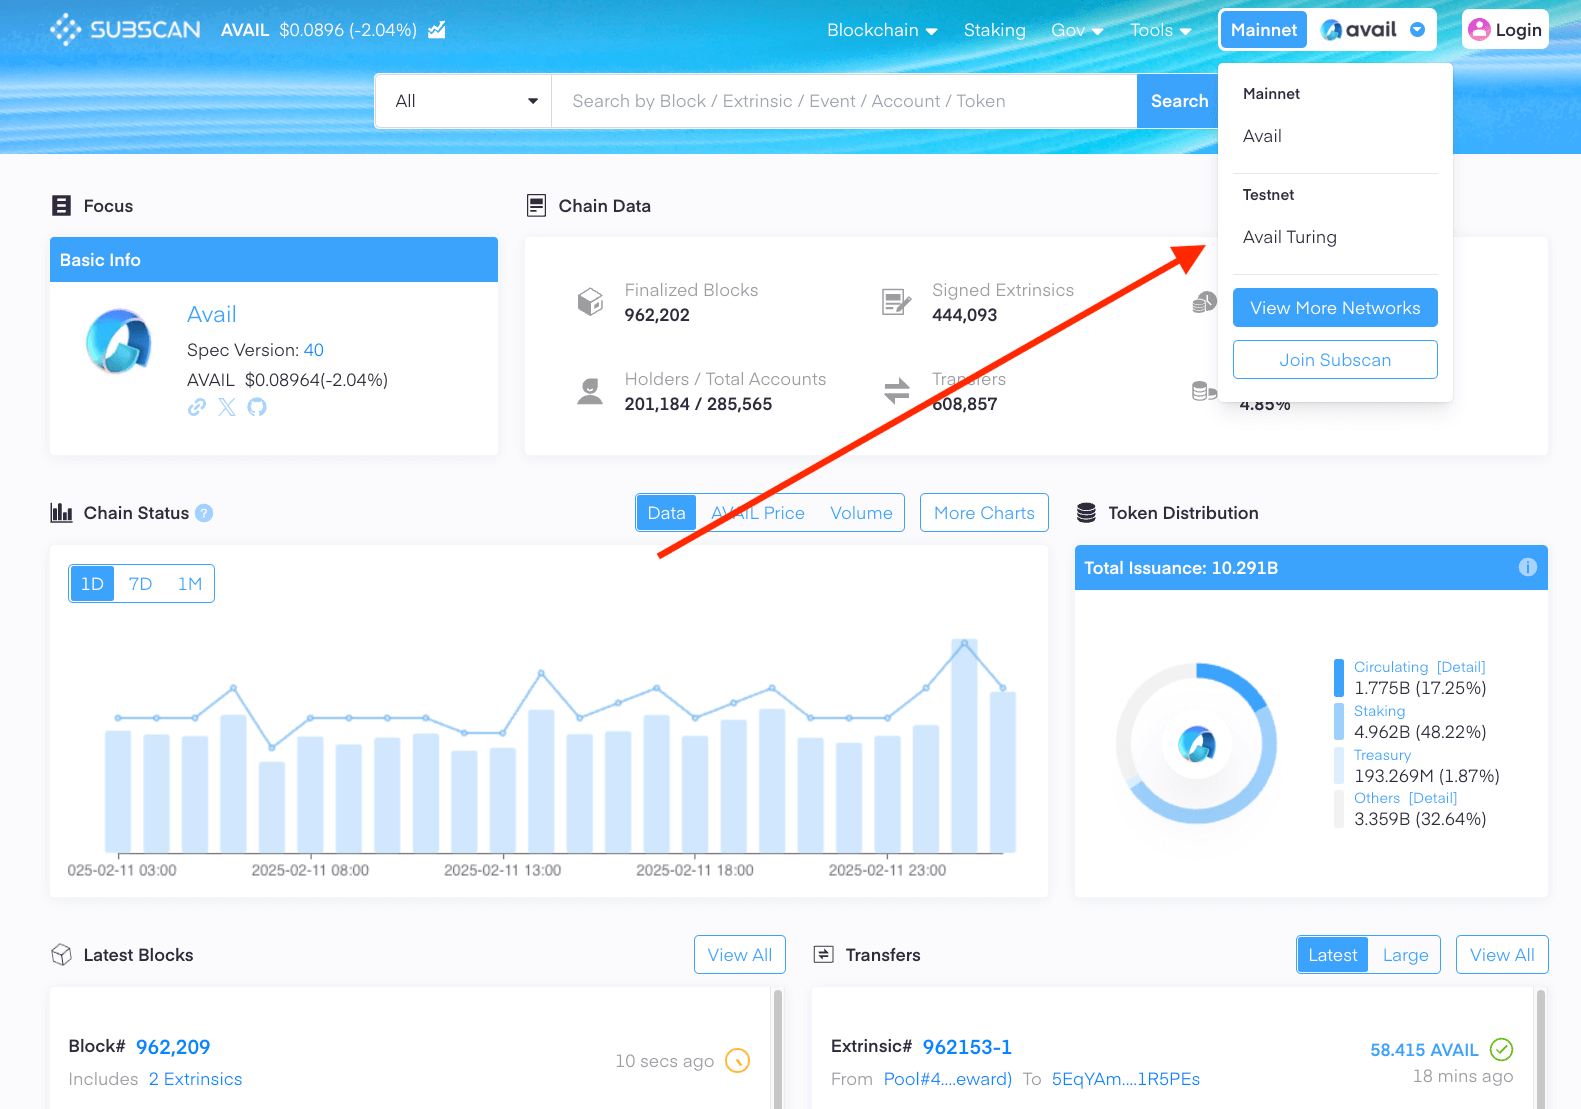
## Look up the details of a particular transaction
> **Note**
>
> 1. Due to how the network is designed, it is not possible for the `AvailApps` explorer to query a transaction's details using just it's hash directly from a node.
>
> 2. The `Subscan` explorer however, makes it possible to do so, since it queries from a dedicated indexer
> built on top of Avail to support this feature.
#### AvailApps Explorer
> **Note**
>
> **Search for a txn using it's `block number`/`block hash` *AND* it's `transaction hash`**
1. Search for the `block number` or `block hash` of the block your transaction was included in.
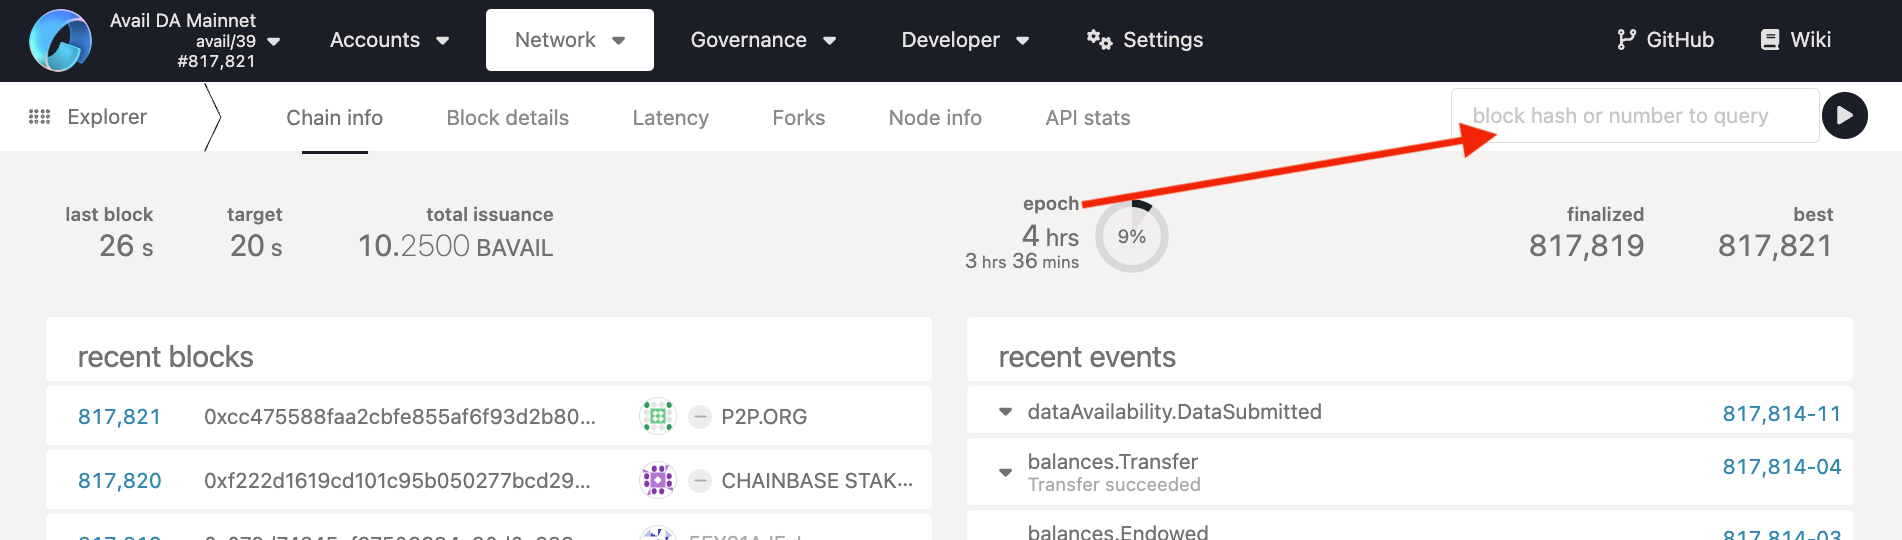
2. The explorer then fetches all transactions from that specific block. Click on the hash of the transaction you are interested in to get a detailed view.
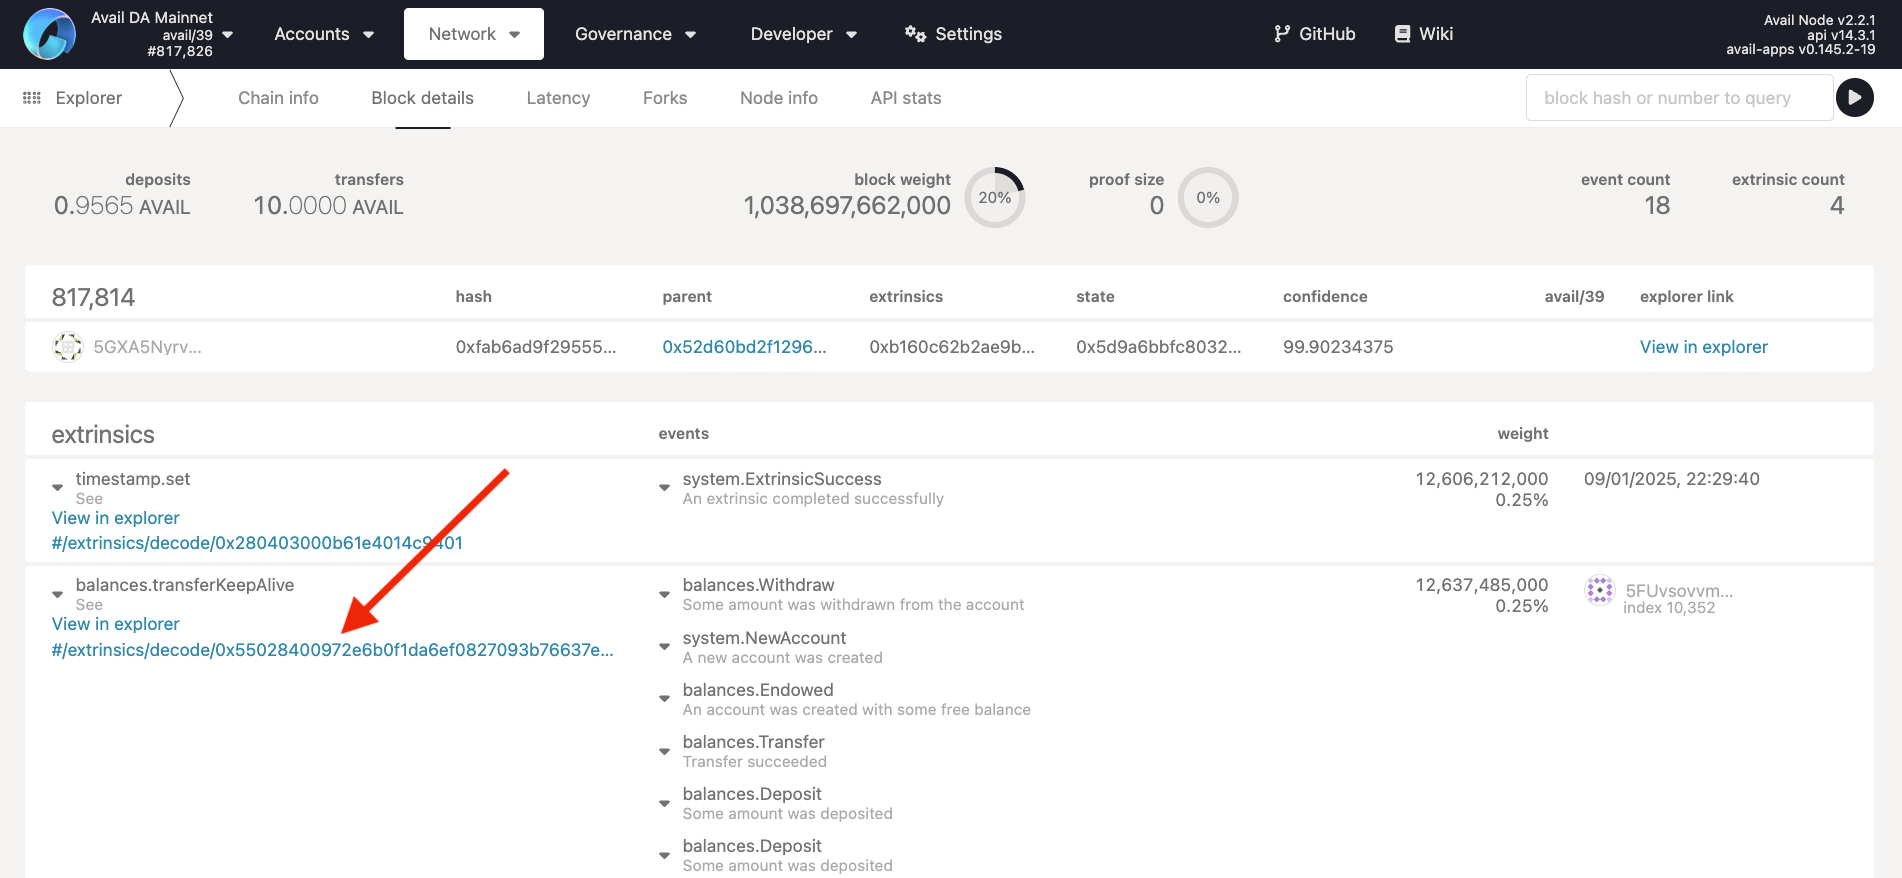
#### Subscan Explorer
> **Note**
>
> **Search for a txn using just it's `transaction hash`**
1. Just paste a`transaction hash` and click the `search` button.
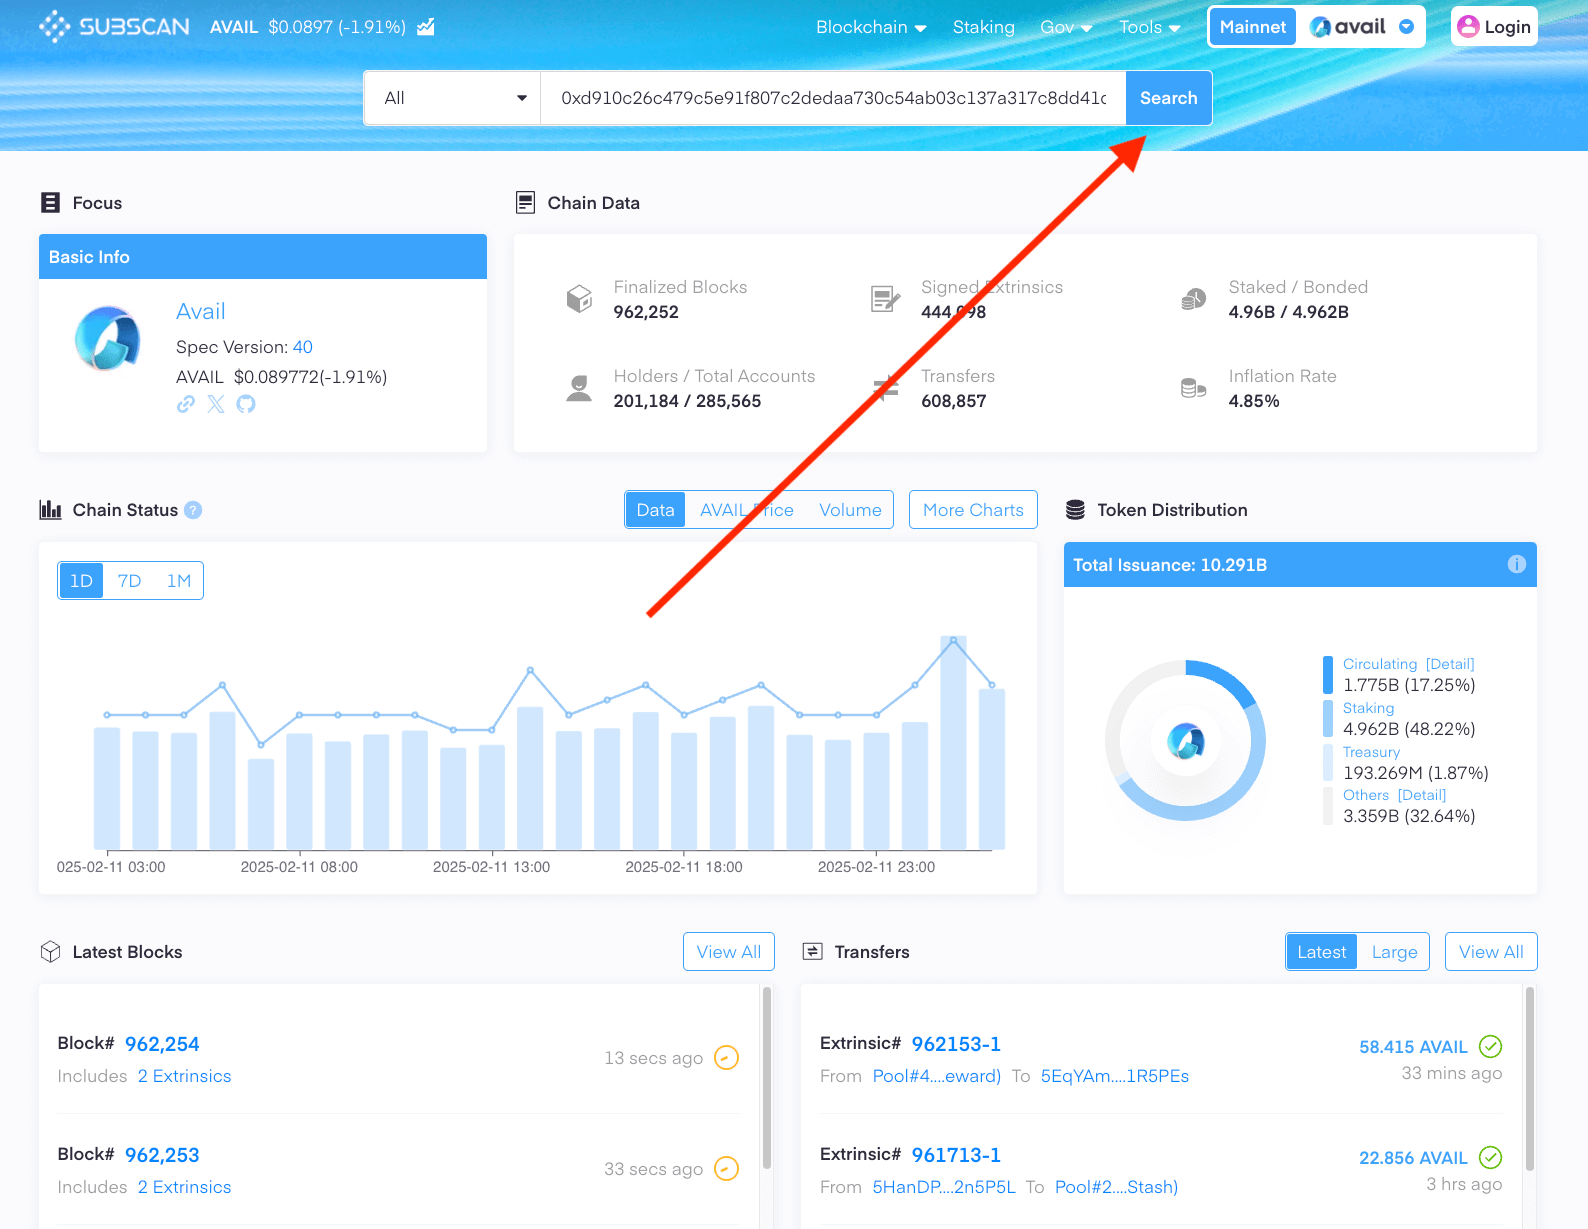
2. The explorer then fetches the transaction details and displays them.
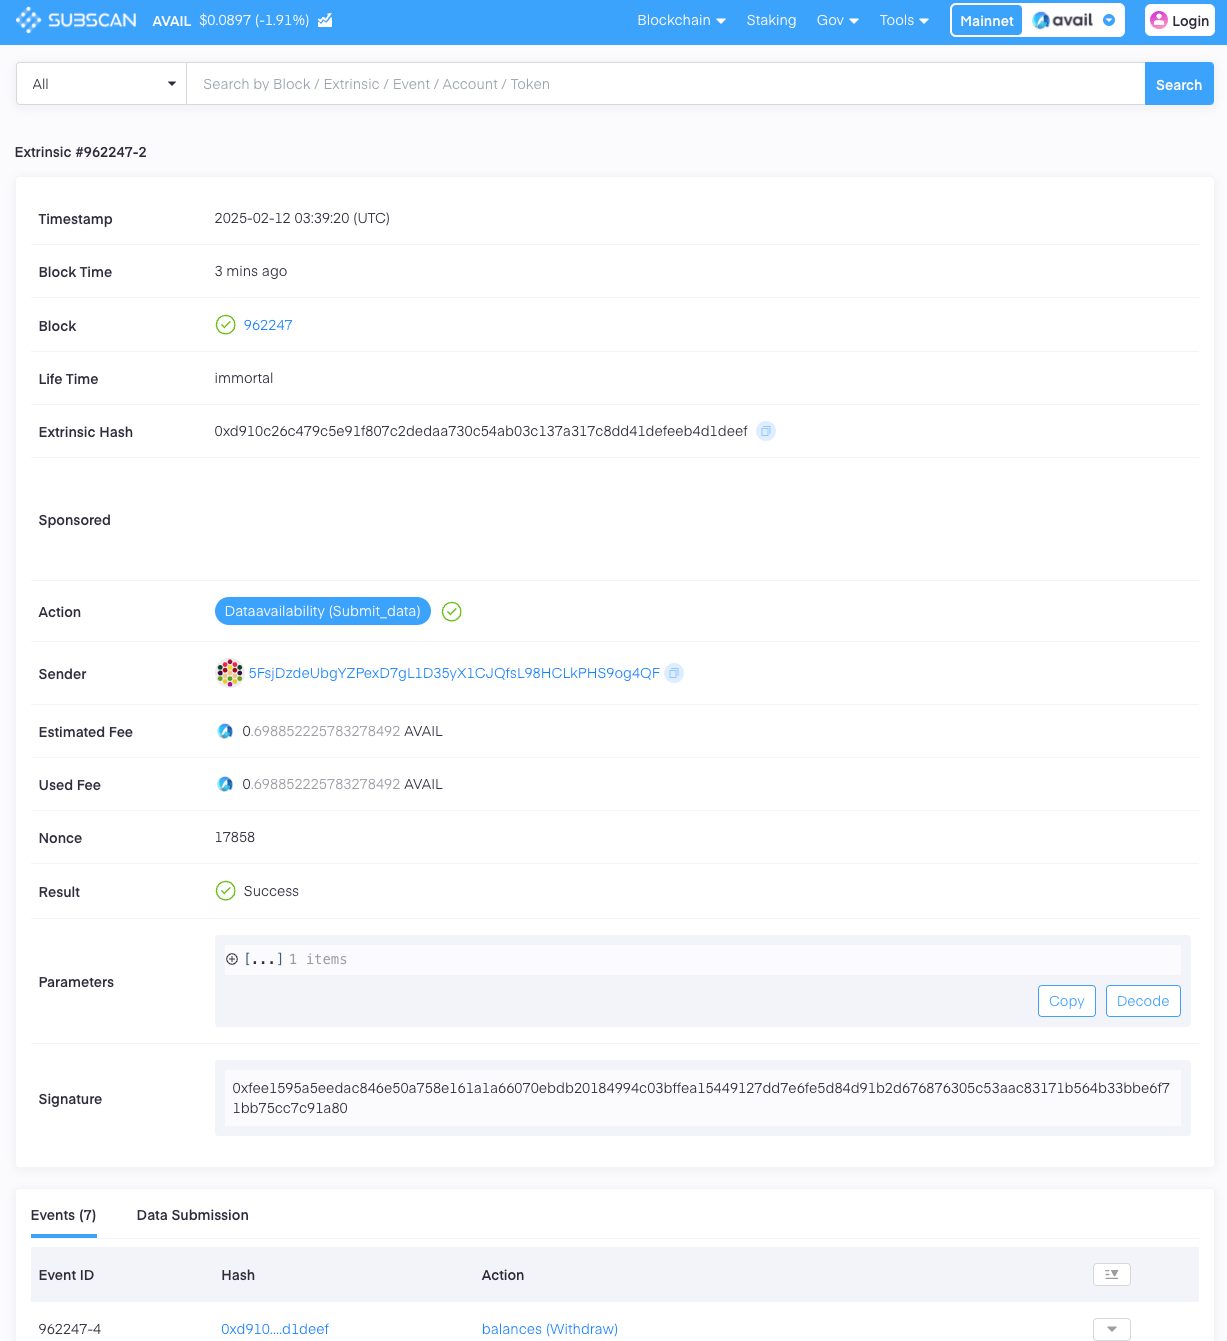
## Create accounts within the explorer
#### AvailApps Explorer
The `AvailApps` explorer can be used to add or import Avail accounts into the explorer.
To go to the page, click on the `Accounts` tab on the top-left, or click [this link](https://explorer.availproject.org/#/accounts).
1. The `accounts` section shows any accounts created straight from the explorer. You don't need any wallet extensions to create or use them.
2. The `extension` section shows any accounts connected to the explorer from wallets like `Polkadot.js`, `Subwallet`, `Talisman`, etc...
The following gif shows you how to create an account straight from the explorer:
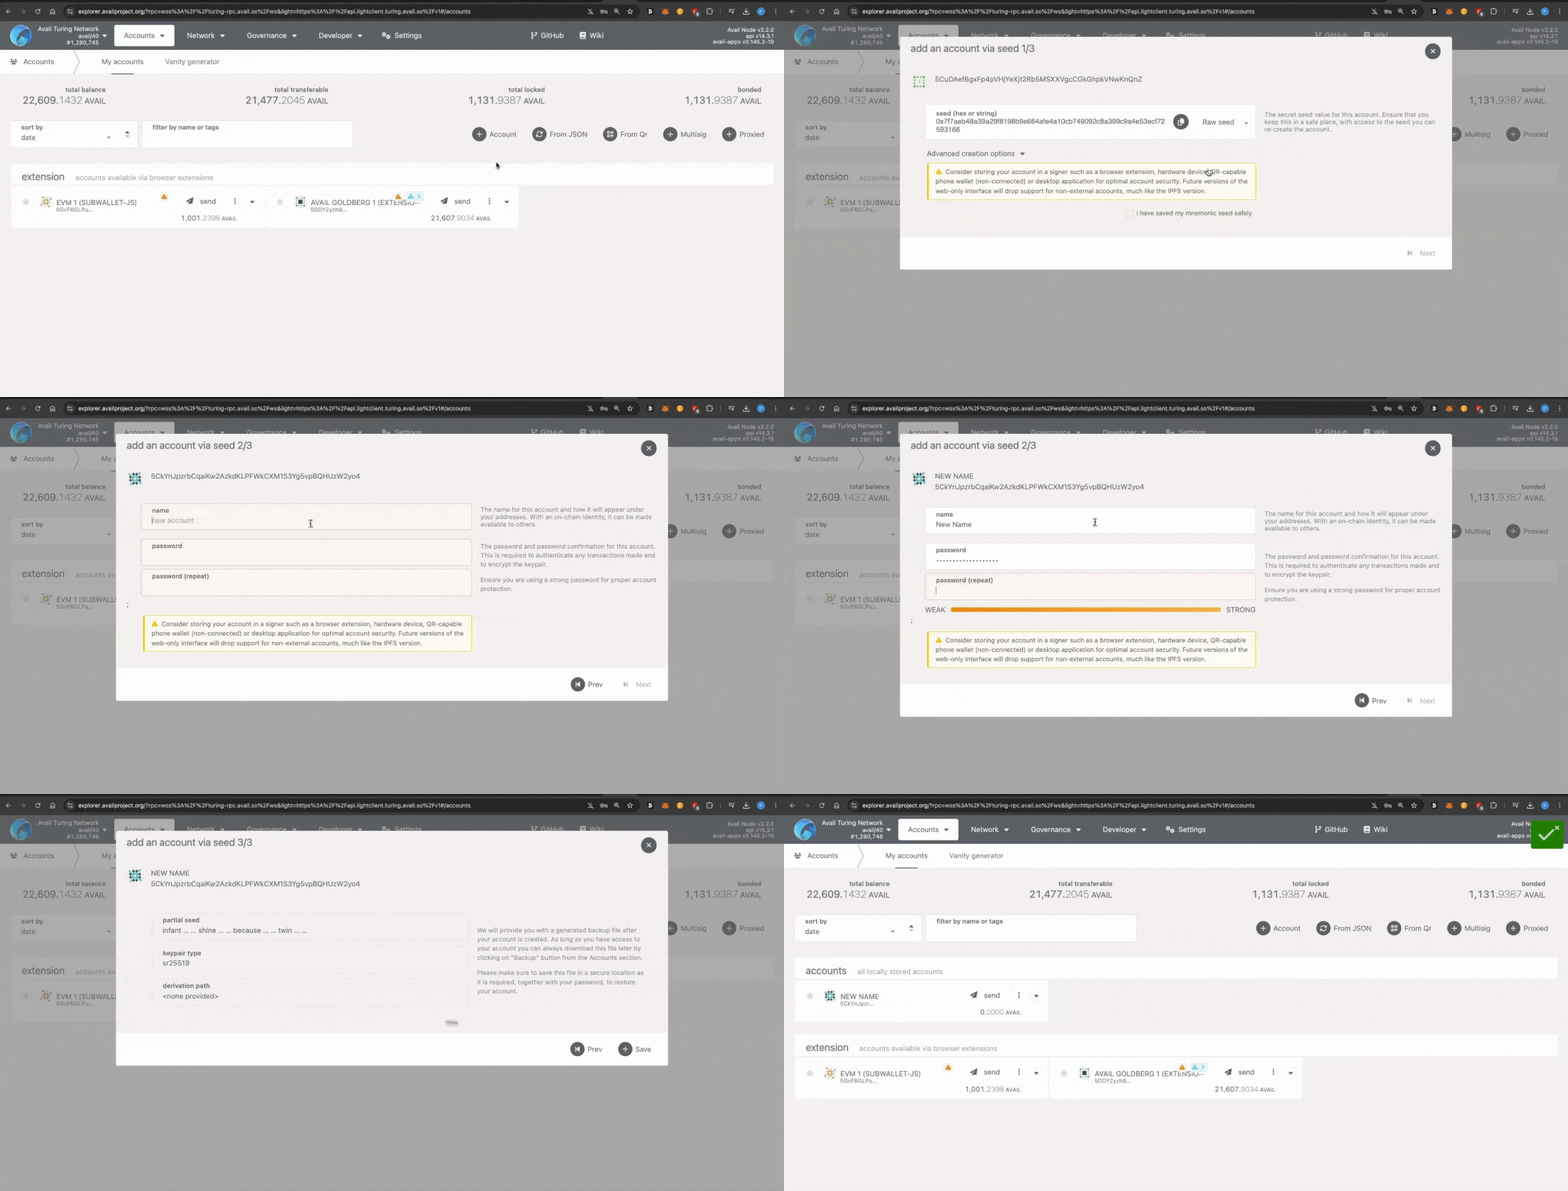
You can do a few things here:
1. Create a new account using a `mnemonic` or by clicking on the `+ Account` button.
2. Import an account via an encrypted JSON file.
3. Connect extension accounts from wallets like `Polkadot.js`, `Subwallet`, `Talisman`, etc...
4. Create a multisig account. We have covered instructions to do so [in our docs here](/docs/da/user-guides/avail-multisig).
5. Create a proxy account. We have covered instructions to do so [in our docs here](/docs/da/user-guides/proxies-on-avail).
6. The `AvailApps` explorer also allows you to use hardware wallets to safely connect cold accounts. We have covered
instructions to do so [in our docs here](/docs/da/user-guides/ledger-avail).
> Any of these accounts that you connect can be used to sign transactions on the network. Which is something we will cover in the next section.
## Using the explorers to interact with the network
#### AvailApps Explorer
Wrt interacting with the network, the `AvailApps` explorer can be used to:
1. Query data from the network by calling `Chain State` or `RPC` methods.
2. Send transactions to the network by signing and submitting `Extrinsics`.
You can find them within the `Developer` tab.
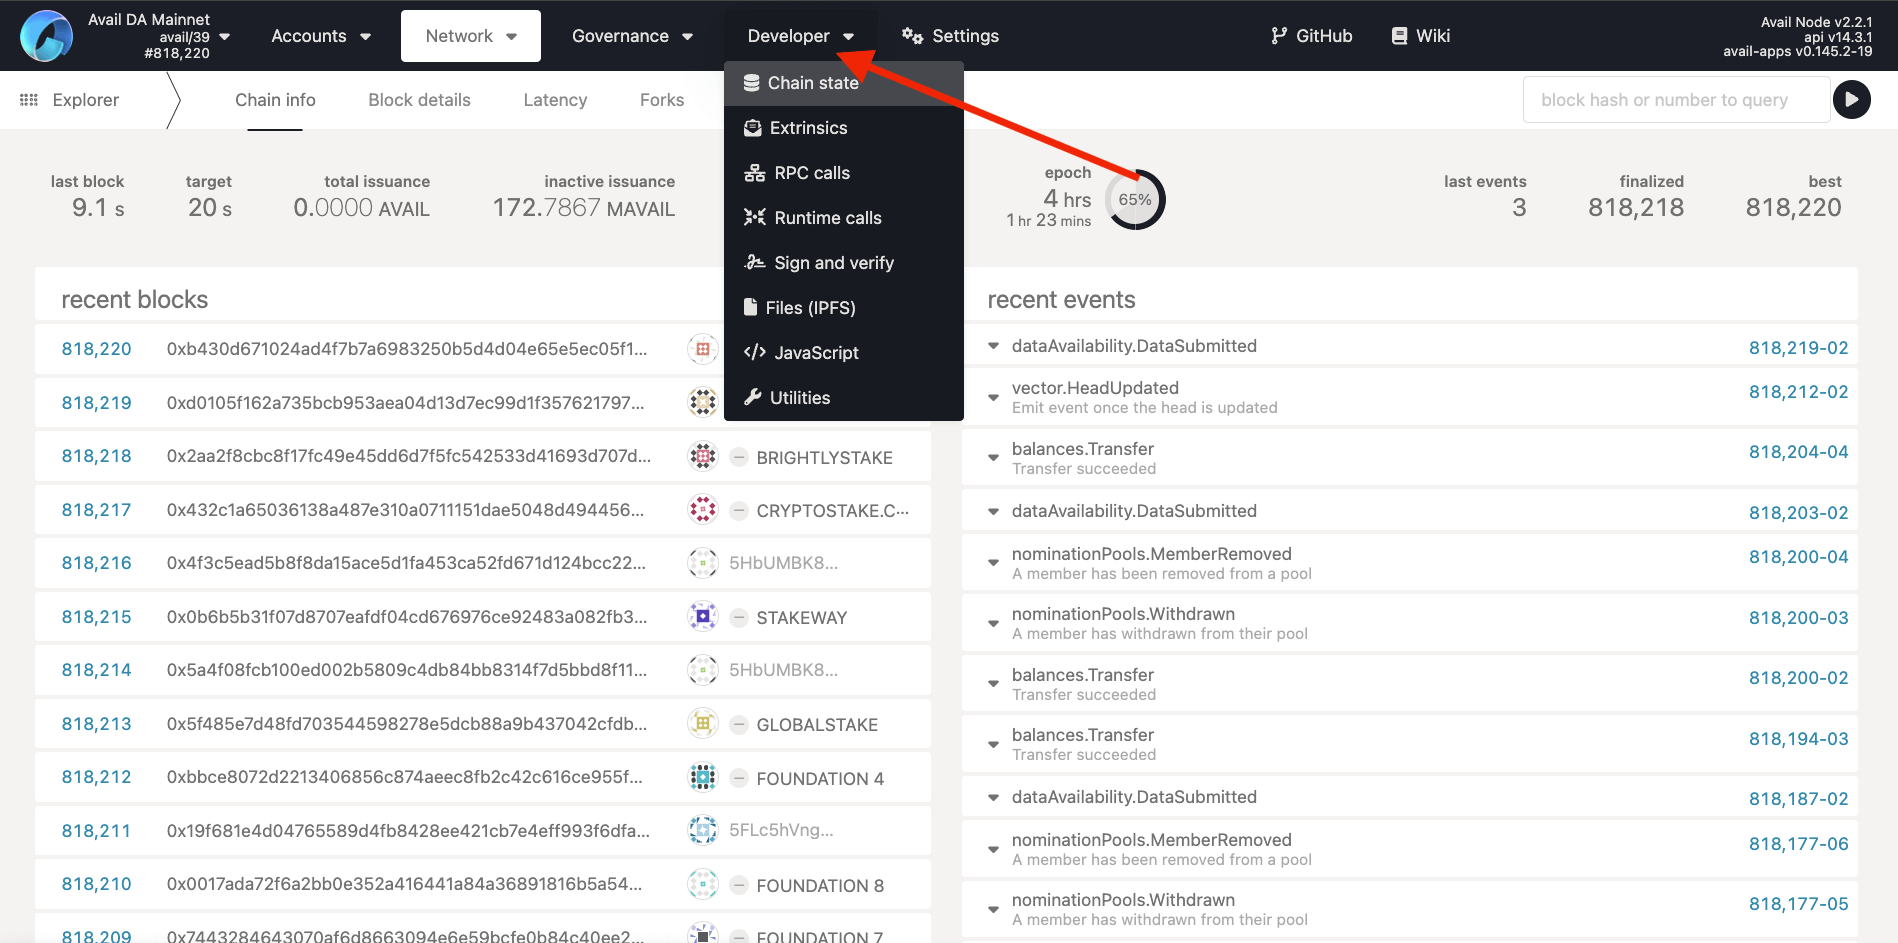
> **Note**
>
> **WHAT ARE PALLETS?**
> Avail organizes its runtime functionality into `pallets`. Each pallet is a collection of calls and extrinsics of a specific functionality.
> For example, the `data_availability` pallet contains all the calls and extrinsics related to querying and submitting data to the network, and so on.
> Some methods might be grouped into seemingly unrelated pallets for technical reasons, but this largely holds true.
>
> To look for a particular method within the `AvailApps` explorer, you need to know the pallet it belongs to.
### How to use the explorer to query the network
Let us learn how to query the network using the `AvailApps` explorer by querying the balance of an account.
1. Either go to the `Chain State` methods menu from within the `Developer` tab or click [on this link](https://explorer.avail.so/#/chainstate).
2. The balance of an account can be queried by calling the `account(AccountId32)` method from within the `system` pallet. Select the `system`
pallet from the dropdown on the left, and the `account(AccountId32)` method from the dropdown on the right.
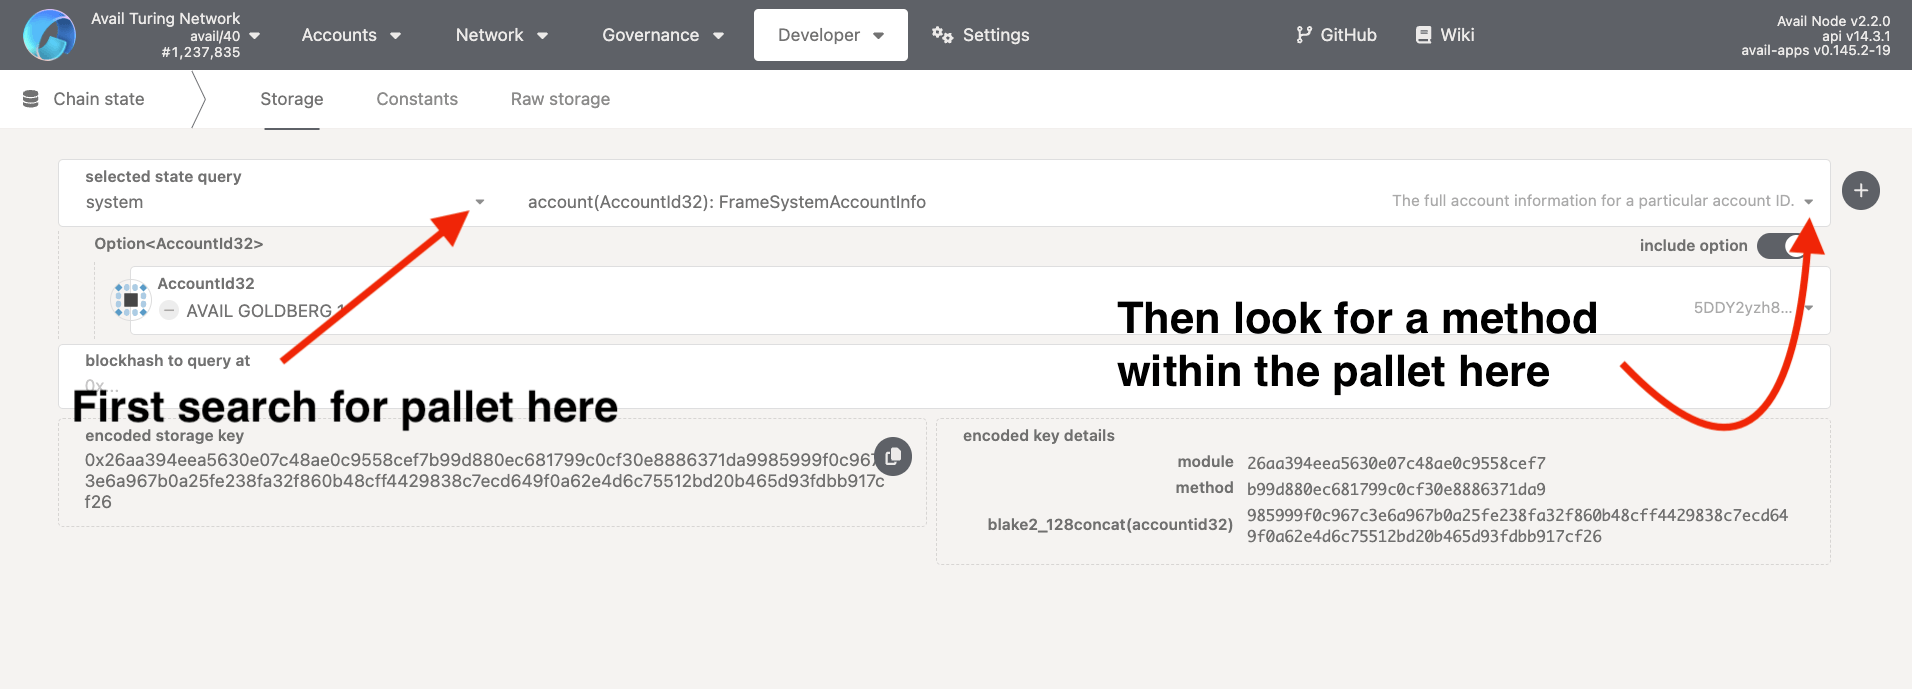
> **Note**
>
> **THE `include option` TOGGLE**
> This toggle allows you to enter params for a method when it is toggled on.
> You can also call methods without passing a param by keeping it off. \
> But `system_account` method won't return anything without an `AccountId32` param being passed to it, so we will keep it on. \
> **Hot tip:** Try calling the `dataAvailability_appKeys` method with the `include option` toggle off to see what happens.
3. Either paste the address of an account in the `AccountId32` field or select an explorer-connected account from the dropdown.
4. Leave the `blockhash` field empty (This will query the latest balance of the account), and click on the `+` button near the top-right.
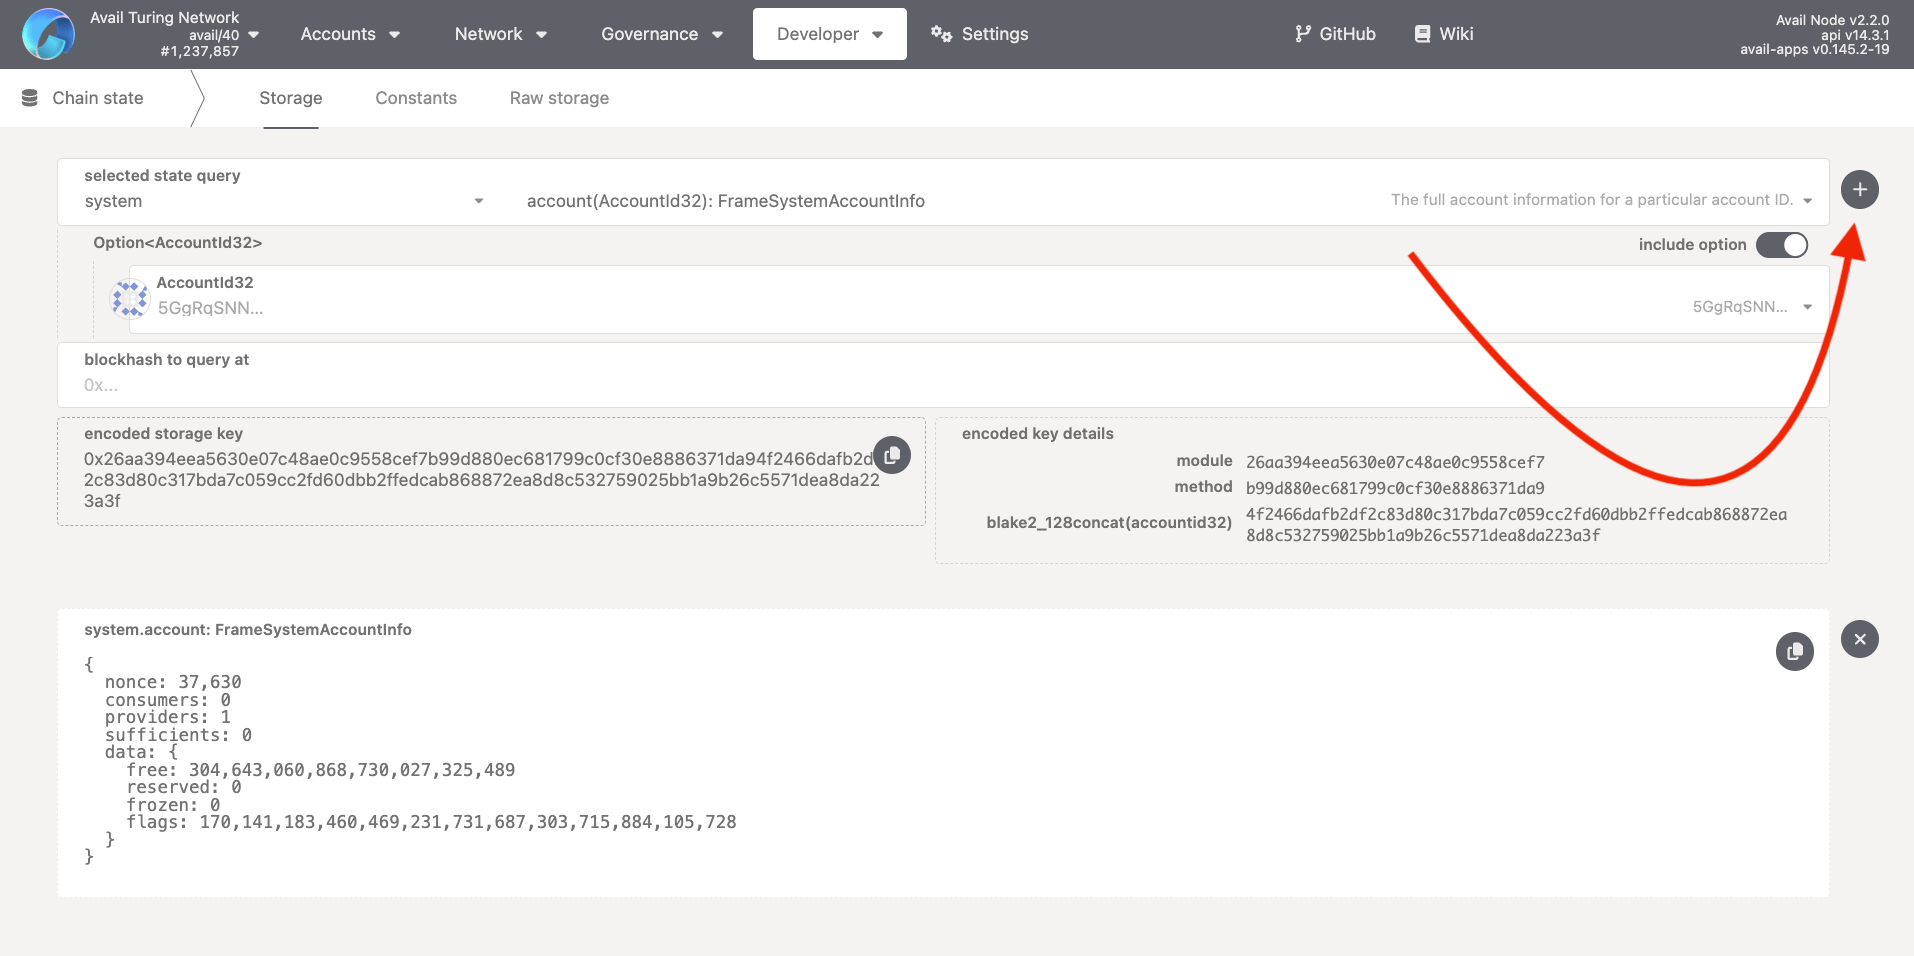
5. And that's it. You just used the `AvailApps` explorer to query the balance of an account on the Avail network. You can query other methods in a similar way.
### How to use the explorer to send transactions to the network
You can also use the `AvailApps` explorer to sign custom transactions/extrinsics and submit them to the network.
We have covered different examples of doing so in our docs. Here is one of them:
[Submit data to a particular `AppID`](#how-to-submit-data-to-my-appid).
### Bonus: How to query chain constants using the explorer
1. The `AvailApps` explorer allows you to query the current values of all of it's runtime constants by going to the constants tab within
`Developer -> Chain State`.
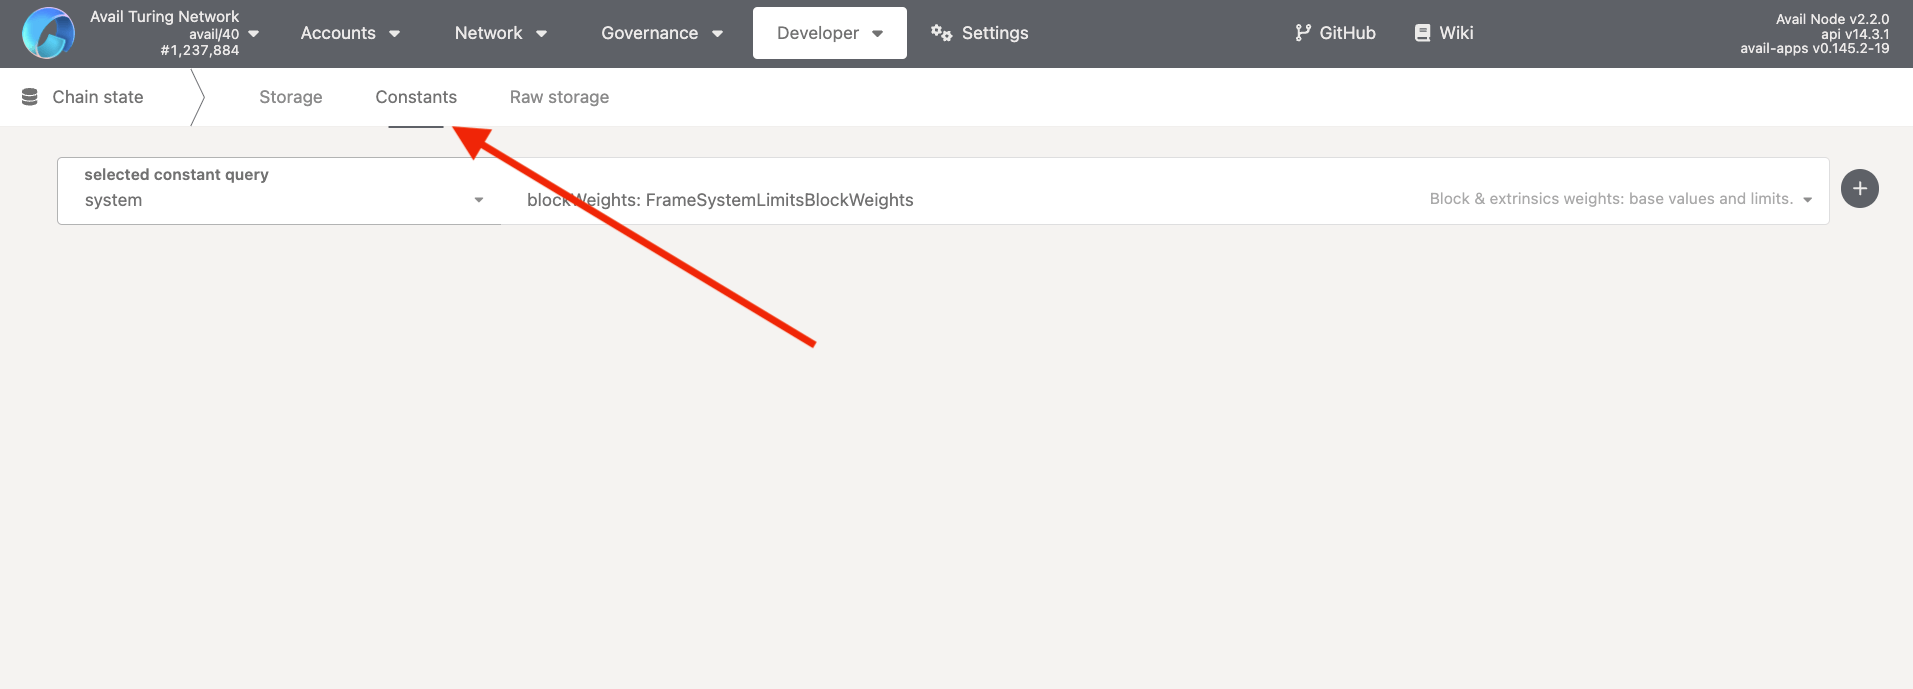
2. For example, to query the current value of the `existentialDeposit` of an account on Avail, which is the minimum amount required by an
account to exist on the network, you can call the `balances_existentialDeposit` constant.
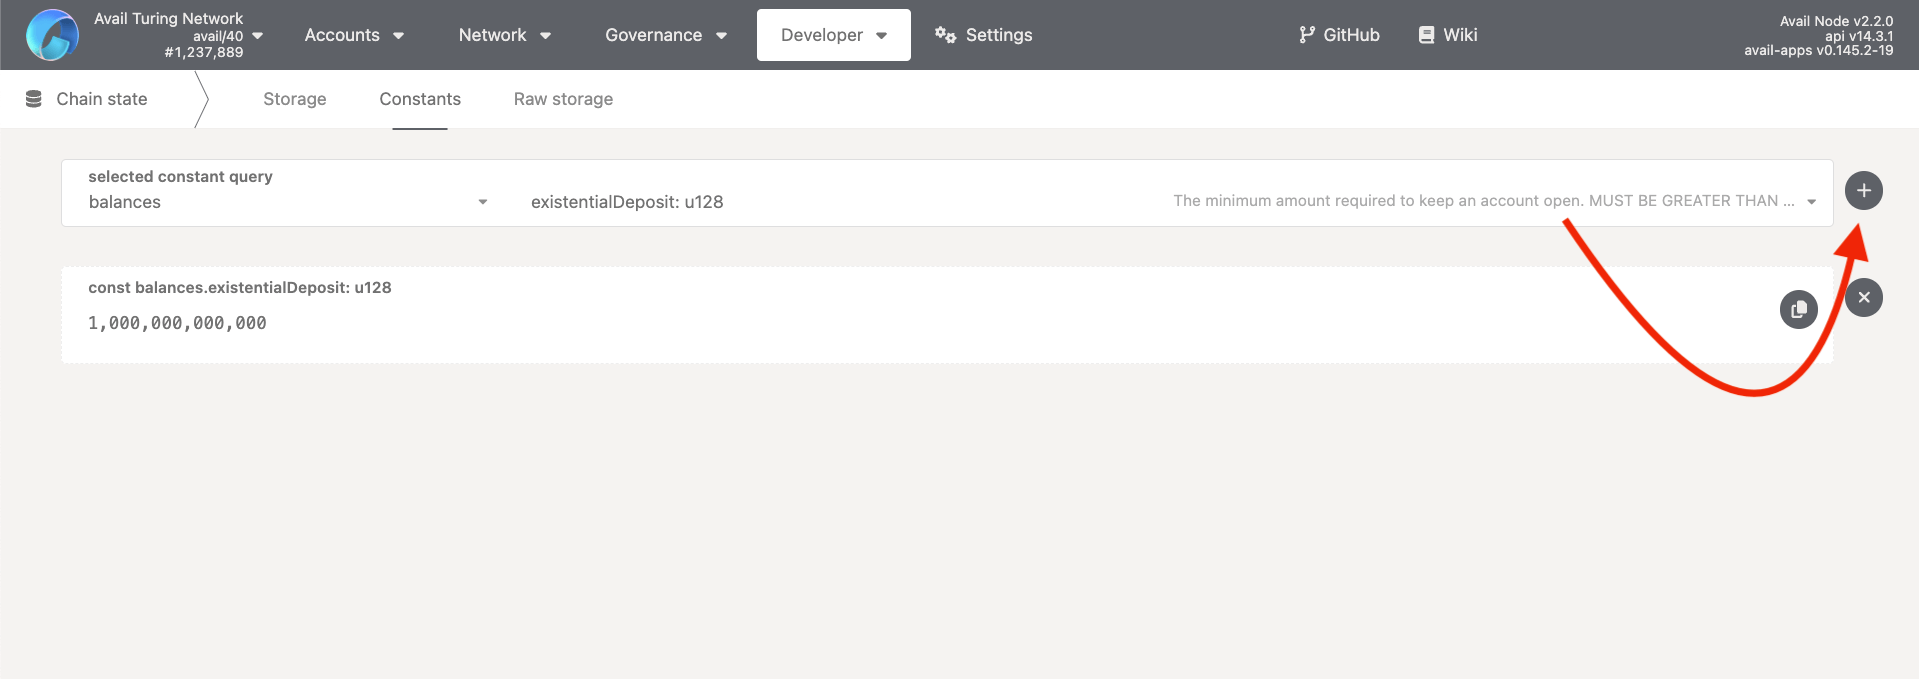
> P.S: The balance displayed is in `attoAVAIL`. 1 `attoAVAIL` = $10^{-18}$ `AVAIL`.
3. You can look up any other constant in a similar way.
#### Subscan Explorer
The `Subscan` explorer leverages it's dedicated indexer to enable users to browse the network in some neat ways.
1. You can browse network activity more conveniently by using different filters.
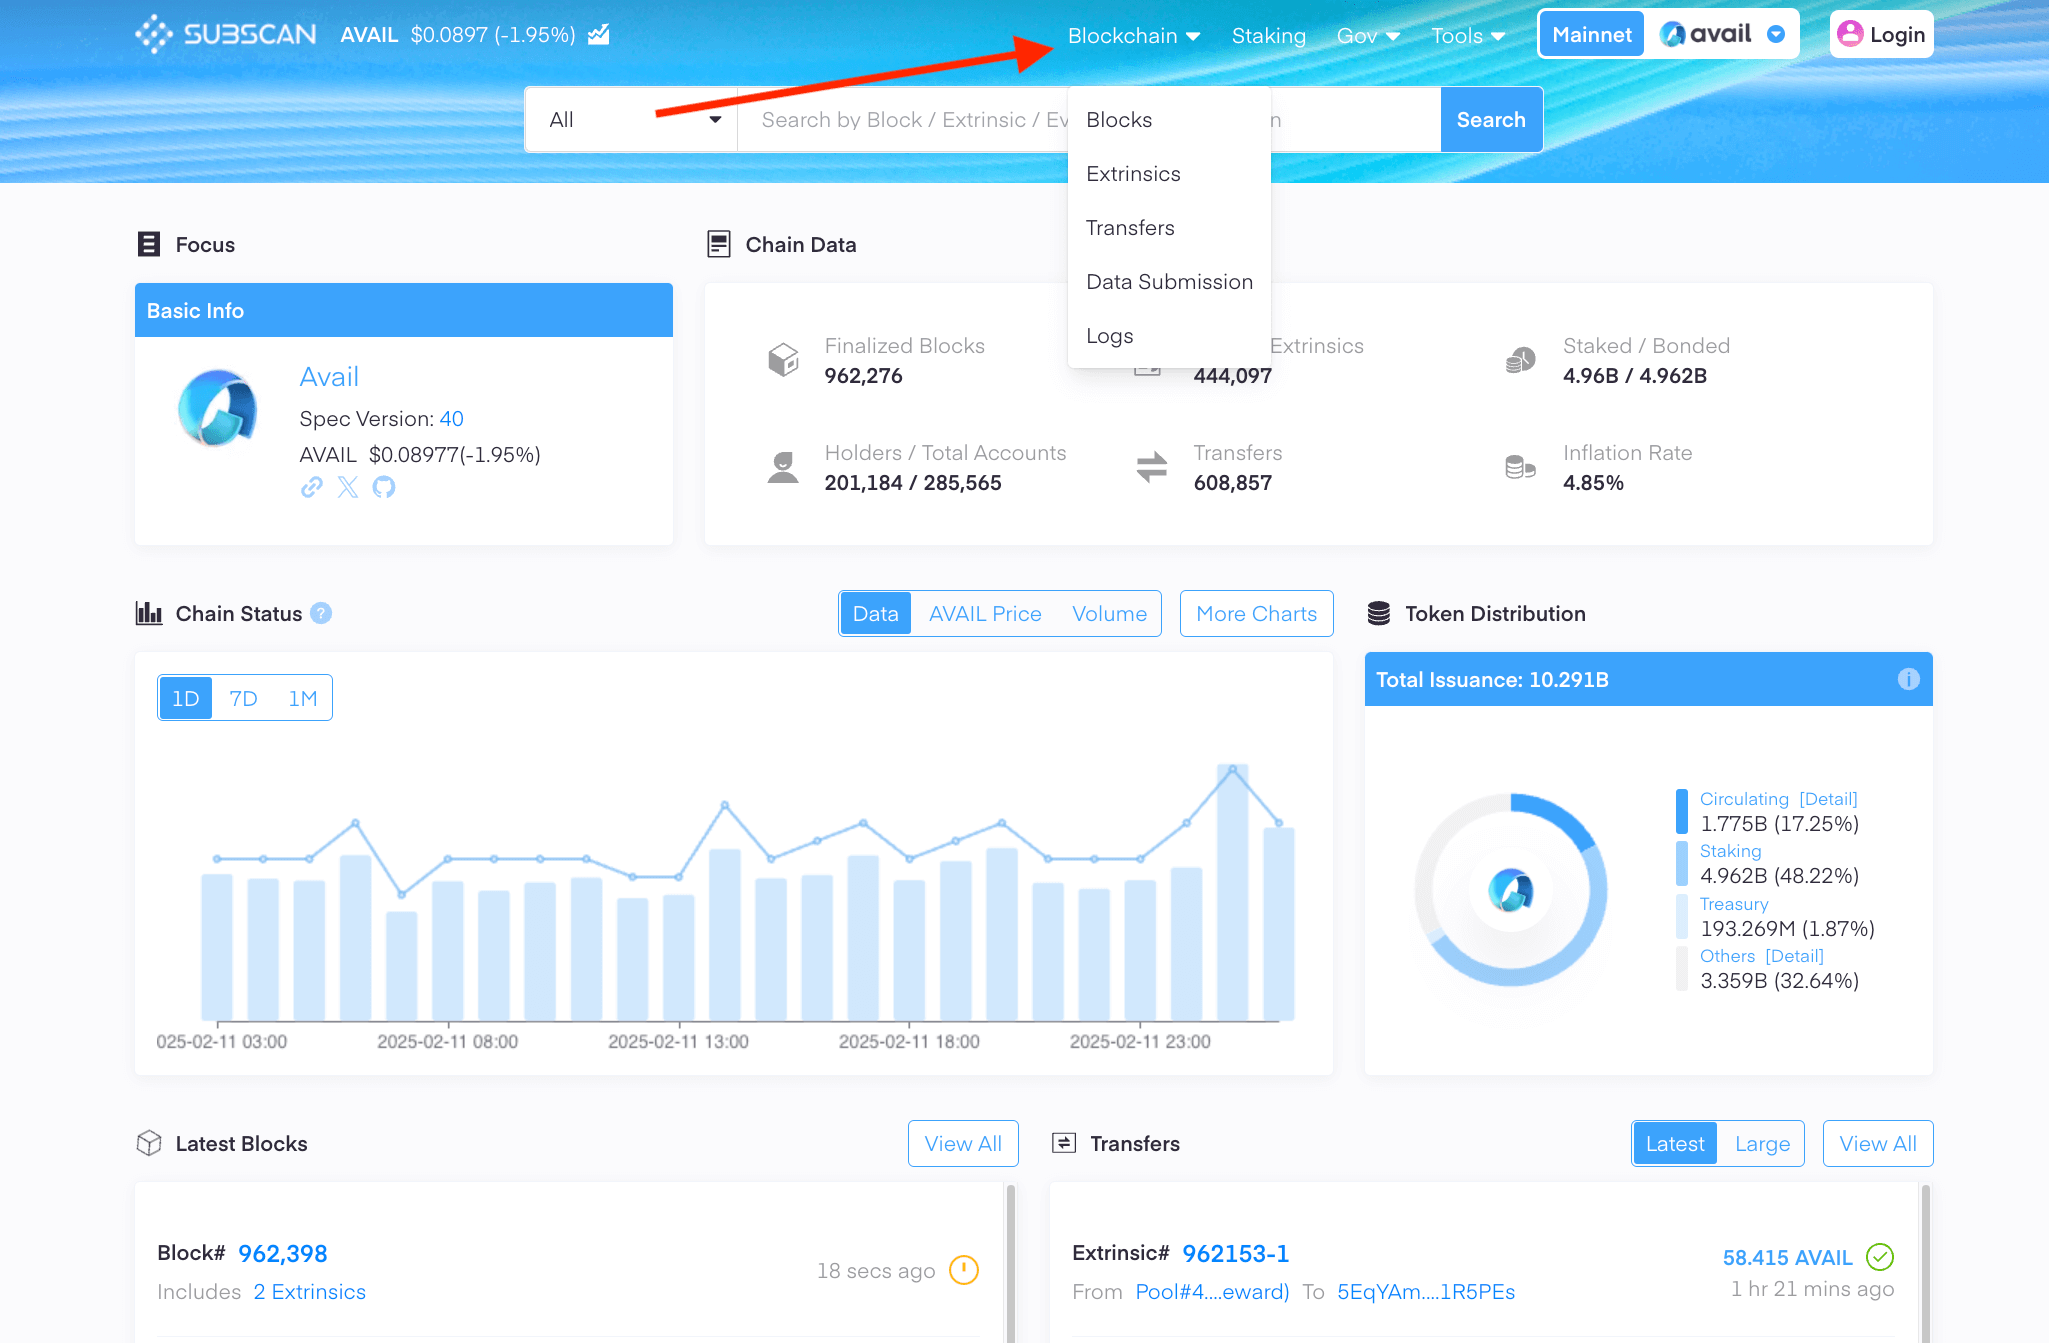
> **Note**
>
> * `Blocks`: Browse blocks by number.
> * `Extrinsics`: Browse all extrinsics submitted to the network.
> * `Transfers`: Browse all extrinsics that involve `AVAIL` token transfers.
> * `Data Submission`: Browse all data submissions to the network.
2. The `Staking` section allows you to browse the staking activity on the network.
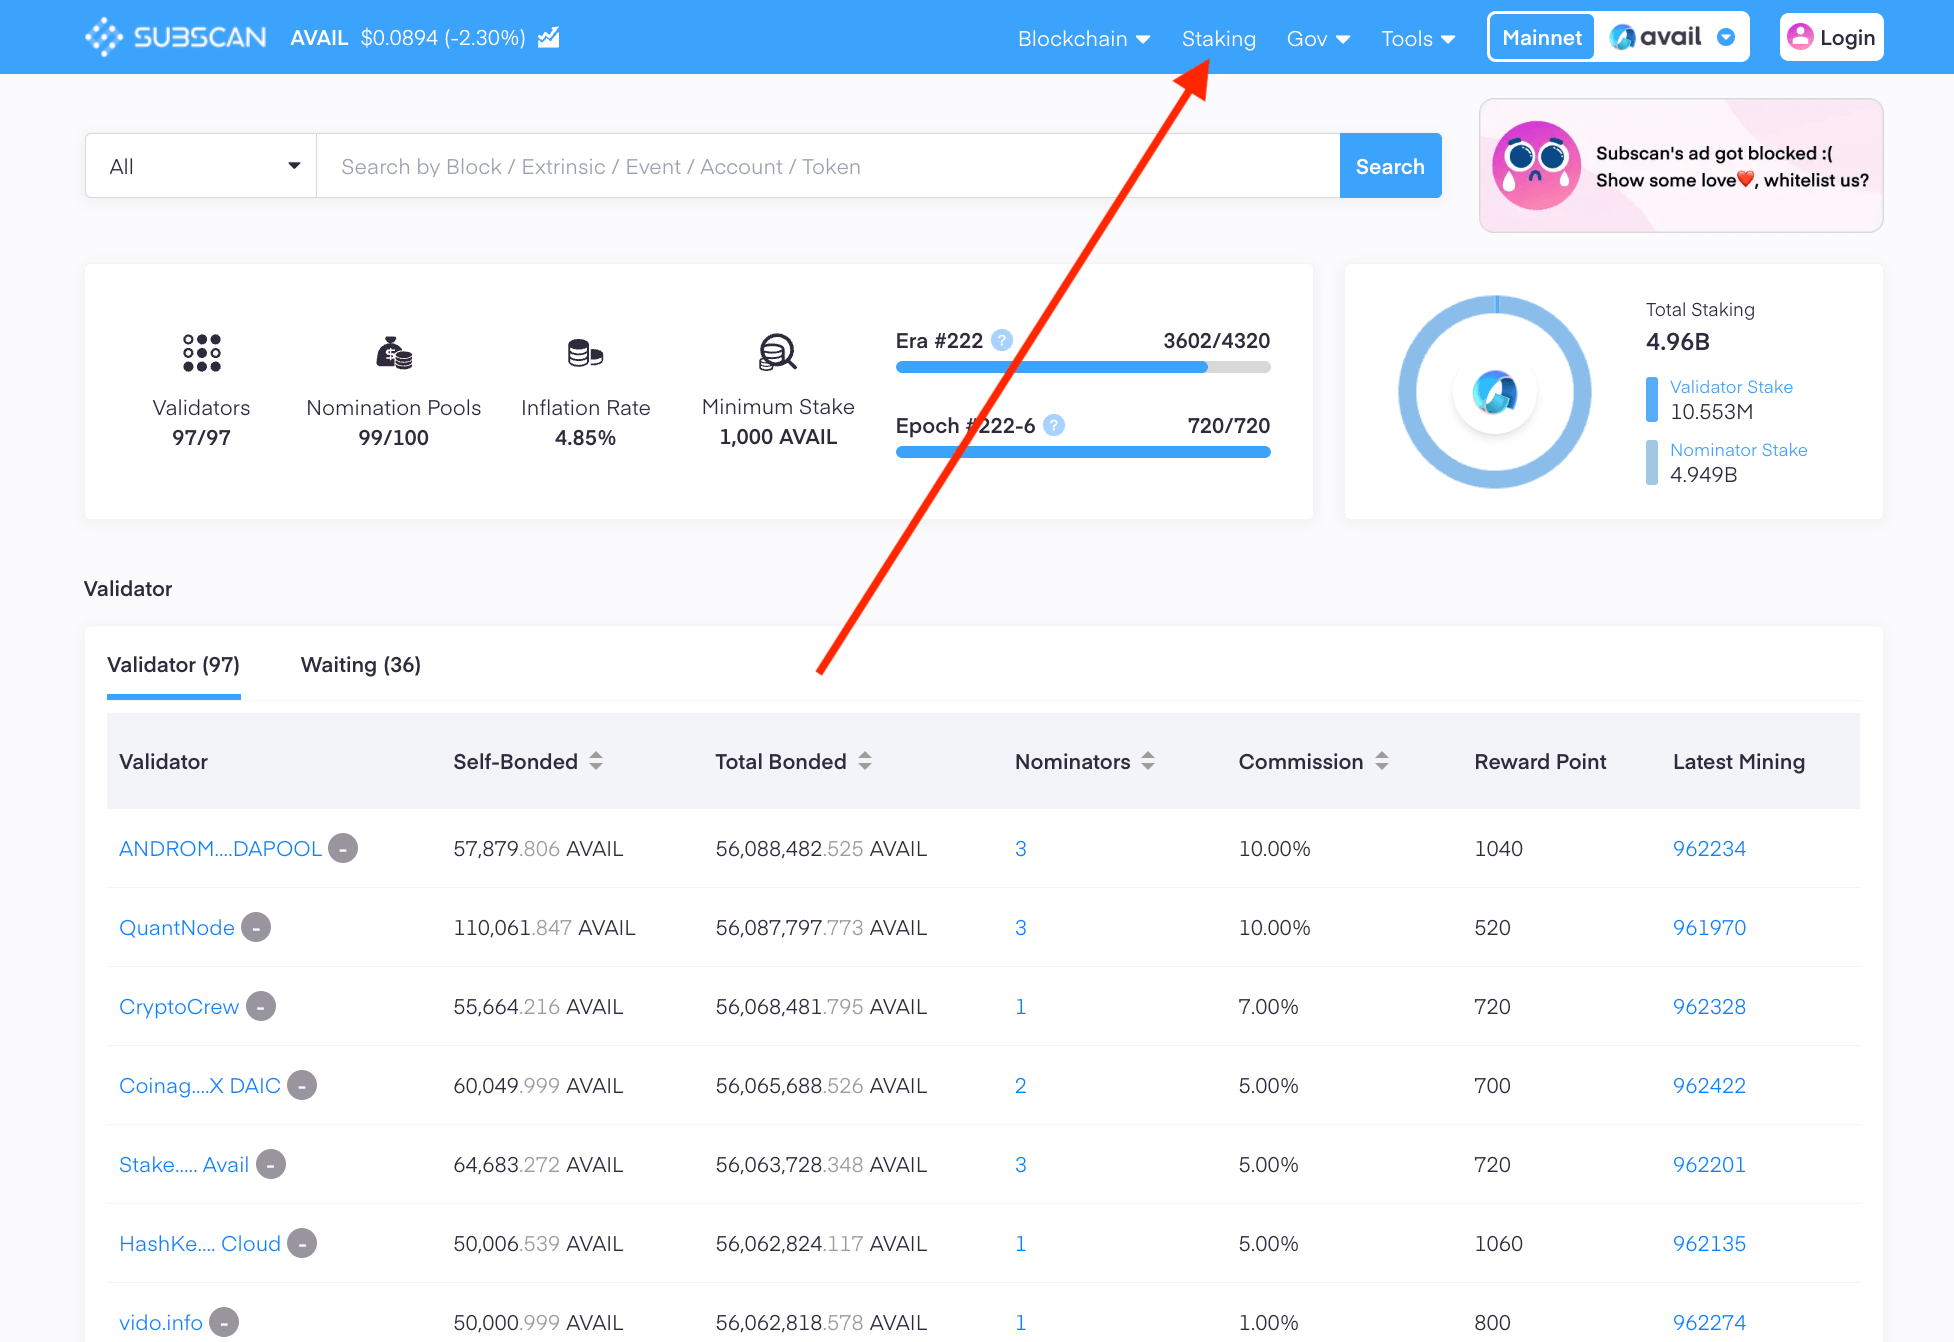
3. The `Governance` section allows you to browse all governance-related activity on the network, including all past proposals.
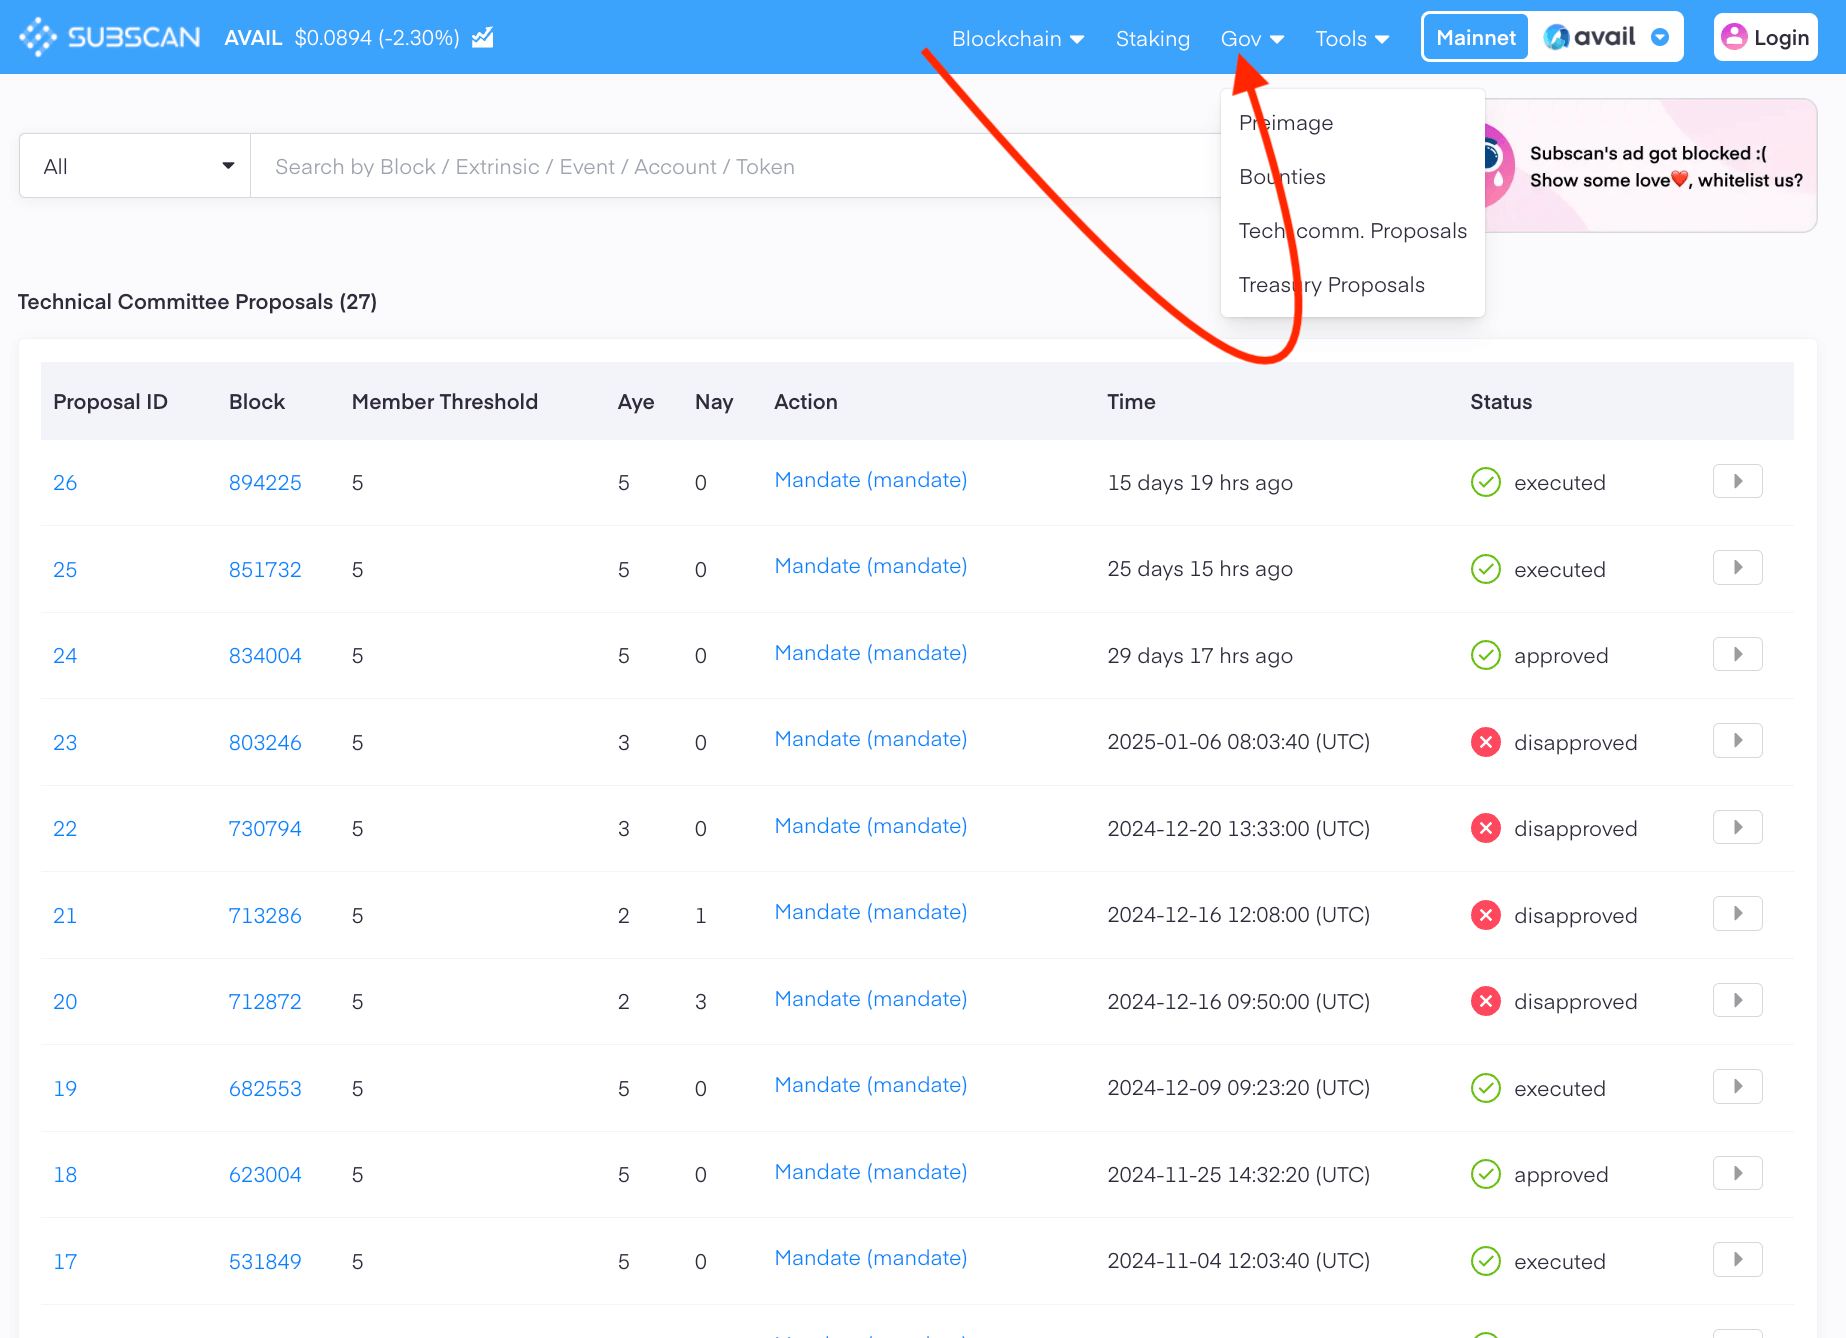
4. The `Tools` section supports some useful features:
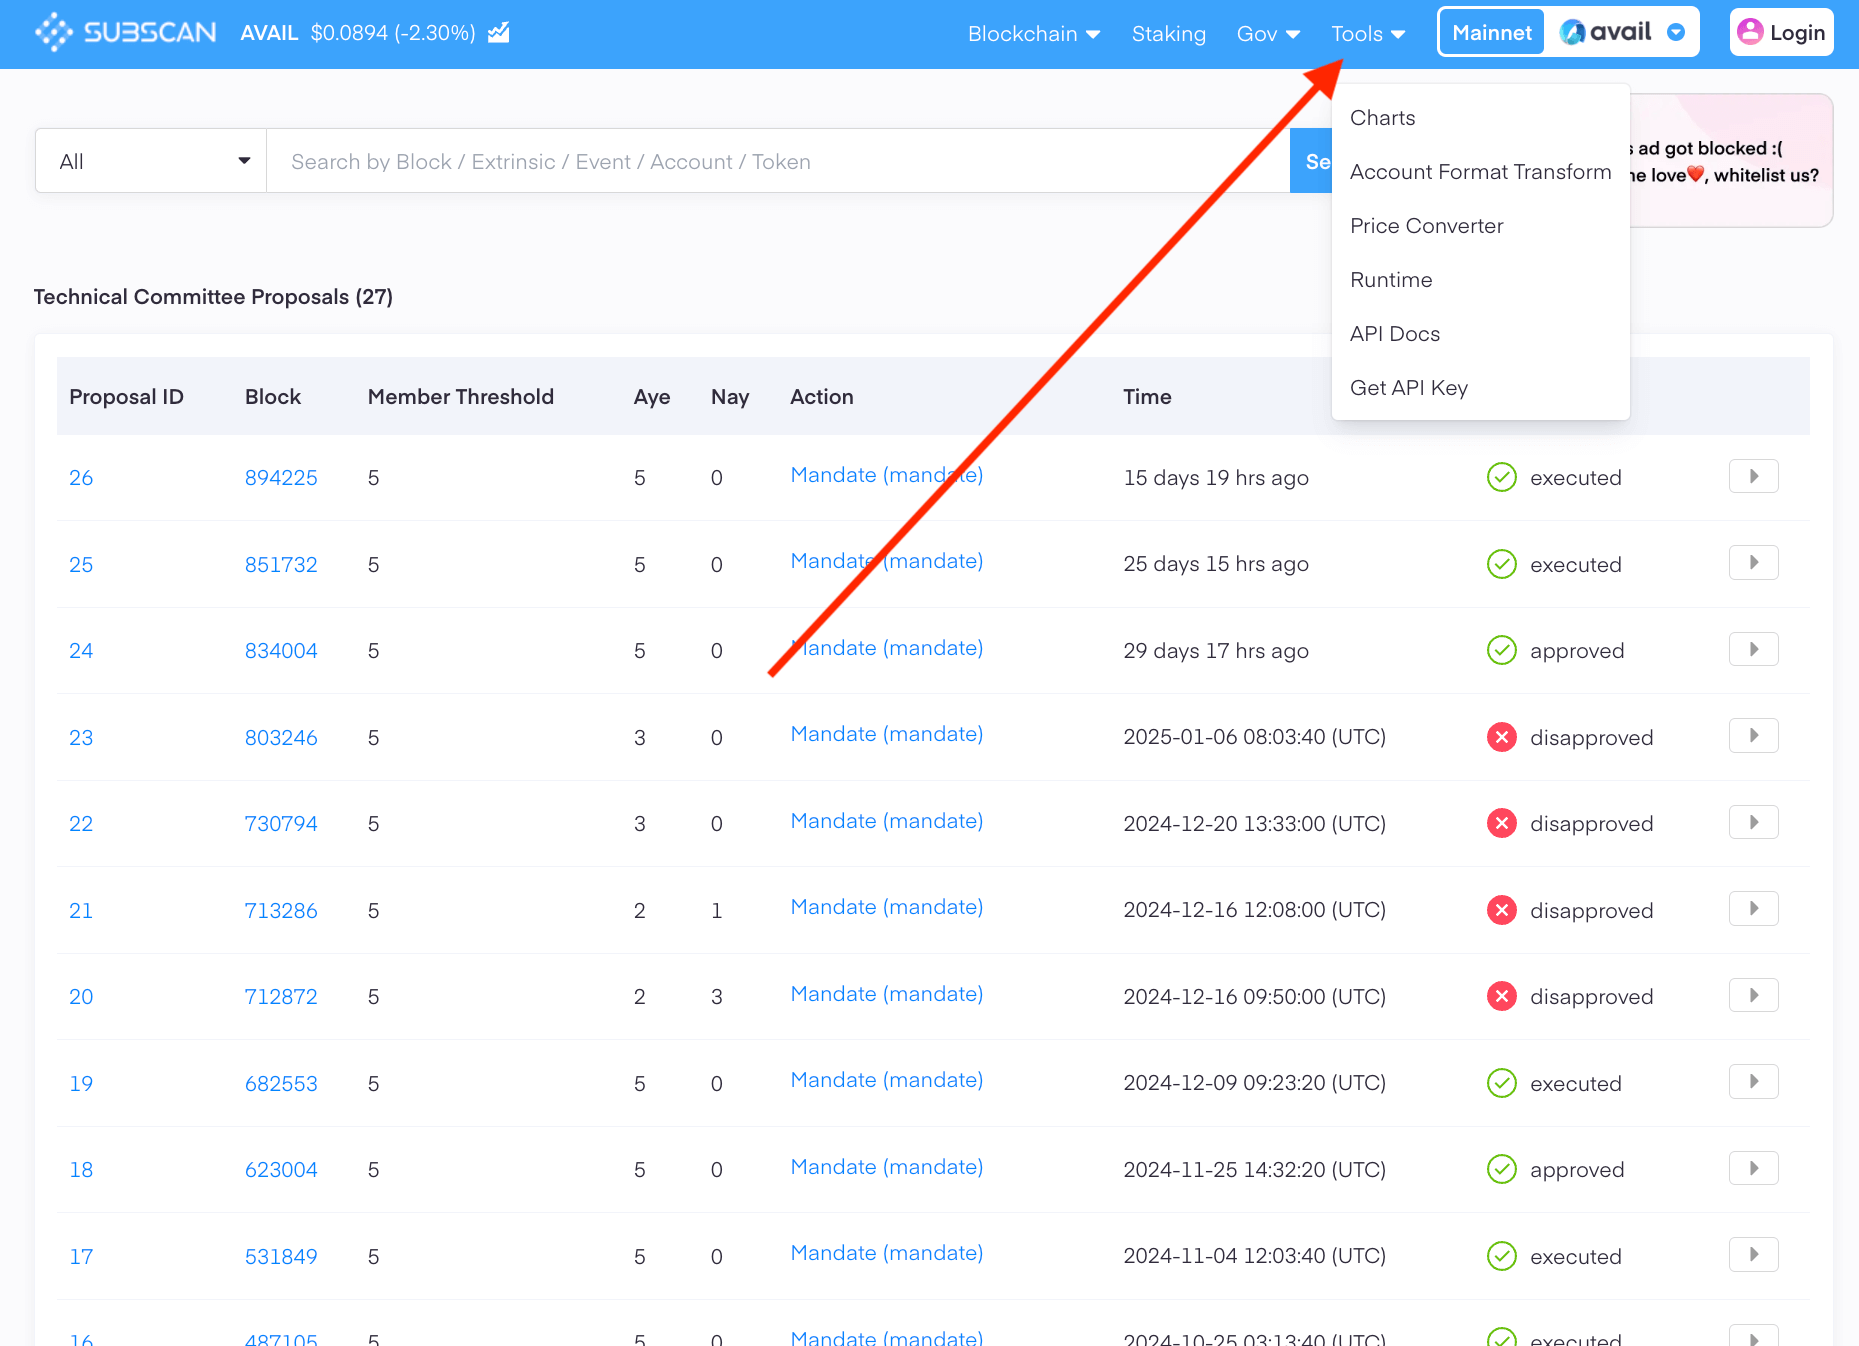
> **Note**
>
> * `Charts`: Some charts for a visual representation of network activity.
> * `Account Format Transform`: Transform an account address into different formats supported by various Substrate-based chains.
> * `Price Converter`: Lookup the historical price of `AVAIL` by `block number` or `timestamp`.
> * `Runtime`: Browse data related to runtime extrinsics.
## Working with App IDs in the explorer
The following sections walk you through querying, creating, and submitting data to App IDs using the AvailApps explorer.
### How to check the next available `appID`?
Anyone can create their own `appID` on Avail DA. Let us first check out the next available `appID` on the network.
1. Make sure you're on the `chain state` section of the explorer. You can access it by [simply clicking this link](https://explorer.availproject.org/#/chainstate),
or by navigating to it through the `developer` tab near the top right.
2. Within the `dataAvailability` pallet, select the `nextAppId` method.
No need to pass any params, just click the `+` button next to the method name.
3. You will be returned the next available `index`/`id` for a new `appID`.
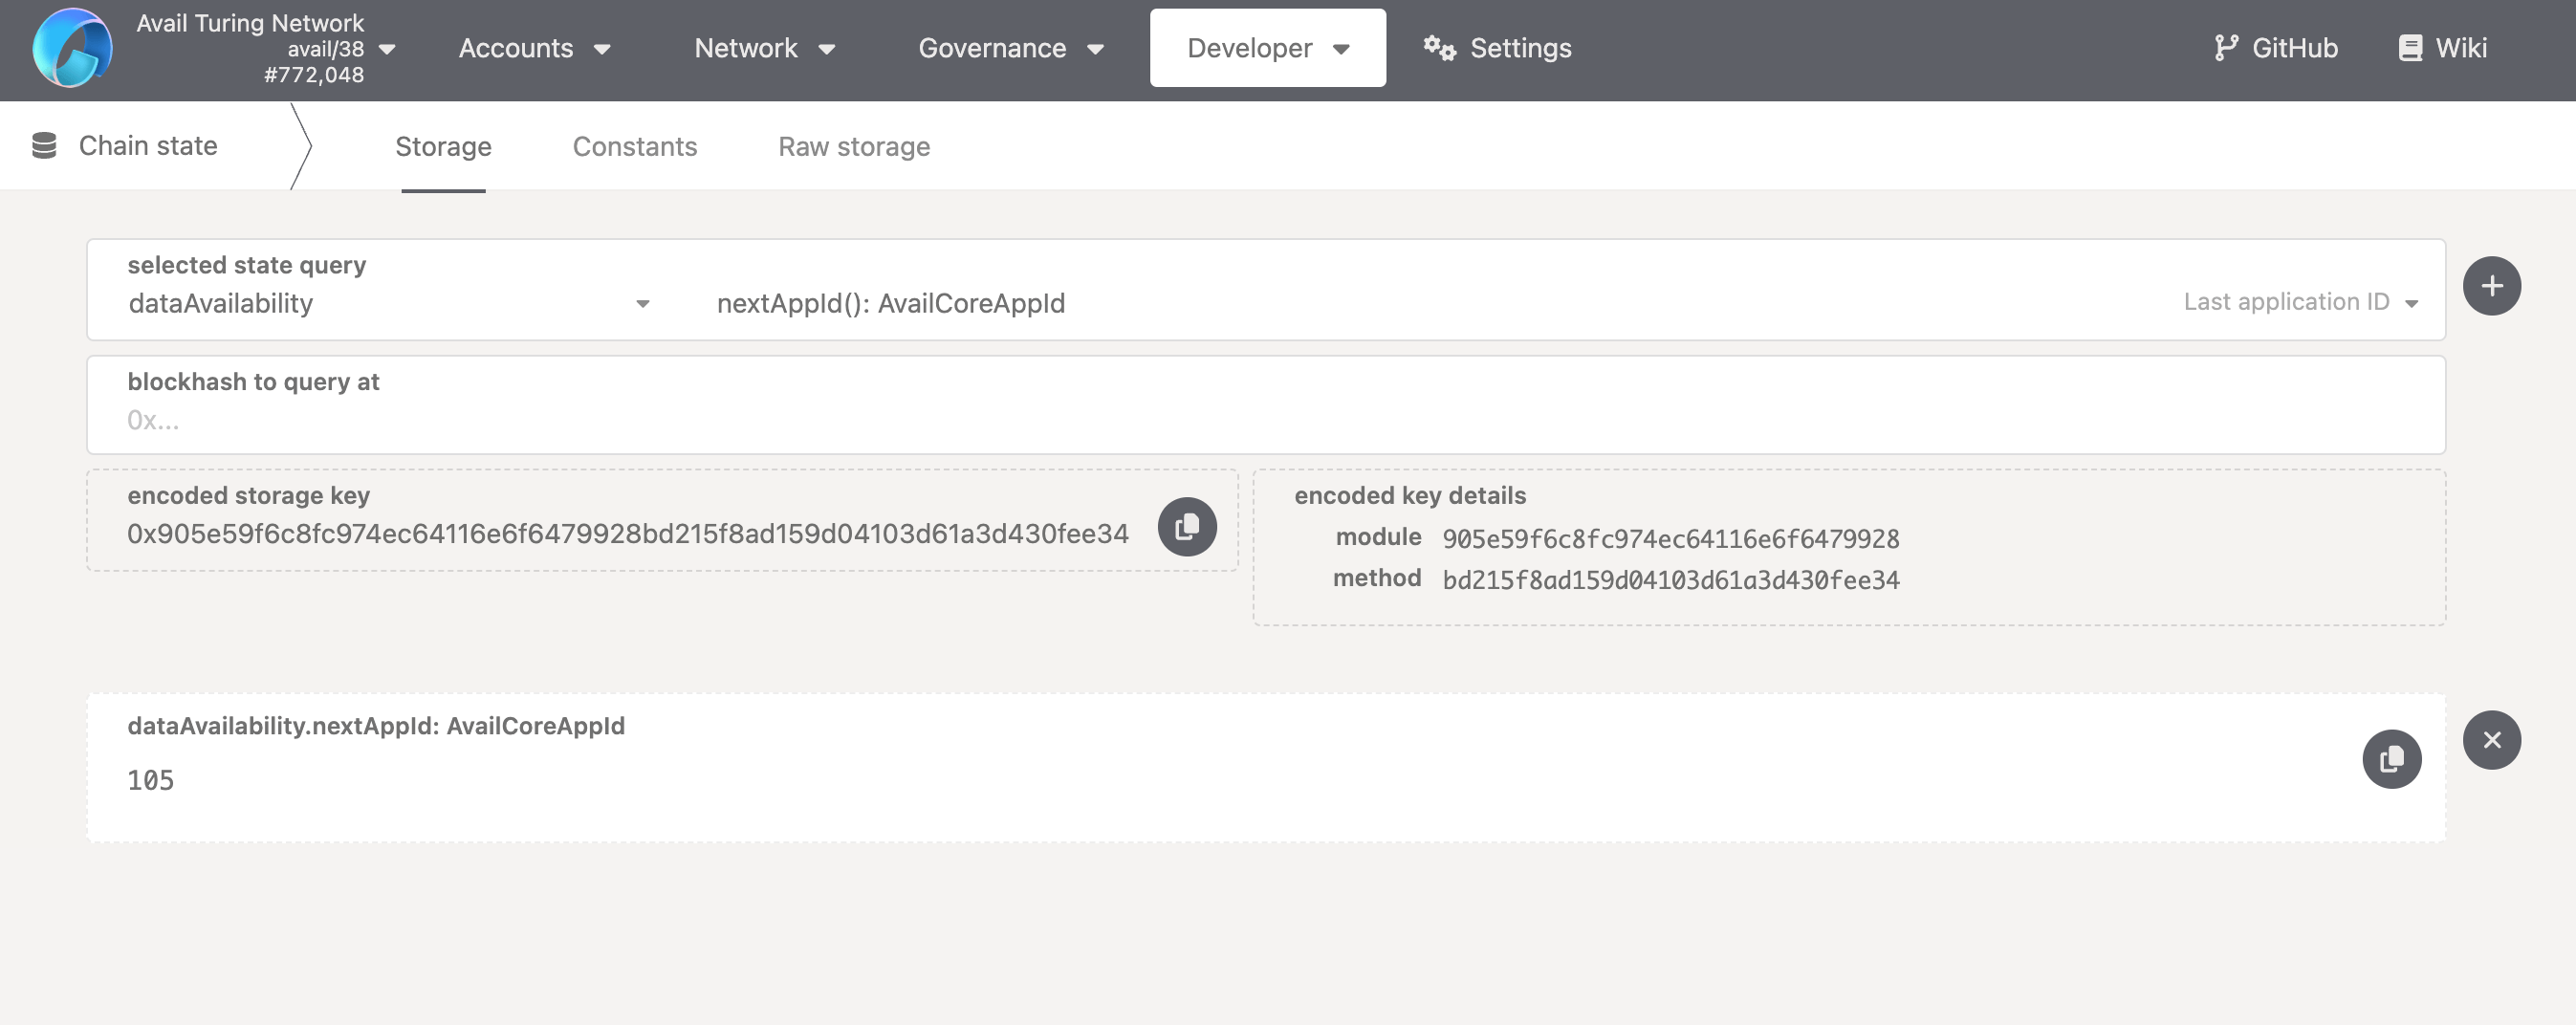
### How to register my own `appID`?
1. Make sure you have one or more Avail DA wallets connected to the explorer. If you don't know how to do so,
you can follow our docs on [setting up a new wallet](/docs/da/user-guides/accounts#creating-an-account-on-avail-da).
2. Simply [click this link](https://explorer.availproject.org/#/extrinsics) OR navigate to the `extrinsics` section of the explorer through the `developer` tab.
> **Note**
>
> Please note that the `Developer` tab does not show the `extrinsics` section at all if you don't
> have a wallet set up on the explorer or an extension wallet connected to it.
> So make sure you have an [Avail DA wallet set up](/docs/da/user-guides/accounts) before moving forward.
3. Select the `dataAvailability` pallet, and the `createApplicationKey` method.
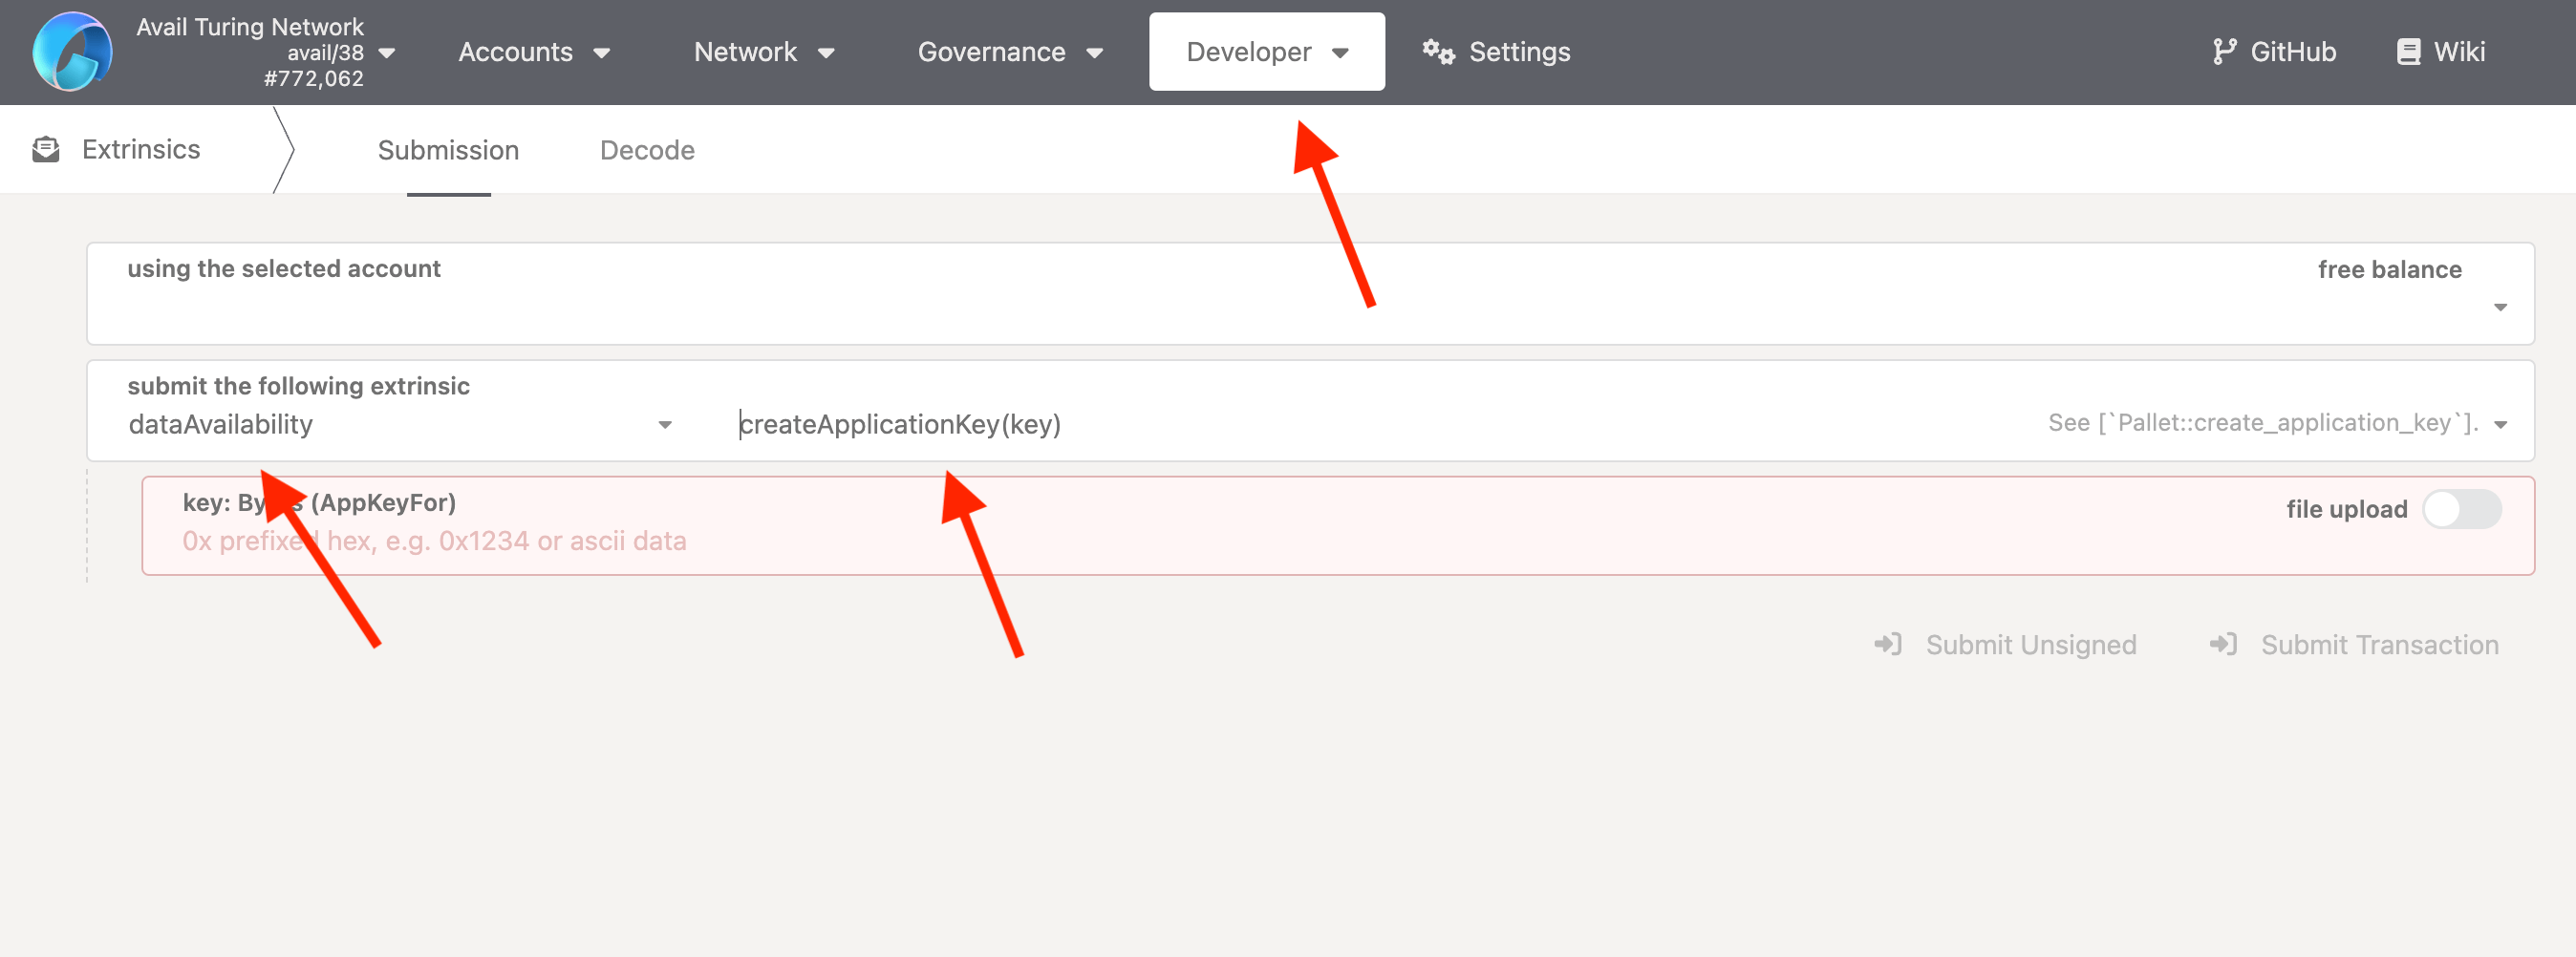
4. Enter a `key` for your `appID`. It can be anything you like, really.
5. This is how it should look like in the end:
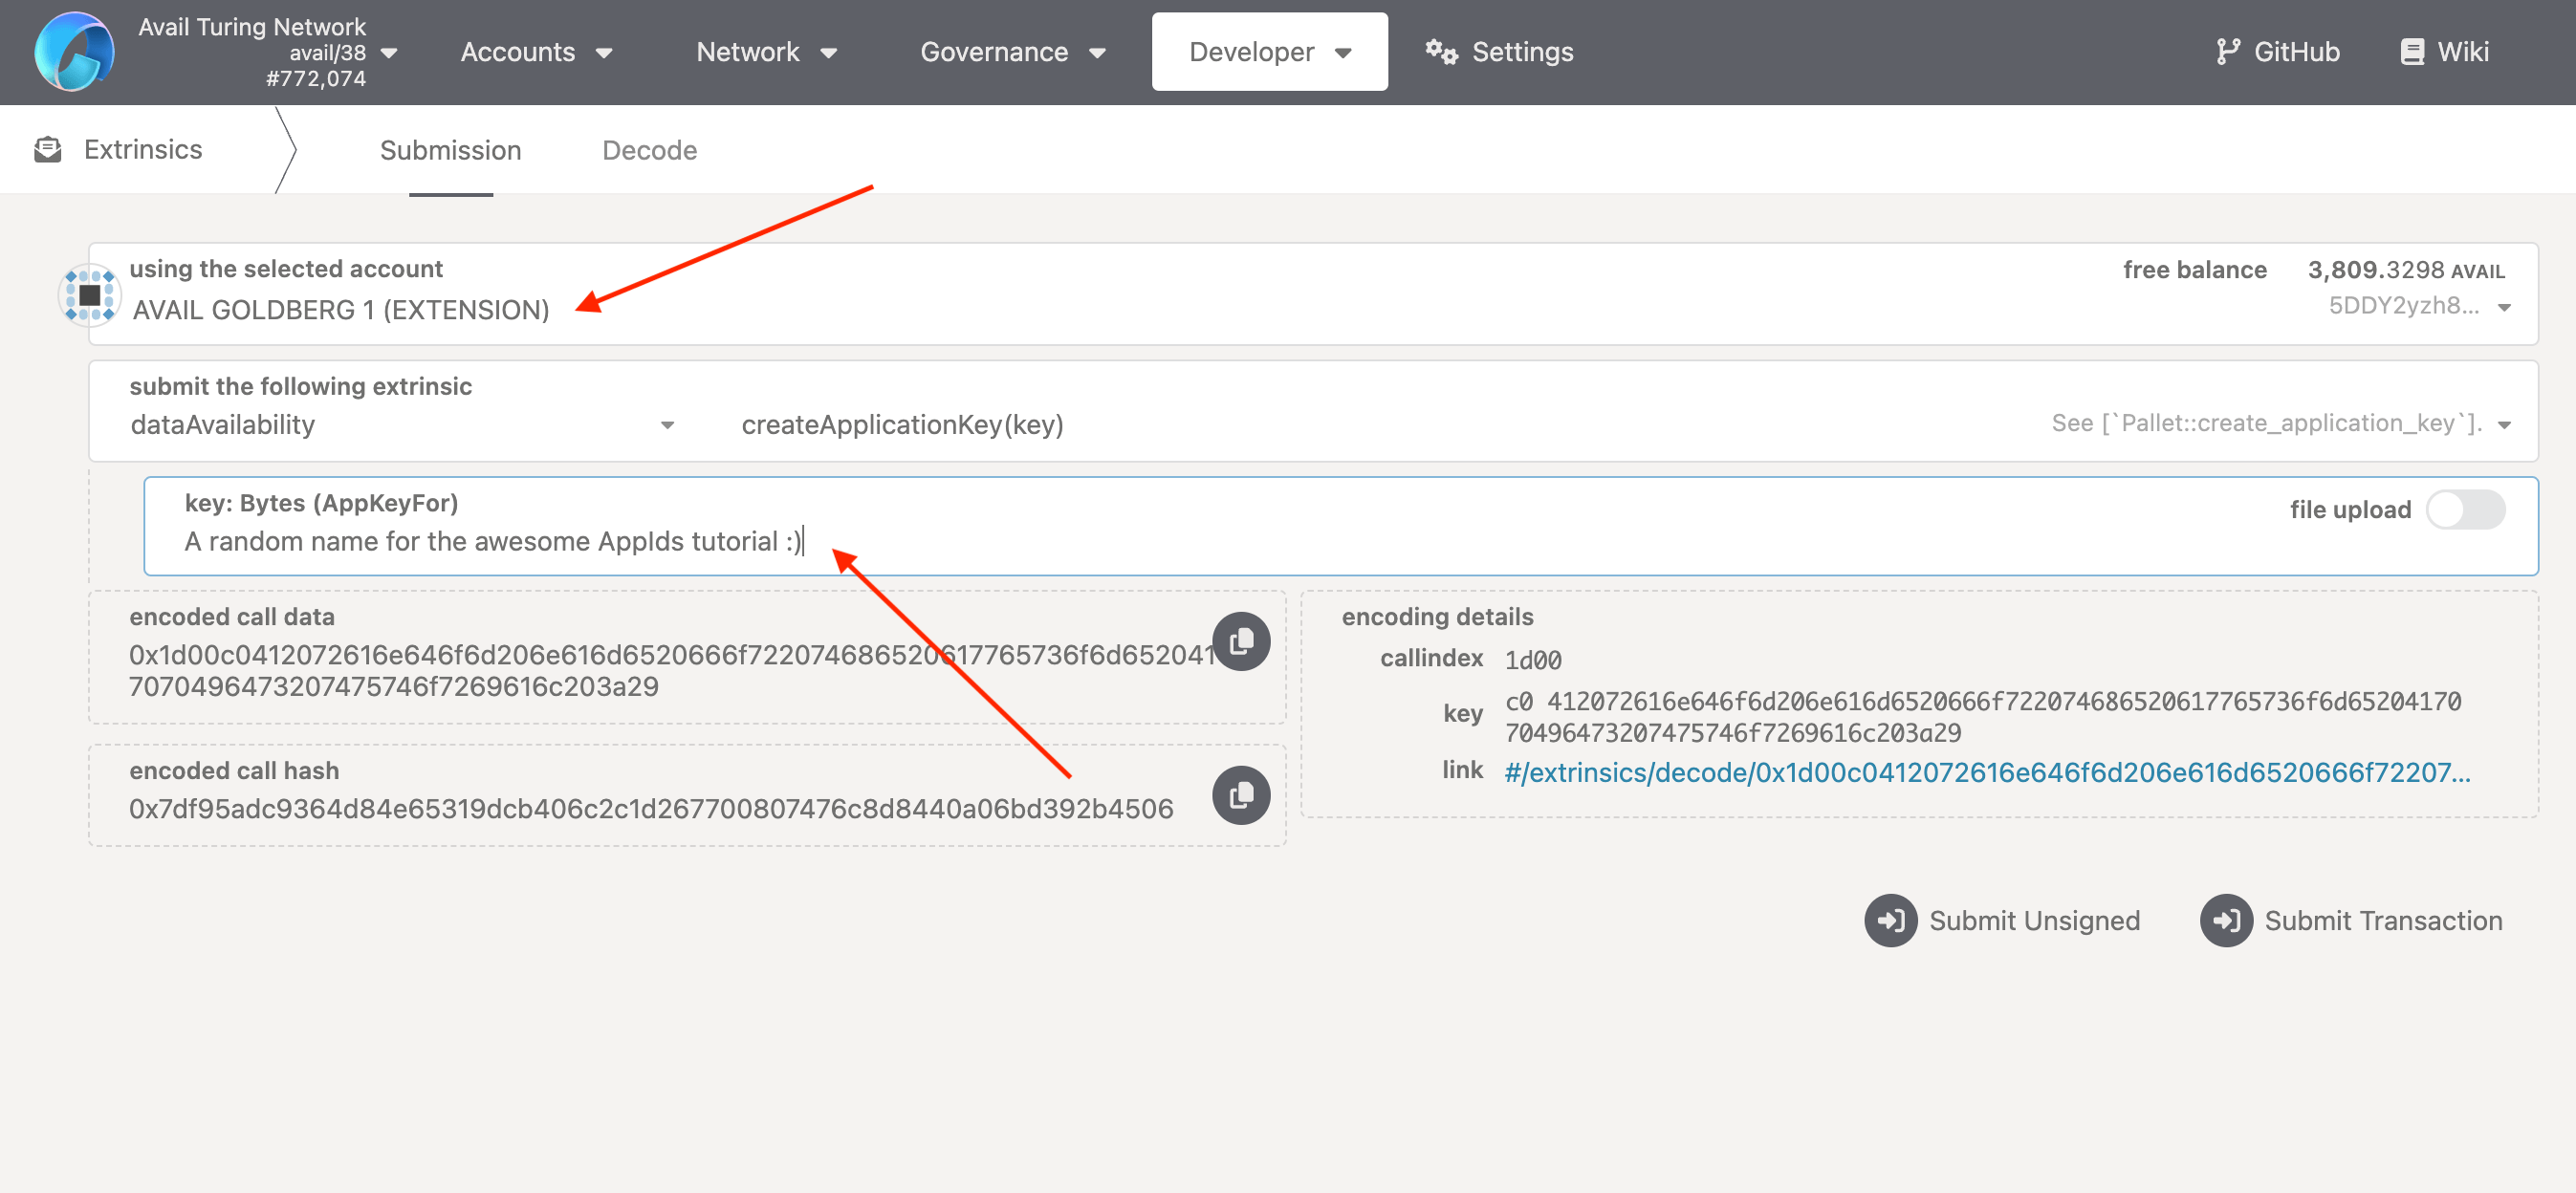
6. Click on `Submit Transaction`, and then click on `Sign and Submit` in the box that pops up.
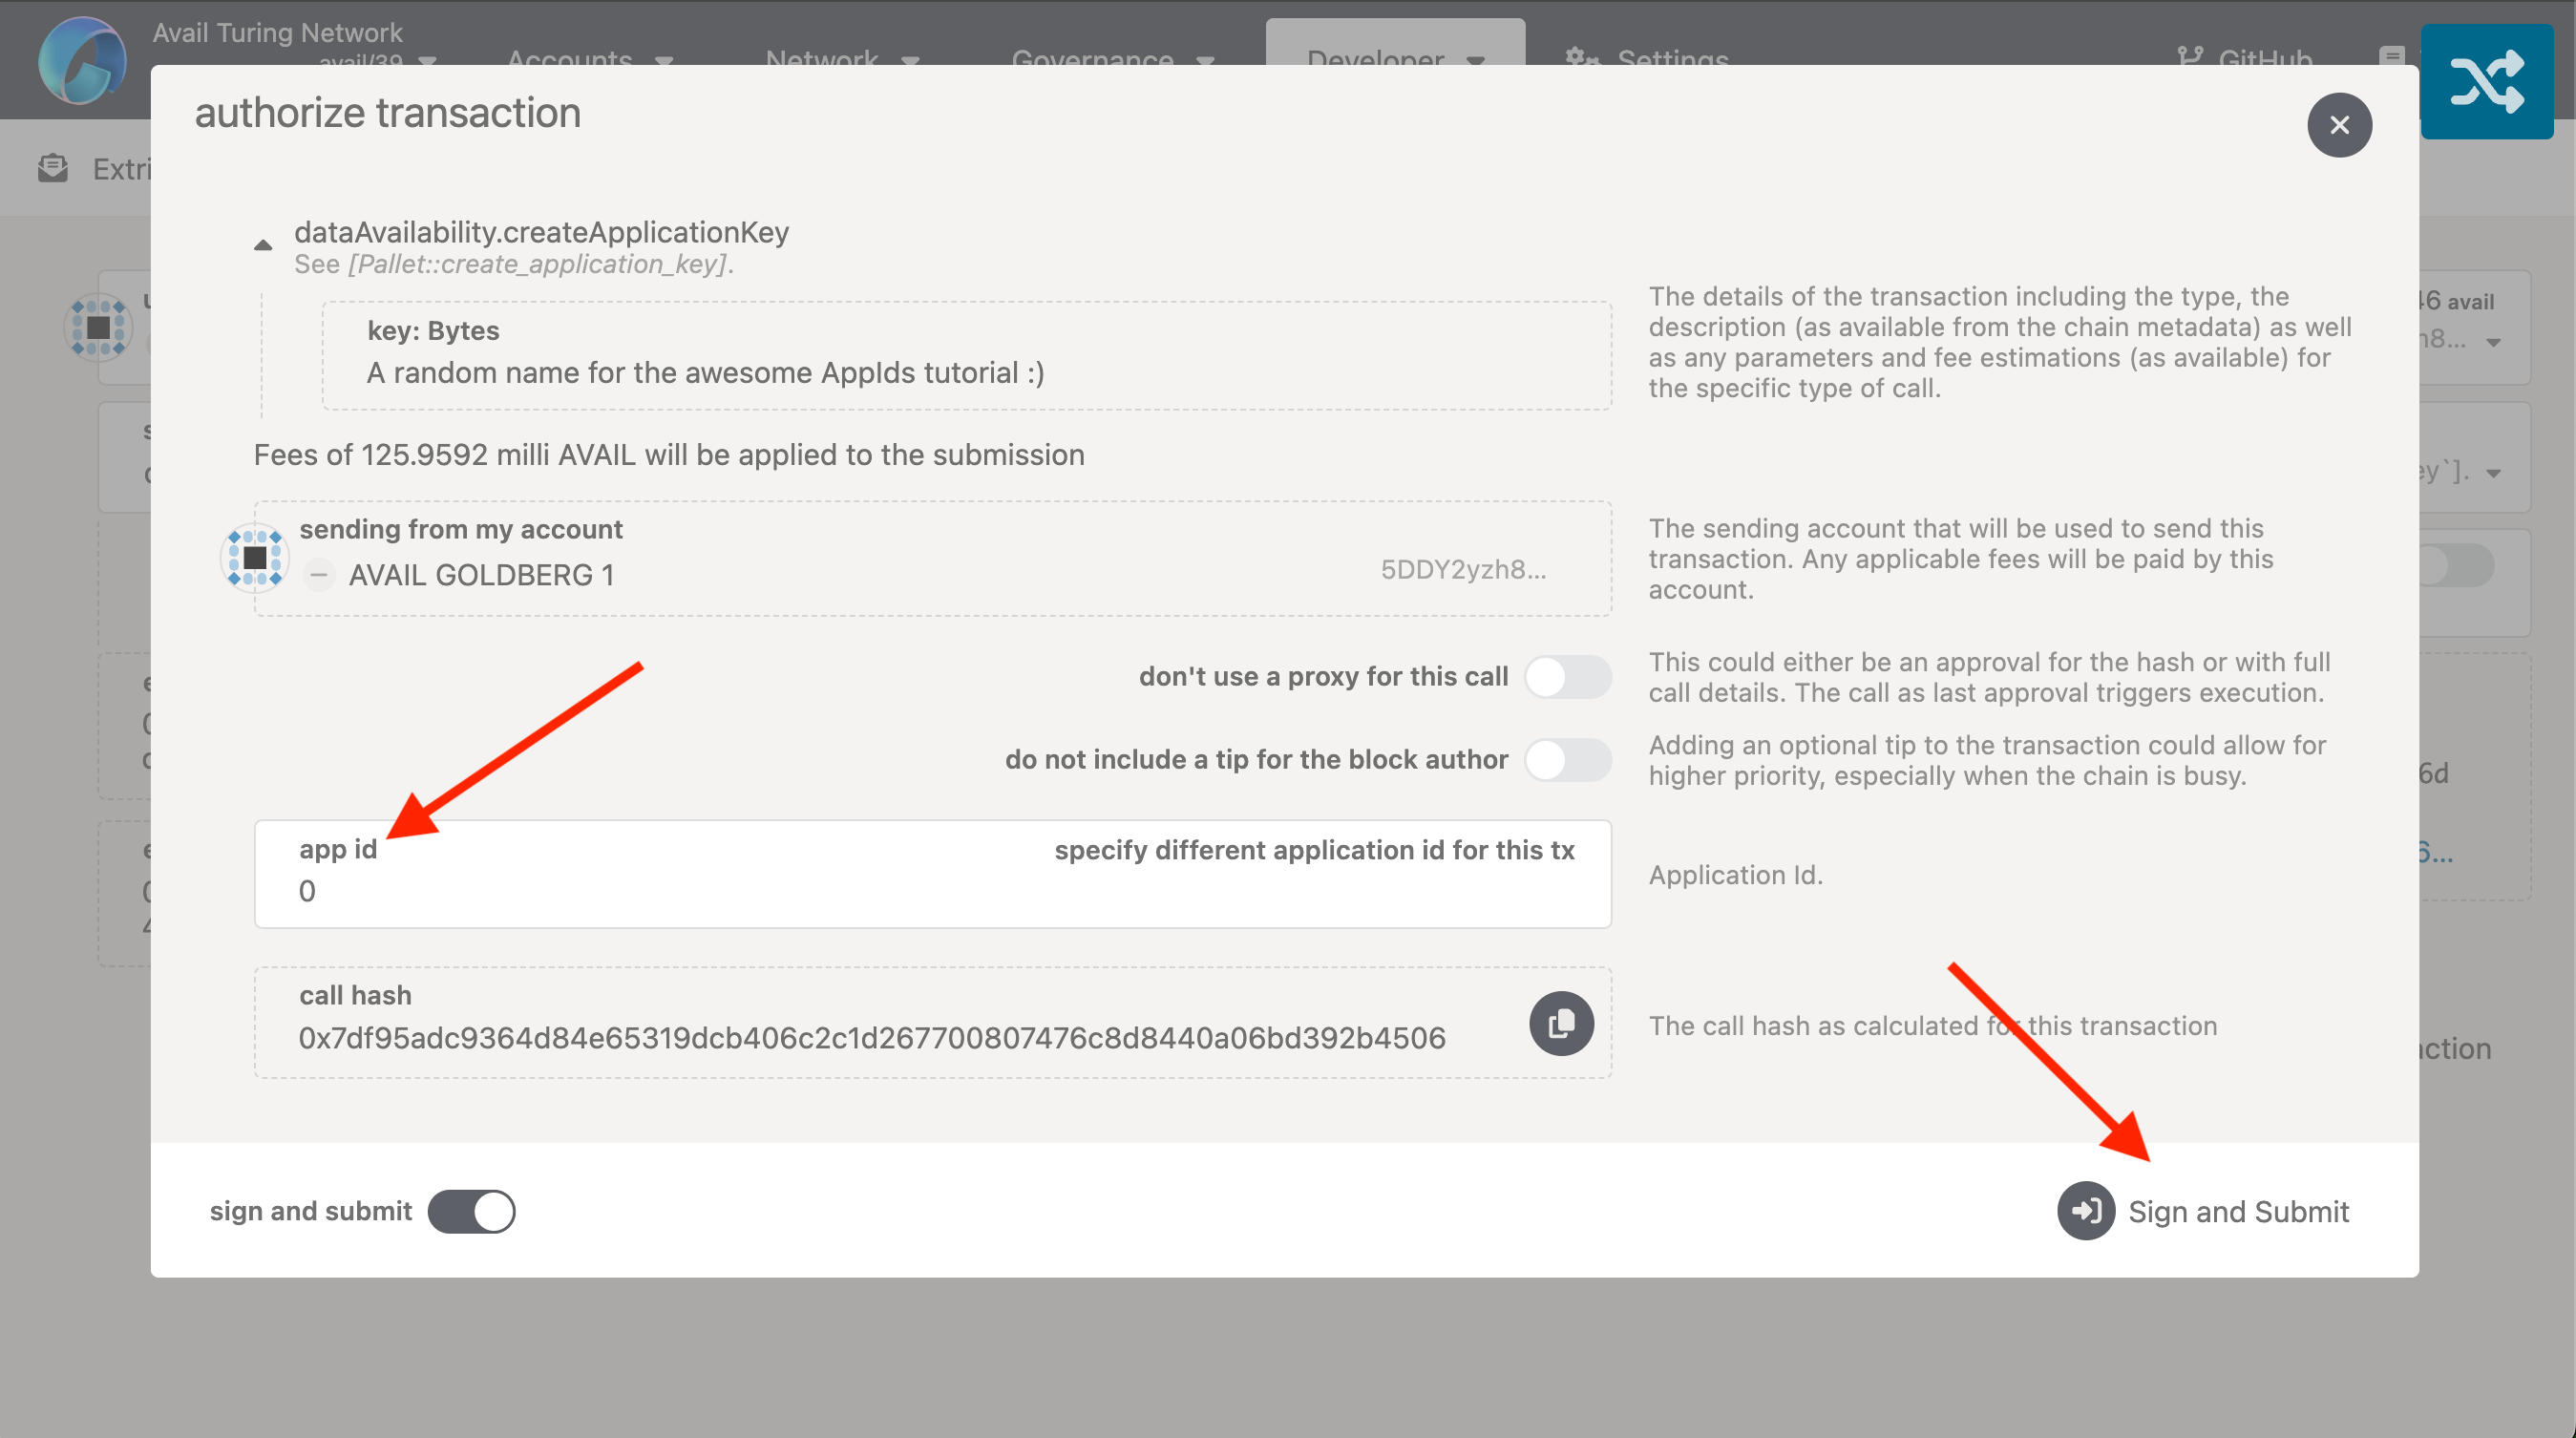
> **Note**
>
> **DO NOT CHANGE THE `appID` FOR THIS TRANSACTION**
>
> 1. Each and every single transaction on Avail DA has an `appID` associated with it, which is **greater than or equal to** `0`.
> 2. A transaction or data submission with the `appID` of `0` is used for **chain-level** operations.
> 3. This is what we need to use for creating a new `appID`, since the act of creating a new `appID` has nothing to do with a specific '*app*' on Avail DA.
> 4. This field would instead have been a positive integer if we, for example, were submitting data to a specific application on Avail DA.
7. Authorize the transaction through your wallet, and you're done! You've successfully created your own `appID` on Avail DA.
8. You can verify `7` by using the steps covered earlier to query the `appKeys` method :)
### How to submit data to my `appID`?
You can submit data to your, or any other `appID` on Avail DA using the explorer by calling the
`submitData` extrinsic from within the `dataAvailability` pallet.
1. Make sure you have one or more Avail DA wallets connected to the explorer. If you don't know how to do so,
you can follow our docs on [setting up a new wallet](/docs/da/user-guides/accounts#creating-an-account-on-avail-da).
2. Simply [click this link](https://explorer.availproject.org/#/extrinsics) OR navigate to the `extrinsics` section of the explorer through the `developer` tab.
3. Select the `dataAvailability` pallet, and the `submitData` method.
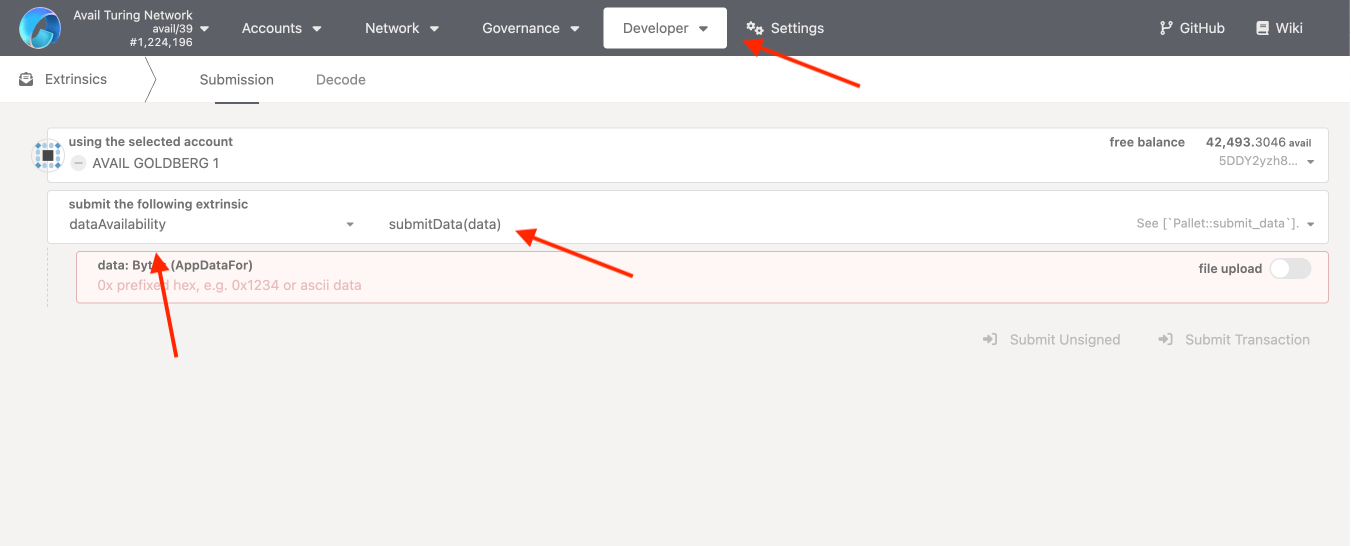
4. Enter a random `data` string that you want to submit to your `appID`, and then click on
`Submit Transaction`.
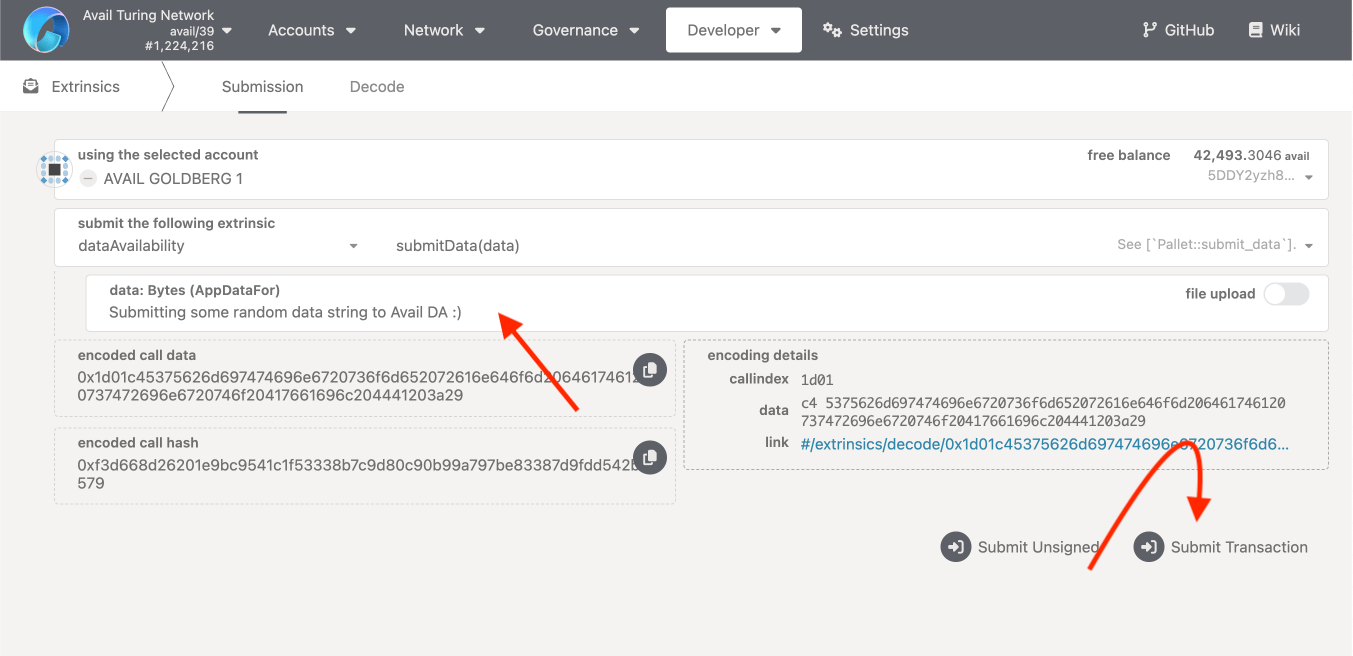
5. Fill in the `AppID` that you want to submit the data to. Click on `Sign and Submit` to authorize the transaction through your wallet.
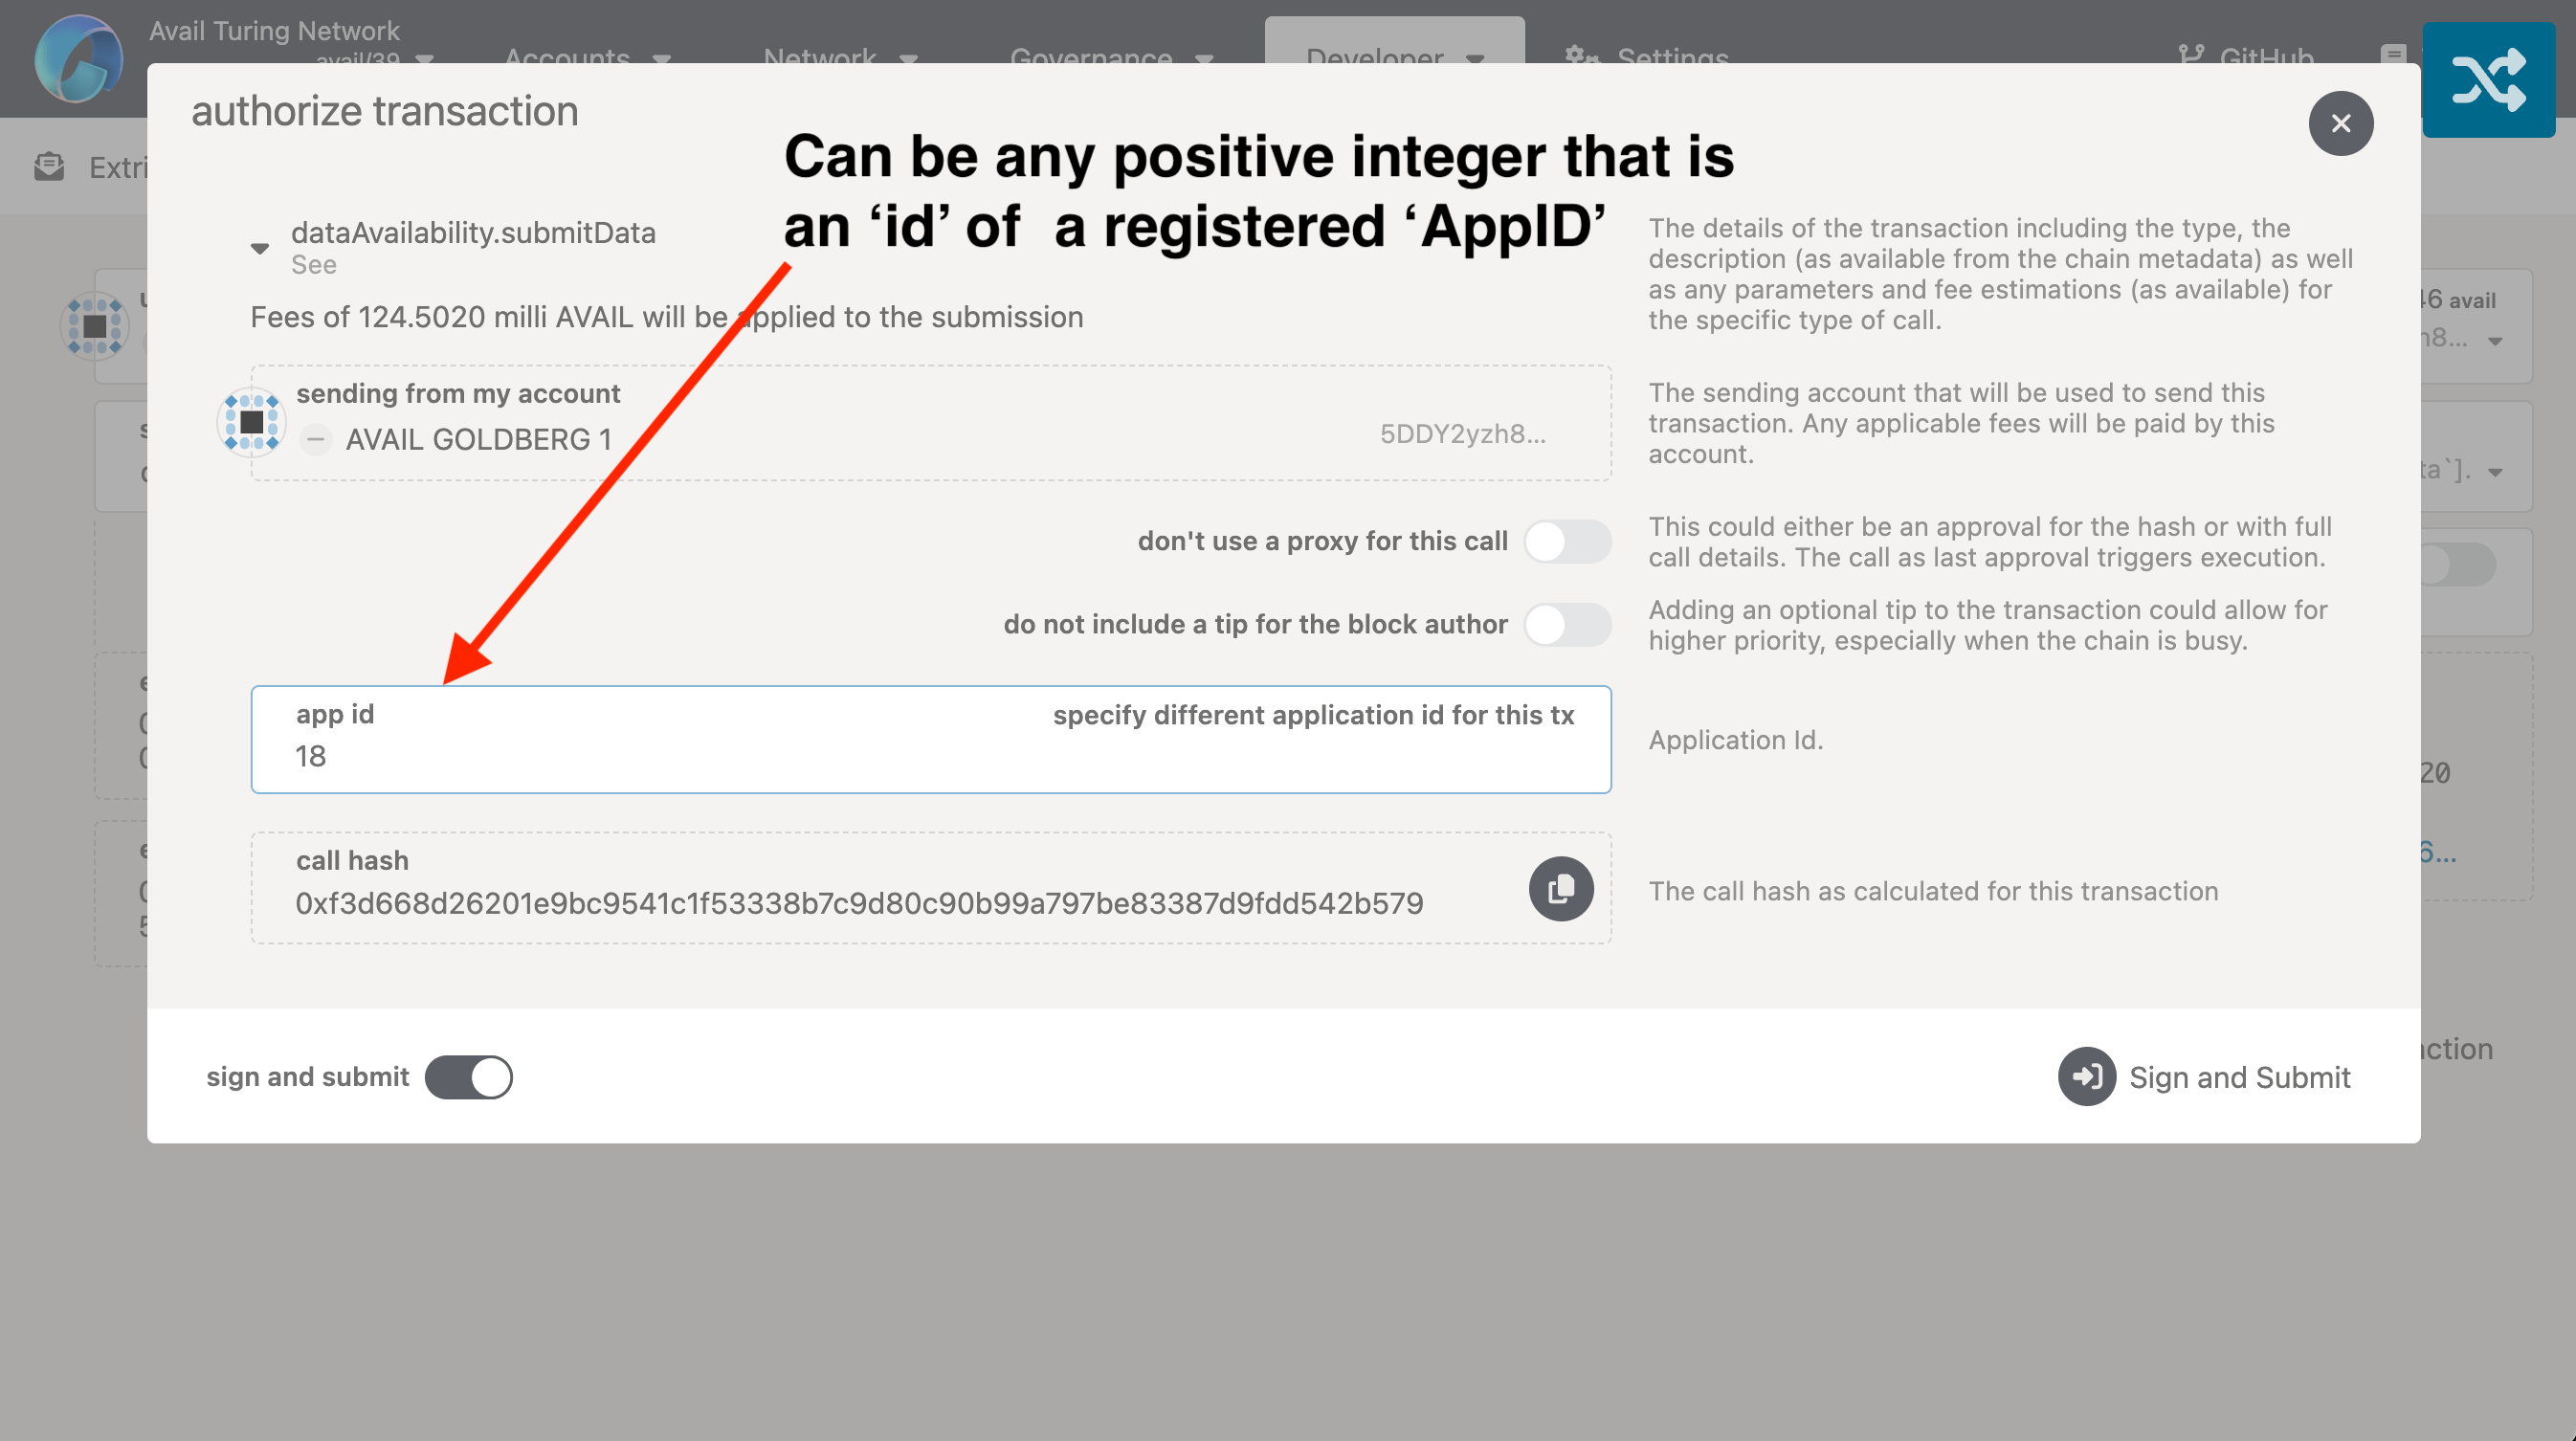
6. Wait for the transaction to be included in a block and then open the detailed view of the block.
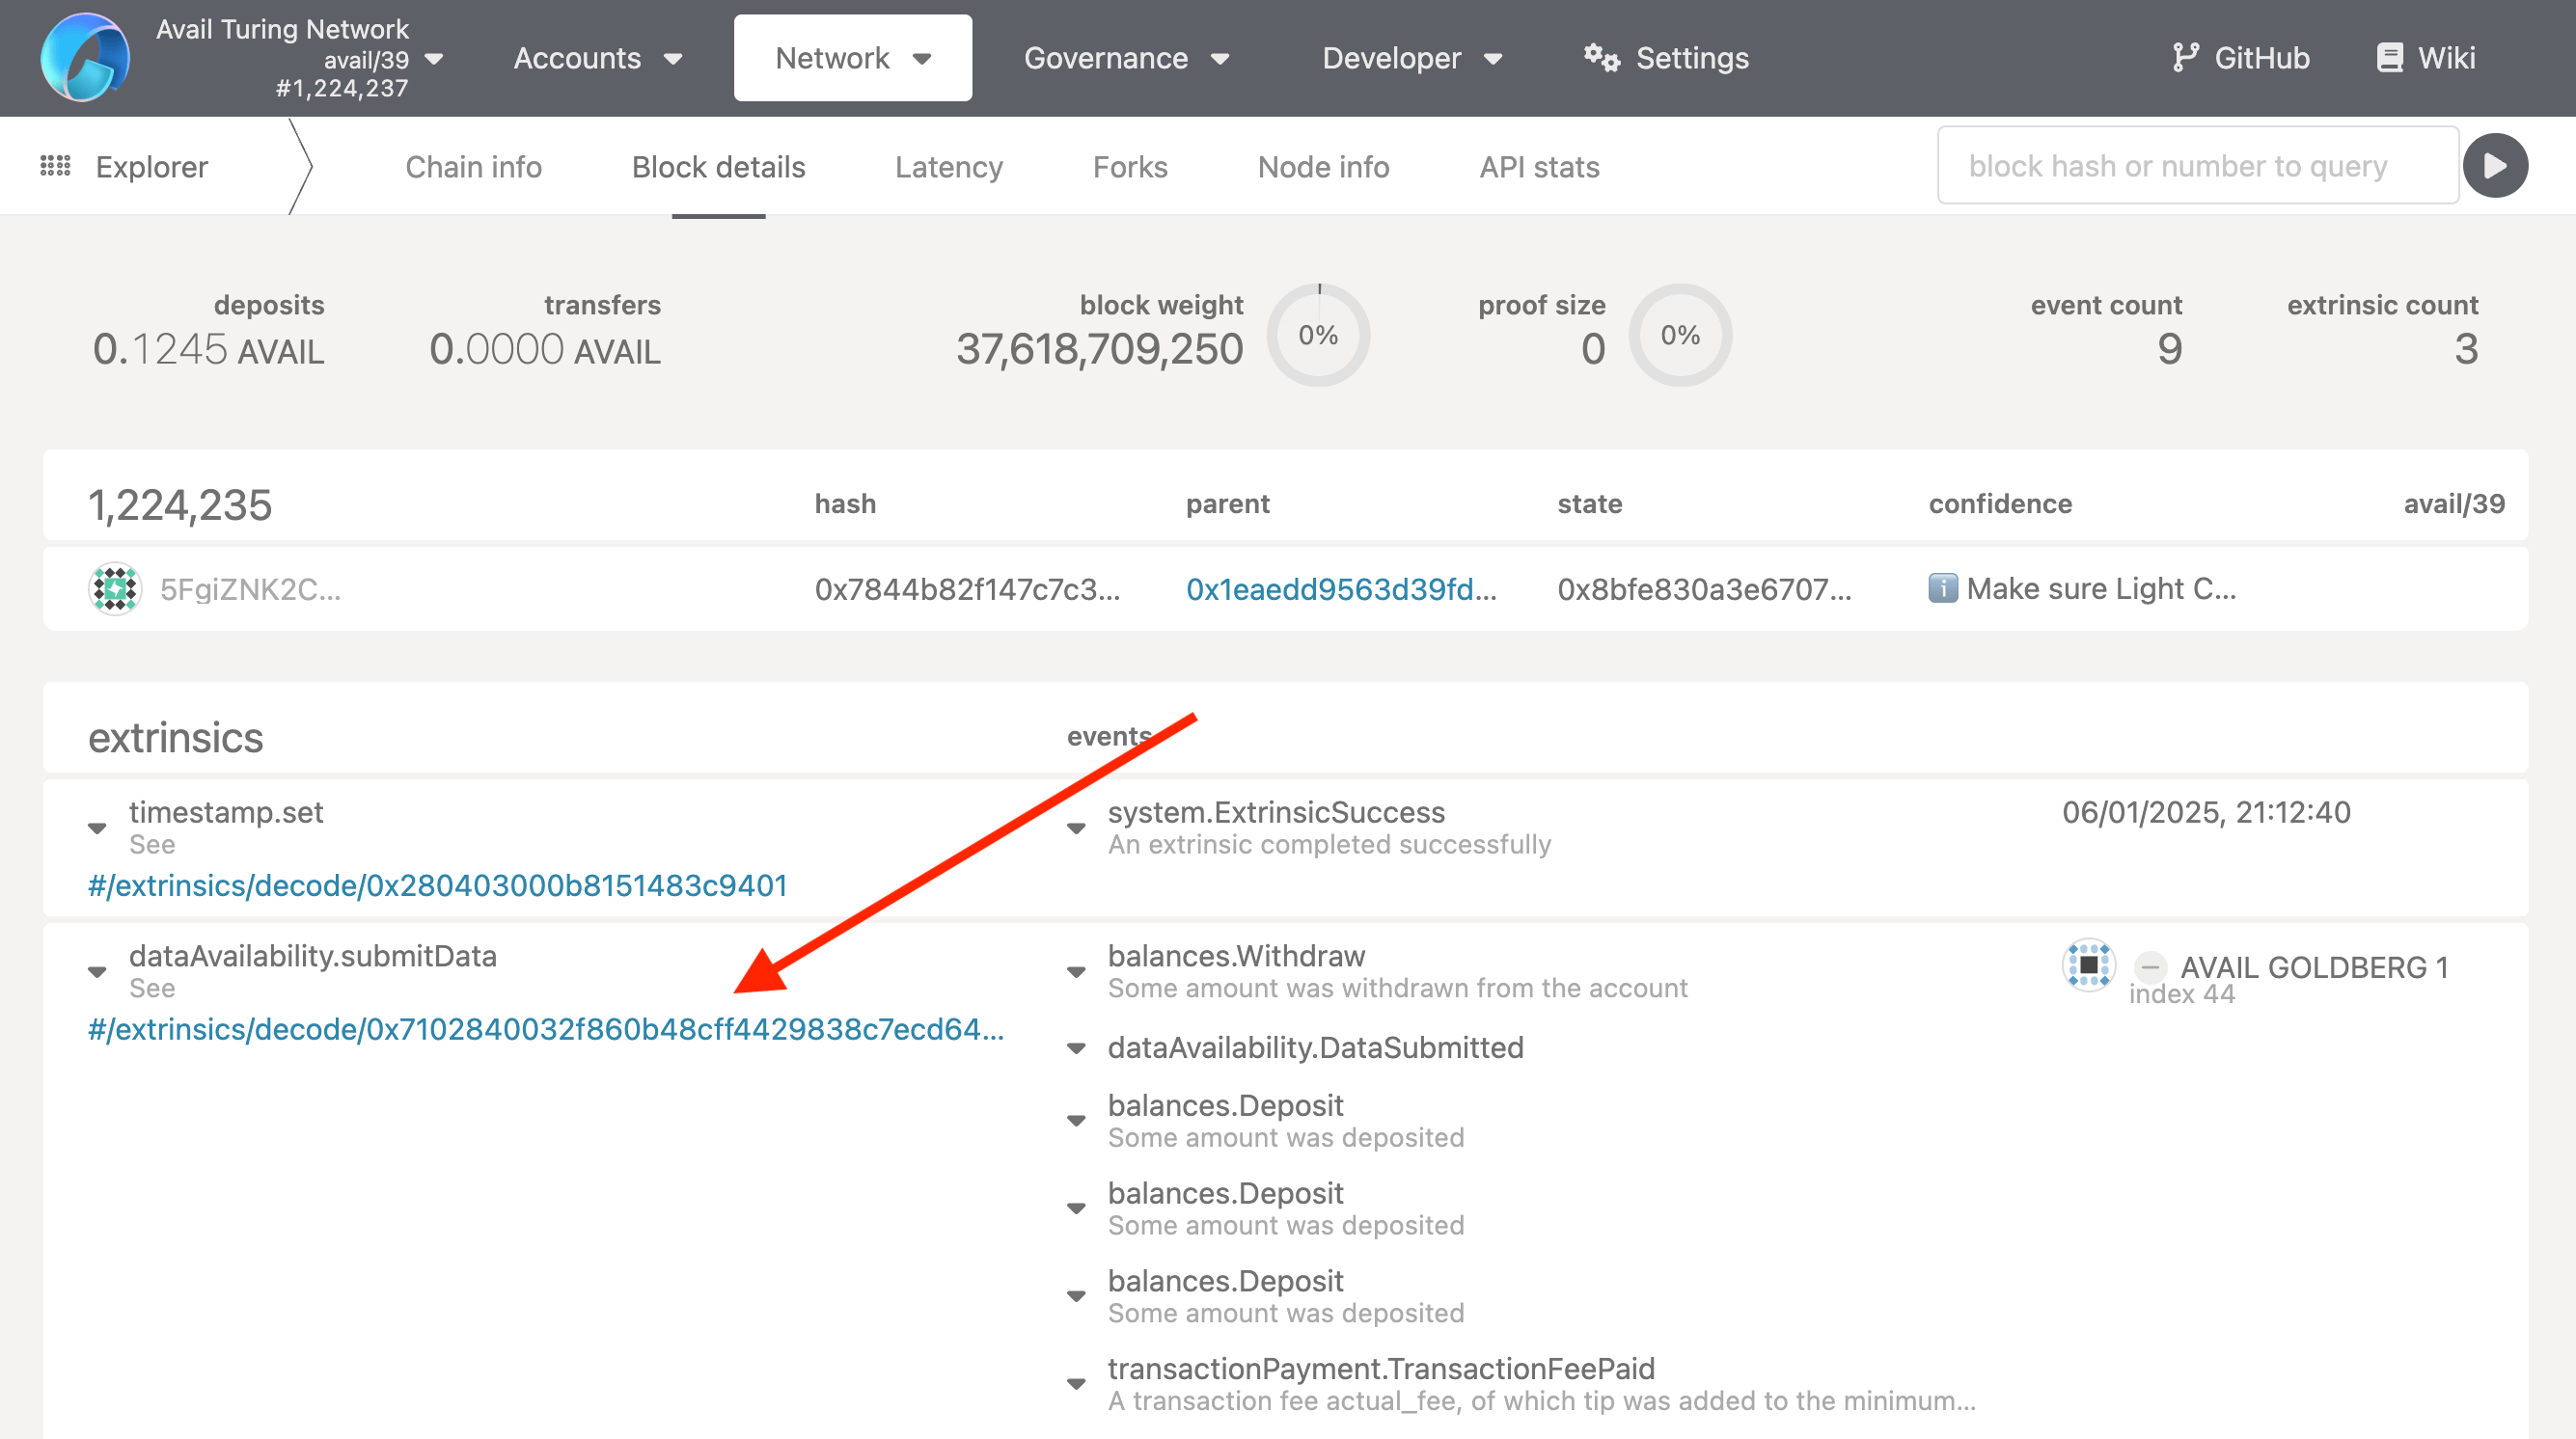
7. Click on your specific transaction to see it's details. This is what it should look like:
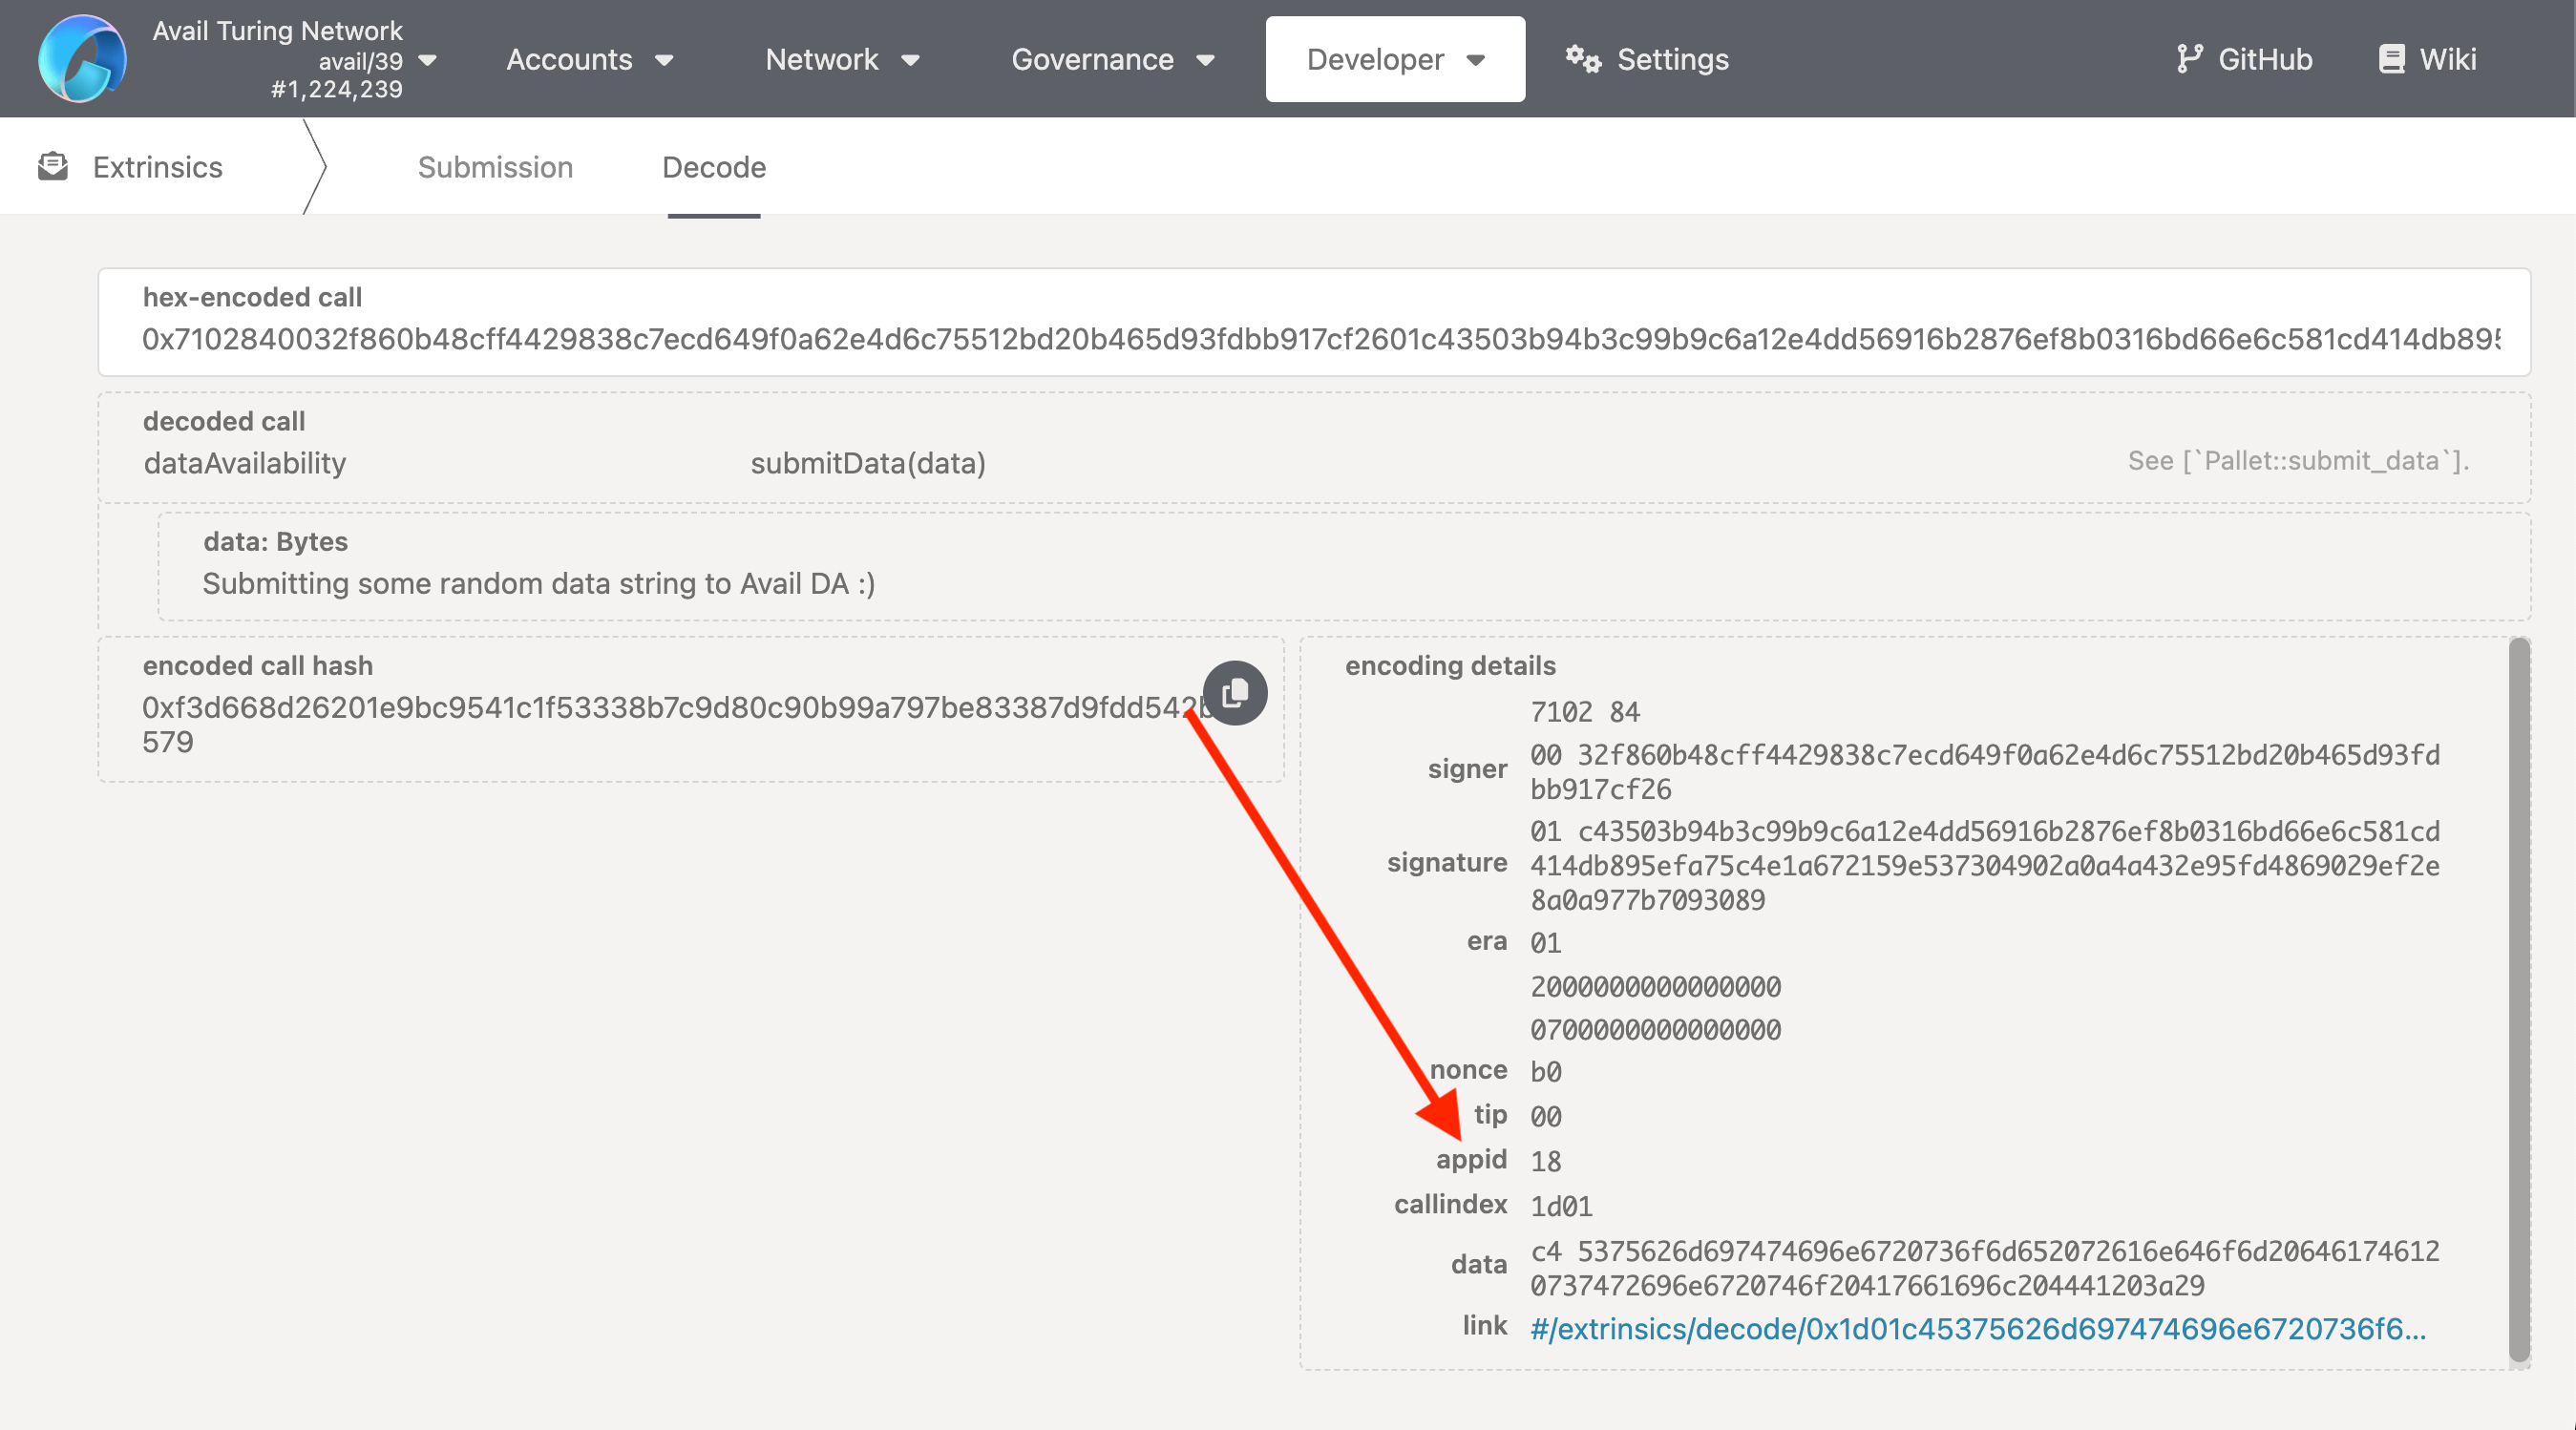
## Wrapping up
We will update this page with more examples and information as we go along.
Feel free to join [our Discord](https://discord.gg/AvailProject) and suggest any additions that you would like to see here.
### Identity
## Introduction
Avail allows you to set canonical on-chain identities for your accounts via the `identity_setIdentity` extrinsic. \
The AvailApps explorer provides a convenient UI to set an identity for your account, which is what we will be doing in the
next section.
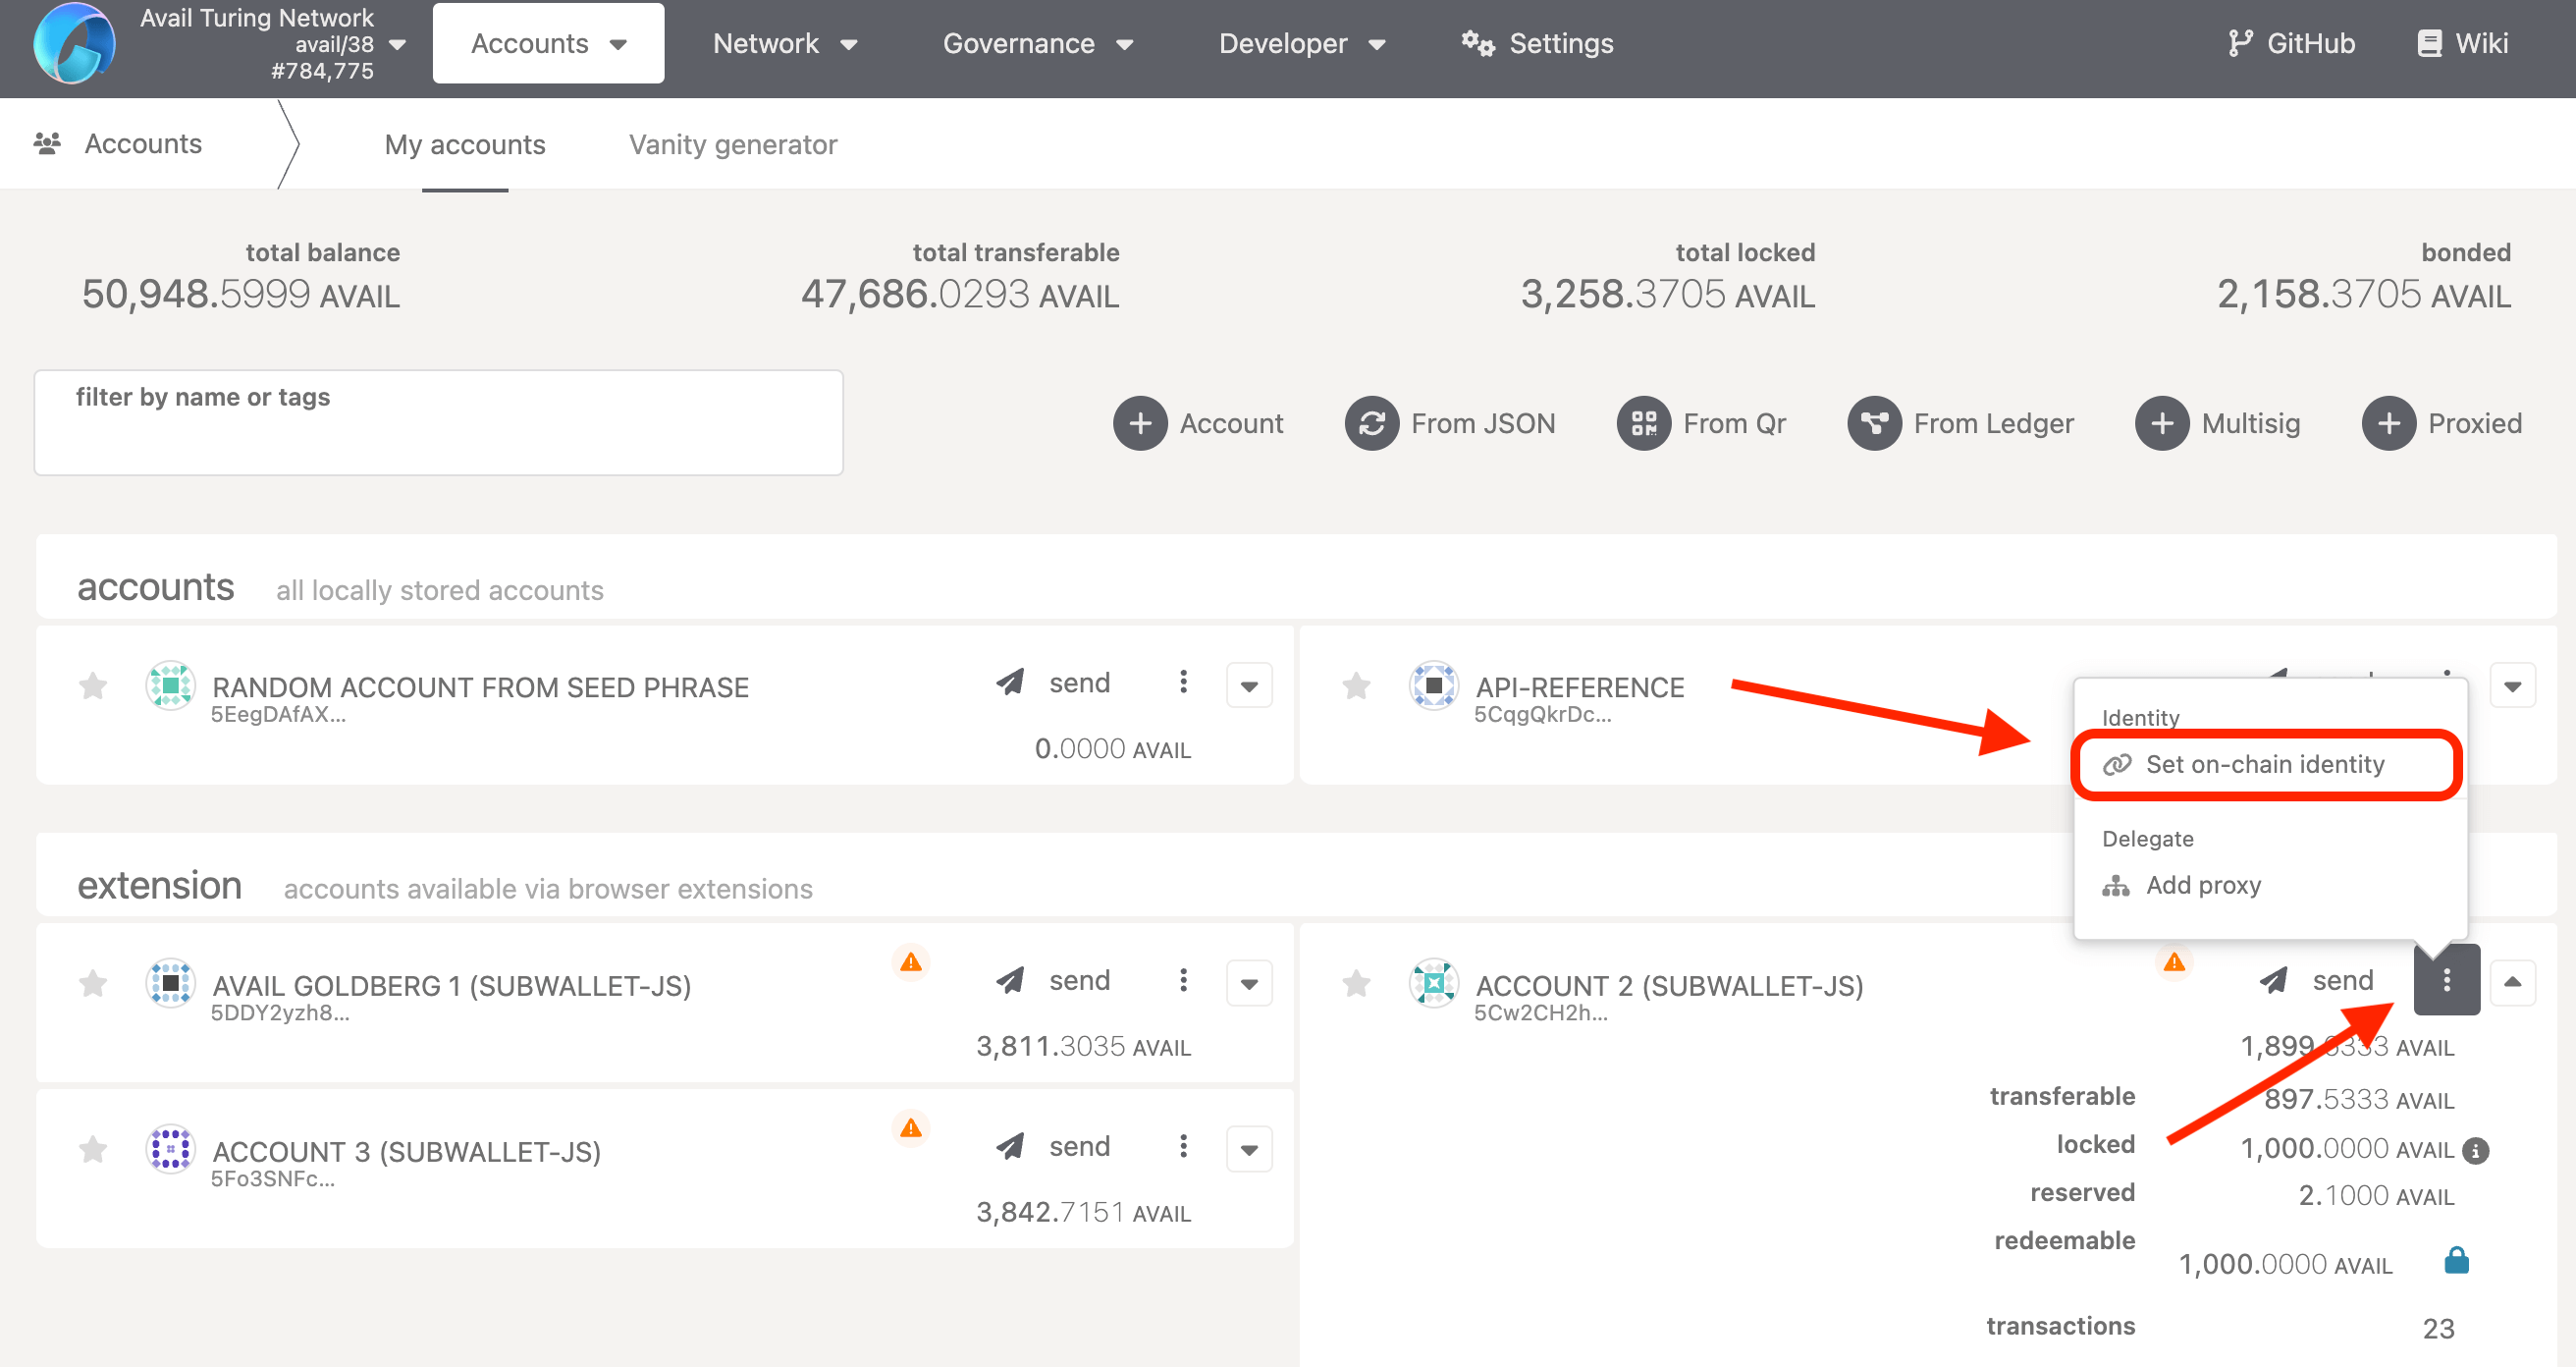
Identities vs Sub-Identities
1. Each account on Avail can create a main identity and up to 100 sub-identities.
2. Each of these sub-identities are linked to the main account.
3. A possible way of using this feature could be to create a main identity for your team, and then create sub-identities
for each of your team members.
4. A deposit of `2 AVAIL` is required per sub-identity.
> **Note**
>
> 1. Users need to lock a small account of `AVAIL` to set an identity, which is refunded if and when the identity is cleared.
> 2. The bond amount for registering an on-chain identity is currently **100 AVAIL**.
> 3. The bond amount for registering each sub-identity is **2 AVAIL**.
> 4. The maximum number of sub-identities per identity is **100**.
## Set Your On-Chain Identity
> **Note**
>
> **PREREQUISITES**
> The only prerequisite is that you have access to one or more Avail DA accounts.
> Refer to our docs on [setting up an Avail wallet](/docs/da/user-guides/accounts) for more details if needed
### Navigate to the accounts page on the Avail Apps Explorer
Go to the [accounts page of the Avail apps explorer](https://explorer.availproject.org/#/accounts).
Select the account whose identity you want to set and click on `Set on-chain identity`.
### Fill out the fields that you want to set
Fill out at least 1 or at most all of the available fields.
All the fields are optional as long as any one of them are filled.
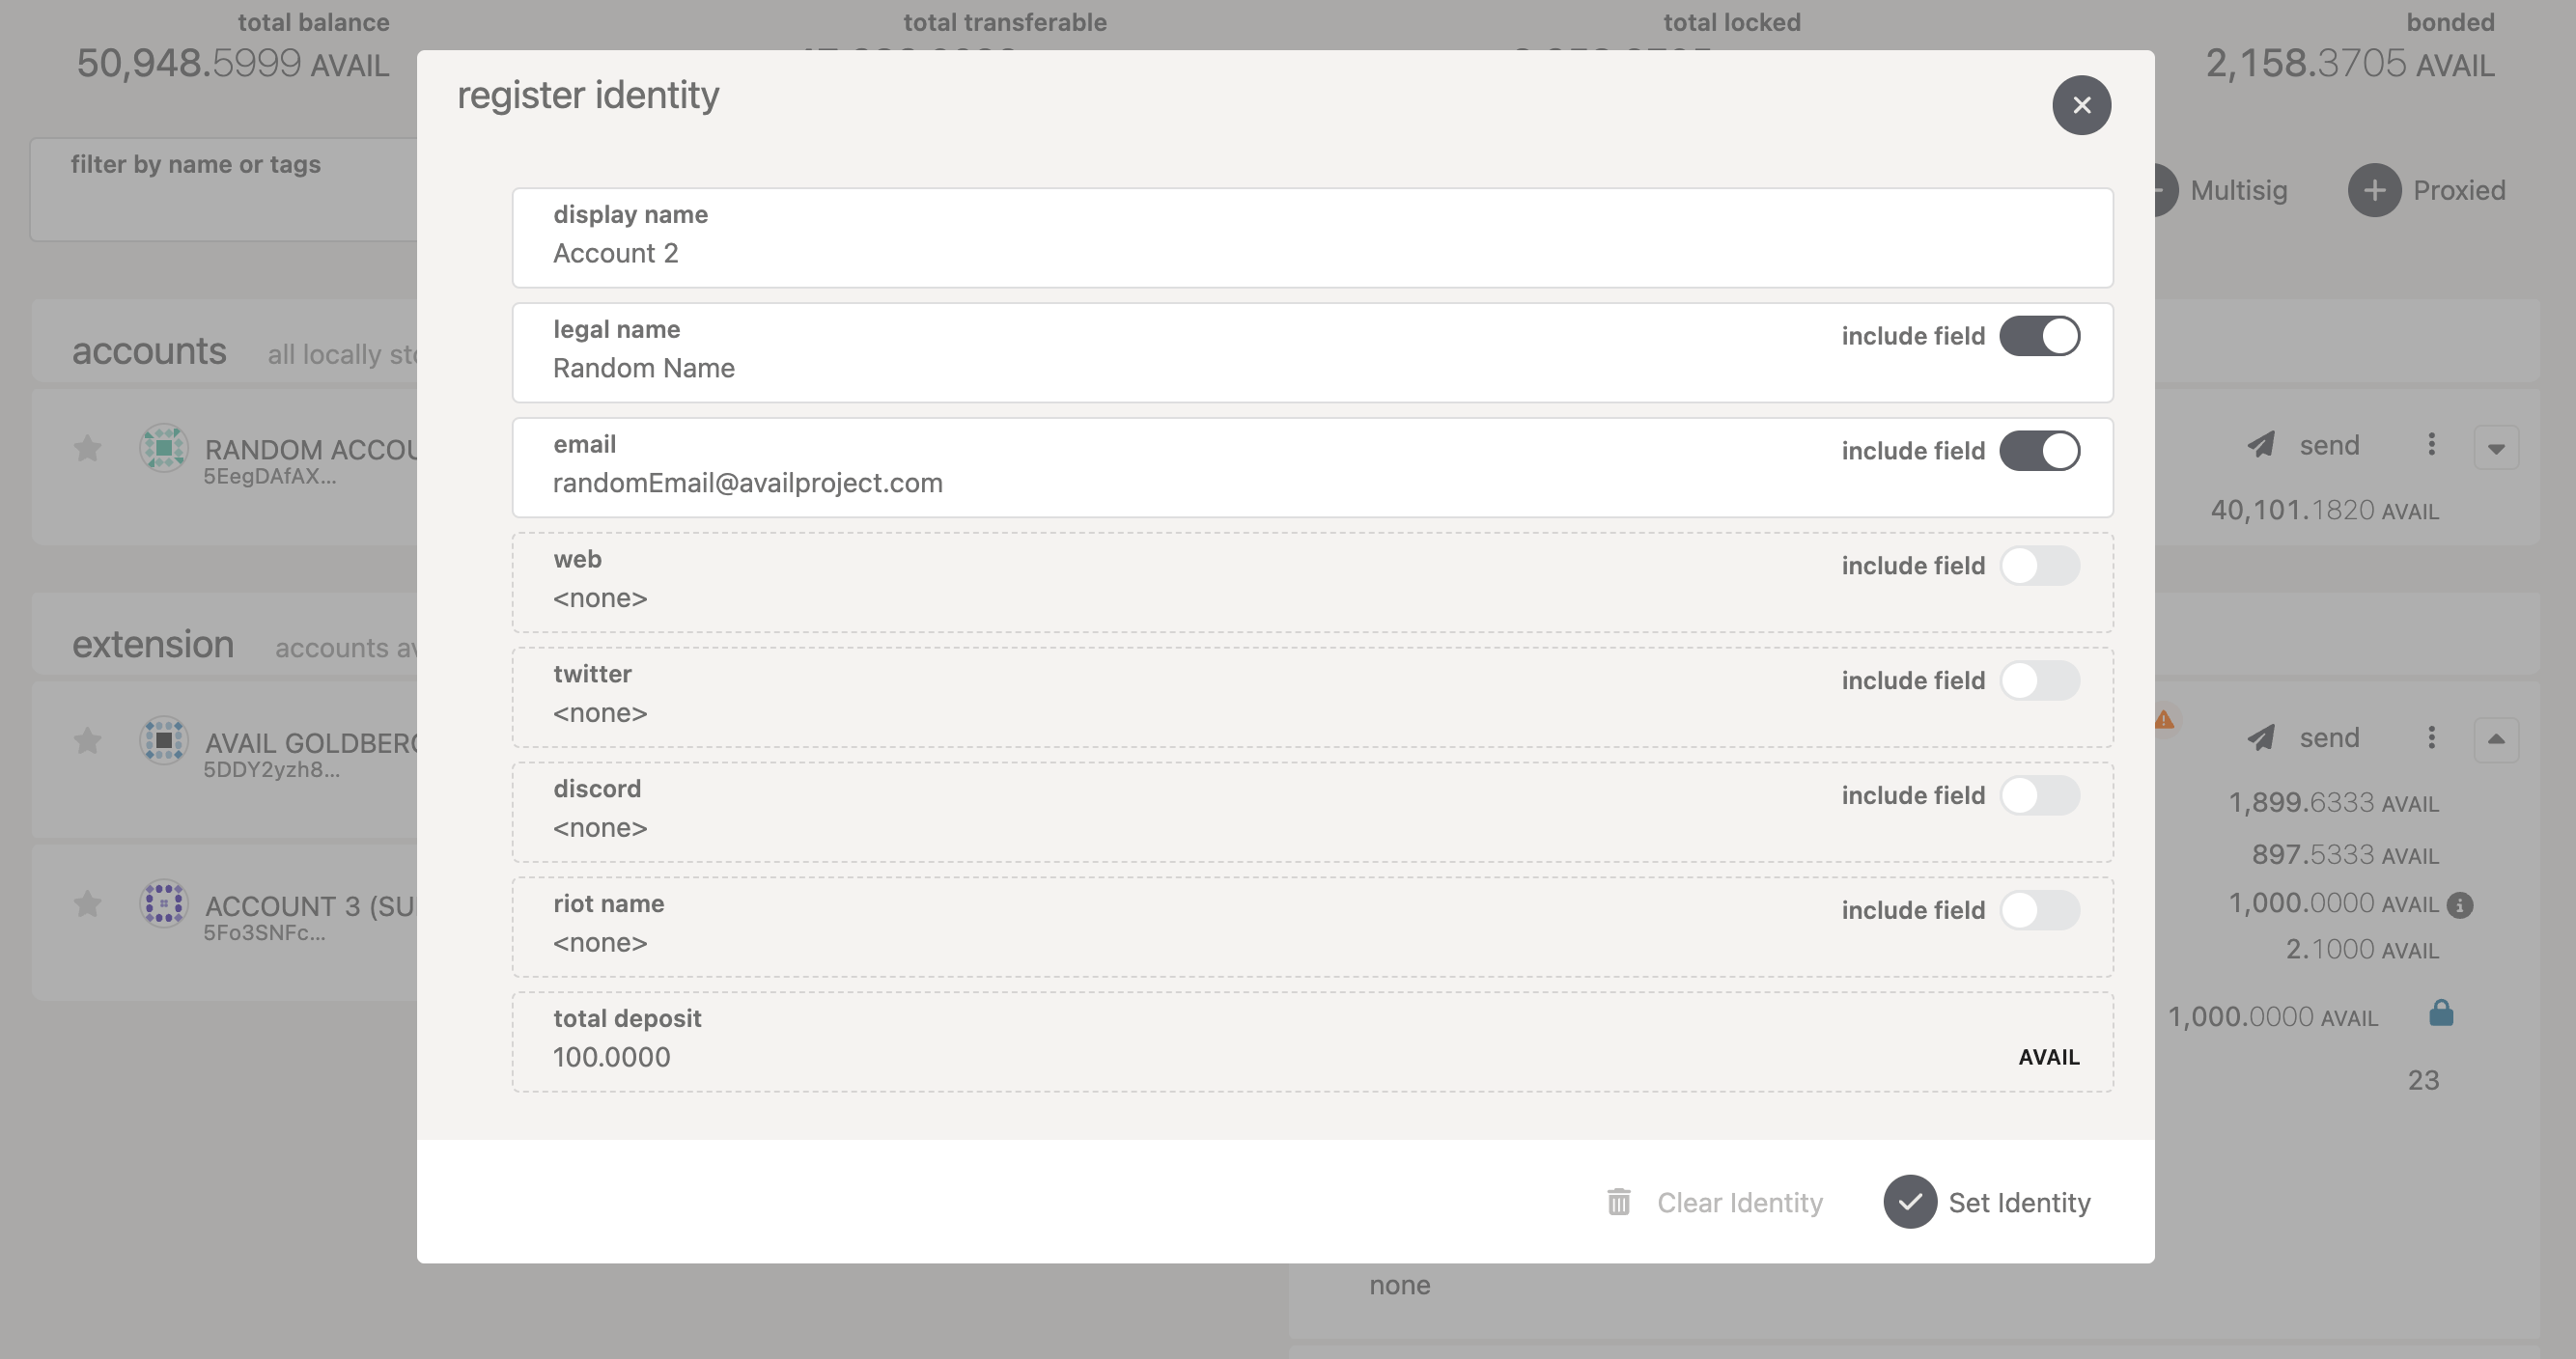
### Submit the transaction
Click on `Set Identity`. Make sure the `appID` is `0`, and click on `Sign and Submit`.
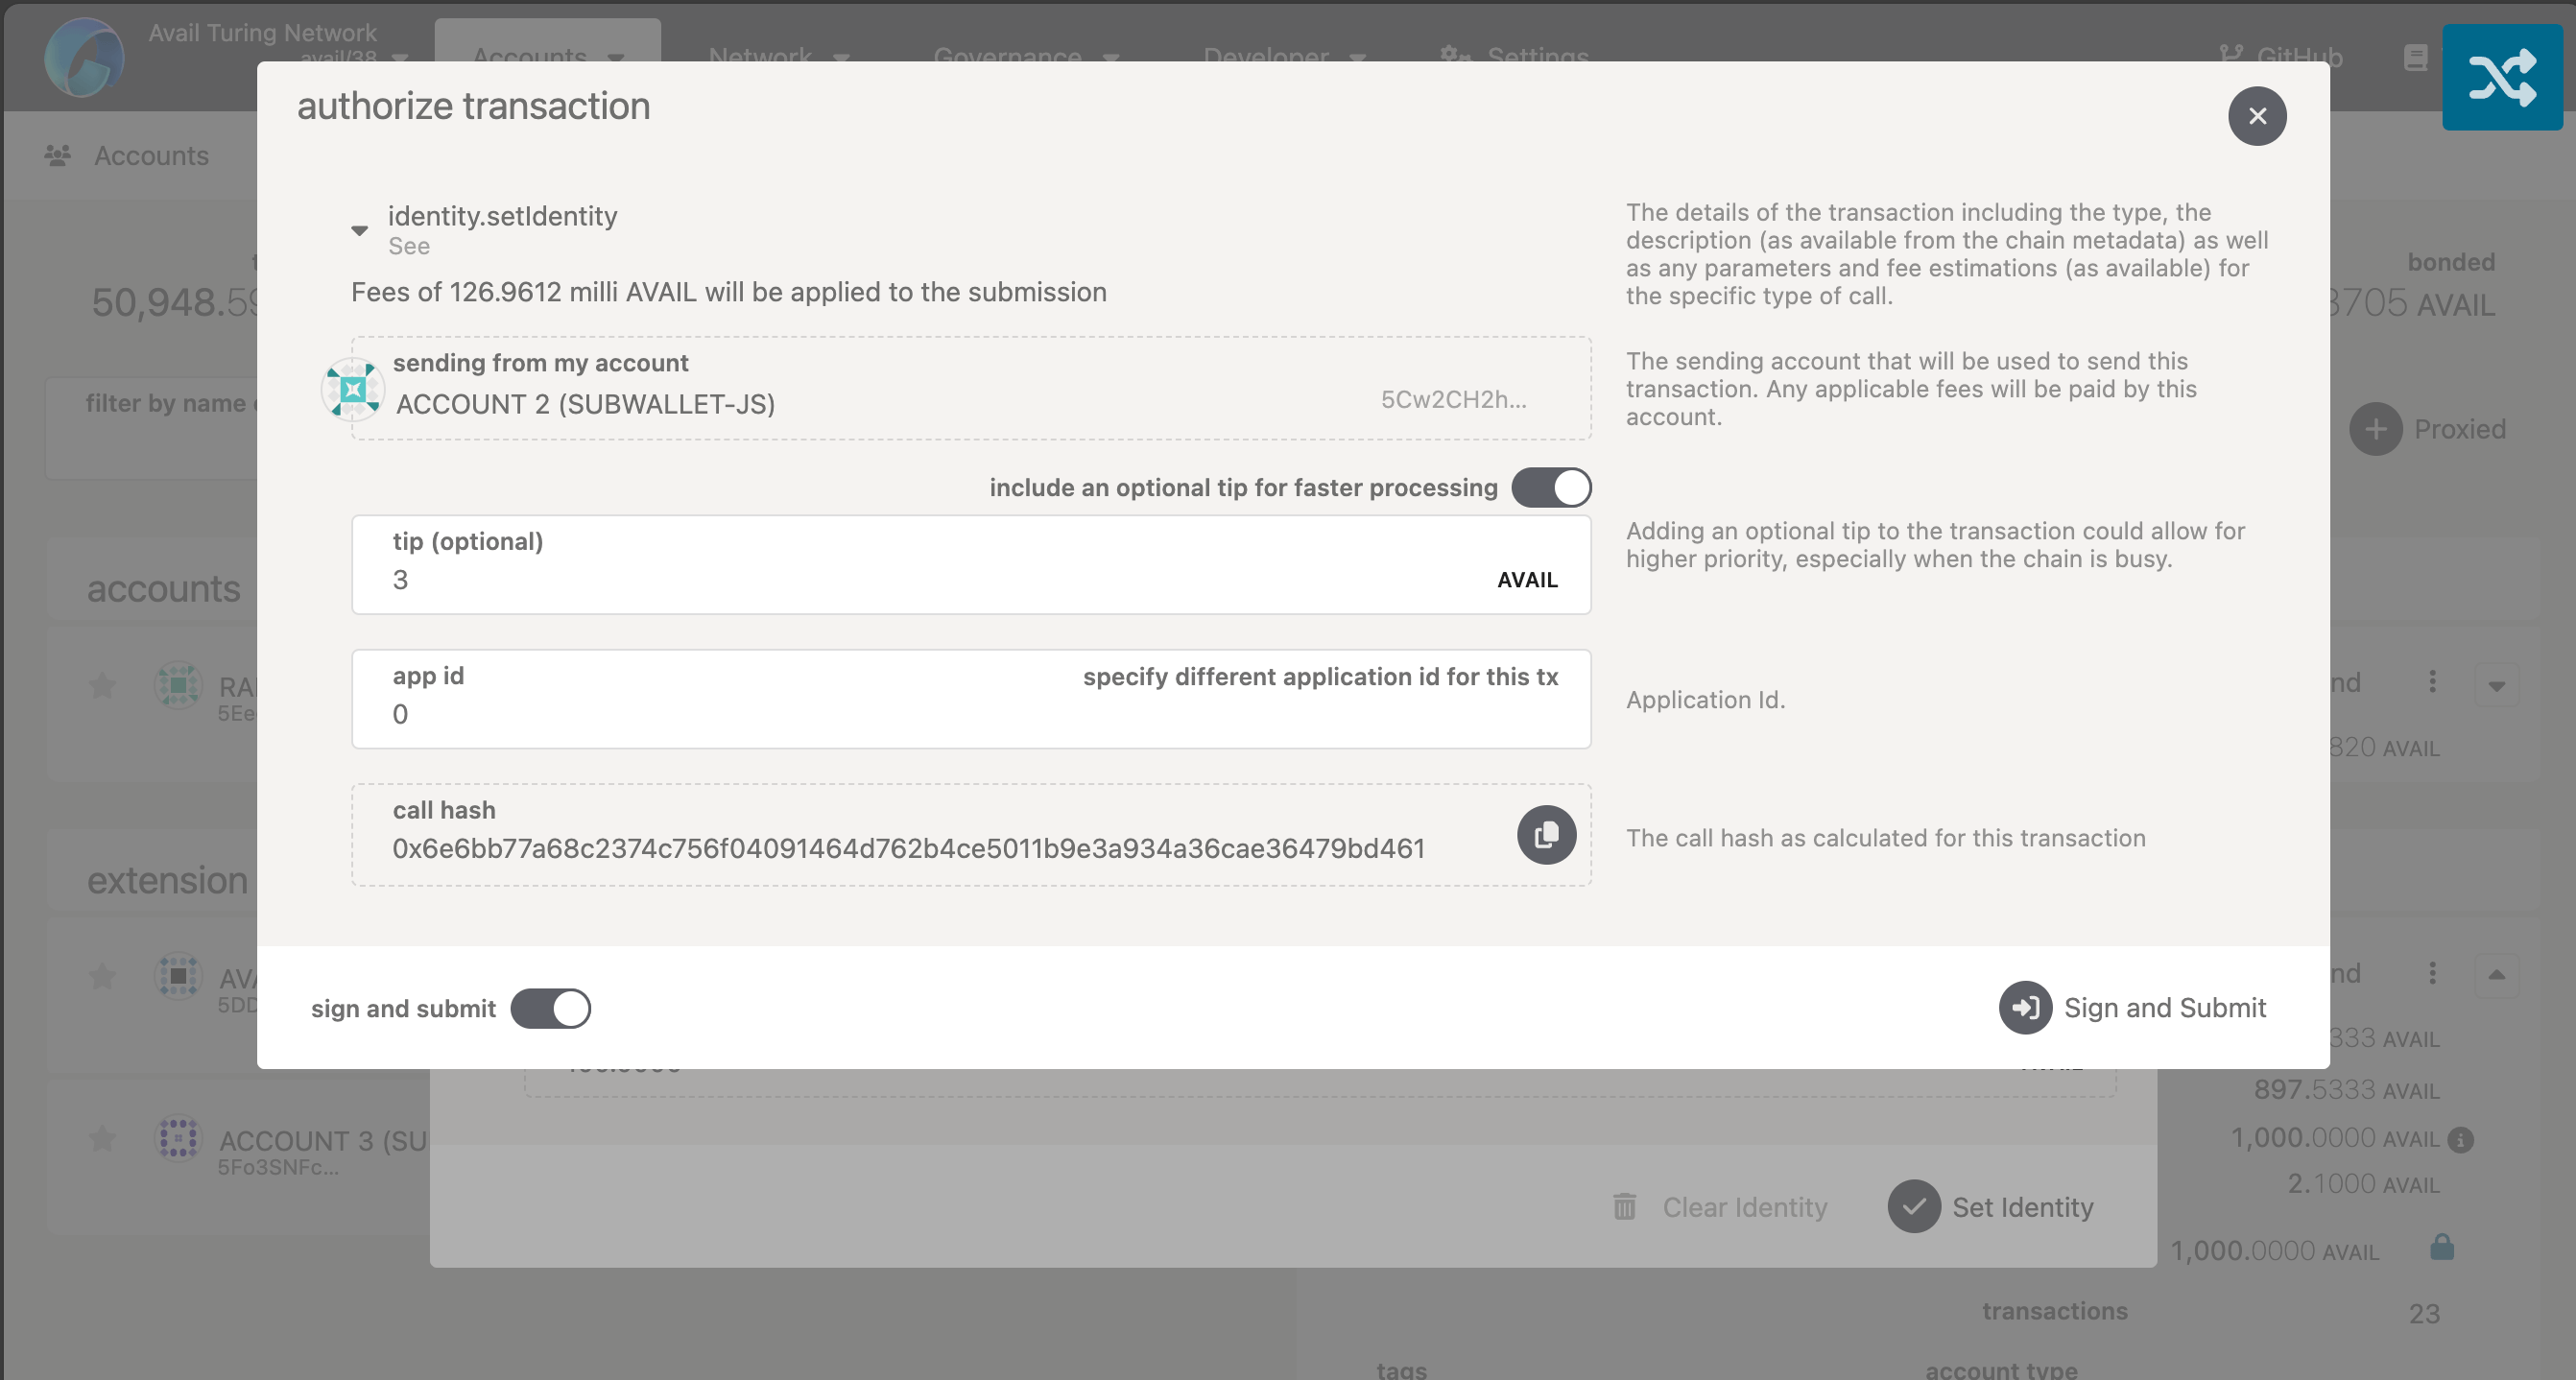
> The account will now have a registered on-chain identity which you can clear to recover the bonded AVAIL tokens.
### Proxies
## Introduction
A *'proxy'* of an account on Avail DA is simply another account on the network that has the power to sign transactions on behalf of the
original account, also known as the *'proxied'* account.
We can also configure the proxy to only have permission to sign a subset of all possible transactions on behalf of the proxied account.
We will learn more about this later.
> **Note**
>
> **MAKE SURE YOU'RE COMFORTABLE WITH THE LINGO**
>
> * *'Proxy'* - A proxy is an account that has the power to sign transactions on behalf of the proxied account.
> * *'Proxied'* - Refers to the original account that the proxies are signing for.
> * *'Any proxy'* - An account that has the power to sign any type of transaction on behalf of the proxied account.
> You can have many different types of proxies on Avail network. Refer to [this section in our docs](/docs/da/user-guides/proxies-on-avail/avail-proxy#proxy-types) for more information.
## 'Proxy' vs 'Pure proxy'
You can create two types of proxies on Avail DA:
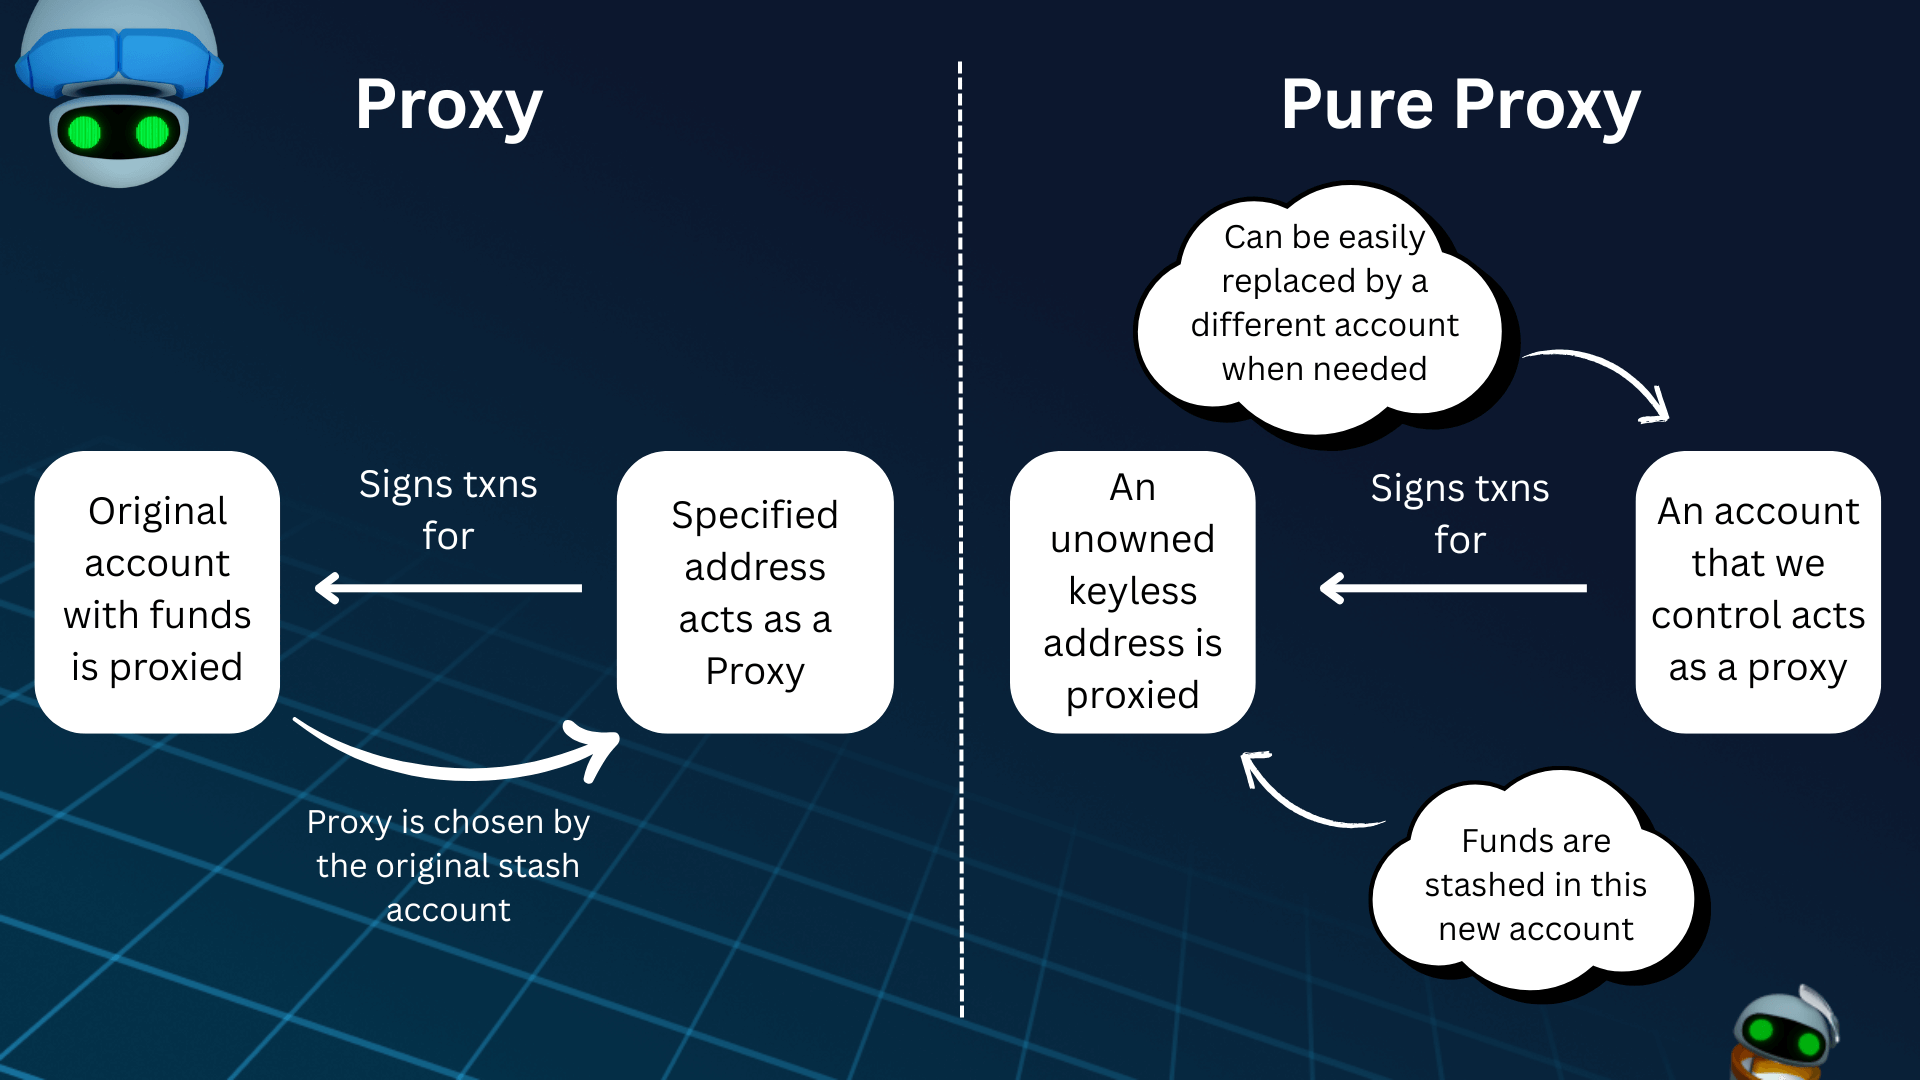
### Proxy accounts
When creating a proxy for an account you own, you choose the exact address of the proxy, which may or may not
be an address that you control.
You can do this using the `proxy.addProxy` extrinsic. The Avail Apps explorer provides a convenient UI abstraction for this,
instructions for which can be found here:
- [**Proxy accounts**](/docs/da/user-guides/proxies-on-avail/avail-proxy)
> 👉 The key principle to note here that is that you can create a proxy account that is not under your control.
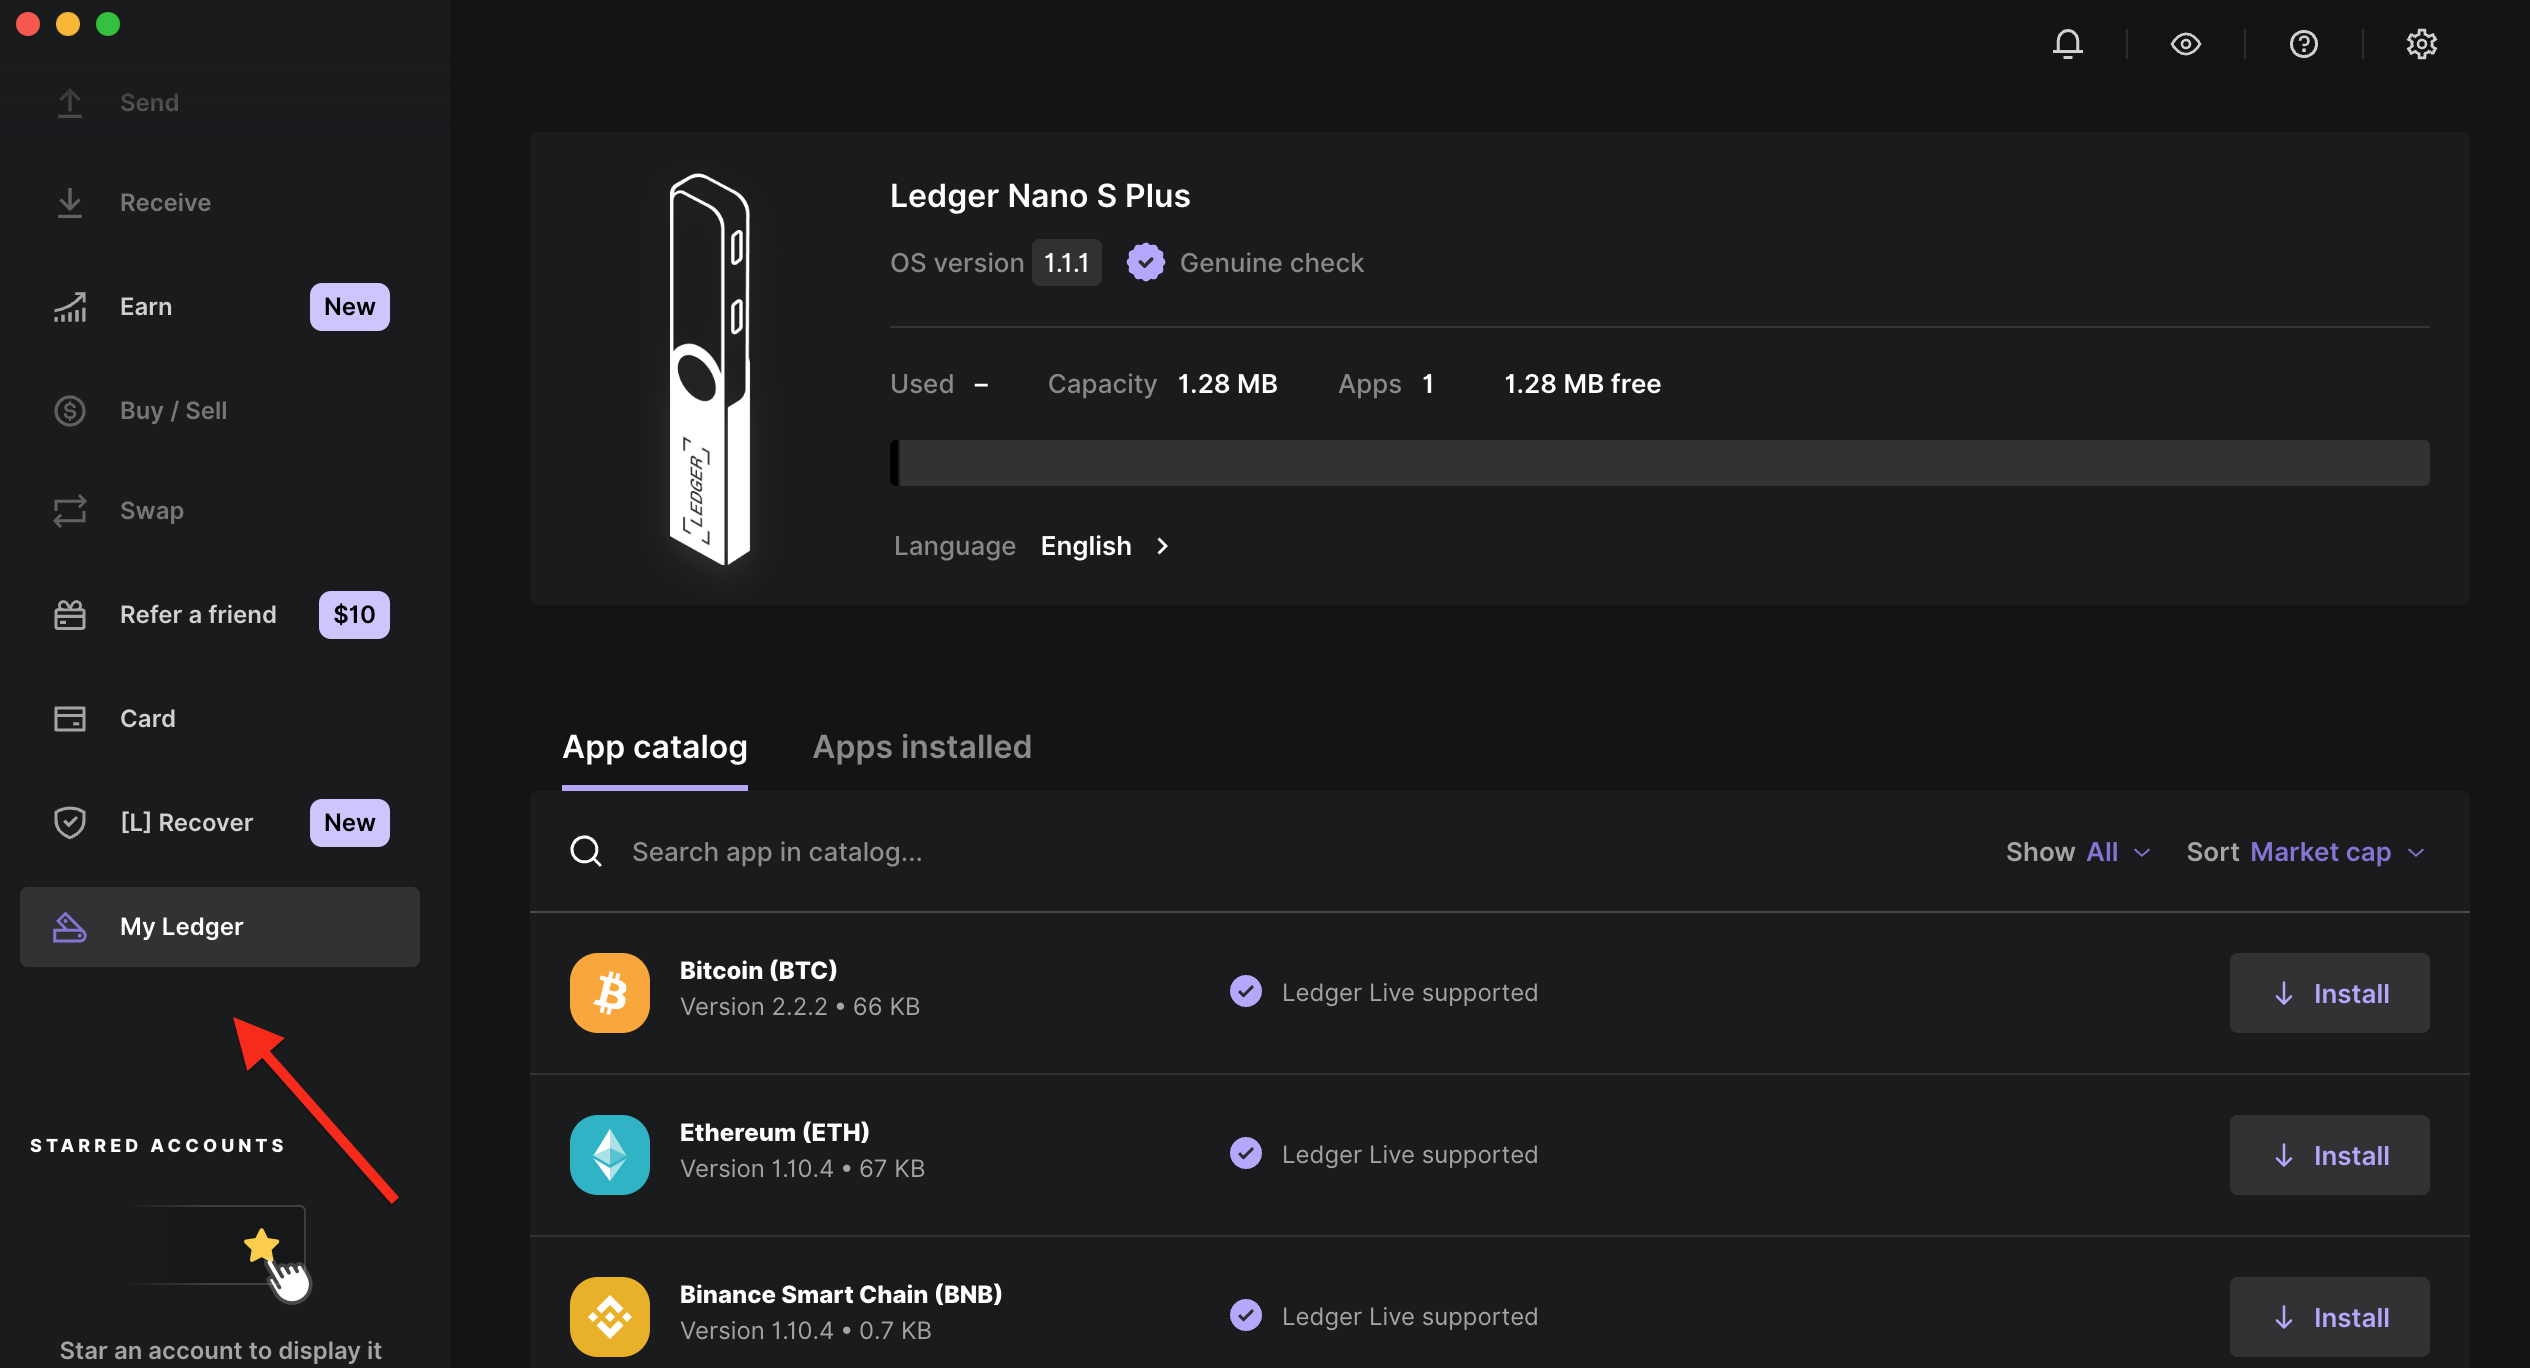
For Example
You might have an account with a significant amount of funds that you want to stake on the network without taking on the
responsibility of managing the staking operation itself.
You may, in this scenario, choose to add a friend's account as a proxy to your original account, but with the stipulation that
this proxy can only sign staking-related operations on your behalf.
You therefore have a situation where a second person has the power to stake funds on your behalf, but without the ability to outright
transfer your tokens away.
> **Warning**
>
> 1. The example above was a hypothetical scenario. Please take care while delegating responsibilities to proxies that you do not control.
> 2. You can always revoke a specific proxy's permissions using the `proxy.removeProxy` extrinsic.
### Pure proxy accounts
When creating a pure proxy for an account you own, you do not get to choose the address of the proxy.
Therein lies the key difference between a proxy and a pure proxy.
While you get a deterministic address in the first case, the proxy address is randomly assigned in the second.
You can create a pure proxy using the `proxy.createPure` extrinsic.
The instructions for this can be found here:
- [**Pure proxy accounts**](/docs/da/user-guides/proxies-on-avail/avail-pure-proxy)
Why would you want a pure proxy?
You will see this more clearly in the [dedicated guide for setting up pure proxies](/docs/da/user-guides/proxies-on-avail/avail-pure-proxy), but the
short answer is that using a pure proxy setup allows you to conveniently rotate the any proxy behind the pure proxy without having to
move funds out of the pure proxy.
This is especially useful when the pure proxy is being used to hold funds on behalf of a committee that
needs to vote on proposals using a multisig, which acts as the any proxy for the pure proxy.
For example:
1. Consider that a pure proxy account is being used to stake `AVAIL` on the network on behalf of a committee of 3 people.
The committee votes on proposals using a multisig, which acts as the any proxy for the pure proxy.
2. If one of the committee members needs to be replaced, a fresh multisig will need to be setup to accommodate the new member.
3. With a pure proxy setup, the old multisig can simply be rotated out in favour of the new multisig without having to unstake or move funds
out of the pure proxy.
4. Any other way of implementing this would require an unstaking of funds followed by a migration into a new account.
> **Note**
>
> Since nobody actually owns the private key of a pure proxy, it cannot be compromised via a private key leak.
### Ledger
Avail DA is a modular blockchain built for the next generation of rollups by being an effective and efficient
solution for the [data availability problem](https://blog.availproject.org/data-availability-what-is-it/).
The AVAIL token is the native token of the Avail DA, used to perform basic transactions, as well as to submit data.
It therefore becomes crucial to store your AVAIL tokens securely, especially for wallets with large amounts of them.
This guide will take you through verifying, rejecting, and approving a transaction on Avail DA using a Ledger wallet.
## Prerequisites
1. A ledger device. Refer to [ledger's official website](https://www.ledger.com/) for the same.
2. The Avail app for ledger should be installed on your ledger device. You can do so by downloading the
[ledger live app](https://www.ledger.com/ledger-live) on your computer or mobile and use it to install the Avail app on your ledger.
> **Warning**
>
> If you're using a new ledger device, it is highly recommended to ensure it's firmware is up to date before anything else.
> You can update it's firmware using the ledger live app.
## Set up your Ledger from scratch
### Video guide
If Youtube is more your style, you can watch the video guide below:
### Install the Avail app on your ledger device
1. Open the Ledger live app and naviagte to the 'My Ledger' tab from the sidebar.
2. Search for the `Avail` app inside the app catalog, and install it on your device.
3. Once installed, this is what your ledger device's homepage should look like:
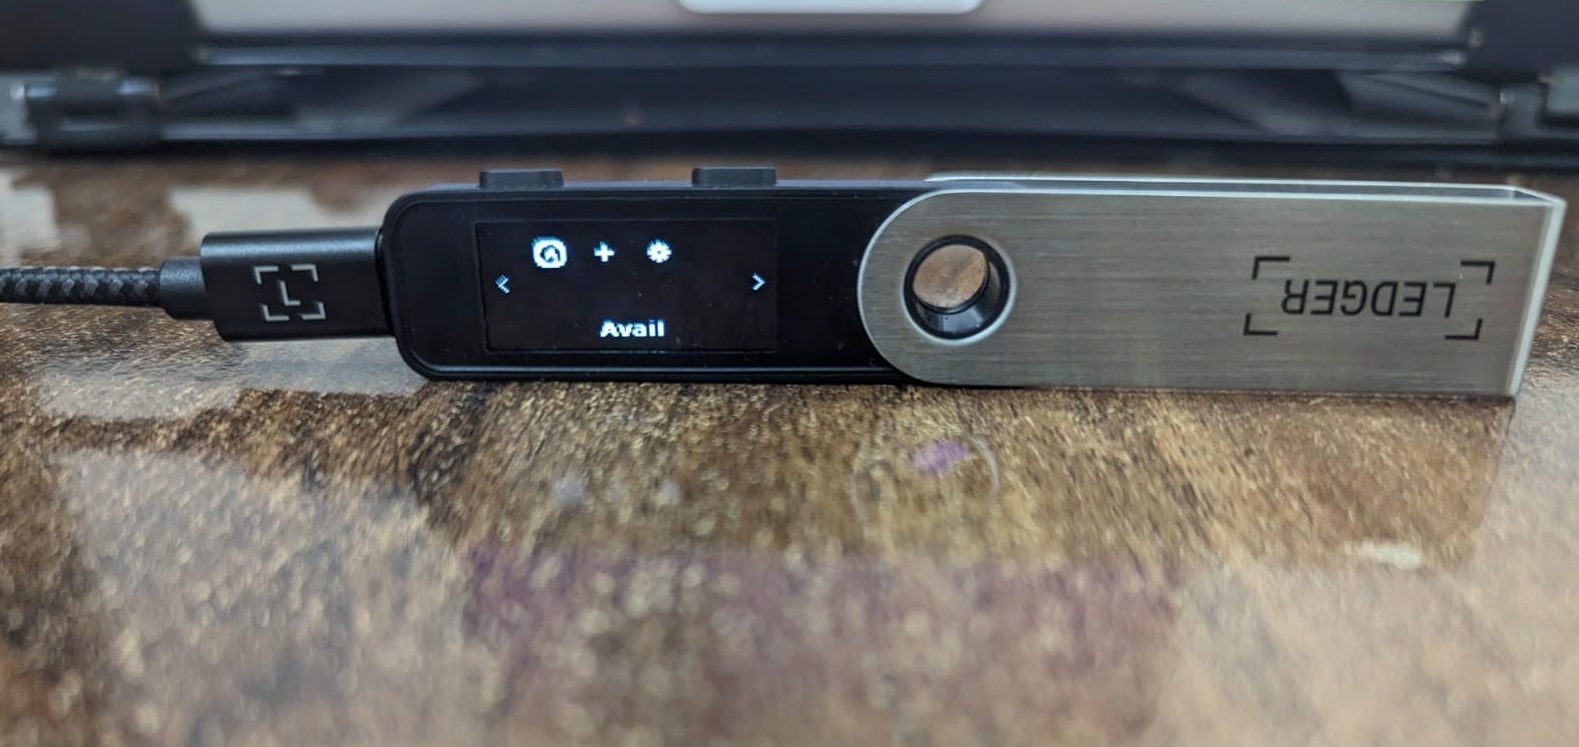
### Open the Avail app on your ledger device
> **Note**
>
> Please note that you will need to have the Avail app open on your ledger device to interact with Avail DA in any capacity.
This is what your ledger device should display when the Avail app is opened:
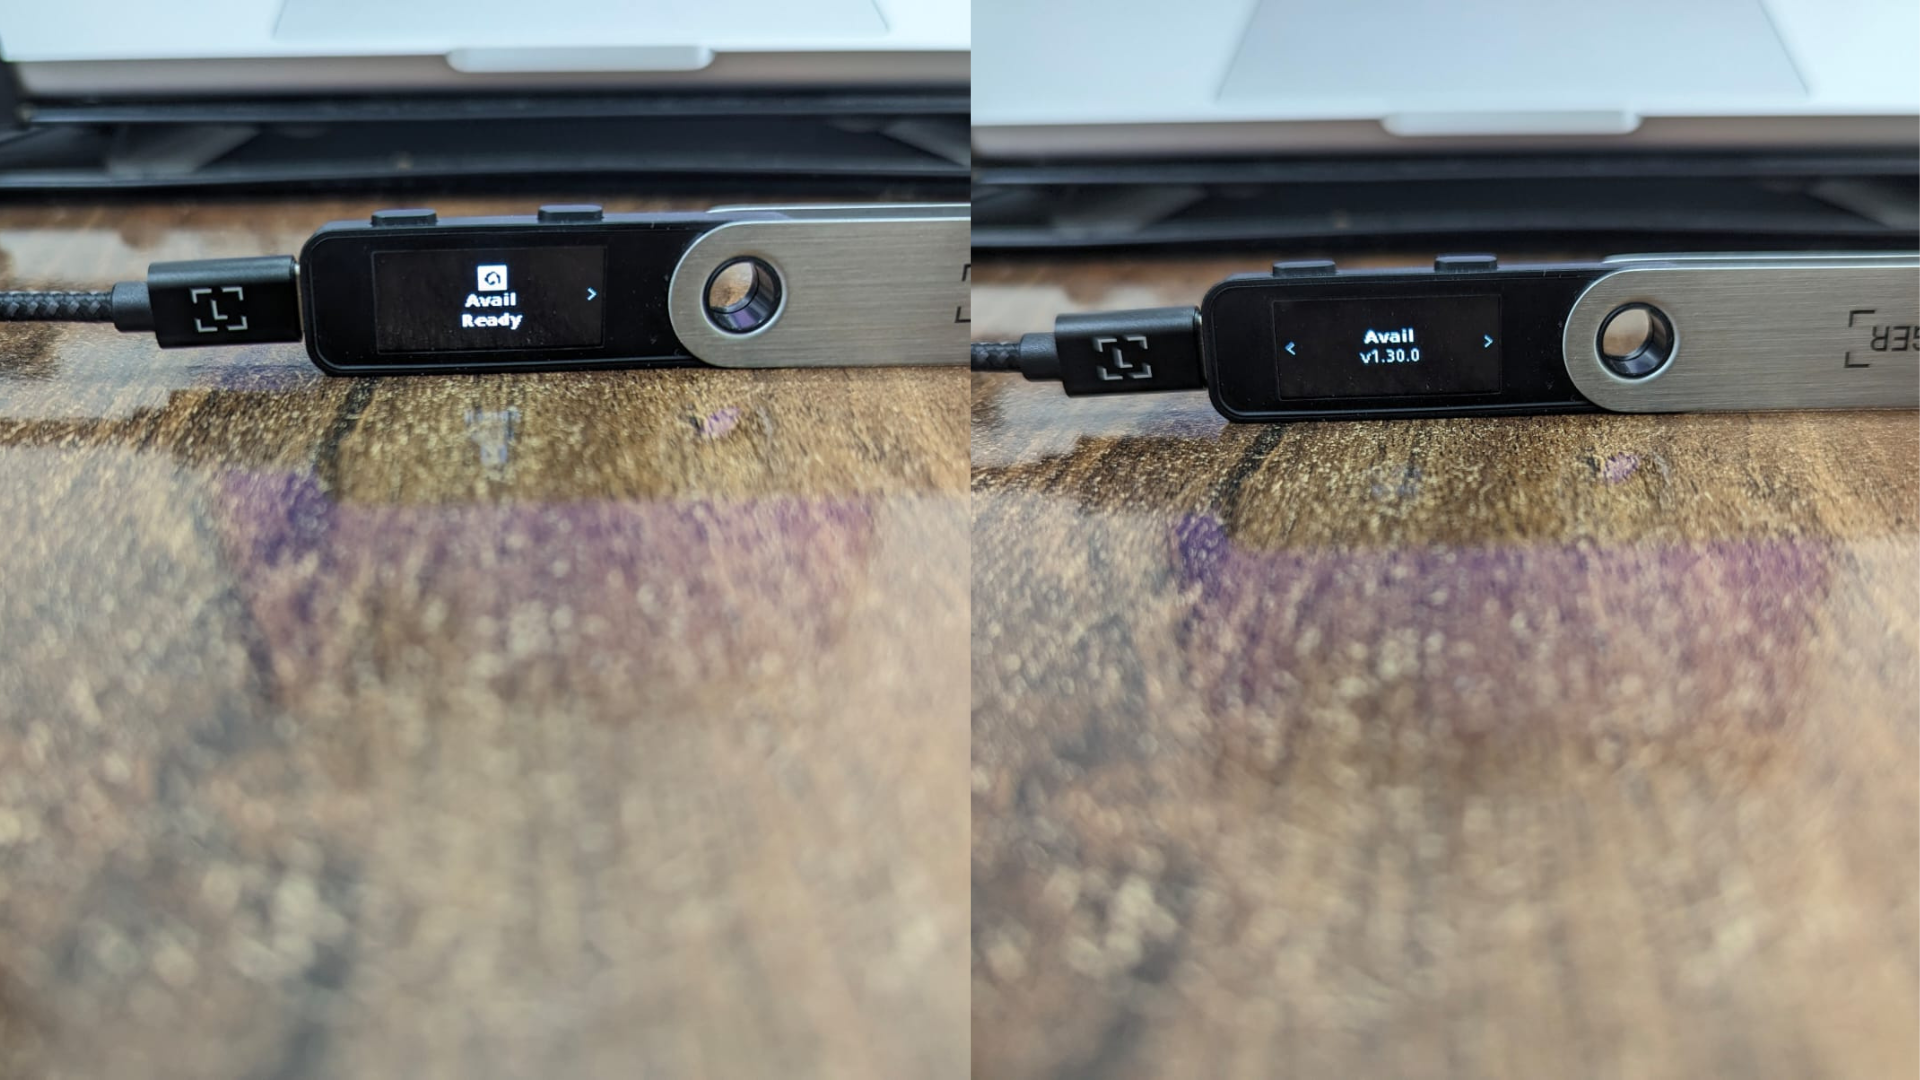
### Derive an Avail DA account online using your ledger device
1. Go to the [settings tab of the Avail apps explorer](https://explorer.availproject.org/#/settings).
2. Click on `manage hardware connections` and select `Attach Ledger via WebUSB`, then save the changes.
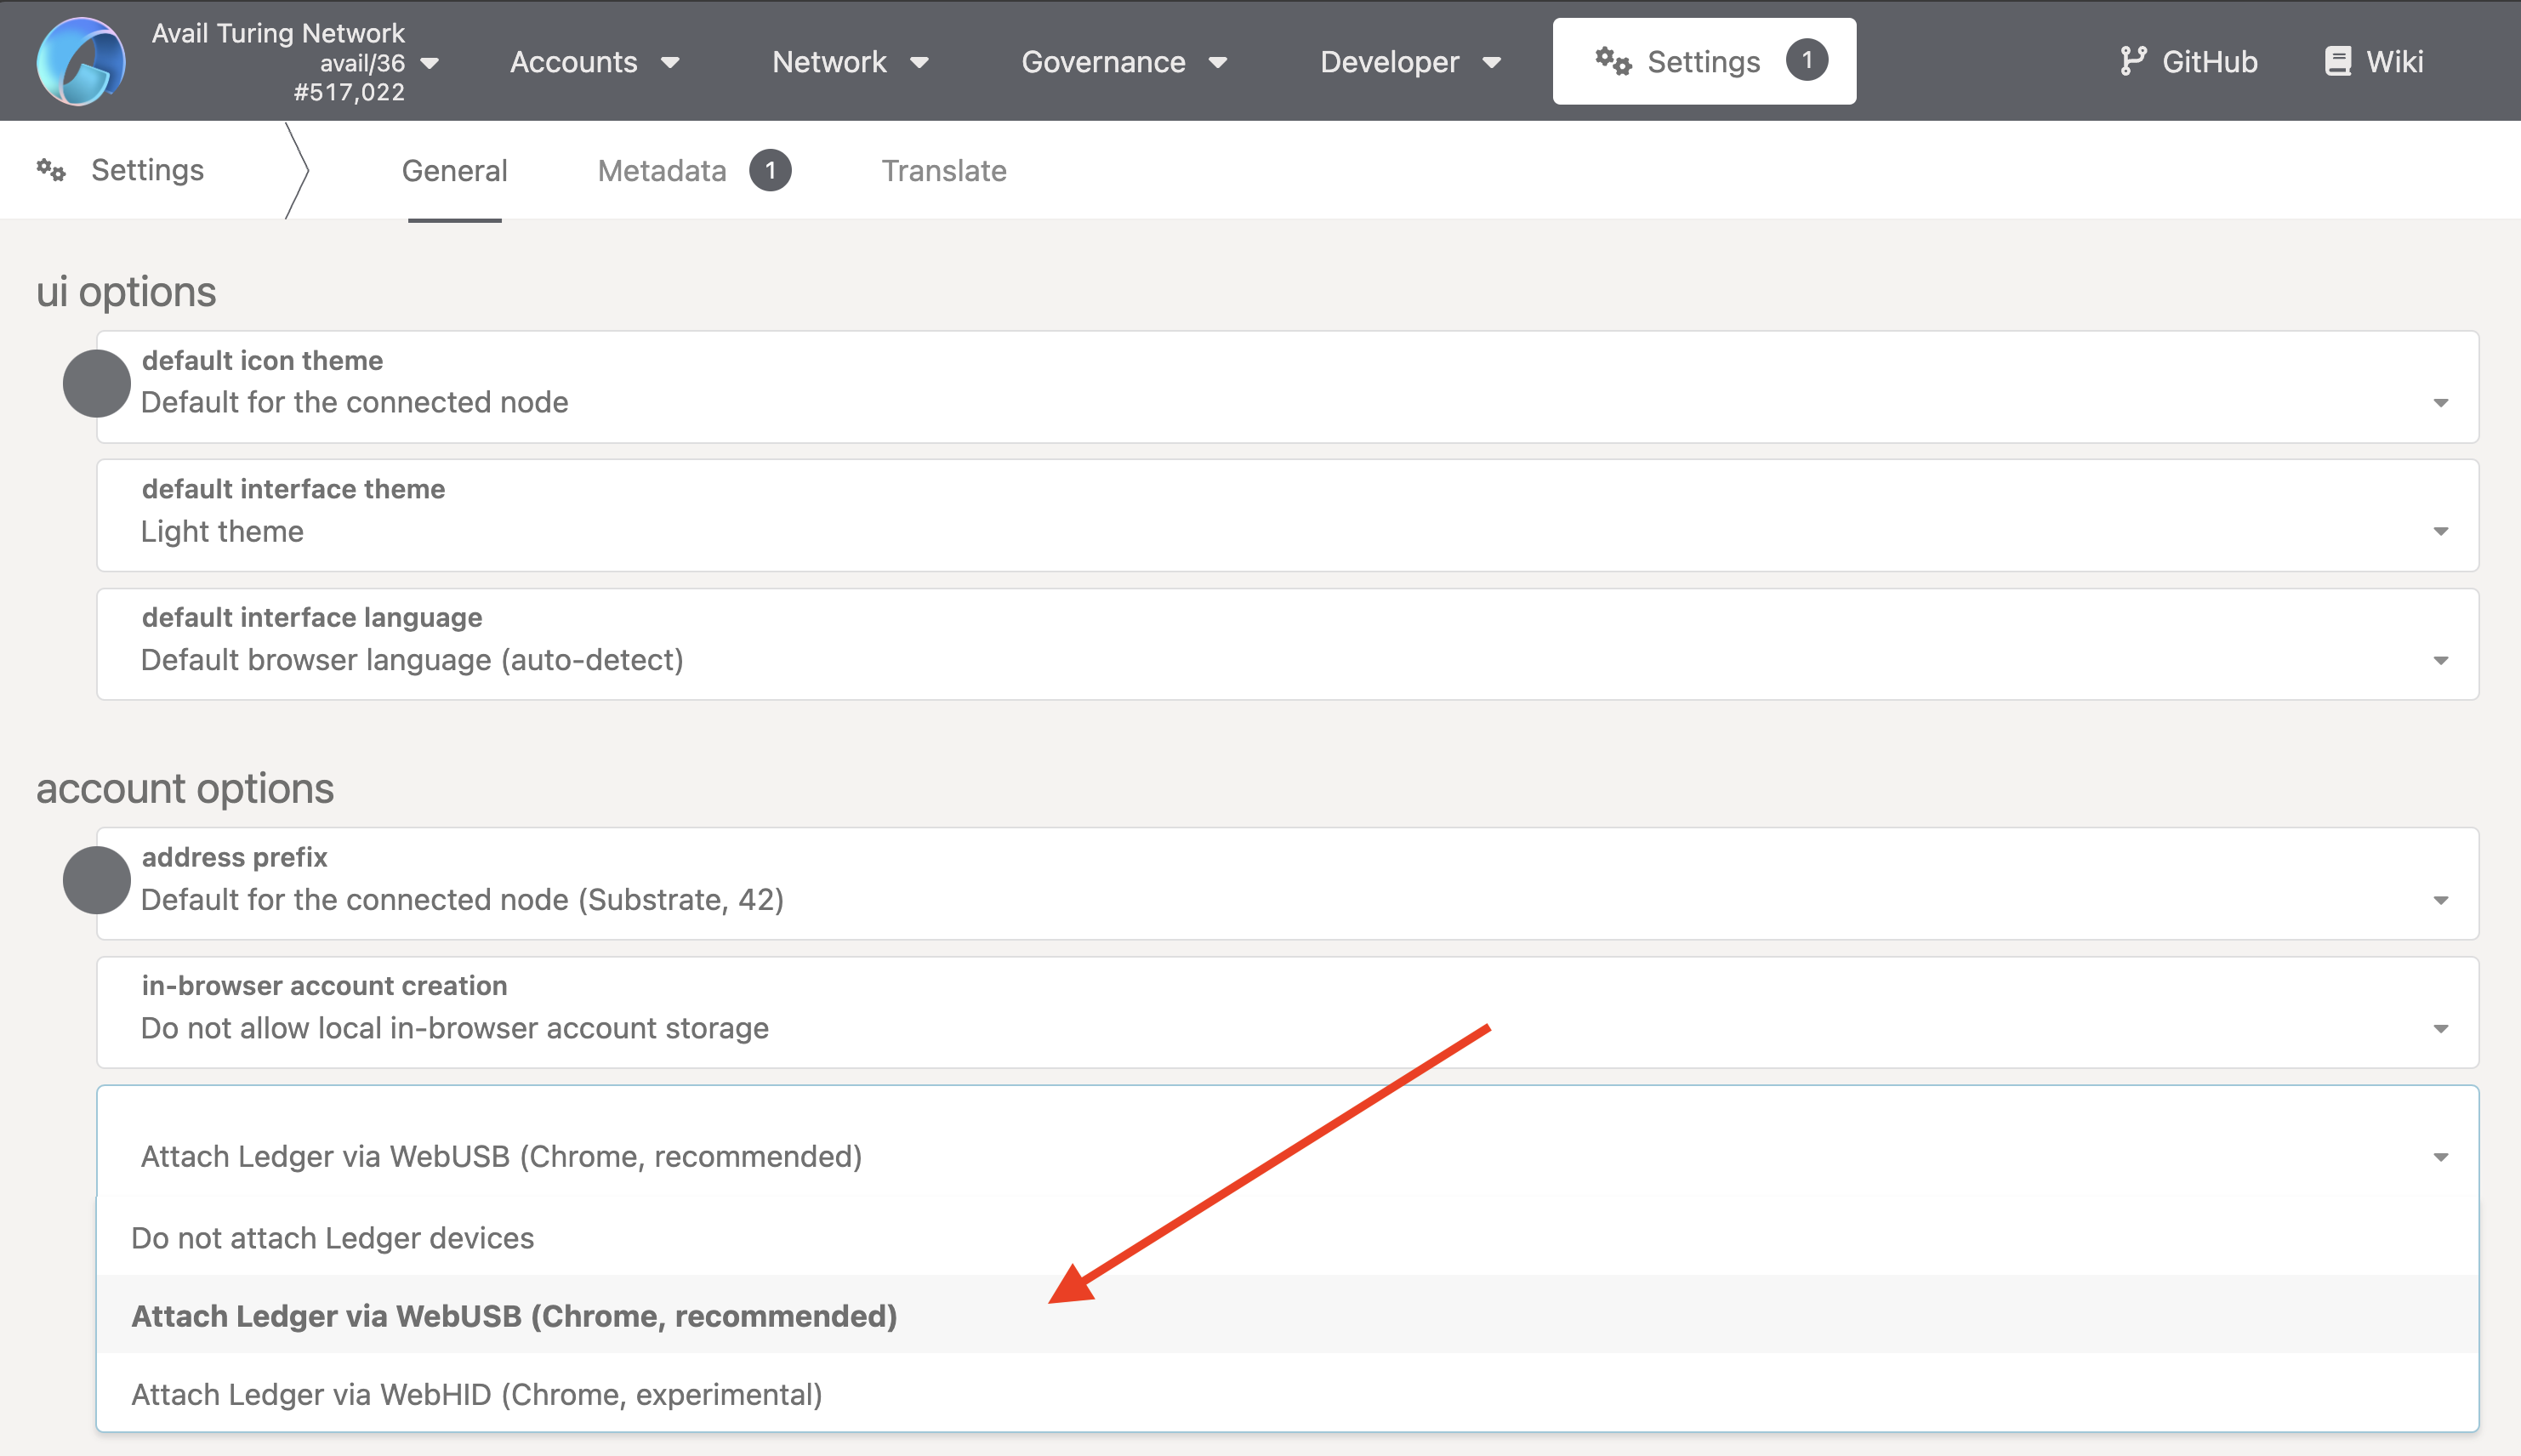
3. Go to the [accounts tab of the Avail apps explorer](https://explorer.availproject.org/#/accounts).
4. Click on `From Ledger`.
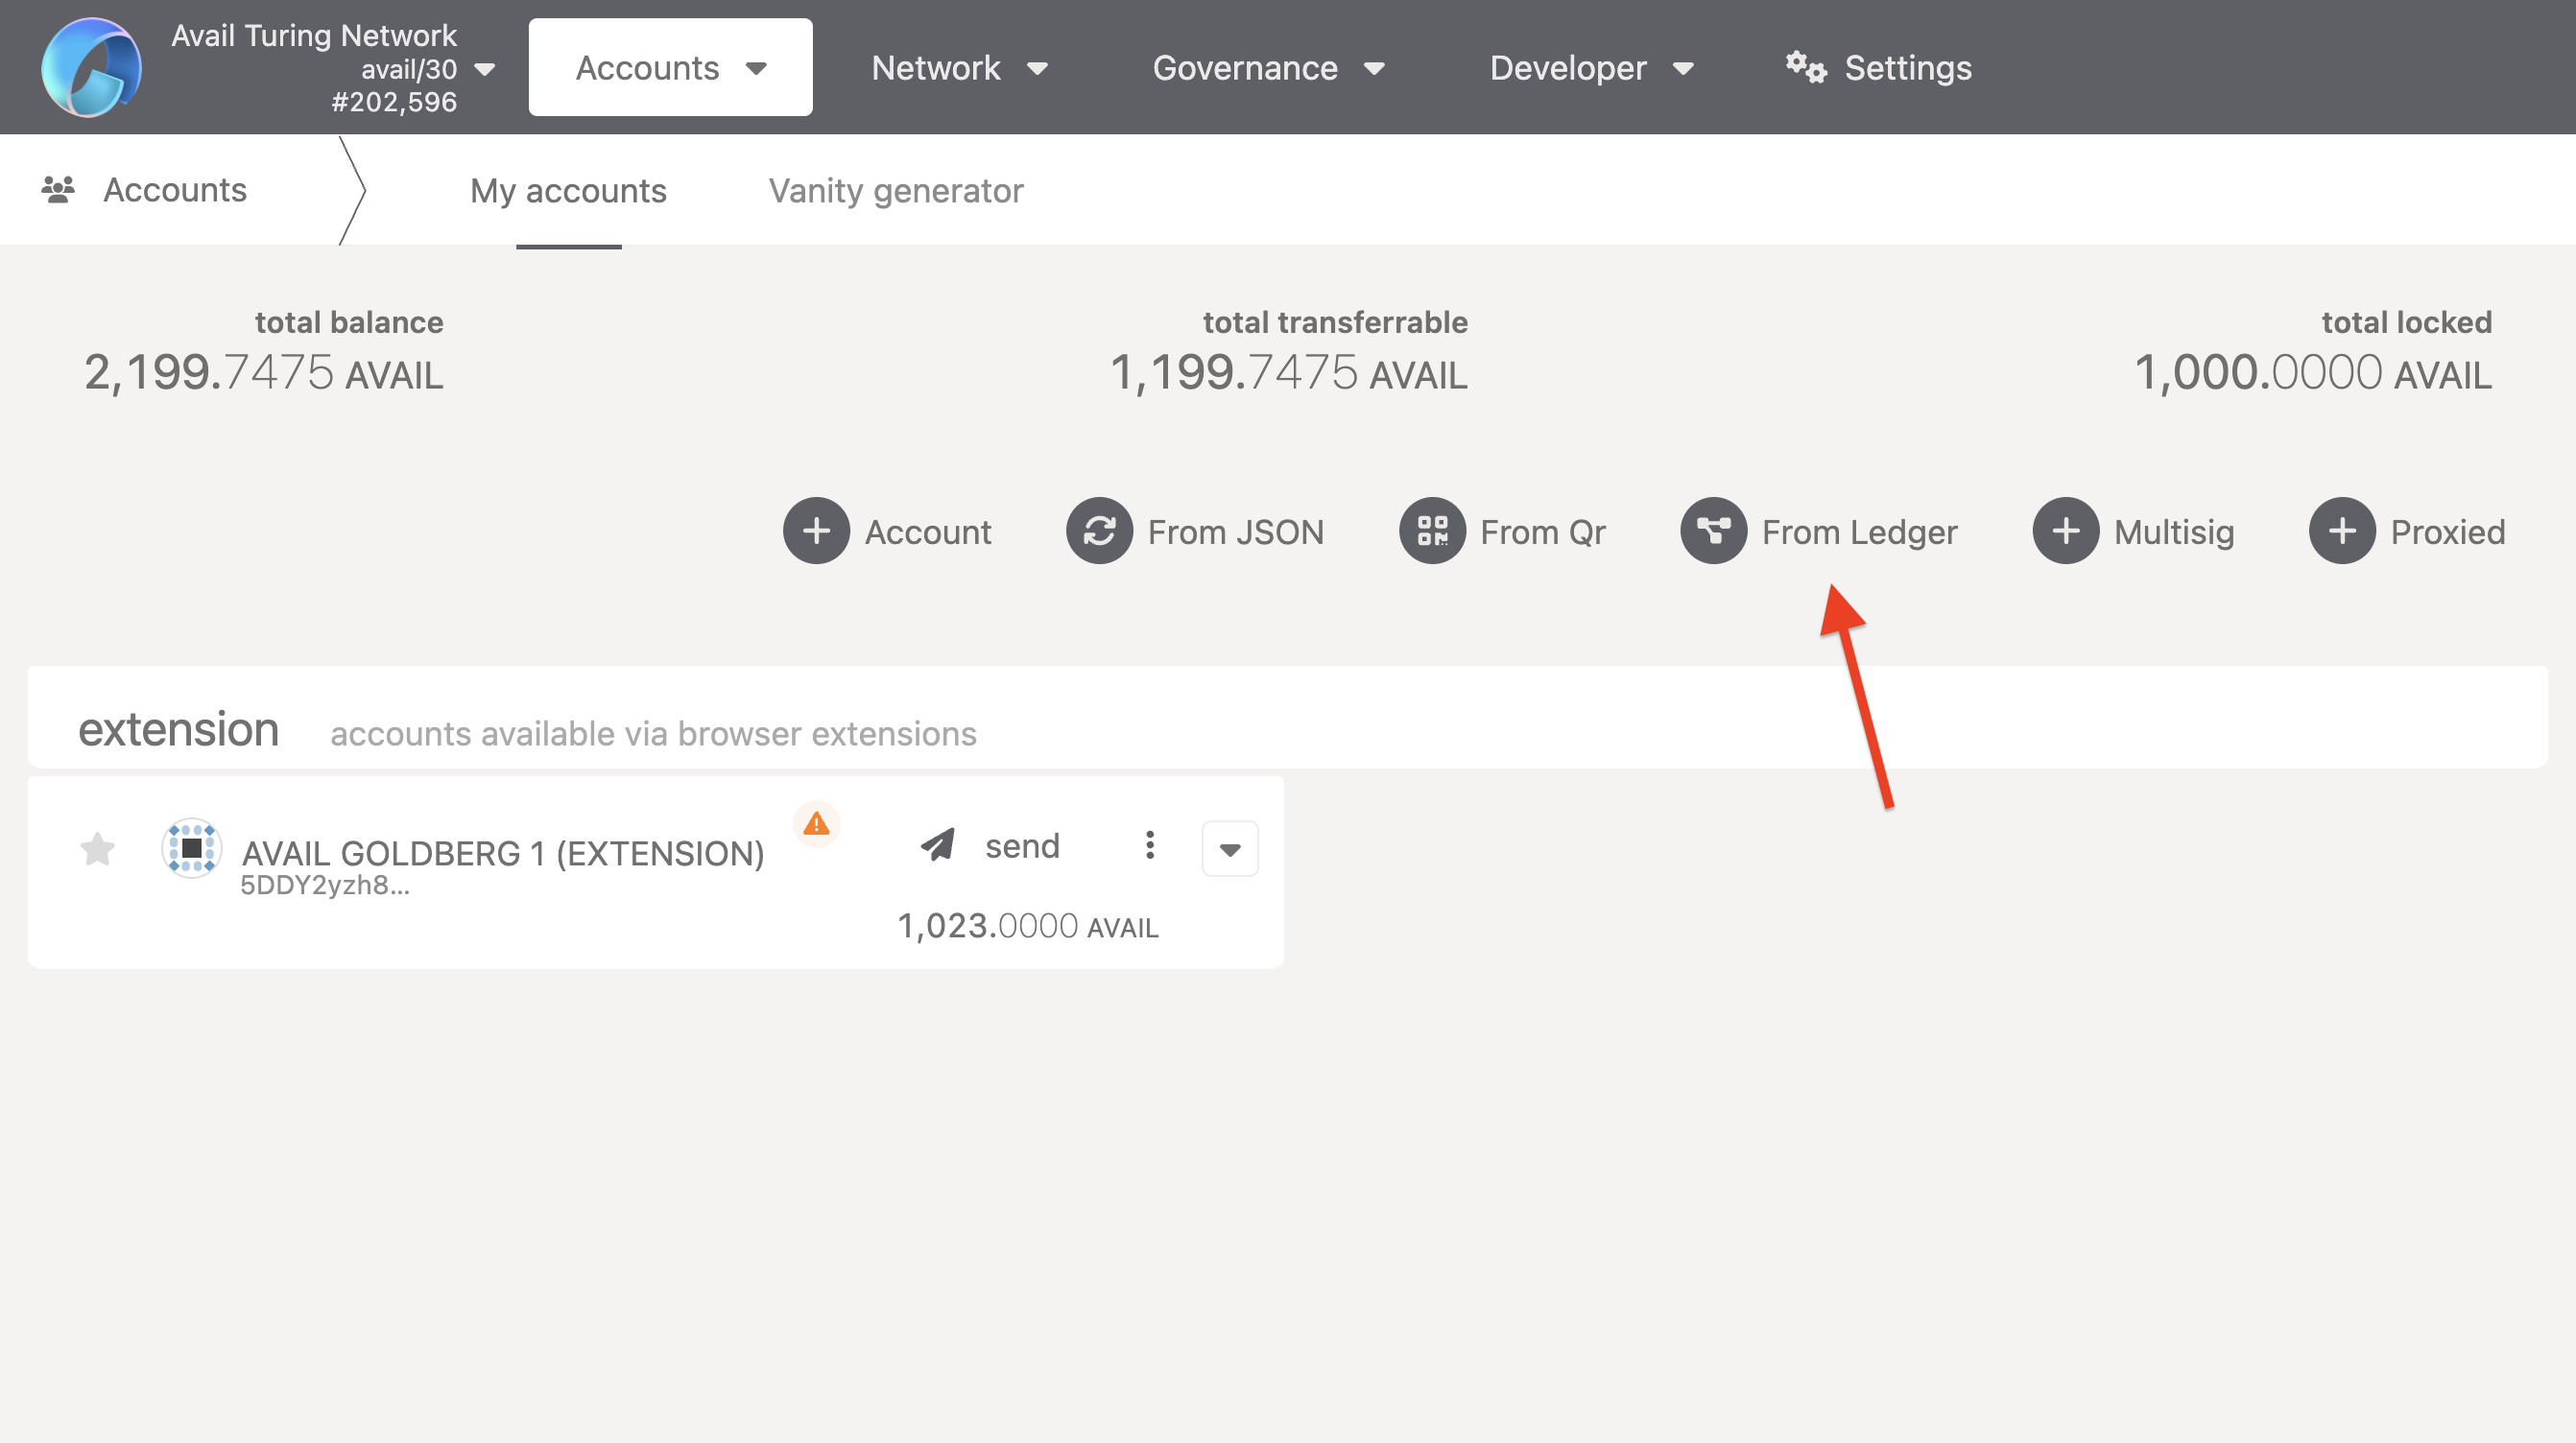
5. A form will pop up. Give your derived account a random name.
6. Choose a top-level and a second-level derivation for your account. We'll be going with `0` and `0` respectively.
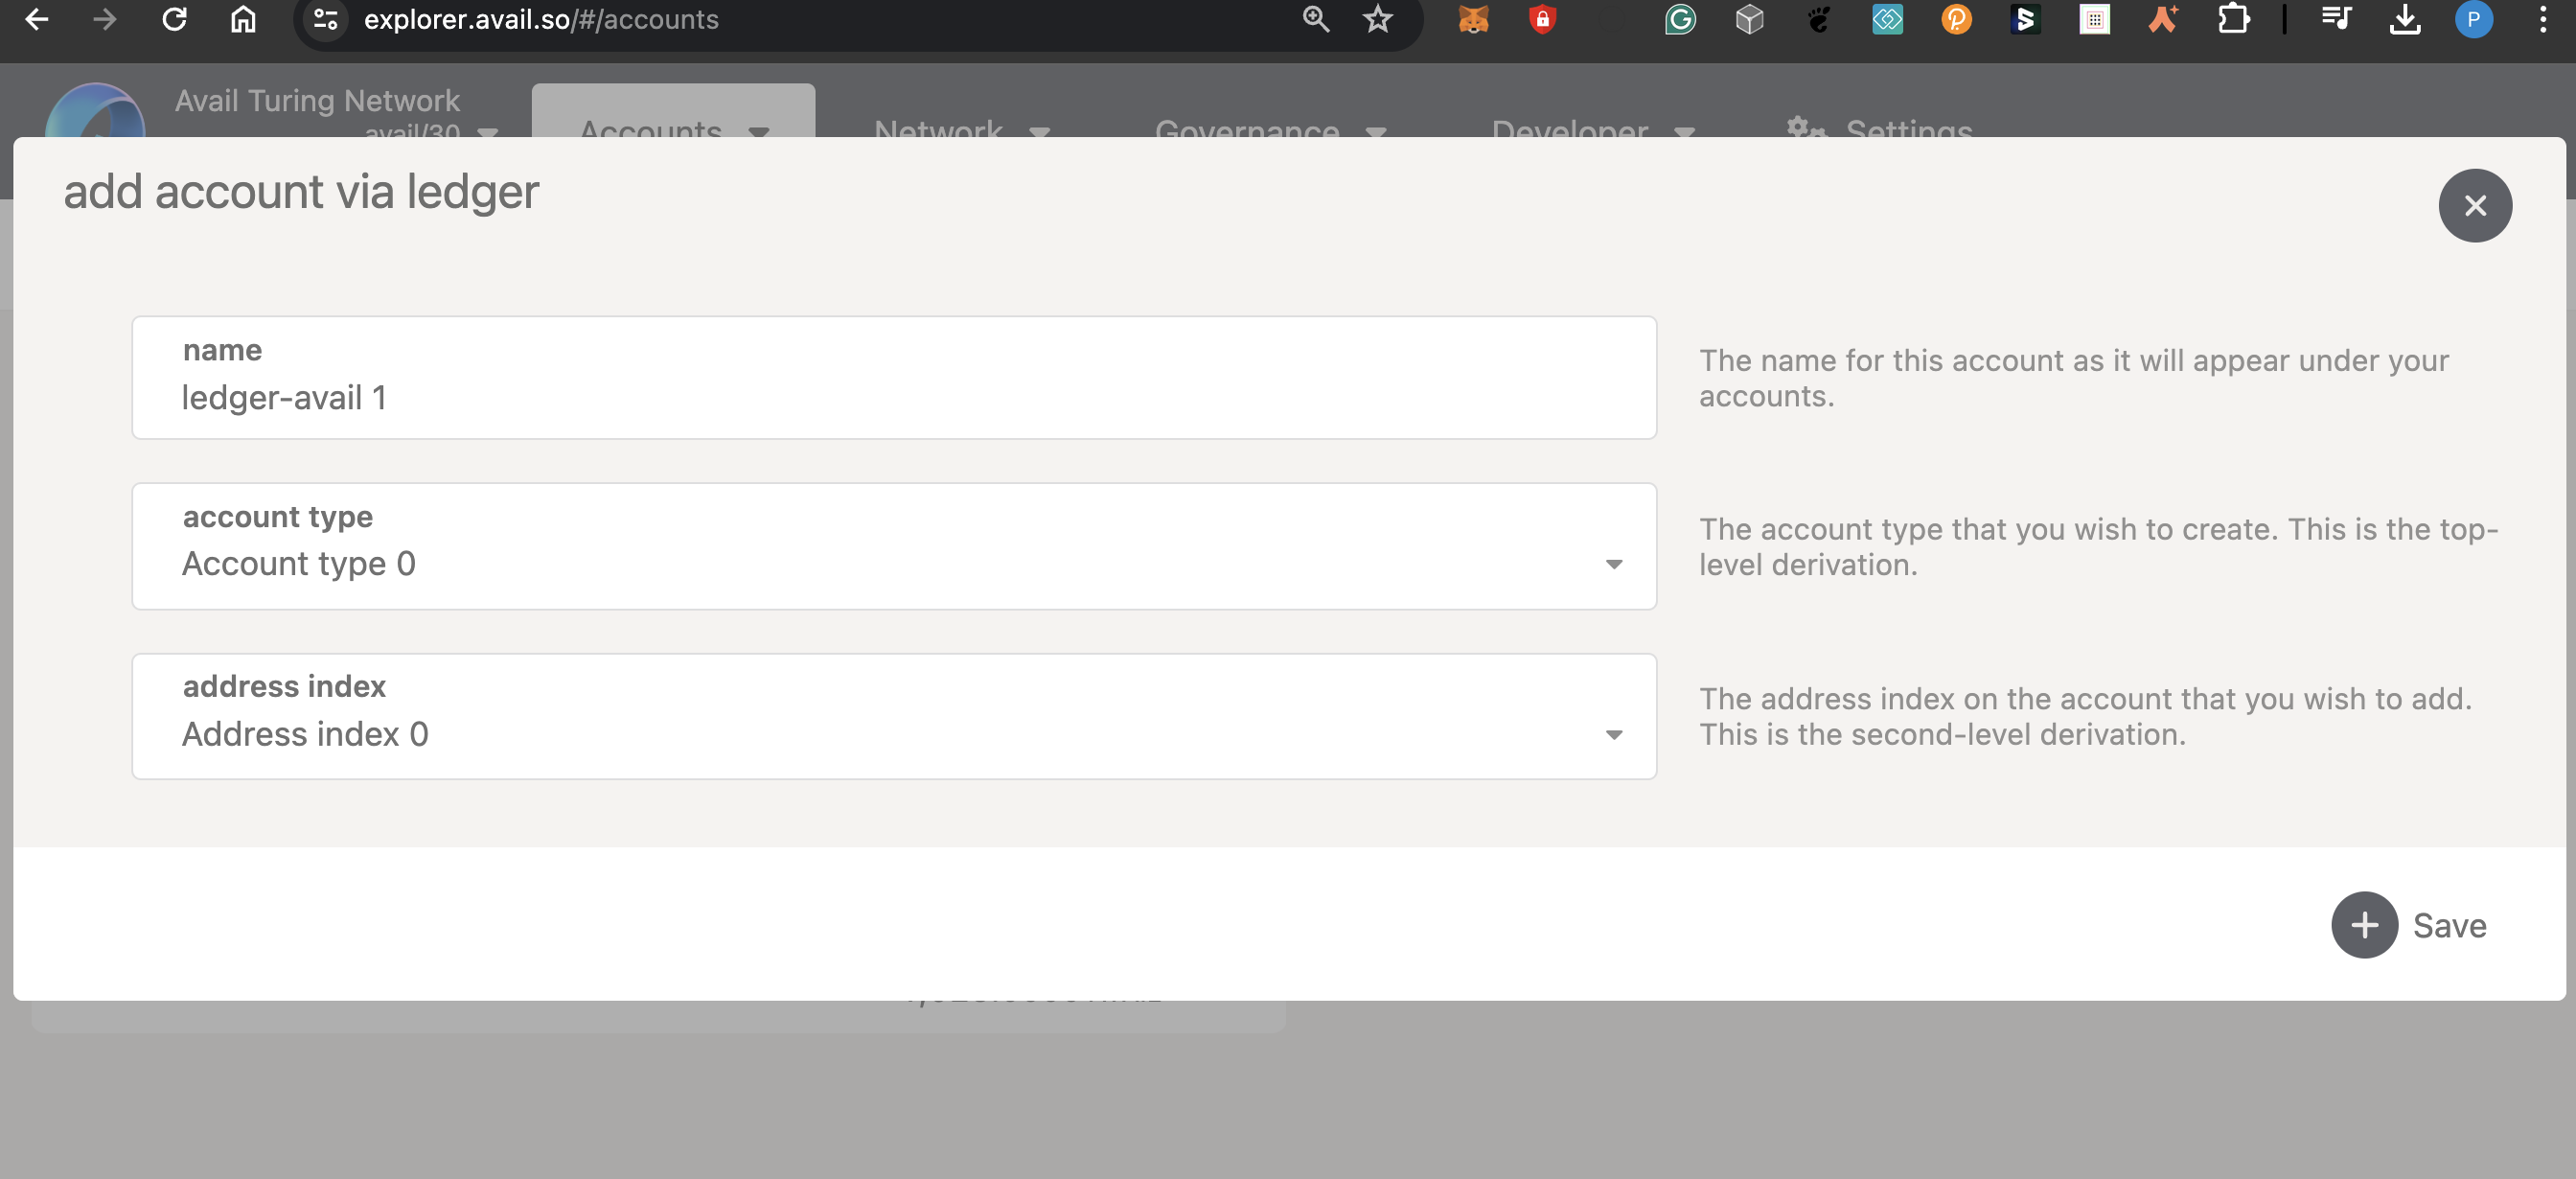
> **Note**
>
> Any account address generated from your ledger will be a unique combination of your ledger-device's
> seed phrase, the top-level derivation, and the second-level derivation.
> This means if you re-connect to the avail apps explorer with the same ledger device in the future (that has not been reset), and use
> the same top-level and second-level derivations, you will get the same account address.
7. This is what the accounts tab should look like after you've derived a hardware account:
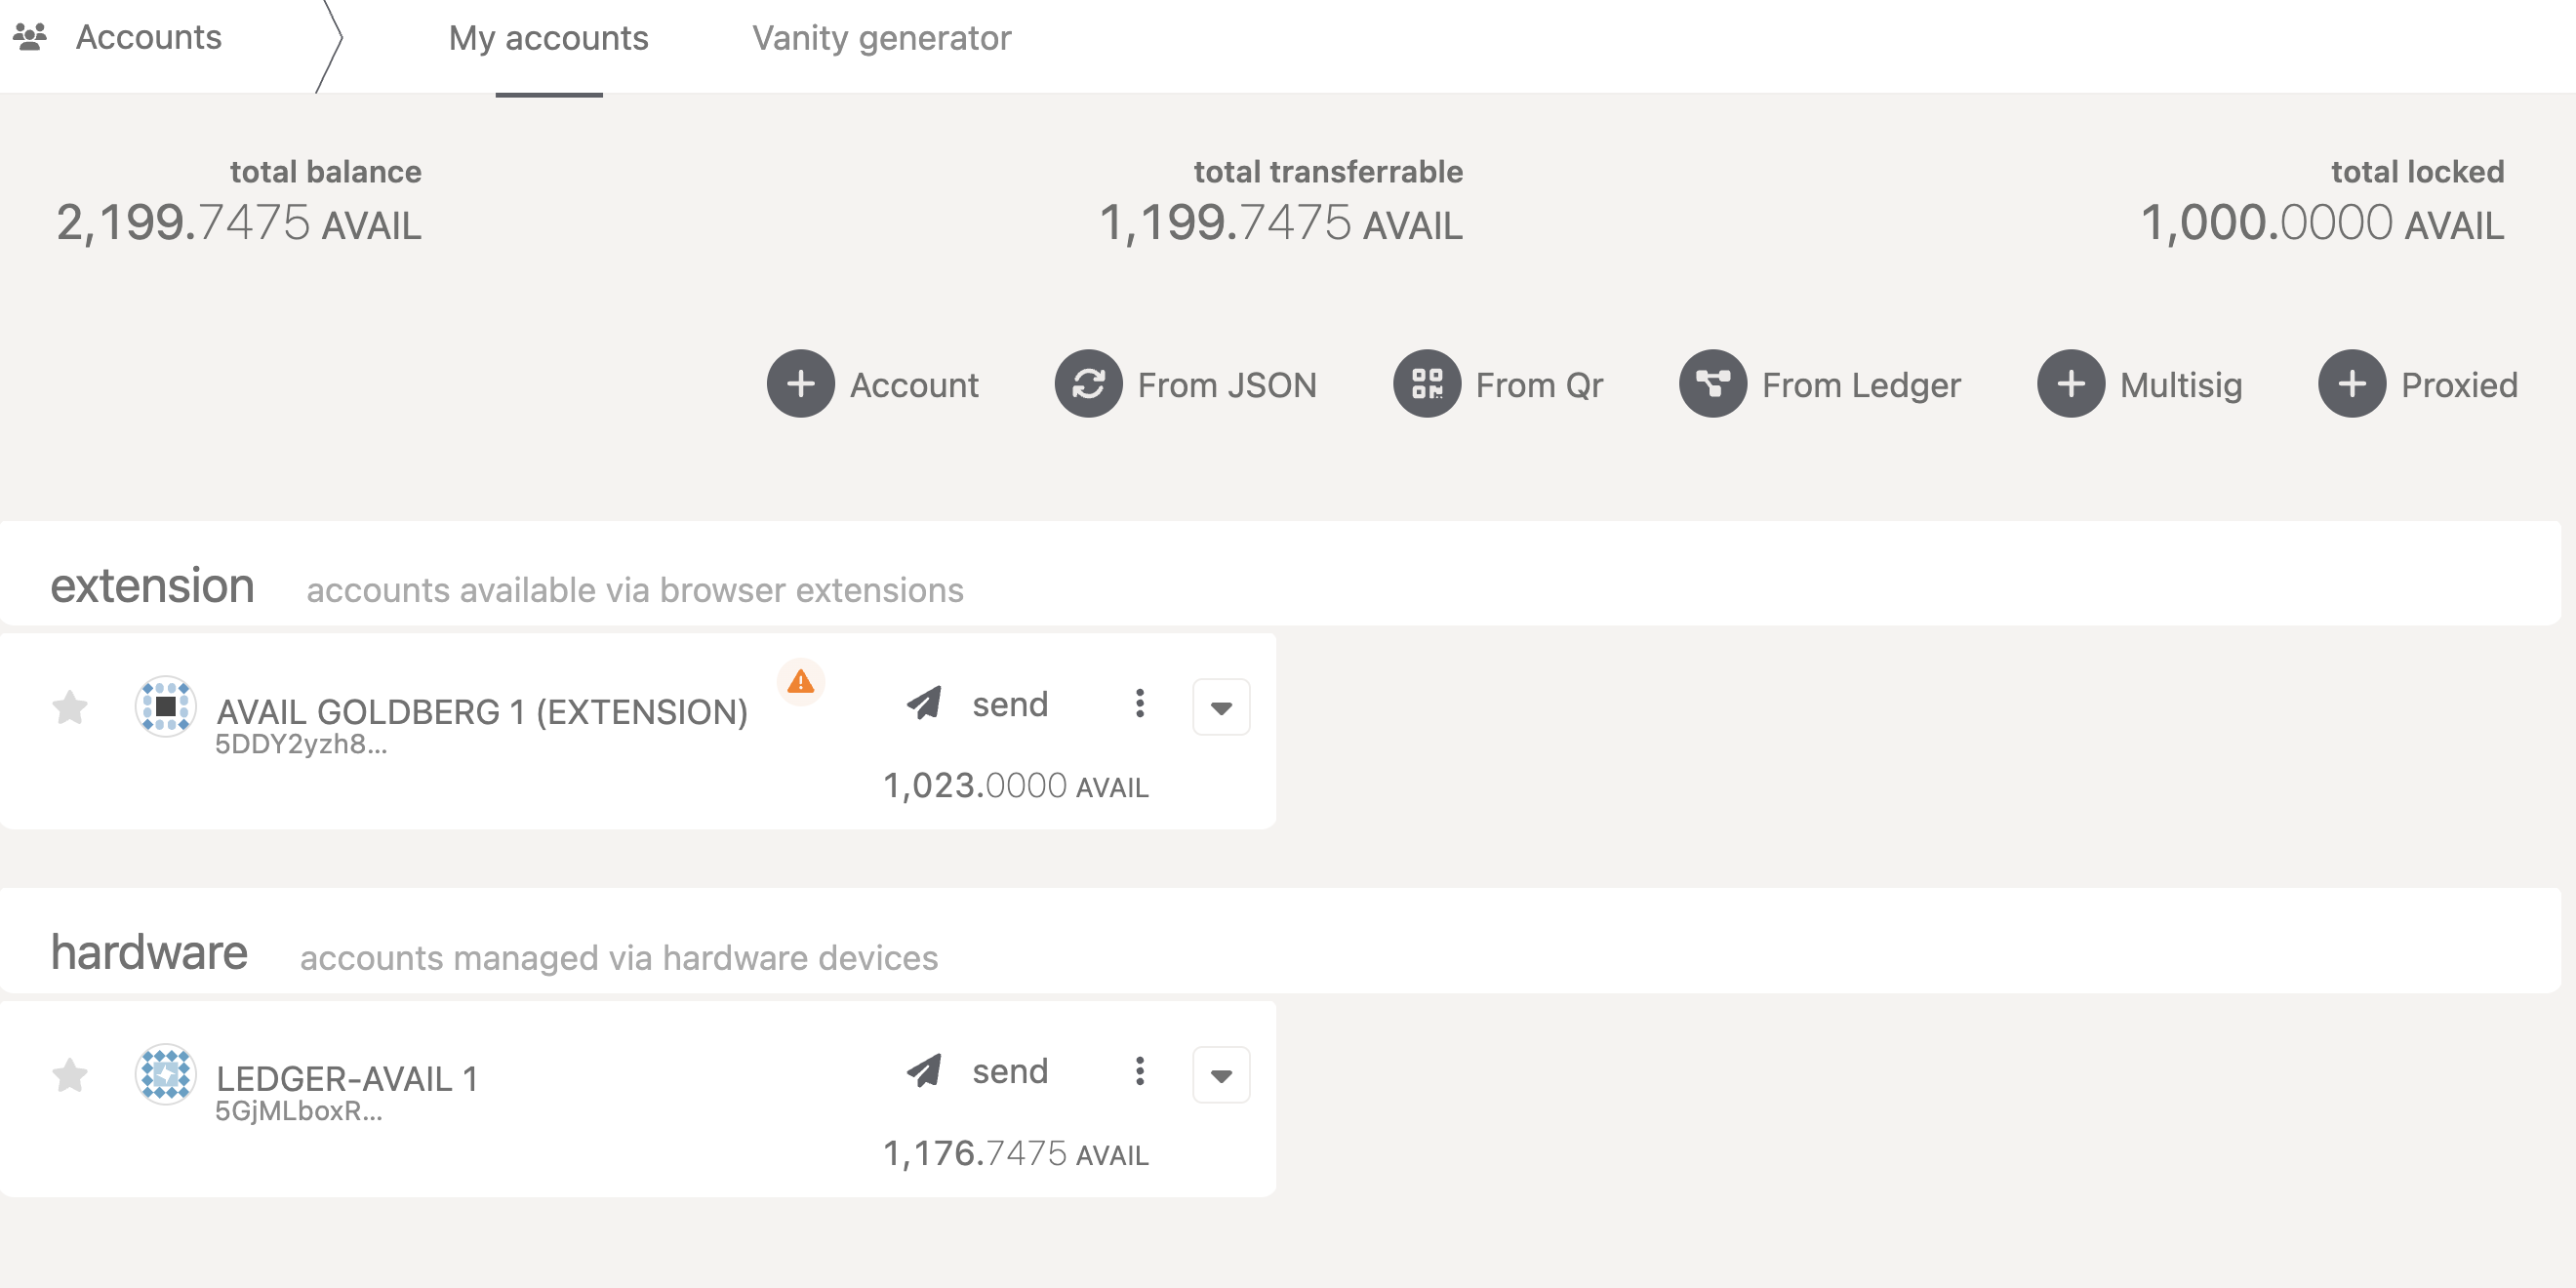
8. Make sure to send some AVAIL to this account to interact with Avail DA.
### Sign a transaction on Avail DA using your ledger device
1. Click on the `send` button alongside your ledger wallet.
2. Enter a recipient's address and an amount to send.
3. Click on `Make Transfer`.
4. Make sure the app id is `0` if you're performing a simple transaction.
> **Note**
>
> Please note that non-zero app ids are used to submit data to Avail DA.
> For all top-level/simple transactions, the correct app id is `0`.
5. Click on `Sign and Submit`.
6. At this point the explorer UI will wait for a signing/rejection of the transaction from your ledger device.
7. You can verify important details of the transaction from your ledger device, including the destination address and the amount of AVAIL being transferred.
This is what it should look like:
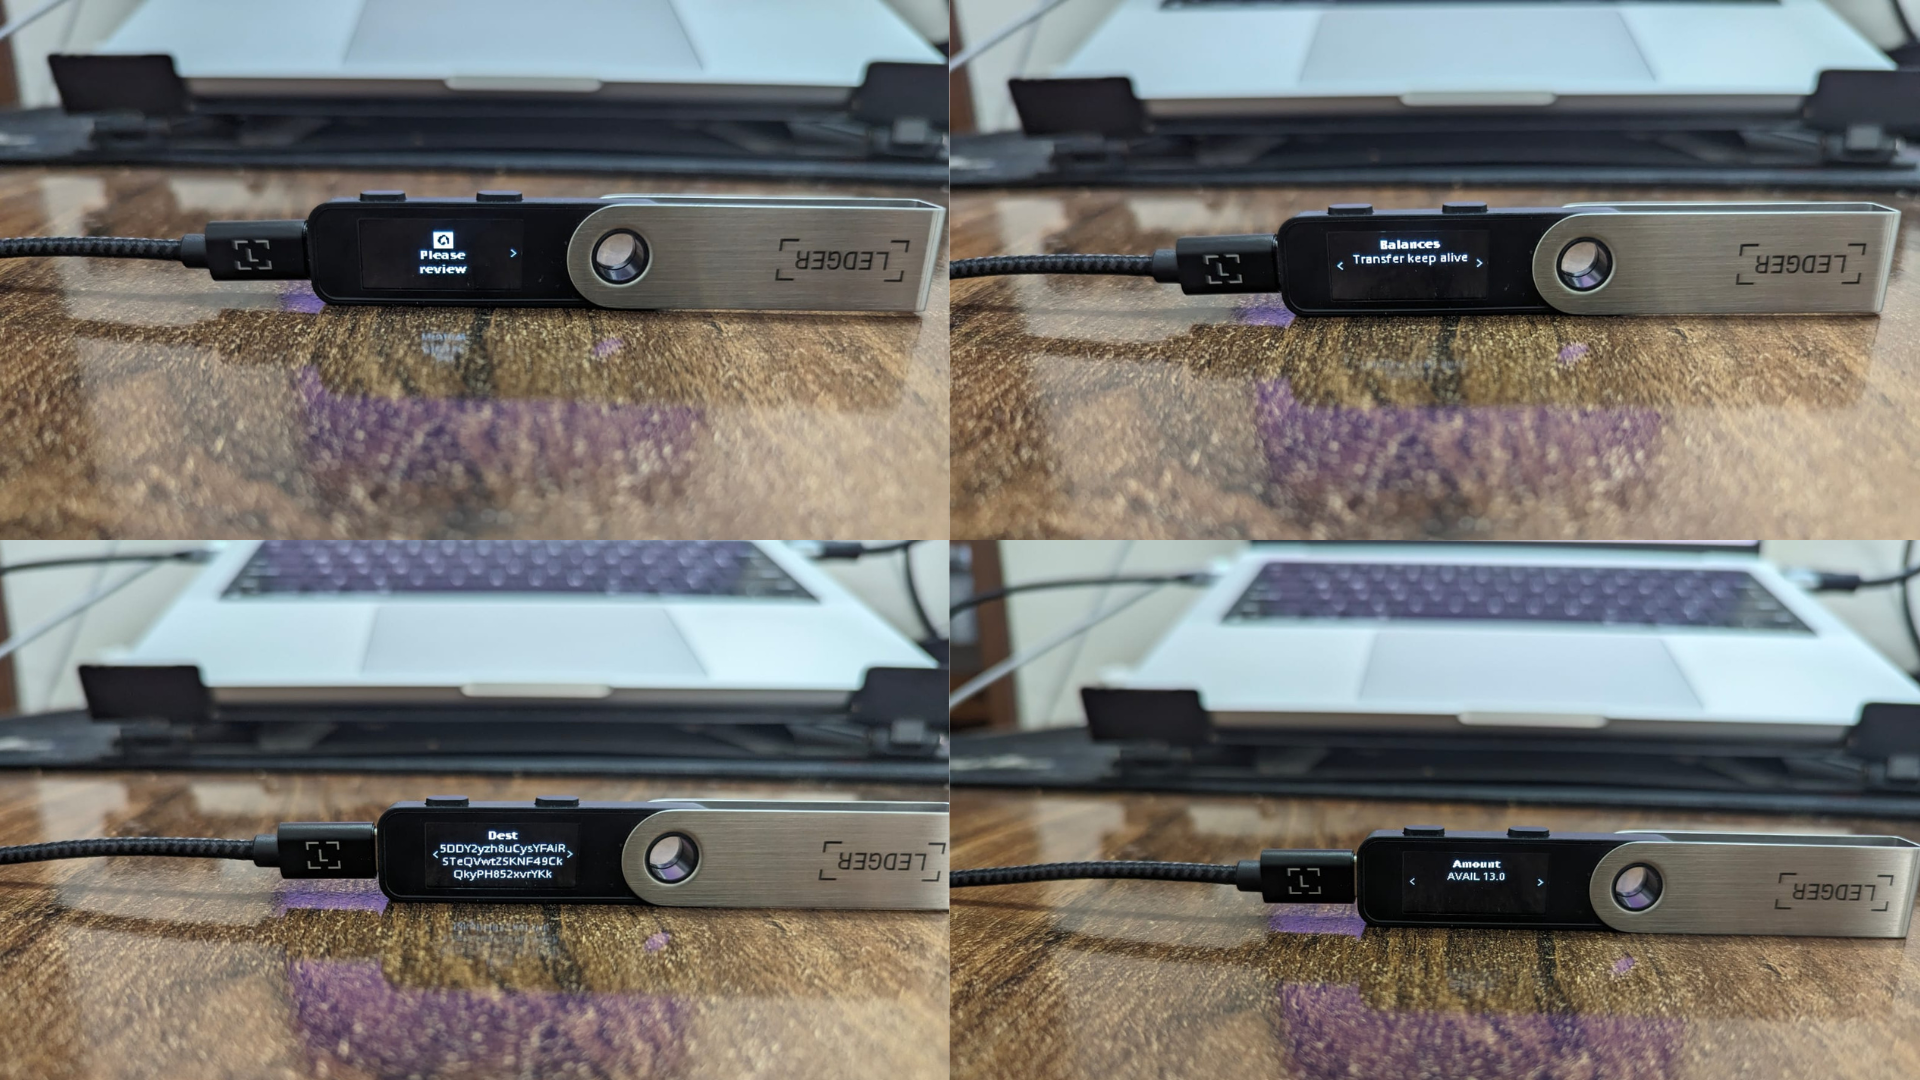
8. Once you are done verifying, `Approve` or `Reject` the transaction using the buttons on your ledger device.
9. Once the transaction has been finalised, you will see a success message on the explorer UI:
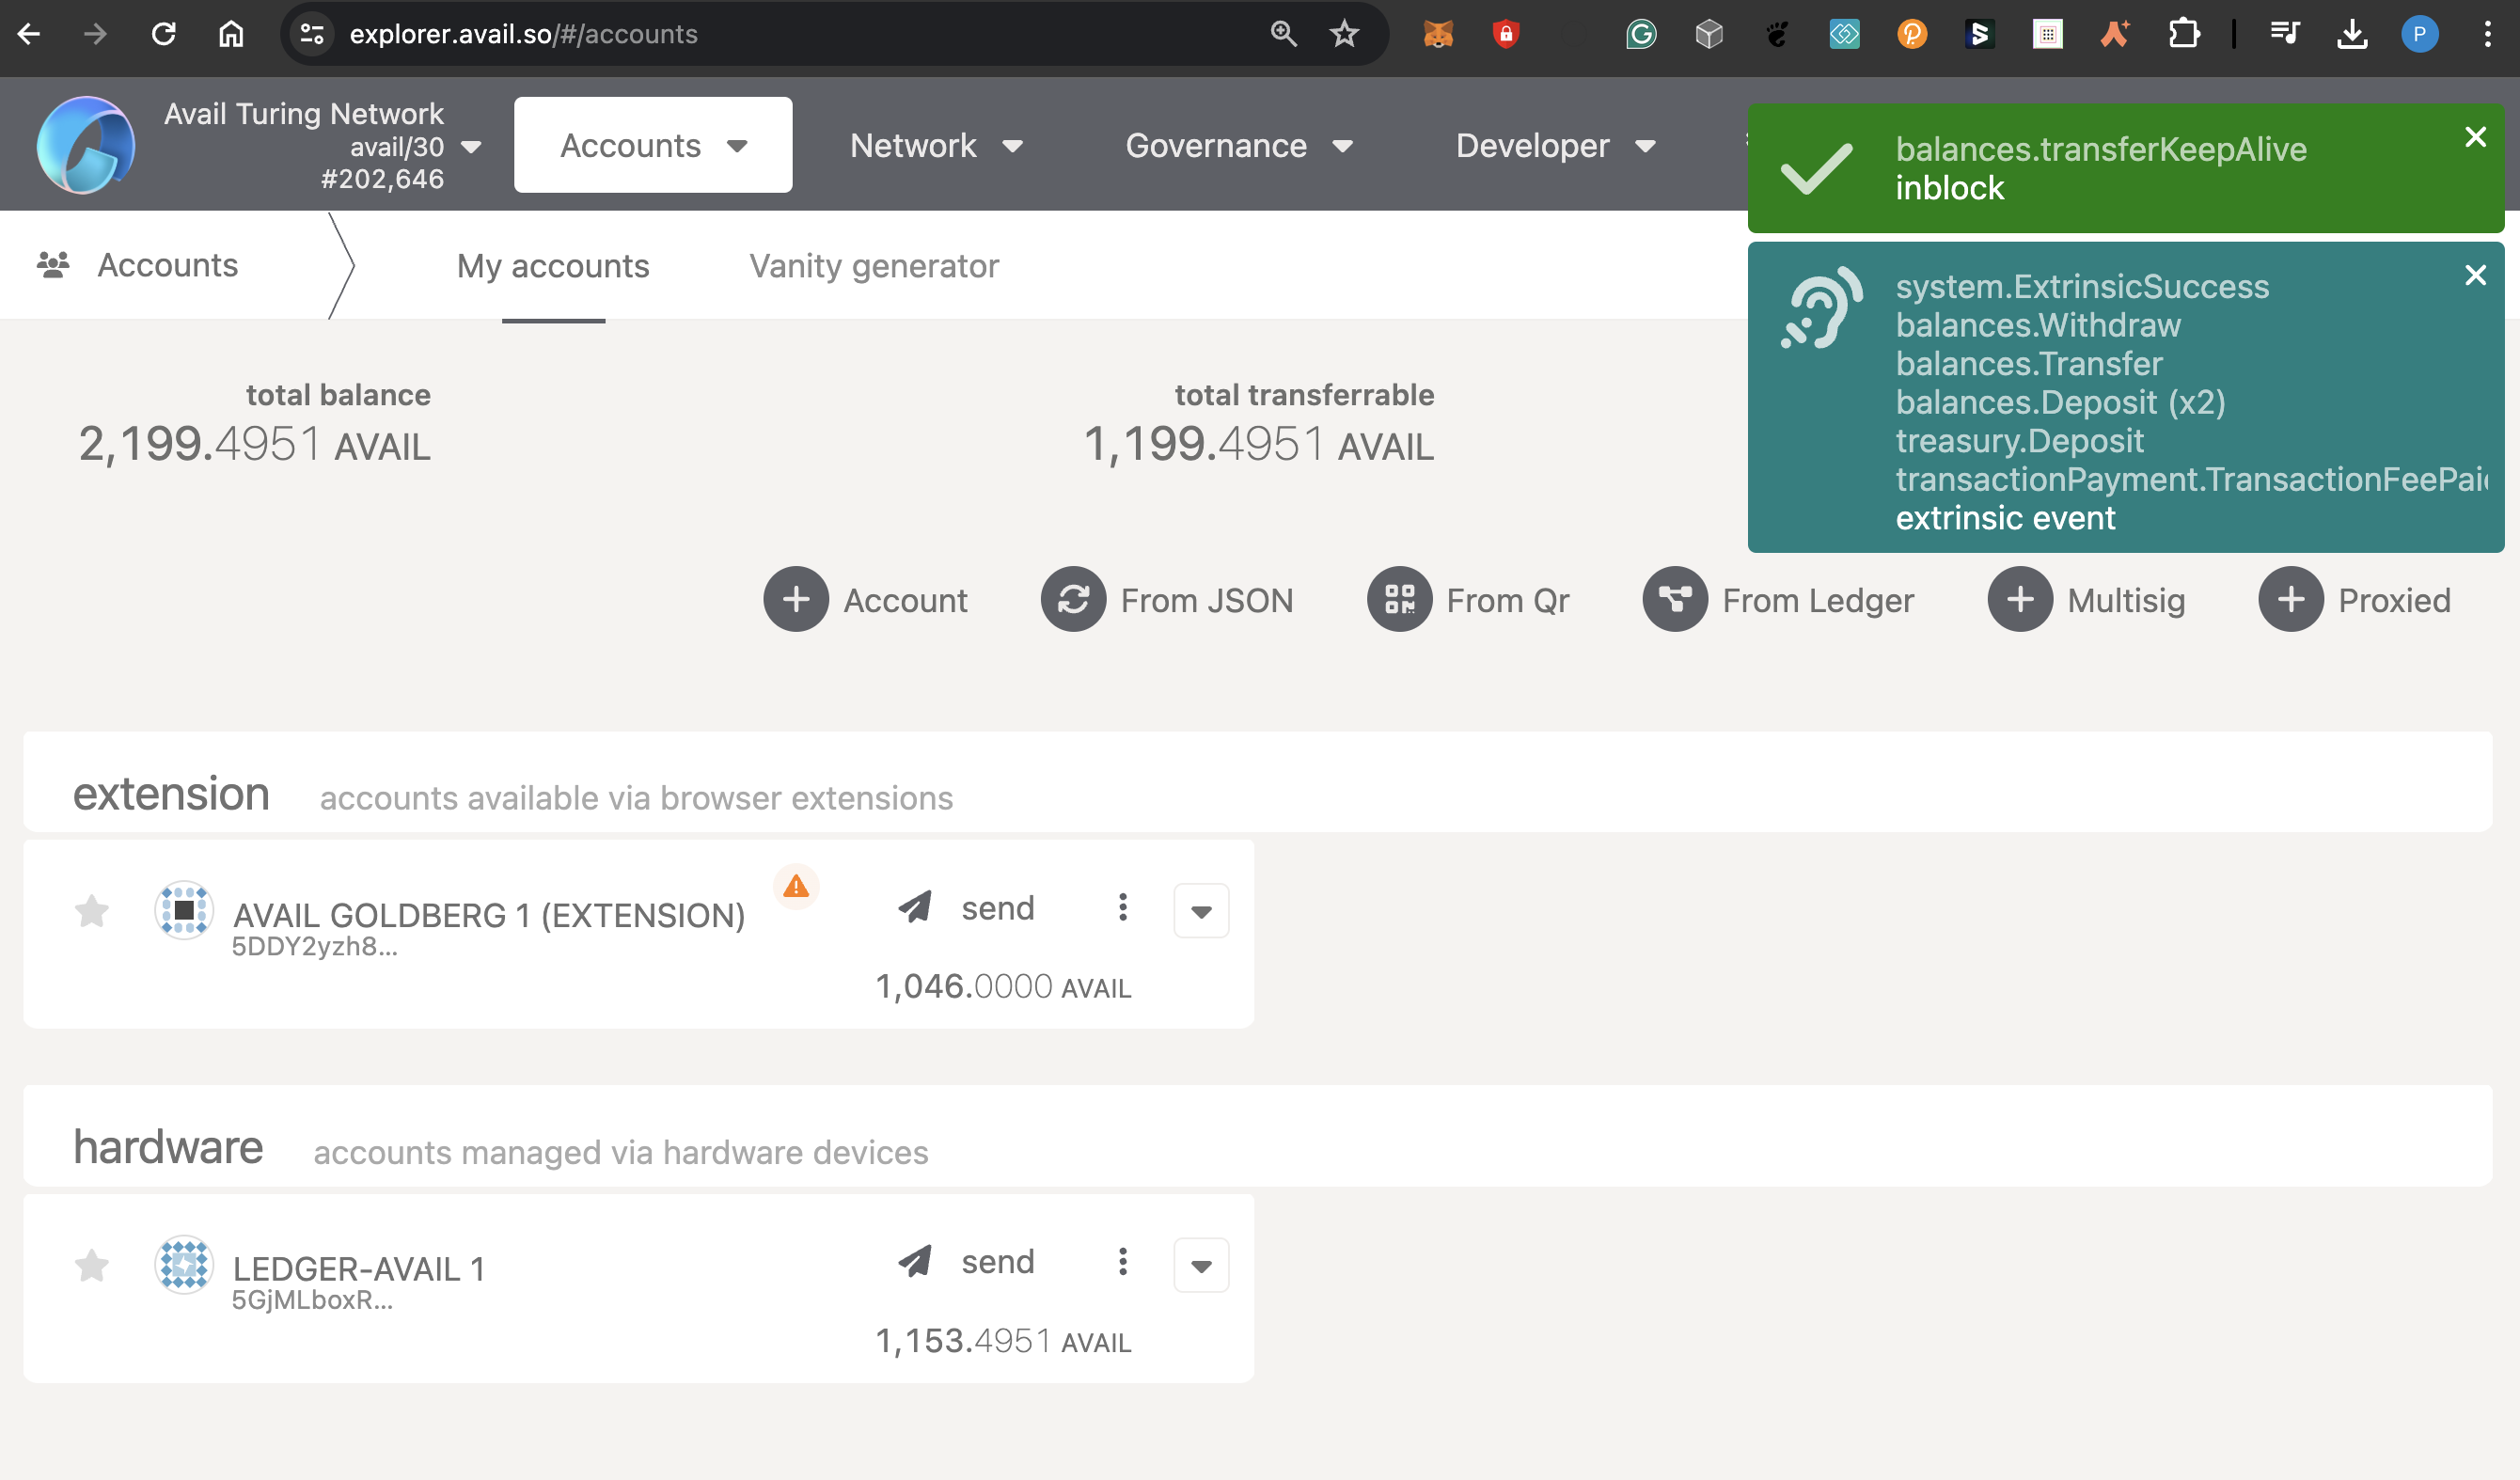
### Support
If you face any issues while using your ledger device with Avail DA, please feel free to reach out to us on our [Telegram](https://t.me/AvailCommunity) or [Discord](https://discord.gg/AvailProject).
## Add your Ledger account to an extension wallet
If you have set up your ledger device and want to use it through a dedicated Avail wallet, this section is for you.
We have included instructions for connecting a ledger account with Subwallet & Talisman, but the process is similar for other wallets.
> **Note**
>
> If you are looking for instructions on getting started with an Avail wallet, you can refer to our [accounts guide](/docs/da/user-guides/accounts/#creating-an-account-on-avail-da).
#### Subwallet
### Prerequisites
Make sure your ledger device is unlocked and the Avail app is open.
### Click near the top to expand the list of accounts
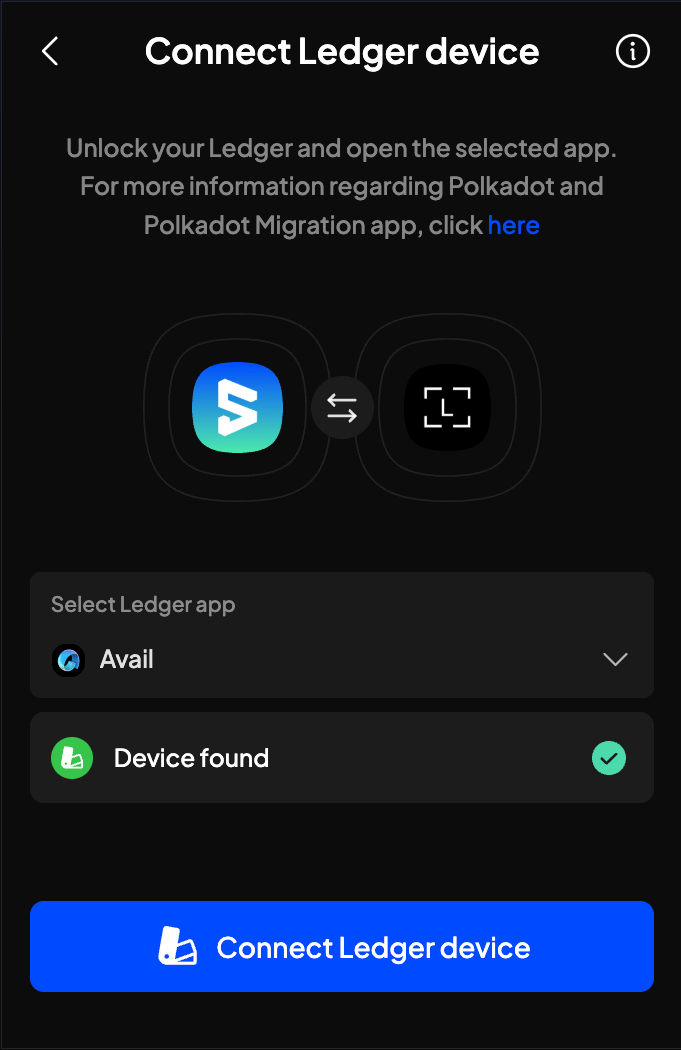
### Click on `Attach account`
### Select the `Connect a ledger device` option
### Search for the `Avail` app and click on `Connect`
### You can now select as many or as few of your ledger accounts to your Subwallet extension wallet
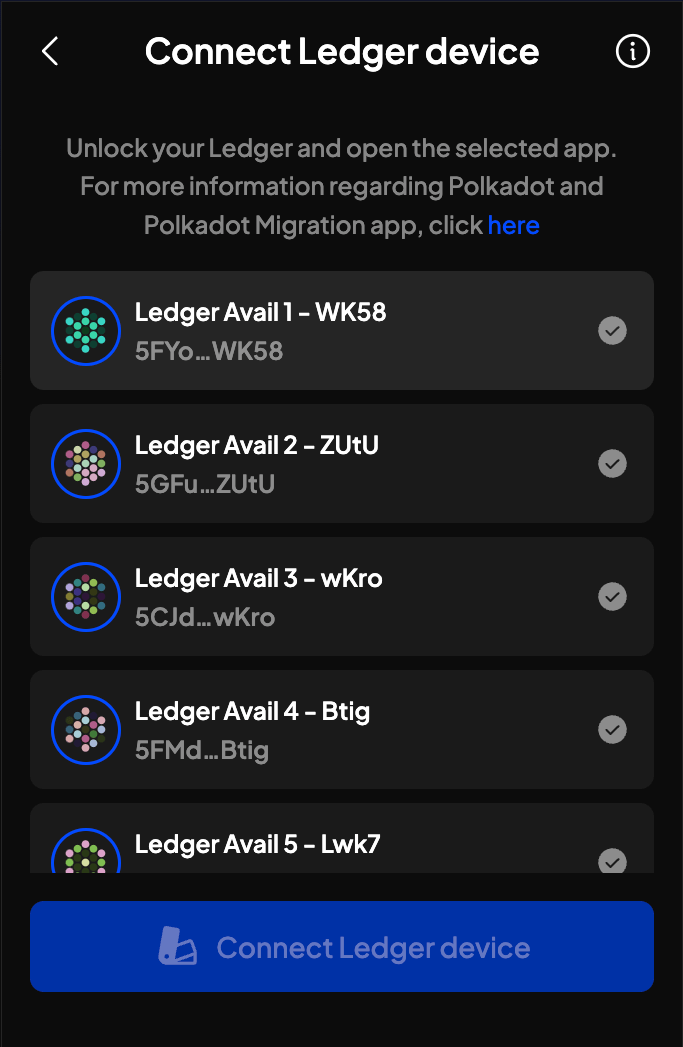
### Click on `Connect Ledger device` to finally import your selected accounts
#### Talisman
### Prerequisites
Make sure your ledger device is unlocked and the Avail app is open.
### CLick on the `+` sign next to the accounts tab
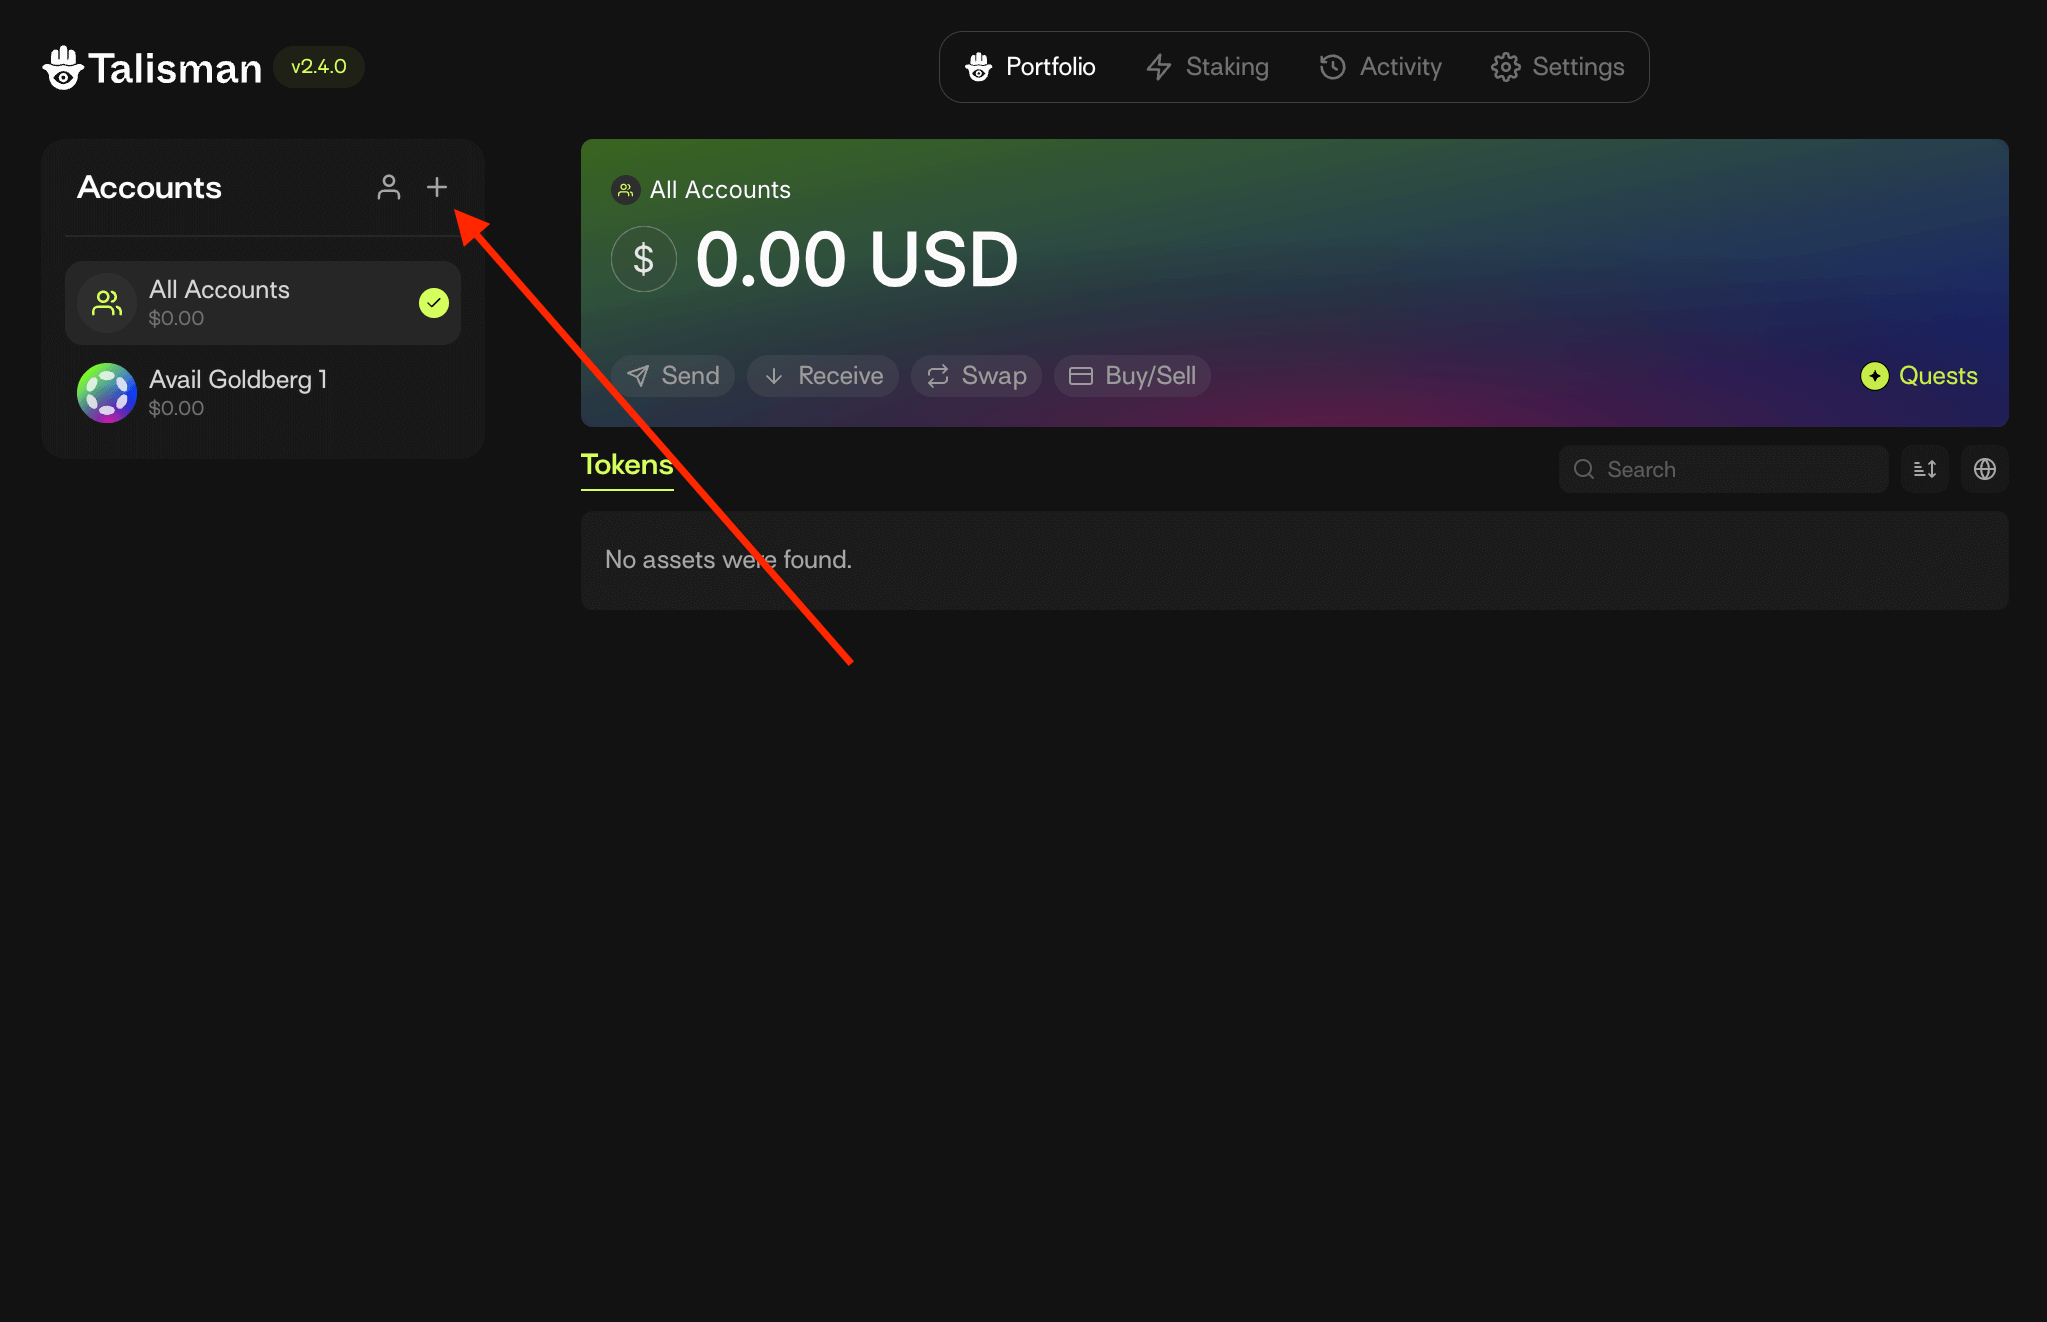
### Click on the `Connect` tab and then on `Connect Ledger`
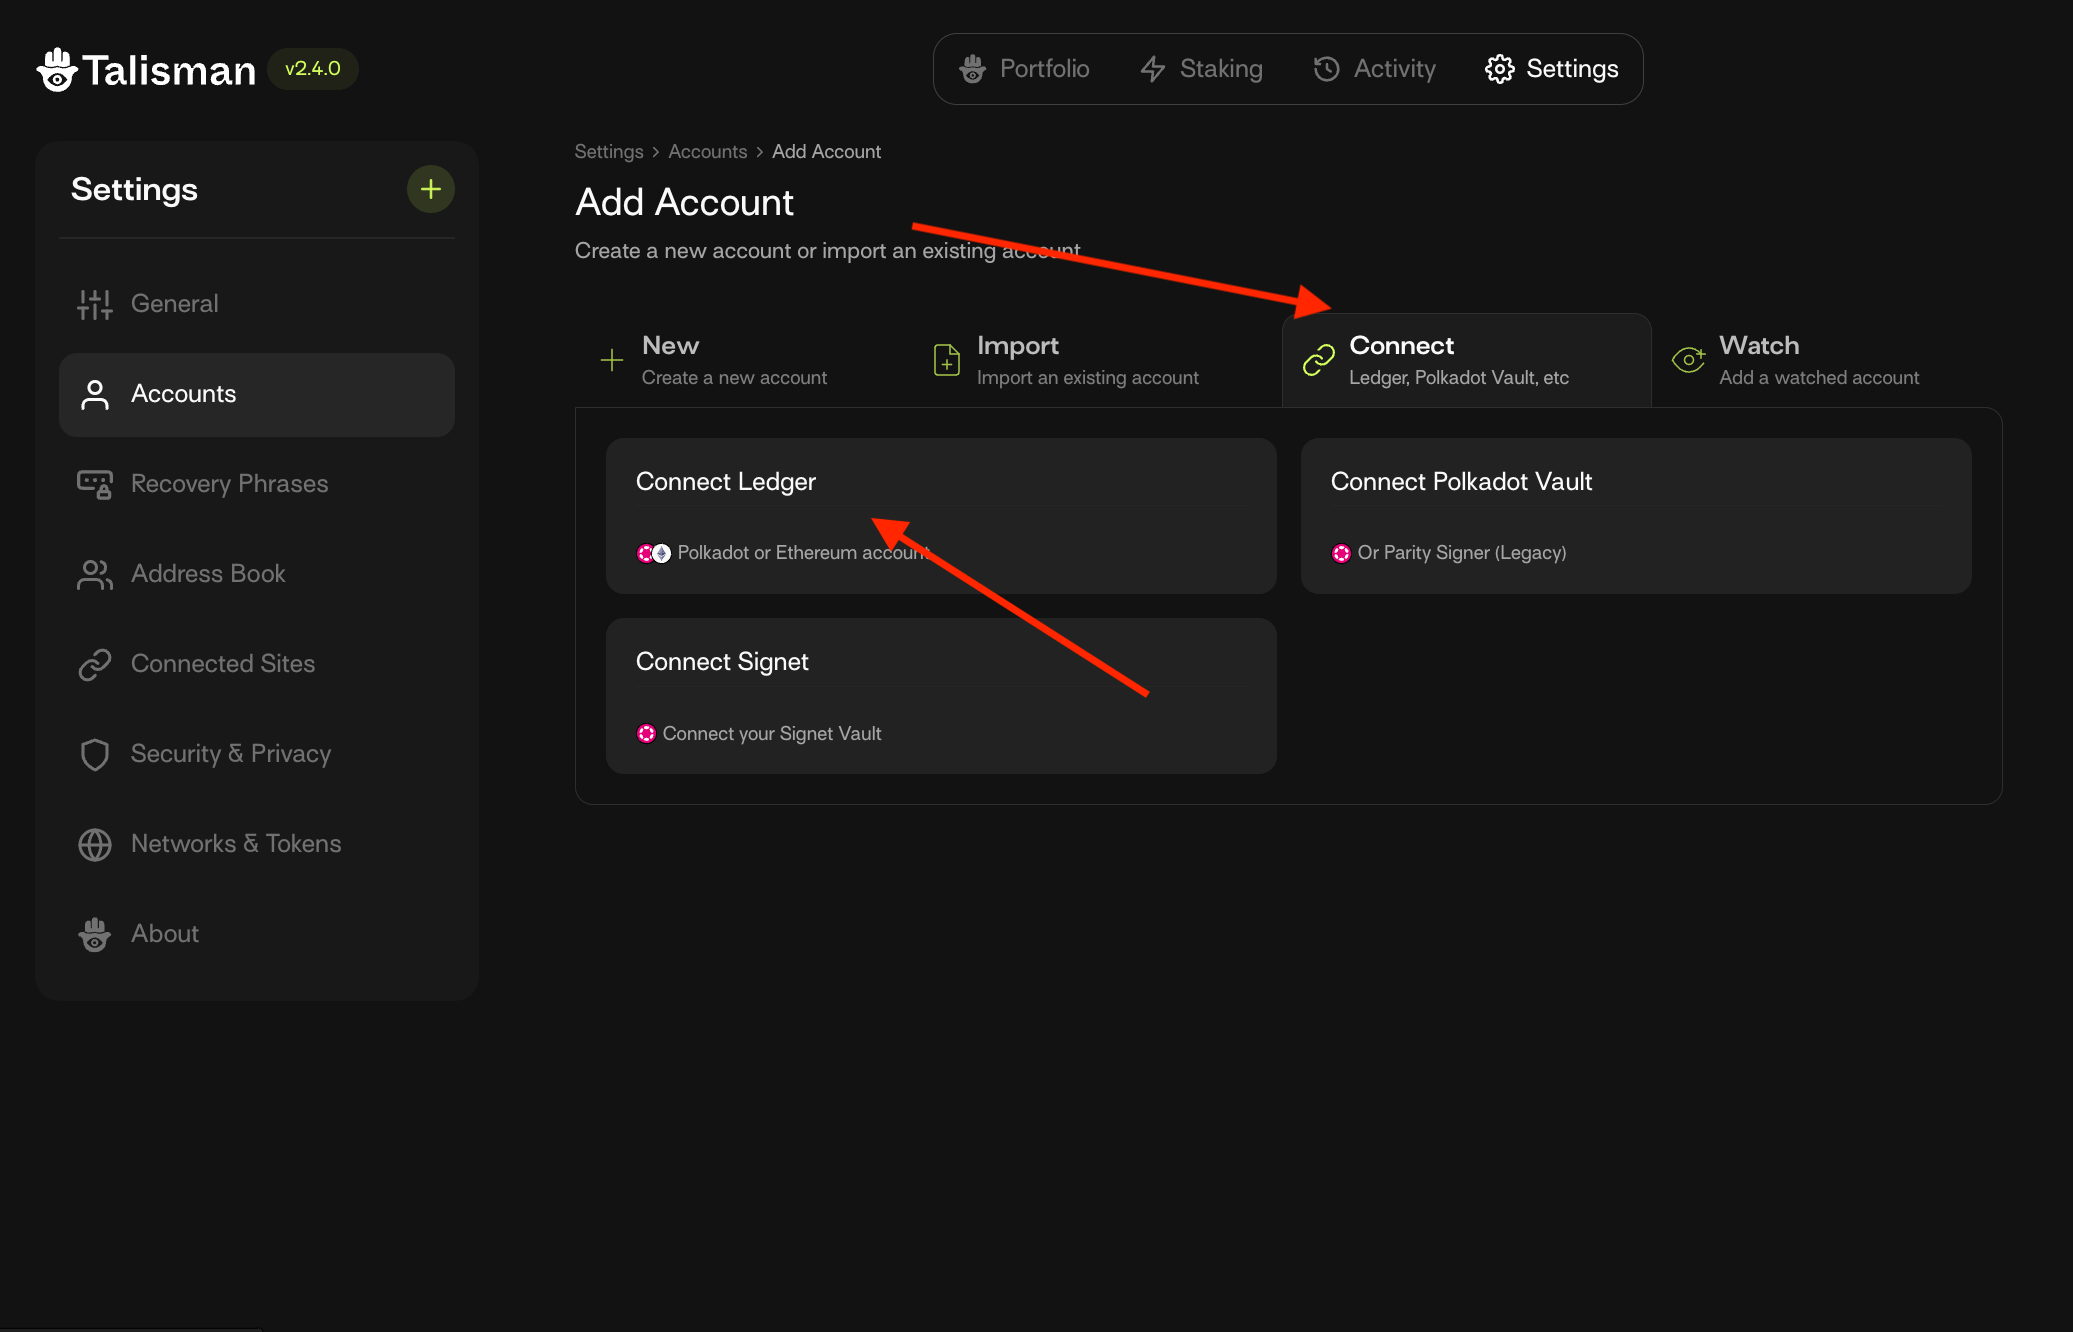
### Select the `Polkadot` option
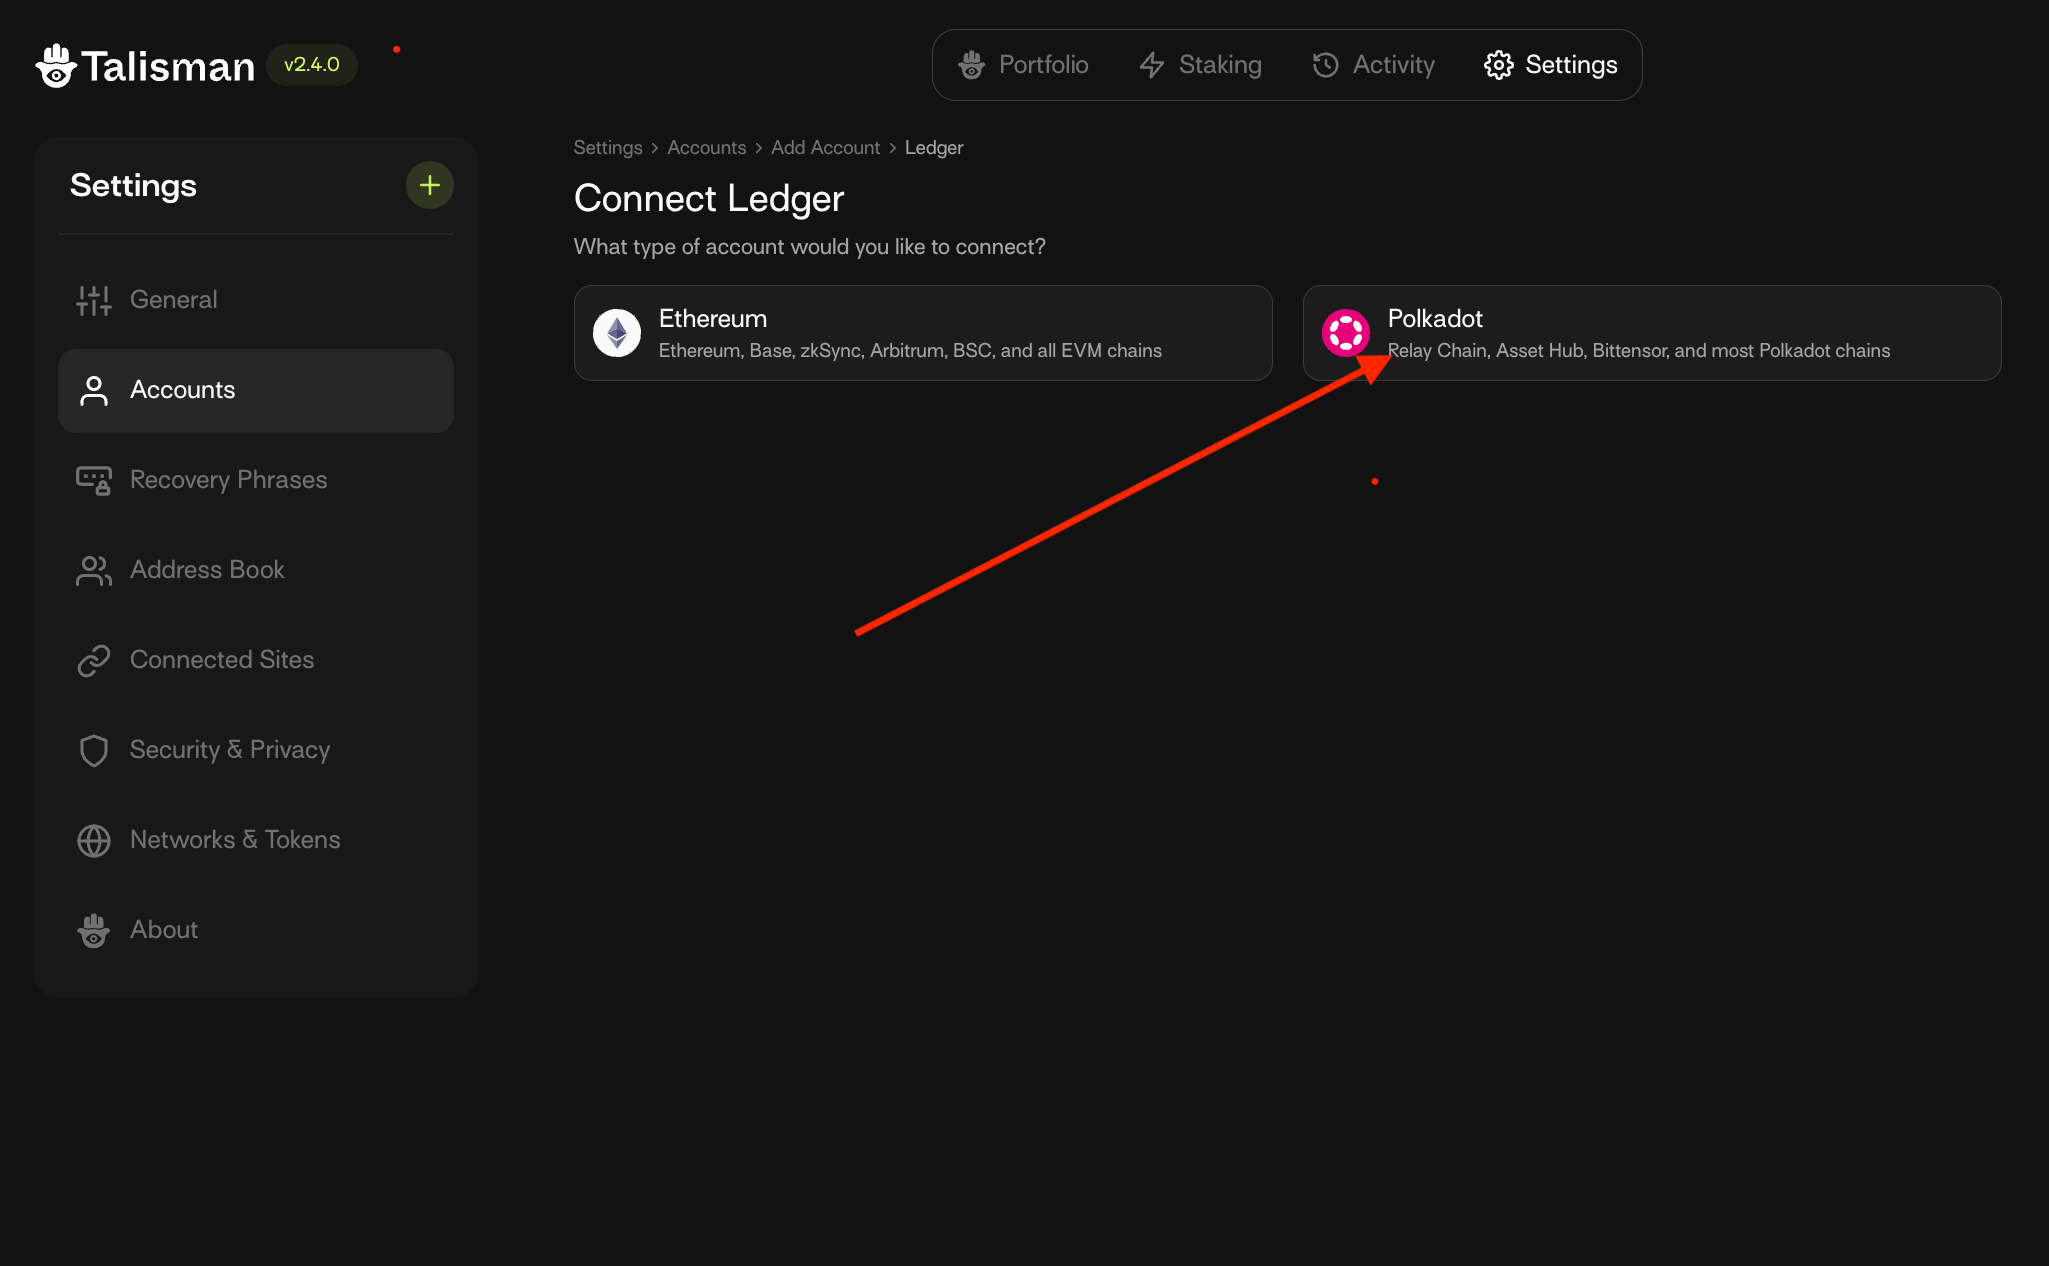
### Search for the `Avail` app and click on `Connect`
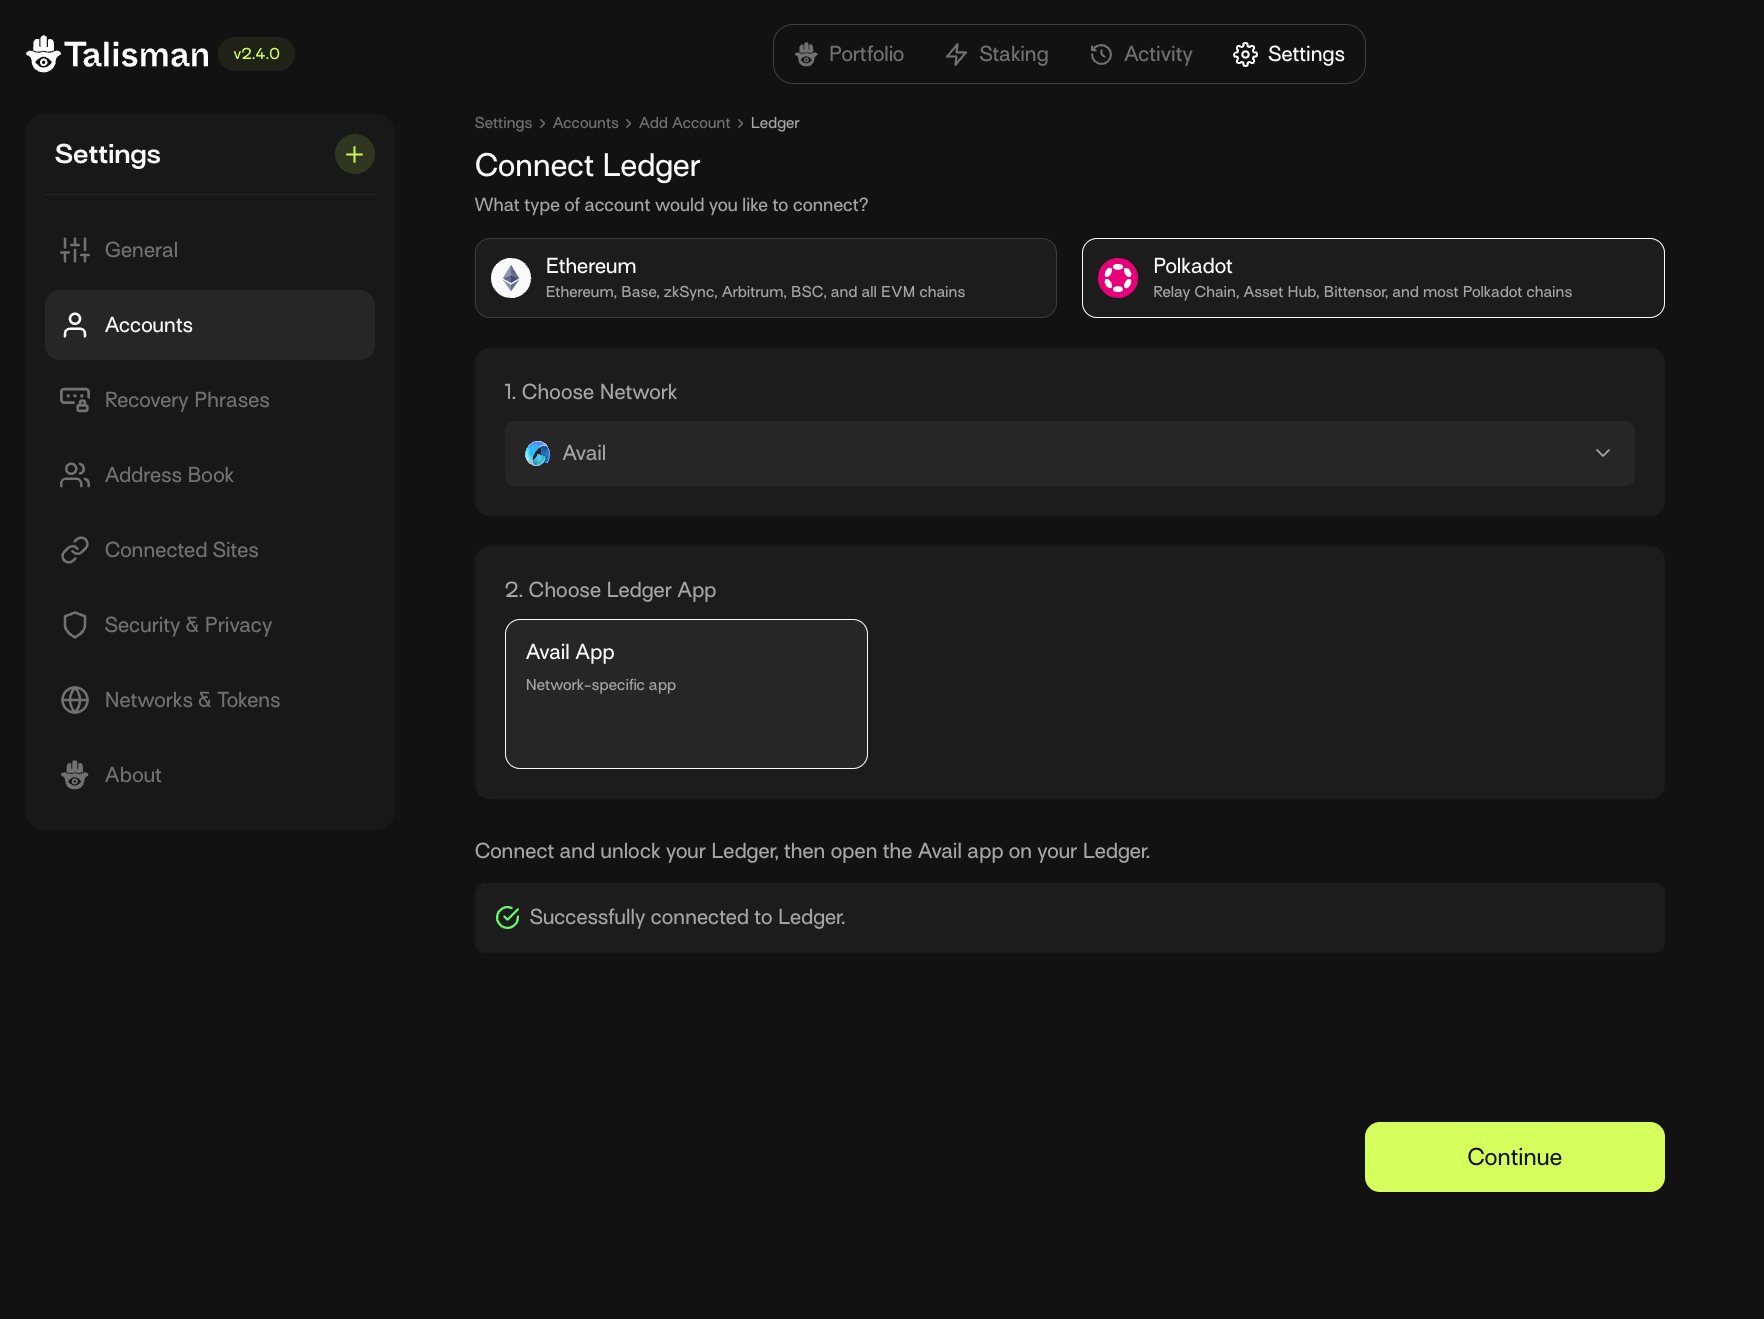
> **Note**
>
> **MAKE SURE YOUR LEDGER DEVICE IS OPEN THROUGHOUT THE PROCESS**
### You can now select as many or as few of your ledger accounts to your Talisman extension wallet
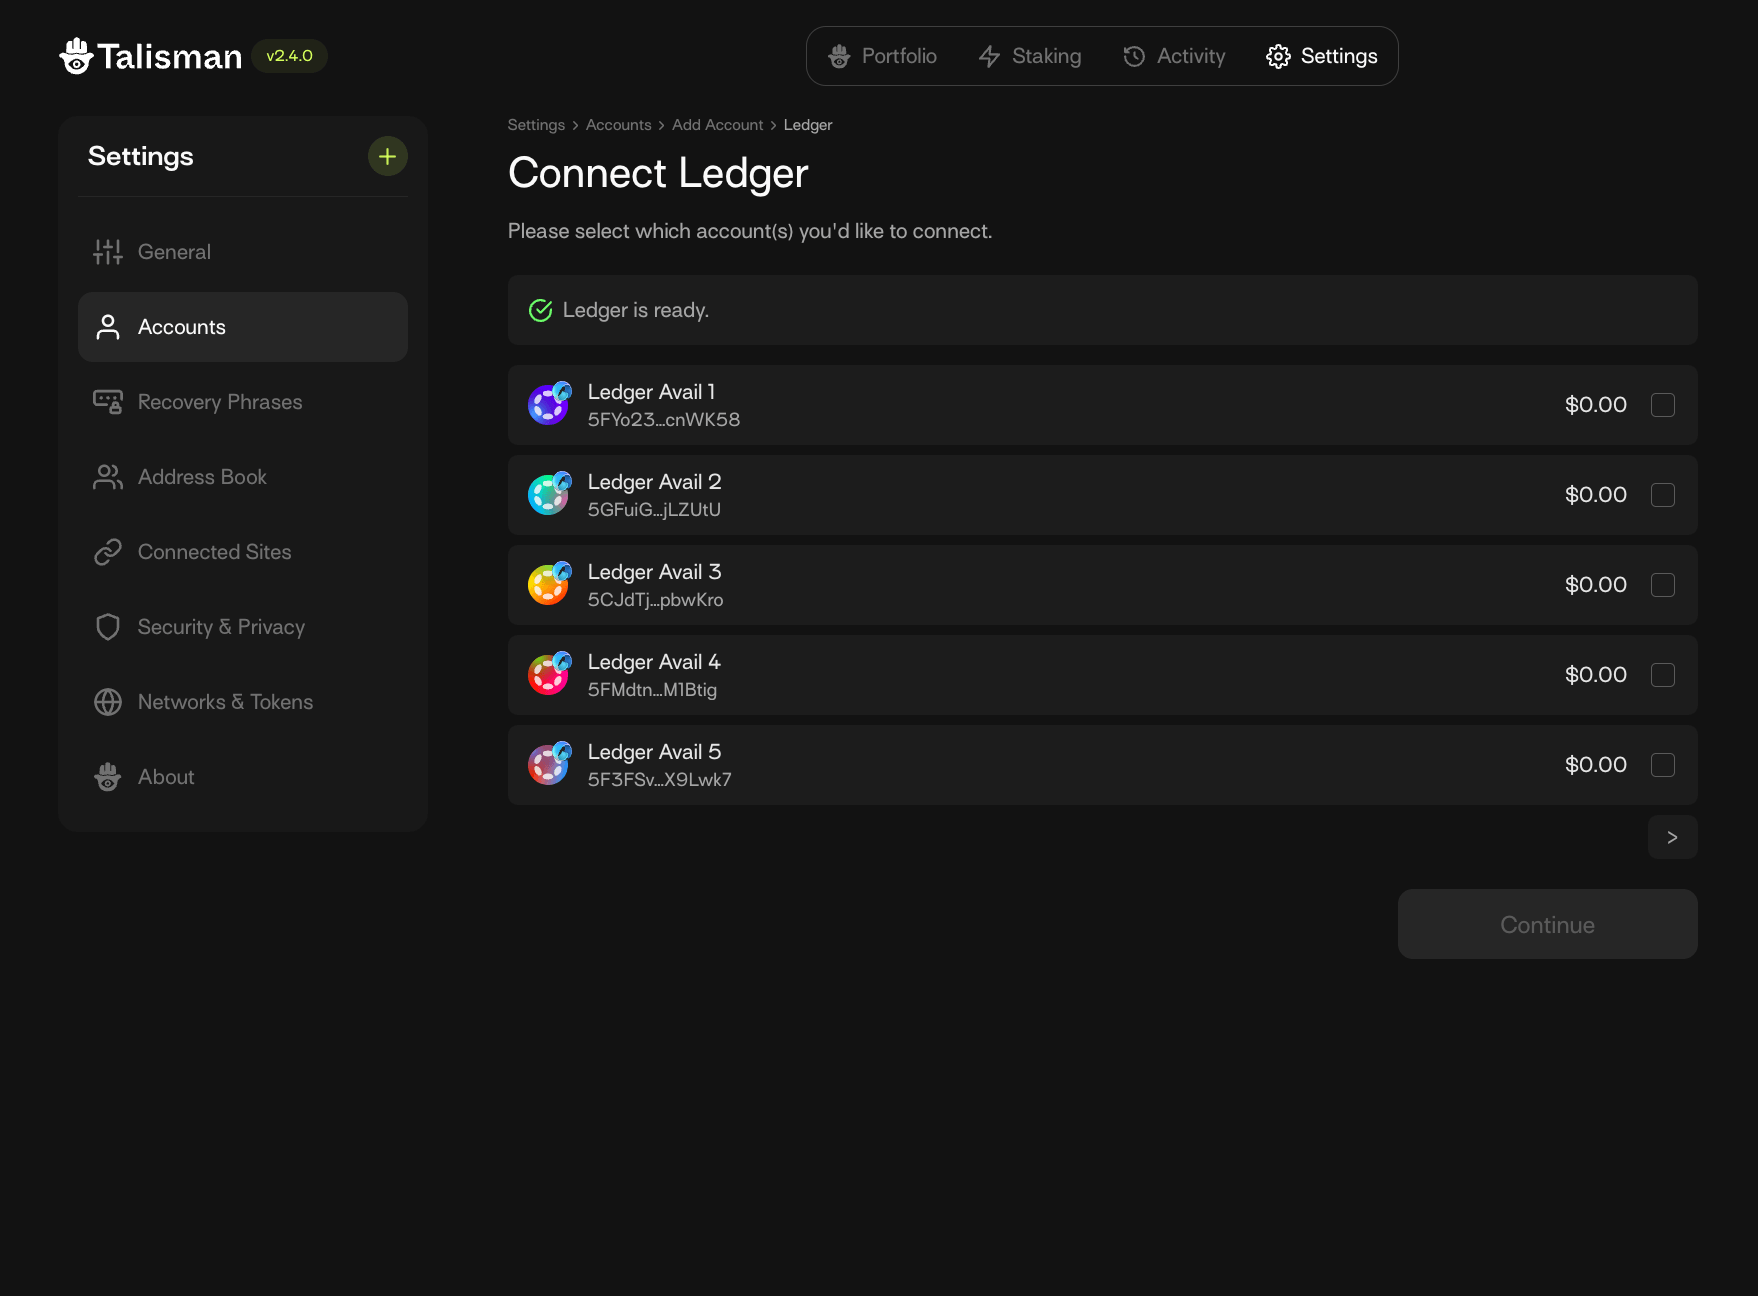
### Click on `Continue` to finally import your selected accounts
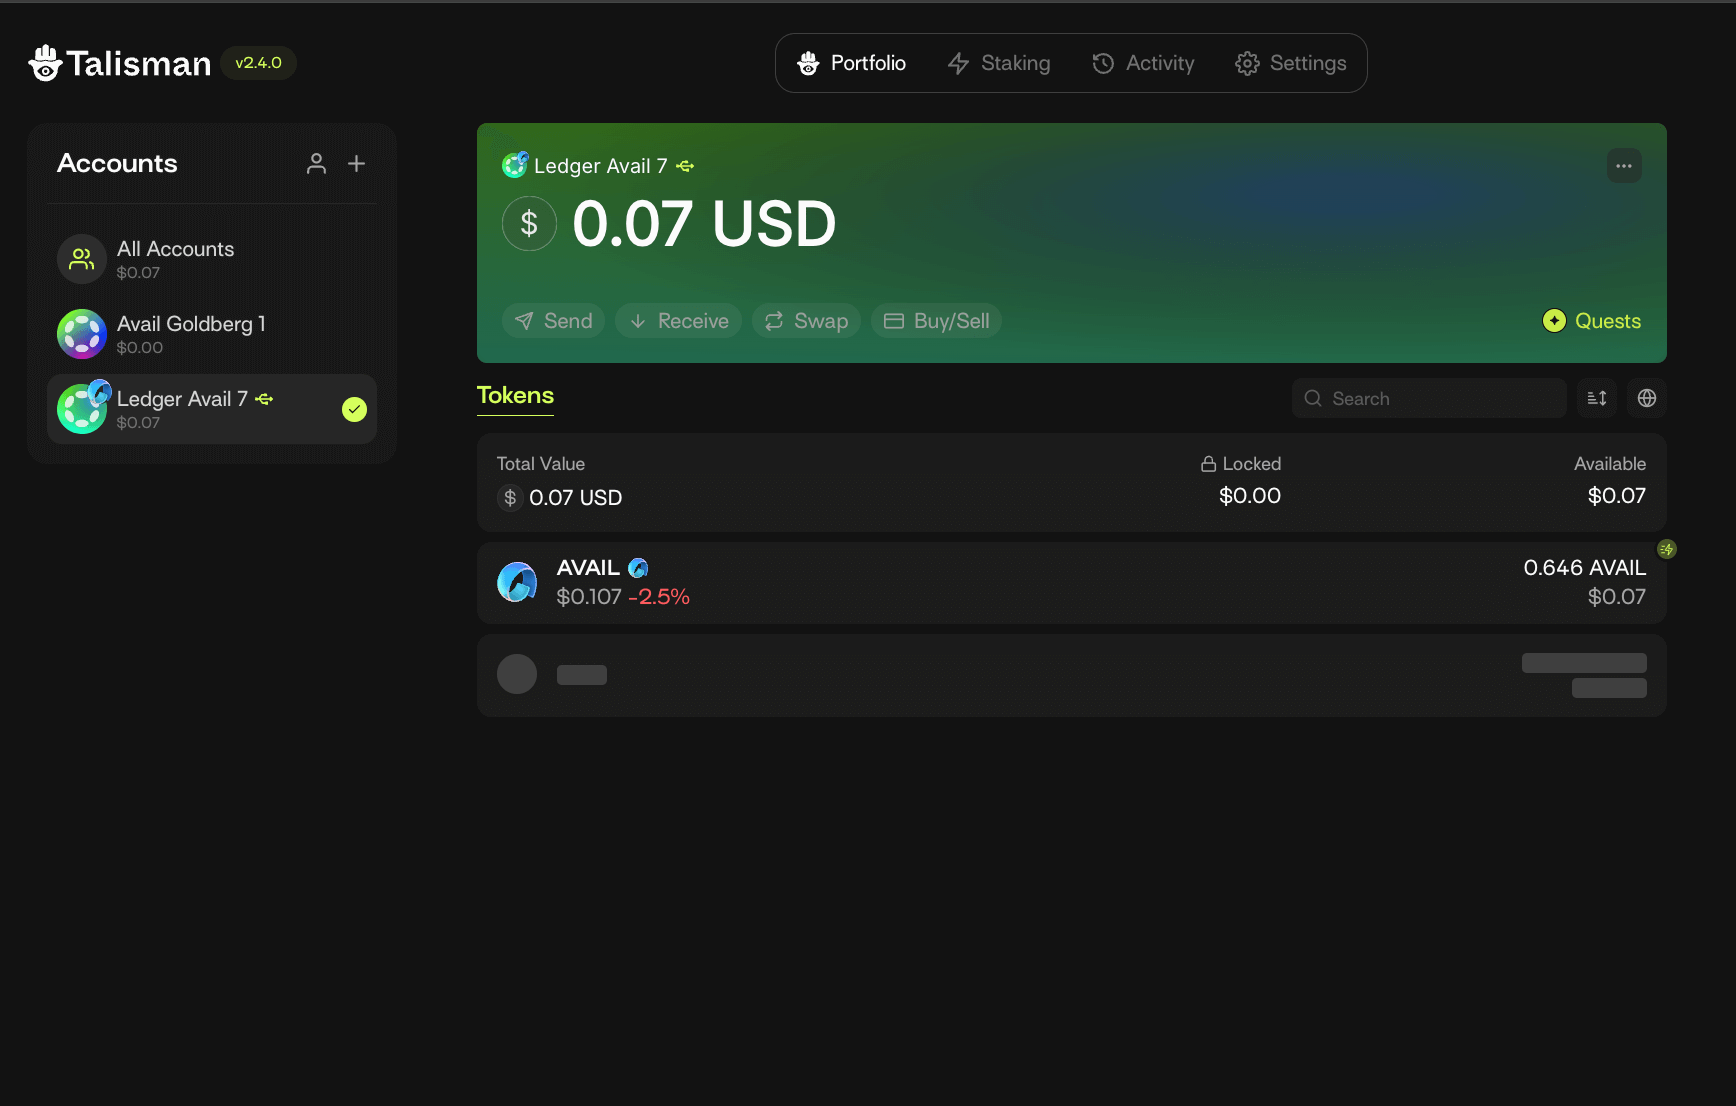
### Staking & Governance
Stake AVAIL tokens and participate in governance. Start with [The AVAIL Token](/docs/da/user-guides/staking-governance/overview) to understand tokenomics, then explore staking and governance.
- [**The AVAIL Token**](/docs/da/user-guides/staking-governance/overview) — Token supply, distribution, and utility on the Avail network.
- [**Stake on Avail**](/docs/da/user-guides/staking-governance/stake-on-avail) — Nominate validators and earn staking rewards.
- [**Avail Governance V1**](/docs/da/user-guides/staking-governance/governance-on-avail) — Propose and vote on network changes through on-chain governance.
### Get current Ethereum head
## Request
* `Path`: `/eth/head`
* `Method type`: `GET`
## Example Request
#### CURL
```bash filename="CURL"
curl https://turing-bridge-api.avail.so/eth/head
```
## Example response
```json filename="Example JSON response"
{
"slot":4454752,
"timestamp":1709191840,
"timestampDiff":1716
}
```
### Get current Avail head
## Request
* `Path`: `/avl/head`
* `Method type`: `GET`
## Example Request
#### CURL
```bash filename="CURL"
curl https://turing-bridge-api.avail.so/avl/head
```
## Example response
```json filename="Example JSON response"
{
"data":{
"end":512738,
"start":488581
}
}
```
### Check liveness of server
## Request
* `Path`: `/`
* `Method type`: `GET`
## Example Request
#### CURL
```bash filename="CURL"
curl https://turing-bridge-api.avail.so/
```
## Example response
```json filename="Example JSON response"
{"name":"Avail Bridge API"}
```
### Get bridge deployment details
## Request
* `Path`: `/info`
* `Method type`: `GET`
## Example Request
#### CURL
```bash filename="CURL"
curl https://turing-bridge-api.avail.so/info
```
## Example response
```json filename="Example JSON response"
{
"availChainName": "hex",
"bridgeContractAddress": "0x1369A4C9391cF90D393b40fAeAD521b0F7019dc5",
"vectorXChainId": "11155111",
"vectorXContractAddress": "0x570f6a1936386a4e060C2Daebbd0b6f5C091e13f"
}
```
### Get Merkle proof for a particular extrinsic
## Request
* `Path`: `/eth/proof/:blockhash?index=`
* `Method type`: `GET`
## Example Request
#### CURL
```bash filename="CURL"
curl "https://turing-bridge-api.avail.so/eth/proof/0x5bc7bd3a4793132007d6d0d9c55dc2ded2fe721a49bd771c1d290e6a3c6ec237?index=5"
```
## Example response
```json filename="Example JSON response"
{
"blobRoot": "0x511030804f9768c9d5c4826cdc7eba25ba0fd8e73ea32467e5fad547397620f8",
"blockHash": "0x5bc7bd3a4793132007d6d0d9c55dc2ded2fe721a49bd771c1d290e6a3c6ec237",
"bridgeRoot": "0xf6c807bc73a637957a61d620bd5e4ef8c7dd234e5fc96dfb6d6041bbe2947782",
"dataRoot": "0x2179e18ee112b080794b40f2239d77041c715ad7392d9fce054b7c10eacd4ebc",
"dataRootCommitment": "0x41cfe14b2e229cc5b4ee0cb7c3c909e1f78ae9e32f986e7496bfd4e007e06519",
"dataRootIndex": 48,
"dataRootProof": [
"0x0395f21560a9ccc1f2aa972601250256fbdb20fd936e1723397ff8d5e4f07b5d",
"0x1e91eb5ce2802373a583ce83898e8b4c1bb648e3c76bad87820a197b73b6d23b",
"0xd49b33b5754aa6c9549e9677e4c646bd4e7d500a2ab9761cffff5363f4608ac7",
"0x575858cb3bb948af2d8c4582310f951eb798281f71e913e044c6c415031f58a3",
"0x353fe475ab9b0e00c3bfae8598fef61ac2921a7928b21ad45b6594c023611156",
"0x4cb574d05c6606d2509ec6849e0cb53d04c5eead1cdbed4704018da938df5460",
"0xd88ddfeed400a8755596b21942c1497e114c302e6118290f91e6772976041fa1",
"0x87eb0ddba57e35f6d286673802a4af5975e22506c7cf4c64bb6be5ee11527f2c"
],
"leaf": "0xe17de7631392427460102691ba8a22adf5fb410548e50d6c636bf1f96840c3c3",
"leafIndex": 0,
"leafProof": [
"0x00017cadd87ec12039f98d646afaa33ed843056ad12f5e971cc81be15d00c26f",
"0xd046caabde74922f9d69e9fd33de6d3b9ee0f5c536183c4f4259f078afda538a"
],
"message": {
"destinationDomain": 2,
"from": "0xd43593c715fdd31c61141abd04a99fd6822c8558854ccde39a5684e7a56da27d",
"id": 256491151949829,
"message": {
"fungibleToken": {
"amount": 5000000000000000,
"asset_id": "0x0000000000000000000000000000000000000000000000000000000000000000"
}
},
"originDomain": 1,
"to": "0x0000000000000000000000000000000000000000000000000000000000000000"
},
"rangeHash": "0x21c402a3ccf8df26cb720c6d2fb409f04c809adef7a9a852e463cca83588f4fb"
}
```
### Get storage proof for a block
## Request
* `Path`: `/avl/proof/:block_hash/:messageId`
* `Method type`: `GET`
## Example Request
#### CURL
```bash filename="CURL"
curl "https://turing-bridge-api.avail.so/avl/proof/0x7963d8403d137cb5560e2436df07c233d18030b5f3f0c61b85083e2a8f2b5e55/1"
```
## Example response
```json filename="Example JSON response"
{
"accountProof": [
"0xf90211a04ea3386c3564d92c70c842f4fe40a382ab0c0915bd52f1cfdf515e7df40f6365a05fd188dd610941144f5367487b343528f30b6fe1713e14c489a925d31b76de8ea081a4596748d2119583d96af1f6459bfc4d4cf48e5cf9f4171bb0f15b54bfc705a0934bf30f9e4643c1e8cabd31b65867d5dce6702ff922d5d5f88edd77c16eddf8a020c236a887760702595f069baa5c20a5d7f7ff56e99e4f2291e6c383ec2f1376a0a4c5d6569cf6acb8b7b744bdb847ee84c7a250a05858f21c4b71e892e0f6368ca0431a25d2f4d04d92b7f663f91b65029bd2a443fdcd71d6a5d1cd2bad5f937da5a09d5da24c3c97ebd7ed4897206e30464414bdaf91fb633ef6e5aa61ec4573b829a0e1850f0a51e6f8fb4e7b7d0a592a478e4fd4f55132faad2e05c774f2c5bf3722a0e437d19bee3cdd31e6a54da59dd1730d20ad59b1e816ba304b0f8cf89fa62697a07c9058190b5603de7af44f45d2654832a5e5186db18b28514101f5df81287a27a08637a03272d24e7d380f3d68a38525d0348cce5fe90ae32f2b51149badd96f75a0d45f94f513a8918bafb074ac20f951e6ddd59cfa414550ea7af155ea7530e386a03dc457251a135a4002731a17ee72e722897a64509dd108eeb729bb1d9a84bf3ca0e1834ab71a27a983540fee14db56a40c26e3936db6b76d950a117acd5d2a03fea053388d24ffe072f62c6ed5dc8d8e286e167648a5bed4f9a1445df2b2581a589880",
"0xf90211a05f1dfe6f285811ddc2b5c1b2e0b4c9715586274627a60885abf66fe60f58f39ea098709a8cac54a765fa8b09b12849171bc2aadece08d4d21e2631efb92e422a72a09456842fb2f41eeaad70f98549983ec28ac5cc97b2bacd325a341bf8fecbd3fda012f6579824d8706f219fab4e6209270b3c5a7f9b9b10434422173bee004ebf87a0cad660f5066719c1e57fa895b385aedb678d89843f93fa9d284137cce585d912a08aee33972b41bd2c81bb805877f91b5c720c518551071c8c7b7b5035fc855dcaa0fe78af4efca09613a5b166012ad59ce6450d8f612d872010b8cb2cfce5171e01a0ed34274b556d95bc83b368a313d81e2418c84435e094626f568294de2c6adda3a0c4a8516496de7bd739485f7f0ea764e5f1e64f18ea24d5c2662df9321ad476b0a0c3ac05b241ad4ce2e59c05d280a56cdcaa38b8d974d0086a517ea0e71f47dbbba0c786b94bc71965e950e2cddbc6dc3d20b9527f14ac6720dffd93531f58cbb2caa0db4936424a52afb5f811937e21c36dbfc115f36167f57ea0f0770ba5b2b01509a08bfc560bf436ebfd1b9b2a16b38c37fdef7b27b5c5facf3d8487034100e04da3a0d19c58734f31adc98c08131a3f441d4945c63a569d381265517fb270d149fcd9a0a49a515f1d226b9a55079dd09128e8d068ce4473fc2afc7ce83ca73b4a4aeca8a039f4a70c5da7a6f9a75ccfbfa4e4660f367d83ed133633a09d8d85f3b81619b080",
"0xf90211a013013c8d88c90029dae1eb17e9fde9d31aa12a845f977d5b05edfbb836490ed1a08313217b9700aa20e3f2bca060da9c6986794e32e39ee8378c5fc090ea3900c4a0bb6f74f7517cc6d53e1ac28cda4b7492460eac8ad25dae2e6f5dd83054975f5aa06591f5961ce401397d1b7ca8ace8c514f0711029a4804afc5dff746535f4b310a0acb9ff577f6e255b1739bdca46b3fca567678334cef7a7c3459110d398117ca0a0ca52f676d720f2148ea17a8949d8456043eca88e500c0455de24bd5f97c4574ba043f8dbbd691453a0601664d5a35b89b7980c679924f93427d446ccb4b8f54bfba0429ee0cf4db61c968b343ade1502260068beaa87dc31e673c3abeaad60dbe7a5a03e27446763b24c289f918b1710dd069019fb95cd822997fb6fbc1db75ac8b0eca0fdf20b9898a99a2378bb653195060908595370eb56d905306ca1d1260d5c4120a0c63d1fb8a5be22724ea48117eab3b87f9a2ff76c6dec7f3568ddc16098f31b68a0e527b82ba67b4d9299c0e11f48362894ff615bf39e36ccde2d4e13b636262833a008b21c1e3dc4c5938833ed344842aff4a75297019736e1b66820a959d3092561a02bcb48ab6bf1b0b426008ab0919010b847473a3710806632bed77f05d10b2f5ca09b61c79db573dcc92d61a101051e2cffc43389cbffb39cba671fd5a706c26cd1a030051e73e7a062b2812459e8cd4c2db94c408f2dc706fc16ed632cda8707f3bd80",
"0xf90211a007df9be996660f9f91495c59b998832068088ae9034c5b04639694168b9571e6a0aa1dc52398e74cf48729ec879a6ee91c2e73cc73c076f953dda4dfe580ff05e3a0afc1d0a6d1d8723d5c16d5b25673eb3f4d05ef1466612ee9182781bbe987611ea038064f5d9c62106631b05c606352db759e3b535cdafeafb16638c9515731a7cba06800f0958bb61b89dd4bb02eb3da4bf6c14ad00b4a48a66019b0e6d15cc84ee1a08c149b7166f15e51a524ee32ea212f60d6df6a800e01d4fa22ffede5a39ee9e5a093922185d4bdbe12d5e5c62194739038e89b01d67f476acc8865817ac7ed9008a016d39ae51fad6e0f060d8653d173460ed52a823010a29db6edbc042b21e78fbca0f2c153d9c2c2b50644bc8098925dbb3ed618fa7e82ebb94e40965b2c977b6811a01f01669c56000db9ac524e334dace75e9f082db5c95ed9075caacc99165abc76a04ced0f74f50c438075f4d18fe1a0bbafa324e4a5a0d5fb7865acb35c72533e4ba0c8053b16343a4f4dd43ab76abb1cac2f8e791fdb3fa9121014cf7a42151860d3a06961b3a4f6ca879e0377f734d66f930af3258e1492be0c693d395c84a311a644a0a38ea23af3ce3d1d5b485a5c264f9cffaabe184e362466de6bf6e634062f5548a062843d42cff1c276a0e11cc1c6921151b7e84b8de41a2834c0beac97f6a07de3a0609f8c69b1fc2754e2d08946285d80a5a319647acef900dd97a62d21258a035880",
"0xf90211a0aec1c4685e2c3b64c256d10b3135ef48b013524839f8373dbd0bc0eac8d7ba1fa05ab97dd3b415869a2674d9dd1744abfb45de8dffc2c302b05c1336d40c80cf14a07ad83ef3d645503b9afcf48de32fb677beef8b637aa120e6624acea518eb5b3fa030775e5e8230f409c292e2d4033a7530f83656cb67148acc599d37f782f8ef8ba013f3d308779aeb8958a612b37a07807a1783b0f99e1e5f76303fb7c3c44d622ca06e7b7e9dcfc4c24c702aef326848015731a4e20f0d8a02a401197e99c62ca1d7a0ae60461c17040fd1475fceac5e5f5528d2b972b084b4d5413f8cfb41f1ac7075a029a319fc16340bb5889952869c0184a1fc1d0427aa488dd597909671c9b41b6ca03abb30bb5daf1a503a65f2e7979f61ed288f163937406758e2a44ed7a751d216a04e9cfefe88b368b66e1da951909d6e6ce639845c19690778f6e316c9dc902d52a0c7eb14d0cf6465626d7834f200810b009aeb7b13f384c096ebe3ec503b75f4faa0ad3c0d202e74be0f188316e4e466ae7fca89b6a20994b22747b2f95febf5a449a0692d63a3756a510f8467f7da09e97da406265b4201fa4fe3577cbb887045cd6ea093b71eb86d53ddf8d13df0e7c446867dbacf096455045a2bd9690c56a443b4c3a0e712c0b14d1130db6db7edd7a93af2fc1a06d2e5793c4e54dcacca98b4cc6997a0bcc85c28e9f209b9b419e66f87bce37fbb42ba8416880935275c377d2fcebcc180",
"0xf90191a0deb916373640a76bb6056aa37e9d548908c92fb5d3ea1fc69a1c99ddeb40eb24a029b4cdce0d4f7eed71cf6f6d21f4d27ef510b3e36c7c67587e84a08b8b288de380a0cd92c24f26cec2802437f2f8e56cdd35e47ed3edc4c806540740f5bf83f1c5ffa0aadf083c80930dee9f09d295708b24f31d2f41f50e1442e32ecbf03eb5b4a707a0f5335f3280d3be255686e95e46a353a1562a8008919a0051a46fb3fcce7c53caa07f9373bba9b4111e6d4ef57fecd16526497cdeaceccdb26ae09c526b834c83c3a0d000e75b89a65aedb850451d369e3ac5bf4d7ff0d71ec5e837417c0eaf074135a0a994cad72a8a641c62979d6f94ea0087a14770876869de76ff0aba4c51b7cfc480a094b7d0ec3e0de0f4135fed0b225c1a5f09fd8660e37fa7ee3d47cdf774fe4940a06e2c53738e77dd7b3c06aada2fcd6035a8435f8edbd40e0e9856439024502a2fa000e7bef9cf8c6301c9d0aba5e61136a898292f1cbde8861987d0999358f5505f80a0c232ad4a9e338ea79c8f86fc6a83952f212b4477a031a3c24d98d5aac8ef1fac8080",
"0xf87180808080a038eace52a35a1cb3ba4dfc5a7dd4fd884d999c017dd48546779e9b1ceee867f3a07564257a73fdfa4e290ad21fe914294174996ac87095b5730370371f5ea133e980808080a0d51dbe737bf6d8c5b89bcf7724074067d2a4986c4180a5016a8bebfbc92f56e1808080808080",
"0xf8669d38b7b6c4749ee47ec3483ea3325831ccd2fbcbbbcf7cb559ed13d35a14b846f8440280a0927826564770fb917bb1bc72e196fcf2fe2601c838c744106d1691a9da45b795a0fc50d62823735da871a4b45630e8f4a5aef99c18855869762b05d4f7fac4a859"
],
"storageProof": [
"0xf90211a02b61c0a3f1012b0c3fe640d90daf8f756f30665e9763d97c2809e683f57418bca0ca985e3b14af8741416d7c735fcc856c510138e8a82edd8506e49d8cac71258ca0bfebf2d2da505708433ec9e6d7d6f5f5706b502435ad98b8429f04f497f1e79ca0481bcb4d57a33e6fdd2d824b3f0bea708c76f437b114d043da26a9b019220552a01e5139fa355fc9ab10b4901bb0a1aee4b97b21441f3a6c2ecccadd2009b6e34fa05806452c1672d430087e3aac3e49901fe6788e8d5e2db17140ed49d3e4a6e262a00bc15c11195738ae6967054b12acc80948f99d852b3a05b2572407c67e98dfaca028fa67ddfd82c094d593d0001f099cff4f5bdad51cf0d77f4e5d15243c23701fa06ddefc9d483203b04420fc19c1de59664c839a726edb7cd6d519f63444293567a0fa38292ed34577ba490dfb1335d9ee2871bf64a498d8af13eb665516bc122fc8a03b6f3c05d6c9151aa3f552d3088d12e80ab70d78ef046ddf4d311dc35fd89699a02bbf18d484d22ce32d8efb9ad5236ca770f34ca46093a062c9fd0c00fce179b1a093e4702951798f5331327b8a6a613307e12edc789dc1ddb21ba4ef185122cedda091b0434eedf92e47d68213d40c2ead10fb94f7ce34845d9b85ddc255a5586f98a0b6a8a018fe45d5a78c237915cdc4db38a151c2078e9fd72ed53481072e816366a0c4a7126e02988de7caae8abdd299cf6fbde0eb2adc9be75ded86e8ea8388dead80",
"0xf90151a0401fa10b5959532f16179be0bd2506e7f849495298c2de8fd5b8c4d63b1f2c1ca01dcc18ed03ed3183fe26600b23afedbebdd947d6b5019cc010ea359e0234afe0a050030a57a0878bb51bbd0c62d3ba0c2b782ebc5d6ec012a7a1bd0f20917558b6a0db69566205faf59c73db049a04d81f63db7d2dbafbe66ed91557e511ed0938d780a0e6114e00cb6c2aa9cf632cb93e5ccad1b4c9af79c769950743a647fe829c602ca0bcb35466c5b4c32c509da47141cb7b9c3dddff0ebcd0ea050bad4d398e2fb25f808080a054876fae9e71b3585d4e83ee48c65b366f6f13a3c1b9e2749918145eabd1c46da004531fc338c340e676badc1a99cad6ece2da3d08945f806cb7063bf3343d35f48080a0c68fcd91600b226b6c847f28d2f6ca3f60c55b1009b26e59f4d1087bb5d6fcc0a06c5aec8aa331b1f04b26a06cb64c5a6d63616d717f236d31106751bbea0d666880",
"0xf871a08eccb5e838d7d0699e06d85c472bb097d8012c44d790e5d15c5b8465c7abb88180a02581c4c4535083ecd9ea1a314216bbe948f27bccb2e997c7796a9eec8f4c3df0a0c453ceda114a9775f135a7a2687f75e753c6f814789528fb73bb8cb5dec7eac680808080808080808080808080",
"0xf8429f31265685397ec9fa17535b5603e86e2b01a583b71373e1b2cbfac2a5bff58fa1a0eb70a047920b4aa1f3a418b52e455694d4e1a2362fd7fbcf16fe53d798311beb"
]
}
```
### Bridge a message from origin to destination chain
* On-chain name of extrinsic: `vector_sendMessage` to send a message from Avail to Ethereum.
* On-chain name of extrinsic: `vector_execute` to execute a message receieved from Ethereum on Avail.
> **Warning**
>
> `vector_sendMessage` must be submitted directly. Wrapped bridge sends, including proxy, multisig, scheduler, and batch calls, are rejected and will fail validation.
## Send an arbitrary message from Avail DA to Ethereum
#### avail-rust
Let us first look at how an arbitrary message is being sent using the `vector_sendMessage` extrinsic below.
```rust
let da_call = avail::tx()
.vector()
.send_message(message, recipient, domain);
let params = AvailExtrinsicParamsBuilder::new().build();
let maybe_tx_progress = sdk
.api
.tx()
.sign_and_submit_then_watch(&da_call, &account, params)
.await;
```
## Full Example
### Sending arbitrary message from Avail to Ethereum.
Initialize the `avail-rust` SDK.
```rust
use alloy_network::EthereumWallet;
use alloy_provider::ProviderBuilder;
use anyhow::Result;
use avail_bridge_tools::{address_to_h256, AvailBridgeContract, BridgeApiMerkleProof, Config};
use avail_rust::avail::runtime_types::bounded_collections::bounded_vec::BoundedVec;
use avail_rust::avail::vector::calls::types::send_message::Message;
use avail_rust::{avail, AvailExtrinsicParamsBuilder, Keypair, SecretUri, WaitFor, SDK};
use reqwest::Url;
use serde::{Deserialize, Serialize};
use std::fs;
use std::str::FromStr;
use std::time::Duration;
#[tokio::main]
async fn main() -> Result<()> {
let content = fs::read_to_string("./config.toml").expect("Read config.toml");
let config = toml::from_str::(&content).expect("Parse config.toml");
println!("Using config:\n{:#?}", config);
let sdk = SDK::new(config.avail_rpc_url.as_str())
.await
.expect("Initializing SDK");
let secret_uri =
SecretUri::from_str(config.avail_mnemonic.as_str()).expect("Valid secret URI");
let account = Keypair::from_uri(&secret_uri).expect("Valid secret URI");
}
```
Now we set our `domain` (similar to `chainID` in EVM chains). We also set the `recipient` contract address, in this case it will be the VectorX Bridge contract address.
```rust
// Ethereum domain
let domain = 2u32;
// Recipient contract address on the Ethereum network
let recipient = address_to_h256(config.receive_message_contract_address.parse()?);
```
After we have all this ready, we just need to define our message and send it using the `vector_sendMessage` extrinsic which is defined as `vector().sendMessage(message, recipient, domain)`
```rust
let data = BoundedVec(config.message_data.as_bytes().to_vec());
// Arbitrary message to send
let message = Message::ArbitraryMessage(data);
let da_call = avail::tx()
.vector()
.send_message(message, recipient, domain);
let params = AvailExtrinsicParamsBuilder::new().build();
let maybe_tx_progress = sdk
.api
.tx()
.sign_and_submit_then_watch(&da_call, &account, params)
.await;
```
Finally we wait for the transaction to be included in Avail's block and do some transaction handling.
```rust
let transaction = sdk
.util
.progress_transaction(maybe_tx_progress, WaitFor::BlockFinalization)
.await;
let tx_in_block = match transaction {
Ok(tx_in_block) => tx_in_block,
Err(message) => {
panic!("Error: {}", message);
}
};
println!("Finalized block hash: {:?}", tx_in_block.block_hash());
let events = tx_in_block
.wait_for_success()
.await
.expect("Waiting for success");
println!("Transaction result: {:?}", events);
let block_hash = tx_in_block.block_hash();
let extrinsic_index = events.extrinsic_index();
let block = sdk
.rpc
.chain
.get_block(None)
.await
.expect("Get block by hash");
```
### Retrieving data on Ethereum
Once we have sent the arbitrary message, we can interact with the Bridge API to determine if it has been sent to Ethereum.
1. Wait and check if the block range in which our message is sent has been received on Ethereum.
```rust
let block_num = block.block.header.number;
loop {
let avail_head_info: AvailHeadInfo =
reqwest::get(format!("{}/avl/head", config.bridge_api_url))
.await
.unwrap()
.json()
.await?;
println!("New range: {avail_head_info:?}");
if (avail_head_info.data.start..=avail_head_info.data.end).contains(&(block_num as u64)) {
println!("Stored avail head is in range!");
break;
}
tokio::time::sleep(Duration::from_secs(60)).await;
}
```
2. Get the proof from the VectorX Bridge API.
```rust
let url: String = format!(
"{}/eth/proof/{:?}?index={}",
config.bridge_api_url, block_hash, extrinsic_index
);
println!("Proof url: {url}");
let proof: BridgeApiMerkleProof = reqwest::get(url).await.unwrap().json().await.unwrap();
println!("Proof: {proof:?}");
let signer = config
.ethereum_mnemonic
.parse::()?;
```
3. Interact with the VectorX Bridge contract to retrieve the message
```rust
let provider = ProviderBuilder::new()
.with_recommended_fillers()
.wallet(EthereumWallet::from(signer))
.on_http(Url::parse(config.ethereum_url.as_str())?);
let contract_address = config.contract_address.parse()?;
let contract = AvailBridgeContract::new(contract_address, &provider);
let call = contract.receiveMessage(proof.clone().try_into().unwrap(), proof.into());
let pending_tx = call.send().await?;
let res = pending_tx.watch().await?;
println!("Result: {res:?}");
Ok(())
```
***
image: "/img/docs-link-preview\.png"
* Bringing it all together, we have the following. Inside `src/main.rs`, paste the following code:
```rust
use alloy_network::EthereumWallet;
use alloy_provider::ProviderBuilder;
use anyhow::Result;
use avail_bridge_tools::{address_to_h256, AvailBridgeContract, BridgeApiMerkleProof, Config};
use avail_rust::avail::runtime_types::bounded_collections::bounded_vec::BoundedVec;
use avail_rust::avail::vector::calls::types::send_message::Message;
use avail_rust::{avail, AvailExtrinsicParamsBuilder, Keypair, SecretUri, WaitFor, SDK};
use reqwest::Url;
use serde::{Deserialize, Serialize};
use std::fs;
use std::str::FromStr;
use std::time::Duration;
#[tokio::main]
async fn main() -> Result<()> {
let content = fs::read_to_string("./config.toml").expect("Read config.toml");
let config = toml::from_str::(&content).expect("Parse config.toml");
println!("Using config:\n{:#?}", config);
let sdk = SDK::new(config.avail_rpc_url.as_str())
.await
.expect("Initializing SDK");
let secret_uri =
SecretUri::from_str(config.avail_mnemonic.as_str()).expect("Valid secret URI");
let account = Keypair::from_uri(&secret_uri).expect("Valid secret URI");
// Ethereum domain
let domain = 2u32;
// Recipient contract address on the Ethereum network
let recipient = address_to_h256(config.receive_message_contract_address.parse()?);
let data = BoundedVec(config.message_data.as_bytes().to_vec());
// Arbitrary message to send
let message = Message::ArbitraryMessage(data);
let da_call = avail::tx()
.vector()
.send_message(message, recipient, domain);
let params = AvailExtrinsicParamsBuilder::new().build();
let maybe_tx_progress = sdk
.api
.tx()
.sign_and_submit_then_watch(&da_call, &account, params)
.await;
let transaction = sdk
.util
.progress_transaction(maybe_tx_progress, WaitFor::BlockFinalization)
.await;
let tx_in_block = match transaction {
Ok(tx_in_block) => tx_in_block,
Err(message) => {
panic!("Error: {}", message);
}
};
println!("Finalized block hash: {:?}", tx_in_block.block_hash());
let events = tx_in_block
.wait_for_success()
.await
.expect("Waiting for success");
println!("Transaction result: {:?}", events);
let block_hash = tx_in_block.block_hash();
let extrinsic_index = events.extrinsic_index();
let block = sdk
.rpc
.chain
.get_block(None)
.await
.expect("Get block by hash");
let block_num = block.block.header.number;
loop {
let avail_head_info: AvailHeadInfo =
reqwest::get(format!("{}/avl/head", config.bridge_api_url))
.await
.unwrap()
.json()
.await?;
println!("New range: {avail_head_info:?}");
if (avail_head_info.data.start..=avail_head_info.data.end).contains(&(block_num as u64)) {
println!("Stored avail head is in range!");
break;
}
tokio::time::sleep(Duration::from_secs(60)).await;
}
let url: String = format!(
"{}/eth/proof/{:?}?index={}",
config.bridge_api_url, block_hash, extrinsic_index
);
println!("Proof url: {url}");
let proof: BridgeApiMerkleProof = reqwest::get(url).await.unwrap().json().await.unwrap();
println!("Proof: {proof:?}");
let signer = config
.ethereum_mnemonic
.parse::()?;
let provider = ProviderBuilder::new()
.with_recommended_fillers()
.wallet(EthereumWallet::from(signer))
.on_http(Url::parse(config.ethereum_url.as_str())?);
let contract_address = config.contract_address.parse()?;
let contract = AvailBridgeContract::new(contract_address, &provider);
let call = contract.receiveMessage(proof.clone().try_into().unwrap(), proof.into());
let pending_tx = call.send().await?;
let res = pending_tx.watch().await?;
println!("Result: {res:?}");
Ok(())
}
#[derive(Serialize, Deserialize, Clone, Debug, Default)]
struct AvailHeadInfo {
data: AvailHeadData,
}
#[derive(Serialize, Deserialize, Clone, Debug, Default)]
struct AvailHeadData {
start: u64,
end: u64,
}
```
* Run the code using:
```bash
cargo run
```
## Send an arbitrary message from Ethereum to Avail DA
#### avail-rust
Let us look at how a message sent from Ethereum is being executed on Avail using the `vector` pallet.
```rust
let da_call = avail::tx().vector().execute(
avail_stored_slot,
convert_addressed_message(sent_message),
acc_proof,
stor_proof,
);
```
## Full Example
### Sending arbitrary message from Ethereum to Avail
Let us initialize some of out essentials such as `signer`, `provider`, `contract`, etc. This will allow us to interact with Ethereum easily.
```rust
use alloy::primitives::Address;
use alloy_network::EthereumWallet;
use alloy_provider::ProviderBuilder;
use alloy_sol_types::sol;
use anyhow::{anyhow, Result};
use avail_bridge_tools::{address_to_h256, convert_addressed_message, eth_seed_to_address, Config};
use avail_rust::avail::runtime_types::bounded_collections::bounded_vec::BoundedVec;
use avail_rust::avail_core::data_proof::AddressedMessage;
use avail_rust::{avail, AvailExtrinsicParamsBuilder, Keypair, SecretUri, WaitFor, SDK};
use reqwest::Url;
use serde::{Deserialize, Deserializer};
use sp_core::H256;
use std::fs;
use std::str::FromStr;
use std::time::Duration;
sol!(
#[sol(rpc)]
AvailBridgeContract,
"src/availbridge.json"
);
#[tokio::main]
async fn main() -> Result<()> {
let content = fs::read_to_string("./config.toml").expect("Read config.toml");
let config = toml::from_str::(&content).expect("Parse config.toml");
let secret_uri = SecretUri::from_str(config.avail_mnemonic.as_str())
.expect("parse avail sender mnemonic");
let account = Keypair::from_uri(&secret_uri).expect("create keypair");
let recipient = account.public_key().0;
let ethereum_signer = config
.ethereum_mnemonic
.parse::()?;
let sender = eth_seed_to_address(config.ethereum_mnemonic.as_str());
let provider = ProviderBuilder::new()
.with_recommended_fillers()
.wallet(EthereumWallet::from(ethereum_signer))
.on_http(Url::parse(config.ethereum_url.as_str())?);
let contract_addr: Address = config.contract_address.parse()?;
let contract = AvailBridgeContract::new(contract_addr, &provider);
}
```
2. Now we send a message using `contract.sendMessage` from Ethereum to Avail.
```rust
let call = contract.sendMessage(recipient.into(), config.clone().message_data.into());
let pending_tx = call.from(sender.0.into());
let pending_tx = pending_tx.send().await?;
let receipt = pending_tx.get_receipt().await?;
let block_number = receipt.block_number.ok_or(anyhow!("No block number!"))?;
println!("Included in block no: {block_number}");
let logs = receipt
.inner
.as_receipt()
.ok_or(anyhow!("Cannot convert to receipt"))?
.logs
.clone();
assert!(!logs.is_empty(), "Logs are empty!");
let message_id = u64::from_be_bytes(
logs[0].clone().inner.data.data[32 - 8..]
.try_into()
.unwrap(),
);
let sent_message = AddressedMessage {
message: avail_rust::avail_core::data_proof::Message::ArbitraryMessage(
config.message_data.as_bytes().to_vec().try_into().unwrap(),
),
from: address_to_h256(sender),
to: H256(recipient),
origin_domain: 2,
destination_domain: 1,
id: message_id,
};
```
### Retrieving and Executing the message sent to Avail
1. Using the Bridge API we check if the Ethereum block in which we sent the message is in range for the bridge. If it is, then we get the account and storage proofs.
```rust
let (avail_stored_block_hash, avail_stored_slot) = loop {
let ethereum_slot_info: EthereumSlotInfo =
reqwest::get(format!("{}/eth/head", config.bridge_api_url))
.await
.unwrap()
.json()
.await?;
println!("New slot: {ethereum_slot_info:?}");
let block_info: BlockInfo = reqwest::get(format!(
"{}/beacon/slot/{}",
config.bridge_api_url, ethereum_slot_info.slot
))
.await
.unwrap()
.json()
.await?;
println!("Slot to block number: {}", block_info.block_number);
if block_info.block_number >= block_number {
println!("Stored eth head is in range!");
break (block_info.block_hash, ethereum_slot_info.slot);
}
tokio::time::sleep(Duration::from_secs(60)).await;
};
let account_storage_proof: AccountStorageProof = reqwest::get(format!(
"{}/avl/proof/{:?}/{}",
config.bridge_api_url, avail_stored_block_hash, message_id
))
.await
.expect("Cannot get account/storage proofs.")
.json()
.await
.expect("Cannot deserialize");
println!("Got proof! {account_storage_proof:?}");
let acc_proof = BoundedVec(
account_storage_proof
.account_proof
.into_iter()
.map(BoundedVec)
.collect::>(),
);
let stor_proof = BoundedVec(
account_storage_proof
.storage_proof
.into_iter()
.map(BoundedVec)
.collect::>(),
);
println!("Message: {sent_message:?}");
let sdk = SDK::new(config.avail_rpc_url.as_str())
.await
.expect("create sdk");
```
2. We then call in Avail to call the `execute` method in the `vector` pallet, which is for executing a bridged message from Ethereum. We are submitting proof against the roots stored in the pallet storage. The pallet then executes the message we are giving proof for.
We only get the encoded tx, that we then have to sign and send, and wait for the transaction to included and executed on Avail.
```rust
let da_call = avail::tx().vector().execute(
avail_stored_slot,
convert_addressed_message(sent_message),
acc_proof,
stor_proof,
);
let params = AvailExtrinsicParamsBuilder::new().build();
let maybe_tx_progress = sdk
.api
.tx()
.sign_and_submit_then_watch(&da_call, &account, params)
.await;
let transaction = sdk
.util
.progress_transaction(maybe_tx_progress, WaitFor::BlockFinalization)
.await;
let tx_in_block = match transaction {
Ok(tx_in_block) => tx_in_block,
Err(message) => {
panic!("Error: {}", message);
}
};
println!("Finalized block hash: {:?}", tx_in_block.block_hash());
```
***
Bringing it all together in `src/main.rs`:
```rust
use alloy::primitives::Address;
use alloy_network::EthereumWallet;
use alloy_provider::ProviderBuilder;
use alloy_sol_types::sol;
use anyhow::{anyhow, Result};
use avail_bridge_tools::{address_to_h256, convert_addressed_message, eth_seed_to_address, Config};
use avail_rust::avail::runtime_types::bounded_collections::bounded_vec::BoundedVec;
use avail_rust::avail_core::data_proof::AddressedMessage;
use avail_rust::{avail, AvailExtrinsicParamsBuilder, Keypair, SecretUri, WaitFor, SDK};
use reqwest::Url;
use serde::{Deserialize, Deserializer};
use sp_core::H256;
use std::fs;
use std::str::FromStr;
use std::time::Duration;
sol!(
#[sol(rpc)]
AvailBridgeContract,
"src/availbridge.json"
);
#[tokio::main]
async fn main() -> Result<()> {
let content = fs::read_to_string("./config.toml").expect("Read config.toml");
let config = toml::from_str::(&content).expect("Parse config.toml");
let secret_uri = SecretUri::from_str(config.avail_mnemonic.as_str())
.expect("parse avail sender mnemonic");
let account = Keypair::from_uri(&secret_uri).expect("create keypair");
let recipient = account.public_key().0;
let ethereum_signer = config
.ethereum_mnemonic
.parse::()?;
let sender = eth_seed_to_address(config.ethereum_mnemonic.as_str());
let provider = ProviderBuilder::new()
.with_recommended_fillers()
.wallet(EthereumWallet::from(ethereum_signer))
.on_http(Url::parse(config.ethereum_url.as_str())?);
let contract_addr: Address = config.contract_address.parse()?;
let contract = AvailBridgeContract::new(contract_addr, &provider);
let call = contract.sendMessage(recipient.into(), config.clone().message_data.into());
let pending_tx = call.from(sender.0.into());
let pending_tx = pending_tx.send().await?;
let receipt = pending_tx.get_receipt().await?;
let block_number = receipt.block_number.ok_or(anyhow!("No block number!"))?;
println!("Included in block no: {block_number}");
let logs = receipt
.inner
.as_receipt()
.ok_or(anyhow!("Cannot convert to receipt"))?
.logs
.clone();
assert!(!logs.is_empty(), "Logs are empty!");
let message_id = u64::from_be_bytes(
logs[0].clone().inner.data.data[32 - 8..]
.try_into()
.unwrap(),
);
let sent_message = AddressedMessage {
message: avail_rust::avail_core::data_proof::Message::ArbitraryMessage(
config.message_data.as_bytes().to_vec().try_into().unwrap(),
),
from: address_to_h256(sender),
to: H256(recipient),
origin_domain: 2,
destination_domain: 1,
id: message_id,
};
let (avail_stored_block_hash, avail_stored_slot) = loop {
let ethereum_slot_info: EthereumSlotInfo =
reqwest::get(format!("{}/eth/head", config.bridge_api_url))
.await
.unwrap()
.json()
.await?;
println!("New slot: {ethereum_slot_info:?}");
let block_info: BlockInfo = reqwest::get(format!(
"{}/beacon/slot/{}",
config.bridge_api_url, ethereum_slot_info.slot
))
.await
.unwrap()
.json()
.await?;
println!("Slot to block number: {}", block_info.block_number);
if block_info.block_number >= block_number {
println!("Stored eth head is in range!");
break (block_info.block_hash, ethereum_slot_info.slot);
}
tokio::time::sleep(Duration::from_secs(60)).await;
};
let account_storage_proof: AccountStorageProof = reqwest::get(format!(
"{}/avl/proof/{:?}/{}",
config.bridge_api_url, avail_stored_block_hash, message_id
))
.await
.expect("Cannot get account/storage proofs.")
.json()
.await
.expect("Cannot deserialize");
println!("Got proof! {account_storage_proof:?}");
let acc_proof = BoundedVec(
account_storage_proof
.account_proof
.into_iter()
.map(BoundedVec)
.collect::>(),
);
let stor_proof = BoundedVec(
account_storage_proof
.storage_proof
.into_iter()
.map(BoundedVec)
.collect::>(),
);
println!("Message: {sent_message:?}");
let sdk = SDK::new(config.avail_rpc_url.as_str())
.await
.expect("create sdk");
let da_call = avail::tx().vector().execute(
avail_stored_slot,
convert_addressed_message(sent_message),
acc_proof,
stor_proof,
);
let params = AvailExtrinsicParamsBuilder::new().build();
let maybe_tx_progress = sdk
.api
.tx()
.sign_and_submit_then_watch(&da_call, &account, params)
.await;
let transaction = sdk
.util
.progress_transaction(maybe_tx_progress, WaitFor::BlockFinalization)
.await;
let tx_in_block = match transaction {
Ok(tx_in_block) => tx_in_block,
Err(message) => {
panic!("Error: {}", message);
}
};
println!("Finalized block hash: {:?}", tx_in_block.block_hash());
Ok(())
}
#[derive(Deserialize, Debug, Clone)]
#[serde(rename_all = "camelCase")]
struct BlockInfo {
block_number: u64,
block_hash: H256,
}
#[derive(Deserialize, Debug, Clone)]
#[serde(rename_all = "camelCase")]
struct EthereumSlotInfo {
pub slot: u64,
pub _timestamp: u64,
pub _timestamp_diff: u64,
}
#[derive(Deserialize, Debug, Clone)]
#[serde(rename_all = "camelCase")]
struct AccountStorageProof {
#[serde(deserialize_with = "bytes_from_hex")]
account_proof: Vec>,
#[serde(deserialize_with = "bytes_from_hex")]
storage_proof: Vec>,
}
fn bytes_from_hex<'de, D>(deserializer: D) -> Result>, D::Error>
where
D: Deserializer<'de>,
{
let buf = >::deserialize(deserializer)?;
let res = buf
.iter()
.map(|e| {
let without_prefix = e.trim_start_matches("0x");
hex::decode(without_prefix).unwrap()
})
.collect::>();
Ok(res)
}
```
Run the code using:
```bash
cargo run
```
### Bridge tokens from origin to destination chain
* On-chain name of extrinsic: `vector_sendMessage` to send a message from Avail to Ethereum.
* On-chain name of extrinsic: `vector_execute` to execute a message receieved from Ethereum on Avail.
> **Warning**
>
> Avail-to-Ethereum token bridge sends use `vector_sendMessage` and must be submitted directly. Wrapped bridge sends, including multisig, proxy, scheduler, and batch calls, are rejected.
## Bridge tokens from Avail DA to Ethereum
## Bridge tokens from Ethereum to Avail DA
#### avail-rust
Let us look at how a message sent from Ethereum is being executed on Avail using the `vector` pallet.
```rust
let da_call = avail::tx().vector().execute(
avail_stored_slot,
convert_addressed_message(sent_message),
acc_proof,
stor_proof,
);
```
## Full Example
### Sending AVAIL tokens from Ethereum to Avail
Let us initialize some of out essentials such as `signer`, `provider`, `contract`, etc. This will allow us to interact with Ethereum easily.
```rust
use alloy::primitives::{Address, U256};
use alloy_network::EthereumWallet;
use alloy_provider::ProviderBuilder;
use alloy_sol_types::sol;
use anyhow::{anyhow, Result};
use avail_bridge_tools::{address_to_h256, convert_addressed_message, eth_seed_to_address, Config};
use avail_rust::avail::runtime_types::bounded_collections::bounded_vec::BoundedVec;
use avail_rust::avail_core::data_proof::AddressedMessage;
use avail_rust::{avail, AvailExtrinsicParamsBuilder, WaitFor, SDK};
use avail_rust::{subxt_signer::SecretUri, Keypair};
use reqwest::Url;
use serde::{Deserialize, Deserializer};
use sp_core::H256;
use std::{fs, str::FromStr, time::Duration};
sol!(
#[sol(rpc)]
AvailBridgeContract,
"src/availbridge.json"
);
#[tokio::main]
async fn main() -> Result<()> {
let content = fs::read_to_string("./config.toml").expect("Read config.toml");
let config = toml::from_str::(&content).unwrap();
let secret_uri =
SecretUri::from_str(config.avail_mnemonic.as_str()).expect("Valid secret URI");
let account = Keypair::from_uri(&secret_uri).expect("Valid secret URI");
let recipient = account.public_key().0;
let amount: u128 = 100000;
let ethereum_signer = config
.ethereum_mnemonic
.parse::()?;
let sender = eth_seed_to_address(config.ethereum_mnemonic.as_str());
let provider = ProviderBuilder::new()
.with_recommended_fillers()
.wallet(EthereumWallet::from(ethereum_signer))
.on_http(Url::parse(config.ethereum_url.as_str())?);
```
2. Now we send a message using `contract.sendAVAIL` from Ethereum to Avail.
```rust
let contract = AvailBridgeContract::new(contract_addr, &provider);
let call = contract.sendAVAIL(recipient.into(), U256::from(amount));
let pending_tx = call.from(sender.0.into());
let pending_tx = pending_tx.send().await?;
let receipt = pending_tx.get_receipt().await?;
let block_number = receipt.block_number.ok_or(anyhow!("No block number!"))?;
println!("Included in block no: {block_number}");
let logs = receipt
.inner
.as_receipt()
.ok_or(anyhow!("Cannot convert to receipt"))?
.logs
.clone();
assert!(!logs.is_empty(), "Logs are empty!");
```
3. Let us also define our `message_id` and define the parameters of our AVAIL that is being sent to be understandable by the Avail network, such as `message.asset_id`, `message.amount`, `from` addressm `to` address, `origin_domain` (Ethereum), `destination_domain` (Avail)
```rust
let message_id = u64::from_be_bytes(
logs[0].clone().inner.data.data[32 - 8..]
.try_into()
.unwrap(),
);
let sent_message = AddressedMessage {
message: avail_rust::avail_core::data_proof::Message::FungibleToken {
asset_id: H256::zero(),
amount,
},
from: address_to_h256(sender),
to: H256(recipient),
origin_domain: 2,
destination_domain: 1,
id: message_id,
};
```
### Retrieving and Executing the message sent to Avail
1. Using the Bridge API we check if the Ethereum block in which we sent the message is in range for the bridge. If it is, then we get the account and storage proofs.
```rust
let (avail_stored_block_hash, avail_stored_slot) = loop {
let ethereum_slot_info: EthereumSlotInfo =
reqwest::get(format!("{}/eth/head", config.bridge_api_url))
.await
.unwrap()
.json()
.await?;
println!("New slot: {ethereum_slot_info:?}");
let block_info: BlockInfo = reqwest::get(format!(
"{}/beacon/slot/{}",
config.bridge_api_url, ethereum_slot_info.slot
))
.await
.unwrap()
.json()
.await?;
println!("Slot to num: {}", block_info.block_number);
if block_info.block_number >= block_number {
println!("Stored eth head is in range!");
break (block_info.block_hash, ethereum_slot_info.slot);
}
tokio::time::sleep(Duration::from_secs(60)).await;
};
let account_storage_proof: AccountStorageProof = reqwest::get(format!(
"{}/avl/proof/{:?}/{}",
config.bridge_api_url, avail_stored_block_hash, message_id
))
.await
.expect("Cannot get account/storage proofs.")
.json()
.await
.expect("Cannot deserialize");
println!("Got proof! {account_storage_proof:?}");
let acc_proof = BoundedVec(
account_storage_proof
.account_proof
.into_iter()
.map(BoundedVec)
.collect::>(),
);
let stor_proof = BoundedVec(
account_storage_proof
.storage_proof
.into_iter()
.map(BoundedVec)
.collect::>(),
);
println!("Message: {sent_message:?}");
```
2. We then initialize the Avail SDK and call the `execute` method in the `vector` pallet, which is for executing a bridged message from Ethereum. We are submitting proof against the roots stored in the pallet storage. The pallet then executes the message we are giving proof for.
We only get the encoded tx, that we then have to sign and send, and wait for the transaction to included and executed on Avail.
```rust
let sdk = SDK::new(config.avail_rpc_url.as_str()).await.unwrap();
let da_call = avail::tx().vector().execute(
avail_stored_slot,
convert_addressed_message(sent_message),
acc_proof,
stor_proof,
);
let params = AvailExtrinsicParamsBuilder::new().build();
let maybe_tx_progress = sdk
.api
.tx()
.sign_and_submit_then_watch(&da_call, &account, params)
.await;
let transaction = sdk
.util
.progress_transaction(maybe_tx_progress, WaitFor::BlockFinalization)
.await;
let tx_in_block = match transaction {
Ok(tx_in_block) => tx_in_block,
Err(message) => {
panic!("Error: {}", message);
}
};
println!("Executed at block: {:?}", tx_in_block.block_hash());
```
***
* Bringing it all together in `src/main.rs`:
```rust
use alloy::primitives::{Address, U256};
use alloy_network::EthereumWallet;
use alloy_provider::ProviderBuilder;
use alloy_sol_types::sol;
use anyhow::{anyhow, Result};
use avail_bridge_tools::{address_to_h256, convert_addressed_message, eth_seed_to_address, Config};
use avail_rust::avail::runtime_types::bounded_collections::bounded_vec::BoundedVec;
use avail_rust::avail_core::data_proof::AddressedMessage;
use avail_rust::{avail, AvailExtrinsicParamsBuilder, WaitFor, SDK};
use avail_rust::{subxt_signer::SecretUri, Keypair};
use reqwest::Url;
use serde::{Deserialize, Deserializer};
use sp_core::H256;
use std::{fs, str::FromStr, time::Duration};
sol!(
#[sol(rpc)]
AvailBridgeContract,
"src/availbridge.json"
);
#[tokio::main]
async fn main() -> Result<()> {
let content = fs::read_to_string("./config.toml").expect("Read config.toml");
let config = toml::from_str::(&content).unwrap();
let secret_uri =
SecretUri::from_str(config.avail_mnemonic.as_str()).expect("Valid secret URI");
let account = Keypair::from_uri(&secret_uri).expect("Valid secret URI");
let recipient = account.public_key().0;
let amount: u128 = 100000;
let ethereum_signer = config
.ethereum_mnemonic
.parse::()?;
let sender = eth_seed_to_address(config.ethereum_mnemonic.as_str());
let provider = ProviderBuilder::new()
.with_recommended_fillers()
.wallet(EthereumWallet::from(ethereum_signer))
.on_http(Url::parse(config.ethereum_url.as_str())?);
let contract_addr: Address = config.contract_address.parse()?;
let contract = AvailBridgeContract::new(contract_addr, &provider);
let call = contract.sendAVAIL(recipient.into(), U256::from(amount));
let pending_tx = call.from(sender.0.into());
let pending_tx = pending_tx.send().await?;
let receipt = pending_tx.get_receipt().await?;
let block_number = receipt.block_number.ok_or(anyhow!("No block number!"))?;
println!("Included in block no: {block_number}");
let logs = receipt
.inner
.as_receipt()
.ok_or(anyhow!("Cannot convert to receipt"))?
.logs
.clone();
assert!(!logs.is_empty(), "Logs are empty!");
let message_id = u64::from_be_bytes(
logs[0].clone().inner.data.data[32 - 8..]
.try_into()
.unwrap(),
);
let sent_message = AddressedMessage {
message: avail_rust::avail_core::data_proof::Message::FungibleToken {
asset_id: H256::zero(),
amount,
},
from: address_to_h256(sender),
to: H256(recipient),
origin_domain: 2,
destination_domain: 1,
id: message_id,
};
let (avail_stored_block_hash, avail_stored_slot) = loop {
let ethereum_slot_info: EthereumSlotInfo =
reqwest::get(format!("{}/eth/head", config.bridge_api_url))
.await
.unwrap()
.json()
.await?;
println!("New slot: {ethereum_slot_info:?}");
let block_info: BlockInfo = reqwest::get(format!(
"{}/beacon/slot/{}",
config.bridge_api_url, ethereum_slot_info.slot
))
.await
.unwrap()
.json()
.await?;
println!("Slot to num: {}", block_info.block_number);
if block_info.block_number >= block_number {
println!("Stored eth head is in range!");
break (block_info.block_hash, ethereum_slot_info.slot);
}
tokio::time::sleep(Duration::from_secs(60)).await;
};
let account_storage_proof: AccountStorageProof = reqwest::get(format!(
"{}/avl/proof/{:?}/{}",
config.bridge_api_url, avail_stored_block_hash, message_id
))
.await
.expect("Cannot get account/storage proofs.")
.json()
.await
.expect("Cannot deserialize");
println!("Got proof! {account_storage_proof:?}");
let acc_proof = BoundedVec(
account_storage_proof
.account_proof
.into_iter()
.map(BoundedVec)
.collect::>(),
);
let stor_proof = BoundedVec(
account_storage_proof
.storage_proof
.into_iter()
.map(BoundedVec)
.collect::>(),
);
println!("Message: {sent_message:?}");
let sdk = SDK::new(config.avail_rpc_url.as_str()).await.unwrap();
let da_call = avail::tx().vector().execute(
avail_stored_slot,
convert_addressed_message(sent_message),
acc_proof,
stor_proof,
);
let params = AvailExtrinsicParamsBuilder::new().build();
let maybe_tx_progress = sdk
.api
.tx()
.sign_and_submit_then_watch(&da_call, &account, params)
.await;
let transaction = sdk
.util
.progress_transaction(maybe_tx_progress, WaitFor::BlockFinalization)
.await;
let tx_in_block = match transaction {
Ok(tx_in_block) => tx_in_block,
Err(message) => {
panic!("Error: {}", message);
}
};
println!("Executed at block: {:?}", tx_in_block.block_hash());
Ok(())
}
#[derive(Deserialize, Debug, Clone)]
#[serde(rename_all = "camelCase")]
struct BlockInfo {
block_number: u64,
block_hash: H256,
}
#[derive(Deserialize, Debug, Clone)]
#[serde(rename_all = "camelCase")]
struct EthereumSlotInfo {
pub slot: u64,
pub _timestamp: u64,
pub _timestamp_diff: u64,
}
#[derive(Deserialize, Debug, Clone)]
#[serde(rename_all = "camelCase")]
struct AccountStorageProof {
#[serde(deserialize_with = "bytes_from_hex")]
account_proof: Vec>,
#[serde(deserialize_with = "bytes_from_hex")]
storage_proof: Vec>,
}
fn bytes_from_hex<'de, D>(deserializer: D) -> Result>, D::Error>
where
D: Deserializer<'de>,
{
let buf = >::deserialize(deserializer)?;
let res = buf
.iter()
.map(|e| {
let without_prefix = e.trim_start_matches("0x");
hex::decode(without_prefix).unwrap()
})
.collect::>();
Ok(res)
}
```
* Run the code using:
```bash
cargo run
```
### V1 Deprecated
> **Warning**
>
> **The V1 Light Client API has been deprecated.**
> All V1 endpoints have equivalent V2 replacements. Please migrate to the [V2 API](/docs/da/api-reference/avail-lc-api).
## What replaced it
The V2 API is a backward-compatible upgrade that preserves all V1 functionality while adding WebSocket support for real-time subscriptions and selective field queries for more efficient data retrieval.
## How to migrate
Change `/v1/` to `/v2/` in your endpoint paths. All V1 endpoints have direct V2 equivalents:
| V1 endpoint | V2 equivalent |
| ----------------------- | ----------------------------------------------- |
| `/v1/version` | `GET /v2/version` |
| `/v1/status` | `GET /v2/status` |
| `/v1/blocks/{n}` | `GET /v2/blocks/{n}` |
| `/v1/blocks/{n}/header` | `GET /v2/blocks/{n}/header` |
| `/v1/blocks/{n}/data` | `GET /v2/blocks/{n}/data?fields=data,extrinsic` |
| `/v1/submit` | `POST /v2/submit` |
### New in V2
* **WebSocket API** — real-time subscriptions for block and data availability events
* **Selective field queries** — request only the fields you need (e.g., `?fields=data,extrinsic`)
See the [V2 API reference](/docs/da/api-reference/avail-lc-api) for full endpoint documentation.
### Fetch specified block status and confidence if applicable
> **Note**
>
> **LOOKING FOR INSTRUCTIONS ON HOW TO RUN YOUR OWN LIGHT CLIENT?**
> You can check out [our docs here](/docs/da/operate/run-a-light-client/light-client#running-the-light-client) for instructions on how to run your own light client.
Gets specified block status and confidence if applicable.
**Use cases:**
* Polling the status of the block
* Querying historical block statuses
*Params*:
* `block_number` - block number (required)
*Response*:
* **status** - block status
* **confidence** - data availability confidence, available if block processing is finished.
#### Status
* **unavailable** - block will not be processed if
\
**latest\_block - sync\_depth > block\_number**
* **pending** - block will be processed at some point in the future if
\
**latest\_block - sync\_depth ≤ block\_number ≤ latest\_block**
* **verifying-header** - block processing is started, and the header finality is being checked
* **verifying-confidence** - block header is verified and available, confidence is being checked
* **verifying-data** - confidence is achieved, and data is being fetched and verified (if configured)
* **finished** - block header is available, confidence is achieved, and data is available (if configured)
This status does not give information on what is available. In the case of web sockets messages are already
pushed, similar to case of the frequent polling, so header and confidence will be available if
**verifying-header** and **verifying-confidence** has been successful.
#### CURL
```bash filename="CURL"
curl "localhost:7007/v2/blocks/{insert a suitable block number}"
```
#### Rust
```bash filename="CURL"
curl "https://api.lightclient.mainnet.avail.so/v2/blocks/{insert a suitable block number}"
```
```rust
use reqwest::StatusCode;
use serde::{Deserialize, Serialize};
#[derive(Debug, Serialize, Deserialize)]
#[serde(untagged)]
enum BlockResponse {
NotFound(String),
BlockStatus {
status: String,
confidence: Option,
},
}
const LIGHT_CLIENT_URL: &str = "https://api.lightclient.mainnet.avail.so";
#[tokio::main]
async fn main() {
let block_number = 672481; // Example block number
let block_url = format!("{LIGHT_CLIENT_URL}/v2/blocks/{block_number}");
let response = reqwest::get(&block_url).await.unwrap();
if response.status() == StatusCode::OK {
let response_text = response.text().await.unwrap();
println!("Raw response: {}", response_text);
let block_info: BlockResponse = serde_json::from_str(&response_text).unwrap();
match block_info {
BlockResponse::NotFound(message) => println!("Block status: {}", message),
BlockResponse::BlockStatus {
status,
confidence,
} => println!(
"Block status: {}, Confidence: {:?}",
status,
confidence.unwrap_or_default()
),
}
} else {
eprintln!("Failed to get block status: {}", response.status());
}
// ...error handling...
}
```
Sample Response:
```json
{
"status": "unavailable|pending|verifying-header|verifying-confidence|verifying-data|incomplete|finished",
"confidence": {confidence} // Optional
}
```
> If **block\_number > latest\_block,** block status cannot yet be derived and the response on this and other endpoints with `/v2/blocks/{block_number}` prefix is:
```yaml
Not Found
```
### Fetch the header for a specific block if available
> **Note**
>
> **LOOKING FOR INSTRUCTIONS ON HOW TO RUN YOUR OWN LIGHT CLIENT?**
> You can check out [our docs here](/docs/da/operate/run-a-light-client/light-client#running-the-light-client) for instructions on how to run your own light client.
Gets the header for a specifc block if available.
*Params*:
* `block_number` - block number (required)
*Response*:
If **block\_status = "verifying-confidence|verifying-data|finished"**, the header is available, and the response is:
```yaml
HTTP/1.1 200 OK
Content-Type: application/json
{
"hash": "{hash}",
"parent_hash": "{parent-hash}",
"number": {number},
"state_root": "{state-root}",
"extrinsics_root": "{extrinsics-root}",
"extension": {
"rows": {rows},
"cols": {cols},
"data_root": "{data-root}", // Optional
"commitments": [
"{commitment}", ...
],
"app_lookup": {
"size": {size},
"index": [
{
"app_id": {app-id},
"start": {start}
}
]
}
}
}
```
If **block\_status = "unavailable|pending|verifying-header"**, header is not available and response is:
```yaml
HTTP/1.1 400 Bad Request
```
#### CURL
```bash filename="CURL"
curl "localhost:7007/v2/blocks/{insert a suitable block number}/header"
```
#### Rust
```bash filename="CURL"
curl "https://api.lightclient.mainnet.avail.so/v2/blocks/{insert a suitable block number}/header"
```
```rust
use reqwest::{StatusCode, Client};
use serde::{Deserialize, Serialize};
#[derive(Debug, Serialize, Deserialize)]
struct BlockHeaderResponse {
hash: String,
parent_hash: String,
number: u32,
state_root: String,
extrinsics_root: String,
extension: Extension,
}
#[derive(Debug, Serialize, Deserialize)]
struct Extension {
rows: u32,
cols: u32,
data_root: Option,
commitments: Vec,
app_lookup: AppLookup,
}
#[derive(Debug, Serialize, Deserialize)]
struct AppLookup {
size: u32,
index: Vec,
}
#[derive(Debug, Serialize, Deserialize)]
struct AppIndex {
app_id: Option,
start: u32,
}
const LIGHT_CLIENT_URL: &str = "https://api.lightclient.mainnet.avail.so";
#[tokio::main]
async fn main() {
let block_number = 592445; // Example block number
let client = Client::new();
let header_url = format!("{LIGHT_CLIENT_URL}/v2/blocks/{block_number}/header");
let response = client.get(header_url).send().await.unwrap();
match response.status() {
StatusCode::OK => {
let block_header: BlockHeaderResponse = response.json().await.unwrap();
println!("Block header: {:?}", block_header);
}
StatusCode::BAD_REQUEST => {
println!("Header not available for block {}", block_number);
}
_ => {
eprintln!("Failed to get block header: {}", response.status());
}
}
// ...error handling...
}
```
### Fetch block data if available
> **Note**
>
> **LOOKING FOR INSTRUCTIONS ON HOW TO RUN YOUR OWN LIGHT CLIENT?**
> You can check out [our docs here](/docs/da/operate/run-a-light-client/light-client#running-the-light-client) for instructions on how to run your own light client.
> **Warning**
>
> **Note:**
> Light client must be running in `app-mode`to retrieve data. [Click here](/docs/da/operate/run-a-light-client/light-client#setting-your-identity-using-identitytoml) for instructions on how to run an Avail Light Client in `app-mode`.
Gets the block data if available.
Only returns data if the block contains it for the configured `app_id`. If there is no data against the configured `app_id` it returns an empty array.
Query parameter `fields` specifies whether to return decoded data and encoded extrinsic (with signature). If `fields` parameter is omitted, response contains **hash** and **data**, while **extrinsic** is omitted.
The `data` and `extrinsic` is encoded in `base64` format.
#### CURL
```sh
curl "localhost:7007/v2/blocks/{block_number}/data?fields=data,extrinsic"
```
#### Rust
```sh
curl "https://api.lightclient.mainnet.avail.so/v2/blocks/{block_number}/data?fields=data,extrinsic"
```
```rust
use reqwest::{Client, StatusCode};
use serde::{Deserialize, Serialize};
#[derive(Debug, Serialize, Deserialize)]
struct BlockDataResponse {
data_transactions: Vec,
}
#[derive(Debug, Serialize, Deserialize)]
struct DataTransaction {
data: Option, // Base-64 encoded data (optional)
extrinsic: Option, // Base-64 encoded extrinsic (optional)
}
const LIGHT_CLIENT_URL: &str = "https://api.lightclient.mainnet.avail.so";
#[tokio::main]
async fn main() {
let block_number = 592445; // Example block number
let client = Client::new();
let data_url = format!("{LIGHT_CLIENT_URL}/v2/blocks/{block_number}/data?fields=data,extrinsic");
let response = client.get(&data_url).send().await.unwrap();
match response.status() {
StatusCode::OK => {
let block_data: BlockDataResponse = response.json().await.unwrap();
println!("Block data: {:?}", block_data);
}
StatusCode::BAD_REQUEST => {
println!("Data not available for block {}", block_number);
}
_ => {
eprintln!("Failed to get block data: {}", response.status());
}
}
// ...error handling...
}
```
Sample Response:
If **block\_status = "finished"**, data is available and the response is:
```yaml
{
"data_transactions": [
{
"data": "{base-64-encoded-data}" // Optional
"extrinsic": "{base-64-encoded-extrinsic}", // Optional
}
]
}
```
If **block\_status** is not **“finished”**, or **`app-mode`** is not enabled, data is not available and the response is:
```yaml
Not Found
```
If no data is available in the block against the configured `app_id` in `app-mode`:
```yaml
{
"data_transactions": []
}
```
> **Note**
>
> The next few methods are used to submit data to the Avail network. But to use them:
>
> 1. you need to configure an `identity.toml` file which will contain the seed phrase
> for an account that has some `AVAIL` tokens. You can learn how to do that [here](/docs/da/operate/run-a-light-client/light-client#setting-your-identity-using-identitytoml).
>
> 2. You will also need to run the Avail LC in app-client mode. The command to do all this will
> look something like this:
>
> ```sh
> curl -sL1 avail.sh | bash -s -- --app_id 1 --identity identity.toml --network mainnet
> ```
### Fetch current status and active modes of the light client
> **Note**
>
> **LOOKING FOR INSTRUCTIONS ON HOW TO RUN YOUR OWN LIGHT CLIENT?**
> You can check out [our docs here](/docs/da/operate/run-a-light-client/light-client#running-the-light-client) for instructions on how to run your own light client.
Gets current status and active modes of the light client.
*Params*:
* None
*Response*:
* **modes** - active modes
* **app\_id** - if **app** mode is active, this field contains configured application ID
* **genesis\_hash** - genesis hash of the network to which the light client is connected
* **network** - network host, version and spec version light client is currently con
* **blocks** - state of processed blocks
#### Modes
* **light** - data availability sampling mode, the light client performs random sampling and calculates confidence
* **app** - light client fetches, verifies, and stores application-related data
#### Blocks
* **latest** - block number of the latest [finalized](https://docs.substrate.io/learn/consensus/) block received from the node
* **available** - range of blocks with verified data availability (configured confidence has been achieved)
* **app\_data** - range of blocks with app data retrieved and verified
* **historical\_sync** - state for historical blocks syncing up to configured block (ommited if historical sync is not configured)
#### Historical sync
* **synced** - `true` if there are no historical blocks left to sync
* **available** - range of historical blocks with verified data availability (configured confidence has been achieved)
* **app\_data** - range of historical blocks with app data retrieved and verified
#### CURL
```bash filename="CURL"
curl "localhost:7007/v2/status"
```
#### Rust
```bash filename="CURL"
curl "https://api.lightclient.mainnet.avail.so/v2/status"
```
```rust
use reqwest::StatusCode;
use serde::{Deserialize, Serialize};
#[derive(Debug, Serialize, Deserialize)]
struct StatusResponse {
modes: Vec,
app_id: Option,
genesis_hash: String,
network: String,
blocks: Blocks,
partition: Option,
}
#[derive(Debug, Serialize, Deserialize)]
struct Blocks {
latest: u32,
available: Range,
app_data: Option,
historical_sync: Option,
}
#[derive(Debug, Serialize, Deserialize)]
struct Range {
first: u32,
last: u32,
}
#[derive(Debug, Serialize, Deserialize)]
struct HistoricalSync {
synced: bool,
available: Range,
app_data: Range,
}
#[derive(Debug, Serialize, Deserialize)]
struct Partition {
// Define fields as per your requirement
}
const LIGHT_CLIENT_URL: &str = "https://api.lightclient.mainnet.avail.so";
#[tokio::main]
async fn main() {
let status_url = format!("{LIGHT_CLIENT_URL}/v2/status");
let response = reqwest::get(&status_url).await.unwrap();
if response.status() == StatusCode::OK {
let response_text = response.text().await.unwrap();
println!("Raw response: {}", response_text);
let status_info: StatusResponse = serde_json::from_str(&response_text).unwrap();
println!("Status: {:?}", status_info);
} else {
eprintln!("Failed to get status: {}", response.status());
}
// ...error handling...
}
```
Sample Response:
```json
{
"modes":["light"],
"genesis_hash":"0x6f09966420b2608d1947ccfb0f2a362450d1fc7fd902c29b67c906eaa965a7ae",
"network":"wss://goldberg.avail.tools:443/ws/1.11.1-38304bb5126/data-avail/22",
"blocks":{
"latest":572269,
"available":{
"first":572068,
"last":572268
}
}
}
```
### WebSocket API
The Avail light client WebSocket API allows real-time communication between a client and a server over a
persistent connection. The Web socket API can be used on its own or in combination with HTTP API to enable different pull/push use cases.
HTTPS vs WSS
`HTTP` and `Websocket` are two different ways of communicating with a server. `HTTP` is a request-response protocol,
where a connection persists for only so long as the request is being processed. In contrast, a websocket connection
persists for as long as the client and server are connected. This allows for real-time communication between the two,
and enables the client to fetch information from the server as soon as it is available, without having to
poll the server for updates.
> **Note**
>
> HOW TO CONNECT TO THE WEBSOCKET SERVER
> You cannot use `CURL` to send websocket commands, since `CURL` cannot maintain a persistent connection.
> Although there are a variety of librariries we can use, the following examples are using [wscat](https://github.com/websockets/wscat).
>
> To install `wscat`, simply run:
>
> ```sh
> npm install -g wscat
> ```
## Get started with the Websocket Avail LC API
1. The Avail LC Websocket API generates a unique `subscription_id` upon request.
2. This ID is used to connect to the websocket server.
3. The `v2/subscriptions` method creates subscriptions for given topics. In case of reconnects, the user needs to subscribe again.
### Generate a subscription ID
1. The very first step in using the Avail LC Websocket API is to generate a subscription ID.
2. You can do that using a simple `Curl` request to the `v2/subscriptions` endpoint.
Request:
#### CURL
```bash filename="CURL"
curl -X POST "http://localhost:7007/v2/subscriptions" \
-H "Content-Type: application/json" \
-d '{
"topics": ["header-verified", "confidence-achieved", "data-verified"],
"data_fields": ["data", "extrinsic"]
}'
```
#### Rust
```bash filename="CURL"
curl -X POST "https://api.lightclient.mainnet.avail.so/v2/subscriptions" \
-H "Content-Type: application/json" \
-d '{
"topics": ["header-verified", "confidence-achieved", "data-verified"],
"data_fields": ["data", "extrinsic"]
}'
```
```rust
use reqwest::{Client, StatusCode};
use serde::{Deserialize, Serialize};
use serde_json::json;
#[derive(Debug, Serialize, Deserialize)]
struct SubscriptionResponse {
subscription_id: String,
}
const LIGHT_CLIENT_URL: &str = "https://api.lightclient.mainnet.avail.so";
#[tokio::main]
async fn main() {
let client = Client::new();
let subscriptions_url = format!("{LIGHT_CLIENT_URL}/v2/subscriptions");
let topics = vec!["header-verified", "confidence-achieved", "data-verified"];
let data_fields = vec!["data", "extrinsic"];
let response = client.post(&subscriptions_url)
.header("Content-Type", "application/json")
.body(json!({ "topics": topics, "data_fields": data_fields }).to_string())
.send()
.await
.unwrap();
match response.status() {
StatusCode::OK => {
let subscription_response: SubscriptionResponse = response.json().await.unwrap();
println!("Subscription ID: {}", subscription_response.subscription_id);
}
_ => {
eprintln!("Failed to create subscription: {}", response.status());
}
}
// ...error handling...
}
```
Sample Response:
```yaml
{
"subscription_id": "{subscription-id}"
}
```
### Initialize the Websocket connection
You can use this method to actually connect to Avail light client web socket. Multiple connections are currently allowed.
To connect to the Avail LC websocket API, you need:
1. Access to a [running Light Client](/docs/da/operate/run-a-light-client/light-client#running-the-light-client).
2. A subscription ID generated using the [`v2/subscriptions`](#v2subscriptions) method.
3. to run this wscat command in the terminal:
#### Local
```sh
wscat -c ws://127.0.0.1:7007/v2/ws/{subscription-id}
```
#### Remote
```sh
wscat -c wss://api.lightclient.mainnet.avail.so/v2/ws/{subscription-id}
```
Your terminal should look something like this:
> **Note**
>
> Please note that you will regularly receive information related to the topics you chose to subscribe to
> for as long as the `ws` connection persists, even if you don't actually send any messages.
Every request should contain unique **request\_id** field, used to correlate request with response.
## Subscription IDs vs Request IDs
Each time you use the [`v2/subscriptions`](#v2subscriptions) method, you will receive a unique **subscription\_id**.
This ID is used to connect to the websocket server.
Each of these IDs will be of the [UUID4 format](https://www.uuidgenerator.net/version4).
Coming to requests, every request you make to the websocket server should contain a **request\_id** field,
which will need to be a UUID4 value. You can choose to use a single, random UUID4 value to send all your requests,
or you can use a unique UUID4 value for each request you send. The choice is yours.
Using a single UUID4 value is simple, but using a unique UUID4 value for each request can help you
correlate each response with a unique request.
The Avail LC API was designed with dev experience in mind, and this way you can choose the way that suits you best.
### Submit data to Avail DA
> **Note**
>
> **LOOKING FOR INSTRUCTIONS ON HOW TO RUN YOUR OWN LIGHT CLIENT?**
> You can check out [our docs here](/docs/da/operate/run-a-light-client/light-client#running-the-light-client) for instructions on how to run your own light client.
> **Warning**
>
> **Note:**
> Light client must be running in `app-mode`to retrieve data. [Click here](/docs/da/operate/run-a-light-client/light-client#setting-your-identity-using-identitytoml) for instructions on how to run an Avail Light Client in `app-mode`.
> Submits application data to the avail network
In case of `data` transaction, data transaction is created, signed and submitted.\
In case of `extrinsic`, externally created and signed transaction is submitted.
Only one field is allowed per request.\
Both `data` and `extrinsic` has to be encoded using base64 encoding.
*Params:*
* `base64` encoded data or extrinsic
> **Note**
>
> **HOW TO SUBMIT DATA USING THE LIGHT CLIENT?**
>
> 1. To use this method you need to run your Light Client in the `app-client` mode.
> You can then submit data directly to the `appID` you configured while booting up the Light Client.
>
> 2. You can only pass `Base64` encoded data to be submitted via the Light Client.
> You can use [this website](https://www.base64encode.org/) to encode & decode your data into the required formats.
*Response:*
* **block\_number** - block number where transaction is included
* **block\_hash** - block hash where transaction is included
* **hash** - transaction hash
* **index** - transaction index in the block
#### CURL
```bash filename="CURL"
curl -XPOST 127.0.0.1:7007/v2/submit --header "Content-Type: application/json" --data '{"data":"dGVzdAo="}'
```
#### Rust
```rust
use reqwest::{Client, StatusCode};
use serde::{Deserialize, Serialize};
use serde_json::json;
#[derive(Debug, Serialize, Deserialize)]
struct SubmitResponse {
block_number: u32,
block_hash: String,
hash: String,
index: u32,
}
const LIGHT_CLIENT_URL: &str = "https://api.lightclient.mainnet.avail.so";
#[tokio::main]
async fn main() {
let client = Client::new();
let submit_url = format!("{LIGHT_CLIENT_URL}/v2/submit");
let data = "dGVzdAo="; // Example base64 encoded data
let response = client.post(&submit_url)
.header("Content-Type", "application/json")
.body(json!({ "data": data }).to_string())
.send()
.await
.unwrap();
match response.status() {
StatusCode::OK => {
let submit_response: SubmitResponse = response.json().await.unwrap();
println!("Submit response: {:?}", submit_response);
}
StatusCode::NOT_FOUND => {
println!("App mode not active or signing key not configured.");
}
_ => {
eprintln!("Failed to submit data: {}", response.status());
}
}
// ...error handling...
}
```
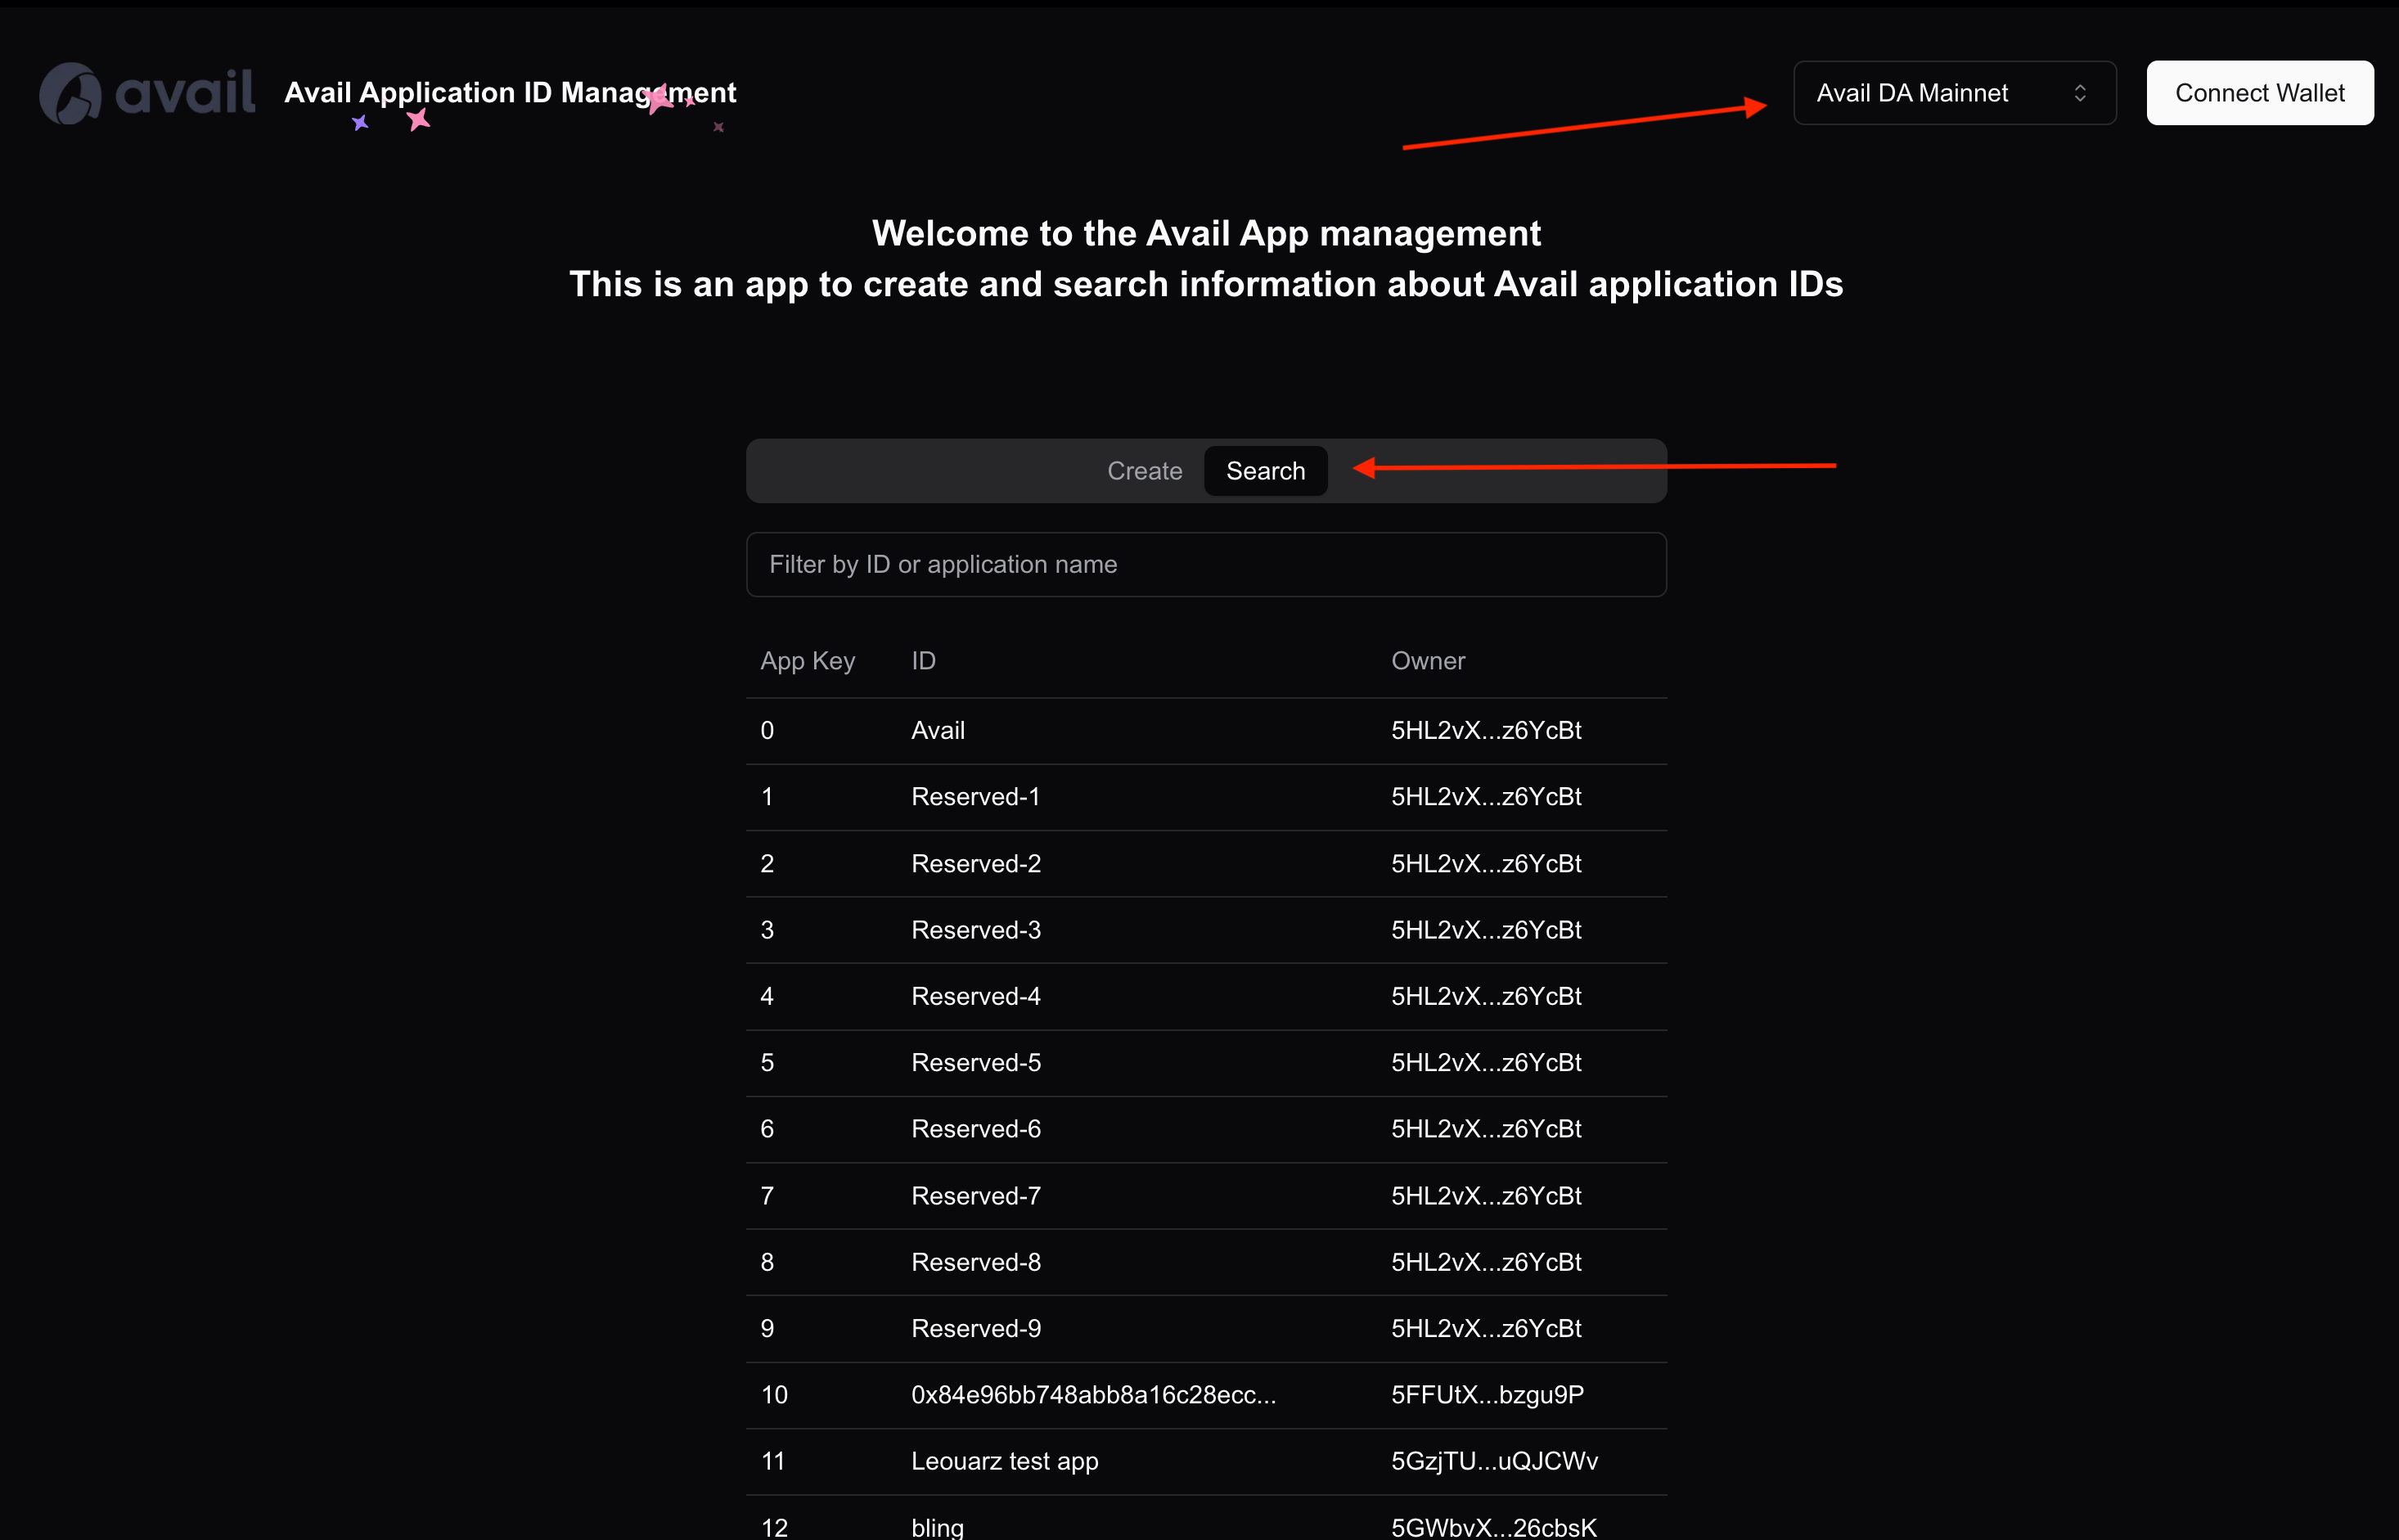
Sample Response:
```json
{
"block_number": "{block-number}",
"block_hash": "{block-hash}",
"hash": "{transaction-hash}",
"index": "{transaction-index}"
}
```
If app mode is not active (or signing key is not configured and `data` is submitted) response is:
```text
Not found
```
### Fetch the latest block
> **Note**
>
> **LOOKING FOR INSTRUCTIONS ON HOW TO RUN YOUR OWN LIGHT CLIENT?**
> You can check out [our docs here](/docs/da/operate/run-a-light-client/light-client#running-the-light-client) for instructions on how to run your own light client.
Gets the version of the light client binary, and the version of the Avail node it is connected to.
*Params*:
* None
*Response*:
* Light Client version
* Network version
#### CURL
```bash filename="CURL"
curl "localhost:7007/v2/version"
```
#### Rust
```bash filename="CURL"
curl "https://api.lightclient.mainnet.avail.so/v2/version"
```
```rust
use reqwest::StatusCode;
use serde::{Deserialize, Serialize};
#[derive(Debug, Serialize, Deserialize)]
struct VersionResponse {
version: String,
network_version: String,
}
const LIGHT_CLIENT_URL: &str = "https://api.lightclient.mainnet.avail.so";
#[tokio::main]
async fn main() {
let version_url = format!("{LIGHT_CLIENT_URL}/v2/version");
let response = reqwest::get(&version_url).await.unwrap();
if response.status() == StatusCode::OK {
let response_text = response.text().await.unwrap();
println!("Raw response: {}", response_text);
let version_info: VersionResponse = serde_json::from_str(&response_text).unwrap();
println!(
"Light Client version: {}, Network version: {}",
version_info.version, version_info.network_version
);
} else {
eprintln!("Failed to get version: {}", response.status());
}
// ...error handling...
}
```
Sample Response:
```json
{
"version":"v1.9.0",
"network_version":"1.10"
}
```
### Submit data to Avail DA
> **Note**
>
> While the `SubscriptionID` generated by your Light Client is unique, and you need it to initially connect to the client,
> you can use **ANY** [UUID4 number](https://www.uuidgenerator.net/version4)
> as the `request_id` in your request.
*Sample Request:*
#### json
```json
{"type":"submit","request_id":"4a482bb0-3c22-475d-a2b8-af1c27aa2636","message":{"data":"dGVzdAo="}}
```
> **Note**
>
> **HOW TO SUBMIT DATA USING THE LIGHT CLIENT?**
>
> 1. To use this method you need to run your Light Client in the `app-client` mode.
> You can then submit data directly to the `appID` you configured while booting up the Light Client.
>
> 2. You can only pass `Base64` encoded data to be submitted via the Light Client.
> You can use [this website](https://www.base64encode.org/) to encode & decode your data into the required formats.
*Sample Response:*
```json
{"topic":"data-transaction-submitted","request_id":"4a482bb0-3c22-475d-a2b8-af1c27aa2636","message":{"block_number":597725,"block_hash":"0x84803b93bf96aea90fae8fcb21cae70d310783ae8e9c4f4e1d696cec2791c0e3","hash":"0x290efdc7856fd29ec406c610f79aaa3c8079c11f8338093efad739b454bef0ac","index":1}}
```
### Request Avail light client version data
> **Note**
>
> While the `SubscriptionID` generated by your Light Client is unique, and you need it to initially connect to the client,
> you can use **ANY** [UUID4 number](https://www.uuidgenerator.net/version4)
> as the `request_id` in your request.
Request Avail light client version data.
*Sample Request:*
#### json
```json
{"topic":"version","request_id":"4a482bb0-3c22-475d-a2b8-af1c27aa2636","message":{"version":"v1.12.4","network_version":"2.2.1-4f0439f4448"}}
```
*Sample Response:*
```json
{"topic":"version","request_id":"4a482bb0-3c22-475d-a2b8-af1c27aa2636","message":{"version":"v1.7.10","network_version":"1.10"}}
```
### Request current Avail light client status data
> **Note**
>
> While the `SubscriptionID` generated by your Light Client is unique, and you need it to initially connect to the client,
> you can use **ANY** [UUID4 number](https://www.uuidgenerator.net/version4)
> as the `request_id` in your request.
Request current Avail light client status data.
*Sample Request:*
#### json
```json
{"type":"status","request_id":"4a482bb0-3c22-475d-a2b8-af1c27aa2636"}
```
*Sample Response:*
```json
{"topic":"status","request_id":"4a482bb0-3c22-475d-a2b8-af1c27aa2636","message":{"modes":["light","app"],"app_id":13,"genesis_hash":"0xb91746b45e0346cc2f815a520b9c6cb4d5c0902af848db0a80f85932d2e8276a","network":"wss://avail-mainnet.public.blastapi.io/2.2.1-4f0439f4448/39","blocks":{"latest":828832,"available":{"first":828743,"last":828831},"app_data":{"first":828743,"last":828831}}}}
```
### author-submit-and-watch-extrinsic
> **Error**
>
> **`author_submitAndWatchExtrinsic` IS NOT RECOMMENDED FOR USE RIGHT NOW**
>
> 1. Avail builds on top of the [Polkadot SDK](https://docs.polkadot.com/develop/parachains/intro-polkadot-sdk/#substrate) (formerly known as Substrate)
> and implements most of it's underlying calls and extrinsics.
> 2. The `author_submitAndWatchExtrinsic` RPC call is known to be buggy and unreliable, and as such, not recommended for use.
> 3. We recommend most devs [use our dedicated SDKs](/docs/da/api-reference/avail-node-api) instead of trying to use this RPC call directly.
> 4. You can read more about the problem in this Github issue: [https://github.com/paritytech/subxt/issues/1668](https://github.com/paritytech/subxt/issues/1668)
> 5. Since the problem is upstream, we can't fix it directly.
> 6. We will keep this page updated with any new information :)
### author-submit-extrinsic
> **Note**
>
> **WE RECOMMEND USING THE AVAIL SDKs DIRECTLY**
>
> 1. The `author_submitExtrinsic` RPC call is a low-level API that allows you to manually submit any extrinsic to the Avail network using a signed hash.
> 2. We recommend using our dedicated SDKs instead of using this RPC call directly for convenience.
> 3. The SDKs themselves use this RPC call internally, and offer a higher level of abstraction for interacting with the network.
> **Note**
>
> **KNOW THE DIFFERENCE**
>
> 1. `author_submitExtrinsic` & `author_submitAndWatchExtrinsic` are different RPC calls that serve different, but similar purposes.
> 2. We recommend not using the latter directly either. You can read about the problems with it [in this page in our docs](/docs/da/api-reference/avail-node-api/author-submit-and-watch-extrinsic).
### Transfer funds without ensuring min balance for sender
On-chain name of extrinsic: `balances_transferAllowDeath`
## Parameters
#### avail-js
| parameter | type | optional | description |
| --------- | ------------- | -------- | ----------------------------------------------- |
| dest | string | false | account that will receive funds |
| value | BN | false | amount that is send. 10^18 is equal to 1 AVL |
| waitFor | WaitFor | false | wait for block inclusion or finalization |
| account | KeyringPair | false | account that will send and sign the transaction |
| options | SignerOptions | true | used to overwrite existing signer options |
#### avail-rust
| parameter | type | optional | description |
| --------- | ----------- | -------- | ----------------------------------------------- |
| dest | string | false | account that will receive funds |
| value | BN | false | amount that is send. 10^18 is equal to 1 AVAIL |
| waitFor | WaitFor | false | wait for block inclusion or finalization |
| account | KeyringPair | false | account that will send and sign the transaction |
#### avail-go
| parameter | type | optional | description |
| ---------------- | -------- | -------- | ------------------------------------------------------ |
| api | API | false | api for avail chain |
| dest | string | false | account that will receive funds |
| amount | Ucompact | false | amount that is send. 10^18 is equal to 1 AVL |
| WaitForInclusion | WaitFor | false | wait for block inclusion or finalization |
| Seed | Mnemonic | false | seed of the account that needs to sign the transaction |
## Return value
On failure, a reason of failure is returned. On Success, TransferEvent event, KilledAccount (optionally) event, transaction hash and block
hash is returned.
## Minimal Example
> **Note**
>
> 1. You will need to set up the dev environment required to run this example.
> For instructions, [check out our docs here](/docs/da/api-reference/avail-node-api#setting-up-the-dev-environment).
>
> 2. If you're sending an extrinsic (i.e conducting a transaction) you will need to replace the demo seed phrase with your own seed phrase.
> The rest of the code should work as is.
#### avail-js
1. Inside `your-file-name.ts`, add the following code:
```typescript showLineNumbers filename="avail-js" name="cmd1"
import * as dotenv from 'dotenv';
import { Account, SDK, BN } from 'avail-js-sdk';
dotenv.config();
export async function transferAllowDeath() {
// Initialize SDK with Turing endpoint
const sdk = await SDK.New('wss://turing-rpc.avail.so/ws');
// Create account from seed in .env file
const seed = process.env.SEED;
if (!seed) {
throw new Error("SEED environment variable is not set");
}
// Create account from seed
const account = Account.new(seed);
console.log("Sender Address: ", account.address);
// Destination address to send AVAIL to
const destinationAddress = "5DDY2yzh8uCysYFAiRSTeQVwtZSKNF49CkQkyPH852xvrYKk";
console.log("Recipient Address: ", destinationAddress);
// Amount to transfer: 12.345 AVAIL
const amount = new BN('12345000000000000000');
// Create transfer transaction
const tx = sdk.tx.balances.transferAllowDeath(destinationAddress, amount);
console.log("Submitting transfer transaction...");
// Execute and wait for inclusion
const res = await tx.executeWaitForInclusion(account, {});
// Check if transaction was successful
const isOk = res.isSuccessful();
if (isOk === undefined) {
throw new Error("Cannot check if transaction was successful");
}
else if (!isOk) {
throw new Error("Transaction failed");
}
console.log(`Transaction Hash: ${res.txHash}`);
console.log(`Block Hash: ${res.blockHash}`);
console.log(`Block Number: ${res.blockNumber}`);
console.log("Transfer completed successfully");
process.exit(0);
}
// Execute the function
transferAllowDeath();
```
2. Run the code using:
```bash filename="terminal" name="cmd2"
ts-node your-file-name.ts
```
#### avail-rust
1. Inside `main.rs`, add the following code:
```rust showLineNumbers filename="avail-rust" name="cmd3"
use dotenvy::dotenv;
use std::env;
use avail_rust::prelude::*;
use core::str::FromStr;
pub async fn transfer_allow_death() -> Result<(), ClientError> {
// Create a new SDK instance
let sdk = SDK::new("wss://turing-rpc.avail.so/ws").await?;
// Loading seed phrase and creating an account derived from the seed
dotenv().ok();
let seed = env::var("SEED").expect("SEED environment variable is not set");
let account = account::from_secret_uri(&seed)?;
println!("Account Address: {}", account.public_key().to_account_id());
// Executing the transaction
let dest = AccountId::from_str("5HGjWAeFDfFCWPsjFQdVV2Msvz2XtMktvgocEZcCj68kUMaw").unwrap();
let amount = 12_345_000_000_000_000_000u128; // 12.345 AVAIL being transferred to the destination account
let tx = sdk.tx.balances.transfer_allow_death(dest, amount);
let res = tx.execute_and_watch_inclusion(&account, Options::default()).await?;
println!(
"Block Hash: {:?}, Block Number: {}, Tx Hash: {:?}, Tx Index: {}",
res.block_hash, res.block_number, res.tx_hash, res.tx_index
);
println!("Transfer completed successfully");
Ok(())
}
// Add a main function to call transfer_allow_death
#[tokio::main]
async fn main() {
if let Err(e) = transfer_allow_death().await {
eprintln!("Error: {:?}", e);
}
}
```
2. Run the code using:
```bash filename="terminal" name="cmd4"
cargo run
```
#### avail-go
1. Inside `main.go`, add the following code:
```go showLineNumbers filename="avail-go" name="cmd5"
package main
import (
"fmt"
"log"
"os"
"github.com/availproject/avail-go-sdk/metadata"
"github.com/availproject/avail-go-sdk/primitives"
SDK "github.com/availproject/avail-go-sdk/sdk"
"github.com/joho/godotenv"
)
func main() {
// Load environment variables from .env file
err := godotenv.Load()
if err != nil {
log.Fatal("Error loading .env file")
}
// Make sure the SEED environment variable is set
seed := os.Getenv("SEED")
if seed == "" {
log.Fatal("SEED environment variable is not set")
}
// Create an account from the SEED environment variable
acc, err := SDK.Account.NewKeyPair(seed)
if err != nil {
log.Fatalf("Failed to create account: %v", err)
}
fmt.Println("Your account Address: " + acc.SS58Address(42))
// Initialize an SDK instance
sdk, err := SDK.NewSDK("https://turing-rpc.avail.so/rpc")
if err != nil {
log.Fatalf("Failed to initialize SDK: %v", err)
}
// Destination address
destAddress, err := primitives.NewAccountIdFromAddress("5DDY2yzh8uCysYFAiRSTeQVwtZSKNF49CkQkyPH852xvrYKk")
if err != nil {
log.Fatalf("Failed to convert address: %v", err)
}
dest := destAddress.ToMultiAddress()
// Create a Balance from a string
// The value is 10 AVAIL
amount, err := metadata.NewBalanceFromString("10000000000000000000")
if err != nil {
log.Fatalf("Failed to create balance: %v", err)
}
// Transferring funds without the
// necessary checks of keeping the sender's account alive
tx := sdk.Tx.Balances.TransferAllowDeath(dest, amount)
// Execute the transaction
res, err := tx.ExecuteAndWatchInclusion(acc, SDK.NewTransactionOptions())
if err != nil {
log.Fatalf("Transaction failed: %v", err)
}
// Check if the transaction was successful
if !res.IsSuccessful().UnsafeUnwrap() {
log.Fatal("Transaction was not successful")
}
fmt.Println("Transaction successful")
// Printing out all the values of the transaction
fmt.Println(fmt.Sprintf(`Block Hash: %v, Block Index: %v, Tx Hash: %v, Tx Index: %v`, res.BlockHash.ToHexWith0x(), res.BlockNumber, res.TxHash.ToHexWith0x(), res.TxIndex))
fmt.Println("Transfer completed successfully")
}
```
2. Run the code using:
```bash filename="terminal" name="cmd6"
go run main.go
```
> **Note**
>
> If you receive errors related to missing dependencies while trying to execute your code, run:
>
> ```bash filename="terminal"
> go mod tidy
> ```
>
> and try again.
### Transfer funds while ensuring min balance for sender
On-chain name of extrinsic: `balances_transferKeepAlive`
## Parameters
#### avail-js
| parameter | type | optional | description |
| --------- | ------------- | -------- | ----------------------------------------------- |
| dest | string | false | account that will receive funds |
| value | BN | false | amount that is send. 10^18 is equal to 1 AVL |
| waitFor | WaitFor | false | wait for block inclusion or finalization |
| account | KeyringPair | false | account that will send and sign the transaction |
| options | SignerOptions | true | used to overwrite existing signer options |
#### avail-rust
| parameter | type | optional | description |
| --------- | ----------- | -------- | ----------------------------------------------- |
| dest | \&str | false | account that will receive funds |
| value | u128 | false | amount that is send. 10^18 is equal to 1 AVAIL |
| waitFor | WaitFor | false | wait for block inclusion or finalization |
| account | KeyringPair | false | account that will send and sign the transaction |
#### avail-go
| parameter | type | optional | description |
| ---------------- | -------- | -------- | ------------------------------------------------------ |
| api | API | false | api for avail chain |
| dest | string | false | account that will receive funds |
| amount | Ucompact | false | amount that is send. 10^18 is equal to 1 AVL |
| WaitForInclusion | WaitFor | false | wait for block inclusion or finalization |
| Seed | Mnemonic | false | seed of the account that needs to sign the transaction |
## Return value
On failure, a reason of failure is returned. On Success, TransferEvent event, transaction hash and block hash is returned.
## Basic Example
#### avail-js
1. Inside `your-file-name.ts`, add the following code:
```typescript showLineNumbers filename="avail-js" name="cmd1"
import * as dotenv from 'dotenv';
import { Account, SDK, BN } from 'avail-js-sdk';
dotenv.config();
export async function transferKeepAlive() {
// Initialize SDK with Turing endpoint
const sdk = await SDK.New('wss://turing-rpc.avail.so/ws');
// Create account from seed in .env file
const seed = process.env.SEED;
if (!seed) {
throw new Error("SEED environment variable is not set");
}
// Create account from seed
const account = Account.new(seed);
console.log("Sender Address: ", account.address);
// Destination address to send AVAIL to
const destinationAddress = "5DDY2yzh8uCysYFAiRSTeQVwtZSKNF49CkQkyPH852xvrYKk";
console.log("Recipient Address: ", destinationAddress);
// Amount to transfer: 12 AVAIL
const amount = new BN('12000000000000000000'); // 12 with 18 zeroes
console.log("Transfer Amount: 12 AVAIL");
// Create transfer transaction
const tx = sdk.tx.balances.transferKeepAlive(destinationAddress, amount);
console.log("Submitting transfer transaction...");
// Execute and wait for inclusion
const res = await tx.executeWaitForInclusion(account, {});
// Check if transaction was successful
const isOk = res.isSuccessful();
if (isOk === undefined) {
throw new Error("Cannot check if transaction was successful");
}
else if (!isOk) {
throw new Error("Transaction failed");
}
console.log(`Transaction Hash: ${res.txHash}`);
console.log(`Block Hash: ${res.blockHash}`);
console.log(`Block Number: ${res.blockNumber}`);
console.log("Transfer completed successfully");
process.exit(0);
}
// Execute the function
transferKeepAlive();
```
2. Run the code using:
```bash filename="terminal" name="cmd2"
ts-node your-file-name.ts
```
#### avail-rust
1. Inside `main.rs`, add the following code:
```rust showLineNumbers filename="avail-rust" name="cmd3"
use dotenvy::dotenv;
use std::env;
use avail_rust::prelude::*;
use core::str::FromStr;
pub async fn transfer_keep_alive() -> Result<(), ClientError> {
// Create a new SDK instance
let sdk = SDK::new("wss://turing-rpc.avail.so/ws").await?;
// Loading seed phrase and creating an account derived from the seed
dotenv().ok();
let seed = env::var("SEED").expect("SEED environment variable is not set");
let account = account::from_secret_uri(&seed)?;
println!("Account Address: {}", account.public_key().to_account_id());
// Executing the transaction
let dest = AccountId::from_str("5HGjWAeFDfFCWPsjFQdVV2Msvz2XtMktvgocEZcCj68kUMaw").unwrap();
let amount = 1_000_000_000_000_000_000u128; // 1 AVAIL being transferred to the destination account
let tx = sdk.tx.balances.transfer_keep_alive(dest, amount);
let res = tx.execute_and_watch_inclusion(&account, Options::default()).await?;
println!(
"Block Hash: {:?}, Block Number: {}, Tx Hash: {:?}, Tx Index: {}",
res.block_hash, res.block_number, res.tx_hash, res.tx_index
);
println!("Transfer completed successfully");
Ok(())
}
// Add a main function to call transfer_keep_alive
#[tokio::main]
async fn main() {
if let Err(e) = transfer_keep_alive().await {
eprintln!("Error: {:?}", e);
}
}
```
2. Run the code using:
```bash filename="terminal" name="cmd4"
cargo run
```
#### avail-go
1. Inside `main.go`, add the following code:
```go showLineNumbers filename="avail-go" name="cmd5"
package main
import (
"fmt"
"log"
"os"
"github.com/availproject/avail-go-sdk/metadata"
"github.com/availproject/avail-go-sdk/primitives"
SDK "github.com/availproject/avail-go-sdk/sdk"
"github.com/joho/godotenv"
)
func main() {
// Load environment variables from .env file
err := godotenv.Load()
if err != nil {
log.Fatal("Error loading .env file")
}
// Make sure the SEED environment variable is set
seed := os.Getenv("SEED")
if seed == "" {
log.Fatal("SEED environment variable is not set")
}
// Create an account from the SEED environment variable
acc, err := SDK.Account.NewKeyPair(seed)
if err != nil {
log.Fatalf("Failed to create account: %v", err)
}
fmt.Println("Your account Address: " + acc.SS58Address(42))
// Initialize an SDK instance
sdk, err := SDK.NewSDK("https://turing-rpc.avail.so/rpc")
if err != nil {
log.Fatalf("Failed to initialize SDK: %v", err)
}
// Destination address
destAddress, err := primitives.NewAccountIdFromAddress("5DDY2yzh8uCysYFAiRSTeQVwtZSKNF49CkQkyPH852xvrYKk")
if err != nil {
log.Fatalf("Failed to convert address: %v", err)
}
dest := destAddress.ToMultiAddress()
// Create a Balance from a string
// The value is 10 AVAIL
amount, err := metadata.NewBalanceFromString("10000000000000000000")
if err != nil {
log.Fatalf("Failed to create balance: %v", err)
}
// Transferring funds while ensuring the sender's account
// retains a minimum balance
tx := sdk.Tx.Balances.TransferKeepAlive(dest, amount)
// Execute the transaction
res, err := tx.ExecuteAndWatchInclusion(acc, SDK.NewTransactionOptions())
if err != nil {
log.Fatalf("Transaction failed: %v", err)
}
// Check if the transaction was successful
if !res.IsSuccessful().UnsafeUnwrap() {
log.Fatal("Transaction was not successful")
}
fmt.Println("Transaction successful")
// Printing out all the values of the transaction
fmt.Println(fmt.Sprintf(`Block Hash: %v, Block Index: %v, Tx Hash: %v, Tx Index: %v`, res.BlockHash.ToHexWith0x(), res.BlockNumber, res.TxHash.ToHexWith0x(), res.TxIndex))
fmt.Println("Transfer completed successfully")
}
```
2. Run the code using:
```bash filename="terminal" name="cmd6"
go run main.go
```
> **Note**
>
> If you receive errors related to missing dependencies while trying to execute your code, run:
>
> ```bash filename="terminal" name="cmd7"
> go mod tidy
> ```
>
> and try again.
### Transfer all funds from one account to another
On-chain name of extrinsic: `balances_transferAll`
## Parameters
#### avail-js
| parameter | type | optional | description |
| --------- | ------------- | -------- | ------------------------------------------------ |
| dest | string | false | account that will receive funds |
| keepAlive | boolean | false | if set to false it will reap the account as well |
| waitFor | WaitFor | false | wait for block inclusion or finalization |
| account | KeyringPair | false | account that will send and sign the transaction |
| options | SignerOptions | true | used to overwrite existing signer options |
#### avail-rust
| parameter | type | optional | description |
| --------- | ----------- | -------- | ------------------------------------------------ |
| dest | \&str | false | account that will receive funds |
| keepAlive | bool | false | if set to false it will reap the account as well |
| waitFor | WaitFor | false | wait for block inclusion or finalization |
| account | KeyringPair | false | account that will send and sign the transaction |
#### avail-go
| parameter | type | optional | description |
| ---------------- | -------- | -------- | ------------------------------------------------------ |
| api | API | false | api for avail chain |
| dest | string | false | account that will receive funds |
| WaitForInclusion | WaitFor | false | wait for block inclusion or finalization |
| Seed | Mnemonic | false | seed of the account that needs to sign the transaction |
## Return value
On failure, a reason of failure is returned. On Success, TransferEvent event, KilledAccount (optionally) event, transaction hash and block
hash is returned.
## Minimal Example
> **Note**
>
> 1. You will need to set up the dev environment required to run this example.
> For instructions, [check out our docs here](/docs/da/api-reference/avail-node-api#setting-up-the-dev-environment).
>
> 2. If you're sending an extrinsic (i.e conducting a transaction) you will need to replace the demo seed phrase with your own seed phrase.
> The rest of the code should work as is.
#### avail-js
1. Inside `your-file-name.ts`, add the following code:
```typescript showLineNumbers filename="avail-js" name="cmd1"
import * as dotenv from 'dotenv';
import { Account, SDK } from 'avail-js-sdk';
dotenv.config();
export async function transferAll() {
// Initialize SDK with Turing endpoint
const sdk = await SDK.New('wss://turing-rpc.avail.so/ws');
// Create account from seed in .env file
const seed = process.env.SEED;
if (!seed) {
throw new Error("SEED environment variable is not set");
}
// Create account from seed
const account = Account.new(seed);
console.log("Sender Address: ", account.address);
// Destination address to send all available AVAIL to
const destinationAddress = "5DDY2yzh8uCysYFAiRSTeQVwtZSKNF49CkQkyPH852xvrYKk";
console.log("Recipient Address: ", destinationAddress);
// Setting this value to false will reap your account
const keepAlive = true;
// Create transfer all transaction
const tx = sdk.tx.balances.transferAll(destinationAddress, keepAlive);
console.log("Submitting transfer all transaction...");
// Execute and wait for inclusion
const res = await tx.executeWaitForInclusion(account, {});
// Check if transaction was successful
const isOk = res.isSuccessful();
if (isOk === undefined) {
throw new Error("Cannot check if transaction was successful");
}
else if (!isOk) {
throw new Error("Transaction failed");
}
console.log(`Transaction Hash: ${res.txHash}`);
console.log(`Block Hash: ${res.blockHash}`);
console.log(`Block Number: ${res.blockNumber}`);
console.log("Transfer completed successfully");
process.exit(0);
}
// Execute the function
transferAll();
```
2. Run the code using:
```bash filename="terminal" name="cmd2"
ts-node your-file-name.ts
```
#### avail-rust
1. Inside `main.rs`, add the following code:
```rust showLineNumbers filename="avail-rust" name="cmd3"
use dotenvy::dotenv;
use std::env;
use avail_rust::prelude::*;
use core::str::FromStr;
pub async fn transfer_all() -> Result<(), ClientError> {
// Create a new SDK instance
let sdk = SDK::new("wss://turing-rpc.avail.so/ws").await?;
// Loading seed phrase and creating an account derived from the seed
dotenv().ok();
let seed = env::var("SEED").expect("SEED environment variable is not set");
let account = account::from_secret_uri(&seed)?;
println!("Account Address: {}", account.public_key().to_account_id());
// Executing the transaction
let dest = AccountId::from_str("5DDY2yzh8uCysYFAiRSTeQVwtZSKNF49CkQkyPH852xvrYKk").unwrap();
// Please take note of the `keep_alive` bool parameter
// If set to true (which is the case right now), the transfer transaction will leave the origin account with a small balance
// that is above the existential deposit and prevents the account from being reaped
// Set the `keep_alive` parameter to `false` only if you are ok with the origin account being reaped
let tx = sdk.tx.balances.transfer_all(dest, true);
let res = tx.execute_and_watch_inclusion(&account, Options::default()).await?;
println!(
"Block Hash: {:?}, Block Number: {}, Tx Hash: {:?}, Tx Index: {}",
res.block_hash, res.block_number, res.tx_hash, res.tx_index
);
Ok(())
}
// Add a main function to call transfer_all
#[tokio::main]
async fn main() {
if let Err(e) = transfer_all().await {
eprintln!("Error: {:?}", e);
}
}
```
2. Run the code using:
```bash filename="terminal" name="cmd4"
cargo run
```
#### avail-go
1. Inside `main.go`, add the following code:
```go showLineNumbers filename="avail-go" name="cmd5"
package main
import (
"fmt"
"log"
"os"
"github.com/availproject/avail-go-sdk/primitives"
SDK "github.com/availproject/avail-go-sdk/sdk"
"github.com/joho/godotenv"
)
func main() {
// Load environment variables from .env file
err := godotenv.Load()
if err != nil {
log.Fatal("Error loading .env file")
}
// Make sure the SEED environment variable is set
seed := os.Getenv("SEED")
if seed == "" {
log.Fatal("SEED environment variable is not set")
}
// Create an account from the SEED environment variable
acc, err := SDK.Account.NewKeyPair(seed)
if err != nil {
log.Fatalf("Failed to create account: %v", err)
}
fmt.Println("Your account Address: " + acc.SS58Address(42))
// Initialize an SDK instance
sdk, err := SDK.NewSDK("https://turing-rpc.avail.so/rpc")
if err != nil {
log.Fatalf("Failed to initialize SDK: %v", err)
}
// Convert the hex string to a MultiAddress
destAddress, err := primitives.NewAccountIdFromAddress("5DDY2yzh8uCysYFAiRSTeQVwtZSKNF49CkQkyPH852xvrYKk")
if err != nil {
log.Fatalf("Failed to convert address: %v", err)
}
dest := destAddress.ToMultiAddress()
// Set to false if you don't want to keep the account alive
keepAlive := true
// Transferring all funds
tx := sdk.Tx.Balances.TransferAll(dest, keepAlive)
// Execute the transaction
res, err := tx.ExecuteAndWatchInclusion(acc, SDK.NewTransactionOptions())
if err != nil {
log.Fatalf("Transaction failed: %v", err)
}
// Check if the transaction was successful
if !res.IsSuccessful().UnsafeUnwrap() {
log.Fatal("Transaction was not successful")
}
fmt.Println("Transaction successful")
// Printing out all the values of the transaction
fmt.Println(fmt.Sprintf(`Block Hash: %v, Block Index: %v, Tx Hash: %v, Tx Index: %v`, res.BlockHash.ToHexWith0x(), res.BlockNumber, res.TxHash.ToHexWith0x(), res.TxIndex))
}
```
2. Run the code using:
```bash filename="terminal" name="cmd6"
go run main.go
```
> **Note**
>
> If you receive errors related to missing dependencies while trying to execute your code, run:
>
> ```bash filename="terminal"
> go mod tidy
> ```
>
> and try again.
### Fetch block data from Avail DA using RPC calls
The Avail node supports a variety of RPC calls for fetching block data. This page covers a few
different calls that are commonly used to fetch block data:
## Fetch block hash using block number
### Parameters
#### avail-js
| parameter | type | optional | description |
| ----------- | ------ | -------- | ------------------------------------------------------------------------------------- |
| blockNumber | number | true | The block number of the block to fetch (fetches hash of latest block if not provided) |
#### avail-rust
| parameter | type | optional | description |
| ----------- | ------ | -------- | ------------------------------------------------------------------------------------- |
| blockNumber | number | true | The block number of the block to fetch (fetches hash of latest block if not provided) |
#### avail-go
| parameter | type | optional | description |
| ----------- | ------ | -------- | ------------------------------------------------------------------------------------- |
| blockNumber | number | true | The block number of the block to fetch (fetches hash of latest block if not provided) |
### Example
#### avail-js
1. Inside `your-file-name.ts`, add the following code:
```typescript showLineNumbers filename="avail-js" name="cmd1"
import { SDK } from "avail-js-sdk";
export async function chainGetBlockHash() {
// Initialize SDK with Turing endpoint
const sdk = await SDK.New('wss://turing-rpc.avail.so/ws');
// 1. Gets the block hash for the latest block if no argument is provided
// 2. Gets the block hash for the block at the given block number if a block number is provided
const hash = await sdk.client.api.rpc.chain.getBlockHash(1451847)
console.log("getBlockHash")
console.log(hash.toJSON())
process.exit(0);
}
// Execute the function
chainGetBlockHash()
```
2. Run the script using the following command:
```bash filename="terminal"
node your-file-name.ts
```
#### avail-rust
1. Inside `main.rs`, add the following code:
```rust showLineNumbers filename="avail-rust" name="cmd3"
use avail_rust::prelude::*;
pub async fn get_block_hash() -> Result<(), ClientError> {
// Create a new SDK instance
let sdk = SDK::new("wss://turing-rpc.avail.so/ws").await?;
// 1. Get the block hash for a specific block if argument is provided
// 2. Get the latest block hash if no argument is provided
let block_hash = rpc::chain::get_block_hash(&sdk.client, Some(1451847)).await?;
println!("Latest Block Hash: {:?}", block_hash);
Ok(())
}
#[tokio::main]
async fn main() -> Result<(), ClientError> {
get_block_hash().await?;
Ok(())
}
```
2. Run the script using the following command:
```bash filename="terminal" name="cmd4"
cargo run
```
#### avail-go
1. Inside `main.go`, add the following code:
```go showLineNumbers filename="avail-go" name="cmd5"
package main
import (
"fmt"
"log"
prim "github.com/availproject/avail-go-sdk/primitives"
SDK "github.com/availproject/avail-go-sdk/sdk"
)
func main() {
// Initialize an SDK instance
sdk, err := SDK.NewSDK("https://turing-rpc.avail.so/rpc")
if err != nil {
log.Fatalf("Failed to initialize SDK: %v", err)
}
// Get the latest block hash by not passing any parameters
latestBlockHash, err := sdk.Client.Rpc.Chain.GetBlockHash(prim.None[uint32]())
if err != nil {
log.Fatalf("Failed to get the leatest block hash: %v", err)
}
// Print the block hash
fmt.Println("Latest Block Hash: ", latestBlockHash)
// Get a specific block hash by passing the block number
specificBlockHash, err := sdk.Client.Rpc.Chain.GetBlockHash(prim.Some[uint32](1451847))
if err != nil {
log.Fatalf("Failed to get the specific block hash: %v", err)
}
// Print the block hash
fmt.Println("Specific Block Hash: ", specificBlockHash)
}
```
2. Run the script using the following command:
```bash filename="terminal" name="cmd6"
go run main.go
```
## Fetch block header using block hash
### Parameters
#### avail-js
| parameter | type | optional | description |
| --------- | ------ | -------- | ------------------------------------------------------------------------------- |
| blockHash | string | true | The hash of the block to fetch (fetches header of latest block if not provided) |
#### avail-rust
| parameter | type | optional | description |
| --------- | ------ | -------- | ------------------------------------------------------------------------------- |
| blockHash | string | true | The hash of the block to fetch (fetches header of latest block if not provided) |
#### avail-go
| parameter | type | optional | description |
| --------- | ------ | -------- | ------------------------------------------------------------------------------- |
| blockHash | string | true | The hash of the block to fetch (fetches header of latest block if not provided) |
### Example
#### avail-js
1. Inside `your-file-name.ts`, add the following code:
```typescript showLineNumbers filename="avail-js" name="cmd1"
import { SDK } from "avail-js-sdk";
export async function chainGetBlockHeader() {
// Initialize SDK with Turing endpoint
const sdk = await SDK.New('wss://turing-rpc.avail.so/ws');
// 1. Gets the block header for the latest block if no argument is provided
// 2. Gets the block header for a specific block if a block hash is provided
const header = await sdk.client.api.rpc.chain.getHeader("0x75a6c54bb5ea904e47fa151956992d7cf543bc7c936d78488e311db8e10397c1")
console.log("getBlockHeader")
console.log(header.toJSON())
process.exit(0);
}
// Execute the function
chainGetBlockHeader()
```
2. Run the script using the following command:
```bash filename="terminal"
node your-file-name.ts
```
#### avail-rust
1. Inside `main.rs`, add the following code:
```rust showLineNumbers filename="avail-rust" name="cmd3"
use avail_rust::prelude::*;
pub async fn get_block_header() -> Result<(), ClientError> {
// Create a new SDK instance
let sdk = SDK::new("wss://turing-rpc.avail.so/ws").await?;
// 1. Gets the block header for a specific block if argument is provided
// 2. Gets the latest block header if no argument is provided
let block_hash = new_h256_from_hex("0x75a6c54bb5ea904e47fa151956992d7cf543bc7c936d78488e311db8e10397c1")?;
// Get the latest block header
let latest_block_header = rpc::chain::get_header(&sdk.client, None).await?;
// Get the block header for a specific block
let block_header = rpc::chain::get_header(&sdk.client, Some(block_hash)).await?;
println!("Latest Block Header: {:?}", latest_block_header);
println!("Block Header: {:?}", block_header);
Ok(())
}
#[tokio::main]
async fn main() -> Result<(), ClientError> {
get_block_header().await?;
Ok(())
}
```
2. Run the script using the following command:
```bash filename="terminal" name="cmd4"
cargo run
```
#### avail-go
1. Inside `main.go`, add the following code:
```go showLineNumbers filename="avail-go" name="cmd5"
package main
import (
"fmt"
"log"
prim "github.com/availproject/avail-go-sdk/primitives"
SDK "github.com/availproject/avail-go-sdk/sdk"
)
func main() {
// Initialize an SDK instance
sdk, err := SDK.NewSDK("https://turing-rpc.avail.so/rpc")
if err != nil {
log.Fatalf("Failed to initialize SDK: %v", err)
}
// Get the latest block hash by not passing any parameters
latestBlockHeader, err := sdk.Client.Rpc.Chain.GetHeader(prim.None[prim.H256]())
if err != nil {
log.Fatalf("Failed to get the latest block header: %v", err)
}
// Print the block header
fmt.Println("Latest Block Header: ", latestBlockHeader)
// Get a specific block header by passing the block hash
blockHash, err := prim.NewH256FromHexString("0x75a6c54bb5ea904e47fa151956992d7cf543bc7c936d78488e311db8e10397c1")
if err != nil {
log.Fatalf("Failed to create H256 from hex: %v", err)
}
specificBlockHeader, err := sdk.Client.Rpc.Chain.GetHeader(prim.Some[prim.H256](blockHash))
if err != nil {
log.Fatalf("Failed to get the specific block header: %v", err)
}
// Print the block header
fmt.Println("Specific Block Header: ", specificBlockHeader)
}
```
2. Run the script using the following command:
```bash filename="terminal" name="cmd6"
go run main.go
```
## Fetch entire block using block hash
### Parameters
#### avail-js
| parameter | type | optional | description |
| --------- | ------ | -------- | ------------------------------------------------------------------------------ |
| blockHash | string | true | The hash of the block to fetch (fetches block of latest block if not provided) |
#### avail-rust
| parameter | type | optional | description |
| --------- | ------ | -------- | ------------------------------------------------------------------------------ |
| blockHash | string | true | The hash of the block to fetch (fetches block of latest block if not provided) |
#### avail-go
| parameter | type | optional | description |
| --------- | ------ | -------- | ------------------------------------------------------------------------------ |
| blockHash | string | true | The hash of the block to fetch (fetches block of latest block if not provided) |
### Example
#### avail-js
1. Inside `your-file-name.ts`, add the following code:
```typescript showLineNumbers filename="avail-js" name="cmd1"
import { SDK } from "avail-js-sdk";
export async function chainGetBlock() {
// Initialize SDK with Turing endpoint
const sdk = await SDK.New('wss://turing-rpc.avail.so/ws');
// 1. Gets the block for the latest block if no argument is provided
// 2. Gets block header and body for a specific block if a block hash is provided
const block = await sdk.client.api.rpc.chain.getBlock("0x75a6c54bb5ea904e47fa151956992d7cf543bc7c936d78488e311db8e10397c1")
console.log("getBlock")
console.log(block.toJSON())
process.exit(0);
}
// Execute the function
chainGetBlock()
```
2. Run the script using the following command:
```bash filename="terminal"
node your-file-name.ts
```
#### avail-rust
1. Inside `main.rs`, add the following code:
```rust showLineNumbers filename="avail-rust" name="cmd3"
use avail_rust::prelude::*;
pub async fn get_block() -> Result<(), ClientError> {
// Create a new SDK instance
let sdk = SDK::new("wss://turing-rpc.avail.so/ws").await?;
// 1. Get the block for a specific block if argument is provided
// 2. Get the latest block if no argument is provided
let block_hash = new_h256_from_hex("0x75a6c54bb5ea904e47fa151956992d7cf543bc7c936d78488e311db8e10397c1")?;
// Get the latest block
let latest_block = rpc::chain::get_block(&sdk.client, None).await?;
// Get the block for a specific block
let specific_block = rpc::chain::get_block(&sdk.client, Some(block_hash)).await?;
println!("Latest Block: {:?}", latest_block);
// println!(" Specific Block: {:?}", block);
Ok(())
}
#[tokio::main]
async fn main() -> Result<(), ClientError> {
get_block().await?;
Ok(())
}
```
2. Run the script using the following command:
```bash filename="terminal" name="cmd4"
cargo run
```
#### avail-go
1. Inside `main.go`, add the following code:
```go showLineNumbers filename="avail-go" name="cmd5"
package main
import (
"fmt"
"log"
prim "github.com/availproject/avail-go-sdk/primitives"
SDK "github.com/availproject/avail-go-sdk/sdk"
)
func main() {
// Initialize an SDK instance
sdk, err := SDK.NewSDK("https://turing-rpc.avail.so/rpc")
if err != nil {
log.Fatalf("Failed to initialize SDK: %v", err)
}
// Get the latest block by not passing any parameters
latestBlock, err := sdk.Client.Rpc.Chain.GetBlock(prim.None[prim.H256]())
if err != nil {
log.Fatalf("Failed to get the latest block: %v", err)
}
// Print the block
fmt.Println("Latest Block: ", latestBlock)
// Get a specific block by passing the block hash
blockHash, err := prim.NewH256FromHexString("0x75a6c54bb5ea904e47fa151956992d7cf543bc7c936d78488e311db8e10397c1")
if err != nil {
log.Fatalf("Failed to create H256 from hex: %v", err)
}
specificBlock, err := sdk.Client.Rpc.Chain.GetBlock(prim.Some(blockHash))
if err != nil {
log.Fatalf("Failed to get the specific block: %v", err)
}
// Print the block
fmt.Println("Specific Block: ", specificBlock)
}
```
2. Run the script using the following command:
```bash filename="terminal" name="cmd6"
go run main.go
```
### Fetch an AppID from Avail DA
> **Note**
>
> `App Ids` are core to the dev experience on Avail DA, and we highly recommend you understand how they work before you start working with them.
> You can check out [our docs for the same](/docs/da/build/interact/app-id).
On-chain name of method: `dataAvailability_appKeys`
## Parameters
#### avail-js
| parameter | type | optional | description |
| --------- | ------ | -------- | ----------------------------------------------------- |
| key | string | true | The `app_id` associated with this key will be fetched |
#### avail-rust
| parameter | type | optional | description |
| --------- | ------ | -------- | ----------------------------------------------------- |
| key | string | true | The `app_id` associated with this key will be fetched |
#### avail-go
| parameter | type | optional | description |
| --------- | ------ | -------- | ----------------------------------------------------- |
| key | string | true | The `app_id` associated with this key will be fetched |
## Return value
On failure, a reason for failure is returned. On sucess, the returned JSON object contains:
1. `Owner`: The owner of the `app_id`
2. `appID`: The numerical index of the `app_id`
## Minimal example (Fetch a particular `app_id`)
> **Note**
>
> 1. You will need to set up the dev environment required to run this example.
> For instructions, [check out our docs here](/docs/da/api-reference/avail-node-api#setting-up-the-dev-environment).
>
> 2. If you're sending an extrinsic (i.e conducting a transaction) you will need to replace the demo seed phrase with your own seed phrase.
> The rest of the code should work as is.
#### avail-js
1. Inside `your-file-name.ts`, add the following code:
```typescript showLineNumbers filename="avail-js" name="cmd1"
import { SDK, Pallets } from 'avail-js-sdk';
export async function getAppIdByKey() {
// Initialize SDK with Turing endpoint
const sdk = await SDK.New('wss://turing-rpc.avail.so/ws');
// Get the current block hash
const blockHash = await sdk.client.bestBlockHash();
console.log(`Current block hash: ${blockHash}`);
// Get storage at the current block
const storageAt = await sdk.client.storageAt(blockHash);
// The key to look up
const appKey = "my Application Key Name!!!";
// Fetch the app keys entry for this key
const entry = await Pallets.DataAvailabilityStorage.AppKeys.fetch(storageAt, appKey);
if (entry === null) {
console.log(`No app ID found for key: "${appKey}"`);
} else {
console.log(`App ID: ${entry.value.appId}`);
console.log(`Owner: ${entry.value.owner.toSS58()}`);
console.log(`Key: ${appKey}`);
console.log("App Key fetched successfully");
}
process.exit(0);
}
// Execute the function
getAppIdByKey();
```
2. Run the code using:
```bash filename="terminal" name="cmd2"
ts-node your-file-name.ts
```
#### avail-rust
1. Inside `main.rs`, add the following code:
```rust showLineNumbers filename="avail-rust" name="cmd3"
use avail_rust::prelude::*;
use avail::data_availability::storage::types::app_keys::Param0;
pub async fn da_app_keys() -> Result<(), ClientError> {
// Create a new SDK instance
let sdk = SDK::new("wss://turing-rpc.avail.so/ws").await?;
let key = String::from("My Application Key").as_bytes().to_vec();
let key = Param0 { 0: key };
let block_hash = sdk.client.best_block_hash().await?;
let storage = sdk.client.storage().at(block_hash);
let address = avail::storage().data_availability().app_keys(key);
let result = storage.fetch(&address).await?;
dbg!(result);
Ok(())
}
// Add a main function to call da_app_keys
#[tokio::main]
async fn main() {
if let Err(e) = da_app_keys().await {
eprintln!("Error: {:?}", e);
}
else {
println!("App Key fetched successfully");
}
}
```
2. Run the code using:
```bash filename="terminal" name="cmd4"
cargo run
```
Sample Response:
```json
result = Some(
AppKeyInfo {
owner: AccountId32(
[
10,
255,
21,
20,
123,
225,
34,
49,
109,
40,
40,
86,
26,
184,
109,
251,
201,
136,
224,
246,
137,
212,
142,
149,
160,
242,
197,
86,
117,
80,
45,
110,
],
),
id: AppId(
1,
),
},
)
```
> **Note**
>
> The list of numbers seperated by commas is merely a different way of representing the Substrate
> addresses in the `AccountId32` format.
#### avail-go
1. Inside `main.go`, add the following code:
```go showLineNumbers filename="avail-go" name="cmd5"
package main
import (
"fmt"
"log"
daPallet "github.com/availproject/avail-go-sdk/metadata/pallets/data_availability"
prim "github.com/availproject/avail-go-sdk/primitives"
SDK "github.com/availproject/avail-go-sdk/sdk"
)
func main() {
sdk, err := SDK.NewSDK("https://turing-rpc.avail.so/rpc")
if err != nil {
log.Fatalf("Failed to initialize SDK: %v", err)
}
// Get the latest block hash
latestBlockHash, err := sdk.Client.BestBlockHash()
if err != nil {
log.Fatalf("Failed to get latest block hash: %v", err)
}
// Initialize the block storage
blockStorage, err := sdk.Client.StorageAt(prim.Some(latestBlockHash))
if err != nil {
log.Fatalf("Failed to get block storage: %v", err)
}
{
storage := daPallet.StorageAppKeys{}
keyString := "Citizen Justice"
key := []byte(keyString)
val, err := storage.Fetch(&blockStorage, key)
if err != nil {
log.Fatalf("Failed to fetch app keys: %v", err)
}
if val.IsSome() {
entry := val.Unwrap()
fmt.Println("App Key Owner: ", entry.Value.Owner.ToHuman())
fmt.Println("App Key AppId: ", entry.Value.AppId)
fmt.Println("App Key fetched successfully")
} else {
fmt.Println("No app keys found for the given key.")
}
}
}
```
2. Run the code using:
```bash filename="terminal" name="cmd6"
go run main.go
```
## Another example (Fetch all available `app_ids` registered on Avail DA)
> **Note**
>
> 1. Think of the `dataAvailability_appKeys` as a method that returns all the `app_ids` registered on Avail DA
> as a mapping of their names to their owner and index.
> 2. In most cases a dev will be interested in fetching only a particular `app_id` and not all of them.
> 3. We are however including both scenarios here.
#### avail-js
1. Inside `your-file-name.ts`, add the following code:
```typescript showLineNumbers filename="avail-js" name="cmd1"
import { SDK, Pallets } from 'avail-js-sdk';
export async function getAllAppIds() {
// Initialize SDK with Turing endpoint
const sdk = await SDK.New('wss://turing-rpc.avail.so/ws');
// Get the current block hash
const blockHash = await sdk.client.bestBlockHash();
console.log(`Current block hash: ${blockHash}`);
// Get storage at the current block
const storageAt = await sdk.client.storageAt(blockHash);
// Fetch all app keys entries
const entries = await Pallets.DataAvailabilityStorage.AppKeys.fetchAll(storageAt);
console.log(`Total number of app IDs: ${entries.length}`);
// Display all app IDs and their details
entries.forEach((entry) => {
console.log(` App ID: ${entry.value.appId}`);
console.log(` Owner: ${entry.value.owner.toSS58()}`);
let keyString = "";
try {
keyString = new TextDecoder().decode(entry.key);
console.log(` Key (as string): ${keyString}`);
} catch (e) {
console.log(` Key (hex): 0x${Buffer.from(entry.key).toString('hex')}`);
}
});
process.exit(0);
}
// Execute the function
getAllAppIds();
```
2. Run the code using:
```bash filename="terminal" name="cmd2"
ts-node your-file-name.ts
```
#### avail-rust
1. Inside `main.rs`, add the following code:
```rust showLineNumbers filename="avail-rust" name="cmd3"
use avail_rust::prelude::*;
pub async fn da_app_keys_iter() -> Result<(), ClientError> {
// Create a new SDK instance
let sdk = SDK::new("wss://turing-rpc.avail.so/ws").await?;
let block_hash = sdk.client.best_block_hash().await?;
let storage = sdk.client.storage().at(block_hash);
let address = avail::storage().data_availability().app_keys_iter();
let mut results = storage.iter(address).await?;
while let Some(Ok(kv)) = results.next().await {
let key = (&kv.key_bytes[49..]).to_vec();
let key = String::from_utf8(key).unwrap();
println!("Key: {:?}", key);
println!("Value: {:?}", kv.value);
}
Ok(())
}
// Add a main function to call da_app_keys_iter
#[tokio::main]
async fn main() {
if let Err(e) = da_app_keys_iter().await {
eprintln!("Error: {:?}", e);
}
}
```
2. Run the code using:
```bash filename="terminal" name="cmd4"
cargo run
```
#### avail-go
1. Inside `main.go`, add the following code:
```go showLineNumbers filename="avail-go" name="cmd5"
package main
import (
"fmt"
"log"
daPallet "github.com/availproject/avail-go-sdk/metadata/pallets/data_availability"
prim "github.com/availproject/avail-go-sdk/primitives"
SDK "github.com/availproject/avail-go-sdk/sdk"
)
func main() {
sdk, err := SDK.NewSDK("https://turing-rpc.avail.so/rpc")
if err != nil {
log.Fatalf("Failed to initialize SDK: %v", err)
}
// Get the latest block hash
latestBlockHash, err := sdk.Client.BestBlockHash()
if err != nil {
log.Fatalf("Failed to get latest block hash: %v", err)
}
// Initialize the block storage
blockStorage, err := sdk.Client.StorageAt(prim.Some(latestBlockHash))
if err != nil {
log.Fatalf("Failed to get block storage: %v", err)
}
// Fetch all app keys
{
storage := daPallet.StorageAppKeys{}
val, err := storage.FetchAll(&blockStorage)
if err != nil {
log.Fatalf("Failed to fetch all app keys: %v", err)
}
if len(val) == 0 {
log.Println("No app keys found.")
} else {
for i := 0; i < len(val); i++ {
fmt.Println("App Key Owner: ", val[i].Value.Owner.ToHuman())
fmt.Println("App Key AppId: ", val[i].Value.AppId)
}
}
}
}
```
2. Run the code using:
```bash filename="terminal" name="cmd6"
go run main.go
```
### Create a new App ID on Avail DA
> **Note**
>
> `App Ids` are core to the dev experience on Avail DA, and we highly recommend you understand how they work before you start working with them.
> You can check out [our docs for the same](/docs/da/build/interact/app-id).
On-chain name of extrinsic: `dataAvailability_createApplicationKey`
## Parameters
#### avail-js
| parameter | type | optional | description |
| --------- | ------------- | -------- | ----------------------------------------------- |
| key | string | false | name of the application key |
| waitFor | WaitFor | false | wait for block inclusion or finalization |
| account | KeyringPair | false | account that will send and sign the transaction |
| options | SignerOptions | true | used to overwrite existing signer options |
#### avail-rust
### Parameters
| parameter | type | optional | description |
| --------- | ----------- | -------- | ----------------------------------------------- |
| key | Key | false | name of the application key |
| waitFor | WaitFor | false | wait for block inclusion or finalization |
| account | KeyringPair | false | account that will send and sign the transaction |
#### avail-go
| parameter | type | optional | description |
| ---------------- | -------- | -------- | ------------------------------------------------------ |
| api | API | false | api for avail chain |
| WaitForInclusion | WaitFor | false | wait for block inclusion or finalization |
| Seed | Mnemonic | false | seed of the account that needs to sign the transaction |
| data | string | false | name of the application key |
## Returns
On failure, a reason of failure is returned. On Success, ApplicationKeyCreated event, transaction hash and block hash is returned.
## Minimal Example
> **Note**
>
> 1. You will need to set up the dev environment required to run this example.
> For instructions, [check out our docs here](/docs/da/api-reference/avail-node-api#setting-up-the-dev-environment).
>
> 2. If you're sending an extrinsic (i.e conducting a transaction) you will need to replace the demo seed phrase with your own seed phrase.
> The rest of the code should work as is.
#### avail-js
1. Inside `your-file-name.ts`, add the following code:
```typescript showLineNumbers filename="avail-js" name="cmd1"
import * as dotenv from 'dotenv';
import { Account, SDK, Pallets } from 'avail-js-sdk';
dotenv.config();
export async function createApplicationKey() {
// Initialize SDK with Turing endpoint
const sdk = await SDK.New('wss://turing-rpc.avail.so/ws');
// Create account from seed in .env file
const seed = process.env.SEED;
if (!seed) {
throw new Error("SEED environment variable is not set");
}
// Create account from seed
const account = Account.new(seed);
console.log("Account Address: ", account.address);
// Use a fixed key string
const key = "my Application Key Name";
// Create application key transaction
const tx = sdk.tx.dataAvailability.createApplicationKey(key);
console.log("Submitting transaction to create application key...");
// Execute and wait for inclusion
const res = await tx.executeWaitForInclusion(account, {});
// Check if transaction was successful
const isOk = res.isSuccessful();
if (isOk === undefined) {
throw new Error("Cannot check if transaction was successful");
}
else if (!isOk) {
throw new Error("Transaction failed");
}
// Extract event data
if (res.events === undefined) throw new Error("No events found");
const event = res.events.findFirst(Pallets.DataAvailabilityEvents.ApplicationKeyCreated);
if (event === undefined) throw new Error("ApplicationKeyCreated event not found");
const appId = event.id;
console.log(`Application created successfully:`);
console.log(`Owner: ${event.owner}`);
console.log(`Key: ${event.keyToString()}`);
console.log(`App Id: ${appId}`);
console.log(`Transaction Hash: ${res.txHash}`);
process.exit(0);
}
// Execute the function
createApplicationKey()
```
2. Run the code using:
```bash filename="terminal" name="cmd2"
ts-node your-file-name.ts
```
#### avail-rust
1. Inside `main.rs`, add the following code:
```rust showLineNumbers filename="avail-rust" name="cmd3"
use dotenvy::dotenv;
use std::env;
use avail_rust::prelude::*;
type ApplicationKeyCreatedEvent = avail::data_availability::events::ApplicationKeyCreated;
pub async fn create_application_key() -> Result<(), ClientError> {
// Create a new SDK instance
let sdk = SDK::new("wss://turing-rpc.avail.so/ws").await?;
// Loading seed phrase and creating an account derived from the seed
dotenv().ok();
let seed = env::var("SEED").expect("SEED environment variable is not set");
let account = account::from_secret_uri(&seed)?;
println!("Account Address: {}", account.public_key().to_account_id());
// Application Key Creation
// Please note that if an application key with the same `key` already exists, the transaction will fail.
let key = "My Application Key".as_bytes().to_vec();
let tx = sdk.tx.data_availability.create_application_key(key);
let res = tx.execute_and_watch_inclusion(&account, Options::default()).await?;
assert_eq!(res.is_successful(), Some(true), "Transactions must be successful");
let events = res.events.as_ref().unwrap();
let event = events.find_first::().unwrap();
let Some(event) = event else {
return Err("Failed to get Application Key Created Event".into());
};
let app_id = event.id.0;
println!("Application Key Created");
println!("{}",app_id);
Ok(())
}
// Add a main function to call create_application_key
#[tokio::main]
async fn main() {
if let Err(e) = create_application_key().await {
eprintln!("Error: {:?}", e);
}
}
```
2. Run the code using:
```bash filename="terminal" name="cmd4"
cargo run
```
#### avail-go
1. Inside `main.go`, add the following code:
```go showLineNumbers filename="avail-go" name="cmd5"
package main
import (
"fmt"
"log"
"os"
daPallet "github.com/availproject/avail-go-sdk/metadata/pallets/data_availability"
SDK "github.com/availproject/avail-go-sdk/sdk"
"github.com/joho/godotenv"
)
func main() {
// Load environment variables from .env file
err := godotenv.Load()
if err != nil {
log.Fatal("Error loading .env file")
}
// Make sure the SEED environment variable is set
seed := os.Getenv("SEED")
if seed == "" {
log.Fatal("SEED environment variable is not set")
}
// Create an account from the SEED environment variable
acc, err := SDK.Account.NewKeyPair(seed)
if err != nil {
log.Fatalf("Failed to create account: %v", err)
}
fmt.Println("Your account Address: " + acc.SS58Address(42))
// Initialize an SDK instance
sdk, err := SDK.NewSDK("https://turing-rpc.avail.so/rpc")
if err != nil {
log.Fatalf("Failed to initialize SDK: %v", err)
}
// Generate an application key
// Please note that the transaction will fail if
// an AppID with the same key already exists
key := "My new application key"
tx := sdk.Tx.DataAvailability.CreateApplicationKey([]byte(key))
// Execute the transaction
res, err := tx.ExecuteAndWatchInclusion(acc, SDK.NewTransactionOptions())
if err != nil {
log.Fatalf("Transaction failed: %v", err)
}
// Check if the transaction was successful
if !res.IsSuccessful().UnsafeUnwrap() {
log.Fatal("Transaction was not successful")
}
fmt.Println("Application Key Created Successfully")
// Printing out all the values of the event ApplicationKeyCreated
events := res.Events.UnsafeUnwrap()
eventMyb := SDK.EventFindFirst(events, daPallet.EventApplicationKeyCreated{})
event := eventMyb.UnsafeUnwrap().UnsafeUnwrap()
appId := event.Id
fmt.Println(fmt.Sprintf(`Owner: %v, Key: %v, AppId: %v`, event.Owner.ToHuman(), string(event.Key), appId))
fmt.Println(fmt.Sprintf(`Block Hash: %v, Block Index: %v, Tx Hash: %v, Tx Index: %v`, res.BlockHash.ToHexWith0x(), res.BlockNumber, res.TxHash.ToHexWith0x(), res.TxIndex))
fmt.Println("Application Key Created")
}
```
2. Run the code using:
```bash filename="terminal" name="cmd6"
go run main.go
```
> **Note**
>
> If you receive errors related to missing dependencies while trying to execute your code, run:
>
> ```bash filename="terminal" name="cmd7"
> go mod tidy
> ```
>
> and try again.
### Fetch the next available App ID on Avail DA
> **Note**
>
> `App Ids` are core to the dev experience on Avail DA, and we highly recommend you understand how they work before you start working with them.
> You can check out [our docs for the same](/docs/da/build/interact/app-id).
On-chain name of method: `dataAvailability_nextAppId`
> **Note**
>
> `app_ids`, once registered, cannot be claimed by another dev.
> You can use this method to fetch the next available `app_id` for your awesome rollup :)
## Parameters
#### avail-js
None
#### avail-rust
None
#### avail-go
None
## Returns
* `app_id`: The next available App ID
## Minimal example (Fetch the next available `app_id`)
> **Note**
>
> 1. You will need to set up the dev environment required to run this example.
> For instructions, [check out our docs here](/docs/da/api-reference/avail-node-api#setting-up-the-dev-environment).
>
> 2. If you're sending an extrinsic (i.e conducting a transaction) you will need to replace the demo seed phrase with your own seed phrase.
> The rest of the code should work as is.
#### avail-js
1. Inside `your-file-name.ts`, add the following code:
```typescript showLineNumbers filename="avail-js" name="cmd1"
import { SDK, Pallets } from 'avail-js-sdk';
export async function getNextAppId() {
// Initialize SDK with Turing endpoint
const sdk = await SDK.New('wss://turing-rpc.avail.so/ws');
// Get the current block hash
const blockHash = await sdk.client.bestBlockHash();
console.log(`Current block hash: ${blockHash}`);
// Get storage at the current block
const storageAt = await sdk.client.storageAt(blockHash);
// Fetch the next available app ID
const nextAppId = await Pallets.DataAvailabilityStorage.NextAppId.fetch(storageAt);
console.log(`Next available App ID is: ${nextAppId}`);
console.log("App ID fetched successfully");
process.exit(0);
}
// Execute the function
getNextAppId();
```
2. Run the code using:
```bash filename="terminal" name="cmd2"
ts-node your-file-name.ts
```
Sample Response:
```json
99
```
#### avail-rust
1. Inside `main.rs`, add the following code:
```rust showLineNumbers filename="avail-rust" name="cmd3"
use avail_rust::prelude::*;
pub async fn da_next_app_id() -> Result<(), ClientError> {
// Create a new SDK instance
let sdk = SDK::new("wss://turing-rpc.avail.so/ws").await?;
let block_hash = sdk.client.best_block_hash().await?;
let storage = sdk.client.storage().at(block_hash);
let address = avail::storage().data_availability().next_app_id();
let result = storage.fetch_or_default(&address).await?;
println!("Next available App ID is: {:?}", result);
Ok(())
}
// Add a main function to call da_next_app_id
#[tokio::main]
async fn main() {
if let Err(e) = da_next_app_id().await {
eprintln!("Error: {:?}", e);
}
else {
println!("App ID fetched successfully");
}
}
```
2. Run the code using:
```bash filename="terminal" name="cmd4"
cargo run
```
Sample Response:
```json
Some(
AppId(
99,
),
)
```
#### avail-go
1. Inside `main.go`, add the following code:
```go showLineNumbers filename="avail-go" name="cmd5"
package main
import (
"fmt"
"log"
daPallet "github.com/availproject/avail-go-sdk/metadata/pallets/data_availability"
prim "github.com/availproject/avail-go-sdk/primitives"
SDK "github.com/availproject/avail-go-sdk/sdk"
)
func main() {
sdk, err := SDK.NewSDK("https://turing-rpc.avail.so/rpc")
if err != nil {
log.Fatalf("Failed to initialize SDK: %v", err)
}
// Get the latest block hash
latestBlockHash, err := sdk.Client.BestBlockHash()
if err != nil {
log.Fatalf("Failed to get latest block hash: %v", err)
}
// Initialize the block storage
blockStorage, err := sdk.Client.StorageAt(prim.Some(latestBlockHash))
if err != nil {
log.Fatalf("Failed to get block storage: %v", err)
}
// Call the StorageNextAppId function
storage := daPallet.StorageNextAppId{}
nextAppId, err := storage.Fetch(&blockStorage)
if err != nil {
log.Fatalf("Failed to fetch next app ID: %v", err)
}
fmt.Printf("Next available App ID is: %v\n", nextAppId)
fmt.Println("App ID fetched successfully")
}
```
2. Run the code using:
```bash filename="terminal" name="cmd6"
go run main.go
```
### Submit new data to Avail DA
On-chain name of extrinsic: `dataAvailability_submitData`
## Parameters
#### avail-js
| parameter | type | optional | description |
| --------- | ------------- | -------- | ----------------------------------------------- |
| data | string | false | data to be submitted |
| waitFor | WaitFor | false | wait for block inclusion or finalization |
| account | KeyringPair | false | account that will send and sign the transaction |
| options | SignerOptions | true | used to overwrite existing signer options |
#### avail-rust
| parameter | type | optional | description |
| --------- | ----------- | -------- | ----------------------------------------------- |
| key | Key | false | name of the application key |
| waitFor | WaitFor | false | wait for block inclusion or finalization |
| account | KeyringPair | false | account that will send and sign the transaction |
#### avail-go
| parameter | type | optional | description |
| ---------------- | ------------- | -------- | ------------------------------------------------------ |
| api | API | false | api for avail chain |
| WaitForInclusion | WaitFor | false | wait for block inclusion or finalization |
| Seed | Mnemonic | false | seed of the account that needs to sign the transaction |
| data | SignerOptions | true | data to be submitted |
| AppID | SignerOptions | true | AppID in which the transaction needs to be signed |
## Returns
On failure, a reason of failure is returned. On Success, DataSubmitted event, transaction data, transaction hash and block hash is returned.
## Submit data using a specific `app_id`
> **Note**
>
> 1. You will need to set up the dev environment required to run this example.
> For instructions, [check out our docs here](/docs/da/api-reference/avail-node-api#setting-up-the-dev-environment).
>
> 2. If you're sending an extrinsic (i.e conducting a transaction) you will need to replace the demo seed phrase with your own seed phrase.
> The rest of the code should work as is.
> **Note**
>
> **PLEASE NOTE**
>
> 1. You can submit data to Avail DA using a specific `app_id` that you created. If you don't know how,
> read more [in our docs here](/docs/da/api-reference/avail-node-api/da-create-application-key).
>
> 2. You can submit data to **ANY** `app_id`, even if you didn't create it. This however does not contitute an
> attack vector since the rollups building on top of Avail DA can always filter out DA submissions.
#### avail-js
1. Inside `your-file-name.ts`, paste the following code:
```typescript showLineNumbers filename="avail-js" name="cmd1"
import * as dotenv from 'dotenv';
import { Account, SDK, Pallets } from 'avail-js-sdk';
dotenv.config();
export async function submitData() {
// Initialize SDK with Turing endpoint
const sdk = await SDK.New('wss://turing-rpc.avail.so/ws');
// Create account from seed in .env file
const seed = process.env.SEED;
if (!seed) {
throw new Error("SEED environment variable is not set");
}
// Create account from seed
const account = Account.new(seed);
console.log("Account Address: ", account.address);
// Replace with your own AppID
const appId = 89;
console.log(`Submitting data to App Id: ${appId}`);
// Create data submission transaction
const data = "My Data Submission";
const tx = sdk.tx.dataAvailability.submitData(data);
console.log("Submitting transaction with data...");
// Execute and wait for inclusion with app_id
const res = await tx.executeWaitForInclusion(account, { app_id: appId });
// Check if transaction was successful
const isOk = res.isSuccessful();
if (isOk === undefined) {
throw new Error("Cannot check if transaction was successful");
}
else if (!isOk) {
throw new Error("Transaction failed");
}
// Extract event data
if (res.events === undefined) throw new Error("No events found");
// Transaction Details
console.log(
`Block Hash: ${res.blockHash}, Block Number: ${res.blockNumber}, Tx Hash: ${res.txHash}, Tx Index: ${res.txIndex}`
);
// Find DataSubmitted event
const event = res.events.findFirst(Pallets.DataAvailabilityEvents.DataSubmitted);
if (event === undefined) throw new Error("DataSubmitted event not found");
console.log(`Data submitted successfully:`);
console.log(`Who: ${event.who}`);
console.log(`DataHash: ${event.dataHash}`);
console.log("Data submission completed successfully");
process.exit(0);
}
// Execute the function
submitData();
```
2. Run the code using:
```bash filename="terminal" name="cmd2"
ts-node your-file-name.ts
```
#### avail-rust
1. Inside `src/main.rs`, paste the following code:
```rust showLineNumbers filename="avail-rust" name="cmd3"
use dotenvy::dotenv;
use std::env;
use avail_rust::prelude::*;
type DataSubmissionCall = avail::data_availability::calls::types::SubmitData;
pub async fn submit_data() -> Result<(), ClientError> {
// Create a new SDK instance
let sdk = SDK::new("wss://turing-rpc.avail.so/ws").await?;
// Loading seed phrase and creating an account derived from the seed
dotenv().ok();
let seed = env::var("SEED").expect("SEED environment variable is not set");
let account = account::from_secret_uri(&seed)?;
println!("Account Address: {}", account.public_key().to_account_id());
// Please note that the tx will fail if this application key does not exist
let my_application_key = 1;
// Data Submission
let data = String::from("My Data").into_bytes();
let options = Options::new().app_id(my_application_key);
let tx = sdk.tx.data_availability.submit_data(data);
let res = tx.execute_and_watch_inclusion(&account, options).await?;
assert_eq!(res.is_successful(), Some(true), "Transactions must be successful");
println!(
"Block Hash: {:?}, Block Number: {}, Tx Hash: {:?}, Tx Index: {}",
res.block_hash, res.block_number, res.tx_hash, res.tx_index
);
// Decoding
let decoded = res.decode_as::().await?;
let Some(decoded) = decoded else {
return Err("Failed to get Data Submission Call data".into());
};
let data = to_ascii(decoded.data.0).unwrap();
println!("Call data: {:?}", data);
println!("Data Submission finished correctly");
Ok(())
}
// Add a main function to call submit_data
#[tokio::main]
async fn main() {
if let Err(e) = submit_data().await {
eprintln!("Error: {:?}", e);
}
}
```
2. Run the code using:
```bash filename="terminal" name="cmd4"
cargo run
```
#### avail-go
1. Inside `main.go`, paste the following code:
```go showLineNumbers filename="avail-go" name="cmd5"
package main
import (
"fmt"
"log"
"os"
SDK "github.com/availproject/avail-go-sdk/sdk"
"github.com/joho/godotenv"
)
func main() {
// Load environment variables from .env file
err := godotenv.Load()
if err != nil {
log.Fatal("Error loading .env file")
}
// Make sure the SEED environment variable is set
seed := os.Getenv("SEED")
if seed == "" {
log.Fatal("SEED environment variable is not set")
}
// Create an account from the SEED environment variable
acc, err := SDK.Account.NewKeyPair(seed)
if err != nil {
log.Fatalf("Failed to create account: %v", err)
}
fmt.Println("Your account Address: " + acc.SS58Address(42))
// Initialize an SDK instance
sdk, err := SDK.NewSDK("https://turing-rpc.avail.so/rpc")
if err != nil {
log.Fatalf("Failed to initialize SDK: %v", err)
}
// Submit data to Avail
appId := uint32(89)
tx := sdk.Tx.DataAvailability.SubmitData([]byte("Submitting some data using avail-go-sdk"))
res, err := tx.ExecuteAndWatchInclusion(acc, SDK.NewTransactionOptions().WithAppId(appId))
if err != nil {
log.Fatalf("Transaction failed: %v", err)
}
// Check if the transaction was successful
if !res.IsSuccessful().UnsafeUnwrap() {
log.Fatal("Transaction was not successful")
}
// Printing out all the values of the transaction
fmt.Println(fmt.Sprintf(`Block Hash: %v, Block Index: %v, Tx Hash: %v, Tx Index: %v`, res.BlockHash.ToHexWith0x(), res.BlockNumber, res.TxHash.ToHexWith0x(), res.TxIndex))
fmt.Println("Data submission completed successfully")
}
```
2. Run the code using:
```bash filename="terminal" name="cmd6"
go run main.go
```
> **Note**
>
> If you receive errors related to missing dependencies while trying to execute your code, run:
>
> ```bash filename="terminal" name="cmd7"
> go mod tidy
> ```
>
> and try again.
> This will lead to your data being submitted through a specific `app_id`, which you can verify by looking
> up your transaction on the [Avail explorer](https://explorer.availproject.org/#/explorer).
### Create a new nomination pool
On-chain name of method: `nominationPools_create`
## Parameters
#### avail-js
| parameter | type | optional | description |
| --------- | ------------- | -------- | --------------------------------------------------- |
| amount | BN | false | The amount of funds to delegate to the pool |
| root | string | false | The account to set as \[`PoolRoles::root`] |
| nominator | string | false | The account to set as the \[`PoolRoles::nominator`] |
| bouncer | string | false | The account to set as the \[`PoolRoles::bouncer`] |
| waitFor | WaitFor | false | wait for block inclusion or finalization |
| account | KeyringPair | false | account that will send and sign the transaction |
| options | SignerOptions | true | used to overwrite existing signer options |
#### avail-rust
| parameter | type | optional | description |
| --------- | ----------- | -------- | --------------------------------------------------- |
| amount | u128 | false | The amount of funds to delegate to the pool |
| root | \&str | false | The account to set as \[`PoolRoles::root`] |
| nominator | \&str | false | The account to set as the \[`PoolRoles::nominator`] |
| bouncer | \&str | false | The account to set as the \[`PoolRoles::bouncer`] |
| waitFor | WaitFor | false | wait for block inclusion or finalization |
| account | KeyringPair | false | account that will send and sign the transaction |
| options | Options | true | transaction parameters |
#### avail-go
| parameter | type | optional | description |
| --------- | ----------- | -------- | --------------------------------------------------- |
| amount | u128 | false | The amount of funds to delegate to the pool |
| root | \&str | false | The account to set as \[`PoolRoles::root`] |
| nominator | \&str | false | The account to set as the \[`PoolRoles::nominator`] |
| bouncer | \&str | false | The account to set as the \[`PoolRoles::bouncer`] |
| waitFor | WaitFor | false | wait for block inclusion or finalization |
| account | KeyringPair | false | account that will send and sign the transaction |
| options | Options | true | transaction parameters |
## Returns
On failure, a reason for the failure is returned. On success, the function will return a object of type `PoolCreateTxSuccess`.
This object contains the details of the transaction and your newly created nomination pool.
## Minimal example
> **Note**
>
> 1. You will need to set up the dev environment required to run this example.
> For instructions, [check out our docs here](/docs/da/api-reference/avail-node-api#setting-up-the-dev-environment).
>
> 2. If you're sending an extrinsic (i.e conducting a transaction) you will need to replace the demo seed phrase with your own seed phrase.
> The rest of the code should work as is.
> **Warning**
>
> 1. The minimum amount of `AVAIL` required to create a nomination pool is `10_000 AVAIL`.
> 2. You need to allocate privileges to some accounts while creating the pool.
>
>
>
> Different roles within a nomination pool
>
>
> A pool consists of 4 roles, each of which having different responsibilities in managing the running of the pool.
>
> 1. Root: Can change the nominator, bouncer, or itself. Further, it can perform any of the actions the nominator or bouncer can.
> 2. Depositor: Creates the pool and is the initial member. The depositor can only leave the pool once all other members have left. Once they leave by withdrawing, the pool is fully removed from the system.
> 3. Nominator: Can select the validators the pool nominates.
> 4. Bouncer: Can change the pool's state and kick (permissionlessly unbond/withdraw) members if the pool is blocked.
>
#### avail-js
1. Inside `your-file-name.ts`, add the following code:
```typescript showLineNumbers filename="avail-js" name="cmd1"
import * as dotenv from 'dotenv';
import { Account, SDK, BN, Pallets } from 'avail-js-sdk';
dotenv.config();
export async function nominationPoolsCreate() {
// Initialize SDK with Turing endpoint
const sdk = await SDK.New('wss://turing-rpc.avail.so/ws');
// Create account from seed in .env file
const seed = process.env.SEED;
if (!seed) {
throw new Error("SEED environment variable is not set");
}
// Create account from seed
const account = Account.new(seed);
console.log("Account Address: ", account.address);
// Initial deposit amount: 10,000 AVAIL
const amount = new BN(10).pow(new BN(18)).mul(new BN(10000)); // 10,000 AVAIL
console.log("Initial Deposit: 10,000 AVAIL");
// Pool roles - using Alice's address for all roles
const root = "5GrwvaEF5zXb26Fz9rcQpDWS57CtERHpNehXCPcNoHGKutQY"; // Alice
const nominator = "5GrwvaEF5zXb26Fz9rcQpDWS57CtERHpNehXCPcNoHGKutQY"; // Alice
const bouncer = "5GrwvaEF5zXb26Fz9rcQpDWS57CtERHpNehXCPcNoHGKutQY"; // Alice
console.log("Pool Roles:");
console.log(`Root: ${root}`);
console.log(`Nominator: ${nominator}`);
console.log(`Bouncer: ${bouncer}`);
// Create pool transaction
const tx = sdk.tx.nominationPools.create(amount, root, nominator, bouncer);
console.log("Submitting create pool transaction...");
// Execute and wait for inclusion
const res = await tx.executeWaitForInclusion(account, {});
// Check if transaction was successful
const isOk = res.isSuccessful();
if (isOk === undefined) {
throw new Error("Cannot check if transaction was successful");
}
else if (!isOk) {
throw new Error("Transaction failed");
}
console.log("\nPool creation completed successfully");
// Log all transaction details
console.log("\nTransaction Details:");
console.log(`Transaction Hash: ${res.txHash}`);
console.log(`Block Hash: ${res.blockHash}`);
console.log(`Block Number: ${res.blockNumber}`);
process.exit(0);
}
// Execute the function
nominationPoolsCreate();
```
2. Run the code using:
```bash filename="terminal" name="cmd2"
ts-node your-file-name.ts
```
Sample Response:
```js
{
"isErr": false,
"event": {
"depositor": "5GrwvaEF5zXb26Fz9rcQpDWS57CtERHpNehXCPcNoHGKutQY",
"poolId": "1"
},
"event2": {
"member": "5GrwvaEF5zXb26Fz9rcQpDWS57CtERHpNehXCPcNoHGKutQY",
"poolId": "1",
"bonded": "10000",
"joined": "true"
},
"event": {
"key": "0x4d79417765736f6d654b6579",
"owner": "5GrwvaEF5zXb26Fz9rcQpDWS57CtERHpNehXCPcNoHGKutQY",
"id": "10"
},
"events": [...],
"txHash": "0x5ae9edbd2a2da96eeffc14cf9050d711082890fa6bfb8749ad2c4947565f3bd2",
"txIndex": 1,
"blockHash": "0x152338c1b0696d12664cf3d4c159af3d54beca151ba1ea8b00989a66dc8050b0",
"blockNumber": 1
}
```
#### avail-rust
1. Inside `main.rs`, add the following code:
```rust showLineNumbers filename="avail-rust" name="cmd3"
use dotenvy::dotenv;
use std::env;
use avail_rust::prelude::*;
use core::str::FromStr;
pub async fn nomination_pools_create() -> Result<(), ClientError> {
// Create a new SDK instance
let sdk = SDK::new("wss://turing-rpc.avail.so/ws").await?;
// Loading seed phrase and creating an account derived from the seed
dotenv().ok();
let seed = env::var("SEED").expect("SEED environment variable is not set");
let account = account::from_secret_uri(&seed)?;
//Setting the amount to bond and the pool id
let amount = 10_000_000_000_000_000_000_000u128; // 10_000 Avail tokens
//Setting the root, nominator and bouncer
let root = account.public_key().to_account_id(); //Setting the root to be the account itself
let nominator = AccountId::from_str("5DDY2yzh8uCysYFAiRSTeQVwtZSKNF49CkQkyPH852xvrYKk").unwrap();
let bouncer = AccountId::from_str("5D7LgWT5J6MVRa6PvTTXUfd9VvggEcguvPnnWAGK44CJKFEq").unwrap();
//Executing the transaction
let tx = sdk.tx.nomination_pools.create(amount, root, nominator, bouncer);
let res = tx.execute_and_watch_inclusion(&account, Options::new()).await?;
assert_eq!(res.is_successful(), Some(true));
Ok(())
}
#[tokio::main]
async fn main() {
if let Err(e) = nomination_pools_create().await {
eprintln!("Error: {:?}", e);
}
}
```
2. Run the code using:
```bash filename="terminal" name="cmd4"
cargo run
```
Sample Response:
```rust showLineNumbers filename="avail-rust" name="cmd3"
PoolCreateTxSuccess {
event: Created {
depositor: AccountId32(...),
pool_id: 1,
},
event2: Bonded {
member: AccountId32(...),
pool_id: 1,
bonded: 1000000000000000000000000,
joined: true,
},
events: ExtrinsicEvents {
ext_hash: 0xd68cd496c042b1de9484c03160dcaea0b66d939a7293d457b721e908542ce4dd,
idx: 1,
events: Events {
event_bytes: [...],
start_idx: 1,
num_events: 19,
},
},
tx_hash: 0xd68cd496c042b1de9484c03160dcaea0b66d939a7293d457b721e908542ce4dd,
tx_index: 1,
block_hash: 0x21119a080adf597abb22db237f8824a0dbd823feb6a809e2f2d9bb7872377e9d,
block_number: 1,
}
```
#### avail-go
1. Inside `main.go`, add the following code:
```go showLineNumbers filename="avail-go" name="cmd5"
package main
import (
"fmt"
"log"
"os"
"github.com/availproject/avail-go-sdk/metadata"
"github.com/availproject/avail-go-sdk/primitives"
SDK "github.com/availproject/avail-go-sdk/sdk"
"github.com/joho/godotenv"
)
func main() {
// Load environment variables from .env file
err := godotenv.Load()
if err != nil {
log.Fatal("Error loading .env file")
}
// Make sure the SEED environment variable is set
seed := os.Getenv("SEED")
if seed == "" {
log.Fatal("SEED environment variable is not set")
}
// Create an account from the SEED environment variable
acc, err := SDK.Account.NewKeyPair(seed)
if err != nil {
log.Fatalf("Failed to create account: %v", err)
}
fmt.Println("Your account Address: " + acc.SS58Address(42))
// Initialize an SDK instance
sdk, err := SDK.NewSDK("https://turing-rpc.avail.so/rpc")
if err != nil {
log.Fatalf("Failed to initialize SDK: %v", err)
}
// Set the amount and addresses
amount, err := metadata.NewBalanceFromString("1000000000000000000000000") // Example amount
if err != nil {
log.Fatalf("Failed to create balance: %v", err)
}
rootAddress, err := primitives.NewAccountIdFromAddress("5DqMavSQikX9eMzwHKiC8xS6VWB2yCd5gGQuQq7KheM2Mgc7")
if err != nil {
log.Fatalf("Failed to convert root address: %v", err)
}
nominatorAddress, err := primitives.NewAccountIdFromAddress("5FphMk7DhSdq7jXsQCVQthw7XTiCWxdA9ZS6V43rKeJzvya9")
if err != nil {
log.Fatalf("Failed to convert nominator address: %v", err)
}
bouncerAddress, err := primitives.NewAccountIdFromAddress("5G9fM7DhSdq7jXsQCVQthw7XTiCWxdA9ZS6V43rKeJzvya9")
if err != nil {
log.Fatalf("Failed to convert bouncer address: %v", err)
}
// Convert addresses to MultiAddress
root := rootAddress.ToMultiAddress()
nominator := nominatorAddress.ToMultiAddress()
bouncer := bouncerAddress.ToMultiAddress()
// Create the Create transaction
tx := sdk.Tx.NominationPools.Create(amount, root, nominator, bouncer)
// Execute the transaction
res, err := tx.ExecuteAndWatchInclusion(acc, SDK.NewTransactionOptions())
if err != nil {
log.Fatalf("Transaction failed: %v", err)
}
// Check if the transaction was successful
if !res.IsSuccessful().UnsafeUnwrap() {
log.Fatal("Transaction was not successful")
}
fmt.Println("Create transaction successful")
fmt.Printf("Block Hash: %v, Block Number: %v, Tx Hash: %v, Tx Index: %v\n", res.BlockHash.ToHexWith0x(), res.BlockNumber, res.TxHash.ToHexWith0x(), res.TxIndex)
}
```
2. Run the code using:
```bash filename="terminal" name="cmd6"
go run main.go
```
### Create a new nomination pool with a specific pool ID
On-chain name of method: `nominationPools_createWithPoolId`
## Parameters
#### avail-js
| parameter | type | optional | description |
| --------- | ------------- | -------- | --------------------------------------------------- |
| amount | BN | false | The amount of funds to delegate to the pool |
| root | string | false | The account to set as \[`PoolRoles::root`] |
| nominator | string | false | The account to set as the \[`PoolRoles::nominator`] |
| bouncer | string | false | The account to set as the \[`PoolRoles::bouncer`] |
| poolId | number | false | pool id |
| waitFor | WaitFor | false | wait for block inclusion or finalization |
| account | KeyringPair | false | account that will send and sign the transaction |
| options | SignerOptions | true | used to overwrite existing signer options |
#### avail-rust
| parameter | type | optional | description |
| --------- | ----------- | -------- | --------------------------------------------------- |
| amount | u128 | false | The amount of funds to delegate to the pool |
| root | \&str | false | The account to set as \[`PoolRoles::root`] |
| nominator | \&str | false | The account to set as the \[`PoolRoles::nominator`] |
| bouncer | \&str | false | The account to set as the \[`PoolRoles::bouncer`] |
| pool id | u32 | false | pool id |
| waitFor | WaitFor | false | wait for block inclusion or finalization |
| account | KeyringPair | false | account that will send and sign the transaction |
| options | Options | true | transaction parameters |
#### avail-go
| parameter | type | optional | description |
| --------- | ----------- | -------- | --------------------------------------------------- |
| amount | u128 | false | The amount of funds to delegate to the pool |
| root | \&str | false | The account to set as \[`PoolRoles::root`] |
| nominator | \&str | false | The account to set as the \[`PoolRoles::nominator`] |
| bouncer | \&str | false | The account to set as the \[`PoolRoles::bouncer`] |
| pool id | u32 | false | pool id |
| waitFor | WaitFor | false | wait for block inclusion or finalization |
| account | KeyringPair | false | account that will send and sign the transaction |
| options | Options | true | transaction parameters |
## Returns
On failure, a reason for the failure is returned. On success, the function will return a object of type `PoolCreateWithPoolIdTxSuccess`.
This object contains the details of the transaction and your newly created nomination pool.
## Minimal example
> **Note**
>
> 1. You will need to set up the dev environment required to run this example.
> For instructions, [check out our docs here](/docs/da/api-reference/avail-node-api#setting-up-the-dev-environment).
>
> 2. If you're sending an extrinsic (i.e conducting a transaction) you will need to replace the demo seed phrase with your own seed phrase.
> The rest of the code should work as is.
> **Warning**
>
> 1. The minimum amount of `AVAIL` required to create a nomination pool is `10_000 AVAIL`.
> 2. You need to allocate privileges to some accounts while creating the pool.
>
>
>
> Different roles within a nomination pool
>
>
> A pool consists of 4 roles, each of which having different responsibilities in managing the running of the pool.
>
> 1. Root: Can change the nominator, bouncer, or itself. Further, it can perform any of the actions the nominator or bouncer can.
> 2. Depositor: Creates the pool and is the initial member. The depositor can only leave the pool once all other members have left. Once they leave by withdrawing, the pool is fully removed from the system.
> 3. Nominator: Can select the validators the pool nominates.
> 4. Bouncer: Can change the pool's state and kick (permissionlessly unbond/withdraw) members if the pool is blocked.
>
#### avail-js
1. Inside `your-file-name.ts`, add the following code:
```typescript showLineNumbers filename="avail-js" name="cmd1"
import * as dotenv from 'dotenv';
import { Account, SDK, BN, Pallets } from 'avail-js-sdk';
dotenv.config();
export async function nominationPoolsCreateWithPoolId() {
// Initialize SDK with Turing endpoint
const sdk = await SDK.New('wss://turing-rpc.avail.so/ws');
// Create account from seed in .env file
const seed = process.env.SEED;
if (!seed) {
throw new Error("SEED environment variable is not set");
}
// Create account from seed
const account = Account.new(seed);
console.log("Account Address: ", account.address);
// Initial deposit amount: 10,000 AVAIL
const amount = new BN(10).pow(new BN(18)).mul(new BN(10000)); // 10,000 AVAIL
console.log("Initial Deposit: 10,000 AVAIL");
// Pool roles - using Alice's address for all roles
const root = "5GrwvaEF5zXb26Fz9rcQpDWS57CtERHpNehXCPcNoHGKutQY"; // Alice
const nominator = "5GrwvaEF5zXb26Fz9rcQpDWS57CtERHpNehXCPcNoHGKutQY"; // Alice
const bouncer = "5GrwvaEF5zXb26Fz9rcQpDWS57CtERHpNehXCPcNoHGKutQY"; // Alice
const poolId = 0; // Specific pool ID to create
// Create pool with ID transaction
const tx = sdk.tx.nominationPools.createWithPoolId(amount, root, nominator, bouncer, poolId);
console.log("Submitting create pool with ID transaction...");
// Execute and wait for inclusion
const res = await tx.executeWaitForInclusion(account, {});
// Check if transaction was successful
const isOk = res.isSuccessful();
if (isOk === undefined) {
throw new Error("Cannot check if transaction was successful");
}
else if (!isOk) {
throw new Error("Transaction failed");
}
console.log("\nPool creation with ID completed successfully");
// Log all transaction details
console.log("\nTransaction Details:");
console.log(`Transaction Hash: ${res.txHash}`);
console.log(`Block Hash: ${res.blockHash}`);
console.log(`Block Number: ${res.blockNumber}`);
process.exit(0);
}
// Execute the function
nominationPoolsCreateWithPoolId();
```
2. Run the code using:
```bash filename="terminal" name="cmd2"
ts-node your-file-name.ts
```
Sample Response:
```js
{
"isErr": false,
"event": {
"depositor": "5FHneW46xGXgs5mUiveU4sbTyGBzmstUspZC92UhjJM694ty",
"poolId": "0"
},
"event2": {
"member": "5FHneW46xGXgs5mUiveU4sbTyGBzmstUspZC92UhjJM694ty",
"poolId": "0",
"bonded": "10000",
"joined": "true"
},
"events": [...],
"txHash": "0x6b50caed7950e67934cabbf88a1f7dc2e7e995ac608402f91a4db19be0da5c41",
"txIndex": 1,
"blockHash": "0xc06df7dbb1e404f54499f942479ddcffc92665c021ea07c2798fc2f354f403d3",
"blockNumber": 6
}
```
#### avail-rust
1. Inside `main.rs`, add the following code:
```rust showLineNumbers filename="avail-rust" name="cmd3"
use dotenvy::dotenv;
use std::env;
use avail_rust::prelude::*;
use core::str::FromStr;
pub async fn nomination_pools_create_with_pool_id() -> Result<(), ClientError> {
// Create a new SDK instance
let sdk = SDK::new("wss://turing-rpc.avail.so/ws").await?;
// Loading seed phrase and creating an account derived from the seed
dotenv().ok();
let seed = env::var("SEED").expect("SEED environment variable is not set");
let account = account::from_secret_uri(&seed)?;
//Setting the amount to bond and the pool id
let amount = 10_000_000_000_000_000_000_000u128; // 10_000 Avail tokens
let pool_id = 1; // You need to use a pool id that is not already in use
//Setting the root, nominator and bouncer
let root = account.public_key().to_account_id(); //Setting the root to be the account itself
let nominator = AccountId::from_str("5DDY2yzh8uCysYFAiRSTeQVwtZSKNF49CkQkyPH852xvrYKk").unwrap();
let bouncer = AccountId::from_str("5D7LgWT5J6MVRa6PvTTXUfd9VvggEcguvPnnWAGK44CJKFEq").unwrap();
//Executing the transaction
let tx = sdk.tx.nomination_pools.create_with_pool_id(amount, root, nominator, bouncer, pool_id);
let res = tx.execute_and_watch_inclusion(&account, Options::new()).await?;
assert_eq!(res.is_successful(), Some(true));
println!(
"Block Hash: {:?}, Block Number: {}, Tx Hash: {:?}, Tx Index: {}",
res.block_hash, res.block_number, res.tx_hash, res.tx_index
);
Ok(())
}
#[tokio::main]
async fn main() {
if let Err(e) = nomination_pools_create_with_pool_id().await {
eprintln!("Error: {:?}", e);
}
}
```
2. Run the code using:
```bash filename="terminal" name="cmd4"
cargo run
```
Sample Response:
```rust showLineNumbers filename="avail-rust" name="cmd3"
PoolCreateWithPoolIdTxSuccess {
event: Created {
depositor: AccountId32(...),
pool_id: 0,
},
event2: Bonded {
member: AccountId32(...),
pool_id: 0,
bonded: 1000000000000000000000000,
joined: true,
},
events: ExtrinsicEvents {
ext_hash: 0xaa16bad7378608bda89476353a61c1ae1ecc36166f0c5adda50cd563162889db,
idx: 1,
events: Events {
event_bytes: [],
start_idx: 1,
num_events: 19,
},
},
tx_hash: 0xaa16bad7378608bda89476353a61c1ae1ecc36166f0c5adda50cd563162889db,
tx_index: 1,
block_hash: 0xc04789228e6fa209119336ac33bcd6280b6b0c22e5ef9125c36b9f4a04e58adc,
block_number: 32,
}
```
#### avail-go
1. Inside `main.go`, add the following code:
```go showLineNumbers filename="avail-go" name="cmd5"
package main
import (
"fmt"
"log"
"os"
"github.com/availproject/avail-go-sdk/metadata"
"github.com/availproject/avail-go-sdk/primitives"
SDK "github.com/availproject/avail-go-sdk/sdk"
"github.com/joho/godotenv"
)
func main() {
// Load environment variables from .env file
err := godotenv.Load()
if err != nil {
log.Fatal("Error loading .env file")
}
// Make sure the SEED environment variable is set
seed := os.Getenv("SEED")
if seed == "" {
log.Fatal("SEED environment variable is not set")
}
// Create an account from the SEED environment variable
acc, err := SDK.Account.NewKeyPair(seed)
if err != nil {
log.Fatalf("Failed to create account: %v", err)
}
fmt.Println("Your account Address: " + acc.SS58Address(42))
// Initialize an SDK instance
sdk, err := SDK.NewSDK("https://turing-rpc.avail.so/rpc")
if err != nil {
log.Fatalf("Failed to initialize SDK: %v", err)
}
// Set the amount, pool ID, and addresses
amount, err := metadata.NewBalanceFromString("1000000000000000000000000") // Example amount
if err != nil {
log.Fatalf("Failed to create balance: %v", err)
}
poolId := uint32(1)
rootAddress, err := primitives.NewAccountIdFromAddress("5DqMavSQikX9eMzwHKiC8xS6VWB2yCd5gGQuQq7KheM2Mgc7")
if err != nil {
log.Fatalf("Failed to convert root address: %v", err)
}
nominatorAddress, err := primitives.NewAccountIdFromAddress("5FphMk7DhSdq7jXsQCVQthw7XTiCWxdA9ZS6V43rKeJzvya9")
if err != nil {
log.Fatalf("Failed to convert nominator address: %v", err)
}
bouncerAddress, err := primitives.NewAccountIdFromAddress("5G9fM7DhSdq7jXsQCVQthw7XTiCWxdA9ZS6V43rKeJzvya9")
if err != nil {
log.Fatalf("Failed to convert bouncer address: %v", err)
}
// Convert addresses to MultiAddress
root := rootAddress.ToMultiAddress()
nominator := nominatorAddress.ToMultiAddress()
bouncer := bouncerAddress.ToMultiAddress()
// Create the CreateWithPoolId transaction
tx := sdk.Tx.NominationPools.CreateWithPoolId(amount, root, nominator, bouncer, poolId)
// Execute the transaction
res, err := tx.ExecuteAndWatchInclusion(acc, SDK.NewTransactionOptions())
if err != nil {
log.Fatalf("Transaction failed: %v", err)
}
// Check if the transaction was successful
if !res.IsSuccessful().UnsafeUnwrap() {
log.Fatal("Transaction was not successful")
}
fmt.Println("CreateWithPoolId transaction successful")
fmt.Printf("Block Hash: %v, Block Number: %v, Tx Hash: %v, Tx Index: %v\n", res.BlockHash.ToHexWith0x(), res.BlockNumber, res.TxHash.ToHexWith0x(), res.TxIndex)
}
```
2. Run the code using:
```bash filename="terminal" name="cmd6"
go run main.go
```
### Join a nomination pool
On-chain name of method: `nominationPools_join`
## Parameters
#### avail-js
| parameter | type | optional | description |
| --------- | ------------- | -------- | ----------------------------------------------- |
| amount | BN | false | The amount of funds to delegate to the pool |
| poolId | number | false | pool id |
| waitFor | WaitFor | false | wait for block inclusion or finalization |
| account | KeyringPair | false | account that will send and sign the transaction |
| options | SignerOptions | true | used to overwrite existing signer options |
#### avail-rust
| parameter | type | optional | description |
| --------- | ----------- | -------- | ----------------------------------------------- |
| amount | u128 | false | The amount of funds to delegate to the pool |
| pool id | u32 | false | pool id |
| waitFor | WaitFor | false | wait for block inclusion or finalization |
| account | KeyringPair | false | account that will send and sign the transaction |
| options | Options | true | transaction parameters |
#### avail-go
| parameter | type | optional | description |
| --------- | ----------- | -------- | ----------------------------------------------- |
| amount | u128 | false | The amount of funds to delegate to the pool |
| pool id | u32 | false | pool id |
| waitFor | WaitFor | false | wait for block inclusion or finalization |
| account | KeyringPair | false | account that will send and sign the transaction |
| options | Options | true | transaction parameters |
## Returns
On failure, a reason for the failure is returned. On success, the function will return a object of type `PoolJoinTxSuccess`.
This object contains the details of the transaction and some information about the nomination pool oyu just joined.
## Minimal example
> **Note**
>
> 1. You will need to set up the dev environment required to run this example.
> For instructions, [check out our docs here](/docs/da/api-reference/avail-node-api#setting-up-the-dev-environment).
>
> 2. If you're sending an extrinsic (i.e conducting a transaction) you will need to replace the demo seed phrase with your own seed phrase.
> The rest of the code should work as is.
> **Warning**
>
> 1. The minimum amount of `AVAIL` required to join a nomination pool is `100 AVAIL`.
> 2. Enter the `poolId` carefully.
#### avail-js
1. Inside `your-file-name.ts`, add the following code:
```javascript showLineNumbers filename="avail-js"
import * as dotenv from 'dotenv';
import { Account, SDK, BN, Pallets } from 'avail-js-sdk';
dotenv.config();
export async function nominationPoolsJoin() {
// Initialize SDK with Turing endpoint
const sdk = await SDK.New('wss://turing-rpc.avail.so/ws');
// Create account from seed in .env file
const seed = process.env.SEED;
if (!seed) {
throw new Error("SEED environment variable is not set");
}
// Create account from seed
const account = Account.new(seed);
console.log("Account Address: ", account.address);
// Join amount: 1,000 AVAIL
const amount = new BN(10).pow(new BN(18)).mul(new BN(1000)); // 1,000 AVAIL
console.log("Join Amount: 1,000 AVAIL");
// Pool ID to join
// Replace with the actual pool ID you want to join
const poolId = 1;
console.log(`Joining Pool ID: ${poolId}`);
// Create join transaction
const tx = sdk.tx.nominationPools.join(amount, poolId);
console.log("Submitting join transaction...");
// Execute and wait for inclusion
const res = await tx.executeWaitForInclusion(account, {});
// Check if transaction was successful
const isOk = res.isSuccessful();
if (isOk === undefined) {
throw new Error("Cannot check if transaction was successful");
}
else if (!isOk) {
throw new Error("Transaction failed");
}
console.log("Pool join operation completed successfully");
// Log all transaction details
console.log("\nTransaction Details:");
console.log(`Transaction Hash: ${res.txHash}`);
console.log(`Block Hash: ${res.blockHash}`);
console.log(`Block Number: ${res.blockNumber}`);
process.exit(0);
}
// Execute the function
nominationPoolsJoin();
```
2. Run the code using:
```bash filename="terminal" name="cmd2"
ts-node your-file-name.ts
```
Sample Response:
```js
{
"isErr": false,
"event": {
"member": "5FHneW46xGXgs5mUiveU4sbTyGBzmstUspZC92UhjJM694ty",
"poolId": "1",
"bonded": "10000",
"joined": "true"
},
"events": [...],
"txHash": "0x06baecbb8680e90d025d1fd08044d0d251054a89e82dd460022bdf3796020050",
"txIndex": 1,
"blockHash": "0x82078130da46adacf5bdff86618ab6e1c443fda6d883d9fcf967a41a2e29d612",
"blockNumber": 19
}
```
#### avail-rust
1. Inside `main.rs`, add the following code:
```rust showLineNumbers filename="avail-rust" name="cmd3"
use dotenvy::dotenv;
use std::env;
use avail_rust::prelude::*;
pub async fn nomination_pools_join() -> Result<(), ClientError> {
// Create a new SDK instance
let sdk = SDK::new("wss://turing-rpc.avail.so/ws").await?;
// Loading seed phrase and creating an account derived from the seed
dotenv().ok();
let seed = env::var("SEED").expect("SEED environment variable is not set");
let account = account::from_secret_uri(&seed)?;
//Setting the amount to bond and the pool id
let amount = 1_00_000_000_000_000_000_000_000u128; // 1_000_00 Avail tokens
let pool_id = 1;
//Executing the transaction
let tx = sdk.tx.nomination_pools.join(amount, pool_id);
let res = tx.execute_and_watch_inclusion(&account, Options::new()).await?;
assert_eq!(res.is_successful(), Some(true));
println!(
"Block Hash: {:?}, Block Number: {}, Tx Hash: {:?}, Tx Index: {}",
res.block_hash, res.block_number, res.tx_hash, res.tx_index
);
Ok(())
}
#[tokio::main]
async fn main() {
if let Err(e) = nomination_pools_join().await {
eprintln!("Error: {:?}", e);
}
}
```
2. Run the code using:
```bash filename="terminal" name="cmd4"
cargo run
```
Sample Response:
```rust showLineNumbers filename="avail-rust" name="cmd3"
PoolJoinTxSuccess {
event: Bonded {
member: AccountId32(...),
pool_id: 1,
bonded: 1000000000000000000000000,
joined: true,
},
events: ExtrinsicEvents {
ext_hash: 0x1c3c2412859e9c1d29a17cdaad48ff835bfbc7bb1b2bda5686d152f7c5145a40,
idx: 1,
events: Events {
event_bytes: [...],
start_idx: 1,
num_events: 12,
},
},
tx_hash: 0x1c3c2412859e9c1d29a17cdaad48ff835bfbc7bb1b2bda5686d152f7c5145a40,
tx_index: 1,
block_hash: 0x67f28bfd6826522dc53ccfdec24dffbe9954ff4af8d96e81e983227af101786b,
block_number: 24,
}
```
#### avail-go
1. Inside `main.go`, add the following code:
```go showLineNumbers filename="avail-go" name="cmd5"
package main
import (
"fmt"
"log"
"os"
"github.com/availproject/avail-go-sdk/metadata"
SDK "github.com/availproject/avail-go-sdk/sdk"
"github.com/joho/godotenv"
)
func main() {
// Load environment variables from .env file
err := godotenv.Load()
if err != nil {
log.Fatal("Error loading .env file")
}
// Make sure the SEED environment variable is set
seed := os.Getenv("SEED")
if seed == "" {
log.Fatal("SEED environment variable is not set")
}
// Create an account from the SEED environment variable
acc, err := SDK.Account.NewKeyPair(seed)
if err != nil {
log.Fatalf("Failed to create account: %v", err)
}
fmt.Println("Your account Address: " + acc.SS58Address(42))
// Initialize an SDK instance
sdk, err := SDK.NewSDK("https://turing-rpc.avail.so/rpc")
if err != nil {
log.Fatalf("Failed to initialize SDK: %v", err)
}
// Set the amount to bond and the pool ID
// 1_000_00 Avail tokens
amount, err := metadata.NewBalanceFromString("1000000000000000000000000")
if err != nil {
log.Fatalf("Failed to create balance: %v", err)
}
poolId := uint32(1)
// Create the join transaction
tx := sdk.Tx.NominationPools.Join(amount, poolId)
// Execute the transaction
res, err := tx.ExecuteAndWatchInclusion(acc, SDK.NewTransactionOptions())
if err != nil {
log.Fatalf("Transaction failed: %v", err)
}
// Check if the transaction was successful
if !res.IsSuccessful().UnsafeUnwrap() {
log.Fatal("Transaction was not successful")
}
fmt.Println("Join transaction successful")
fmt.Printf("Block Hash: %v, Block Number: %v, Tx Hash: %v, Tx Index: %v\n", res.BlockHash.ToHexWith0x(), res.BlockNumber, res.TxHash.ToHexWith0x(), res.TxIndex)
}
```
2. Run the code using:
```bash filename="terminal" name="cmd6"
go run main.go
```
### Nominate validator(s) for your nomination pool
On-chain name of method: `nominationPools_nominate`
## Parameters
#### avail-js
| parameter | type | optional | description |
| ---------- | ------------- | -------- | ----------------------------------------------- |
| poolId | number | false | pool id |
| validators | string\[] | false | list of validators to nominate |
| waitFor | WaitFor | false | wait for block inclusion or finalization |
| account | KeyringPair | false | account that will send and sign the transaction |
| options | SignerOptions | true | used to overwrite existing signer options |
#### avail-rust
| parameter | type | optional | description |
| --------- | ----------- | -------- | ----------------------------------------------- |
| targets | &\[String] | false | list of validator addresses to nominate |
| waitFor | WaitFor | false | wait for block inclusion or finalization |
| account | KeyringPair | false | account that will send and sign the transaction |
| options | Options | true | transaction parameters |
#### avail-go
| parameter | type | optional | description |
| --------- | ----------- | -------- | ----------------------------------------------- |
| targets | &\[String] | false | list of validator addresses to nominate |
| waitFor | WaitFor | false | wait for block inclusion or finalization |
| account | KeyringPair | false | account that will send and sign the transaction |
| options | Options | true | transaction parameters |
## Returns
On failure, a reason for the failure is returned. On success, the function will return a object of type `NominateTxSuccess`.
This object contains the details of the transaction and the nomination pool.
## Minimal example
> **Note**
>
> 1. You will need to set up the dev environment required to run this example.
> For instructions, [check out our docs here](/docs/da/api-reference/avail-node-api#setting-up-the-dev-environment).
>
> 2. If you're sending an extrinsic (i.e conducting a transaction) you will need to replace the demo seed phrase with your own seed phrase.
> The rest of the code should work as is.
#### avail-js
1. Inside `your-file-name.ts`, add the following code:
```javascript showLineNumbers filename="avail-js"
import * as dotenv from 'dotenv';
import { Account, SDK, Pallets } from 'avail-js-sdk';
dotenv.config();
export async function nominationPoolsNominate() {
// Initialize SDK with Turing endpoint
const sdk = await SDK.New('wss://turing-rpc.avail.so/ws');
// Create account from seed in .env file
const seed = process.env.SEED;
if (!seed) {
throw new Error("SEED environment variable is not set");
}
// Create account from seed
const account = Account.new(seed);
console.log("Account Address: ", account.address);
// Pool ID to nominate from
const poolId = 1;
console.log(`Pool ID: ${poolId}`);
// Validator targets to nominate
const validators = [
"5GNJqTPyNqANBkUVMN1LPPrxXnFouWXoe2wNSmmEoLctxiZY", // Alice Stash
"5FHneW46xGXgs5mUiveU4sbTyGBzmstUspZC92UhjJM694ty", // Bob
];
// Create nominate transaction
const tx = sdk.tx.nominationPools.nominate(poolId, validators);
console.log("Submitting pool nomination transaction...");
// Execute and wait for inclusion
const res = await tx.executeWaitForInclusion(account, {});
// Check if transaction was successful
const isOk = res.isSuccessful();
if (isOk === undefined) {
throw new Error("Cannot check if transaction was successful");
}
else if (!isOk) {
throw new Error("Transaction failed");
}
console.log("\nPool nomination completed successfully");
// Log all transaction details
console.log("\nTransaction Details:");
console.log(`Transaction Hash: ${res.txHash}`);
console.log(`Block Hash: ${res.blockHash}`);
console.log(`Block Number: ${res.blockNumber}`);
process.exit(0);
}
// Execute the function
nominationPoolsNominate();
```
2. Run the code using:
```bash filename="terminal" name="cmd2"
ts-node your-file-name.ts
```
Sample Response:
```js
{
"isErr": false,
"events": [...],
"txHash": "0x98b993baf90183d85dece9357d3bc32311f4201b015b63845a13dbc22bf22370",
"txIndex": 1,
"blockHash": "0x84ef5a0ada4af71358ee701a2500bce7f6688efb554c32ba1a30c459f64d5370",
"blockNumber": 48
}
```
#### avail-rust
1. Inside `main.rs`, add the following code:
```rust showLineNumbers filename="avail-rust" name="cmd3"
use dotenvy::dotenv;
use std::env;
use avail_rust::prelude::*;
use core::str::FromStr;
pub async fn nomination_pools_nominate() -> Result<(), ClientError> {
// Create a new SDK instance
let sdk = SDK::new("wss://turing-rpc.avail.so/ws").await?;
// Loading seed phrase and creating an account derived from the seed
dotenv().ok();
let seed = env::var("SEED").expect("SEED environment variable is not set");
let account = account::from_secret_uri(&seed)?;
//Setting the pool id and the validators to nominate
let pool_id = 1; // Use your pool id here
//Setting an array of validators to nominate
let validators = [
AccountId::from_str("5DqMavSQikX9eMzwHKiC8xS6VWB2yCd5gGQuQq7KheM2Mgc7").expect("Invalid account ID"),
AccountId::from_str("5FphMk7DhSdq7jXsQCVQthw7XTiCWxdA9ZS6V43rKeJzvya9").expect("Invalid account ID"),
];
//Executing the transaction
let tx = sdk.tx.nomination_pools.nominate(pool_id, validators.to_vec());
let res = tx.execute_and_watch_inclusion(&account, Options::new()).await?;
assert_eq!(res.is_successful(), Some(true));
Ok(())
}
#[tokio::main]
async fn main() {
if let Err(e) = nomination_pools_nominate().await {
eprintln!("Error: {:?}", e);
}
}
```
2. Run the code using:
```bash filename="terminal" name="cmd4"
cargo run
```
Sample Response:
```rust showLineNumbers filename="avail-rust" name="cmd3"
NominateTxSuccess {
events: ExtrinsicEvents {
ext_hash: 0x6e0ae6fde353974f8b46aace441c49ba7ab135fa3743e0e1331d35c4528dacfb,
idx: 1,
events: Events {
event_bytes: [...],
start_idx: 1,
num_events: 8,
},
},
tx_data: Nominate {
targets: [
Id(AccountId32(...)),
],
},
tx_hash: 0x6e0ae6fde353974f8b46aace441c49ba7ab135fa3743e0e1331d35c4528dacfb,
tx_index: 1,
block_hash: 0xd9b3c0e77d6b376b3963055f65156e30c63b4ecc54d6c113ecb431b9cf877bb8,
block_number: 28,
}
```
### Fetch information on the active era
On-chain name of method: `staking_activeEra`
## Parameters
#### avail-js
None
#### avail-rust
None
#### avail-go
None
## Returns
* `index`: The index of the active era
* `start`: The timestamp when the active era started
## Minimal example (Fetch the active era)
> **Note**
>
> 1. You will need to set up the dev environment required to run this example.
> For instructions, [check out our docs here](/docs/da/api-reference/avail-node-api#setting-up-the-dev-environment).
>
> 2. If you're sending an extrinsic (i.e conducting a transaction) you will need to replace the demo seed phrase with your own seed phrase.
> The rest of the code should work as is.
#### avail-js
1. Inside `your-file-name.ts`, add the following code:
```typescript showLineNumbers filename="avail-js" name="cmd1"
import { SDK, Pallets, BN } from "avail-js-sdk";
export async function getActiveEra() {
// Initialize SDK with Turing endpoint
const sdk = await SDK.New("wss://turing-rpc.avail.so/ws");
// Get the current block hash
const blockHash = await sdk.client.bestBlockHash();
console.log(`Current block hash: ${blockHash}`);
// Get storage at the current block
const storageAt = await sdk.client.storageAt(blockHash);
// Fetch active era information
const activeEra = await Pallets.StakingStorage.ActiveEra.fetch(storageAt);
if (!activeEra) {
console.log("No active era found");
process.exit(1);
}
// Log all properties of activeEra
console.log("\nAll Active Era Properties:");
for (const [key, value] of Object.entries(activeEra)) {
console.log(`${key}: ${value}`);
}
process.exit(0);
}
// Execute the function
getActiveEra();
```
2. Run the code using:
```bash filename="terminal" name="cmd2"
ts-node your-file-name.ts
```
#### avail-rust
1. Inside `main.rs`, add the following code:
```rust showLineNumbers filename="avail-rust" name="cmd3"
use avail_rust::prelude::*;
pub async fn staking_active_era() -> Result<(), ClientError> {
// Create a new SDK instance
let sdk = SDK::new("wss://turing-rpc.avail.so/ws").await?;
let block_hash = sdk.client.best_block_hash().await?;
let storage = sdk.client.storage().at(block_hash);
let address = avail::storage().staking().active_era();
let result = storage.fetch(&address).await?;
dbg!(result);
Ok(())
}
#[tokio::main]
async fn main() {
if let Err(e) = staking_active_era().await {
eprintln!("Error: {:?}", e);
}
}
```
2. Run the code using:
```bash filename="terminal" name="cmd4"
cargo run
```
Sample Response:
```json
result = Some(
ActiveEraInfo {
index: 174,
start: Some(
1726523440000,
),
},
)
```
#### avail-go
1. Inside `main.go`, add the following code:
```go showLineNumbers filename="avail-go" name="cmd5"
package main
import (
"fmt"
"log"
staPallet "github.com/availproject/avail-go-sdk/metadata/pallets/staking"
prim "github.com/availproject/avail-go-sdk/primitives"
SDK "github.com/availproject/avail-go-sdk/sdk"
)
func main() {
sdk, err := SDK.NewSDK("https://turing-rpc.avail.so/rpc")
if err != nil {
log.Fatalf("Failed to initialize SDK: %v", err)
}
// Get the latest block hash
latestBlockHash, err := sdk.Client.BestBlockHash()
if err != nil {
log.Fatalf("Failed to get latest block hash: %v", err)
}
// Initialize the block storage
blockStorage, err := sdk.Client.StorageAt(prim.Some(latestBlockHash))
if err != nil {
log.Fatalf("Failed to get block storage: %v", err)
}
// Fetch the active era
{
storage := staPallet.StorageActiveEra{}
val, err := storage.Fetch(&blockStorage)
if err != nil {
log.Fatalf("Failed to fetch active era: %v", err)
}
fmt.Println("Active Era: ", val.Unwrap())
}
}
```
2. Run the code using:
```bash filename="terminal" name="cmd6"
go run main.go
```
### Bond AVAIL tokens on Avail DA
On-chain name of extrinsic: `staking_bond`
## Parameters
#### avail-js
| parameter | type | optional | description |
| --------- | ------------------------ | -------- | -------------------------------------------------------- |
| value | BN | false | amount that is bond. 10^18 is equal to 1 AVL |
| payee | StakingRewardDestination | false | Can be: "Stakzed", "Stash", "None" or an account address |
| waitFor | WaitFor | false | wait for block inclusion or finalization |
| account | KeyringPair | false | account that will send and sign the transaction |
| options | SignerOptions | true | used to overwrite existing signer options |
#### avail-rust
| parameter | type | optional | description |
| --------- | ----------------- | -------- | ------------------------------------------------------- |
| value | u128 | false | amount that is bond. 10^18 is equal to 1 AVAIL |
| payee | RewardDestination | false | Can be: "Staked", "Stash", "None" or an account address |
| waitFor | WaitFor | false | wait for block inclusion or finalization |
| account | KeyringPair | false | account that will send and sign the transaction |
#### avail-go
| parameter | type | optional | description |
| ---------------- | -------- | -------- | ------------------------------------------------------- |
| api | API | false | api for avail chain |
| amount | Ucompact | false | amount that is bond. |
| payee | Payee | false | Can be: "Staked", "Stash", "None" or an account address |
| WaitForInclusion | WaitFor | false | wait for block inclusion or finalization |
| Seed | Mnemonic | false | seed of the account that needs to sign the transaction |
## Returns
On failure, a reason of failure is returned. On Success, Bonded event, transaction hash and block hash is returned.
## Minimal example
> **Note**
>
> 1. You will need to set up the dev environment required to run this example.
> For instructions, [check out our docs here](/docs/da/api-reference/avail-node-api#setting-up-the-dev-environment).
>
> 2. If you're sending an extrinsic (i.e conducting a transaction) you will need to replace the demo seed phrase with your own seed phrase.
> The rest of the code should work as is.
#### avail-js
1. Inside `your-file-name.ts`, add the following code:
```typescript showLineNumbers filename="avail-js" name="cmd1"
import * as dotenv from 'dotenv';
import { Account, SDK, BN, Pallets } from 'avail-js-sdk';
dotenv.config();
export async function stakingBond() {
// Initialize SDK with Turing endpoint
const sdk = await SDK.New('wss://turing-rpc.avail.so/ws');
// Create account from seed in .env file
const seed = process.env.SEED;
if (!seed) {
throw new Error("SEED environment variable is not set");
}
// Create account from seed
const account = Account.new(seed);
console.log("Account Address: ", account.address);
// Bond amount: 10,000 AVAIL
const value = new BN(10_000).mul(new BN(10).pow(new BN(18)));
console.log("Bond Amount: 10,000 AVAIL");
// Reward destination
const payee = "Staked";
console.log("Reward Destination: ", payee);
// Create bond transaction
const tx = sdk.tx.staking.bond(value, payee);
console.log("Submitting bond transaction...");
// Execute and wait for inclusion
const res = await tx.executeWaitForInclusion(account, {});
// Check if transaction was successful
const isOk = res.isSuccessful();
if (isOk === undefined) {
throw new Error("Cannot check if transaction was successful");
}
else if (!isOk) {
throw new Error("Transaction failed");
}
console.log("Bond completed successfully");
console.log(`Transaction Hash: ${res.txHash}`);
console.log(`Block Hash: ${res.blockHash}`);
process.exit(0);
}
// Execute the function
stakingBond();
```
2. Run the code using:
```bash filename="terminal" name="cmd2"
ts-node your-file-name.ts
```
#### avail-rust
1. Inside `src/main.rs`, paste the following code:
```rust showLineNumbers filename="avail-rust" name="cmd3"
use dotenvy::dotenv;
use std::env;
use avail_rust::{
prelude::*,
transactions::staking::RewardDestination,
};
pub async fn staking_bond() -> Result<(), ClientError> {
// Create a new SDK instance
let sdk = SDK::new("wss://turing-rpc.avail.so/ws").await?;
// Loading seed phrase and creating an account derived from the seed
dotenv().ok();
let seed = env::var("SEED").expect("SEED environment variable is not set");
let account = account::from_secret_uri(&seed)?;
//Setting amount of AVAIL to be staked
let value = 1_000_000_000_000_000_000u128 * 1_000_000u128; // 1,000,000 AVAIL
//Setting the payee to be a Validator
let payee = RewardDestination::Staked;
// Executing the transaction
let tx = sdk.tx.staking.bond(value, payee);
let res = tx.execute_and_watch_inclusion(&account, Options::default()).await?;
assert_eq!(res.is_successful(), Some(true));
println!(
"Block Hash: {:?}, Block Number: {}, Tx Hash: {:?}, Tx Index: {}",
res.block_hash, res.block_number, res.tx_hash, res.tx_index
);
Ok(())
}
#[tokio::main]
async fn main() {
if let Err(e) = staking_bond().await {
eprintln!("Error: {:?}", e);
}
}
```
2. Run the code using:
```bash filename="terminal" name="cmd4"
cargo run
```
#### avail-go
1. Inside `main.go`, paste the following code:
```go showLineNumbers filename="avail-go" name="cmd5"
package main
import (
"fmt"
"log"
"os"
"github.com/availproject/avail-go-sdk/metadata"
SDK "github.com/availproject/avail-go-sdk/sdk"
"github.com/joho/godotenv"
)
func main() {
// Load environment variables from .env file
err := godotenv.Load()
if err != nil {
log.Fatal("Error loading .env file")
}
// Make sure the SEED environment variable is set
seed := os.Getenv("SEED")
if seed == "" {
log.Fatal("SEED environment variable is not set")
}
// Create an account from the SEED environment variable
acc, err := SDK.Account.NewKeyPair(seed)
if err != nil {
log.Fatalf("Failed to create account: %v", err)
}
fmt.Println("Your account Address: " + acc.SS58Address(42))
// Initialize an SDK instance
sdk, err := SDK.NewSDK("https://turing-rpc.avail.so/rpc")
if err != nil {
log.Fatalf("Failed to initialize SDK: %v", err)
}
// Create a Balance from a string
// The value here is 1000 AVAIL
amount, err := metadata.NewBalanceFromString("1000000000000000000000")
if err != nil {
log.Fatalf("Failed to create balance: %v", err)
}
// Create a RewardDestination
payee := metadata.RewardDestination{VariantIndex: 0}
// Call the `Bond` function
tx := sdk.Tx.Staking.Bond(amount, payee)
// Execute the transaction
res, err := tx.ExecuteAndWatchInclusion(acc, SDK.NewTransactionOptions())
if err != nil {
log.Fatalf("Transaction failed: %v", err)
}
// Check if the transaction was successful
if !res.IsSuccessful().UnsafeUnwrap() {
log.Fatal("Transaction was not successful")
}
fmt.Println("Transaction successful")
// Printing out all the values of the transaction
fmt.Println(fmt.Sprintf(`Block Hash: %v, Block Index: %v, Tx Hash: %v, Tx Index: %v`, res.BlockHash.ToHexWith0x(), res.BlockNumber, res.TxHash.ToHexWith0x(), res.TxIndex))
}
```
2. Run the code using:
```bash filename="terminal" name="cmd6"
go run main.go
```
> **Note**
>
> If you receive errors related to missing dependencies while trying to execute your code, run:
>
> ```bash filename="terminal"
> go mod tidy
> ```
>
> and try again.
### Stop validating on Avail DA
On-chain name of extrinsic: `staking_chill`
## Parameters
#### avail-js
| parameter | type | optional | description |
| --------- | ------------- | -------- | ----------------------------------------------- |
| waitFor | WaitFor | false | wait for block inclusion or finalization |
| account | KeyringPair | false | account that will send and sign the transaction |
| options | SignerOptions | true | used to overwrite existing signer options |
#### avail-rust
| parameter | type | optional | description |
| --------- | ----------- | -------- | ----------------------------------------------- |
| waitFor | WaitFor | false | wait for block inclusion or finalization |
| account | KeyringPair | false | account that will send and sign the transaction |
#### avail-go
| parameter | type | optional | description |
| ---------------- | -------- | -------- | ------------------------------------------------------ |
| WaitForInclusion | WaitFor | false | wait for block inclusion or finalization |
| api | API | false | api for avail chain |
| Seed | Mnemonic | false | seed of the account that needs to sign the transaction |
## Returns
On failure, a reason of failure is returned. On Success, Chilled event, transaction hash and block hash is returned.
## Minimal example
> **Note**
>
> 1. You will need to set up the dev environment required to run this example.
> For instructions, [check out our docs here](/docs/da/api-reference/avail-node-api#setting-up-the-dev-environment).
>
> 2. If you're sending an extrinsic (i.e conducting a transaction) you will need to replace the demo seed phrase with your own seed phrase.
> The rest of the code should work as is.
#### avail-js
1. Inside `your-file-name.ts`, add the following code:
```typescript showLineNumbers filename="avail-js" name="cmd1"
import * as dotenv from 'dotenv';
import { Account, SDK, Pallets } from 'avail-js-sdk';
dotenv.config();
export async function stakingChill() {
// Initialize SDK with Turing endpoint
const sdk = await SDK.New('wss://turing-rpc.avail.so/ws');
// Create account from seed in .env file
const seed = process.env.SEED;
if (!seed) {
throw new Error("SEED environment variable is not set");
}
// Create account from seed
const account = Account.new(seed);
console.log("Account Address: ", account.address);
// Create chill transaction
const tx = sdk.tx.staking.chill();
console.log("Submitting chill transaction...");
// Execute and wait for inclusion
const res = await tx.executeWaitForInclusion(account, {});
// Check if transaction was successful
const isOk = res.isSuccessful();
if (isOk === undefined) {
throw new Error("Cannot check if transaction was successful");
}
else if (!isOk) {
throw new Error("Transaction failed");
}
console.log("Chill operation completed successfully");
console.log(`Transaction Hash: ${res.txHash}`);
console.log(`Block Hash: ${res.blockHash}`);
process.exit(0);
}
// Execute the function
stakingChill();
```
2. Run the code using:
```bash filename="terminal" name="cmd2"
ts-node your-file-name.ts
```
#### avail-rust
1. Inside `src/main.rs`, paste the following code:
```rust showLineNumbers filename="avail-rust" name="cmd3"
use dotenvy::dotenv;
use std::env;
use avail_rust::prelude::*;
pub async fn staking_chill() -> Result<(), ClientError> {
// Create a new SDK instance
let sdk = SDK::new("wss://turing-rpc.avail.so/ws").await?;
// Loading seed phrase and creating an account derived from the seed
dotenv().ok();
let seed = env::var("SEED").expect("SEED environment variable is not set");
let account = account::from_secret_uri(&seed)?;
//Executing the transaction
let tx = sdk.tx.staking.chill();
let res = tx.execute_and_watch_inclusion(&account, Options::new()).await?;
assert_eq!(res.is_successful(), Some(true));
println!(
"Block Hash: {:?}, Block Number: {}, Tx Hash: {:?}, Tx Index: {}",
res.block_hash, res.block_number, res.tx_hash, res.tx_index
);
Ok(())
}
#[tokio::main]
async fn main() {
if let Err(e) = staking_chill().await {
eprintln!("Error: {:?}", e);
}
}
```
2. Run the code using:
```bash filename="terminal" name="cmd4"
cargo run
```
#### avail-go
1. Inside `main.go`, paste the following code:
```go showLineNumbers filename="avail-go" name="cmd5"
package main
import (
"fmt"
"log"
"os"
SDK "github.com/availproject/avail-go-sdk/sdk"
"github.com/joho/godotenv"
)
func main() {
// Load environment variables from .env file
err := godotenv.Load()
if err != nil {
log.Fatal("Error loading .env file")
}
// Make sure the SEED environment variable is set
seed := os.Getenv("SEED")
if seed == "" {
log.Fatal("SEED environment variable is not set")
}
// Create an account from the SEED environment variable
acc, err := SDK.Account.NewKeyPair(seed)
if err != nil {
log.Fatalf("Failed to create account: %v", err)
}
fmt.Println("Your account Address: " + acc.SS58Address(42))
// Initialize an SDK instance
sdk, err := SDK.NewSDK("https://turing-rpc.avail.so/rpc")
if err != nil {
log.Fatalf("Failed to initialize SDK: %v", err)
}
// Create the chill transaction
tx := sdk.Tx.Staking.Chill()
// Execute the transaction
res, err := tx.ExecuteAndWatchInclusion(acc, SDK.NewTransactionOptions())
if err != nil {
log.Fatalf("Transaction failed: %v", err)
}
// Check if the transaction was successful
if !res.IsSuccessful().UnsafeUnwrap() {
log.Fatal("Transaction was not successful")
}
fmt.Println("Chill transaction successful")
// Printing out all the values of the transaction
fmt.Println(fmt.Sprintf(`Block Hash: %v, Block Index: %v, Tx Hash: %v, Tx Index: %v`, res.BlockHash.ToHexWith0x(), res.BlockNumber, res.TxHash.ToHexWith0x(), res.TxIndex))
}
```
2. Run the code using:
```bash filename="terminal" name="cmd6"
go run main.go
```
> **Note**
>
> If you receive errors related to missing dependencies while trying to execute your code, run:
>
> ```bash filename="terminal"
> go mod tidy
> ```
>
> and try again.
### Nominate staked AVAIL tokens to one or more validators
On-chain name of extrinsic: `staking_nominate`
## Parameters
#### avail-js
| parameter | type | optional | description |
| --------- | ------------- | -------- | ----------------------------------------------- |
| targets | string\[] | false | list of addresses to nominate |
| waitFor | WaitFor | false | wait for block inclusion or finalization |
| account | KeyringPair | false | account that will send and sign the transaction |
| options | SignerOptions | true | used to overwrite existing signer options |
#### avail-rust
| parameter | type | optional | description |
| --------- | ----------- | -------- | ----------------------------------------------- |
| targets | &\[String] | false | list of addresses to nominate |
| waitFor | WaitFor | false | wait for block inclusion or finalization |
| account | KeyringPair | false | account that will send and sign the transaction |
#### avail-go
| parameter | type | optional | description |
| ---------------- | --------- | -------- | ------------------------------------------------------ |
| stash | string\[] | false | list od addresses to nominate |
| WaitForInclusion | WaitFor | false | wait for block inclusion or finalization |
| api | API | false | api for avail chain |
| Seed | Mnemonic | false | seed of the account that needs to sign the transaction |
## Returns
On failure, a reason of failure is returned. On Success, Nominate transaction data, transaction hash and block hash is returned.
## Minimal example
> **Note**
>
> 1. You will need to set up the dev environment required to run this example.
> For instructions, [check out our docs here](/docs/da/api-reference/avail-node-api#setting-up-the-dev-environment).
>
> 2. If you're sending an extrinsic (i.e conducting a transaction) you will need to replace the demo seed phrase with your own seed phrase.
> The rest of the code should work as is.
#### avail-js
1. Inside `your-file-name.ts`, add the following code:
```typescript showLineNumbers filename="avail-js" name="cmd1"
import * as dotenv from 'dotenv';
import { Account, SDK, Pallets } from 'avail-js-sdk';
dotenv.config();
export async function stakingNominate() {
// Initialize SDK with Turing endpoint
const sdk = await SDK.New('wss://turing-rpc.avail.so/ws');
// Create account from seed in .env file
const seed = process.env.SEED;
if (!seed) {
throw new Error("SEED environment variable is not set");
}
// Create account from seed
const account = Account.new(seed);
console.log("Account Address: ", account.address);
// Validator targets to nominate
const targets = [
"5GNJqTPyNqANBkUVMN1LPPrxXnFouWXoe2wNSmmEoLctxiZY", // Alice Stash
"5FHneW46xGXgs5mUiveU4sbTyGBzmstUspZC92UhjJM694ty", // Bob
];
console.log("Nominating validators:");
targets.forEach((target, index) => {
console.log(` ${index + 1}. ${target}`);
});
// Create nominate transaction
const tx = sdk.tx.staking.nominate(targets);
console.log("Submitting nomination transaction...");
// Execute and wait for inclusion
const res = await tx.executeWaitForInclusion(account, {});
// Check if transaction was successful
const isOk = res.isSuccessful();
if (isOk === undefined) {
throw new Error("Cannot check if transaction was successful");
}
else if (!isOk) {
throw new Error("Transaction failed");
}
console.log("Nomination completed successfully");
console.log(`Transaction Hash: ${res.txHash}`);
console.log(`Block Hash: ${res.blockHash}`);
process.exit(0);
}
// Execute the function
stakingNominate();
```
2. Run the code using:
```bash filename="terminal" name="cmd2"
ts-node your-file-name.ts
```
#### avail-rust
1. Inside `src/main.rs`, paste the following code:
```rust showLineNumbers filename="avail-rust" name="cmd3"
use dotenvy::dotenv;
use std::env;
use avail_rust::prelude::*;
use core::str::FromStr;
pub async fn staking_nominate() -> Result<(), ClientError> {
// Create a new SDK instance
let sdk = SDK::new("wss://turing-rpc.avail.so/ws").await?;
// Loading seed phrase and creating an account derived from the seed
dotenv().ok();
let seed = env::var("SEED").expect("SEED environment variable is not set");
let account = account::from_secret_uri(&seed)?;
//Setting the Validator to be nominated, max 16 targets
let targets = [
AccountId::from_str("5DqMavSQikX9eMzwHKiC8xS6VWB2yCd5gGQuQq7KheM2Mgc7").expect("Invalid account ID"),
AccountId::from_str("5FphMk7DhSdq7jXsQCVQthw7XTiCWxdA9ZS6V43rKeJzvya9").expect("Invalid account ID"),
];
//Executing the transaction
let tx = sdk.tx.staking.nominate(&targets);
let res = tx.execute_and_watch_inclusion(&account, Options::default()).await?;
assert_eq!(res.is_successful(), Some(true));
println!(
"Block Hash: {:?}, Block Number: {}, Tx Hash: {:?}, Tx Index: {}",
res.block_hash, res.block_number, res.tx_hash, res.tx_index
);
Ok(())
}
#[tokio::main]
async fn main() {
if let Err(e) = staking_nominate().await {
eprintln!("Error: {:?}", e);
}
}
```
2. Run the code using:
```bash filename="terminal" name="cmd4"
cargo run
```
#### avail-go
1. Inside `main.go`, paste the following code:
```go showLineNumbers filename="avail-go" name="cmd5"
package main
import (
"fmt"
"log"
"os"
"github.com/availproject/avail-go-sdk/primitives"
SDK "github.com/availproject/avail-go-sdk/sdk"
"github.com/joho/godotenv"
)
func main() {
// Load environment variables from .env file
err := godotenv.Load()
if err != nil {
log.Fatal("Error loading .env file")
}
// Make sure the SEED environment variable is set
seed := os.Getenv("SEED")
if seed == "" {
log.Fatal("SEED environment variable is not set")
}
// Create an account from the SEED environment variable
acc, err := SDK.Account.NewKeyPair(seed)
if err != nil {
log.Fatalf("Failed to create account: %v", err)
}
fmt.Println("Your account Address: " + acc.SS58Address(42))
// Initialize an SDK instance
sdk, err := SDK.NewSDK("https://turing-rpc.avail.so/rpc")
if err != nil {
log.Fatalf("Failed to initialize SDK: %v", err)
}
// Convert the addresses to AccountId
address1, err := primitives.NewAccountIdFromAddress("5DqMavSQikX9eMzwHKiC8xS6VWB2yCd5gGQuQq7KheM2Mgc7")
if err != nil {
log.Fatalf("Failed to convert address1: %v", err)
}
address2, err := primitives.NewAccountIdFromAddress("5FphMk7DhSdq7jXsQCVQthw7XTiCWxdA9ZS6V43rKeJzvya9")
if err != nil {
log.Fatalf("Failed to convert address2: %v", err)
}
// Create an array of AccountId
targets := []primitives.MultiAddress{
address1.ToMultiAddress(),
address2.ToMultiAddress(),
}
// Create the nominate transaction
tx := sdk.Tx.Staking.Nominate(targets)
// Execute the transaction
res, err := tx.ExecuteAndWatchInclusion(acc, SDK.NewTransactionOptions())
if err != nil {
log.Fatalf("Transaction failed: %v", err)
}
// Check if the transaction was successful
if !res.IsSuccessful().UnsafeUnwrap() {
log.Fatal("Transaction was not successful")
}
fmt.Println("Nomination transaction successful")
// Printing out all the values of the transaction
fmt.Println(fmt.Sprintf(`Block Hash: %v, Block Index: %v, Tx Hash: %v, Tx Index: %v`, res.BlockHash.ToHexWith0x(), res.BlockNumber, res.TxHash.ToHexWith0x(), res.TxIndex))
}
```
2. Run the code using:
```bash filename="terminal" name="cmd6"
go run main.go
```
> **Note**
>
> If you receive errors related to missing dependencies while trying to execute your code, run:
>
> ```bash filename="terminal"
> go mod tidy
> ```
>
> and try again.
### Unbond AVAIL tokens from Avail DA
On-chain name of extrinsic: `staking_unbond`
## Parameters
#### avail-js
| parameter | type | optional | description |
| --------- | ------------- | -------- | ----------------------------------------------- |
| value | BN | false | amount of tokens to unbond |
| waitFor | WaitFor | false | wait for block inclusion or finalization |
| account | KeyringPair | false | account that will send and sign the transaction |
| options | SignerOptions | true | used to overwrite existing signer options |
#### avail-rust
| parameter | type | optional | description |
| --------- | ------------- | -------- | ----------------------------------------------- |
| value | u128 | false | amount of tokens to unbond |
| waitFor | WaitFor | false | wait for block inclusion or finalization |
| account | KeyringPair | false | account that will send and sign the transaction |
| options | SignerOptions | true | used to overwrite existing signer options |
#### avail-go
| parameter | type | optional | description |
| ---------------- | -------- | -------- | ------------------------------------------------------ |
| amount | Ucompact | false | amount of tokens to unbond |
| WaitForInclusion | WaitFor | false | wait for block inclusion or finalization |
| api | API | false | api for avail chain |
| Seed | Mnemonic | false | seed of the account that needs to sign the transaction |
## Returns
On failure, a reason of failure is returned. On Success, Unbonded event, transaction hash and block hash is returned.
## Minimal example
> **Note**
>
> 1. You will need to set up the dev environment required to run this example.
> For instructions, [check out our docs here](/docs/da/api-reference/avail-node-api#setting-up-the-dev-environment).
>
> 2. If you're sending an extrinsic (i.e conducting a transaction) you will need to replace the demo seed phrase with your own seed phrase.
> The rest of the code should work as is.
#### avail-js
1. Inside `your-file-name.ts`, add the following code:
```typescript showLineNumbers filename="avail-js" name="cmd1"
import * as dotenv from 'dotenv';
import { Account, SDK, BN, Pallets } from 'avail-js-sdk';
dotenv.config();
export async function stakingUnbond() {
// Initialize SDK with Turing endpoint
const sdk = await SDK.New('wss://turing-rpc.avail.so/ws');
// Create account from seed in .env file
const seed = process.env.SEED;
if (!seed) {
throw new Error("SEED environment variable is not set");
}
// Create account from seed
const account = Account.new(seed);
console.log("Account Address: ", account.address);
// Unbond amount: 1 AVAIL
const value = new BN(10).pow(new BN(18)); // 1 AVAIL
console.log("Unbond Amount: 1 AVAIL");
// Create unbond transaction
const tx = sdk.tx.staking.unbond(value);
console.log("Submitting unbond transaction...");
// Execute and wait for inclusion
const res = await tx.executeWaitForInclusion(account, {});
// Check if transaction was successful
const isOk = res.isSuccessful();
if (isOk === undefined) {
throw new Error("Cannot check if transaction was successful");
}
else if (!isOk) {
throw new Error("Transaction failed");
}
console.log("Unbond operation completed successfully");
console.log(`Transaction Hash: ${res.txHash}`);
console.log(`Block Hash: ${res.blockHash}`);
process.exit(0);
}
// Execute the function
stakingUnbond();
```
2. Run the code using:
```bash filename="terminal" name="cmd2"
ts-node your-file-name.ts
```
#### avail-rust
1. Inside `src/main.rs`, paste the following code:
```rust showLineNumbers filename="avail-rust" name="cmd3"
use dotenvy::dotenv;
use std::env;
use avail_rust::prelude::*;
pub async fn staking_unbond() -> Result<(), ClientError> {
// Create a new SDK instance
let sdk = SDK::new("wss://turing-rpc.avail.so/ws").await?;
// Loading seed phrase and creating an account derived from the seed
dotenv().ok();
let seed = env::var("SEED").expect("SEED environment variable is not set");
let account = account::from_secret_uri(&seed)?;
let value = 1_000_000_000_000_000_000u128; // 1 AVAIL
//Executing the transaction
let tx = sdk.tx.staking.unbond(value);
let res = tx.execute_and_watch_inclusion(&account, Options::new()).await?;
assert_eq!(res.is_successful(), Some(true));
println!(
"Block Hash: {:?}, Block Number: {}, Tx Hash: {:?}, Tx Index: {}",
res.block_hash, res.block_number, res.tx_hash, res.tx_index
);
Ok(())
}
#[tokio::main]
async fn main() {
if let Err(e) = staking_unbond().await {
eprintln!("Error: {:?}", e);
}
}
```
2. Run the code using:
```bash filename="terminal" name="cmd4"
cargo run
```
#### avail-go
1. Inside `main.go`, paste the following code:
```go showLineNumbers filename="avail-go" name="cmd5"
package main
import (
"fmt"
"log"
"os"
"github.com/availproject/avail-go-sdk/metadata"
SDK "github.com/availproject/avail-go-sdk/sdk"
"github.com/joho/godotenv"
)
func main() {
// Load environment variables from .env file
err := godotenv.Load()
if err != nil {
log.Fatal("Error loading .env file")
}
// Make sure the SEED environment variable is set
seed := os.Getenv("SEED")
if seed == "" {
log.Fatal("SEED environment variable is not set")
}
// Create an account from the SEED environment variable
acc, err := SDK.Account.NewKeyPair(seed)
if err != nil {
log.Fatalf("Failed to create account: %v", err)
}
fmt.Println("Your account Address: " + acc.SS58Address(42))
// Initialize an SDK instance
sdk, err := SDK.NewSDK("https://turing-rpc.avail.so/rpc")
if err != nil {
log.Fatalf("Failed to initialize SDK: %v", err)
}
// Create a Balance from a string for the unbond amount
unbondAmount, err := metadata.NewBalanceFromString("1000000000000000000")
if err != nil {
log.Fatalf("Failed to create balance: %v", err)
}
// Create the unbond transaction
tx := sdk.Tx.Staking.Unbond(unbondAmount)
// Execute the transaction
res, err := tx.ExecuteAndWatchInclusion(acc, SDK.NewTransactionOptions())
if err != nil {
log.Fatalf("Transaction failed: %v", err)
}
// Check if the transaction was successful
if !res.IsSuccessful().UnsafeUnwrap() {
log.Fatal("Transaction was not successful")
}
fmt.Println("Unbond transaction successful")
// Printing out all the values of the transaction
fmt.Println(fmt.Sprintf(`Block Hash: %v, Block Index: %v, Tx Hash: %v, Tx Index: %v`, res.BlockHash.ToHexWith0x(), res.BlockNumber, res.TxHash.ToHexWith0x(), res.TxIndex))
}
```
2. Run the code using:
```bash filename="terminal" name="cmd6"
go run main.go
```
> **Note**
>
> If you receive errors related to missing dependencies while trying to execute your code, run:
>
> ```bash filename="terminal"
> go mod tidy
> ```
>
> and try again.
### Become a validator on Avail DA
On-chain name of extrinsic: `staking_validate`
## Parameters
#### avail-js
| parameter | type | optional | description |
| ---------- | ------------- | -------- | ----------------------------------------------------- |
| commission | number | false | how much validator charge nominators in 0 - 100 range |
| blocked | boolean | false | whether or not this validator accepts nominations |
| waitFor | WaitFor | false | wait for block inclusion or finalization |
| account | KeyringPair | false | account that will send and sign the transaction |
| options | SignerOptions | true | used to overwrite existing signer options |
#### avail-rust
| parameter | type | optional | description |
| ---------- | ----------- | -------- | ----------------------------------------------------- |
| commission | u8 | false | how much validator charge nominators in 0 - 100 range |
| blocked | bool | false | whether or not this validator accepts nominations |
| waitFor | WaitFor | false | wait for block inclusion or finalization |
| account | KeyringPair | false | account that will send and sign the transaction |
#### avail-go
| parameter | type | optional | description |
| ---------------- | -------- | -------- | ------------------------------------------------------ |
| commission | number | false | how much validator charge nominators in 0 - 100 range |
| WaitForInclusion | WaitFor | false | wait for block inclusion or finalization |
| api | API | false | api for avail chain |
| Seed | Mnemonic | false | seed of the account that needs to sign the transaction |
## Returns
On failure, a reason of failure is returned. On Success, ValidatorPrefsSet event, transaction hash and block hash is returned.
## Minimal example
> **Note**
>
> 1. You will need to set up the dev environment required to run this example.
> For instructions, [check out our docs here](/docs/da/api-reference/avail-node-api#setting-up-the-dev-environment).
>
> 2. If you're sending an extrinsic (i.e conducting a transaction) you will need to replace the demo seed phrase with your own seed phrase.
> The rest of the code should work as is.
#### avail-js
1. Inside `your-file-name.ts`, add the following code:
```typescript showLineNumbers filename="avail-js" name="cmd1"
import * as dotenv from 'dotenv';
import { Account, SDK, Pallets } from 'avail-js-sdk';
dotenv.config();
export async function stakingValidate() {
// Initialize SDK with Turing endpoint
const sdk = await SDK.New('wss://turing-rpc.avail.so/ws');
// Create account from seed in .env file
const seed = process.env.SEED;
if (!seed) {
throw new Error("SEED environment variable is not set");
}
// Create account from seed
const account = Account.new(seed);
console.log("Account Address: ", account.address);
// Validator settings
const commission = 5; // 5%
const blocked = false;
console.log(`Commission: ${commission}%`);
console.log(`Blocked: ${blocked}`);
// Create validate transaction
const tx = sdk.tx.staking.validate(commission, blocked);
console.log("Submitting validate transaction...");
// Execute and wait for inclusion
const res = await tx.executeWaitForInclusion(account, {});
// Check if transaction was successful
const isOk = res.isSuccessful();
if (isOk === undefined) {
throw new Error("Cannot check if transaction was successful");
}
else if (!isOk) {
throw new Error("Transaction failed");
}
console.log("Validation setup completed successfully");
console.log(`Transaction Hash: ${res.txHash}`);
console.log(`Block Hash: ${res.blockHash}`);
process.exit(0);
}
// Execute the function
stakingValidate();
```
2. Run the code using:
```bash filename="terminal" name="cmd2"
ts-node your-file-name.ts
```
#### avail-rust
1. Inside `src/main.rs`, paste the following code:
```rust showLineNumbers filename="avail-rust" name="cmd3"
use dotenvy::dotenv;
use std::env;
use avail_rust::transactions::staking::Commission;
use avail_rust::prelude::*;
pub async fn staking_validate() -> Result<(), ClientError> {
// Create a new SDK instance
let sdk = SDK::new("wss://turing-rpc.avail.so/ws").await?;
// Loading seed phrase and creating an account derived from the seed
dotenv().ok();
let seed = env::var("SEED").expect("SEED environment variable is not set");
let account = account::from_secret_uri(&seed)?;
//Setting your Validator's commission and blocking status
let commission = Commission::new(5)?; // 5%
let blocked = false; // Not blocked
//Executing the transaction
let tx = sdk.tx.staking.validate(commission, blocked);
let res = tx.execute_and_watch_inclusion(&account, Options::new()).await?;
assert_eq!(res.is_successful(), Some(true));
println!(
"Block Hash: {:?}, Block Number: {}, Tx Hash: {:?}, Tx Index: {}",
res.block_hash, res.block_number, res.tx_hash, res.tx_index
);
Ok(())
}
#[tokio::main]
async fn main() {
if let Err(e) = staking_validate().await {
eprintln!("Error: {:?}", e);
}
}
```
2. Run the code using:
```bash filename="terminal" name="cmd4"
cargo run
```
#### avail-go
1. Inside `main.go`, paste the following code:
```go showLineNumbers filename="avail-go" name="cmd5"
package main
import (
"fmt"
"log"
"os"
"github.com/availproject/avail-go-sdk/metadata"
SDK "github.com/availproject/avail-go-sdk/sdk"
"github.com/joho/godotenv"
)
func main() {
// Load environment variables from .env file
err := godotenv.Load()
if err != nil {
log.Fatal("Error loading .env file")
}
// Make sure the SEED environment variable is set
seed := os.Getenv("SEED")
if seed == "" {
log.Fatal("SEED environment variable is not set")
}
// Create an account from the SEED environment variable
acc, err := SDK.Account.NewKeyPair(seed)
if err != nil {
log.Fatalf("Failed to create account: %v", err)
}
fmt.Println("Your account Address: " + acc.SS58Address(42))
// Initialize an SDK instance
sdk, err := SDK.NewSDK("https://turing-rpc.avail.so/rpc")
if err != nil {
log.Fatalf("Failed to initialize SDK: %v", err)
}
// Set validator preferences
prefs := metadata.ValidatorPrefs{
Commission: metadata.NewPerbillFromU8(5), // 5% commission
Blocked: false, // Not blocked
}
// Create the validate transaction
tx := sdk.Tx.Staking.Validate(prefs)
// Execute the transaction
res, err := tx.ExecuteAndWatchInclusion(acc, SDK.NewTransactionOptions())
if err != nil {
log.Fatalf("Transaction failed: %v", err)
}
// Check if the transaction was successful
if !res.IsSuccessful().UnsafeUnwrap() {
log.Fatal("Transaction was not successful")
}
fmt.Println("Validation transaction successful")
// Printing out all the values of the transaction
fmt.Println(fmt.Sprintf(`Block Hash: %v, Block Index: %v, Tx Hash: %v, Tx Index: %v`, res.BlockHash.ToHexWith0x(), res.BlockNumber, res.TxHash.ToHexWith0x(), res.TxIndex))
}
```
2. Run the code using:
```bash filename="terminal" name="cmd6"
go run main.go
```
> **Note**
>
> If you receive errors related to missing dependencies while trying to execute your code, run:
>
> ```bash filename="terminal"
> go mod tidy
> ```
>
> and try again.
### Fetch balances and other information for an account
On-chain name of method: `system_account`
## Parameters
#### avail-js
| parameter | type | optional | description |
| --------- | ---- | -------- | --------------------------------------------- |
| address | SS58 | true | The account address to fetch information for |
#### avail-rust
| parameter | type | optional | description |
| --------- | ---- | -------- | --------------------------------------------- |
| address | SS58 | true | The account address to fetch information for |
#### avail-go
| parameter | type | optional | description |
| --------- | ---- | -------- | --------------------------------------------- |
| address | SS58 | true | The account address to fetch information for |
## Returns
* `nonce`: Current nonce of the account on Avail DA
* `consumers`: The number of other modules that currently depend on this account's existence. The account cannot be reaped until this is zero
* `providers`: The number of other modules that allow this account to exist. The account may not be reaped until this is zero.
* `sufficients`: The number of modules that allow this account to exist for their own purposes only. The account may not be reaped until this is zero.
* `free`: Amount of Transferrable AVAIL tokens with the account
* `reserved`: Amount of AVAIL tokens that are not bonded, but also not yet freely available
* `frozen`: Amount of AVAIL tokens currently staked by the account
* `flags`: Some extra information about the account
> **Note**
>
> **NONCE**
>
> * Every account on Avail DA starts with a nonce value of `0`. This number represents
> the number of transactions executed on Avail DA by that particular account.
>
> * Every successive transaction will have a nonce value that is incremented by `1` from the previous transaction.
>
> * To extend this a bit further, the sum of all non-zero nonces on Avail DA will be equal to the total number of transactions executed on Avail DA.
## Minimal example (Fetch account information for a single account)
> **Note**
>
> 1. You will need to set up the dev environment required to run this example.
> For instructions, [check out our docs here](/docs/da/api-reference/avail-node-api#setting-up-the-dev-environment).
>
> 2. If you're sending an extrinsic (i.e conducting a transaction) you will need to replace the demo seed phrase with your own seed phrase.
> The rest of the code should work as is.
#### avail-js
1. Inside `your-file-name.ts`, add the following code:
```typescript showLineNumbers filename="avail-js" name="cmd1"
import * as dotenv from 'dotenv';
import { SDK, Pallets } from 'avail-js-sdk';
dotenv.config();
export async function getAccountBalance() {
// Initialize SDK with Turing endpoint
const sdk = await SDK.New('wss://turing-rpc.avail.so/ws');
// Address to check balance for
const address = "5DDY2yzh8uCysYFAiRSTeQVwtZSKNF49CkQkyPH852xvrYKk";
console.log(`Checking balance for address: ${address}`);
// Get the current block hash
const blockHash = await sdk.client.bestBlockHash();
// Get storage at the current block
const storageAt = await sdk.client.storageAt(blockHash);
// Fetch account information
const accountInfo = await Pallets.SystemStorage.Account.fetch(storageAt, address);
// Format balances in AVAIL (dividing by 10^18)
const free = accountInfo.value.accountData.free.toString();
const reserved = accountInfo.value.accountData.reserved.toString();
const frozen = accountInfo.value.accountData.frozen.toString();
console.log("The following balances are in the smallest units, divide by 10^18 to get the balance in AVAIL");
console.log(`Free Balance: ${free}`);
console.log(`Reserved Balance: ${reserved}`);
console.log(`Frozen Balance: ${frozen}`);
console.log("Account information fetched successfully");
process.exit(0);
}
// Execute the function
getAccountBalance();
```
2. Run the code using:
```bash filename="terminal" name="cmd2"
ts-node your-file-name.ts
```
#### avail-rust
1. Inside `main.rs`, add the following code:
```rust showLineNumbers filename="avail-rust" name="cmd3"
use avail_rust::prelude::*;
use core::str::FromStr;
pub async fn system_account() -> Result<(), ClientError> {
// Create a new SDK instance
let sdk = SDK::new("wss://turing-rpc.avail.so/ws").await?;
let account_id = AccountId::from_str("5CqgQkrDcdg5QrtuxT3H7WszrqgrBMhdwRbmMVXQzc4VSiEg").unwrap();
let block_hash = sdk.client.best_block_hash().await?;
let storage = sdk.client.storage().at(block_hash);
let address = avail::storage().system().account(account_id);
let result = storage.fetch(&address).await?;
if let Some(account) = result {
println!("Consumers: {}", account.consumers);
println!("Data: {:?}", account.data);
println!("Nonce: {}", account.nonce);
println!("Providers: {}", account.providers);
println!("Sufficients: {}", account.sufficients);
}
Ok(())
}
// Add a main function to call system_account
#[tokio::main]
async fn main() {
if let Err(e) = system_account().await {
eprintln!("Error: {:?}", e);
}
else {
println!("Account information fetched successfully");
}
}
```
2. Run the code using:
```bash filename="terminal" name="cmd4"
cargo run
```
Sample Response:
```json
result = Some(
AccountInfo {
nonce: 26,
consumers: 2,
providers: 1,
sufficients: 0,
data: AccountData {
free: 3809329880703171553761,
reserved: 2100000000000000000,
frozen: 1008370553028965837506,
flags: ExtraFlags(
170141183460469231731687303715884105728,
),
},
},
)
```
#### avail-go
1. Inside `main.go`, add the following code:
```go showLineNumbers filename="avail-go" name="cmd5"
package main
import (
"fmt"
"log"
prim "github.com/availproject/avail-go-sdk/primitives"
"github.com/availproject/avail-go-sdk/sdk"
syPallet "github.com/availproject/avail-go-sdk/metadata/pallets/system"
"github.com/availproject/avail-go-sdk/primitives"
)
func main() {
// Initialize the SDK
sdk, err := sdk.NewSDK("https://turing-rpc.avail.so/rpc")
if err != nil {
log.Fatalf("Failed to initialize SDK: %v", err)
}
// Get the latest block hash
latestBlockHash, err := sdk.Client.BestBlockHash()
if err != nil {
log.Fatalf("Failed to get latest block hash: %v", err)
}
// Initialize the block storage
blockStorage, err := sdk.Client.StorageAt(prim.Some(latestBlockHash))
if err != nil {
log.Fatalf("Failed to get block storage: %v", err)
}
// Create the account ID
accountId, err := primitives.NewAccountIdFromAddress("5DDY2yzh8uCysYFAiRSTeQVwtZSKNF49CkQkyPH852xvrYKk")
if err != nil {
log.Fatalf("Failed to convert address: %v", err)
}
// Fetch the account data
storage := syPallet.StorageAccount{}
val, err := storage.Fetch(&blockStorage, accountId)
if err != nil {
log.Fatalf("Failed to fetch account: %v", err)
}
// Log the account data
fmt.Println("Free Balance: ", val.Value.AccountData.Free.ToHuman())
fmt.Println("Reserved Balance: ", val.Value.AccountData.Reserved.ToHuman())
fmt.Println("Frozen Balance: ", val.Value.AccountData.Frozen.ToHuman())
fmt.Println("Account information fetched successfully")
}
```
2. Run the code using:
```bash filename="terminal" name="cmd6"
go run main.go
```
> **Note**
>
> If you receive errors related to missing dependencies while trying to execute your code, run:
>
> ```bash filename="terminal"
> go mod tidy
> ```
>
> and try again.
### Retrieve Pre-Image Data
> **Note**
>
> **NEED AN API KEY?**
> Contact our team to get an API key for accessing the Turbo DA API endpoints.
> **Endpoint:** `GET /v1/get_pre_image`
Retrieves the original data that was previously submitted to Turbo DA.
## Parameters
* `x-api-key` - Your API authentication key (required)
* `submission_id` - The unique identifier received when data was submitted (query parameter)
## Response
* The raw binary data that was originally submitted
#### CURL
```bash filename="Fetching raw data against your submission ID"
curl -X GET 'https://staging.turbo-api.availproject.org/v1/get_pre_image?submission_id=YOUR_SUBMISSION_ID' \
-H 'x-api-key: YOUR_API_KEY'
```
Sample Response:
```
{
"data": "Raw binary data"
}
```
> If the submission ID is invalid, you'll receive an appropriate HTTP error code with an error message:
```json
{
"error": "Customer Expenditure entry not found"
}
```
> **Note**
>
> This endpoint complements the `submit_raw_data` endpoint by allowing users to retrieve the original data they submitted using the submission ID they received.
> It's particularly useful for verifying that data was correctly stored or for retrieving data that was submitted by others in your organization.
### Submit JSON Data to Turbo DA
> **Note**
>
> **Why does this endpoint exist?**
>
> 1. The `submit_data` endpoint exists to provide a more structured interface for applications that prefer working with JSON.
>
> 2. For submitting files or arbitrary binary data, use the [`submit_raw_data`](/docs/da/api-reference/avail-turbo-da-api/submit-raw-data) endpoint instead.
> **Note**
>
> **NEED AN API KEY?**
> Contact our team to get an API key for accessing the Turbo DA API endpoints.
> **Endpoint:** `POST /v1/submit_data`
Submits string data in JSON format to Turbo DA. This endpoint is designed for applications that prefer working with structured JSON data rather than raw binary content.
## Parameters
* `x-api-key` - Your API authentication key (required)
* `Content-Type` - Must be `application/json`
## Request Body
```json
{
"data": "Your string data here"
}
```
## Response
* **submission\_id** - Unique identifier for tracking your submission
#### CURL
```bash filename="Submitting JSON data"
curl -X POST 'https://staging.turbo-api.availproject.org/v1/submit_data' \
-H 'x-api-key: YOUR_API_KEY' \
-H 'Content-Type: application/json' \
-d '{"data": "Hello Avail Network!"}'
```
Sample Response:
```json
{
"submission_id": ""
}
```
> If the request fails due to invalid API key or server error, you'll receive an appropriate HTTP error code with an error message:
```json
{
"error": "Error message details"
}
```
### Get Submission Information
> **Note**
>
> **NEED AN API KEY?**
> Contact our team to get an API key for accessing the Turbo DA API endpoints.
> **Endpoint:** `GET /v1/get_submission_info`
Retrieves metadata and status information about a previous data submission to Turbo DA.
## Parameters
* `x-api-key` - Your API authentication key (required)
* `submission_id` - The unique identifier received when data was submitted (query parameter)
## Response
* Metadata about the submission including status, transaction details, and timestamps
#### CURL
```bash filename="Fetching submission info against your submission ID"
curl -X GET 'https://staging.turbo-api.availproject.org/v1/get_submission_info?submission_id=YOUR_SUBMISSION_ID' \
-H 'x-api-key: YOUR_API_KEY'
```
Sample Response:
```json
{
"data": {
"amount_data": "20.00 B",
"block_hash": "0x087c21csd7cdc3d08y007eb940b0883175a20a22965e61819d533efa8d601aec1",
"block_number": 1465348,
"created_at": "2023-06-15T10:30:45Z",
"data_billed": "1024",
"data_hash": "0xc30f0eadacfc1579a2a6cee3b3154bf5df8f41ac824d555e74363b6fc55df8f8",
"fees": "124443109311818076",
"tx_hash": "0xff57e96bee175118f8c3779241469170b692a3d91697182af92774e594963969",
"tx_index": 1,
"user_id": "user@example.com"
},
"error": null,
"id": "7b8f9e2a-c531-4d45-8c7a-1b2d3e4f5g6h",
"state": "Finalized",
}
```
> If the submission ID is invalid or not found, you'll receive an appropriate HTTP error code with an error message:
### Submit Raw Data to Turbo DA
> **Note**
>
> **NEED AN API KEY?**
> Contact our team to get an API key for accessing the Turbo DA API endpoints.
> **Endpoint:** `POST /v1/submit_raw_data`
Submits raw data to Turbo DA.
## Parameters
* `x-api-key` - Your API authentication key (required)
* `Content-Type` - Must be `application/octet-stream`
## Response
* **submission\_id** - Unique identifier for tracking your submission
#### Submitting a file
```bash filename="Submitting a file"
# Create a sample file
echo "This is test data for Avail network" > data.txt
# Submit the file
curl -X POST 'https://staging.turbo-api.availproject.org/v1/submit_raw_data' \
-H 'x-api-key: YOUR_API_KEY' \
-H 'Content-Type: application/octet-stream' \
--data-binary '@data.txt'
```
#### Submitting raw data
```bash filename="Submitting raw data"
curl -X POST 'https://staging.turbo-api.availproject.org/v1/submit_raw_data' \
-H 'x-api-key: YOUR_API_KEY' \
-H 'Content-Type: application/octet-stream' \
--data-binary 'Hello Avail Network!'
```
Sample Response:
````json
{
"submission_id": ""
}
> If the request fails due to invalid API key or server error, you'll receive an appropriate HTTP error code with an error message:
```json
{
"error": "Error message details"
}
````
### Create an App ID
> **Note**
>
> **LOOKING TO READ MORE ABOUT WHAT APPIDs ARE?**
> You can go through [this page in our docs](/docs/da/concepts/app-ids) for a deeper understanding of how
> AppIDs work on Avail.
> **Note**
>
> **LOOKING FOR PROGRAMMATIC INSTRUCTIONS?**
> You can check out our [API reference](/docs/da/api-reference/avail-node-api/da-create-application-key) for the same.
The easiest way to set up your own `AppID` on Avail DA is to use our [online AppID generator](https://appid.availproject.org/).
## Check the next available `AppID`
> **Note**
>
> Each `appID` consists of 3 fields:
>
> * `key`: This is a string that is the name of the `appID`. Each `appID` should have a unique name.
> * `owner`: This is the address of the account that created the `appID`. A single address can create multiple `AppIds`.
> * `id`: This is the unique integer index of the `appID`. It is incremented by 1 everytime a new `appID` is created. Whenever a new
> `appID` is created, it is automatically assigned the next available `id`.
1. Go to [appid.availproject](https://appid.availproject.org/) and select the correct network from the dropdown.
2. Click on `Search` and you will see a list of already existing `AppIDs` on the network.
> If you choose to create a new `AppID`, it's `id` will be the next integer in the sequence.
## How to register my own `AppID`?
1. You need to connect an Avail DA account to the website. Click on `Connect wallet` to do so.
> **Note**
>
> If you don't have an Avail DA wallet, you can follow our docs on [setting up a new wallet](/docs/da/user-guides/accounts#creating-an-account-on-avail-da).
2. Once connected, simply give your `AppID` a name, click on `Create AppID` and approve the transaction in your wallet to create the `AppID`.
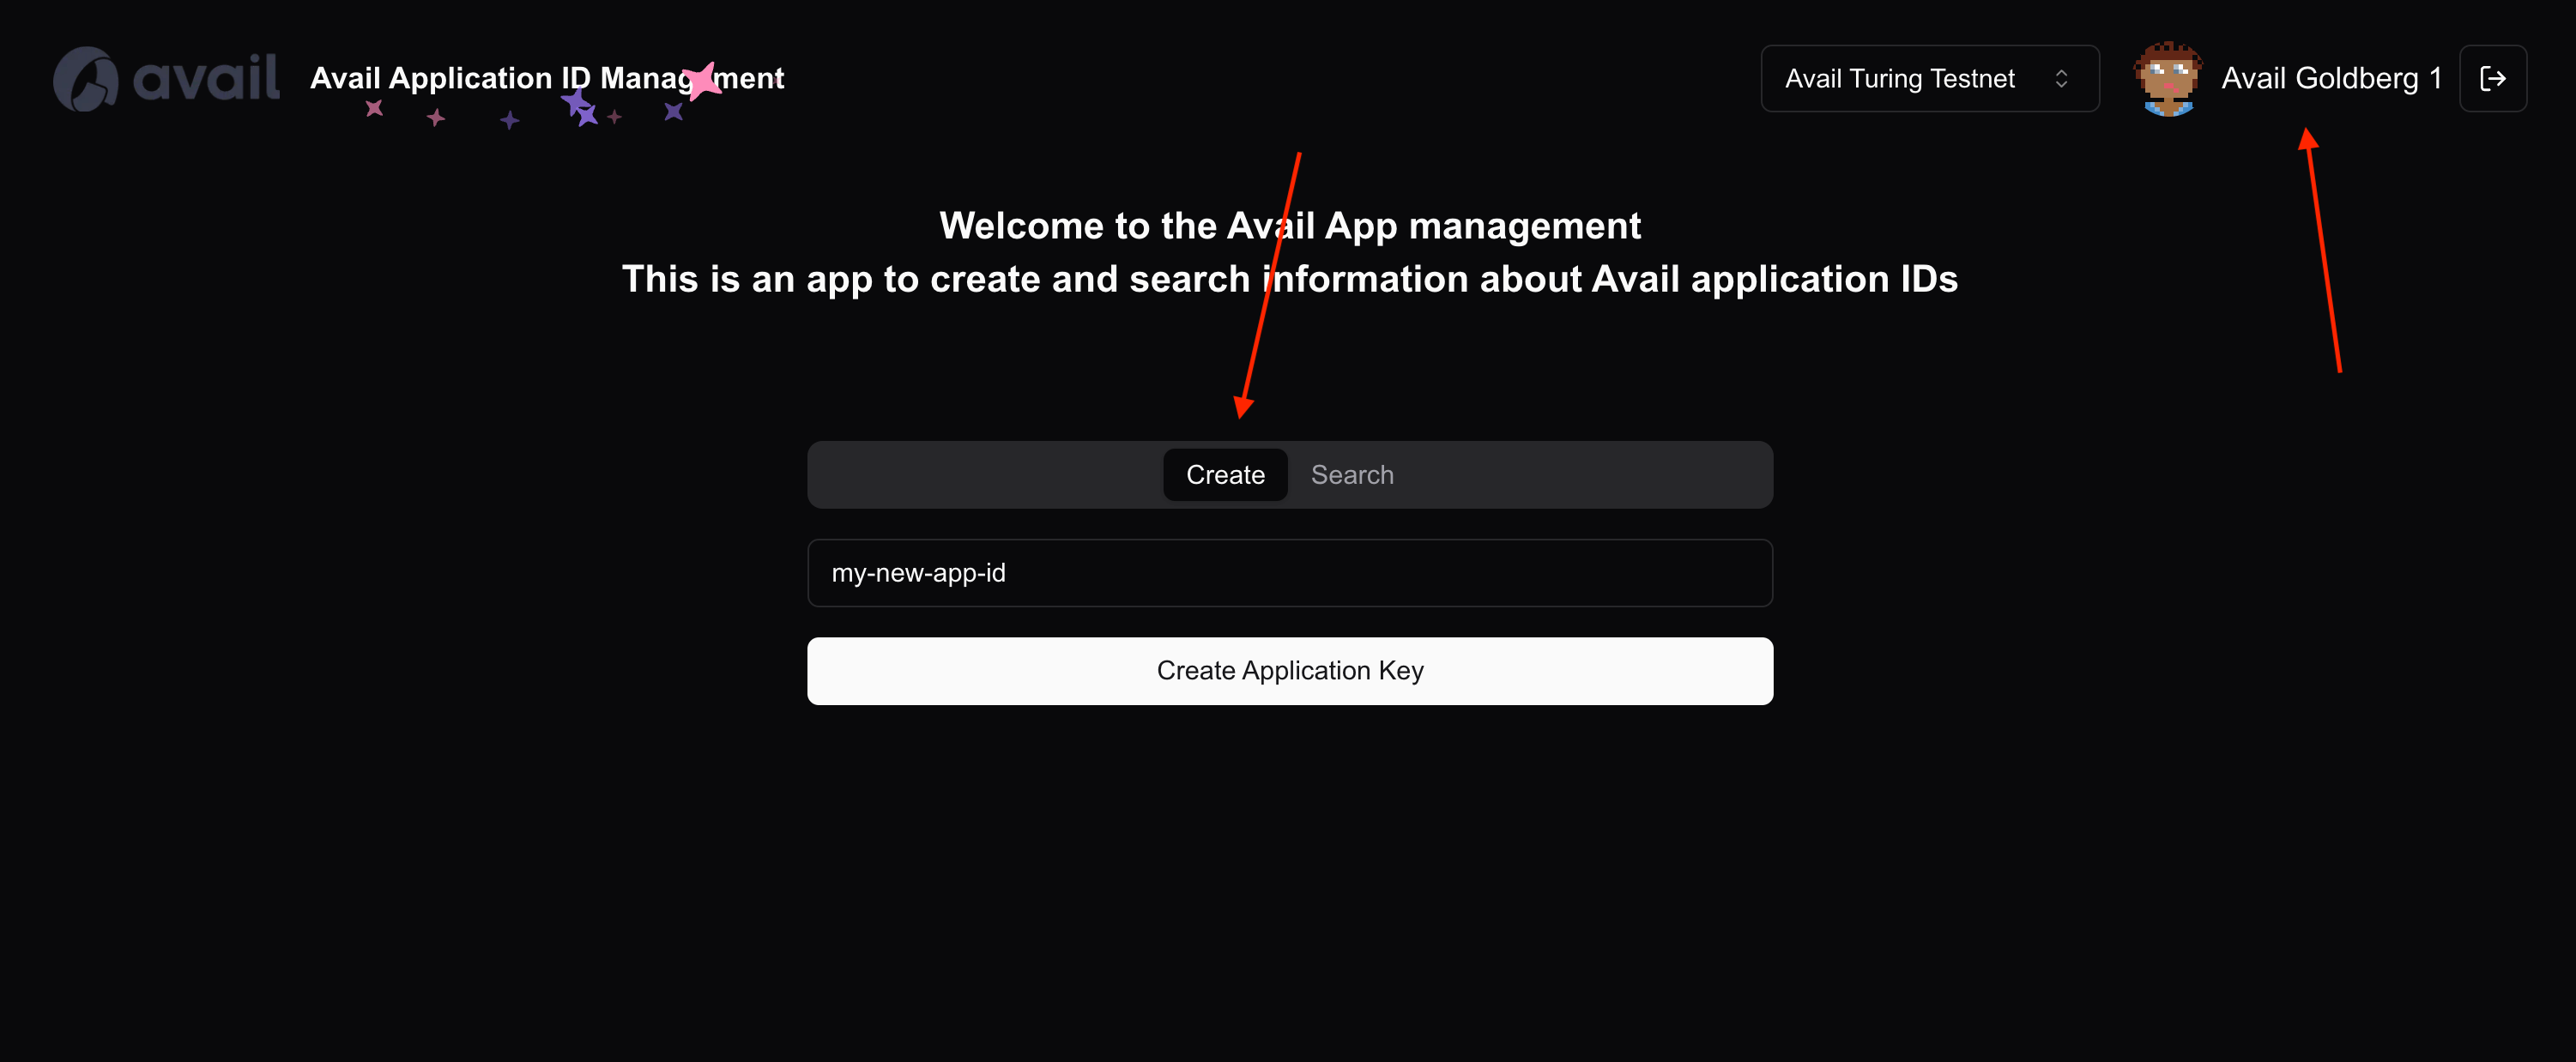
## A few more things of note
1. As stated earlier, the `key` and `id` fields of every `AppID` are unique. This means if you try to create an `AppID` with the same `key` as an existing one,
the operation will fail.
2. If you're a developer and are looking for more programmatic instructions, you can check out our [API reference](/docs/da/api-reference/avail-node-api/da-create-application-key).
### Testnet Faucet
The Avail testnet faucet will be living at [faucet.avail.tools](https://faucet.avail.tools/) for the foreseeable future.
As of now, this is the only officially supported faucet for Avail DA.
> **Note**
>
> PLEASE NOTE
> The faucet is designed to distribute small amounts of AVAIL for testing purposes, not large quantities for validator bonding or similar activities.
> The current maximum balance a requesting address can have is 100 AVAIL.
## How to Use the Faucet
1. Create a Substrate account using a compatible wallet.
We recommend [SubWallet](https://www.subwallet.app/), [Talisman](https://www.talisman.xyz/), or [PolkadotJS](https://polkadot.js.org/).
2. Go to [faucet.avail.tools](https://faucet.avail.tools/).
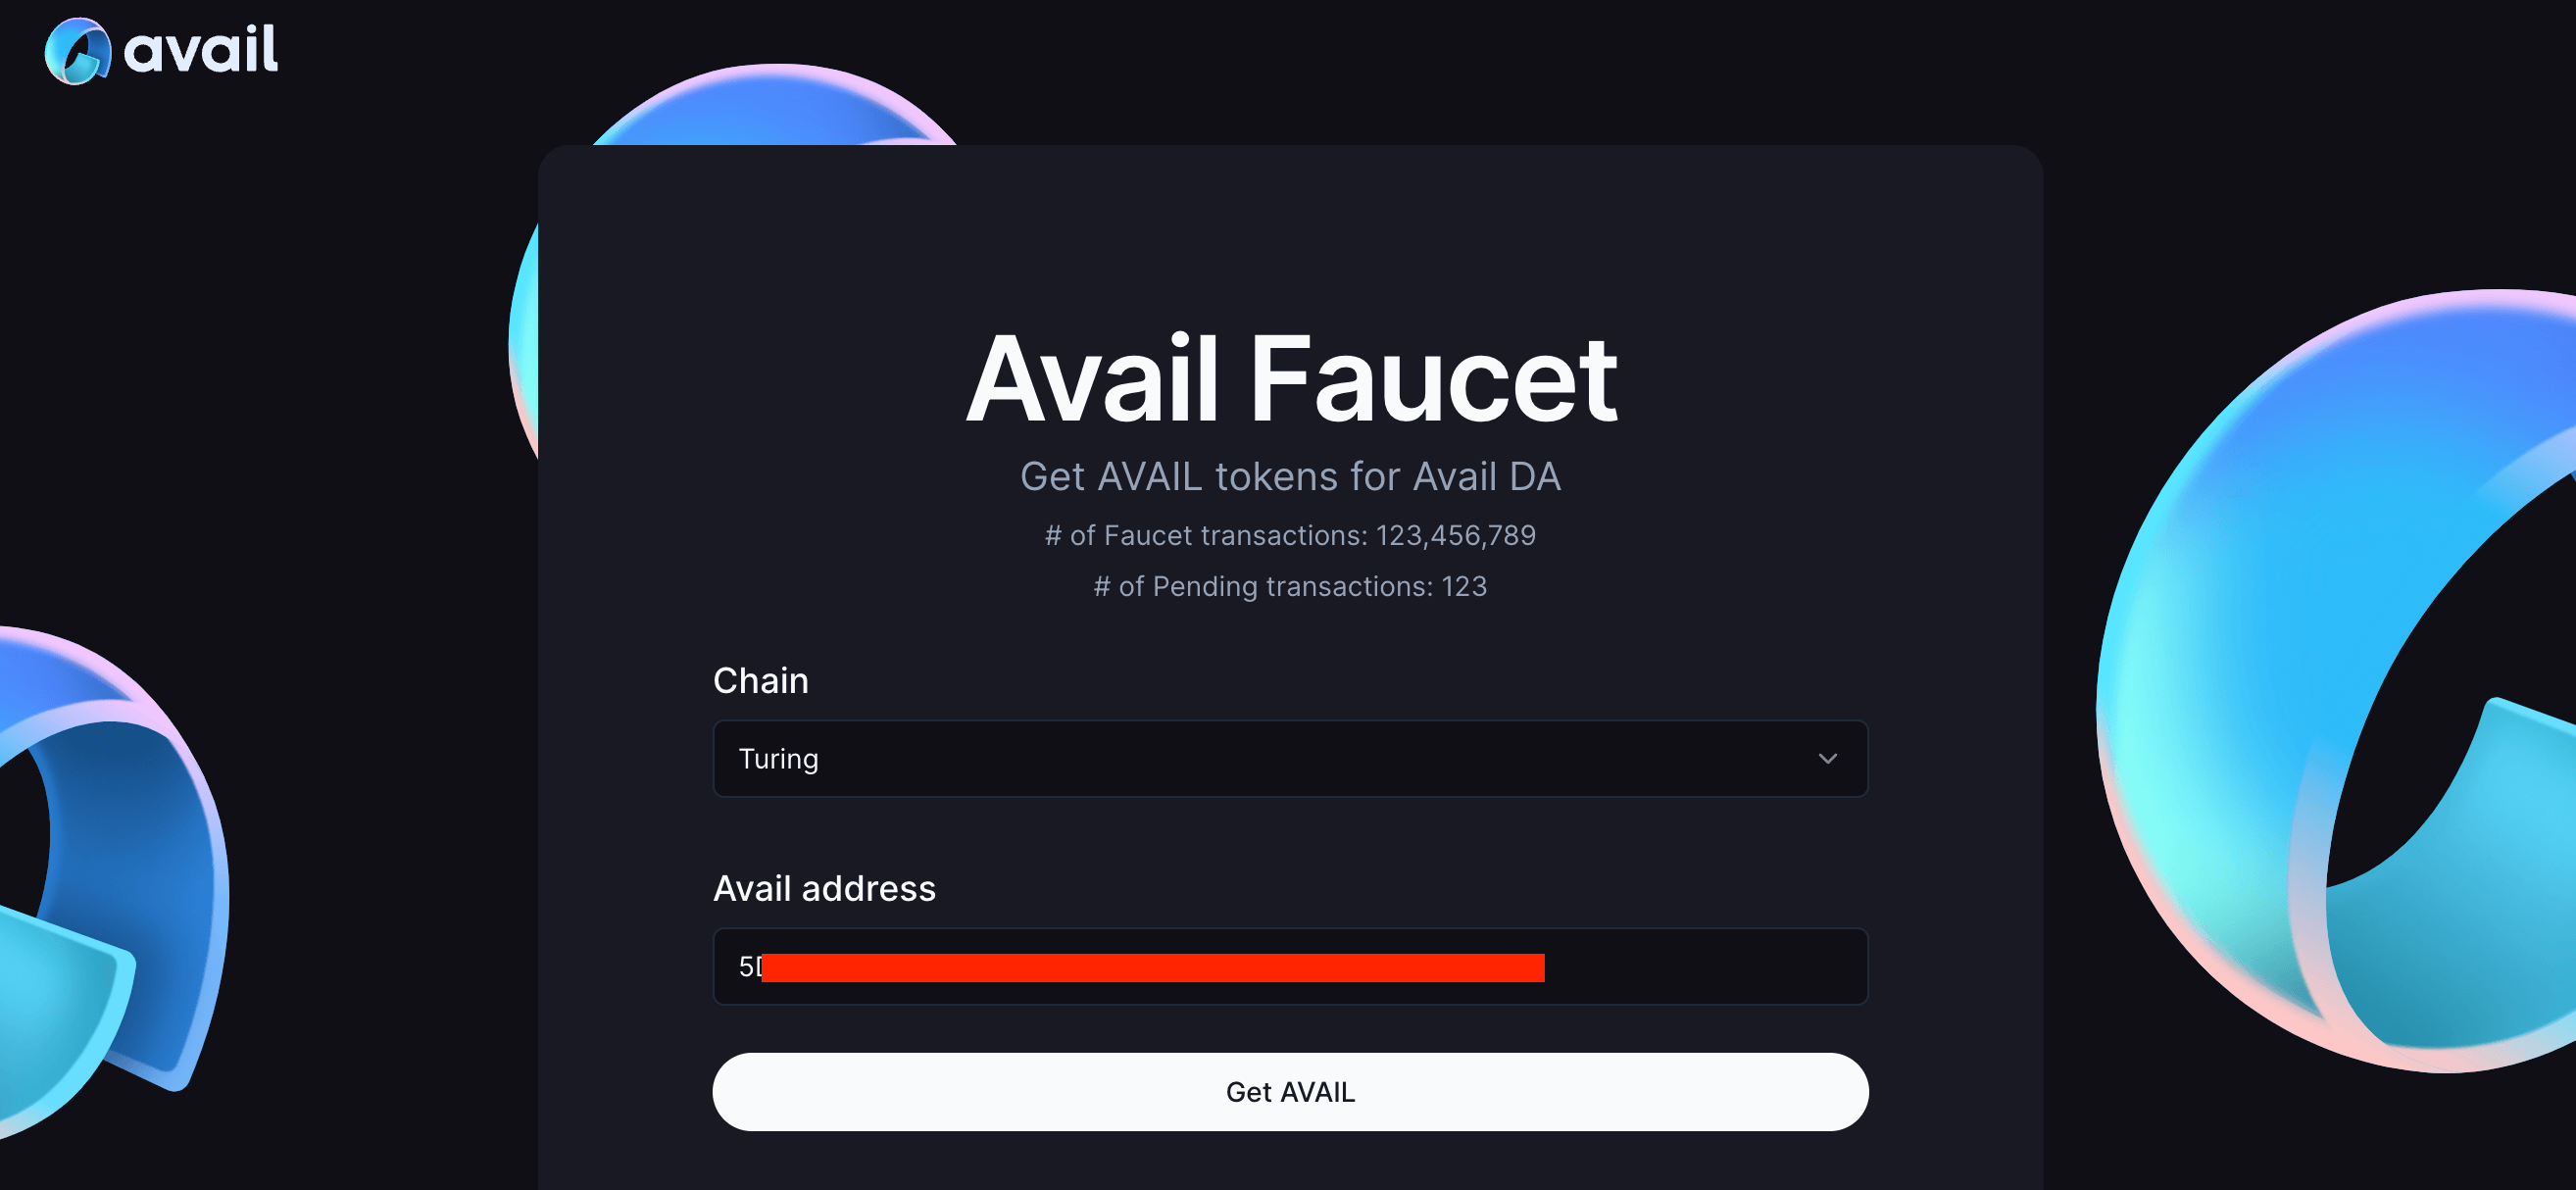
3. Choose the chain you want to receive your tokens on. The default option will be `Turing`.
4. Enter the address where you want to receive your `AVAIL`. The address will begin with `5`.
5. You might see a captcha when trying out the faucet in production. Complete the captcha to get your tokens.
And that's it. You should receive a small amount of AVAIL in your account shortly.
### Query Balances
## Setting up the dev environment
In this guide we will use Avail's dedicated SDKs to interact with the [Turing testnet](/docs/da/networks).
To set up a dev environment for the SDK of your choice, please follow the steps [outlined here](/docs/da/api-reference/avail-node-api#setting-up-the-dev-environment).
## Querying the balance of an account
To query basic information about an account, including it's balance, you need to call the `system_account` extrinsic from the `system` pallet on an Avail node.
#### avail-js
1. Inside `your-file-name.ts`, add the following code:
```typescript showLineNumbers filename="avail-js" name="cmd1"
import * as dotenv from 'dotenv';
import { SDK, Pallets } from 'avail-js-sdk';
dotenv.config();
export async function getAccountBalance() {
// Initialize SDK with Turing endpoint
const sdk = await SDK.New('wss://turing-rpc.avail.so/ws');
// Address to check balance for
const address = "5DDY2yzh8uCysYFAiRSTeQVwtZSKNF49CkQkyPH852xvrYKk";
console.log(`Checking balance for address: ${address}`);
// Get the current block hash
const blockHash = await sdk.client.bestBlockHash();
// Get storage at the current block
const storageAt = await sdk.client.storageAt(blockHash);
// Fetch account information
const accountInfo = await Pallets.SystemStorage.Account.fetch(storageAt, address);
// Format balances in AVAIL (dividing by 10^18)
const free = accountInfo.value.accountData.free.toString();
const reserved = accountInfo.value.accountData.reserved.toString();
const frozen = accountInfo.value.accountData.frozen.toString();
console.log("The following balances are in the smallest units, divide by 10^18 to get the balance in AVAIL");
console.log(`Free Balance: ${free}`);
console.log(`Reserved Balance: ${reserved}`);
console.log(`Frozen Balance: ${frozen}`);
console.log("Account information fetched successfully");
process.exit(0);
}
// Execute the function
getAccountBalance();
```
2. Run the code using:
```bash filename="terminal" name="cmd2"
ts-node your-file-name.ts
```
#### avail-rust
1. Inside `main.rs`, add the following code:
```rust showLineNumbers filename="avail-rust" name="cmd3"
use avail_rust::prelude::*;
use core::str::FromStr;
pub async fn system_account() -> Result<(), ClientError> {
// Create a new SDK instance
let sdk = SDK::new("wss://turing-rpc.avail.so/ws").await?;
let account_id = AccountId::from_str("5CqgQkrDcdg5QrtuxT3H7WszrqgrBMhdwRbmMVXQzc4VSiEg").unwrap();
let block_hash = sdk.client.best_block_hash().await?;
let storage = sdk.client.storage().at(block_hash);
let address = avail::storage().system().account(account_id);
let result = storage.fetch(&address).await?;
if let Some(account) = result {
println!("Consumers: {}", account.consumers);
println!("Data: {:?}", account.data);
println!("Nonce: {}", account.nonce);
println!("Providers: {}", account.providers);
println!("Sufficients: {}", account.sufficients);
}
Ok(())
}
// Add a main function to call system_account
#[tokio::main]
async fn main() {
if let Err(e) = system_account().await {
eprintln!("Error: {:?}", e);
}
else {
println!("Account information fetched successfully");
}
}
```
2. Run the code using:
```bash filename="terminal" name="cmd4"
cargo run
```
#### avail-go
1. Inside `main.go`, add the following code:
```go showLineNumbers filename="avail-go" name="cmd5"
package main
import (
"fmt"
"log"
prim "github.com/availproject/avail-go-sdk/primitives"
"github.com/availproject/avail-go-sdk/sdk"
syPallet "github.com/availproject/avail-go-sdk/metadata/pallets/system"
"github.com/availproject/avail-go-sdk/primitives"
)
func main() {
// Initialize the SDK
sdk, err := sdk.NewSDK("https://turing-rpc.avail.so/rpc")
if err != nil {
log.Fatalf("Failed to initialize SDK: %v", err)
}
// Get the latest block hash
latestBlockHash, err := sdk.Client.BestBlockHash()
if err != nil {
log.Fatalf("Failed to get latest block hash: %v", err)
}
// Initialize the block storage
blockStorage, err := sdk.Client.StorageAt(prim.Some(latestBlockHash))
if err != nil {
log.Fatalf("Failed to get block storage: %v", err)
}
// Create the account ID
accountId, err := primitives.NewAccountIdFromAddress("5DDY2yzh8uCysYFAiRSTeQVwtZSKNF49CkQkyPH852xvrYKk")
if err != nil {
log.Fatalf("Failed to convert address: %v", err)
}
// Fetch the account data
storage := syPallet.StorageAccount{}
val, err := storage.Fetch(&blockStorage, accountId)
if err != nil {
log.Fatalf("Failed to fetch account: %v", err)
}
// Log the account data
fmt.Println("Free Balance: ", val.Value.AccountData.Free.ToHuman())
fmt.Println("Reserved Balance: ", val.Value.AccountData.Reserved.ToHuman())
fmt.Println("Frozen Balance: ", val.Value.AccountData.Frozen.ToHuman())
fmt.Println("Account information fetched successfully")
}
```
2. Run the code using:
```bash filename="terminal" name="cmd6"
go run main.go
```
> **Note**
>
> If you receive errors related to missing dependencies while trying to execute your code, run:
>
> ```bash filename="terminal" name="cmd7"
> go mod tidy
> ```
>
> and try again.
#### AvailApps explorer
The following instructions will guide you on how to query the balance of an account using the AvailApps explorer:
1. Go to the [`chains state` page](https://explorer.avail.so/#/chainstate) on the AvailApps explorer.
2. The balance of an account can be queried by calling the `account(AccountId32)` method from within the `system` pallet. Select the `system`
pallet from the dropdown on the left, and the `account(AccountId32)` method from the dropdown on the right.
3. Either paste the address of an account in the `AccountId32` field or select an explorer-connected account from the dropdown.
4. Leave the `blockhash` field empty (This will query the latest balance of the account), and click on the `+` button near the top-right.
5. And that's it. You just used the `AvailApps` explorer to query the balance of an account on the Avail network. You can query other methods in a similar way.
Your response should look something like this:
Sample Response:
```
{
nonce: '109',
consumers: '2',
providers: '1',
sufficients: '0',
data: {
free: '1,000,000,000,000',
reserved: '100,000,300,000,000,000,000',
frozen: '100,000,000,000,000,000,000',
flags: '170,141,183,460,469,231,731,687,303,715,884,105,728'
}
}
Free balance: 28.3046577073 AVAIL
```
## Fetch account information using a simple `curl` request via the Subscan API
1. The [Subscan API](https://support.subscan.io/) can be used to make API queries to the Subscan indexer to make various kinds of queries.
2. Subscan supports a variety of Substrate-based chains, including Avail DA mainnet and the Turing testnet.
3. You can either use their publicly available endpoints for the Avail networks, or use a [dedicated endpoint](https://pro.subscan.io/).
4. The examples below use publicly available Subscan API endpoints for both networks.
#### avail-mainnet
1. Open a terminal and run the following command:
```bash filename="terminal" name="cmd8"
curl --location --request POST 'https://avail.api.subscan.io/api/v2/scan/search' \
--header 'Content-Type: application/json' \
--data-raw '{
"key": ""
}'
```
2. Replace `` with the address you want to query.
Sample Response:
```json filename="JSON response"
{
"code": 0,
"message": "Success",
"generated_at": 1741796675,
"data": {
"account": {
"address": "5HbUMBK8SBKH22qrm2sRDtWNtfyT331tUHpKkFMUKyirkJ6G",
"balance": "169389.0977233184983879",
"lock": "168914.456888072538284769",
"balance_lock": "168914.456888072538284769",
"is_evm_contract": false,
"account_display": {
"address": "5HbUMBK8SBKH22qrm2sRDtWNtfyT331tUHpKkFMUKyirkJ6G"
},
"substrate_account": null,
"evm_account": "",
"registrar_info": null,
"count_extrinsic": 0,
"nft_amount": "0",
"extra": null,
"display": "",
"web": "",
"riot": "",
"email": "",
"legal": "",
"twitter": "",
"github": "",
"matrix": "",
"discord": "",
"judgements": null,
"reserved": "13000000000000000000",
"bonded": "168914456888072538284769",
"unbonding": "0",
"democracy_lock": "0",
"conviction_lock": "0",
"election_lock": "0",
"staking_info": null,
"nonce": 0,
"role": "validator",
"stash": "5HbUMBK8SBKH22qrm2sRDtWNtfyT331tUHpKkFMUKyirkJ6G",
"is_council_member": false,
"is_techcomm_member": false,
"is_registrar": false,
"is_fellowship_member": false,
"is_module_account": false,
"assets_tag": null,
"is_erc20": false,
"is_erc721": false,
"vesting": null,
"proxy": {
"proxy_account": [
{
"account_display": {
"address": "5HmgLcTCi2trnz4AeEiWs4ngAjALu7o4mFnpKdMBnA8jhFnq"
},
"proxy_type": "Staking"
}
]
},
"multisig": {
"multi_account_member": [
{
"address": "5DfE73hjEYs44JHsuMKzrTMBzkEb6fosaV5xSUEVNjrHwqdB"
},
{
"address": "5DtGLPULvxXoSPvVv2YZdWmCJy8eEYnWj7MwPpdwGgDnFiua"
},
{
"address": "5DyHKiRY2ssTWU4CtbbEPoYFmNKaN2X39KRcgb33fnZqk2Yd"
}
],
"threshold": 2
},
"delegate": null
}
}
}
```
#### turing-testnet
1. Open a terminal and run the following command:
```bash filename="terminal" name="cmd9"
curl --location --request POST 'https://avail-turing.api.subscan.io/api/v2/scan/search' \
--header 'Content-Type: application/json' \
--data-raw '{
"key": ""
}'
```
2. Replace `` with the address you want to query.
Sample Response:
```json filename="JSON response"
{
"code": 0,
"message": "Success",
"generated_at": 1741798906,
"data": {
"account": {
"address": "5DDY2yzh8uCysYFAiRSTeQVwtZSKNF49CkQkyPH852xvrYKk",
"balance": "16360.7888064893714931",
"lock": "1131.93873839810825155",
"balance_lock": "1131.93873839810825155",
"is_evm_contract": false,
"account_display": {
"address": "5DDY2yzh8uCysYFAiRSTeQVwtZSKNF49CkQkyPH852xvrYKk"
},
"substrate_account": null,
"evm_account": "",
"registrar_info": null,
"count_extrinsic": 54,
"nft_amount": "0",
"extra": null,
"display": "",
"web": "",
"riot": "",
"email": "",
"legal": "",
"twitter": "",
"github": "",
"matrix": "",
"discord": "",
"judgements": null,
"reserved": "15100000000000000000",
"bonded": "1131938738398108251550",
"unbonding": "0",
"democracy_lock": "0",
"conviction_lock": "0",
"election_lock": "0",
"staking_info": null,
"nonce": 54,
"role": "nominator",
"stash": "5DDY2yzh8uCysYFAiRSTeQVwtZSKNF49CkQkyPH852xvrYKk",
"is_council_member": false,
"is_techcomm_member": false,
"is_registrar": false,
"is_fellowship_member": false,
"is_module_account": false,
"assets_tag": null,
"is_erc20": false,
"is_erc721": false,
"is_pool_member": true,
"vesting": null,
"proxy": {
"proxy_account": [
{
"account_display": {
"address": "5GvF6GLPuxbseH5qC9w8doUiCMnT4vGvY3Rznu3Fktdw4N45"
},
"proxy_type": "NonTransfer"
}
]
},
"multisig": {
"multi_account": [
{
"address": "5DSCqHHH3whUA3xgkyVSekXB36Gc47SwsJEHLuab5RnFvNua"
}
]
},
"delegate": null,
"nomination_pool_balance": [
{
"pool_id": 3,
"bonded": "100000000000000000000",
"unbonding": "0",
"claimable": "0"
}
]
}
}
}
```
### Transfer Balances
> **Note**
>
> **SETTING UP THE DEV ENVIRONMENT**
> In this guide we will use Avail's dedicated SDKs to interact with the [Turing testnet](/docs/da/networks).
> To set up a dev environment for the SDK of your choice, please follow the steps [outlined here](/docs/da/api-reference/avail-node-api#setting-up-the-dev-environment).
## Transferring funds programmatically
You can transfer `AVAIL` from one account to another programmatically by calling any one of these three extrinsics
from the `balances` pallet on an Avail node:
1. `balances_transferKeepAlive`: Transfers funds from one account to another, but does not allow the sender balance
to dip below the existential deposit.
2. `balances_transferAllowDeath`: Transfers funds from one account to another, and allows the sender balance to dip below
the existential deposit.
3. `balances_transferAll`: Transfers all funds from one account to another.
> **Note**
>
> **EXISTENTIAL DEPOSIT**
> Only accounts with a balance equal to or greater than the `existential deposit` are stored on the state trie.
> The current value of the existential deposit is `0.000001 AVAIL`.
> Any account whose balance dips below this amount is *'reaped'*.
### Transferring funds using `balances_transferKeepAlive`
#### avail-js
1. Inside `your-file-name.ts`, add the following code:
```typescript showLineNumbers filename="avail-js" name="cmd1"
import * as dotenv from 'dotenv';
import { Account, SDK, BN } from 'avail-js-sdk';
dotenv.config();
export async function transferKeepAlive() {
// Initialize SDK with Turing endpoint
const sdk = await SDK.New('wss://turing-rpc.avail.so/ws');
// Create account from seed in .env file
const seed = process.env.SEED;
if (!seed) {
throw new Error("SEED environment variable is not set");
}
// Create account from seed
const account = Account.new(seed);
console.log("Sender Address: ", account.address);
// Destination address to send AVAIL to
const destinationAddress = "5DDY2yzh8uCysYFAiRSTeQVwtZSKNF49CkQkyPH852xvrYKk";
console.log("Recipient Address: ", destinationAddress);
// Amount to transfer: 12 AVAIL
const amount = new BN('12000000000000000000'); // 12 with 18 zeroes
console.log("Transfer Amount: 12 AVAIL");
// Create transfer transaction
const tx = sdk.tx.balances.transferKeepAlive(destinationAddress, amount);
console.log("Submitting transfer transaction...");
// Execute and wait for inclusion
const res = await tx.executeWaitForInclusion(account, {});
// Check if transaction was successful
const isOk = res.isSuccessful();
if (isOk === undefined) {
throw new Error("Cannot check if transaction was successful");
}
else if (!isOk) {
throw new Error("Transaction failed");
}
console.log(`Transaction Hash: ${res.txHash}`);
console.log(`Block Hash: ${res.blockHash}`);
console.log(`Block Number: ${res.blockNumber}`);
console.log("Transfer completed successfully");
process.exit(0);
}
// Execute the function
transferKeepAlive();
```
2. Run the code using:
```bash filename="terminal" name="cmd2"
ts-node your-file-name.ts
```
#### avail-rust
1. Inside `main.rs`, add the following code:
```rust showLineNumbers filename="avail-rust" name="cmd3"
use dotenvy::dotenv;
use std::env;
use avail_rust::prelude::*;
use core::str::FromStr;
pub async fn transfer_keep_alive() -> Result<(), ClientError> {
// Create a new SDK instance
let sdk = SDK::new("wss://turing-rpc.avail.so/ws").await?;
// Loading seed phrase and creating an account derived from the seed
dotenv().ok();
let seed = env::var("SEED").expect("SEED environment variable is not set");
let account = account::from_secret_uri(&seed)?;
println!("Account Address: {}", account.public_key().to_account_id());
// Executing the transaction
let dest = AccountId::from_str("5HGjWAeFDfFCWPsjFQdVV2Msvz2XtMktvgocEZcCj68kUMaw").unwrap();
let amount = 1_000_000_000_000_000_000u128; // 1 AVAIL being transferred to the destination account
let tx = sdk.tx.balances.transfer_keep_alive(dest, amount);
let res = tx.execute_and_watch_inclusion(&account, Options::default()).await?;
println!(
"Block Hash: {:?}, Block Number: {}, Tx Hash: {:?}, Tx Index: {}",
res.block_hash, res.block_number, res.tx_hash, res.tx_index
);
println!("Transfer completed successfully");
Ok(())
}
// Add a main function to call transfer_keep_alive
#[tokio::main]
async fn main() {
if let Err(e) = transfer_keep_alive().await {
eprintln!("Error: {:?}", e);
}
}
```
2. Run the code using:
```bash filename="terminal" name="cmd4"
cargo run
```
#### avail-go
1. Inside `main.go`, add the following code:
```go showLineNumbers filename="avail-go" name="cmd5"
package main
import (
"fmt"
"log"
"os"
"github.com/availproject/avail-go-sdk/metadata"
"github.com/availproject/avail-go-sdk/primitives"
SDK "github.com/availproject/avail-go-sdk/sdk"
"github.com/joho/godotenv"
)
func main() {
// Load environment variables from .env file
err := godotenv.Load()
if err != nil {
log.Fatal("Error loading .env file")
}
// Make sure the SEED environment variable is set
seed := os.Getenv("SEED")
if seed == "" {
log.Fatal("SEED environment variable is not set")
}
// Create an account from the SEED environment variable
acc, err := SDK.Account.NewKeyPair(seed)
if err != nil {
log.Fatalf("Failed to create account: %v", err)
}
fmt.Println("Your account Address: " + acc.SS58Address(42))
// Initialize an SDK instance
sdk, err := SDK.NewSDK("https://turing-rpc.avail.so/rpc")
if err != nil {
log.Fatalf("Failed to initialize SDK: %v", err)
}
// Destination address
destAddress, err := primitives.NewAccountIdFromAddress("5DDY2yzh8uCysYFAiRSTeQVwtZSKNF49CkQkyPH852xvrYKk")
if err != nil {
log.Fatalf("Failed to convert address: %v", err)
}
dest := destAddress.ToMultiAddress()
// Create a Balance from a string
// The value is 10 AVAIL
amount, err := metadata.NewBalanceFromString("10000000000000000000")
if err != nil {
log.Fatalf("Failed to create balance: %v", err)
}
// Transferring funds while ensuring the sender's account
// retains a minimum balance
tx := sdk.Tx.Balances.TransferKeepAlive(dest, amount)
// Execute the transaction
res, err := tx.ExecuteAndWatchInclusion(acc, SDK.NewTransactionOptions())
if err != nil {
log.Fatalf("Transaction failed: %v", err)
}
// Check if the transaction was successful
if !res.IsSuccessful().UnsafeUnwrap() {
log.Fatal("Transaction was not successful")
}
fmt.Println("Transaction successful")
// Printing out all the values of the transaction
fmt.Println(fmt.Sprintf(`Block Hash: %v, Block Index: %v, Tx Hash: %v, Tx Index: %v`, res.BlockHash.ToHexWith0x(), res.BlockNumber, res.TxHash.ToHexWith0x(), res.TxIndex))
fmt.Println("Transfer completed successfully")
}
```
2. Run the code using:
```bash filename="terminal" name="cmd6"
go run main.go --config config.json
```
> **Note**
>
> If you receive errors related to missing dependencies while trying to execute your code, run:
>
> ```bash filename="terminal" name="cmd7"
> go mod tidy
> ```
>
> and try again.
#### AvailApps explorer
1. Go to the [`extrinsics` page](https://explorer.avail.so/#/extrinsics) on the AvailApps explorer.
2. Select an account which has funds on the network.
3. Select the `balances` pallet from the dropdown on the left,
4. Select the `transferKeepAlive` extrinsic from the dropdown on the right.
5. Fill in the `dest` field with the address of the account you want to send funds to.
6. Click on `Submit Transaction` , and then click on `Sign and Submit`.
> **Note**
>
> **DON'T CHANGE THE APPID**
> Transferring funds from one address to the other is a chain-level operation, independent of any `AppID`.
> All such operations are executed with the `AppID set to 0`.
Your response should look something like this:
Sample Response:
```
From=5CqgQkrDcdg5QrtuxT3H7WszrqgrBMhdwRbmMVXQzc4VSiEg, To=5DDY2yzh8uCysYFAiRSTeQVwtZSKNF49CkQkyPH852xvrYKk, Amount=10000000000000000000
TxHash=0x45a3ec18b96c2bff0d92d70ba5f0fa904b79a49610e845b72d16ccf7c094533d, BlockHash=0x9fa20525f0db53e144ff595f00728611d60bd5d5e597f07b82123301067e90be
```
### Transferring funds using `balances_transferAllowDeath`
#### avail-js
1. Inside `your-file-name.ts`, add the following code:
```typescript showLineNumbers filename="avail-js" name="cmd8"
import * as dotenv from 'dotenv';
import { Account, SDK, BN } from 'avail-js-sdk';
dotenv.config();
export async function transferAllowDeath() {
// Initialize SDK with Turing endpoint
const sdk = await SDK.New('wss://turing-rpc.avail.so/ws');
// Create account from seed in .env file
const seed = process.env.SEED;
if (!seed) {
throw new Error("SEED environment variable is not set");
}
// Create account from seed
const account = Account.new(seed);
console.log("Sender Address: ", account.address);
// Destination address to send AVAIL to
const destinationAddress = "5DDY2yzh8uCysYFAiRSTeQVwtZSKNF49CkQkyPH852xvrYKk";
console.log("Recipient Address: ", destinationAddress);
// Amount to transfer: 12.345 AVAIL
const amount = new BN('12345000000000000000');
// Create transfer transaction
const tx = sdk.tx.balances.transferAllowDeath(destinationAddress, amount);
console.log("Submitting transfer transaction...");
// Execute and wait for inclusion
const res = await tx.executeWaitForInclusion(account, {});
// Check if transaction was successful
const isOk = res.isSuccessful();
if (isOk === undefined) {
throw new Error("Cannot check if transaction was successful");
}
else if (!isOk) {
throw new Error("Transaction failed");
}
console.log(`Transaction Hash: ${res.txHash}`);
console.log(`Block Hash: ${res.blockHash}`);
console.log(`Block Number: ${res.blockNumber}`);
console.log("Transfer completed successfully");
process.exit(0);
}
// Execute the function
transferAllowDeath();
```
2. Run the code using:
```bash filename="terminal" name="cmd9"
ts-node your-file-name.ts
```
#### avail-rust
1. Inside `main.rs`, add the following code:
```rust showLineNumbers filename="avail-rust" name="cmd10"
use dotenvy::dotenv;
use std::env;
use avail_rust::prelude::*;
use core::str::FromStr;
pub async fn transfer_allow_death() -> Result<(), ClientError> {
// Create a new SDK instance
let sdk = SDK::new("wss://turing-rpc.avail.so/ws").await?;
// Loading seed phrase and creating an account derived from the seed
dotenv().ok();
let seed = env::var("SEED").expect("SEED environment variable is not set");
let account = account::from_secret_uri(&seed)?;
println!("Account Address: {}", account.public_key().to_account_id());
// Executing the transaction
let dest = AccountId::from_str("5HGjWAeFDfFCWPsjFQdVV2Msvz2XtMktvgocEZcCj68kUMaw").unwrap();
let amount = 12_345_000_000_000_000_000u128; // 12.345 AVAIL being transferred to the destination account
let tx = sdk.tx.balances.transfer_allow_death(dest, amount);
let res = tx.execute_and_watch_inclusion(&account, Options::default()).await?;
println!(
"Block Hash: {:?}, Block Number: {}, Tx Hash: {:?}, Tx Index: {}",
res.block_hash, res.block_number, res.tx_hash, res.tx_index
);
println!("Transfer completed successfully");
Ok(())
}
// Add a main function to call transfer_allow_death
#[tokio::main]
async fn main() {
if let Err(e) = transfer_allow_death().await {
eprintln!("Error: {:?}", e);
}
}
```
2. Run the code using:
```bash filename="terminal" name="cmd11"
cargo run
```
#### avail-go
1. Inside `main.go`, add the following code:
```go showLineNumbers filename="avail-go" name="cmd12"
package main
import (
"fmt"
"log"
"os"
"github.com/availproject/avail-go-sdk/metadata"
"github.com/availproject/avail-go-sdk/primitives"
SDK "github.com/availproject/avail-go-sdk/sdk"
"github.com/joho/godotenv"
)
func main() {
// Load environment variables from .env file
err := godotenv.Load()
if err != nil {
log.Fatal("Error loading .env file")
}
// Make sure the SEED environment variable is set
seed := os.Getenv("SEED")
if seed == "" {
log.Fatal("SEED environment variable is not set")
}
// Create an account from the SEED environment variable
acc, err := SDK.Account.NewKeyPair(seed)
if err != nil {
log.Fatalf("Failed to create account: %v", err)
}
fmt.Println("Your account Address: " + acc.SS58Address(42))
// Initialize an SDK instance
sdk, err := SDK.NewSDK("https://turing-rpc.avail.so/rpc")
if err != nil {
log.Fatalf("Failed to initialize SDK: %v", err)
}
// Destination address
destAddress, err := primitives.NewAccountIdFromAddress("5DDY2yzh8uCysYFAiRSTeQVwtZSKNF49CkQkyPH852xvrYKk")
if err != nil {
log.Fatalf("Failed to convert address: %v", err)
}
dest := destAddress.ToMultiAddress()
// Create a Balance from a string
// The value is 10 AVAIL
amount, err := metadata.NewBalanceFromString("10000000000000000000")
if err != nil {
log.Fatalf("Failed to create balance: %v", err)
}
// Transferring funds without the
// necessary checks of keeping the sender's account alive
tx := sdk.Tx.Balances.TransferAllowDeath(dest, amount)
// Execute the transaction
res, err := tx.ExecuteAndWatchInclusion(acc, SDK.NewTransactionOptions())
if err != nil {
log.Fatalf("Transaction failed: %v", err)
}
// Check if the transaction was successful
if !res.IsSuccessful().UnsafeUnwrap() {
log.Fatal("Transaction was not successful")
}
fmt.Println("Transaction successful")
// Printing out all the values of the transaction
fmt.Println(fmt.Sprintf(`Block Hash: %v, Block Index: %v, Tx Hash: %v, Tx Index: %v`, res.BlockHash.ToHexWith0x(), res.BlockNumber, res.TxHash.ToHexWith0x(), res.TxIndex))
fmt.Println("Transfer completed successfully")
}
```
2. Run the code using:
```bash filename="terminal" name="cmd13"
go run main.go
```
> **Note**
>
> If you receive errors related to missing dependencies while trying to execute your code, run:
>
> ```bash filename="terminal" name="cmd14"
> go mod tidy
> ```
>
> and try again.
#### AvailApps explorer
> **Note**
>
> Follow the same steps as before to use this extrinsic from the AvailApps explorer.
> The only difference being that you need to select `balances_transferAllowDeath` from the dropdown.
Your response should look something like this:
Sample Response:
```
From=5CqgQkrDcdg5QrtuxT3H7WszrqgrBMhdwRbmMVXQzc4VSiEg, To=5HGjWAeFDfFCWPsjFQdVV2Msvz2XtMktvgocEZcCj68kUMaw, Amount=12000000000000000000
MaybeKilled=undefined
TxHash=0x4be89fffca3b7849066c3a7b6b29af318caa49ca12a1ba17610b0a30d97fd30e, BlockHash=0x861531ee9512849cec0bde5294bb65098424c84e3ab64b6c25722574370d8224
```
### Transferring funds using `balances_transferAll`
#### avail-js
1. Inside `your-file-name.ts`, add the following code:
```typescript showLineNumbers filename="avail-js" name="cmd15"
import * as dotenv from 'dotenv';
import { Account, SDK } from 'avail-js-sdk';
dotenv.config();
export async function transferAll() {
// Initialize SDK with Turing endpoint
const sdk = await SDK.New('wss://turing-rpc.avail.so/ws');
// Create account from seed in .env file
const seed = process.env.SEED;
if (!seed) {
throw new Error("SEED environment variable is not set");
}
// Create account from seed
const account = Account.new(seed);
console.log("Sender Address: ", account.address);
// Destination address to send all available AVAIL to
const destinationAddress = "5DDY2yzh8uCysYFAiRSTeQVwtZSKNF49CkQkyPH852xvrYKk";
console.log("Recipient Address: ", destinationAddress);
// Setting this value to false will reap your account
const keepAlive = true;
// Create transfer all transaction
const tx = sdk.tx.balances.transferAll(destinationAddress, keepAlive);
console.log("Submitting transfer all transaction...");
// Execute and wait for inclusion
const res = await tx.executeWaitForInclusion(account, {});
// Check if transaction was successful
const isOk = res.isSuccessful();
if (isOk === undefined) {
throw new Error("Cannot check if transaction was successful");
}
else if (!isOk) {
throw new Error("Transaction failed");
}
console.log("Transfer all completed successfully");
console.log(`Transaction Hash: ${res.txHash}`);
console.log(`Block Hash: ${res.blockHash}`);
console.log(`Block Number: ${res.blockNumber}`);
process.exit(0);
}
// Execute the function
transferAll();
```
2. Run the code using:
```bash filename="terminal" name="cmd16"
ts-node your-file-name.ts
```
#### avail-rust
1. Inside `main.rs`, add the following code:
```rust showLineNumbers filename="avail-rust" name="cmd17"
use dotenvy::dotenv;
use std::env;
use avail_rust::prelude::*;
use core::str::FromStr;
pub async fn transfer_all() -> Result<(), ClientError> {
// Create a new SDK instance
let sdk = SDK::new("wss://turing-rpc.avail.so/ws").await?;
// Loading seed phrase and creating an account derived from the seed
dotenv().ok();
let seed = env::var("SEED").expect("SEED environment variable is not set");
let account = account::from_secret_uri(&seed)?;
println!("Account Address: {}", account.public_key().to_account_id());
// Executing the transaction
let dest = AccountId::from_str("5HGjWAeFDfFCWPsjFQdVV2Msvz2XtMktvgocEZcCj68kUMaw").unwrap();
// Please take note of the `keep_alive` bool parameter
// If set to true, the transfer transaction will leave the origin account with a small balance
// that is above the existential deposit and prevents the account from being reaped
// Set the `keep_alive` parameter to `false` only if you are ok with the origin account being reaped
let tx = sdk.tx.balances.transfer_all(dest, true);
let res = tx.execute_and_watch_inclusion(&account, Options::default()).await?;
println!(
"Block Hash: {:?}, Block Number: {}, Tx Hash: {:?}, Tx Index: {}",
res.block_hash, res.block_number, res.tx_hash, res.tx_index
);
Ok(())
}
// Add a main function to call transfer_all
#[tokio::main]
async fn main() {
if let Err(e) = transfer_all().await {
eprintln!("Error: {:?}", e);
}
}
```
2. Run the code using:
```bash filename="terminal" name="cmd18"
cargo run
```
#### avail-go
1. Inside `main.go`, add the following code:
```go showLineNumbers filename="avail-go" name="cmd19"
package main
import (
"fmt"
"log"
"os"
"github.com/availproject/avail-go-sdk/primitives"
SDK "github.com/availproject/avail-go-sdk/sdk"
"github.com/joho/godotenv"
)
func main() {
// Load environment variables from .env file
err := godotenv.Load()
if err != nil {
log.Fatal("Error loading .env file")
}
// Make sure the SEED environment variable is set
seed := os.Getenv("SEED")
if seed == "" {
log.Fatal("SEED environment variable is not set")
}
// Create an account from the SEED environment variable
acc, err := SDK.Account.NewKeyPair(seed)
if err != nil {
log.Fatalf("Failed to create account: %v", err)
}
fmt.Println("Your account Address: " + acc.SS58Address(42))
// Initialize an SDK instance
sdk, err := SDK.NewSDK("https://turing-rpc.avail.so/rpc")
if err != nil {
log.Fatalf("Failed to initialize SDK: %v", err)
}
// Convert the hex string to a MultiAddress
destAddress, err := primitives.NewAccountIdFromAddress("5DDY2yzh8uCysYFAiRSTeQVwtZSKNF49CkQkyPH852xvrYKk")
if err != nil {
log.Fatalf("Failed to convert address: %v", err)
}
dest := destAddress.ToMultiAddress()
// Set to false if you don't want to keep the account alive
keepAlive := true
// Transferring all funds
tx := sdk.Tx.Balances.TransferAll(dest, keepAlive)
// Execute the transaction
res, err := tx.ExecuteAndWatchInclusion(acc, SDK.NewTransactionOptions())
if err != nil {
log.Fatalf("Transaction failed: %v", err)
}
// Check if the transaction was successful
if !res.IsSuccessful().UnsafeUnwrap() {
log.Fatal("Transaction was not successful")
}
fmt.Println("Transaction successful")
// Printing out all the values of the transaction
fmt.Println(fmt.Sprintf(`Block Hash: %v, Block Index: %v, Tx Hash: %v, Tx Index: %v`, res.BlockHash.ToHexWith0x(), res.BlockNumber, res.TxHash.ToHexWith0x(), res.TxIndex))
}
```
2. Run the code using:
```bash filename="terminal" name="cmd20"
go run main.go
```
> **Note**
>
> If you receive errors related to missing dependencies while trying to execute your code, run:
>
> ```bash filename="terminal" name="cmd21"
> go mod tidy
> ```
>
> and try again.
#### AvailApps explorer
> **Note**
>
> Follow the same steps as before to use this extrinsic from the AvailApps explorer.
> The only difference being that:
>
> 1. You need to select `balances_transferAll` from the dropdown.
> 2. You don't need to fill in an `amount` that you want to transfer, since this extrinsic transfers all funds from the sender's account.
Your response should look something like this:
Sample Response:
```
From=5CqgQkrDcdg5QrtuxT3H7WszrqgrBMhdwRbmMVXQzc4VSiEg, To=5DDY2yzh8uCysYFAiRSTeQVwtZSKNF49CkQkyPH852xvrYKk, Amount=14967497534555492726990
TxHash=0x3dbf0865aae15137e1fe3f922d70b7ff514a8c27e712d12ea1a8a1d4a7af9437, BlockHash=0x129745d18065f66f106b3744fe73ab5f9a1d7cb6205b271d13119399d3a56d31
```
> If you check the balance of the sender account now, it will either be `0` or equal to the `existential deposit` amount, if
> the account is unable to be reaped due to dependencies on the network.
> In this case, while the account will continue to exist on the state trie, it's balance will be too low to perform any operations.
### Read & Write Data
> **Note**
>
> **BEFORE YOU BEGIN**
> We recommend you go through these two pages in our docs before proceeding:
>
> 1. [`Get Testnet Tokens`](/docs/da/build/interact/faucet): To help you get set with some `AVAIL` tokens on the Turing testnet.
> 2. [`Create an AppID`](/docs/da/build/interact/app-id): The guide below focusses on reading & submitting data on a particular AppID. It will help
> to be familiar with the concept.
## Setting up the dev environment
In this guide we will use some dedicated libraries to interact with Avail DA.
To set up a dev environment for `avail-js`, please follow the steps [outlined here](/docs/da/api-reference/avail-node-api#setting-up-the-dev-environment).
## Submitting data to Avail DA
#### avail-js
1. Create a file named `your-file-name.ts`
2. Paste the following code into the file:
This piece of code submits:
* A string named `data` to Avail DA
* to the `appID` of 89
* We expect devs to submit data to their own specific `appID`s.
```typescript showLineNumbers filename="avail-js" name="cmd1"
import * as dotenv from 'dotenv';
import { Account, SDK, Pallets } from 'avail-js-sdk';
dotenv.config();
export async function submitData() {
// Initialize the SDK with a public Turing testnet endpoint
// You can always switch it out with your own endpoint
const sdk = await SDK.New('wss://turing-rpc.avail.so/ws');
// Loading seed phrase and creating an account derived from the seed
const seed = process.env.SEED;
if (!seed) {
throw new Error("SEED environment variable is not set");
}
// Create account from seed
const account = Account.new(seed);
console.log("Account Address: ", account.address);
// Replace with your own AppID
const appId = 89;
console.log(`Submitting data to App Id: ${appId}`);
// Create data submission transaction
const data = "My Data Submission";
const tx = sdk.tx.dataAvailability.submitData(data);
console.log("Submitting transaction with data...");
// Execute and wait for inclusion with app_id
const res = await tx.executeWaitForInclusion(account, { app_id: appId });
// Check if transaction was successful
const isOk = res.isSuccessful();
if (isOk === undefined) {
throw new Error("Cannot check if transaction was successful");
}
else if (!isOk) {
throw new Error("Transaction failed");
}
// Extract event data
if (res.events === undefined) throw new Error("No events found");
// Transaction Details
console.log(
`Block Hash: ${res.blockHash}, Block Number: ${res.blockNumber}, Tx Hash: ${res.txHash}, Tx Index: ${res.txIndex}`
);
// Find DataSubmitted event
const event = res.events.findFirst(Pallets.DataAvailabilityEvents.DataSubmitted);
if (event === undefined) throw new Error("DataSubmitted event not found");
console.log(`Data submitted successfully:`);
console.log(`Who: ${event.who}`);
console.log(`DataHash: ${event.dataHash}`);
console.log("Data submission completed successfully");
process.exit(0);
}
submitData()
```
3. Run the script using the following command:
```bash filename="terminal" name="cmd2"
ts-node your-file-name.ts
```
#### avail-rust
1. Create a file named `main.rs`
2. Paste the following code into the file:
This piece of code submits:
* A string named `data` to Avail DA
* to the `appID` of 1
* We expect devs to submit data to their own specific `appID`s.
```rust showLineNumbers filename="avail-rust" name="cmd3"
use dotenvy::dotenv;
use std::env;
use avail_rust::prelude::*;
type DataSubmissionCall = avail::data_availability::calls::types::SubmitData;
pub async fn submit_data() -> Result<(), ClientError> {
// Create a new SDK instance
let sdk = SDK::new("wss://turing-rpc.avail.so/ws").await?;
// Loading seed phrase and creating an account derived from the seed
dotenv().ok();
let seed = env::var("SEED").expect("SEED environment variable is not set");
let account = account::from_secret_uri(&seed)?;
println!("Account Address: {}", account.public_key().to_account_id());
// Please note that the tx will fail if this application key does not exist
let my_application_key = 1;
// Data Submission
let data = String::from("My Data").into_bytes();
let options = Options::new().app_id(my_application_key);
let tx = sdk.tx.data_availability.submit_data(data);
let res = tx.execute_and_watch_inclusion(&account, options).await?;
assert_eq!(res.is_successful(), Some(true), "Transactions must be successful");
println!(
"Block Hash: {:?}, Block Number: {}, Tx Hash: {:?}, Tx Index: {}",
res.block_hash, res.block_number, res.tx_hash, res.tx_index
);
// Decoding
let decoded = res.decode_as::().await?;
let Some(decoded) = decoded else {
return Err("Failed to get Data Submission Call data".into());
};
let data = to_ascii(decoded.data.0).unwrap();
println!("Call data: {:?}", data);
println!("Data Submission finished correctly");
Ok(())
}
// Add a main function to call submit_data
#[tokio::main]
async fn main() {
if let Err(e) = submit_data().await {
eprintln!("Error: {:?}", e);
}
}
```
3. Run the script using the following command:
```bash filename="terminal" name="cmd4"
cargo run
```
#### avail-go
1. Create a file named `main.go`
2. Paste the following code into the file:
This piece of code submits:
* A string to Avail DA
* to the `appID` of 89
* We expect devs to submit data to their own specific `appID`s.
```go showLineNumbers filename="avail-go" name="cmd5"
package main
import (
"fmt"
"log"
"os"
SDK "github.com/availproject/avail-go-sdk/sdk"
"github.com/joho/godotenv"
)
func main() {
// Load environment variables from .env file
err := godotenv.Load()
if err != nil {
log.Fatal("Error loading .env file")
}
// Make sure the SEED environment variable is set
seed := os.Getenv("SEED")
if seed == "" {
log.Fatal("SEED environment variable is not set")
}
// Create an account from the SEED environment variable
acc, err := SDK.Account.NewKeyPair(seed)
if err != nil {
log.Fatalf("Failed to create account: %v", err)
}
fmt.Println("Your account Address: " + acc.SS58Address(42))
// Initialize an SDK instance
sdk, err := SDK.NewSDK("https://turing-rpc.avail.so/rpc")
if err != nil {
log.Fatalf("Failed to initialize SDK: %v", err)
}
// Submit data to Avail
appId := uint32(89)
tx := sdk.Tx.DataAvailability.SubmitData([]byte("Submitting some data using avail-go-sdk"))
res, err := tx.ExecuteAndWatchInclusion(acc, SDK.NewTransactionOptions().WithAppId(appId))
if err != nil {
log.Fatalf("Transaction failed: %v", err)
}
// Check if the transaction was successful
if !res.IsSuccessful().UnsafeUnwrap() {
log.Fatal("Transaction was not successful")
}
// Printing out all the values of the transaction
fmt.Println(fmt.Sprintf(`Block Hash: %v, Block Index: %v, Tx Hash: %v, Tx Index: %v`, res.BlockHash.ToHexWith0x(), res.BlockNumber, res.TxHash.ToHexWith0x(), res.TxIndex))
fmt.Println("Data submission completed successfully")
}
```
3. Run the script using the following command:
```bash filename="terminal" name="cmd6"
go run main.go
```
#### AvailApps explorer
1. Go to the [`extrinsics` page](https://explorer.avail.so/#/extrinsics) on the AvailApps explorer.
2. Select an account which has funds on the network.
3. Select the `dataAvailability` pallet from the dropdown on the left.
4. Select the `submitData` extrinsic from the dropdown on the right.
5. Enter the data you want to submit in the `data` field.
6. Click on `Submit Transaction` and fill in the details in the pop-up window.
> **Note**
>
> The `appID` should be an integer that represents a valid AppID on the network.
> To check out how to create an AppID on Avail, [refer to this page](/docs/da/build/interact/app-id).
7. Click on `Sign and Submit` and approve the transaction in your wallet.
## Fetch data submission transactions from Avail DA
### Fetch data submissions using transaction hash and block hash
> You can read back your submitted data from Avail DA using the `blockHash` and `txHash` of the transaction.
#### avail-js
1. Create a file named `your-file-name.ts`
2. Paste the following code into the file:
```typescript showLineNumbers filename="avail-js" name="cmd7"
import { SDK, Block } from 'avail-js-sdk';
export async function readDataByHash() {
// Initialize SDK with Turing endpoint
const sdk = await SDK.New('wss://turing-rpc.avail.so/ws');
// Transaction hash and block hash to look up
const txHash = "0x70d8cc521c341d717f5b11d1898fc7a21f9d894c3617929aaabaea71c4814911";
const blockHash = "0xd5f95593d91a581d7ce7b8717789298345be4be47e75ba93e7159cfe23083a7b";
console.log(`Looking up transaction: ${txHash}`);
console.log(`In block: ${blockHash}`);
// Create a Block object for the specified block hash
const block = await Block.New(sdk.client, blockHash);
// Get data submissions for the specified transaction hash
const blobs = block.dataSubmissions({ txHash: txHash });
console.log(`Found ${blobs.length} data submission(s)`);
// Display information for each data blob
if (blobs.length === 0) {
console.log("No data submissions found for this transaction");
} else {
console.log("\nData Submission Details:");
for (const blob of blobs) {
console.log(`Tx Hash: ${blob.txHash}`);
console.log(`Tx Index: ${blob.txIndex}`);
console.log(`Data (ASCII): ${blob.toAscii()}`);
console.log(`App Id: ${blob.appId}`);
console.log(`Signer: ${blob.txSigner}`);
console.log("---");
}
}
console.log("Data retrieval completed successfully");
process.exit(0);
}
readDataByHash()
```
3. Run the script using the following command:
```bash filename="terminal" name="cmd8"
ts-node your-file-name.ts
```
#### avail-rust
1. Create a file named `main.rs`
2. Paste the following code into the file:
```rust showLineNumbers filename="avail-rust" name="cmd9"
use avail_rust::prelude::*;
pub async fn read_data_by_hash() -> Result<(), ClientError> {
// Create a new SDK instance
let sdk = SDK::new("wss://turing-rpc.avail.so/ws").await?;
let block_hash = new_h256_from_hex("0xd5f95593d91a581d7ce7b8717789298345be4be47e75ba93e7159cfe23083a7b")?;
let block = Block::new(&sdk.client, block_hash).await?;
// All Block Blobs by Hash
let tx_hash = new_h256_from_hex("0x70d8cc521c341d717f5b11d1898fc7a21f9d894c3617929aaabaea71c4814911")?;
let blobs = block.data_submissions(Filter::new().tx_hash(tx_hash));
assert_eq!(blobs.len(), 1, "");
let blob = &blobs[0];
// Printout All Block Blobs by Hash
let blob_data = blob.to_ascii().unwrap();
assert_eq!(blob.tx_hash, tx_hash, "Tx Hash must be the same");
println!(
"Tx Hash: {:?}, Tx Index: {}, Data: {:?}, App Id: {}, Tx Singer: {:?}",
blob.tx_hash,
blob.tx_index,
blob_data,
blob.app_id,
blob.ss58address(),
);
println!("Data retrieval completed successfully");
Ok(())
}
// Add a main function to call submit_data
#[tokio::main]
async fn main() {
if let Err(e) = read_data_by_hash().await {
eprintln!("Error: {:?}", e);
}
}
```
3. Run the script using the following command:
```bash filename="terminal" name="cmd10"
cargo run
```
#### avail-go
1. Create a file named `main.go`
2. Paste the following code into the file:
```go showLineNumbers filename="avail-go" name="cmd11"
package main
import (
"fmt"
"log"
"github.com/availproject/avail-go-sdk/primitives"
SDK "github.com/availproject/avail-go-sdk/sdk"
)
func main() {
// Initialize an SDK instance
sdk, err := SDK.NewSDK("https://turing-rpc.avail.so/rpc")
if err != nil {
log.Fatalf("Failed to initialize SDK: %v", err)
}
blockHash, err := primitives.NewBlockHashFromHexString("0xd5f95593d91a581d7ce7b8717789298345be4be47e75ba93e7159cfe23083a7b")
if err != nil {
log.Fatalf("Failed to create block hash: %v", err)
}
block, err := SDK.NewBlock(sdk.Client, blockHash)
if err != nil {
log.Fatalf("Failed to create block: %v", err)
}
// Block Blobs filtered by Transaction Hash
txHash, err := primitives.NewH256FromHexString("0x70d8cc521c341d717f5b11d1898fc7a21f9d894c3617929aaabaea71c4814911")
if err != nil {
log.Fatalf("Failed to create transaction hash: %v", err)
}
blobs := block.DataSubmissions(SDK.Filter{}.WTxHash(txHash))
if err != nil {
log.Fatalf("Failed to create data submissions: %v", err)
}
blob := &blobs[0]
// Printout Block Blobs filtered by Transaction Hash
accountId, err := primitives.NewAccountIdFromMultiAddress(blob.TxSigner)
if err != nil {
log.Fatalf("Failed to create account ID: %v", err)
}
fmt.Println(fmt.Sprintf(`Tx Hash: %v, Tx Index: %v, Data: %v, App Id: %v, Signer: %v,`, blob.TxHash, blob.TxIndex, string(blob.Data), blob.AppId, accountId.ToHuman()))
fmt.Println("Data retrieval completed successfully")
}
```
3. Run the script using the following command:
```bash filename="terminal" name="cmd12"
go run main.go
```
### Fetch data submissions using AppID
> You can read back your submitted data from Avail DA using the `AppID`.
#### avail-js
1. Create a file named `your-file-name.ts`
2. Paste the following code into the file:
```typescript showLineNumbers filename="avail-js" name="cmd13"
import * as dotenv from 'dotenv';
import { SDK, Block } from 'avail-js-sdk';
dotenv.config();
export async function readDataByAppId() {
// Initialize SDK with Turing endpoint
const sdk = await SDK.New('wss://turing-rpc.avail.so/ws');
// App ID and block hash to look up
const appId = 89;
const blockHash = "0xd5f95593d91a581d7ce7b8717789298345be4be47e75ba93e7159cfe23083a7b";
console.log(`Looking up data for App ID: ${appId}`);
console.log(`In block: ${blockHash}`);
// Create a Block object for the specified block hash
const block = await Block.New(sdk.client, blockHash);
// Get data submissions for the specified app ID
const blobs = block.dataSubmissions({ appId: appId });
console.log(`Found ${blobs.length} data submission(s)`);
// Display information for each data blob
if (blobs.length === 0) {
console.log("No data submissions found for this app ID");
} else {
console.log("\nData Submission Details:");
for (const blob of blobs) {
console.log(`Tx Hash: ${blob.txHash}`);
console.log(`Tx Index: ${blob.txIndex}`);
console.log(`Data (ASCII): ${blob.toAscii()}`);
console.log(`App Id: ${blob.appId}`);
console.log(`Signer: ${blob.txSigner}`);
console.log("---");
}
}
console.log("Data retrieval completed successfully");
process.exit(0);
}
readDataByAppId()
```
3. Run the script using the following command:
```bash filename="terminal" name="cmd14"
ts-node your-file-name.ts
```
#### avail-rust
1. Create a file named `main.rs`
2. Paste the following code into the file:
```rust showLineNumbers filename="avail-rust" name="cmd15"
use avail_rust::prelude::*;
pub async fn read_data_by_appid() -> Result<(), ClientError> {
// Create a new SDK instance
let sdk = SDK::new("wss://turing-rpc.avail.so/ws").await?;
let block_hash = new_h256_from_hex("0xd5f95593d91a581d7ce7b8717789298345be4be47e75ba93e7159cfe23083a7b")?;
let block = Block::new(&sdk.client, block_hash).await?;
// All Block Blobs by App Id
let app_id = 89;
let blobs = block.data_submissions(Filter::new().app_id(app_id));
// Printout All Block Blobs by App Id
for blob in blobs {
let blob_data = blob.to_ascii().unwrap();
println!(
"Tx Hash: {:?}, Tx Index: {}, Data: {:?}, App Id: {}, Tx Singer: {:?}",
blob.tx_hash,
blob.tx_index,
blob_data,
blob.app_id,
blob.ss58address(),
);
}
println!("Data retrieval completed successfully");
Ok(())
}
#[tokio::main]
async fn main() {
if let Err(e) = read_data_by_appid().await {
eprintln!("Error: {:?}", e);
}
}
```
3. Run the script using the following command:
```bash filename="terminal" name="cmd16"
cargo run
```
#### avail-go
1. Create a file named `main.go`
2. Paste the following code into the file:
```go showLineNumbers filename="avail-go" name="cmd17"
package main
import (
"fmt"
"log"
"github.com/availproject/avail-go-sdk/primitives"
SDK "github.com/availproject/avail-go-sdk/sdk"
)
func main() {
// Initialize an SDK instance
sdk, err := SDK.NewSDK("https://turing-rpc.avail.so/rpc")
if err != nil {
log.Fatalf("Failed to initialize SDK: %v", err)
}
blockHash, err := primitives.NewBlockHashFromHexString("0x94746ba186876d7407ee618d10cb6619befc59eeb173cacb00c14d1ff492fc58")
if err != nil {
log.Fatalf("Failed to create block hash: %v", err)
}
block, err := SDK.NewBlock(sdk.Client, blockHash)
if err != nil {
log.Fatalf("Failed to create block: %v", err)
}
// Block Blobs filtered by App Id
appId := uint32(2)
blobs := block.DataSubmissions(SDK.Filter{}.WAppId(appId))
if err != nil {
log.Fatalf("Failed to create data submissions: %v", err)
}
// Printout Block Blobs filtered by App Id
for _, blob := range blobs {
if blob.AppId != appId {
log.Fatalf("Transaction App Ids are not the same.")
}
accountId, err := primitives.NewAccountIdFromMultiAddress(blob.TxSigner)
if err != nil {
log.Fatalf("Failed to create account ID: %v", err)
}
fmt.Println(fmt.Sprintf(`Tx Hash: %v, Tx Index: %v, Data: %v, App Id: %v, Signer: %v,`, blob.TxHash, blob.TxIndex, string(blob.Data), blob.AppId, accountId.ToHuman()))
}
fmt.Println("Data retrieval completed successfully")
}
```
3. Run the script using the following command:
```bash filename="terminal" name="cmd18"
go run main.go
```
### Fetch all data submissions for a given block
Here is a complete example of how to fetch all the data submissions for a given block:
#### avail-js
```typescript showLineNumbers filename="avail-js" name="cmd19"
import * as dotenv from 'dotenv';
import { SDK, Block } from 'avail-js-sdk';
dotenv.config();
export async function readDataByBlock() {
// Initialize SDK with Turing endpoint
const sdk = await SDK.New('wss://turing-rpc.avail.so/ws');
// Block hash to look up
const blockHash = "0x94746ba186876d7407ee618d10cb6619befc59eeb173cacb00c14d1ff492fc58";
console.log(`Looking up all data submissions in block: ${blockHash}`);
// Create a Block object for the specified block hash
const block = await Block.New(sdk.client, blockHash);
// Get all data submissions in the block
const blobs = block.dataSubmissions();
console.log(`Found ${blobs.length} data submission(s)`);
// Display information for each data blob
if (blobs.length === 0) {
console.log("No data submissions found in this block");
} else {
console.log("\nData Submission Details:");
for (const blob of blobs) {
console.log(`Tx Hash: ${blob.txHash}`);
console.log(`Tx Index: ${blob.txIndex}`);
console.log(`Data (ASCII): ${blob.toAscii()}`);
console.log(`App Id: ${blob.appId}`);
console.log(`Signer: ${blob.txSigner}`);
console.log("---");
}
}
console.log("Data retrieval completed successfully");
process.exit(0);
}
// Execute the function
readDataByBlock();
```
6. Run the script using the following command:
```bash filename="terminal" name="cmd20"
ts-node your-file-name.ts
```
#### avail-rust
```rust showLineNumbers filename="avail-rust" name="cmd21"
use avail_rust::prelude::*;
pub async fn read_data_by_block() -> Result<(), ClientError> {
// Create a new SDK instance
let sdk = SDK::new("wss://turing-rpc.avail.so/ws").await?;
let block_hash = new_h256_from_hex("0x94746ba186876d7407ee618d10cb6619befc59eeb173cacb00c14d1ff492fc58")?;
let block = Block::new(&sdk.client, block_hash).await?;
// All Block Blobs
let blobs = block.data_submissions(Filter::default());
// Printout All Block Blobs
for blob in blobs {
let blob_data = blob.to_ascii().unwrap();
println!(
"Tx Hash: {:?}, Tx Index: {}, Data: {:?}, App Id: {}, Tx Singer: {:?}",
blob.tx_hash,
blob.tx_index,
blob_data,
blob.app_id,
blob.ss58address(),
);
}
println!("Data retrieval completed successfully");
Ok(())
}
#[tokio::main]
async fn main() {
if let Err(e) = read_data_by_block().await {
eprintln!("Error: {:?}", e);
}
}
```
6. Run the script using the following command:
```bash filename="terminal" name="cmd22"
cargo run
```
#### avail-go
```go showLineNumbers filename="avail-go" name="cmd23"
package main
import (
"fmt"
"log"
"github.com/availproject/avail-go-sdk/primitives"
SDK "github.com/availproject/avail-go-sdk/sdk"
)
func main() {
// Initialize an SDK instance
sdk, err := SDK.NewSDK("https://turing-rpc.avail.so/rpc")
if err != nil {
log.Fatalf("Failed to initialize SDK: %v", err)
}
blockHash, err := primitives.NewBlockHashFromHexString("0x94746ba186876d7407ee618d10cb6619befc59eeb173cacb00c14d1ff492fc58")
if err != nil {
log.Fatalf("Failed to create block hash: %v", err)
}
block, err := SDK.NewBlock(sdk.Client, blockHash)
if err != nil {
log.Fatalf("Failed to create block: %v", err)
}
// All Block Blobs
blobs := block.DataSubmissions(SDK.Filter{})
fmt.Println(len(blobs))
// Printout All Block Blobs
for _, blob := range blobs {
accountId, err := primitives.NewAccountIdFromMultiAddress(blob.TxSigner)
if err != nil {
log.Fatalf("Failed to create account ID: %v", err)
}
fmt.Println(fmt.Sprintf(`Tx Hash: %v, Tx Index: %v, Data: %v, App Id: %v, Signer: %v,`, blob.TxHash, blob.TxIndex, string(blob.Data), blob.AppId, accountId.ToHuman()))
}
fmt.Println("Data retrieval completed successfully")
}
```
6. Run the script using the following command:
```bash filename="terminal" name="cmd24"
go run main.go
```
## Fetch all types of transactions on Avail DA
### Fetch all transactions by a particular signer in a block
Here is a complete example of how to fetch all the transactions by a particular signer in a particular block:
#### avail-js
1. Create a file named `your-file-name.ts`
2. Paste the following code into your file:
```typescript showLineNumbers filename="avail-js" name="cmd25"
import { SDK, Block } from 'avail-js-sdk';
export async function fetchTransactionsBySigner() {
// Initialize SDK with Turing endpoint
const sdk = await SDK.New('wss://turing-rpc.avail.so/ws');
// Block hash and signer address to look up
const blockHash = "0x75a6c54bb5ea904e47fa151956992d7cf543bc7c936d78488e311db8e10397c1";
const signer = "5CqgQkrDcdg5QrtuxT3H7WszrqgrBMhdwRbmMVXQzc4VSiEg";
console.log(`Looking up transactions by signer: ${signer}`);
console.log(`In block: ${blockHash}`);
// Create a Block object for the specified block hash
const block = await Block.New(sdk.client, blockHash);
// Get transactions for the specified signer
const blockTxs = block.transactions({ txSigner: signer });
console.log(`Found ${blockTxs.length} transaction(s)`);
// Display information for each transaction
if (blockTxs.length === 0) {
console.log("No transactions found for this signer");
} else {
console.log("\nTransaction Details:");
for (const tx of blockTxs) {
console.log(`Pallet Name: ${tx.palletName()}`);
console.log(`Pallet Index: ${tx.palletIndex()}`);
console.log(`Call Name: ${tx.callName()}`);
console.log(`Call Index: ${tx.callIndex()}`);
console.log(`Tx Hash: ${tx.txHash()}`);
console.log(`Tx Index: ${tx.txIndex()}`);
console.log(`Signer: ${tx.ss58Address()}`);
console.log("---");
}
}
console.log("Transaction retrieval completed successfully");
process.exit(0);
}
// Execute the function
fetchTransactionsBySigner();
```
3. Run the script using the following command:
```bash filename="terminal" name="cmd26"
ts-node your-file-name.ts
```
#### avail-rust
1. Create a file named `main.rs`
2. Paste the following code into your file:
```rust showLineNumbers filename="avail-rust" name="cmd27"
use avail_rust::prelude::*;
pub async fn fetch_transactions_by_signer() -> Result<(), ClientError> {
// Create a new SDK instance
let sdk = SDK::new("wss://turing-rpc.avail.so/ws").await?;
// Enter the block hash you want to fetch transactions from
let block_hash = new_h256_from_hex("0x75a6c54bb5ea904e47fa151956992d7cf543bc7c936d78488e311db8e10397c1")?;
// Fetch the Block
let block = Block::new(&sdk.client, block_hash).await?;
// Fetch All Transaction filtered by Signer
let account_id = account_id_from_str("5CqgQkrDcdg5QrtuxT3H7WszrqgrBMhdwRbmMVXQzc4VSiEg")?;
let block_transactions = block.transactions(Filter::new().tx_signer(account_id.clone()));
// Printout Block Transactions made by Signer
for tx in block_transactions.iter() {
println!(
"Pallet Name: {:?}, Pallet Index: {}, Call Name: {:?}, Call Index: {:?}, Tx Hash: {:?}, Tx Index: {}",
tx.pallet_name(),
tx.pallet_index(),
tx.call_name(),
tx.call_index(),
tx.tx_hash(),
tx.tx_index()
);
println!(
"Tx Signer: {:?}, App Id: {:?}, Tip: {:?}, Mortality: {:?}, Nonce: {:?}",
tx.ss58address(),
tx.app_id(),
tx.tip(),
tx.mortality(),
tx.nonce(),
);
}
println!("Transaction retrieval completed successfully");
Ok(())
}
#[tokio::main]
async fn main() -> Result<(), ClientError> {
fetch_transactions_by_signer().await?;
Ok(())
}
```
3. Run the script using the following command:
```bash filename="terminal" name="cmd28"
cargo run
```
#### avail-go
1. Create a file named `main.go`
2. Paste the following code into your file:
```go showLineNumbers filename="avail-go" name="cmd29"
package main
import (
"fmt"
"log"
"github.com/availproject/avail-go-sdk/primitives"
SDK "github.com/availproject/avail-go-sdk/sdk"
)
func main() {
// Initialize an SDK instance
sdk, err := SDK.NewSDK("https://turing-rpc.avail.so/rpc")
if err != nil {
log.Fatalf("Failed to initialize SDK: %v", err)
}
blockHash, err := primitives.NewBlockHashFromHexString("0x75a6c54bb5ea904e47fa151956992d7cf543bc7c936d78488e311db8e10397c1")
if err != nil {
log.Fatalf("Failed to create block hash: %v", err)
}
block, err := SDK.NewBlock(sdk.Client, blockHash)
if err != nil {
log.Fatalf("Failed to create block: %v", err)
}
// Create an account ID
accountId, err := primitives.NewAccountIdFromAddress("5CqgQkrDcdg5QrtuxT3H7WszrqgrBMhdwRbmMVXQzc4VSiEg")
if err != nil {
log.Fatalf("Failed to create account ID: %v", err)
}
// All Transaction filtered by Signer
blockTxs := block.Transactions(SDK.Filter{}.WTxSigner(accountId))
fmt.Println("Transaction Count: ", len(blockTxs))
// Printout Block Transactions filtered by Signer
for _, tx := range blockTxs {
fmt.Println(fmt.Sprintf(`Pallet Name: %v, Pallet Index: %v, Call Name: %v, Call Index: %v, Tx Hash: %v, Tx Index: %v`, tx.PalletName(), tx.PalletIndex(), tx.CallName(), tx.CallIndex(), tx.TxHash(), tx.TxIndex()))
fmt.Println(fmt.Sprintf(`Tx Signer: %v, App Id: %v, Tip: %v, Mortality: %v, Nonce: %v`, tx.SS58Address(), tx.AppId(), tx.Tip(), tx.Mortality(), tx.Nonce()))
}
fmt.Println("Transaction retrieval completed successfully")
}
```
3. Run the script using the following command:
```bash filename="terminal" name="cmd30"
go run main.go
```
### Fetch all transactions from a particular block
Here is a complete example of how to fetch all the transactions from a particular block:
#### avail-js
1. Create a file named `your-file-name.ts`
2. Paste the following code into your file:
```typescript showLineNumbers filename="avail-js" name="cmd31"
import { SDK, Block } from 'avail-js-sdk';
export async function fetchAllTransactions() {
// Initialize SDK with Turing endpoint
const sdk = await SDK.New('wss://turing-rpc.avail.so/ws');
// Block hash to look up
const blockHash = "0x9016d7953c88115534a602f2d2548c70c4f5b378d86f4bedda82be2655467c5d";
console.log(`Looking up all transactions in block: ${blockHash}`);
// Create a Block object for the specified block hash
const block = await Block.New(sdk.client, blockHash);
// Get all transactions in the block
const blockTxs = block.transactions();
console.log(`Found ${blockTxs.length} transaction(s)`);
// Display information for each transaction
if (blockTxs.length === 0) {
console.log("No transactions found in this block");
} else {
console.log("\nTransaction Details:");
for (const tx of blockTxs) {
console.log(`Pallet Name: ${tx.palletName()}`);
console.log(`Pallet Index: ${tx.palletIndex()}`);
console.log(`Call Name: ${tx.callName()}`);
console.log(`Call Index: ${tx.callIndex()}`);
console.log(`Tx Hash: ${tx.txHash()}`);
console.log(`Tx Index: ${tx.txIndex()}`);
console.log(`Signer: ${tx.ss58Address()}`);
console.log("---");
}
}
console.log("Transaction retrieval completed successfully");
process.exit(0);
}
// Execute the function
fetchAllTransactions();
```
3. Run the script using the following command:
```bash filename="terminal" name="cmd32"
ts-node your-file-name.ts
```
#### avail-rust
1. Create a file named `main.rs`
2. Paste the following code into your file:
```rust showLineNumbers filename="avail-rust" name="cmd33"
use avail_rust::prelude::*;
pub async fn fetch_all_transactions() -> Result<(), ClientError> {
// Create a new SDK instance
let sdk = SDK::new("wss://turing-rpc.avail.so/ws").await?;
// Enter the block hash you want to fetch transactions from
let block_hash = new_h256_from_hex("0x9016d7953c88115534a602f2d2548c70c4f5b378d86f4bedda82be2655467c5d")?;
let block = Block::new(&sdk.client, block_hash).await?;
// Fetch All Transactions
let block_transactions = block.transactions(Filter::default());
// Printout Block Transactions
for tx in block_transactions.iter() {
println!(
"Pallet Name: {:?}, Pallet Index: {}, Call Name: {:?}, Call Index: {:?}, Tx Hash: {:?}, Tx Index: {}",
tx.pallet_name(),
tx.pallet_index(),
tx.call_name(),
tx.call_index(),
tx.tx_hash(),
tx.tx_index()
);
println!(
"Tx Signer: {:?}, App Id: {:?}, Tip: {:?}, Mortality: {:?}, Nonce: {:?}",
tx.ss58address(),
tx.app_id(),
tx.tip(),
tx.mortality(),
tx.nonce(),
);
}
println!("Transaction retrieval completed successfully");
Ok(())
}
#[tokio::main]
async fn main() -> Result<(), ClientError> {
fetch_all_transactions().await?;
Ok(())
}
```
3. Run the script using the following command:
```bash filename="terminal" name="cmd34"
cargo run
```
#### avail-go
1. Create a file named `main.go`
2. Paste the following code into your file:
```go showLineNumbers filename="avail-go" name="cmd35"
package main
import (
"fmt"
"log"
"github.com/availproject/avail-go-sdk/primitives"
SDK "github.com/availproject/avail-go-sdk/sdk"
)
func main() {
sdk, err := SDK.NewSDK("https://turing-rpc.avail.so/rpc")
if err != nil {
log.Fatalf("Failed to initialize SDK: %v", err)
}
blockHash, err := primitives.NewBlockHashFromHexString("0x9016d7953c88115534a602f2d2548c70c4f5b378d86f4bedda82be2655467c5d")
if err != nil {
log.Fatalf("Failed to create block hash: %v", err)
}
block, err := SDK.NewBlock(sdk.Client, blockHash)
if err != nil {
log.Fatalf("Failed to create block: %v", err)
}
// Fetch All Transactions
blockTxs := block.Transactions(SDK.Filter{})
fmt.Println("Transaction Count: ", len(blockTxs))
// Printout Block Transactions
for _, tx := range blockTxs {
fmt.Println(fmt.Sprintf(`Pallet Name: %v, Pallet Index: %v, Call Name: %v, Call Index: %v, Tx Hash: %v, Tx Index: %v`, tx.PalletName(), tx.PalletIndex(), tx.CallName(), tx.CallIndex(), tx.TxHash(), tx.TxIndex()))
fmt.Println(fmt.Sprintf(`Tx Signer: %v, App Id: %v, Tip: %v, Mortality: %v, Nonce: %v`, tx.SS58Address(), tx.AppId(), tx.Tip(), tx.Mortality(), tx.Nonce()))
}
fmt.Println("Transaction retrieval completed successfully")
}
```
3. Run the script using the following command:
```bash filename="terminal" name="cmd36"
go run main.go
```
## Estimate fees for your data submission
The `avail-js` SDK provides a method to estimate the cost of submitting a particular piece of data to Avail DA.
Here is how you can use it:
#### avail-js
```typescript showLineNumbers filename="avail-js" name="cmd37"
import { initialize, disconnect } from "avail-js-sdk";
const calculateCost = async () => {
// Initialize the avail sdk providerEndpoint
const providerEndpoint = await initialize("wss://turing-rpc.avail.so/ws");
// Dummy sender - insert any address
const sender = "5CDGXH8Q9DzD3TnATTG6qm6f4yR1kbECBGUmh2XbEBQ8Jfa5";
//10^18 decimals to denominate to AVAIL
const DECIMAL = 1000000000000000000;
// Input the data
let data = "This is a random piece of string data!!!";
//Get the estimated cost in AVAIL
const cost = await providerEndpoint.tx.dataAvailability.submitData(data).paymentInfo(sender);
const costInAvail = (parseInt(cost.partialFee.toString()) / DECIMAL).toFixed(6);
console.log(`Estimated Fees: ${costInAvail} AVAIL`);
await disconnect();
};
calculateCost();
```
2. Run the script using the following command:
```bash filename="terminal" name="cmd39"
ts-node your-file-name.ts
```
### Polygon CDK
- [**Deploy a Polygon cdk Validium with Avail DA**](/docs/da/build/rollups/cdk/guide)
### Arbitrum Nitro stack
- [**Overview**](/docs/da/build/rollups/arbitrum-nitro/overview)
- [**[GUIDE] Deploy an Avail-Powered Orbit chain**](/docs/da/build/rollups/arbitrum-nitro/guide)
### Madara Starknet
- [**Overview**](/docs/da/build/rollups/madara/overview)
- [**Avail-Powered Madara Validium**](/docs/da/build/rollups/madara/guide)
- [**Madara Starknet**](https://github.com/madara-alliance/madara)
### Cosmos Avail DA module
## What is CADA (Cosmos Avail DA module)
CADA is a module designed to connect Cosmos sovereign chains with the Avail network, making it easier for any Cosmos chain or rollapp to use Avail as their Data Availability (DA) layer.
With CADA, developers can improve the scalability and security of their decentralized applications within the Cosmos ecosystem. It enables better data handling and availability, allowing Cosmos-based chains to tap into the strengths of Avail and build a more connected and resilient blockchain network.
Learn more about the CADA module below:
- [**Cosmos Avail DA Module**](https://github.com/vitwit/avail-da-module)
## What is Avail DA?
Avail is the permisionless unification layer for web3. Avail is designed to be a platform that connects different ecosystems by providing a modular, scalable, and interoperable platform.
Avail's vision is to provide a cohesive, unified user experience within a flexible and modular blockchain ecosystem, drawing on lessons from Web2 to innovate in Web3.
With Avail's foundational DA layer ([Avail DA](/docs/da/get-started)), different ecosystems can innovate on top freely, while leveraging Nexus for cross-ecosystem messaging.
Learn more about [Avail here](/docs/da/get-started).
## Integration Guide
To integrate the CADA module into your Cosmos SDK application, follow the steps outlined in the [integration guide](https://github.com/vitwit/cada/tree/main/x/cada/integration_docs)
> **Note**
>
> Note: Ensure that the Avail light client URL is correctly configured for the module to function as expected. For instructions on setup Avail locally, please refer to [this documentation](https://github.com/rollkit/avail-da?tab=readme-ov-file#avail-da).
You can also use the references below for integration.You can also simply run the module from these repositories as well:
- [**Cosmos SDK Integration Example**](https://github.com/vitwit/cosmos-sdk/tree/integrate_avail_da)
- [**Avail DA Module with Simapp**](https://github.com/vitwit/avail-da-module/tree/main/simapp)
If you are running the chain from the Simapp repository, you can use this [init-chain script](https://github.com/vitwit/avail-da-module/blob/main/simapp/init-simapp.sh) to set up the testnet.
## How It Works
### CADA (Cosmos Chain)
Initiates the process by running the `PreBlocker ABCI` method.
### Request to Relayer
Sends `block range` information to the relayer.
### Relayer
Fetches the `block data` from the Cosmos Provider and posts it to the Avail light client.
### Avail light client
Confirms whether the data is available.
If **Yes**: Broadcast the Avail height and status.
If **No**: Retry data submission.
### Validators
Vote to confirm the data availability, updating the blob status to "Success" or "Failure" based on results.
These are main components in the workflow:
### 1. CADA
The core functionality of the **CADA** module is integrated with and operates on the Cosmos blockchain.
In the CADA module:
* At each block interval, the `PreBlocker` ABCI method sends a request to the `Relayer`, specifying the range of block heights that are ready to be posted to the **Avail** Data Availability (DA) network.
* The chain is responsible for aggregating vote extensions from all validators and verifying whether the data has been made available on Avail.
* Since verification requires communicating with the light client, an asynchronous voting mechanism is needed. **Vote extensions** enable this asynchronous voting mechanism for verification purposes.
### 2. Relayer
The **Relayer** facilitates communication between the Cosmos Chain, the Avail light client, and the Cosmos Provider.
* **Data Submission**: The relayer is responsible for fetching block data from the Cosmos provider and posting it to the Avail light client via an HTTP request.
* Based on the response from the light client, the relayer submits a transaction informing the validators of the data availability status and the specific Avail block height where the data is included, so that validators can verify it.
* **Data Verification**: During verification, the relayer communicates with the Avail light client to confirm whether the data is truly available at the specified height.
### 3. Avail Light Node
The **Avail light client** allows interaction with the Avail DA network without requiring a full node, and without having to trust remote peers. It leverages **Data Availability Sampling (DAS)**, which the light client performs on every newly created block.
* The chain communicates with the Avail light client via the relayer during the data submission and data availability verification processes.
Find more details about the Avail light client [here](/docs/da/operate/run-a-light-client/overview).
### 4. Cosmos Provider
The **Cosmos Provider** is responsible for fetching block data via RPC so that the data can be posted to Avail for availability checks.
## Workflow
* At each block interval, a request is sent from the `PreBlocker` ABCI method to the Keeper, specifying the range of block heights that are ready to be posted to the `Avail` DA network.
* The range of block heights should be from `provenHeight + 1` to `min(provenHeight + MaxBlocksLimitForBlob, CurrentBlockHeight)`.
* If the status of the previous blocks is either `SUCCESS` or `FAILURE`, the status can be updated to `PENDING`.
```
range = [fromBlock, toBlock] // (fromBlock < toBlock < CurrentBlock)
status = PENDING
```
* The `Proposer` of the block will make a request to the `Relayer` to post the blocks data by passing the range of blocks to be posted.
* The `Relayer` fetches the blocks data from the local provider, converts the blocks data to bytes, and posts that data to `Avail`.
* Once the success of data availability is confirmed, the `Relayer` broadcasts the `Avail height` at which the blob data is made available using the `MsgUpdateBlobStatus` transaction.
* The status, Avail height, and voting deadline will be updated in the state.
```
status = IN_VOTING
availHeight = tx.availHeight
votingEndBlock = currentBlock + votingInterval
```
* At block height `VotingEndBlock - 1`, all the validators verify if the specified blocks data is truly made available at the specified Avail height. They cast their vote (YES or NO) using `vote extensions`.
* At block height `VotingEndBlock`, all the votes from `vote_extensions` will be collected and aggregated. If the collective `voting power is > 66%`, the status will be updated
```
status = SUCCESS // success and ready for next blocks
provenHeight = Range EndHeight // End Height from the given block range
```
* In case of failure at any stage, the whole flow will be repeated.
***
image: "/img/docs-link-preview\.png"
### ZKsync's ZK Stack
- [**Deploy an Avail-powered ZK Stack Validium**](/docs/da/build/rollups/zksync/guide)
### OP Stack
## What is the OP Stack?
The OP Stack is the standardized, shared, and open-source development stack that powers Optimism, maintained by the Optimism Collective.
The OP Stack is the set of software that powers Optimism — currently in the form of the software behind OP Mainnet and eventually in the form of the Optimism Superchain and its governance. The OP Stack is primarily focused around the creation of a shared, high-quality, and fully open-source system for creating new L2 blockchains.
Learn more about the [OP Stack here](https://docs.optimism.io/stack/getting-started).
## What is Avail DA?
Avail is the permisionless unification layer for web3. Avail is designed to be a platform that connects different ecosystems by providing a modular, scalable, and interoperable platform.
Avail's vision is to provide a cohesive, unified user experience within a flexible and modular blockchain ecosystem, drawing on lessons from Web2 to innovate in Web3.
With Avail's foundational DA layer ([Avail DA](/docs/da/get-started)), different ecosystems can innovate on top freely, while leveraging Nexus for cross-ecosystem messaging.
Learn more about [Avail here](/docs/da/get-started).
## How does OP Stack work with Avail?
The OP stack has become a popular choice for communities and companies looking to build their own L2 rollups. t’s used by OP Mainnet and is maintained by the Optimism Collective. It’s also a stack which developers have begun to extend and modify. One such modification is using a purpose-built data availability layer like Avail.
The default DA layer supported by the OP stack is Ethereum. L2 transactions get submitted to the sequencer which is responsible for ordering transactions and creating L2 blocks. Batches of transactions are sent by the sequencer to Ethereum which submits transaction data as calldata.
The Avail team built the Avail's OP Stack integrations which is allows L2s that are built using the integration to send transaction data to Avail instead of Ethereum, lowering transaction fees by up to 90%.
Transactions are submitted to the sequencer node in the Avail OP Stack. The op-batcher then submits a transaction batch to a module called op-avail that has been added to submit data to Avail.
The transaction data is then added to the Avail blockchain and a transaction reference is returned to op-avail which is passed to the op-batcher and submitted to Ethereum as calldata/blobs. The transaction reference posted on Ethereum contains the Avail block hash, sender’s address and nonce of the extrinsic.
Chains built with the Avail OP Stack inherit the security guarantees of Avail’s nominated proof-of-stake blockchain network.
Get started with building your Avail-powered OP Stack chain today.
- [**Transaction Lifecycle**](/docs/da/build/rollups/op-stack/overview)
- [**Avail-Powered Optimium (OP Stack)**](/docs/da/build/rollups/op-stack/guide)
- [**OP Stack Adapter**](https://github.com/availproject/avail-op-stack-adapter)
### Polygon zkEVM
- [**Overview**](/docs/da/build/rollups/zkevm/overview)
- [**Avail-Powered zkEVM Validium**](/docs/da/build/rollups/zkevm/guide)
- [**Validium Node**](https://github.com/availproject/validium-node)
- [**Validium Contracts**](https://github.com/availproject/validium-contracts)
- [**Validium Bridge**](https://github.com/availproject/validium-bridge-service)
### How to Run an Avail node
## How to run an Avail node
There are four main ways of running an Avail node:
1. By running a pre-built binary.
2. By building from source
3. By running a pre-built image using Docker
4. By assisted deployment with an infrastructure provider
> **Note**
>
> **LOOKING TO BE AN RPC PROVIDER?**
>
> We welcome all community members who are looking to run an RPC node on Avail.
> While the exact config of your node will depend on your unique requirements, the following flags are
> required to make sure your node can be used to access all RPC methods:
>
> ```bash showLineNumbers filename="avail-node flags"
> --state-pruning archive
> --blocks-pruning archive
> --rpc-methods Safe
> --rpc-cors all
> --unsafe-rpc-external
> --enable-kate-rpc
> ```
>
>
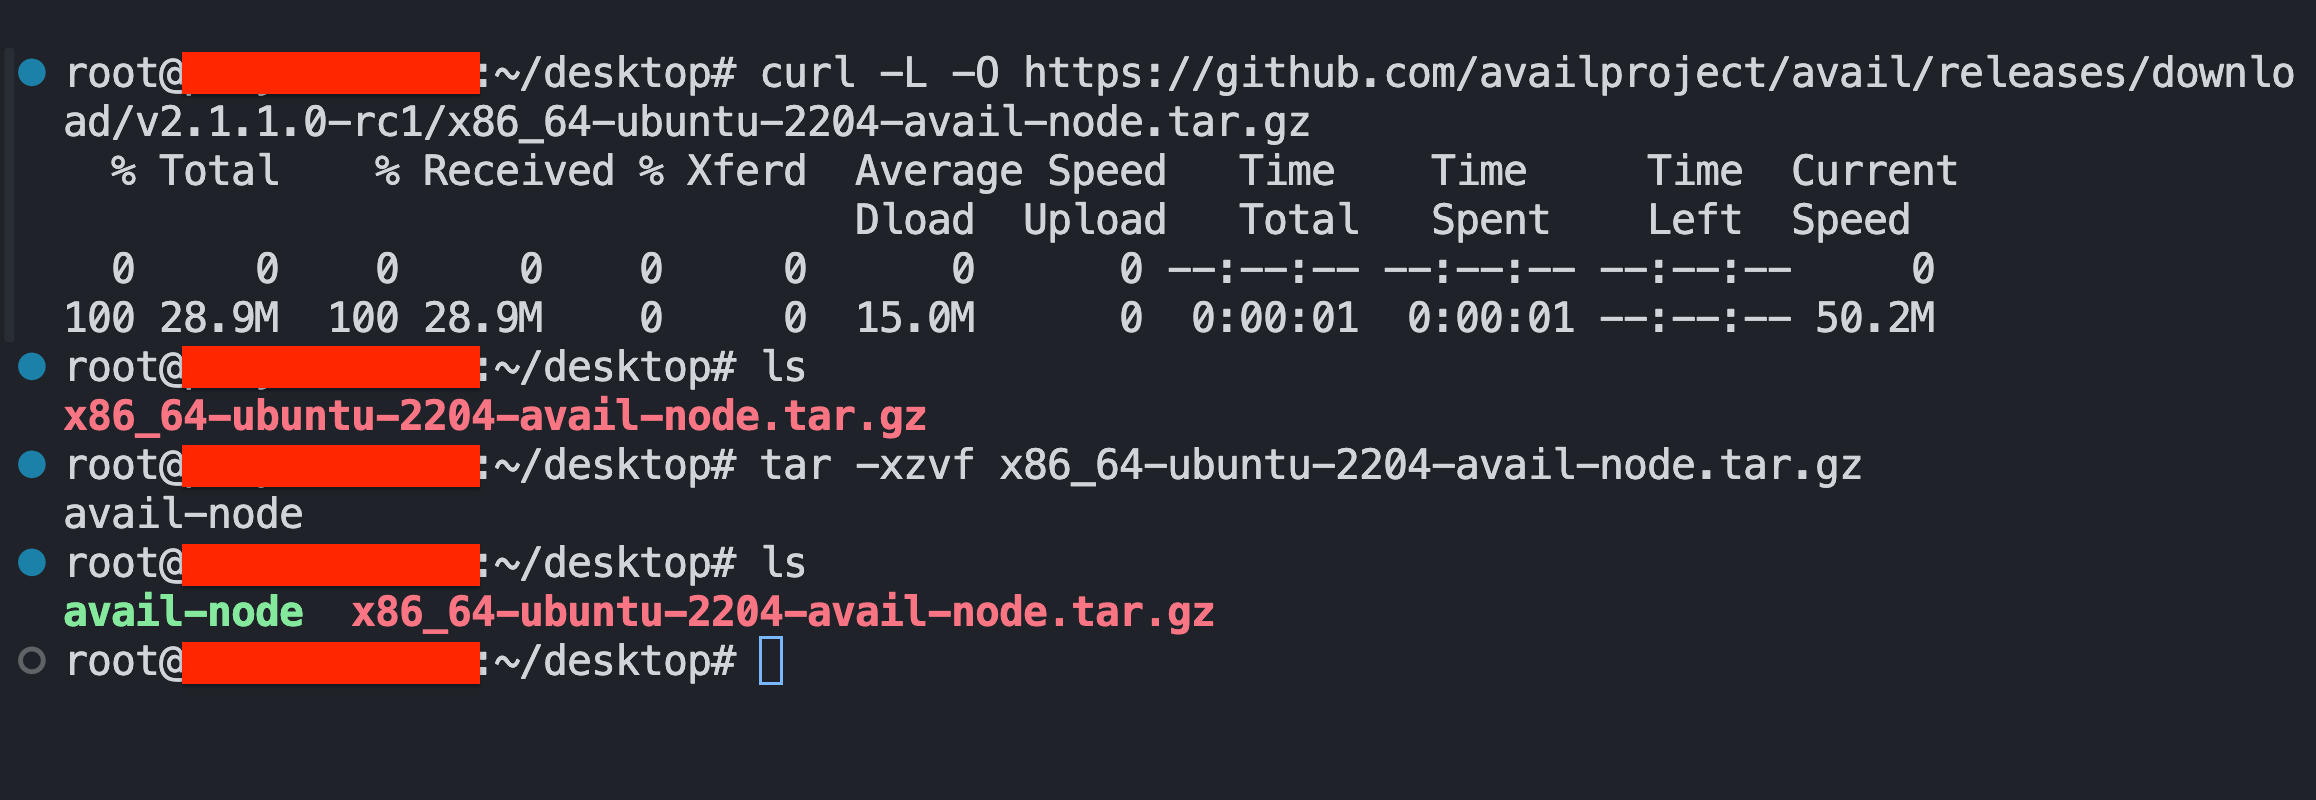
>
> Description of the flags:
>
>
> * **--state-pruning archive**:
>
> Specify the state pruning mode.
> This mode specifies when the block's state (ie, storage) should be pruned (ie, removed) from the database. This setting can only
> be set on the first creation of the database. Every subsequent run will load the pruning mode from the database and will error
> if the stored mode doesn't match this CLI value. It is fine to drop this CLI flag for subsequent runs. Possible values: -
> archive: Keep the state of all blocks. - `archive-canonical`: Keep only the state of finalized blocks. - number Keep the state of
> the last number of finalized blocks. \[default: 256]
>
> * **--blocks-pruning archive**:
>
> Specify the blocks pruning mode.
> This mode specifies when the block's body (including justifications) should be pruned (ie, removed) from the database. Possible
> values: - `archive`: Keep all blocks. - `archive-canonical`: Keep only finalized blocks. - number Keep the last `number` of
> finalized blocks.
>
> * **--rpc-methods Safe**:
>
> RPC methods to expose.
> \[default: auto] \
> Possible values:
>
> * auto: Expose every RPC method only when RPC is listening on `localhost`, otherwise serve only safe RPC methods
> * safe: Allow only a safe subset of RPC methods
> * unsafe: Expose every RPC method (even potentially unsafe ones)
>
> * **--rpc-cors all**:
>
> Specify browser *origins* allowed to access the HTTP & WS RPC servers.
> A comma-separated list of origins (protocol://domain or special `null` value). Value of `all` will disable origin validation.
>
> * **--unsafe-rpc-external**:
>
> Listen to all RPC interfaces.
>
> * **--enable-kate-rpc**:
>
> Enable the Kate pallet.
>
>
> * Looking for a list of all available config flags? Check out the [last section of this page](/docs/da/operate/run-a-full-node/full-node#additional-configs).
#### Run a pre-built binary
1. Go to the [Avail node GitHub releases page](https://github.com/availproject/avail/releases/).
There you will see a lot of pre-built binaries for each version of the Avail node.
2. Please download the binary suitable from your system, of the `latest` version.
You can do this using the GUI or by running the following command in your terminal:
```bash
curl -L -O https://github.com/availproject/avail/releases/download//.tar.gz
```
3. Extract the downloaded file by opening a terminal in the location of the downloaded file and using the following command:
```bash
tar -xzvf .tar.gz
```
> Your terminal should now look something like this:
* The file in red is what we downloaded to our system.
* The file in green is the extracted binary.
4. Once extracted, you will see a pre-built, executable binary named `avail-node` in the same directory.
You can run this binary using the following command:
```bash
./avail-node --name a-random-name --chain mainnet -d ./output
```
5. Your terminal output should look something like this:
```bash
2024-04-29 07:48:22 Avail Node
2024-04-29 07:48:22 ✌️ version 2.1.1-8608dc47f00
2024-04-29 07:48:22 ❤️ by Avail Project , 2017-2024
2024-04-29 07:48:22 📋 Chain specification: Avail Turing Network
2024-04-29 07:48:22 🏷 Node name: possible-point-3102
2024-04-29 07:48:22 👤 Role: FULL
2024-04-29 07:48:22 💾 Database: ParityDb at ./output/chains/avail_turing_network/paritydb/full
2024-04-29 07:48:27 🔨 Initializing Genesis block/state (state: 0x5603…9c01, header-hash: 0xd3d2…8b70)
2024-04-29 07:48:27 👴 Loading GRANDPA authority set from genesis on what appears to be first startup.
2024-04-29 07:48:29 👶 Creating empty BABE epoch changes on what appears to be first startup.
2024-04-29 07:48:29 🏷 Local node identity is: 12D3KooWELgzaRZqsHNyUodhZZF7A1ydsRpgLsY7fojDegKni4YF
2024-04-29 07:48:29 Prometheus metrics extended with avail metrics
2024-04-29 07:48:29 💻 Operating system: linux
2024-04-29 07:48:29 💻 CPU architecture: x86_64
2024-04-29 07:48:29 💻 Target environment: gnu
2024-04-29 07:48:29 💻 CPU: DO-Premium-Intel
2024-04-29 07:48:29 💻 CPU cores: 4
2024-04-29 07:48:29 💻 Memory: 7937MB
2024-04-29 07:48:29 💻 Kernel: 5.15.0-105-generic
2024-04-29 07:48:29 💻 Linux distribution: Ubuntu 22.04.4 LTS
2024-04-29 07:48:29 💻 Virtual machine: yes
2024-04-29 07:48:29 📦 Highest known block at #0
2024-04-29 07:48:29 Running JSON-RPC server: addr=127.0.0.1:9944, allowed origins=["http://localhost:*", "http://127.0.0.1:*", "https://localhost:*", "https://127.0.0.1:*", "https://polkadot.js.org"]
2024-04-29 07:48:29 🏁 CPU score: 950.72 MiBs
2024-04-29 07:48:29 🏁 Memory score: 4.02 GiBs
2024-04-29 07:48:29 🏁 Disk score (seq. writes): 845.72 MiBs
2024-04-29 07:48:29 🏁 Disk score (rand. writes): 338.52 MiBs
2024-04-29 07:48:29 〽️ Prometheus exporter started at 127.0.0.1:9615
2024-04-29 07:48:30 🔍 Discovered new external address for our node: /ip4/139.59.94.121/tcp/30333/ws/p2p/12D3KooWELgzaRZqsHNyUodhZZF7A1ydsRpgLsY7fojDegKni4YF
2024-04-29 07:48:34 ⚙️ Syncing, target=#137399 (9 peers), best: #1000 (0x9e8f…55ab), finalized #512 (0x0a9a…875a), ⬇ 316.3kiB/s ⬆ 14.2kiB/s
2024-04-29 07:48:39 ⚙️ Syncing 235.4 bps, target=#137399 (9 peers), best: #2177 (0x5828…e9da), finalized #2048 (0x2f65…3b2e), ⬇ 113.3kiB/s ⬆ 5.5kiB/s
2024-04-29 07:48:43 [3097] 💸 generated 8 npos targets
2024-04-29 07:48:43 [3097] 💸 generated 8 npos voters, 8 from validators and 0 nominators
2024-04-29 07:48:43 [#3097] 🗳 creating a snapshot with metadata SolutionOrSnapshotSize { voters: 8, targets: 8 }
2024-04-29 07:48:43 [#3097] 🗳 Starting phase Signed, round 1.
2024-04-29 07:48:44 [#3277] 🗳 Starting phase Unsigned((true, 3277)), round 1.
2024-04-29 07:48:44 [#3278] 🗳 queued unsigned solution with score ElectionScore { minimal_stake: 184467440819699, sum_stake: 184467440819699, sum_stake_squared: 34028236722569152873026450601 }
2024-04-29 07:48:44 ⚙️ Syncing 236.0 bps, target=#137400 (10 peers), best: #3357 (0x0c50…7d21), finalized #3072 (0x2803…c15b), ⬇ 244.0kiB/s ⬆ 20.2kiB/s
2024-04-29 07:48:44 [#3457] 🗳 Starting phase Off, round 2.
2024-04-29 07:48:44 [3457] 💸 new validator set of size 1 has been processed for era 1
2024-04-29 07:48:49 ⚙️ Syncing 206.2 bps, target=#137400 (10 peers), best: #4388 (0x2d3d…6b93), finalized #4177 (0x58f8…9518), ⬇ 261.5kiB/s ⬆ 11.6kiB/s
2024-04-29 07:48:54 ⚙️ Syncing 232.0 bps, target=#137400 (10 peers), best: #5548 (0x1aef…1c46), finalized #5120 (0x274f…e5d7), ⬇ 122.7kiB/s ⬆ 6.9kiB/s
2024-04-29 07:48:59 ⚙️ Syncing 118.2 bps, target=#137400 (10 peers), best: #6139 (0x9e52…af00), finalized #5632 (0x5297…a001), ⬇ 66.5kiB/s ⬆ 4.9kiB/s
2024-04-29 07:49:04 ⚙️ Syncing 185.7 bps, target=#137401 (10 peers), best: #7068 (0x911d…666a), finalized #6656 (0xdd79…2e5e), ⬇ 80.7kiB/s ⬆ 1.5kiB/s
2024-04-29 07:49:05 [7417] 💸 generated 9 npos targets
2024-04-29 07:49:05 [7417] 💸 generated 9 npos voters, 9 from validators and 0 nominators
2024-04-29 07:49:05 [#7417] 🗳 creating a snapshot with metadata SolutionOrSnapshotSize { voters: 9, targets: 9 }
2024-04-29 07:49:05 [#7417] 🗳 Starting phase Signed, round 2.
2024-04-29 07:49:06 [#7597] 🗳 Starting phase Unsigned((true, 7597)), round 2.
2024-04-29 07:49:06 [#7598] 🗳 queued unsigned solution with score ElectionScore { minimal_stake: 184447246591607, sum_stake: 1475577972732856, sum_stake_squared: 272166294201800640629142739592 }
2024-04-29 07:49:07 [#7777] 🗳 Finalized election round with compute Unsigned.
2024-04-29 07:49:07 [#7777] 🗳 Starting phase Off, round 3.
2024-04-29 07:49:07 [7777] 💸 new validator set of size 8 has been processed for era 2
2024-04-29 07:49:09 ⚙️ Syncing 206.2 bps, target=#137401 (10 peers), best: #8099 (0x559a…9c2e), finalized #7680 (0x84b6…abc0), ⬇ 103.9kiB/s ⬆ 0.9kiB/s
2024-04-29 07:49:14 ⚙️ Syncing 204.4 bps, target=#137401 (10 peers), best: #9121 (0xf95e…5a17), finalized #8704 (0x6e49…33cd), ⬇ 98.0kiB/s ⬆ 1.5kiB/s
```
#### Build from source
> **Note**
>
> Please note that the following instructions were tested specifically on an Ubuntu machine. If you are using a different operating system, you may need to adjust the commands accordingly.
> However, they should work on all Debian installations, and with minor tweaks, on all Linux distros.
Before proceeding, install the required dependencies:
1. The Rust toolchain: Go to [rust-lang.org/tools/install](https://www.rust-lang.org/tools/install) and follow the instructions to install the Rust toolchain onto your system.
Verify Rust is installed on your system by running:
```bash
rustc --version
```
> **Note**
>
> If the installation process seemed to go smoothly and the command above still doesn't work:
>
> 1. Close your current terminal and try it in a new one.
> 2. Alternatively, in your old terminal, run `source $HOME/.cargo/env` and then run `source $HOME/.cargo/env` again.
If you still encounter issues with Rust's installation, refer to the [Rust installation guide](https://www.rust-lang.org/tools/install) for troubleshooting tips.
2. Make sure your Linux distro is up-to-date by running:
```bash
apt update && apt upgrade
```
3. Make sure some common dependencies are installed using:
```bash
apt install make clang pkg-config libssl-dev build-essential git curl llvm libudev-dev cmake protobuf-compiler -y
```
> **Note**
>
> Some of these commands might not work without being prefixed by 'sudo'.
> However, the 'sudo' command gives the terminal root access, so be careful
> when using it.
4. Clone the Avail node repo and move your terminal into it:
```bash
git clone https://github.com/availproject/avail.git && cd avail
```
5. Build the Avail node by executing this command:
```bash
cargo build --release
```
> **Note**
>
> The build process may take some time, depending on your system's specifications.
> On a system with a Quad-core processor & 8GBs of RAM, the build process typically takes
> around 35-40 minutes.
6. Once your Avail node is compiled locally, you can run it using:
```bash
cargo run --release -- --name a-random-name --chain mainnet -d ./output
```
7. Your terminal output should look something like this:
```bash
2024-04-29 07:48:22 Avail Node
2024-04-29 07:48:22 ✌️ version 2.1.1-8608dc47f00
2024-04-29 07:48:22 ❤️ by Avail Project , 2017-2024
2024-04-29 07:48:22 📋 Chain specification: Avail Turing Network
2024-04-29 07:48:22 🏷 Node name: possible-point-3102
2024-04-29 07:48:22 👤 Role: FULL
2024-04-29 07:48:22 💾 Database: ParityDb at ./output/chains/avail_turing_network/paritydb/full
2024-04-29 07:48:27 🔨 Initializing Genesis block/state (state: 0x5603…9c01, header-hash: 0xd3d2…8b70)
2024-04-29 07:48:27 👴 Loading GRANDPA authority set from genesis on what appears to be first startup.
2024-04-29 07:48:29 👶 Creating empty BABE epoch changes on what appears to be first startup.
2024-04-29 07:48:29 🏷 Local node identity is: 12D3KooWELgzaRZqsHNyUodhZZF7A1ydsRpgLsY7fojDegKni4YF
2024-04-29 07:48:29 Prometheus metrics extended with avail metrics
2024-04-29 07:48:29 💻 Operating system: linux
2024-04-29 07:48:29 💻 CPU architecture: x86_64
2024-04-29 07:48:29 💻 Target environment: gnu
2024-04-29 07:48:29 💻 CPU: DO-Premium-Intel
2024-04-29 07:48:29 💻 CPU cores: 4
2024-04-29 07:48:29 💻 Memory: 7937MB
2024-04-29 07:48:29 💻 Kernel: 5.15.0-105-generic
2024-04-29 07:48:29 💻 Linux distribution: Ubuntu 22.04.4 LTS
2024-04-29 07:48:29 💻 Virtual machine: yes
2024-04-29 07:48:29 📦 Highest known block at #0
2024-04-29 07:48:29 Running JSON-RPC server: addr=127.0.0.1:9944, allowed origins=["http://localhost:*", "http://127.0.0.1:*", "https://localhost:*", "https://127.0.0.1:*", "https://polkadot.js.org"]
2024-04-29 07:48:29 🏁 CPU score: 950.72 MiBs
2024-04-29 07:48:29 🏁 Memory score: 4.02 GiBs
2024-04-29 07:48:29 🏁 Disk score (seq. writes): 845.72 MiBs
2024-04-29 07:48:29 🏁 Disk score (rand. writes): 338.52 MiBs
2024-04-29 07:48:29 〽️ Prometheus exporter started at 127.0.0.1:9615
2024-04-29 07:48:30 🔍 Discovered new external address for our node: /ip4/139.59.94.121/tcp/30333/ws/p2p/12D3KooWELgzaRZqsHNyUodhZZF7A1ydsRpgLsY7fojDegKni4YF
2024-04-29 07:48:34 ⚙️ Syncing, target=#137399 (9 peers), best: #1000 (0x9e8f…55ab), finalized #512 (0x0a9a…875a), ⬇ 316.3kiB/s ⬆ 14.2kiB/s
2024-04-29 07:48:39 ⚙️ Syncing 235.4 bps, target=#137399 (9 peers), best: #2177 (0x5828…e9da), finalized #2048 (0x2f65…3b2e), ⬇ 113.3kiB/s ⬆ 5.5kiB/s
2024-04-29 07:48:43 [3097] 💸 generated 8 npos targets
2024-04-29 07:48:43 [3097] 💸 generated 8 npos voters, 8 from validators and 0 nominators
2024-04-29 07:48:43 [#3097] 🗳 creating a snapshot with metadata SolutionOrSnapshotSize { voters: 8, targets: 8 }
2024-04-29 07:48:43 [#3097] 🗳 Starting phase Signed, round 1.
2024-04-29 07:48:44 [#3277] 🗳 Starting phase Unsigned((true, 3277)), round 1.
2024-04-29 07:48:44 [#3278] 🗳 queued unsigned solution with score ElectionScore { minimal_stake: 184467440819699, sum_stake: 184467440819699, sum_stake_squared: 34028236722569152873026450601 }
2024-04-29 07:48:44 ⚙️ Syncing 236.0 bps, target=#137400 (10 peers), best: #3357 (0x0c50…7d21), finalized #3072 (0x2803…c15b), ⬇ 244.0kiB/s ⬆ 20.2kiB/s
2024-04-29 07:48:44 [#3457] 🗳 Starting phase Off, round 2.
2024-04-29 07:48:44 [3457] 💸 new validator set of size 1 has been processed for era 1
2024-04-29 07:48:49 ⚙️ Syncing 206.2 bps, target=#137400 (10 peers), best: #4388 (0x2d3d…6b93), finalized #4177 (0x58f8…9518), ⬇ 261.5kiB/s ⬆ 11.6kiB/s
2024-04-29 07:48:54 ⚙️ Syncing 232.0 bps, target=#137400 (10 peers), best: #5548 (0x1aef…1c46), finalized #5120 (0x274f…e5d7), ⬇ 122.7kiB/s ⬆ 6.9kiB/s
2024-04-29 07:48:59 ⚙️ Syncing 118.2 bps, target=#137400 (10 peers), best: #6139 (0x9e52…af00), finalized #5632 (0x5297…a001), ⬇ 66.5kiB/s ⬆ 4.9kiB/s
2024-04-29 07:49:04 ⚙️ Syncing 185.7 bps, target=#137401 (10 peers), best: #7068 (0x911d…666a), finalized #6656 (0xdd79…2e5e), ⬇ 80.7kiB/s ⬆ 1.5kiB/s
2024-04-29 07:49:05 [7417] 💸 generated 9 npos targets
2024-04-29 07:49:05 [7417] 💸 generated 9 npos voters, 9 from validators and 0 nominators
2024-04-29 07:49:05 [#7417] 🗳 creating a snapshot with metadata SolutionOrSnapshotSize { voters: 9, targets: 9 }
2024-04-29 07:49:05 [#7417] 🗳 Starting phase Signed, round 2.
2024-04-29 07:49:06 [#7597] 🗳 Starting phase Unsigned((true, 7597)), round 2.
2024-04-29 07:49:06 [#7598] 🗳 queued unsigned solution with score ElectionScore { minimal_stake: 184447246591607, sum_stake: 1475577972732856, sum_stake_squared: 272166294201800640629142739592 }
2024-04-29 07:49:07 [#7777] 🗳 Finalized election round with compute Unsigned.
2024-04-29 07:49:07 [#7777] 🗳 Starting phase Off, round 3.
2024-04-29 07:49:07 [7777] 💸 new validator set of size 8 has been processed for era 2
2024-04-29 07:49:09 ⚙️ Syncing 206.2 bps, target=#137401 (10 peers), best: #8099 (0x559a…9c2e), finalized #7680 (0x84b6…abc0), ⬇ 103.9kiB/s ⬆ 0.9kiB/s
2024-04-29 07:49:14 ⚙️ Syncing 204.4 bps, target=#137401 (10 peers), best: #9121 (0xf95e…5a17), finalized #8704 (0x6e49…33cd), ⬇ 98.0kiB/s ⬆ 1.5kiB/s
```
#### Using Docker
> **Note**
>
> 1. This part of the guide assumes you have [Docker engine installed](https://docs.docker.com/engine/)
> on your system.
>
> 2. You can quickly check if it is installed by running:
>
> ```bash
> docker run hello-world
> ```
>
> 3. It is recommended to run Docker without using the 'sudo' command.
> Check out [these post-installation instructions in Docker's docs](https://docs.docker.com/engine/install/linux-postinstall/) to do so.
To download and run an Avail node using Docker:
1. Simply run the following command in your terminal:
```bash
docker run --restart=on-failure -d -v /root/avail/node-data:/da/node-data -p 9944:9944 -p 30333:30333 docker.io/availj/avail: --chain mainnet -d ./output --name a-random-name
```
* -d runs the container in the background
* -v mounts a volume into the container
* -p publishes containers port to the host machine
2. To configure Docker specific flags you can refer to Docker's documentation,
and you can check out the Additional configs section in this page to get more information
on how to configure the Avail node.
3. To a persistent output from the container, you can run:
```bash
docker logs -f
```
4. After some time, your terminal output should look something like this:
```bash
2024-04-30 16:37:49 💤 Idle (11 peers), best: #143238 (0xde00…04e0), finalized #143236 (0x5624…13b1), ⬇ 1.0kiB/s ⬆ 2.3kiB/s
2024-04-30 16:37:54 💤 Idle (11 peers), best: #143238 (0xde00…04e0), finalized #143236 (0x5624…13b1), ⬇ 1.9kiB/s ⬆ 4.5kiB/s
2024-04-30 16:37:59 💤 Idle (11 peers), best: #143238 (0xde00…04e0), finalized #143236 (0x5624…13b1), ⬇ 2.9kiB/s ⬆ 4.2kiB/s
2024-04-30 16:38:00 ✨ Imported #143239 (0x43fb…a69f)
2024-04-30 16:38:04 💤 Idle (11 peers), best: #143239 (0x43fb…a69f), finalized #143237 (0xbb06…d3ec), ⬇ 5.1kiB/s ⬆ 3.7kiB/s
2024-04-30 16:38:09 💤 Idle (11 peers), best: #143239 (0x43fb…a69f), finalized #143237 (0xbb06…d3ec), ⬇ 2.3kiB/s ⬆ 4.8kiB/s
2024-04-30 16:38:14 💤 Idle (11 peers), best: #143239 (0x43fb…a69f), finalized #143237 (0xbb06…d3ec), ⬇ 1.7kiB/s ⬆ 4.4kiB/s
2024-04-30 16:38:19 💤 Idle (11 peers), best: #143239 (0x43fb…a69f), finalized #143237 (0xbb06…d3ec), ⬇ 3.9kiB/s ⬆ 7.0kiB/s
2024-04-30 16:38:20 ✨ Imported #143240 (0xc8dd…6b41)
2024-04-30 16:38:24 💤 Idle (11 peers), best: #143240 (0xc8dd…6b41), finalized #143237 (0xbb06…d3ec), ⬇ 4.7kiB/s ⬆ 8.1kiB/s
2024-04-30 16:38:29 💤 Idle (12 peers), best: #143240 (0xc8dd…6b41), finalized #143238 (0xde00…04e0), ⬇ 3.8kiB/s ⬆ 4.7kiB/s
2024-04-30 16:38:34 💤 Idle (12 peers), best: #143240 (0xc8dd…6b41), finalized #143238 (0xde00…04e0), ⬇ 2.2kiB/s ⬆ 5.0kiB/s
2024-04-30 16:38:39 💤 Idle (12 peers), best: #143240 (0xc8dd…6b41), finalized #143238 (0xde00…04e0), ⬇ 1.6kiB/s ⬆ 4.2kiB/s
2024-04-30 16:38:40 ✨ Imported #143241 (0x4d2c…e08a)
2024-04-30 16:38:40 ♻️ Reorg on #143241,0x4d2c…e08a to #143241,0x2b03…6360, common ancestor #143240,0xc8dd…6b41
2024-04-30 16:38:40 ✨ Imported #143241 (0x2b03…6360)
2024-04-30 16:38:44 💤 Idle (12 peers), best: #143241 (0x2b03…6360), finalized #143238 (0xde00…04e0), ⬇ 5.2kiB/s ⬆ 6.7kiB/s
2024-04-30 16:38:49 💤 Idle (12 peers), best: #143241 (0x2b03…6360), finalized #143239 (0x43fb…a69f), ⬇ 5.3kiB/s ⬆ 6.8kiB/s
2024-04-30 16:38:54 💤 Idle (12 peers), best: #143241 (0x2b03…6360), finalized #143239 (0x43fb…a69f), ⬇ 2.1kiB/s ⬆ 2.9kiB/s
2024-04-30 16:38:59 💤 Idle (12 peers), best: #143241 (0x2b03…6360), finalized #143239 (0x43fb…a69f), ⬇ 3.1kiB/s ⬆ 7.2kiB/s
2024-04-30 16:39:00 ✨ Imported #143242 (0x807a…e405)
2024-04-30 16:39:00 ♻️ Reorg on #143242,0x807a…e405 to #143242,0xbf6b…7cfb, common ancestor #143241,0x2b03…6360
2024-04-30 16:39:00 ✨ Imported #143242 (0xbf6b…7cfb)
2024-04-30 16:39:04 💤 Idle (12 peers), best: #143242 (0xbf6b…7cfb), finalized #143239 (0x43fb…a69f), ⬇ 6.1kiB/s ⬆ 6.8kiB/s
2024-04-30 16:39:09 💤 Idle (12 peers), best: #143242 (0xbf6b…7cfb), finalized #143240 (0xc8dd…6b41), ⬇ 23.1kiB/s ⬆ 31.6kiB/s
2024-04-30 16:39:14 💤 Idle (12 peers), best: #143242 (0xbf6b…7cfb), finalized #143240 (0xc8dd…6b41), ⬇ 12.6kiB/s ⬆ 62.3kiB/s
2024-04-30 16:39:19 💤 Idle (12 peers), best: #143242 (0xbf6b…7cfb), finalized #143240 (0xc8dd…6b41), ⬇ 15.7kiB/s ⬆ 52.6kiB/s
2024-04-30 16:39:20 ✨ Imported #143243 (0x1de9…4a0b)
2024-04-30 16:39:24 💤 Idle (12 peers), best: #143243 (0x1de9…4a0b), finalized #143240 (0xc8dd…6b41), ⬇ 16.7kiB/s ⬆ 43.6kiB/s
2024-04-30 16:39:29 💤 Idle (12 peers), best: #143243 (0x1de9…4a0b), finalized #143241 (0x2b03…6360), ⬇ 7.1kiB/s ⬆ 34.3kiB/s
2024-04-30 16:39:34 💤 Idle (12 peers), best: #143243 (0x1de9…4a0b), finalized #143241 (0x2b03…6360), ⬇ 1.9kiB/s ⬆ 3.3kiB/s
2024-04-30 16:39:39 💤 Idle (12 peers), best: #143243 (0x1de9…4a0b), finalized #143241 (0x2b03…6360), ⬇ 27.4kiB/s ⬆ 31.7kiB/s
2024-04-30 16:39:40 ✨ Imported #143244 (0xb05b…2158)
2024-04-30 16:39:44 💤 Idle (12 peers), best: #143244 (0xb05b…2158), finalized #143241 (0x2b03…6360), ⬇ 13.8kiB/s ⬆ 35.3kiB/s
2024-04-30 16:39:49 💤 Idle (12 peers), best: #143244 (0xb05b…2158), finalized #143242 (0xbf6b…7cfb), ⬇ 8.2kiB/s ⬆ 131.8kiB/s
2024-04-30 16:39:54 💤 Idle (12 peers), best: #143244 (0xb05b…2158), finalized #143242 (0xbf6b…7cfb), ⬇ 7.0kiB/s ⬆ 4.1kiB/s
2024-04-30 16:39:59 💤 Idle (12 peers), best: #143244 (0xb05b…2158), finalized #143242 (0xbf6b…7cfb), ⬇ 16.3kiB/s ⬆ 44.4kiB/s
2024-04-30 16:40:00 ✨ Imported #143245 (0xe42d…9b4f)
2024-04-30 16:40:00 ♻️ Reorg on #143245,0xe42d…9b4f to #143245,0x0b16…c2ac, common ancestor #143244,0xb05b…2158
2024-04-30 16:40:00 ✨ Imported #143245 (0x0b16…c2ac)
2024-04-30 16:40:04 💤 Idle (12 peers), best: #143245 (0x0b16…c2ac), finalized #143242 (0xbf6b…7cfb), ⬇ 20.5kiB/s ⬆ 40.6kiB/s
2024-04-30 16:40:09 💤 Idle (12 peers), best: #143245 (0x0b16…c2ac), finalized #143243 (0x1de9…4a0b), ⬇ 4.6kiB/s ⬆ 11.4kiB/s
2024-04-30 16:40:14 💤 Idle (12 peers), best: #143245 (0x0b16…c2ac), finalized #143243 (0x1de9…4a0b), ⬇ 52.3kiB/s ⬆ 88.3kiB/s
2024-04-30 16:40:19 💤 Idle (12 peers), best: #143245 (0x0b16…c2ac), finalized #143243 (0x1de9…4a0b), ⬇ 33.4kiB/s ⬆ 40.9kiB/s
2024-04-30 16:40:20 ✨ Imported #143246 (0x8289…0798)
```
#### Assisted Deployment
[OnFinality](https://onfinality.io) is a blockchain native infrastructure provider supporting the Avail ecosystem with private Archive, Full, and Validator nodes. Your Avail node will be fully synced and ready to use within minutes.
> **Note**
>
> To run a node with OnFinality, first [Sign Up](https://app.onfinality.io/signup) for an OnFinality account.
>
> In this guide we will show you how to run a self-service Avail node. For a fully managed setup please contact [support@onfinality.io](mailto:support@onfinality.io)
1. Open the [OnFinality Portal](https://app.onfinality.io) and navigate to the "Dedicated Nodes" menu
2. Select "Avail" > "Deploy Node"
3. Enter your node's configuration, including:
* **Name:** The name you wish to give your node. If you connect to Telemetry this name will be public
* **Node Type:** Full, Archive, or Validator. Note: Lightning Restore is supported for Archive and Validator so your node will sync faster.
* **Image Version:** The (Recommended) version is... recommended!
* **Region:** Select the region which is closest to your applications which will use the node. Look out for the Lightning Restore icon for faster syncing.
* **Configuration:** The Compute size and storage of your node. If in doubt, start with the recommended configuration and scale as necessary.
Press "Next".
4. Review your node's Launch Arguments. See the complete commands and arguments supported by Avail at the bottom of this page.
Press "Next".
5. Review your node's configuration and press "Deploy Node"
6. Your node will initialize and be ready within several minutes. Confirm that the Syncing Status is "Synced" and the CPU is within a healthy range.
Congratulations, your Avail node is now ready to use!
Copy the API Endpoints and fire away
> **Note**
>
> The team at OnFinality will update your node for you as new Avail image versions are released.
>
> For more information, visit OnFinality's guide to [Maintaining and Upgrading your Dedicated Node](https://documentation.onfinality.io/support/maintain-and-upgrade-your-dedicated-node)
Your node will also appear on the [Avail Telemetry site](https://telemetry.avail.so/), listed under the "Node name" from the node command output.
Be sure to select the appropriate network tab at the top to view your node's status.
## Additional configs
The Avail node is a highly customizable piece of software. You can fetch a list of supported commands and flags
using:
```bash
./avail-node --help
```
Alternatively, you can check out [this notion page](https://avail-project.notion.site/Commands-and-options-supported-by-the-Avail-node-838b7b1fb7cd496a869987e7b7a72fdc?pvs=74).
> **Note**
>
> Please note that the notion page may not always be updated.
> The best way to reliably get the latest config options will be `./avail-node --help`.
### System Requirements
## System Requirements
This is the hardware configuration required to set up an Avail node:
| Component | Minimum | Recommended |
| ---------------------------- | :------: | :---------: |
| RAM | 8GB | 16GB |
| CPU (amd64/x86 architecture) | 4 core | 8 core |
| Storage (SSD) | 20-40 GB | 200-300 GB |
> While we do not favor any operating system, more secure and stable Linux server distributions (like CentOS) should be preferred over desktop operating systems (like Mac OS and Windows). Also, the minimum storage requirements will change over time as the network grows.
> It is recommended to use more than the minimum requirements to run a robust full node.
## Methods to Run an Avail Node
There are four primary methods to run an Avail node, each with its own set of instructions:
1. **Using Binaries:** You can follow the instructions provided in the next page for setting up an Avail node using binary releases.
This method is suitable for users who prefer manual installation and configuration.
For reference, you can also explore the [GitHub Releases](https://github.com/availproject/avail/releases) page for
a list of binary releases.
2. **Building from source:** The Avail node is based on open-sourced code. Feel free to
[clone the repo](https://github.com/availproject/avail) and build it locally.
3. **Using Docker:** If you have docker engine installed on your machine, you can use it to run
a [pre-built docker image for the Avail node](https://hub.docker.com/r/availj/avail/tags).
4. **Assisted Deployment:** If you prefer running your Avail node with the help of an infrastructure provider, you can run an avail node on [OnFinality](https://onfinality.io/networks/avail) and have a fully synced node ready to use in minutes
### How to Backup Your Avail Validator
## Understanding Validator Directories
Before diving into backup procedures, it's crucial to understand the directory structure of your Avail node.
### Directory Structure
The Avail node's directory structure is as follows:
```
└── chains
└── da_testnet
└── db
└── keystore
└── network
```
### Directory Descriptions
* **db**: This directory contains the database files, which store blockchain state, transaction history, and other data.
* **keystore**: This is where the encrypted key files for your Validator are stored.
* **network**: This directory contains configuration files related to network connectivity and peer management.
You can specify a custom directory using the `--base-path` parameter.
## Step 1: Re-Sync or Restore Snapshot
### To Re-Sync from Genesis
Run the following command:
```bash
avail purge-chain
```
### To Restore a Database Snapshot
1. Stop your node.
2. Delete existing chain data.
3. Download a snapshot from another node.
4. Restore the snapshot to the `db` folder.
> **Note**
>
> WARP SYNC
> Warp sync will be available in future releases, allowing quicker node setup.
## Step 2: Backup Keystore
### To Move Keystore to a Backup Node
1. Ensure the primary node is offline.
2. Transfer the keystore to a backup node that is in sync.
> **Error**
>
> EQUIVIVOCAITON RISK
> Never run two nodes with identical keys at the same time to avoid double-signing.
This method is not recommended for routine transitions between nodes. For safer alternatives, consult the [Upgrading Guide](/docs/da/operate/become-a-validator/upgrade-your-validator).
### Avail Node - Basics
## Introduction
The goal of this guide is to help you learn the basics of running Avail Node. Don't worry; it's not too complicated, and it won't take you longer than 5 minutes to get a good grasp of how everything works.
> **Note**
>
> BEFORE YOU START
> All the guides, including this one, assume that you are using a Linux or macOS-based system. If you are running Windows and want to follow this guide, make sure to install WSL and continue the guide inside an Ubuntu or Debian instance. To learn more about WSL, check the following [LINK](https://learn.microsoft.com/en-us/windows/wsl/install).
> **Note**
>
> NOTE
> Before trying anything, make sure that you fully read the chapter first before doing any actual work.
## Installation & Setup
Our first step is to obtain the prebuilt binary for Avail Node. [We offer a wide range of prebuilds](https://github.com/availproject/avail/releases), but in case you don't see your Linux flavor or architecture here, head to the FAQ chapter to learn how to build your own executable.
Once you have found your OS (or picked the generic one), execute the given command to obtain the needed Avail Node binary.
```bash
wget https://github.com/availproject/avail/releases/download//.tar.gz && tar -xf ./.tar.gz
```
## Running Our First Network
With the binary ready in our working directory, it's time to run it and see what we get.
```bash
./avail-node
```
Output:
```
Error: Input("Please specify which chain you want to run, e.g. --chain mainnet")
```
Yikes, an error. This is okay; by default, our node doesn't know which chain (network) it should connect to. To fix this, we will provide one, but not the recommended one, not yet.
Instead, we are going to run a development network:
```bash
./avail-node --chain dev
```
Output:
```bash
2023-11-27 16:26:31 Avail Node
2023-11-27 16:26:31 ✌️ version 2.1.4-9d88dbf7b4f
2023-11-27 16:26:31 ❤️ by Avail Project , 2017-2024
2023-11-27 16:26:31 📋 Chain specification: Avail Development Network
2023-11-27 16:26:31 🏷 Node name: cagey-owl-5997
2023-11-27 16:26:31 👤 Role: FULL
2023-11-27 16:26:31 💾 Database: RocksDb at /home/markopetrlic/.local/share/data-avail/chains/avail_development_network/db/full
2023-11-27 16:26:32 [0] 💸 generated 1 npos voters, 1 from validators and 0 nominators
2023-11-27 16:26:32 [0] 💸 generated 1 npos targets
2023-11-27 16:26:32 🔨 Initializing Genesis block/state (state: 0x11f1…3471, header-hash: 0xdb94…2e21)
2023-11-27 16:26:32 👴 Loading GRANDPA authority set from genesis on what appears to be first startup.
2023-11-27 16:26:32 👶 Creating empty BABE epoch changes on what appears to be first startup.
2023-11-27 16:26:32 🏷 Local node identity is: 12D3KooWSKgdEtRrdwWVFPoE3q6z8mzrD5nkQ14Z7ta3D7oTn99V
2023-11-27 16:26:32 Prometheus metrics extended with avail metrics
2023-11-27 16:26:32 💻 Operating system: linux
2023-11-27 16:26:32 💻 CPU architecture: x86_64
2023-11-27 16:26:32 💻 Target environment: gnu
2023-11-27 16:26:32 💻 CPU: 13th Gen Intel(R) Core(TM) i7-13700K
2023-11-27 16:26:32 💻 CPU cores: 16
2023-11-27 16:26:32 💻 Memory: 31863MB
2023-11-27 16:26:32 💻 Kernel: 6.5.12-300.fc39.x86_64
2023-11-27 16:26:32 💻 Linux distribution: Fedora Linux 39 (Workstation Edition)
2023-11-27 16:26:32 💻 Virtual machine: no
2023-11-27 16:26:32 📦 Highest known block at #0
2023-11-27 16:26:32 〽️ Prometheus exporter started at 127.0.0.1:9615
2023-11-27 16:26:32 Running JSON-RPC server: addr=127.0.0.1:9944, allowed origins=["http://localhost:*", "http://127.0.0.1:*", "https://localhost:*", "https://127.0.0.1:*", "https://polkadot.js.org"]
2023-11-27 16:26:32 🏁 CPU score: 1.65 GiBs
2023-11-27 16:26:32 🏁 Memory score: 22.64 GiBs
2023-11-27 16:26:32 🏁 Disk score (seq. writes): 2.16 GiBs
2023-11-27 16:26:32 🏁 Disk score (rand. writes): 733.69 MiBs
2023-11-27 16:26:37 💤 Idle (0 peers), best: #0 (0xdb94…2e21), finalized #0 (0xdb94…2e21), ⬇ 0 ⬆ 0
2023-11-27 16:26:42 💤 Idle (0 peers), best: #0 (0xdb94…2e21), finalized #0 (0xdb94…2e21), ⬇ 0 ⬆ 0
2023-11-27 16:26:47 💤 Idle (0 peers), best: #0 (0xdb94…2e21), finalized #0 (0xdb94…2e21), ⬇ 0 ⬆ 0
2023-11-27 16:26:52 💤 Idle (0 peers), best: #0 (0xdb94…2e21), finalized #0 (0xdb94…2e21), ⬇ 0 ⬆ 0
```
Okay, things are looking better now. No errors so far, but let's break it down for clarity.
### Understanding the logs
```bash
2023-11-27 16:26:31 Avail Node
2023-11-27 16:26:31 ✌️ version 1.8.3-6d8aff28012
2023-11-27 16:26:31 ❤️ by Anonymous, 2017-2023
2023-11-27 16:26:31 📋 Chain specification: Avail Development Network
2023-11-27 16:26:31 🏷 Node name: cagey-owl-5997
2023-11-27 16:26:31 👤 Role: FULL
```
The first, second, and fourth lines indicate that we're running Avail Node v1.8.3 with the Development chain—exactly what we wanted.
The fifth line, `🏷 Node name: cagey-owl-5997`, shows our node name as `cagey-owl-5997`, which isn't ideal. We'll change that shortly.
The last line, `👤 Role: FULL`, reveals that our node is in Full mode, meaning it can't produce blocks. We'll address that too.
### Changing Name
To change our node's name, use the `--name` flag. Before proceeding, make sure to stop your node with `Ctrl-C`. Now, let's rerun it with a more appealing name:
```bash
./avail-node --chain dev --name KingMagnifico
```
Output:
```bash
2023-11-27 16:39:37 Avail Node
2023-11-27 16:39:37 ✌️ version 1.8.3-6d8aff28012
2023-11-27 16:39:37 ❤️ by Anonymous, 2017-2023
2023-11-27 16:39:37 📋 Chain specification: Avail Development Network
2023-11-27 16:39:37 🏷 Node name: KingMagnifico
2023-11-27 16:39:37 👤 Role: FULL
...
```
### Changing from Full to Validator mode
To run our node in validator mode, add the `--validator` flag along with the others. Without this mode, the node won't produce new blocks.
Stop your node again with Ctrl+C and rerun it with the `--validator` flag::
```bash
./avail-node --chain dev --name KingMagnifico --validator
```
Output:
```bash
2023-11-27 16:41:49 Avail Node
2023-11-27 16:41:49 ✌️ version 1.8.3-6d8aff28012
2023-11-27 16:41:49 ❤️ by Anonymous, 2017-2023
2023-11-27 16:41:49 📋 Chain specification: Avail Development Network
2023-11-27 16:41:49 🏷 Node name: KingMagnifico
2023-11-27 16:41:49 👤 Role: AUTHORITY
...
```
Now, instead of 'FULL,' it should say 'AUTHORITY,' indicating that our node is almost ready to produce blocks.
### Session Keys and Peers
If we let our program run for a minute or two, we'll notice the same message being repeated:
```bash
...
2023-11-27 16:48:57 💤 Idle (0 peers), best: #0 (0xdb94…2e21), finalized #0 (0xdb94…2e21), ⬇ 0 ⬆ 0
```
Our node is operating in validator mode, but the network expects validator 'Alice' to be online. To enable block production, besides using the `--validator` flag, the node needs session keys for signing various parts of block production. Without these keys, the network can't identify the block producer, leaving us stuck at block 0. In the next chapter, we'll address how to generate your own session keys. For this development network, we can use the `--alice` flag, and it will automatically insert Alice's session keys.
Let's stop our node again with Ctrl+C and rerun it with the `--alice` flag:
```bash
./avail-node --chain dev --name KingMagnifico --validator --alice
```
Output:
```bash
...
2023-11-27 16:57:10 💤 Idle (0 peers), best: #0 (0xdb94…2e21), finalized #0 (0xdb94…2e21), ⬇ 0 ⬆ 0
2023-11-27 16:57:15 💤 Idle (0 peers), best: #0 (0xdb94…2e21), finalized #0 (0xdb94…2e21), ⬇ 0 ⬆ 0
2023-11-27 16:57:20 🙌 Starting consensus session on top of parent 0xdb94358c6e772b68a9e23b0ecbea316e4245f4d67b140ae5ffb58709ba222e21
2023-11-27 16:57:20 🎁 Prepared block for proposing at 1 (53 ms) [hash: 0xe7562addc0f4c6a249f23c7696f1a033c8801e33b413440b7d6e45f14da24acf; parent_hash: 0xdb94…2e21; extrinsics (1): [0x5e8b…40ea]
2023-11-27 16:57:20 🔖 Pre-sealed block for proposal at 1. Hash now 0x65ff1a30292f68a8c93e59a96a769975cdeb0d18d13fed5a83f168d579190645, previously 0xe7562addc0f4c6a249f23c7696f1a033c8801e33b413440b7d6e45f14da24acf.
2023-11-27 16:57:20 👶 New epoch 0 launching at block 0x65ff…0645 (block slot 85055032 >= start slot 85055032).
2023-11-27 16:57:20 👶 Next epoch starts at slot 85055752
2023-11-27 16:57:20 ✨ Imported #1 (0x65ff…0645)
2023-11-27 16:57:20 💤 Idle (0 peers), best: #1 (0x65ff…0645), finalized #0 (0xdb94…2e21), ⬇ 0 ⬆ 0
2023-11-27 16:57:25 💤 Idle (0 peers), best: #1 (0x65ff…0645), finalized #0 (0xdb94…2e21), ⬇ 0 ⬆ 0
2023-11-27 16:57:25 ❌ Error while dialing /dns/telemetry.avail.tools/tcp/8001/x-parity-ws/%2Fsubmit: Custom { kind: Other, error: Timeout }
2023-11-27 16:57:30 💤 Idle (0 peers), best: #1 (0x65ff…0645), finalized #0 (0xdb94…2e21), ⬇ 0 ⬆ 0
2023-11-27 16:57:35 💤 Idle (0 peers), best: #1 (0x65ff…0645), finalized #0 (0xdb94…2e21), ⬇ 0 ⬆ 0
2023-11-27 16:57:40 🙌 Starting consensus session on top of parent 0x65ff1a30292f68a8c93e59a96a769975cdeb0d18d13fed5a83f168d579190645
2023-11-27 16:57:40 🎁 Prepared block for proposing at 2 (0 ms) [hash: 0xd8b30ca60b080fd49decae48c1ad291a7666f4a3c2287ad5e596565ab1331016; parent_hash: 0x65ff…0645; extrinsics (1): [0x007f…9c1a]
2023-11-27 16:57:40 🔖 Pre-sealed block for proposal at 2. Hash now 0xaa5b610cf99ea519025f4fb803c4e4d874ed8d4eae97045327d44c364bdaec4a, previously 0xd8b30ca60b080fd49decae48c1ad291a7666f4a3c2287ad5e596565ab1331016.
2023-11-27 16:57:40 ✨ Imported #2 (0xaa5b…ec4a)
2023-11-27 16:57:40 💤 Idle (0 peers), best: #2 (0xaa5b…ec4a), finalized #0 (0xdb94…2e21), ⬇ 0 ⬆ 0
2023-11-27 16:57:45 💤 Idle (0 peers), best: #2 (0xaa5b…ec4a), finalized #0 (0xdb94…2e21), ⬇ 0 ⬆ 0
2023-11-27 16:57:50 💤 Idle (0 peers), best: #2 (0xaa5b…ec4a), finalized #0 (0xdb94…2e21), ⬇ 0 ⬆ 0
2023-11-27 16:57:55 💤 Idle (0 peers), best: #2 (0xaa5b…ec4a), finalized #0 (0xdb94…2e21), ⬇ 0 ⬆ 0
2023-11-27 16:58:00 🙌 Starting consensus session on top of parent 0xaa5b610cf99ea519025f4fb803c4e4d874ed8d4eae97045327d44c364bdaec4a
2023-11-27 16:58:00 🎁 Prepared block for proposing at 3 (0 ms) [hash: 0xfae370e93725b66c3909186d9e8d37f28e3ca6ab4f42841cc811d113d98a9335; parent_hash: 0xaa5b…ec4a; extrinsics (1): [0x1e14…5a8e]
2023-11-27 16:58:00 🔖 Pre-sealed block for proposal at 3. Hash now 0x78914110e09581baf6d85c791d1bc9f66400bc6fae2db7ee6724706870689083, previously 0xfae370e93725b66c3909186d9e8d37f28e3ca6ab4f42841cc811d113d98a9335.
2023-11-27 16:58:00 ✨ Imported #3 (0x7891…9083)
2023-11-27 16:58:00 💤 Idle (0 peers), best: #3 (0x7891…9083), finalized #0 (0xdb94…2e21), ⬇ 0 ⬆ 0
2023-11-27 16:58:05 💤 Idle (0 peers), best: #3 (0x7891…9083), finalized #1 (0x65ff…0645), ⬇ 0 ⬆ 0
```
Now, we are running our own development network and we are producing and finalizing blocks. If this doesn't work and you're still stuck at block zero, try adding `--force-authoring` along with the other flags.
### There Must Be A Simpler Way
Although we've used several flags to run a development network, there's an easier way—use the `--dev` flag. This flag combines the following flags into one: `--chain=dev`, `--force-authoring`, `--alice`, `--tmp`, and `--rpc-cors=all`. The last two flags, `--tmp` and `--rpc-cors=all`, are new to us, and we'll discuss `--tmp` shortly.
Stop the node again with Ctrl+C and rerun it with the `--dev` flag:
```bash
./avail-node --dev --name KingMagnifico
```
Output:
```bash
...
2023-11-27 17:05:11 👶 Starting BABE Authorship worker
2023-11-27 17:05:16 💤 Idle (0 peers), best: #0 (0xdb94…2e21), finalized #0 (0xdb94…2e21), ⬇ 0 ⬆ 0
2023-11-27 17:05:20 🙌 Starting consensus session on top of parent 0xdb94358c6e772b68a9e23b0ecbea316e4245f4d67b140ae5ffb58709ba222e21
2023-11-27 17:05:20 🎁 Prepared block for proposing at 1 (53 ms) [hash: 0x14e7136f060633d6fe4c47e85deb3cc6617dd5b978ee32e504eb5c3f900808bf; parent_hash: 0xdb94…2e21; extrinsics (1): [0xf649…0401]
2023-11-27 17:05:20 🔖 Pre-sealed block for proposal at 1. Hash now 0xfb47a6c99e803ee10678440beeb9f870dfb9b807ef96f5172f1d02bf0c163e3e, previously 0x14e7136f060633d6fe4c47e85deb3cc6617dd5b978ee32e504eb5c3f900808bf.
2023-11-27 17:05:20 👶 New epoch 0 launching at block 0xfb47…3e3e (block slot 85055056 >= start slot 85055056).
2023-11-27 17:05:20 👶 Next epoch starts at slot 85055776
2023-11-27 17:05:20 ✨ Imported #1 (0xfb47…3e3e)
2023-11-27 17:05:21 💤 Idle (0 peers), best: #1 (0xfb47…3e3e), finalized #0 (0xdb94…2e21), ⬇ 0 ⬆ 0
```
And we get the same result.
### Temporary and Persistent Storage
When our node runs a network, it needs to store network-related data. By not specifying a location, it stores the data in a default location, which is often not what we want.
Using the `--tmp` flag makes it use a different location each time we run our network. This is implied when using `--dev` and is useful when we don't care about preserving our state. To make our storage persistent through runs, we can use the `-d` flag.
```bash
./avail-node --dev --name KingMagnifico -d ./node-data
```
Output
```bash
2023-11-27 17:13:54 Avail Node
2023-11-27 17:13:54 ✌️ version 1.8.3-6d8aff28012
2023-11-27 17:13:54 ❤️ by Anonymous, 2017-2023
2023-11-27 17:13:54 📋 Chain specification: Avail Development Network
2023-11-27 17:13:54 🏷 Node name: KingMagnifico
2023-11-27 17:13:54 👤 Role: AUTHORITY
2023-11-27 17:13:54 💾 Database: RocksDb at ./node-data/chains/avail_development_network/db/full
```
In the logs (output), you'll notice our database is now located at `./node-data/chains/avail_development_network/db/full` instead of the `tmp` folder.
Once the node is running, a new folder named `node-data` will be created in the working directory. If you take a look, you will see that it consists of subdirectories like `chains` and `avail_development_network`. Inside the last directory, you should find our network data.
After running the node for a minute or two, stop it by pressing Ctrl+C and rerun it. It should use the same storage (database) location and continue from the last produced block.
Now stop the node with Ctrl+C and let's remove our storage: `rm ./node-data -r`.
## Connecting Our Node to Turing
With all this preliminary knowledge ready to be used, we can now finally take the last step and connect our node to the Turing network. I will use the same name as before, KingMagnifico, but I suggest you choose one that you like.
Before running our node, ensure that our storage folder is removed or empty, and that we don't have any previous nodes already running. With that said, let's finally do what we've been waiting for since the beginning:
```bash
./avail-node --chain turing --name KingMagnifico --validator -d ./node-data
```
Output:
```bash
2023-11-27 17:24:41 Avail Node
2023-11-27 17:24:41 ✌️ version 1.8.3-6d8aff28012
2023-11-27 17:24:41 ❤️ by Anonymous, 2017-2023
2023-11-27 17:24:41 📋 Chain specification: Avail Turing Testnet
2023-11-27 17:24:41 🏷 Node name: KingMagnifico
2023-11-27 17:24:41 👤 Role: AUTHORITY
2023-11-27 17:24:41 💾 Database: RocksDb at ./node-data/chains/avail_turing_testnet/db/full
```
Okay, so far so good. Our role is `AUTHORITY`, which means that we are running in validator mode. Our name is clearly the correct one, KingMagnifico, and our database location is correct. Let's see the next few log lines:
```bash
2023-11-27 17:24:43 🔨 Initializing Genesis block/state (state: 0x6bc7…ec83, header-hash: 0x6f09…a7ae)
2023-11-27 17:24:43 👴 Loading GRANDPA authority set from genesis on what appears to be first startup.
2023-11-27 17:24:43 👶 Creating empty BABE epoch changes on what appears to be first startup.
2023-11-27 17:24:43 🏷 Local node identity is: 12D3KooWH5bTMnPJXnUqmGcVTX1fmG5ervReMTBFpFZdJNc9WW4u
2023-11-27 17:24:43 Prometheus metrics extended with avail metrics
2023-11-27 17:24:43 💻 Operating system: linux
2023-11-27 17:24:43 💻 CPU architecture: x86_64
2023-11-27 17:24:43 💻 Target environment: gnu
2023-11-27 17:24:43 💻 CPU: 13th Gen Intel(R) Core(TM) i7-13700K
2023-11-27 17:24:43 💻 CPU cores: 16
2023-11-27 17:24:43 💻 Memory: 31863MB
2023-11-27 17:24:43 💻 Kernel: 6.5.12-300.fc39.x86_64
2023-11-27 17:24:43 💻 Linux distribution: Fedora Linux 39 (Workstation Edition)
2023-11-27 17:24:43 💻 Virtual machine: no
2023-11-27 17:24:43 📦 Highest known block at #0
2023-11-27 17:24:43 〽️ Prometheus exporter started at 127.0.0.1:9615
2023-11-27 17:24:43 Running JSON-RPC server: addr=127.0.0.1:9944, allowed origins=["http://localhost:*", "http://127.0.0.1:*", "https://localhost:*", "https://127.0.0.1:*", "https://polkadot.js.org"]
2023-11-27 17:24:43 🏁 CPU score: 1.61 GiBs
2023-11-27 17:24:43 🏁 Memory score: 22.37 GiBs
2023-11-27 17:24:43 🏁 Disk score (seq. writes): 2.06 GiBs
2023-11-27 17:24:43 🏁 Disk score (rand. writes): 749.80 MiBs
2023-11-27 17:24:43 👶 Starting BABE Authorship worker
2023-11-27 17:24:44 🔍 Discovered new external address for our node: /ip4/176.61.156.176/tcp/30333/p2p/12D3KooWH5bTMnPJXnUqmGcVTX1fmG5ervReMTBFpFZdJNc9WW4u
2023-11-27 17:24:48 ⚙️ Syncing, target=#85251 (8 peers), best: #2685 (0x6fd4…975f), finalized #2560 (0x1282…a791), ⬇ 2.9MiB/s ⬆ 62.5kiB/s
2023-11-27 17:24:53 ⚙️ Syncing 63.0 bps, target=#85251 (8 peers), best: #3000 (0x8189…6cc7), finalized #2560 (0x1282…a791), ⬇ 108.2kiB/s ⬆ 5.5kiB/s
```
Nothing that we haven't seen before, except for the last two lines. `⚙️ Syncing` means that we are syncing all the blocks that were already built, which is exactly what we wanted to see. Let's check the next few lines:
```bash
2023-11-27 17:24:57 [3241] 💸 generated 13 npos targets
2023-11-27 17:24:57 [3241] 💸 generated 22 npos voters, 13 from validators and 9 nominators
2023-11-27 17:24:57 [#3241] 🗳 creating a snapshot with metadata SolutionOrSnapshotSize { voters: 22, targets: 13 }
2023-11-27 17:24:57 [#3241] 🗳 Starting phase Signed, round 1.
2023-11-27 17:24:58 ⚙️ Syncing 61.0 bps, target=#85251 (8 peers), best: #3305 (0xc752…f70e), finalized #3072 (0x1231…8aad), ⬇ 113.8kiB/s ⬆ 0.9kiB/s
2023-11-27 17:25:00 [#3421] 🗳 Starting phase Unsigned((true, 3421)), round 1.
2023-11-27 17:25:00 [#3422] 🗳 queued unsigned solution with score ElectionScore { minimal_stake: 56800545104270, sum_stake: 284279432410424, sum_stake_squared: 16163020265485588884279726278 }
2023-11-27 17:25:02 [#3601] 🗳 Starting phase Off, round 2.
2023-11-27 17:25:02 [3601] 💸 new validator set of size 5 has been processed for era 1
2023-11-27 17:25:03 ⚙️ Syncing 174.0 bps, target=#85252 (8 peers), best: #4175 (0x4e80…5022), finalized #4096 (0xa3c0…c108), ⬇ 218.9kiB/s ⬆ 3.1kiB/s
2023-11-27 17:25:08 ⚙️ Syncing 86.6 bps, target=#85252 (8 peers), best: #4608 (0x1783…e94d), finalized #4321 (0xc708…7dc1), ⬇ 60.8kiB/s ⬆ 0.3kiB/s
2023-11-27 17:25:13 ⚙️ Syncing 194.6 bps, target=#85252 (8 peers), best: #5581 (0x5349…c169), finalized #5120 (0x065c…2a2f), ⬇ 94.7kiB/s ⬆ 0.6kiB/s
2023-11-27 17:25:17 [7561] 💸 generated 35 npos targets
2023-11-27 17:25:17 [7561] 💸 generated 64 npos voters, 35 from validators and 29 nominators
2023-11-27 17:25:17 [#7561] 🗳 creating a snapshot with metadata SolutionOrSnapshotSize { voters: 64, targets: 35 }
2023-11-27 17:25:17 [#7561] 🗳 Starting phase Signed, round 2.
2023-11-27 17:25:18 [#7741] 🗳 Starting phase Unsigned((true, 7741)), round 2.
2023-11-27 17:25:18 [#7742] 🗳 queued unsigned solution with score ElectionScore { minimal_stake: 55937820931230, sum_stake: 581366796392448, sum_stake_squared: 33804612421896598810633033648 }
2023-11-27 17:25:18 [#7921] 🗳 Finalized election round with compute Unsigned.
2023-11-27 17:25:18 [#7921] 🗳 Starting phase Off, round 3.
2023-11-27 17:25:18 [7921] 💸 new validator set of size 10 has been processed for era 2
2023-11-27 17:25:18 ⚙️ Syncing 479.4 bps, target=#85252 (8 peers), best: #7978 (0x01f5…a562), finalized #7680 (0x0ba7…c3f5), ⬇ 302.9kiB/s ⬆ 3.8kiB/s
2023-11-27 17:25:23 ⚙️ Syncing 453.4 bps, target=#85253 (8 peers), best: #10245 (0xad17…4ded), finalized #10240 (0x13da…a4be), ⬇ 591.2kiB/s ⬆ 1.0kiB/s
2023-11-27 17:25:25 [11613] 💸 generated 35 npos targets
2023-11-27 17:25:25 [11613] 💸 generated 74 npos voters, 35 from validators and 39 nominators
```
It's syncing around 450 blocks per second—quite fast! If we leave it for 5 or 10 minutes, it should be done syncing, and this is what we are going to see:
```bash
2023-11-27 17:31:30 [84993] 💸 new validator set of size 185 has been processed for era 21
2023-11-27 17:31:33 ⚙️ Preparing 104.2 bps, target=#85271 (8 peers), best: #85232 (0x234e…a535), finalized #84992 (0x62c0…772a), ⬇ 54.7kiB/s ⬆ 0.9kiB/s
2023-11-27 17:31:38 💤 Idle (8 peers), best: #85271 (0xa69a…7366), finalized #85269 (0xe83c…64ba), ⬇ 46.8kiB/s ⬆ 1.6kiB/s
2023-11-27 17:31:40 ✨ Imported #85272 (0x0410…df45)
2023-11-27 17:31:43 💤 Idle (8 peers), best: #85272 (0x0410…df45), finalized #85270 (0x7604…006b), ⬇ 43.8kiB/s ⬆ 159.2kiB/s
2023-11-27 17:31:48 💤 Idle (8 peers), best: #85272 (0x0410…df45), finalized #85270 (0x7604…006b), ⬇ 87.2kiB/s ⬆ 209.8kiB/s
```
Once we see `💤 Idle`, we are done syncing, and our node has now fully caught up.
## What's Next
This is where our story ends. We have a working node connected to the Turing chain. It doesn't do much right now, certainly doesn't produce any blocks, but this is something that we will fix. Before that, let's discuss in the next chapter how to do a simple but effective deployment.
### Chill Your Validator
## Overview
Two important concepts in Avail consensus are "Chill" and "Slashing". We will explore the conditions under which validators are chilled or slashed, the impact of these actions on validators and nominators.
## Voluntary Chill
Staking bonds can exist in three different states: validating, nominating, or chilled. Chilled which refers to neither validating nor nominating. If a staker wishes to temporarily pause their active involvement
in staking while keeping their funds bonded, they have the option to "chill" their participation.
To step back from active staking or active validating an account can either click "Stop" on the [Network > Staking > Account actions page](https://explorer.avail.so/#/staking/actions) in Avail Apps or make use of the chill extrinsic in the staking pallet.
By choosing to chill, the account or validator becomes inactive in the next era. It's important to note that the chill call must be signed by the controller account, not the stash.
If you decide to voluntarily chill as a validator, your nominators will remain associated with your validator. However, while you are chilled, your bond will not be listed as an option for nominators to select.
This means that any nominators making new nominations or revising existing ones will not be able to choose your validator.
## Involuntary Chill
In the event that a validator becomes unresponsive for an entire session, the validator bond will undergo involuntary chilling. This process restricts the validator from being chosen in the subsequent election,
depending on the session in which the chilling occurred. However, a chilled validator has the ability to declare their intent to validate again at any time. If less than 10% of nodes go offline there is
no slash for being unresponsive or offline.
### Slashing
Involuntary chilling can also occur as a consequence of slashing. However, in such a situation, the validator not only loses their nominations but also faces a potential loss of support. Consequently, even if
the validator re-declares their intent to validate before session 5, there may not be enough nominations to reintegrate the node into the active set.
Nominators have the opportunity to renominate a slashed validator through a display row available in Avail Apps in the "Account Actions".
Slashing can occur under the following conditions
* Equivocation is producing two blocks in the same slot. In GRANDPA, it is sending pre-vote or pre-commit messages for two chains that conflict with each other in the same round. This will slash
the validator and nominators.
* If more than 10% of the validators go offline simultaneously and were chilled in an epoch, all of those validators will be slashed.
The slashing will show immediately on [Avail Apps](https://explorer.avail.so/#/staking/slashes) on the slash tab. However the financial slash is not applied at the time. The physical deduction from
validator stake and nominator stake happens at a later stage. A governance proposal can be made to reverse the slash, this is why there is a delay in the physical deduction of coins. Without
Governance intervention the physical coin deduction will happen a few days later.
Example of a slash shown in Avail Apps:
### Avail Node - Simple Deployment
## Introduction
> **Note**
>
> **ASSISTED DEPLOYMENT**
> If you prefer running your Avail validator with the help of an infrastructure provider, you can check out [on-finality's docs here](https://documentation.onfinality.io/support/set-up-an-avail-validator-with-onfinality).
This guide aims to help you learn the basics of deploying your Avail Node manually or by docker/podman.
## Cloud Server
Deploying long-lasting services is best done on an online machine more than 99% of the time and is dedicated solely to running that service. This means that your Avail Node should not be deployed on a personal computer; running it on your Homelab or a cloud provider is a better option.
There are many cloud providers to choose from. Here are some of them:
* AWS
* Microsoft Azure
* OVHCloud
* DigitalOcean
* Linode
* Google Cloud Platform
It's up to you to research and pick one that will suit all your needs and requirements.
If you already have a running server, you can skip the rest of this section and go straight to the next one.
That said, Latitude is used for this chapter and here are the steps on how to create a new instance there:
1. First, create a project and give it a name.
2. Click on the 'Create Server' button and choose your desired location and image.
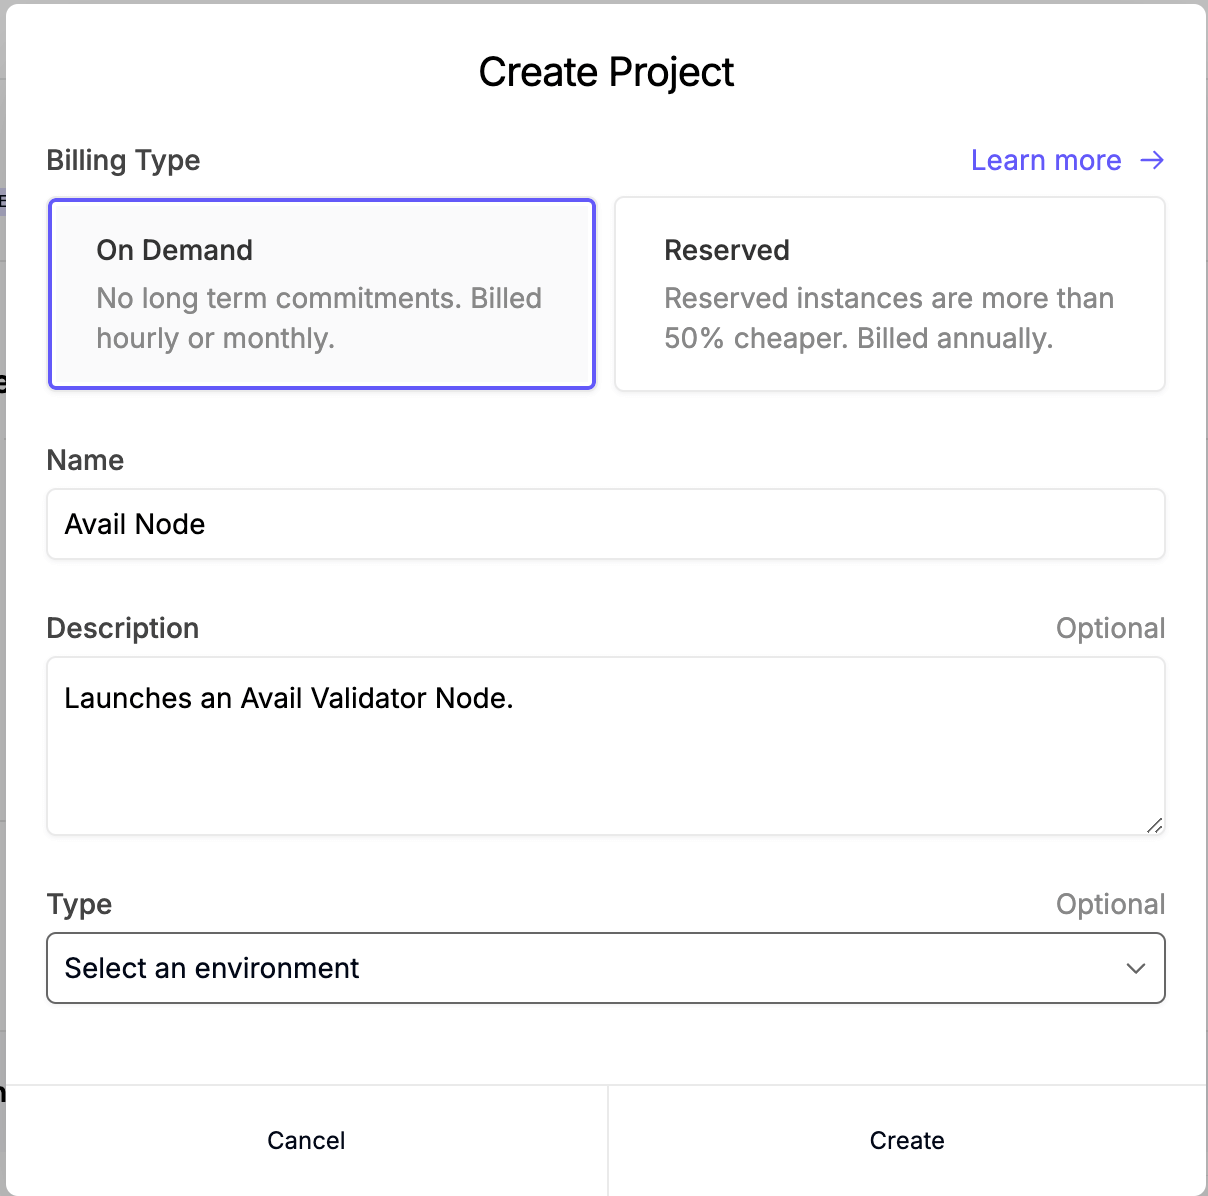
3. Click on the 'Create Server' button and choose your desired location and image. We're using Ubuntu 24 for this guide.
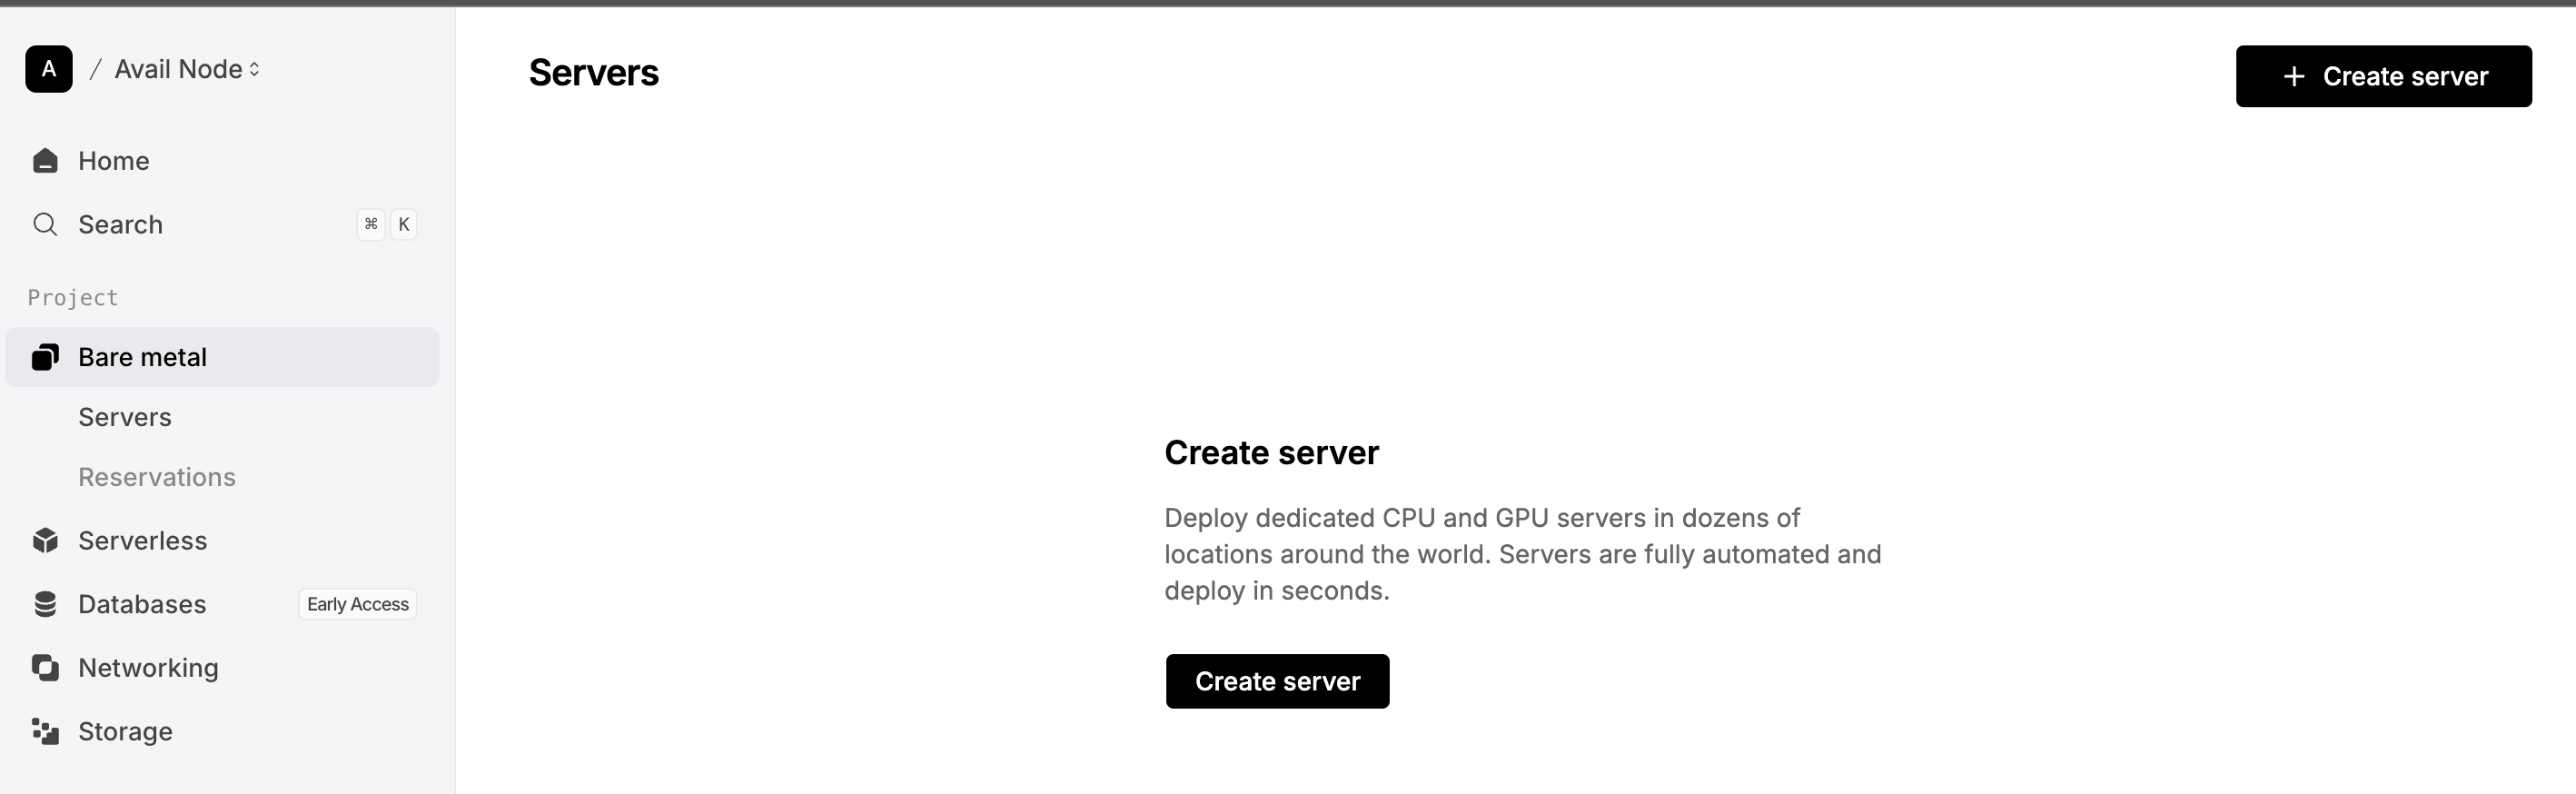
4. For the server type, `c2.small.x86` , `s2.small.x86` , `c2.medium.x86` or anything stronger should do the trick.
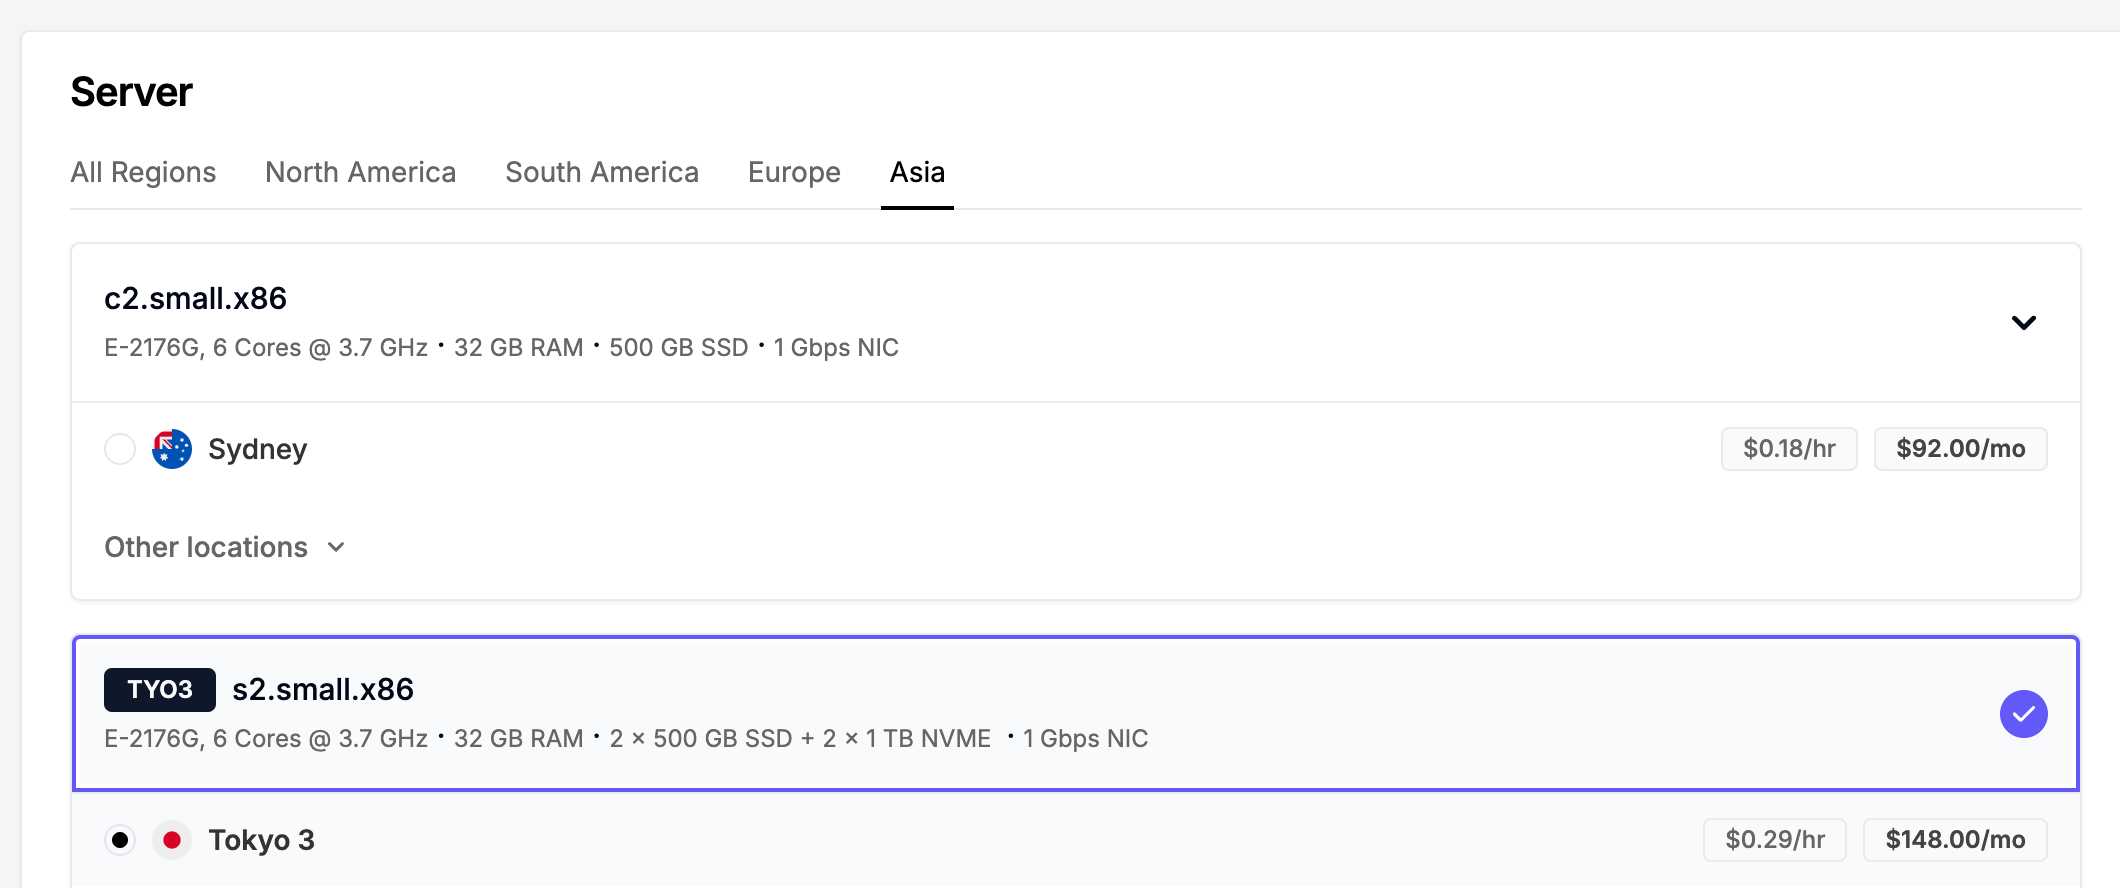
5. Enter your SSH keys

6. Give your server a name.

7. Copy the IP and SSH of your server.

8. SSH into your server by running the following command in your terminal:
```bash
# Replace the IP with your own
ssh ubuntu@199.xxx.xxx.xxx
```
9. If everything is set up correctly, you should see the welcome message:
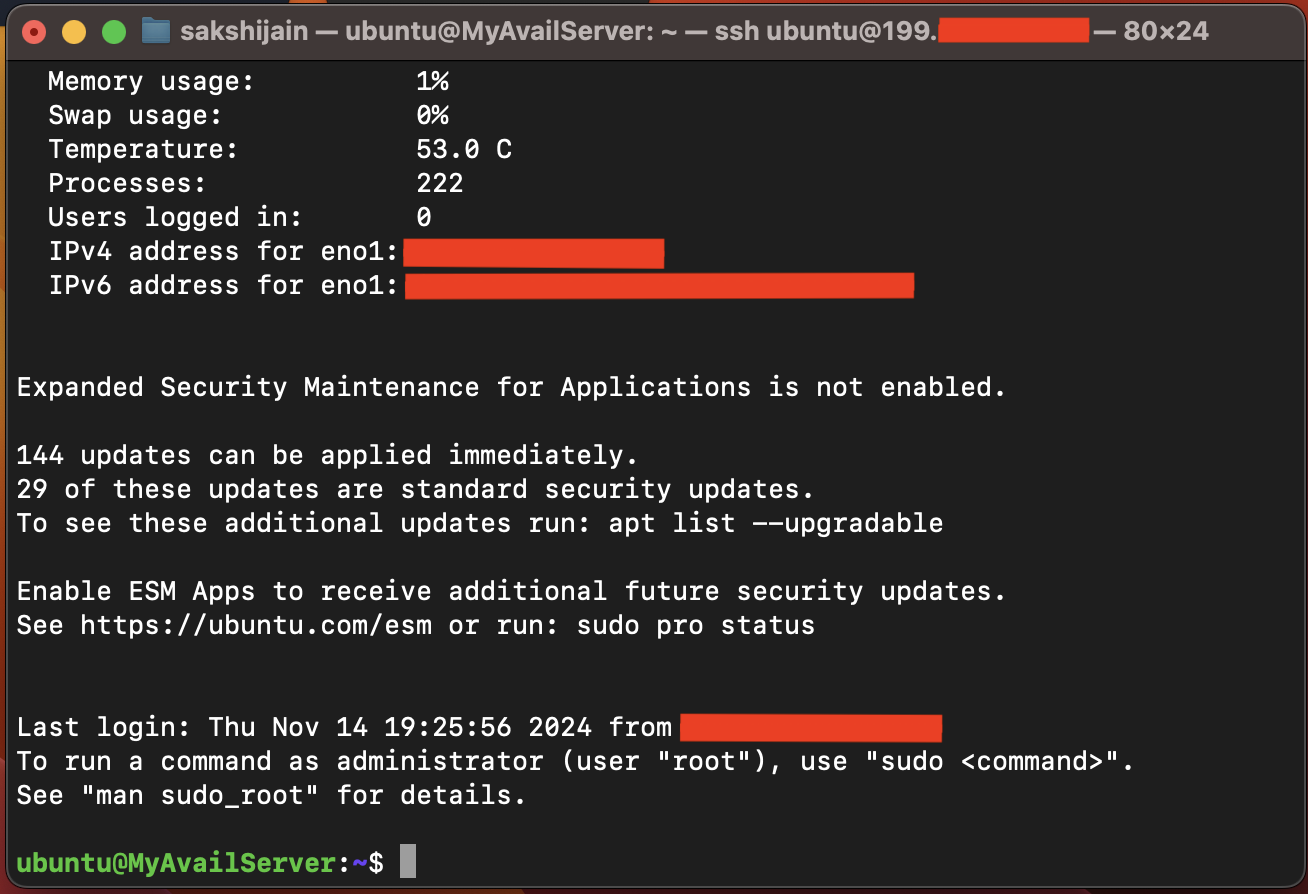
## Bare Metal
We have our server up and online. We updated all our dependencies and are ready to do the work.
> **Note**
>
> **BEFORE WE BEGIN**
>
> While working with Linux distros, it is a good practice to update the package list and upgrade the system before undertaking
> major operations. You can use this command to do so:
>
> ```bash
> sudo apt update && sudo apt upgrade -y
> ```
1. Let's create a folder in the home directory to store our binary and all the data it will generate.
```bash
mkdir avail && cd avail
mkdir node-data
```
2. Depending on the user and operating system used, the path to our newly created folder can be `/root/avail` or `/home/ubuntu/avail` or any other variant. To get the full path, run this:"
```bash
pwd
# Example output: `/root/avail`
```
3. From the [Releases Page](https://github.com/availproject/avail/releases), we grab the latest version and unpack it.
> **Warning**
>
> NODE VERSION FOR TURING
> Please note that the Avail node underwent major breaking changes while making upgrades to transition towards Turing.
```bash
# Obtaning Latest avail-node version for Ubuntu 22.04
# Put in the latest version in the command below
# wget is a command-line utility for downloading files from the internet.
wget https://github.com/availproject/avail/releases/download//x86_64-ubuntu-2204-avail-node.tar.gz
# tar is a command-line utility for working with tarballs, compressed or uncompressed archives containing one or more files or directories.
# The -x option extracts files from an archive, and the -f option specifies the archive file. When used together as tar -xf, it removes the contents of the specified archive file.
tar -xf /root/avail/x86_64-ubuntu-2204-avail-node.tar.gz
# rm stands for "remove" in Linux and Unix-like operating systems. It is used to delete files or directories.
rm -xf x86_64-ubuntu-2204-avail-node.tar.gz
```
We will create a system service file for our node to run automatically, even on restarts. Systemd will run our node as a daemon and manage it for us. To know more about systemd, go [here](https://en.wikipedia.org/wiki/Systemd).
4. Create a seperate directory to store all your node data:
```bash
mkdir node-data
```
5. Let's create a file on `/etc/systemd/system/` and name it `avail.service`. If you are using a non-root user, you will need to execute this operation using the `sudo` command.
For root users:
```bash
touch /etc/systemd/system/avail.service
```
For non-root users:
```bash
sudo touch /etc/systemd/system/avail.service
```
6. Now open that file with your favorite text editor. If this is your first time using Linux first learn how to use [nano](https://www.howtogeek.com/42980/the-beginners-guide-to-nano-the-linux-command-line-text-editor/) before doing anything. Just like before, if you are on a non-root use you might need to execute the command using 'sudo'.
For root users:
```bash
# Use nano or any other text editor like vim or emacs
nano /etc/systemd/system/avail.service
```
For non-root users:
```bash
# Use nano or any other text editor like vim or emacs
sudo nano /etc/systemd/system/avail.service
```
7. Paste the following text and save it:
```ini
[Unit]
Description=Avail Node
[Service]
Type=simple
ExecStart=/root/avail/avail-node --chain mainnet --name {your-name-here} --validator -d /avail/node-data
Restart=always
RestartSec=3
StandardOutput=syslog
StandardError=syslog
SyslogIdentifier=avail-node
[Install]
WantedBy=multi-user.target
```
Let's let's break it down for clarity.
* **Description**: Provides a human-readable description of the service. In this case, it describes the service as "Avail Node". This description is mainly used for documentation purposes and can be displayed in various system management tools and commands.
* **ExecStart**: Specifies the command to start the service. In this case, it runs the /root/avail/data-avail executable with a series of command-line arguments.
* **Restart**: Defines the restart behavior of the service. In this case, the service will be restarted if it fails.
* **RestartSec**: Specifies the time to sleep before restarting the service after it exits unexpectedly. In this case, it's set to 5 seconds.
* **WantedBy**: Specifies the target or targets that this service should be included in. Here, it is set to multi-user.target, which is a common target for services that should be started in a multi-user system.
We discussed what the command line arguments do in the [previous chapter](/docs/da/operate/become-a-validator/basics), so we won't repeat ourselves here.
8. Now, let's enable the service file and start our deamon
For root users:
```bash
systemctl daemon-reload
systemctl start avail.service
systemctl enable avail.service
```
For non-root users:
```bash
sudo systemctl daemon-reload
sudo systemctl start avail.service
sudo systemctl enable avail.service
```
9. You can check the status of your node by:
```bash
systemctl status avail.service
```
10. To check for logs, we can run the following command:
```bash
# -f Follow the journal
# -n Number of journal entries to show
# -u Show logs from the specified unit
journalctl -f -n 1000 -u avail.service
```
or
```bash
journalctl -u avail.service
```
Output
```bash
...
Nov 29 14:56:23 MyAwesomeAvailServer data-avail[13040]: 2023-11-29 14:56:23 ⚙️ Syncing 135.7 bps, target=#93564 (11 peers), best: #1475 (0x1fe8…9dc7), finalized #1024 (0xdff3…8159), ⬇ 1.4MiB/s ⬆ 26.5kiB/s
Nov 29 14:56:28 MyAwesomeAvailServer data-avail[13040]: 2023-11-29 14:56:28 ⚙️ Syncing 144.5 bps, target=#93564 (11 peers), best: #2198 (0xef82…72af), finalized #2048 (0xd68a…5cfc), ⬇ 150.0kiB/s ⬆ 3.7kiB/s
Nov 29 14:56:33 MyAwesomeAvailServer data-avail[13040]: 2023-11-29 14:56:33 ⚙️ Syncing 92.8 bps, target=#93564 (12 peers), best: #2662 (0xdb75…7806), finalized #2560 (0x1282…a791), ⬇ 821.7kiB/s ⬆ 2.6kiB/s
```
As expected, the node is syncing new blocks. If these logs are new to you, head back to the [previous chapter](/docs/da/operate/become-a-validator/basics) where we explained in detail what they mean.
## Docker/Podman
We have our server up and online. We updated all our dependencies and are now ready to do the actual work.
1. In the home directory, let's create a folder where we are going to store all the data that the Avail Docker container will generate.
```bash
mkdir avail && cd avail
mkdir node-data
```
Depending on the user and operating system used, the path to our newly created folder can be `/root/avail` or `/home/ubuntu/avail` or any other variant.
2. To get the full path, run this:"
```bash
pwd
# Example output: `/root/avail`
```
3. Depending on your preferences, install Docker or Podman (or both) and execute one of the commands below. Don't execute all of them.
To read more about Docker, check the [following page](https://www.docker.com/).
To read more about Podman, check the [following page](https://podman.io/).
To read more about SELinux, check the [following page](https://www.redhat.com/en/topics/linux/what-is-selinux).
```bash
# Option 1: If you are using Docker with non-root user use this script
sudo docker run --restart=on-failure -d -v /root/avail/node-data:/da/node-data -p 9944:9944 -p 30333:30333 docker.io/availj/avail:v1.8.0.3 --chain mainnet -d /da/node-data --validator --name MyAwesomeContainerNode
# Option 2: If you are using Docker on SELinux use this script
docker run --restart=on-failure -d -v /root/avail/node-data:/da/node-data:z -p 9944 -p 30333 docker.io/availj/avail:v1.8.0.3 --chain mainnet -d /da/node-data --validator --name MyAwesomeContainerNode
# Option 3: If you are using Podman use this script
podman run -d -v /root/avail/node-data:/da/node-data -p 9944 -p 30333 docker.io/availj/avail:v1.8.0.3 --chain mainnet -d /da/node-data --validator --name MyAwesomeContainerNode
# Option 4: If you are using Podman on SELinux use this script
podman run -d -v /root/avail/node-data:/da/node-data:z -p 9944 -p 30333 docker.io/availj/avail:v1.8.0.3 --chain mainnet -d /da/node-data --validator --name MyAwesomeContainerNode
```
> **Note**
>
> Make sure that you replace `/root/avail/node-data` with your own storage path. If your node-data is located in `/home/ubuntu/avail/node-data` than the flag should look like this:
> `-v /home/ubuntu/avail/node-data:/da/node-data`.
Let's break it down for clarity.
* **--restart on-failure**: It means that the container will be automatically restarted if it exits with a non-zero status, indicating a failure.
* **-d**: It means that the container will be automatically restarted if it exits with a non-zero status, indicating a failure.
* **-v**: Is used to mount a volume in a Docker container. Volumes in Docker provide a way to persist and share data between a Docker container and the host system or between different containers.
* **-p**: is used to publish a container's port to the host. It allows you to map a port from the container to a port on the host, making services running inside the container accessible from outside.
* **docker.io/availj/avail:v1.8.0.3**: Refers to the name of the Docker image from which you want to create a container. A Docker image is a lightweight, stand-alone, executable package that includes everything needed to run a piece of software, including the code, a runtime, libraries, environment variables, and config files.
We discussed what the command line arguments do in the [previous chapter](/docs/da/operate/become-a-validator/basics), so we won't repeat ourselves here.
> **Note**
>
> Podman doesn't have the `--restart` flag, instead it utilizes Quadlets. To know more about how to setup a Quadlet following [this link](https://www.redhat.com/sysadmin/quadlet-podman)
4. To check for logs, we can run the following command:
```bash
# Option 1: If you are using Docker with root user use this script
docker logs -f $(docker ps -lq)
# Option 2: If you are using Docker with non-root user use this script
sudo docker logs -f $(docker ps -lq)
# Option 3: If you are using Podman use this script
podman logs -lf
```
Output
```bash
2023-11-29 22:54:56 ⚙️ Syncing 197.6 bps, target=#94986 (8 peers), best: #4363 (0x5374…0cc4), finalized #4321 (0xc708…7dc1), ⬇ 338.7kiB/s ⬆ 2.9kiB/s
2023-11-29 22:55:01 ⚙️ Syncing 62.0 bps, target=#94987 (8 peers), best: #4673 (0x7495…e6ea), finalized #4608 (0x1783…e94d), ⬇ 14.4kiB/s ⬆ 0.3kiB/s
2023-11-29 22:55:06 ⚙️ Syncing 225.4 bps, target=#94987 (8 peers), best: #5800 (0xbc68…13e8), finalized #5632 (0x5180…98c8), ⬇ 129.3kiB/s ⬆ 0.8kiB/s
```
As expected, the node is syncing new blocks. If these logs are new to you, head back to the [previous chapter](/docs/da/operate/become-a-validator/basics) where we explained in detail what they mean.
## What's Next
This is where our story ends. We have a working node connected to the Turing chain and deployed on a cloud provider. If the system restarts or the Avail Node program suddenly ends, it will be automatically restarted, so there will be almost no downtime.
### How to Monitor Your Avail Validator Node
## Telemetry
Maintaining a healthy, stable, and secure ecosystem involves closely monitoring network operations and performance. In the case of Avail nodes, they come equipped with built-in low-level
telemetry components that automatically gather and transmit detailed information about each node's operation within the network. This backend telemetry data is streamed in real-time to a
designated endpoint, allowing you to observe information regarding your nodes behavior.
Avail project has made available a [public telemetry](http://telemetry.avail.so/) for anyone to view the status of their nodes. This should not replace your own monitoring and alerts. However it is a key tool that anyone can use to view the status
of their nodes at anytime.
Avail telemetry has been added to the chain specification file and should automatically send telemetry data to Avail [public telemetry](http://telemetry.avail.so/). You can however also
add the telemetry `--telemetry-url 'ws://telemetry.avail.so:8001/submit/ 0'` to your avail node start command if your node is not visible on the public telemetry.
You can also use `--name ` to set the name that will display on telemetry. Without this it will display a random node name on the telemetry.
For example:
```
./data-avail --validator \
--port 30333 \
--base-path `pwd`/data \
--chain `pwd`/chainspec.raw.json \
--name AvailNode \
--telemetry-url 'ws://telemetry.avail.tools:8001/submit/ 0'
```
## Monitoring with Prometheus & Grafana
Prometheus serves as a monitoring platform that gathers metrics from monitored targets through scraping their metrics HTTP endpoints. In contrast, Grafana acts as a visualization dashboard specifically designed to present the collected data in an easily understandable and visually appealing manner.
The below guide is for setting up a local Prometheus & Grafana instance on the same server as your Avail node. If you're already experienced with Prometheus & Grafana and want to connect your Avail node to an existing Prometheus installation on a different server, include the `--prometheus-external` flag in your Avail node's startup command.
### Install Prometheus
Install prometheus and prometheus node exporter.
```
sudo apt-get install -y prometheus prometheus-node-exporter
```
Create the prometheus.yml config file
```
cat > $HOME/prometheus.yml << EOF
global:
scrape_interval: 15s
evaluation_interval: 15s
rule_files:
# - "first.rules"
# - "second.rules"
scrape_configs:
- job_name: "prometheus"
scrape_interval: 5s
static_configs:
- targets: ["localhost:9090"]
- job_name: "avail_node"
scrape_interval: 5s
static_configs:
- targets: ["localhost:9615"]
- job_name: node
static_configs:
- targets: ['localhost:9100']
EOF
```
Move `prometheus.yml` to the correct location
```
sudo mv $HOME/prometheus.yml /etc/prometheus/prometheus.yml
```
Update the file permissions
```
sudo chmod 644 /etc/prometheus/prometheus.yml
```
Ensure Prometheus starts automatically
```
sudo systemctl enable prometheus.service prometheus-node-exporter.service
```
Restart Prometheus to activate latest settings
```
sudo systemctl restart prometheus.service prometheus-node-exporter.service
```
Check the status, ensure Prometheus has started without errors
```
sudo systemctl status prometheus.service prometheus-node-exporter.service
```
### Install Grafana
Install Grafana
```
wget -q -O - https://packages.grafana.com/gpg.key | sudo apt-key add -
echo "deb https://packages.grafana.com/oss/deb stable main" > grafana.list
sudo mv grafana.list /etc/apt/sources.list.d/grafana.list
sudo apt-get update && sudo apt-get install -y grafana
```
Ensure Grafana starts automatically
```
sudo systemctl enable grafana-server.service
```
Start Grafana
```
sudo systemctl start grafana-server.service
```
Check the status, ensure Grafana has started without errors
```
sudo systemctl status grafana-server.service
```
### Setup Grafana Dashboard
Ensure port 3000 is open, example of adding to ubuntu firewall
```
sudo ufw allow 3000/tcp
```
In your browser navigate to `http://:3000`. The default login username and password is admin/admin
You will be asked to reset your password, please write it down or remember the password as you will need it for the next login.
You will need to create a datasource. Navigate to **Home->Connections->Data sources**
Click on **Add data source**
Click on **Prometheus**
Set URL to "localhost:9090", then test and save the connection
Navigate back to your home page, on the top right in the menu select **Import dashboard**
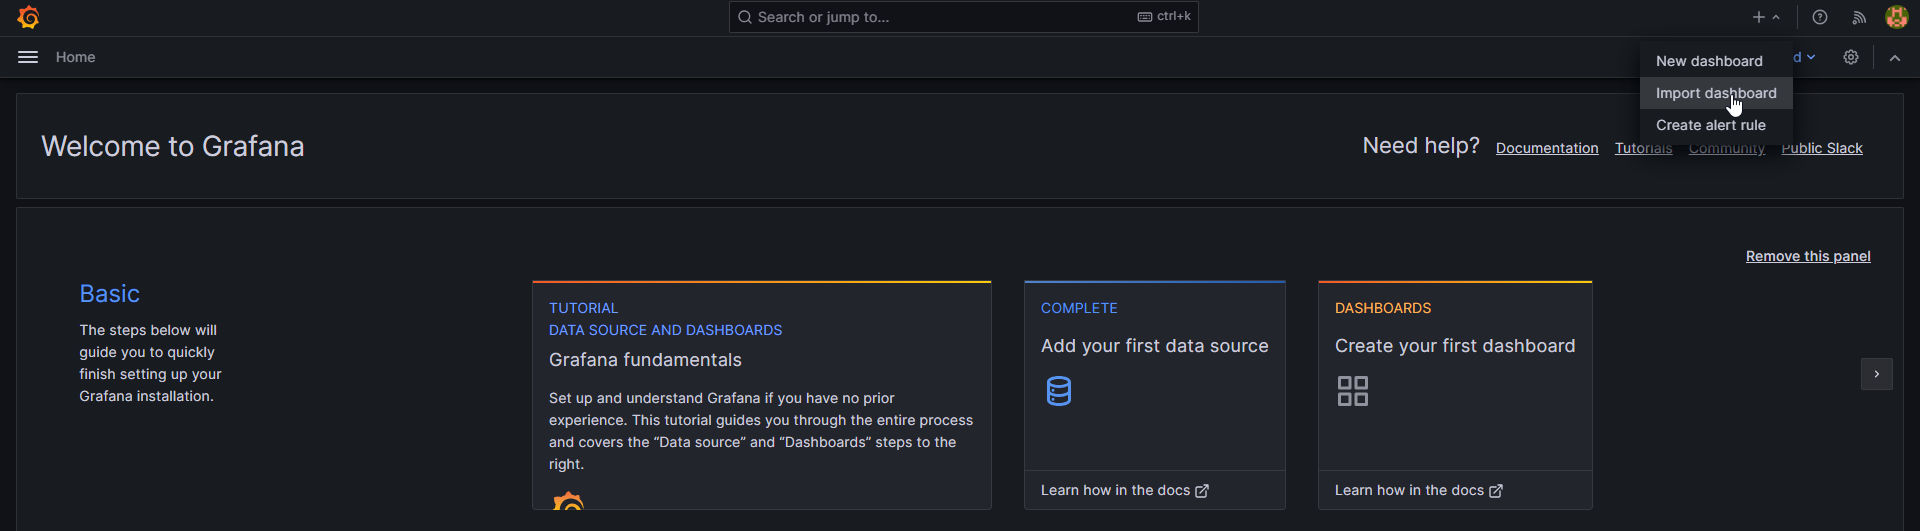
Import the [Avail Node Metrics file](https://raw.githubusercontent.com/availproject/docs/main/static/validator_metrics.json)
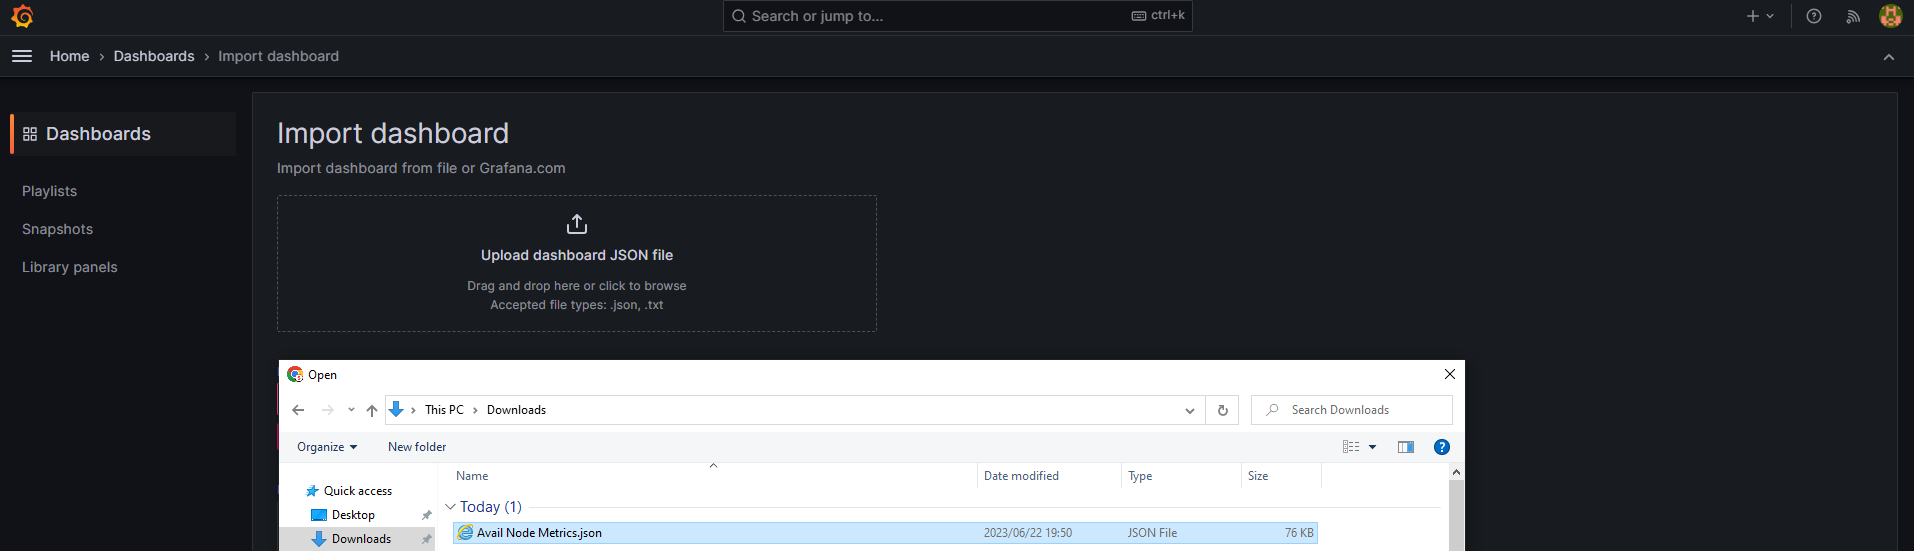
You will have a new dashboard that opens and that you can use to monitor your node
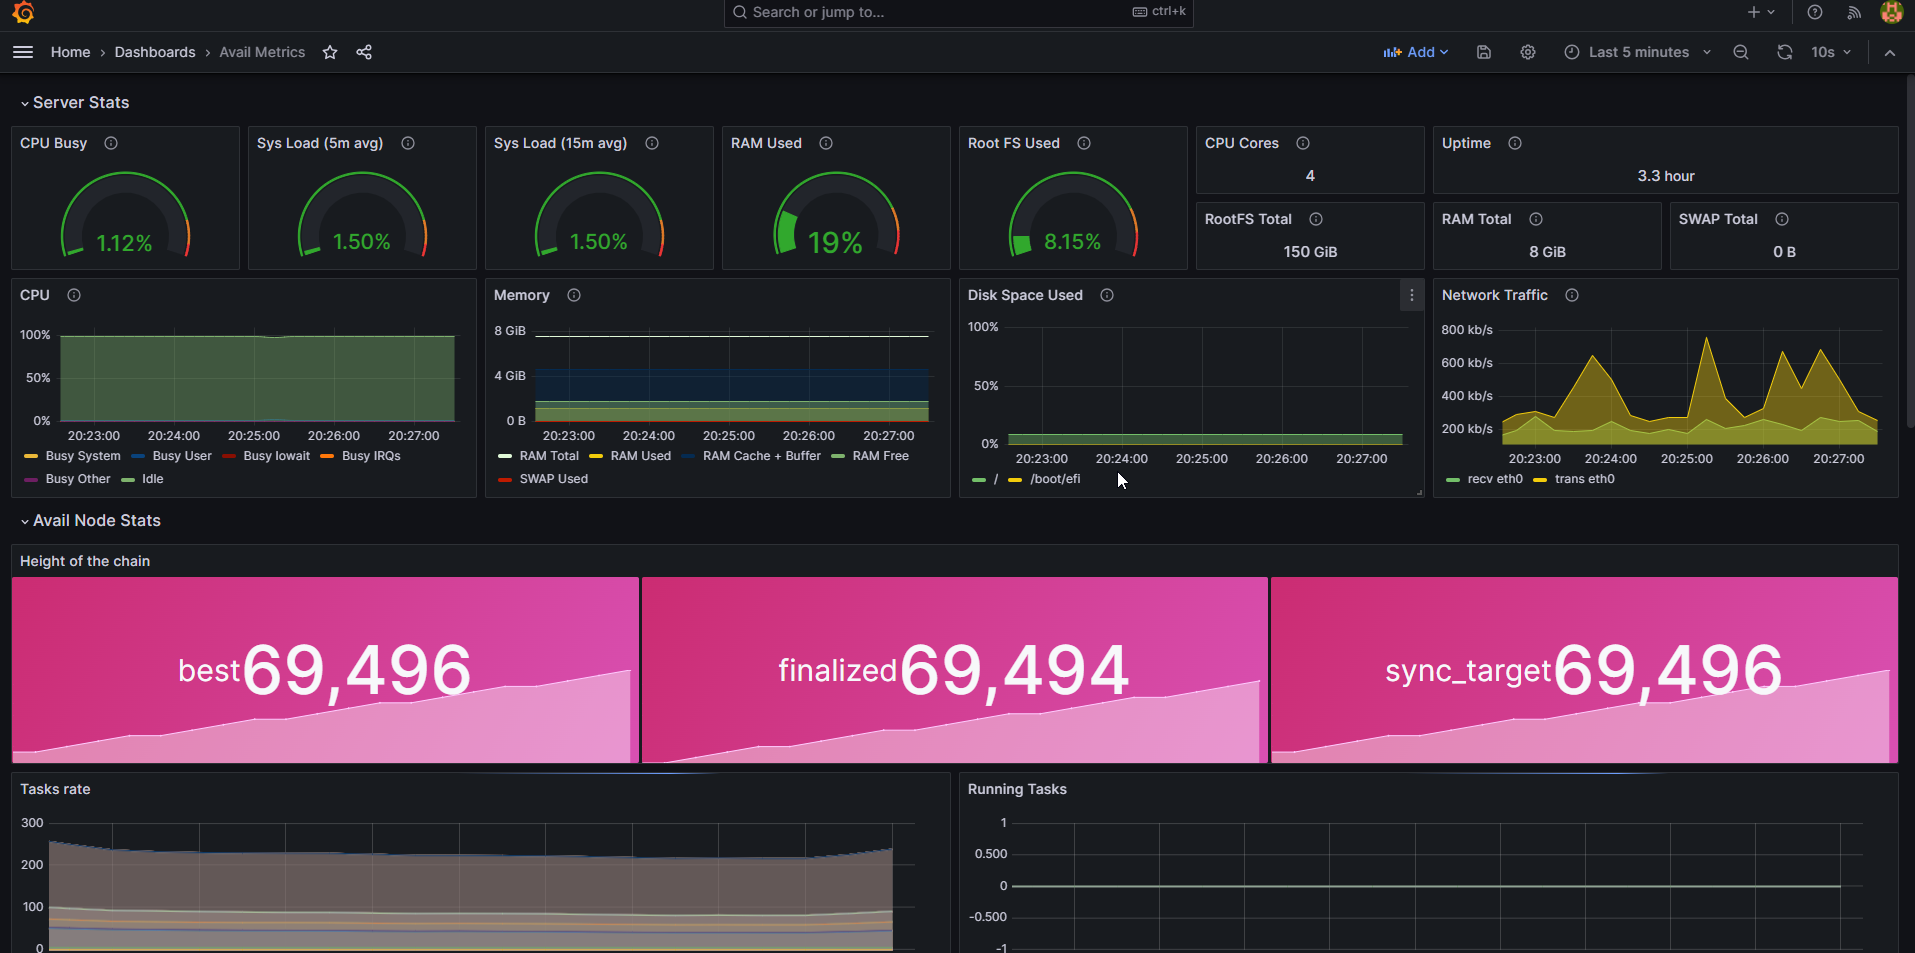
### Avail Node - Session Keys
## Introduction
> **Note**
>
> BEFORE YOU START
> This chapter continues from the 'Simple Deployment' page, so be sure to read that one before proceeding with this one.
> **Note**
>
> NOTE
> Before trying anything, make sure that you fully read the chapter first before doing any actual work.
With our infrastructure set up and our node running, we are ready to register ourselves as potential future validators. If the need for on-chain registration to become a validator seems foreign to you, then this would be a perfect opportunity to do your own research about how Proof of Stake and Nominated Proof Of Stake works.
In short, to prevent people from running faulty validators and earning tokens, all validators need to bond a certain amount of tokens to register and be eligible for the position of producing blocks. With that mechanism in place, all validators that are in some way faulty will either be deregistered or, in the worst case, slashed.
This explanation only covers the surface of how the whole system works, and before continuing, make sure that you do your own research and learn how the system actually operates. A good place to start is to read [Polkadot's explanation](https://wiki.polkadot.network/docs/learn-staking) on how it works.
## Session Keys
Before we can bond our tokens we need to generate our session keys.
In simpler terms, session keys in Substrate are like special secret codes that uniquely identify who's in charge of creating and validating blocks in a blockchain. Each participant, known as a validator, has their own secret key. They use these keys to sign off on the blocks they create, sort of like a personalized signature. This helps make sure everyone knows who's responsible for what, and it adds a layer of security to the whole blockchain process. So, we can think of session keys as the blockchain's way of keeping track of who did what in a trustworthy and secure manner.
To generate it, we can the following command inside the server that is running our node:
### Bare Metal:
```bash
# Generate session keys
curl -H "Content-Type: application/json" -d '{"id":1, "jsonrpc":"2.0", "method": "author_rotateKeys", "params":[]}' http://localhost:9944
# Restart our Node
sudo systemctl restart avail.service
```
### Docker/ Podman
```bash
# First let's ssh into our container
# Option 1: Docker non-root
sudo docker exec -it $(docker ps -lq) /bin/bash
# Option 2: Podman
podman exec -lit /bin/bash
# Generate the Session keys
curl -H "Content-Type: application/json" -d '{"id":1, "jsonrpc":"2.0", "method": "author_rotateKeys", "params":[]}' http://localhost:9944
# Exit and restart containe
exit
# Option 1: Docker non-root
sudo docker restart $(docker ps -lq)
# Option 2: Podman
podman restart -l
```
> **Note**
>
> NOTE
> If you encounter the following error inside the container: `bash: curl: command not found`, make sure to first install `curl` inside the container and then retry it.
> For Ubuntu, you can run `apt install curl -y` for root or `sudo apt install curl -y` for non-root user to have it installed
### Output
Running the curl command either bare metal or inside a container should yield the same result. The command generated the session keys for us, stored them inside our node-related-data folder, and displayed it for us. This key is unique to your own node, so it's important to make sure that it is stored safely and never shared with anyone.
Example Output
```json
{
"jsonrpc": "2.0",
"result": "0x0c26b9ba4b8fb5f3051a24663ce491663d8e8e81e8f1450ab23e4edd7d3b4f4c7e5e1047ae1edAb5bde2dad7915629b8aec892c550515ed0b1cb7e056e8a33d16c9c7faba50abd75438d4a2bbdbb6b2c35e09ad480e07ffeb1a2175feda23a3fd475eb0ad21e2f67693a1d6964b81d1454a19dd53256223a178a74cb0df4cc43",
"id": 1
}
```
### How to Stake Your Validator
This guide offers a step-by-step walkthrough on how to stake your Avail validator.
It covers essential steps such as bonding your funds, managing session keys, and initiating the validation process.
> **Note**
>
> BEFORE YOU START
> This chapter continues from the 'Session Keys' page, so be sure to read that one before proceeding with this one.
## Step 1: Prepare for Staking
Before you can become an active validator, you need to bond your funds to your node. This involves creating two separate Avail accounts: a `stash` account for holding your funds and a `controller` account for managing staking actions.
### Create Avail Accounts
1. Navigate to the Avail network explorer at [https://explorer.availproject.org/](https://explorer.availproject.org/) and choose the correct network.
2. Create a `stash` account.
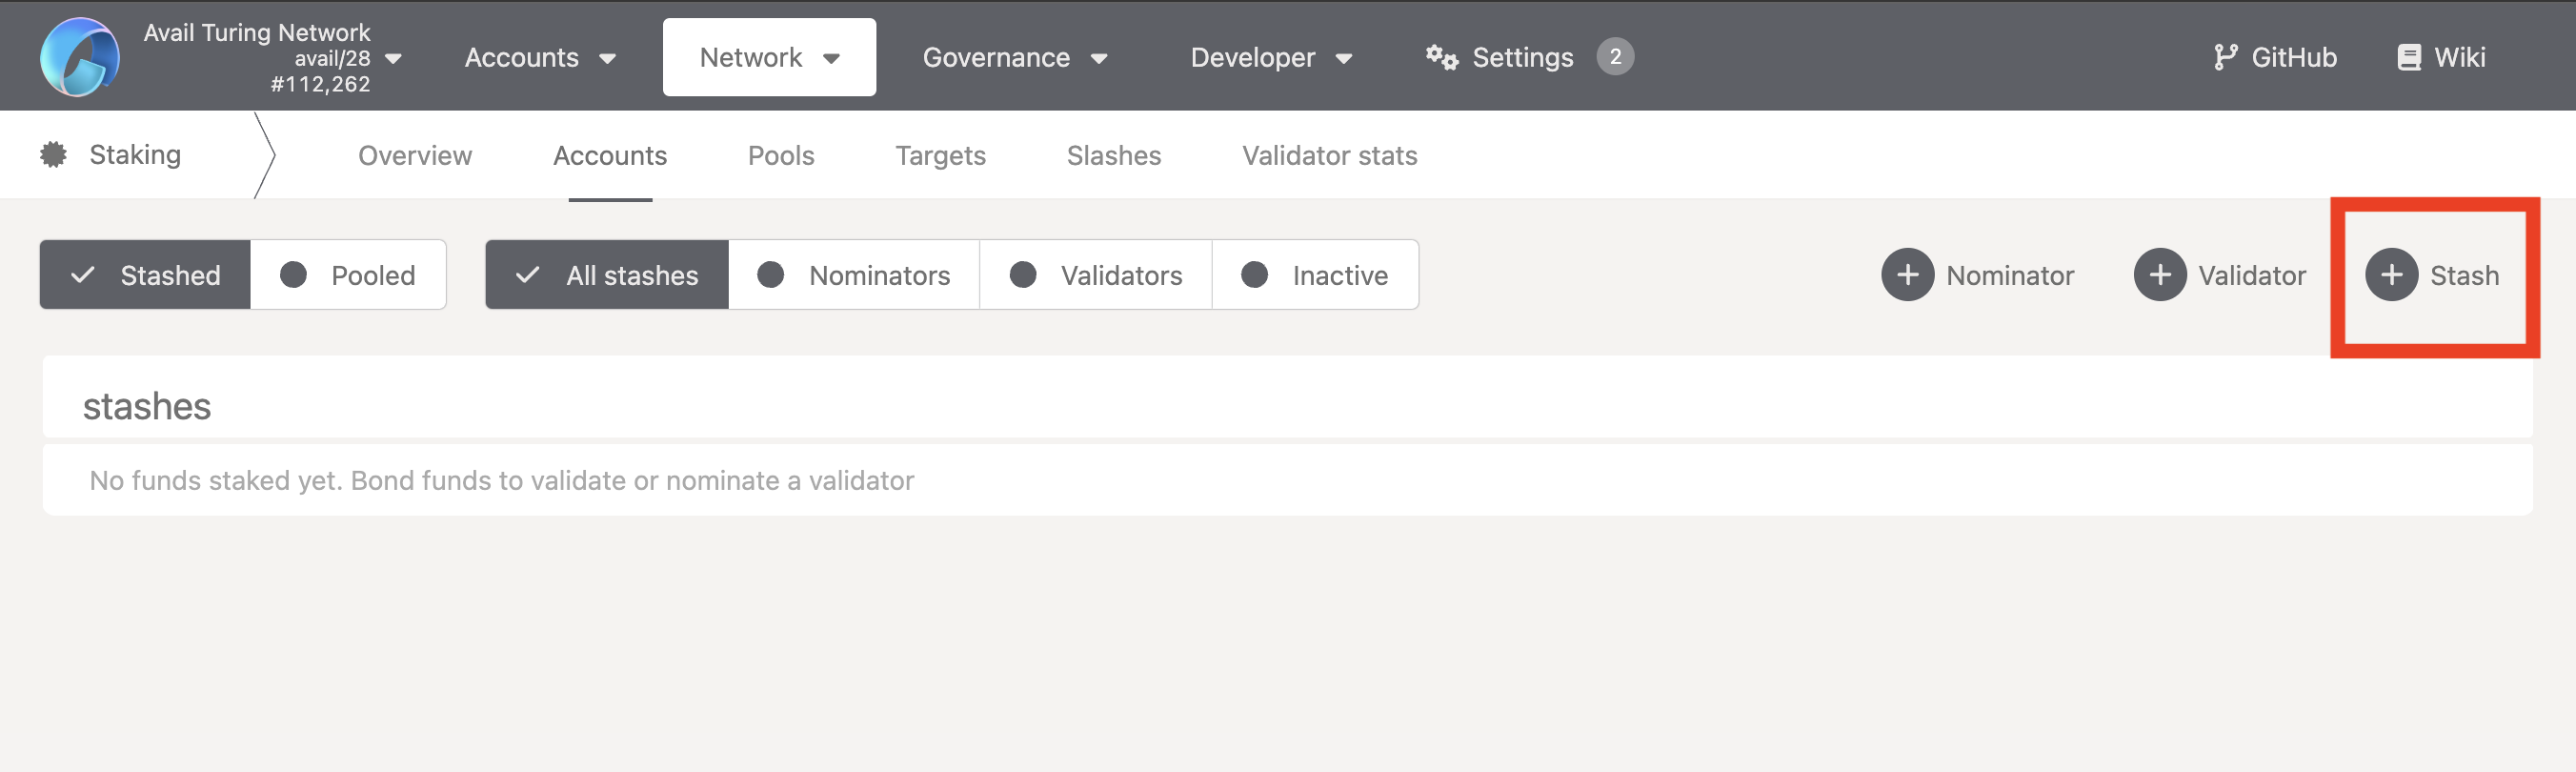
### Bond Your Funds
> **Note**
>
> BONDING TIPS
> Don't bond all your AVAIL tokens as you'll need some for transaction fees. You can always bond more tokens later.
> Note: Withdrawing any bonded amount is subject to the duration of the unbonding period.
1. Navigate to the **Staking** tab in the Explorer.
2. Click on `Stash` to initiate the bonding process.
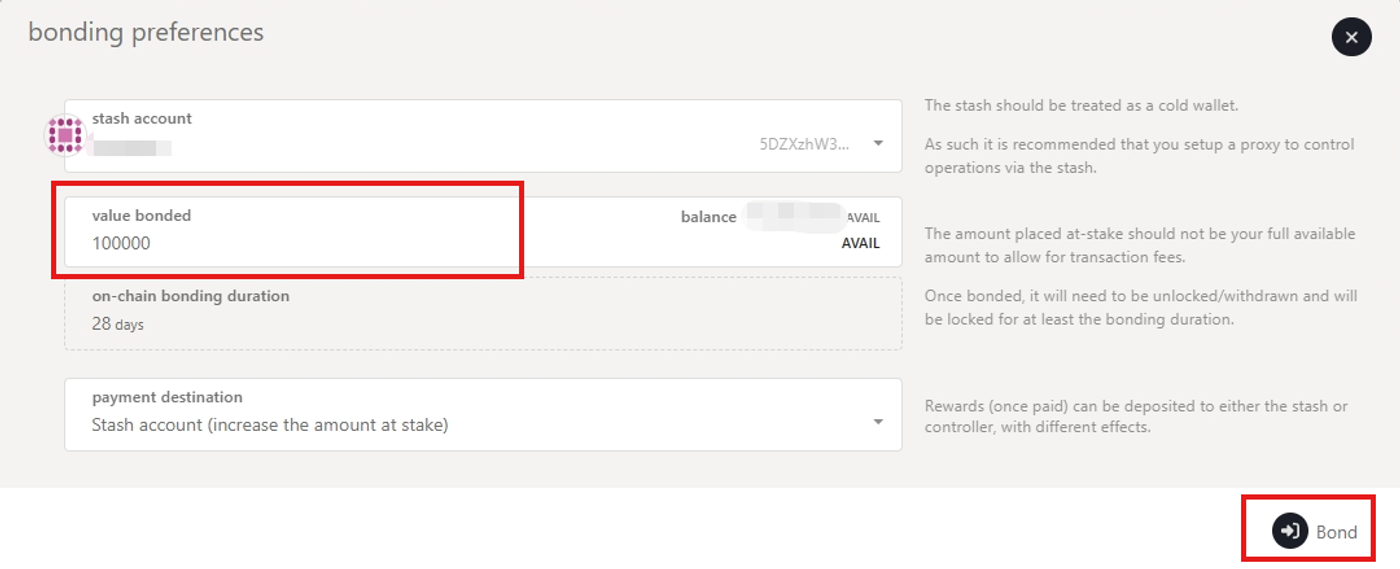
3. Fill in the bonding preferences. Then click `Bond` and `Sign and Submit`.
> **Warning**
>
> You need at least 50,000 AVAIL to join waiting list.
## Step 2: Manage Session Keys
After your node is fully synced, you'll need to rotate and submit your session keys.
### Rotating Session Keys
Run the following command on your node machine:
> Ensure the node is running with the default HTTP RPC port configured.
#### Using Binaries:
```shell
curl -H "Content-Type: application/json" -d '{"id":1, "jsonrpc":"2.0", "method": "author_rotateKeys", "params":[]}' http://localhost:9944
```
The result is the concatenation of the four public keys. Save the hex-encoded
result for the next step and **restart your node**.
#### Using Docker:
```shell
docker ps
```
You should an output similar to:
```
CONTAINER ID IMAGE COMMAND CREATED STATUS PORTS NAMES
da097bbeba75 availj/avail:v1.8.0.4 "/entrypoint.sh" 3 seconds ago Up 3 seconds 0.0.0.0:9615->9615/tcp, :::9615->9615/tcp, 0.0.0.0:9944->9944/tcp, 0.0.0.0:30333->30333/tcp, :::9944->9944/tcp musing_cartwright
```
We need the `CONTAINER ID` from the output above:
```shell
docker exec -i da097bbeba75 curl -sH "Content-Type: application/json" -d '{"id":1, "jsonrpc":"2.0", "method": "author_rotateKeys", "params":[]}' http://localhost:9944
```
### Submit Session Keys
You must inform the network of your Session keys by signing and submitting the
`setKeys` extrinsic. This action associates your validator with your Controller account.
1. Navigate back to the **[Staking](https://explorer.availproject.org/#/staking/actions)** tab.
2. Click on `Set Session Key` and enter the hex-encoded result.
3. Click `Set Session Key` and enter your password when prompted.
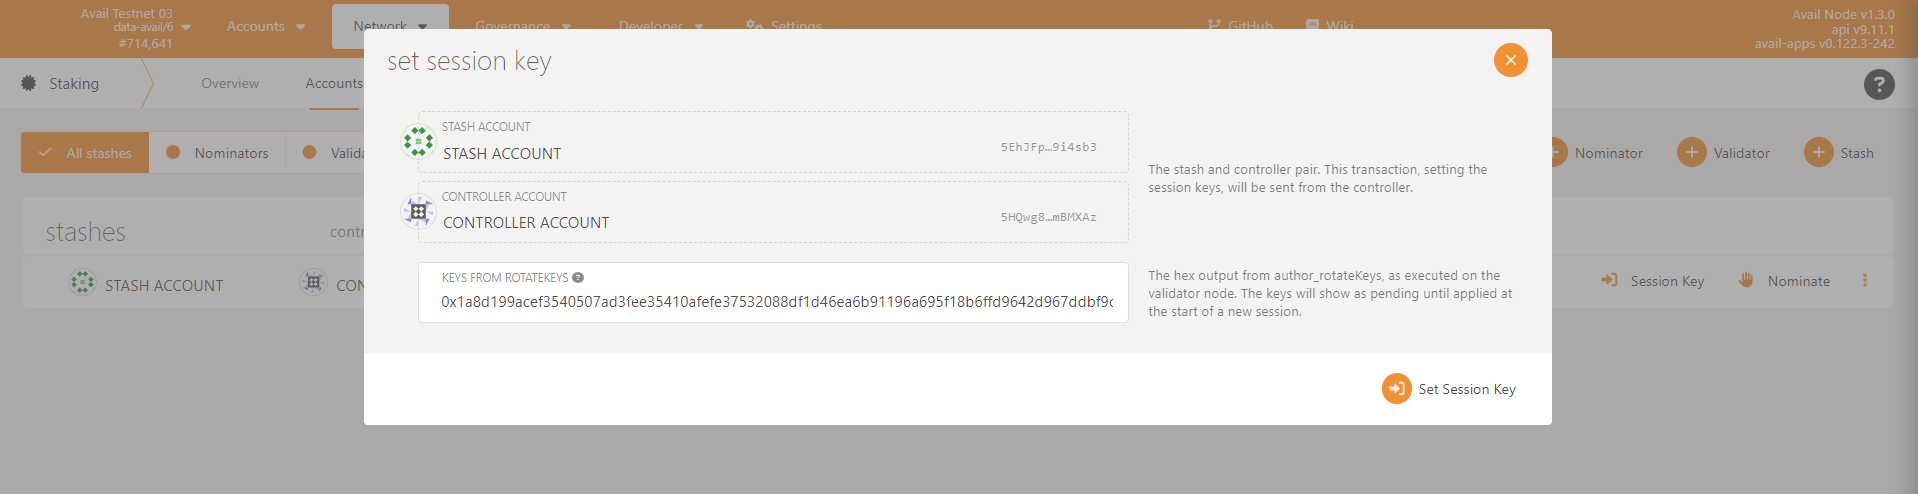
After submitting the extrinsic, you'll observe that **Set Session Key** changes
to **Validate**. Make sure your node is fully synchronized before proceeding further.
## Step 3: Register as a Validator
1. Click `Validate` on the **Staking** tab.

2. Set your validator commission percentage.
3. Enter your password and click `Validate`.
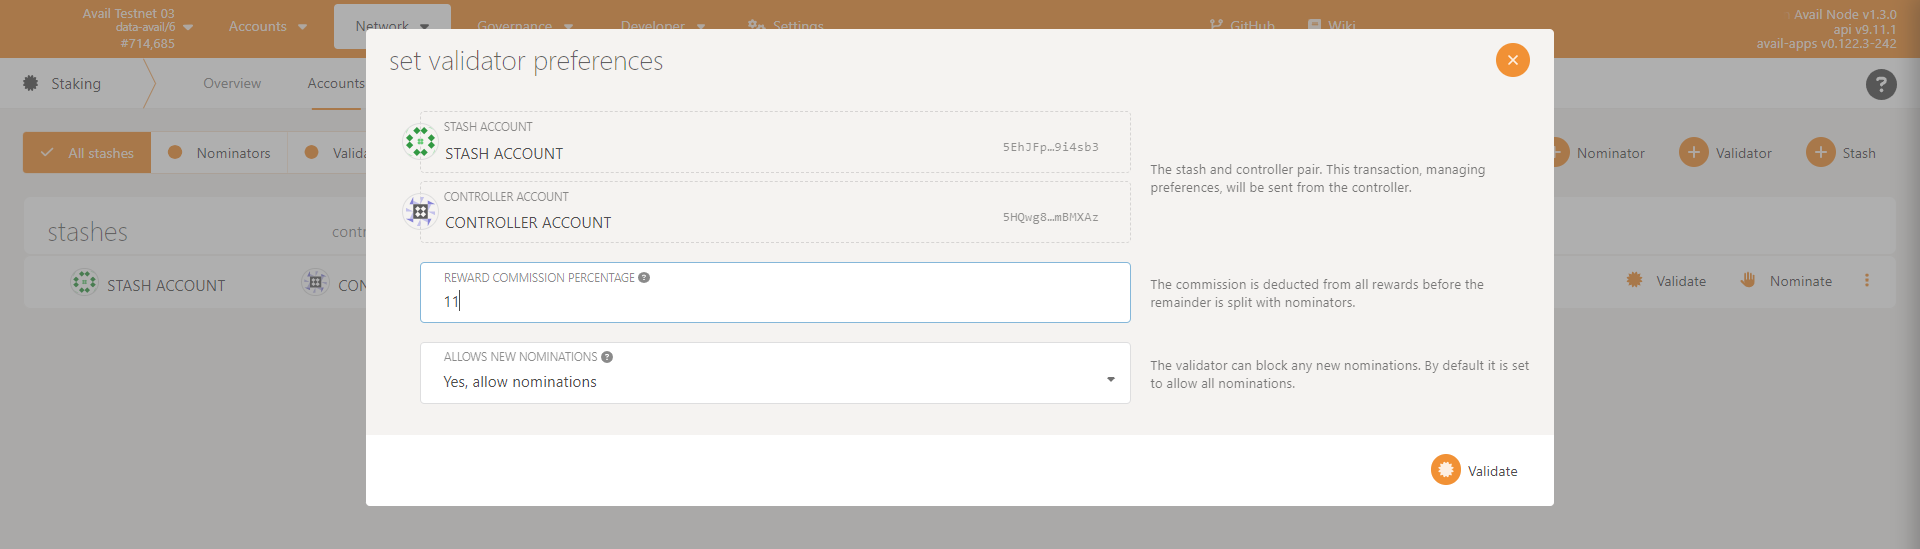
## Step 4: Start Validation
Your validator is now prepared to begin the validation process. If you wish to discontinue,
you can click the stop icon. Please note that the Avail interface doesn't automatically verify
if your node is synchronized; you'll need to confirm this manually. If your node has sufficient
stake, the Avail blockchain will likely select it in the next epoch or two.

### Verify Validator Status
To verify that your node is ready for possible selection at the end of
the next era, follow these steps:
1. Go to the **[Staking](https://explorer.availproject.org/#/staking)** tab and
select `Waiting` to see if your account appears.
2. If your node has enough stake, it will be elected in the next era or two.
> A new set of validators is chosen every **era**, based on the amount staked.
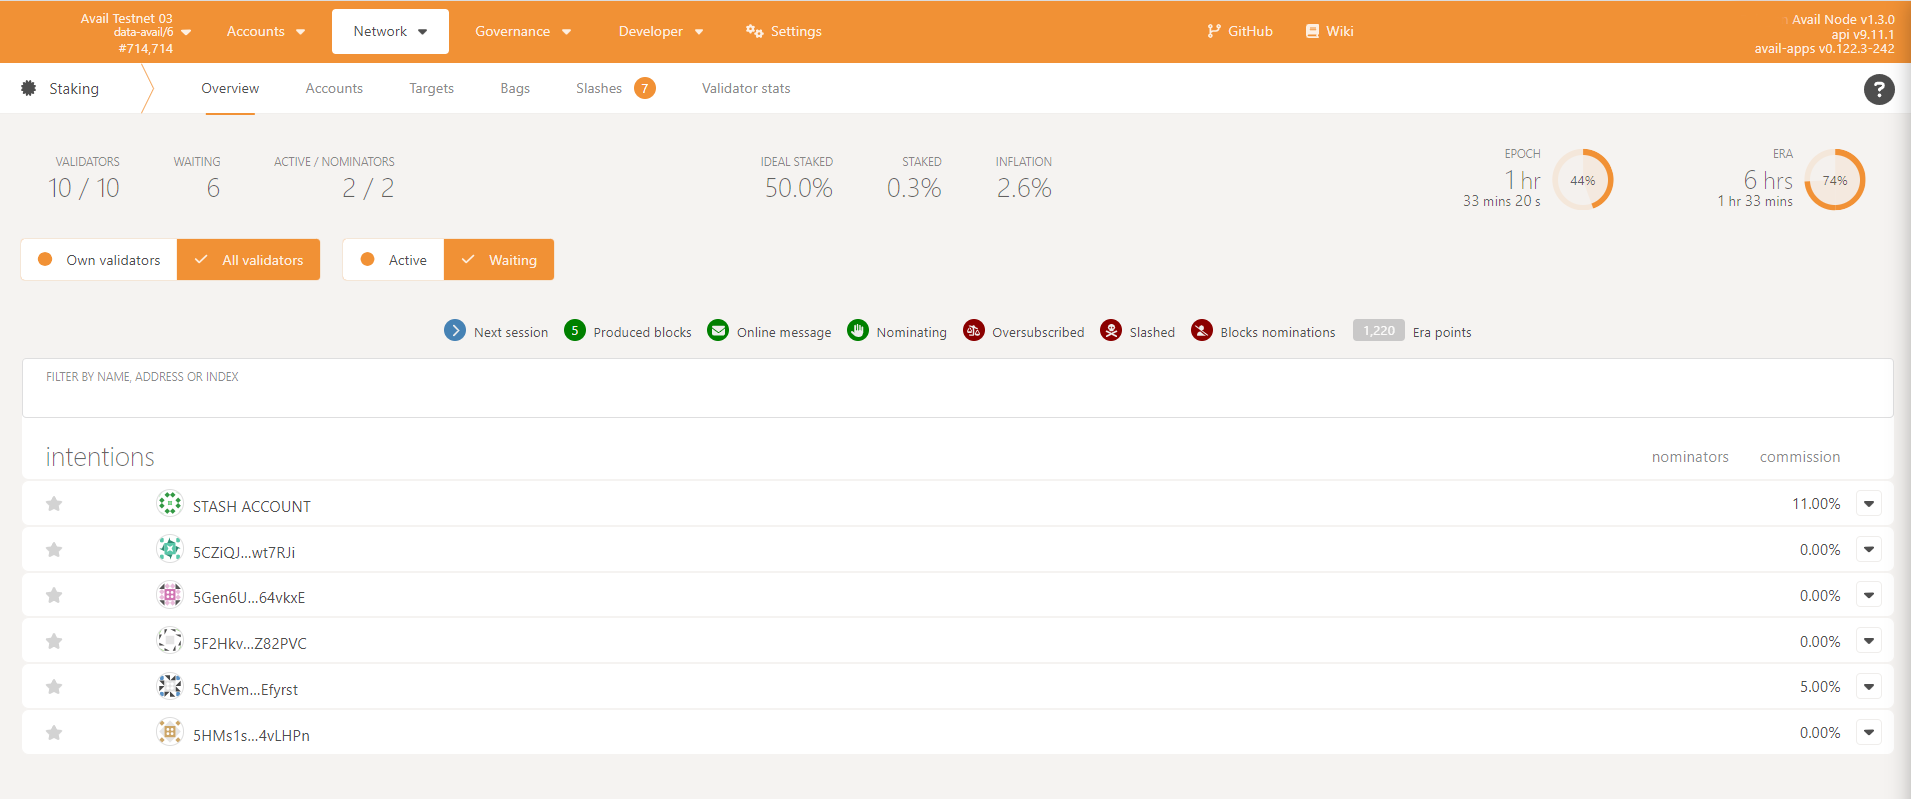
### Monitor Validator in Action
Once your validator node has accrued enough stake, it will be elected for validation.
Below is an example image of an elected validator node actively producing blocks.
In addition, please check out the guide on validator monitoring available
[here](/docs/da/operate/become-a-validator/monitor-your-validator).
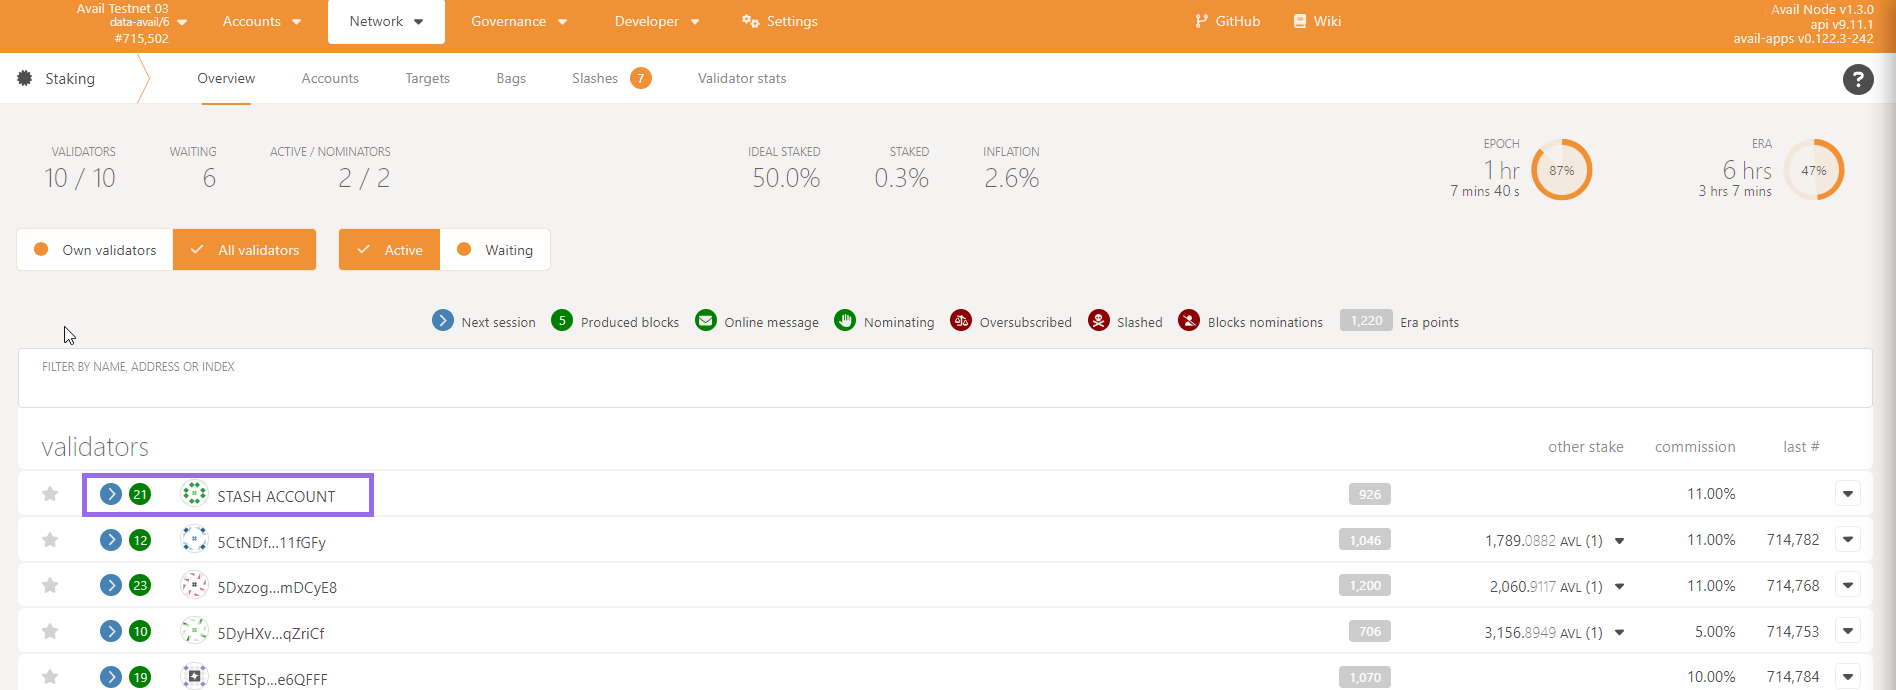
## Next Steps
Congratulations on successfully setting up your Avail Validator node!
You should be seeing something like this:

As you move forward, here are some essential actions to consider:
1. **Backup Your Validator**: Ensure you have a secure backup of your validator settings and keys. Refer to the
[Backup Guide](/docs/da/operate/become-a-validator/backup-your-validator) for detailed steps.
2. **Start Monitoring**: If you haven't already, set up monitoring tools to keep track of your validator's performance. Check out the [Monitoring Guide](/docs/da/operate/become-a-validator/monitor-your-validator) for recommendations.
3. **Join the Community**: Connect with other validators and the Avail team on the official [Discord Channel](https://discord.com/invite/AvailProject). It's a great place to share experiences, ask questions, and get updates.
### How to Run an Avail light client
> **Note**
>
> **LOOKING FOR THE LIGHT CLIENT API REFERENCE?**
> Go to [light client API reference](/docs/da/api-reference/avail-lc-api)
1. Use [Availup](https://github.com/availproject/availup) to run the light client.
2. Download and run a pre-built binary.
3. Build your Light client from source
## Latest release
You can find the latest release binary in the [`avail-light`](https://github.com/availproject/avail-light) repository.
> **Note**
>
> **RECOMMENDED VERSION**
> You can find the latest release of the Avail LC from [our Github repo](https://github.com/availproject/avail-light).
> We recommend devs to use the `Latest` release.
## Light client modes
The Avail light client has two main modes of operation:
1. **Light-client mode**: The basic mode of operation and is always active no matter the mode selected.
If an `app_id` is not provided (or is = 0), this mode will commence. On each header received the client
does random sampling using two mechanisms
2. **App-client mode**: If an `app_id > 0` is given, the application client
(part of the light client) downloads all data specific to that App ID, reconstructs it and persists it locally.
This data can then be accessed via a local HTTP endpoint.
> **Note**
>
> **WE RECOMMEND LEARNING ABOUT APP IDs on AVAIL DA**
> App IDs are an important concept in the context of Avail. We recommend you go through [this page in our docs](/docs/da/concepts/app-ids) to understand how they work before moving forward.
## Running the light client
#### Light-client mode
> **Note**
>
> **CONFIG FLAGS**
> Availup supports many different config flags to support your needs.
> Detailed documentation for them can be found [in our Github repo](https://github.com/availproject/availup?tab=readme-ov-file#availup).
**[`availup`](https://github.com/availproject/availup)** is the recommended way of running the Avail light client for most users.
`availup` is a shell wrapper that allows you to spin up your own instance of the Avail light client
with a simple `curl` command.
> **Note**
>
> To run the Avail LC using `availup`, make sure you have [`curl`](https://curl.se/) installed on your system. To check, quickly:
>
> ```sh
> curl --version
> ```
1. To spin up an Avail light client on the Turing testnet, just run this one command in your terminal:
```sh
curl -sL1 avail.sh | bash
```
2. If everything goes well, the client output will look like this:
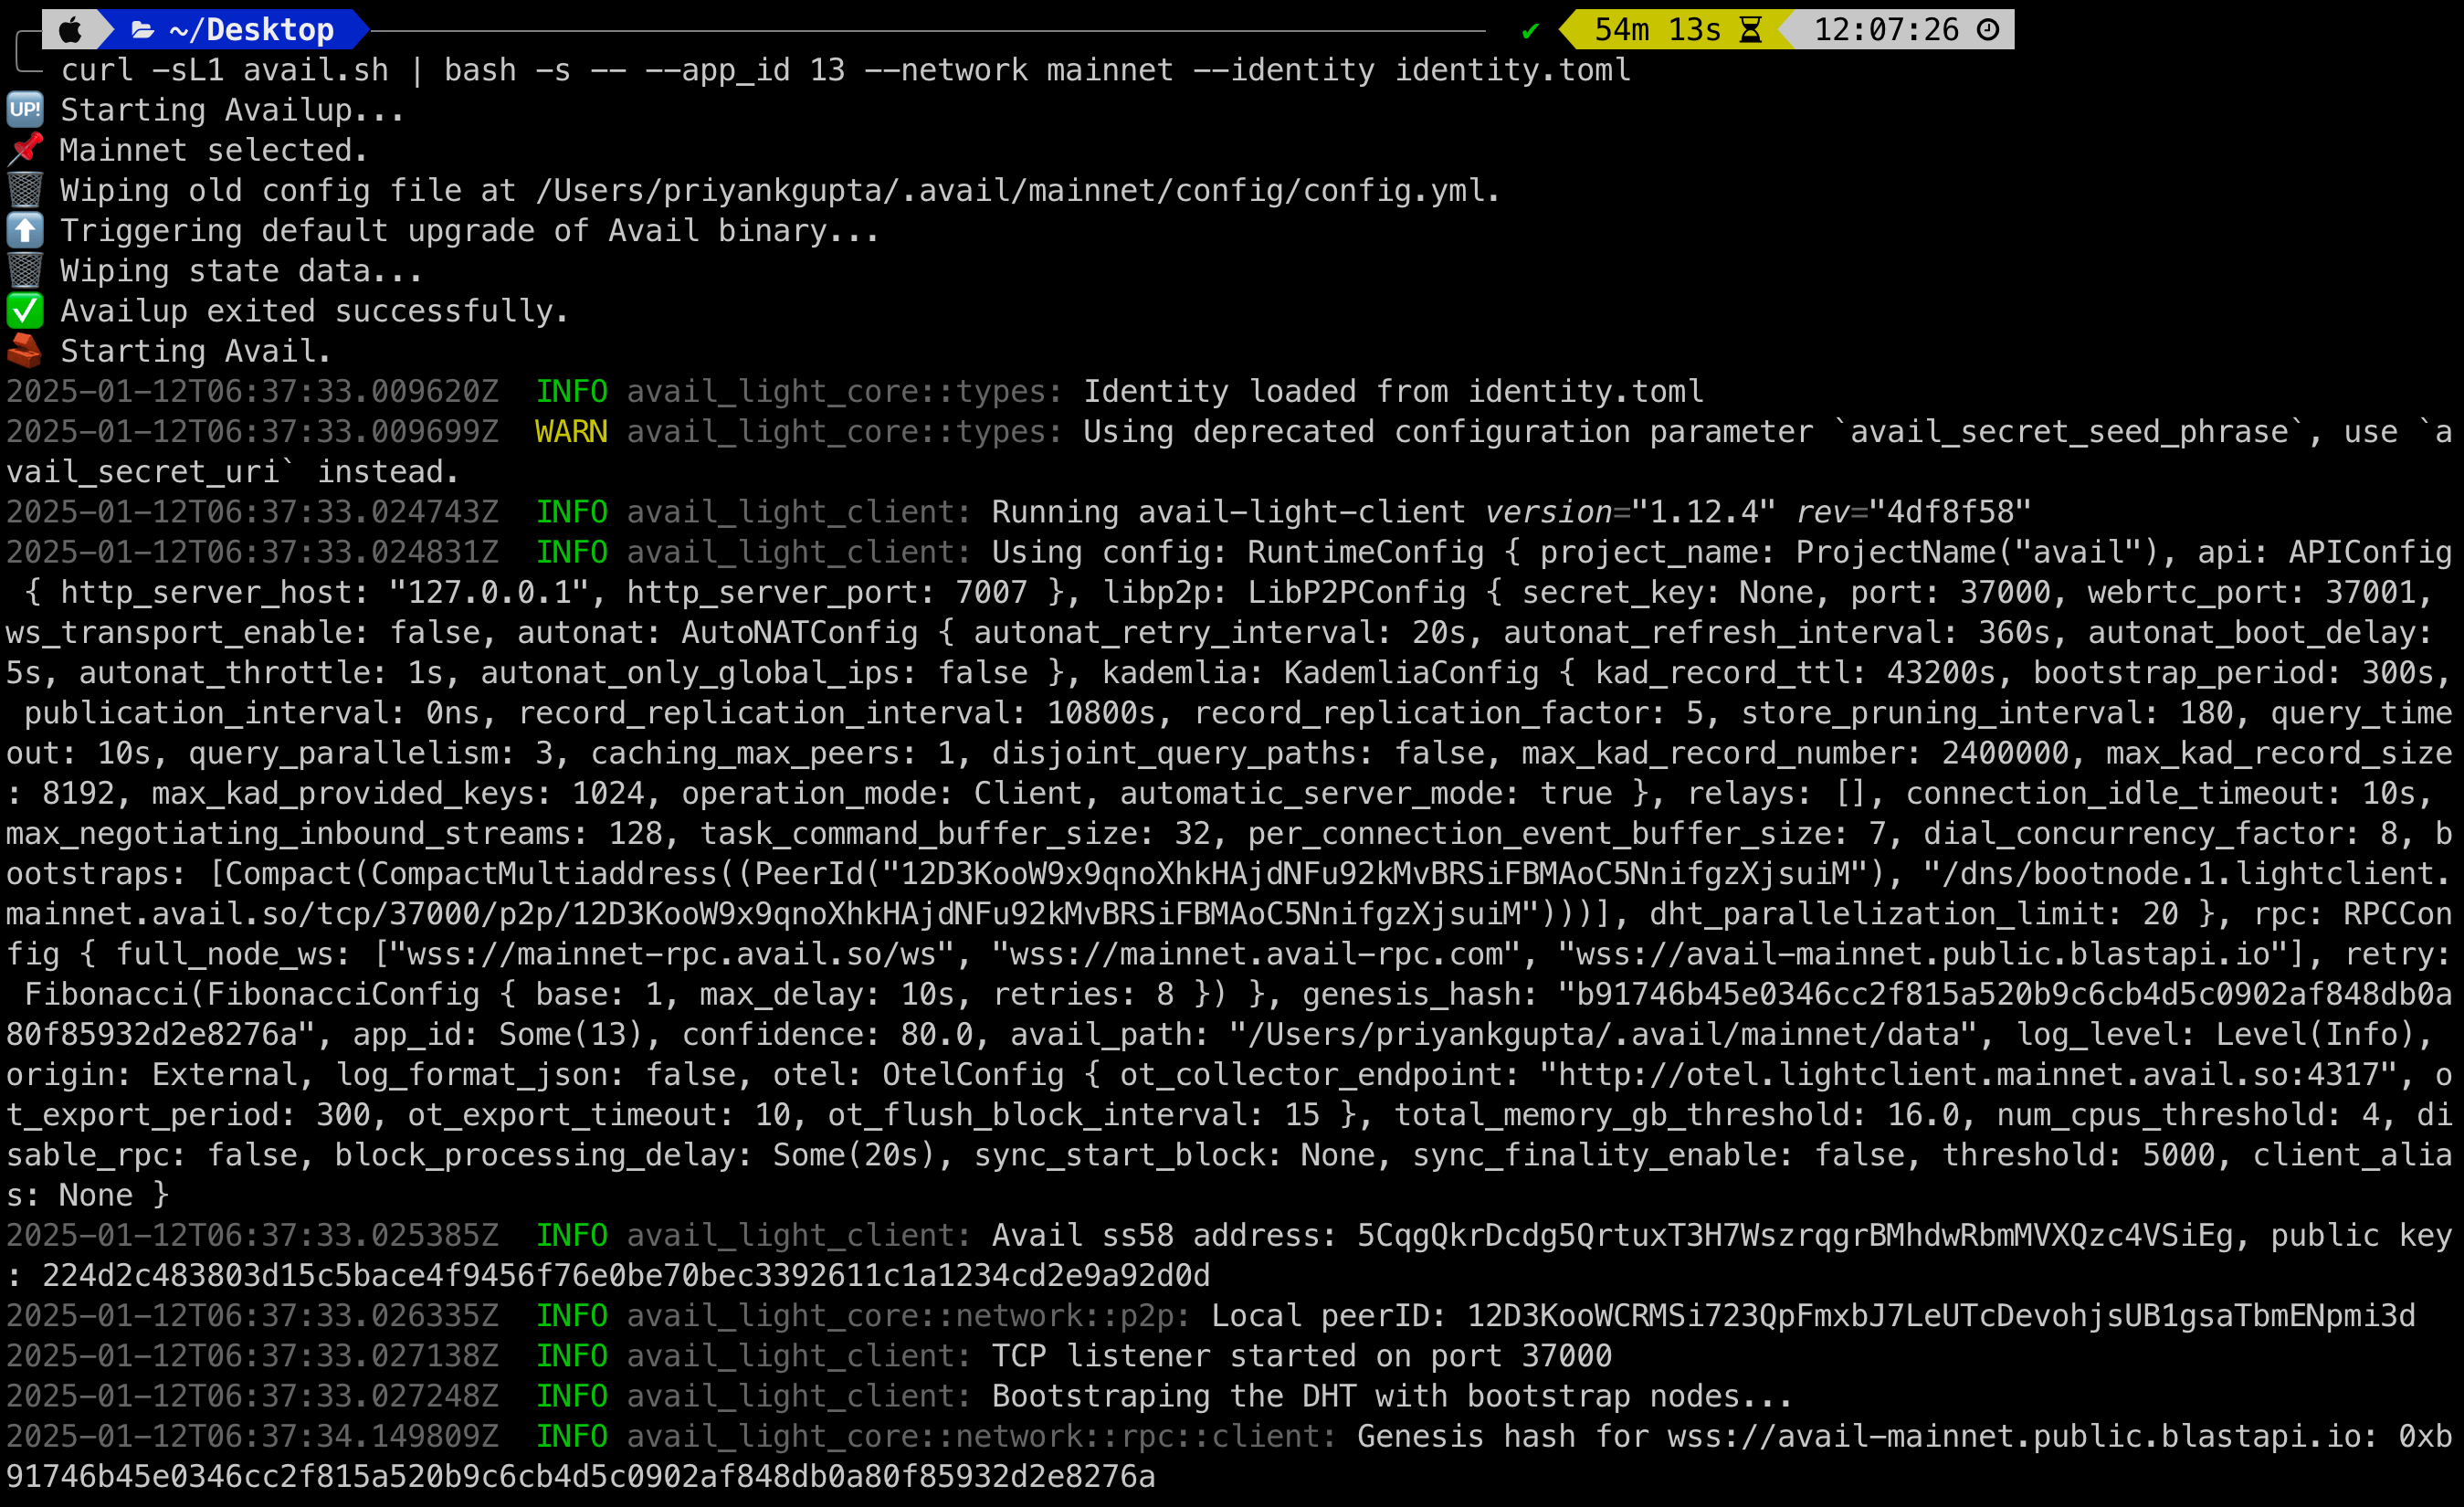
Sample output
```shell
2024-03-20T10:50:25.528628Z INFO avail_light::light_client: Processing finalized block block_number=562690 block_delay=20
2024-03-20T10:50:25.528706Z INFO avail_light::light_client: Random cells generated: 10 block_number=562690 cells_requested=10
2024-03-20T10:50:26.069497Z INFO avail_light::network: Cells fetched from DHT block_number=562690 cells_total=10 cells_fetched=0 cells_verified=0 fetch_elapsed=540.755792ms proof_verification_elapsed=2.208µs
2024-03-20T10:50:28.322706Z INFO avail_light::network: Cells fetched from RPC block_number=562690 cells_total=10 cells_fetched=10 cells_verified=10 fetch_elapsed=2.232714917s proof_verification_elapsed=20.404208ms
2024-03-20T10:50:28.322987Z INFO avail_light::light_client: Confidence factor: 99.90234375 block_number=562690 confidence=99.90234375
2024-03-20T10:50:28.323134Z INFO avail_light::light_client: Sleeping for 14.61143875s seconds
2024-03-20T10:50:28.323154Z INFO avail_light::api::v2: Message published to clients topic=ConfidenceAchieved published=0 failed=0
2024-03-20T10:50:28.859369Z INFO avail_light::network::p2p::event_loop: Cell upload success rate for block 562690: 0/10. Duration: 0
2024-03-20T10:50:41.535425Z INFO avail_light::network::rpc::subscriptions: New justification at block no.: 562692, hash: 0x3b602253298ce9bec9b5b8f0c8767f14502ccaa17a003dfba77f9d90edeaf5da
2024-03-20T10:50:41.709011Z INFO avail_light::network::rpc::subscriptions: Header no.: 562692
2024-03-20T10:50:41.709557Z INFO avail_light::network::rpc::subscriptions: Number of matching signatures: 5/7 for block 562692, set_id 223
2024-03-20T10:50:41.709574Z INFO avail_light::network::rpc::subscriptions: Storing finality checkpoint at block 562692
2024-03-20T10:50:41.709908Z INFO avail_light::network::rpc::subscriptions: Sending finalized block 562692
2024-03-20T10:50:41.709966Z INFO avail_light::api::v2: Message published to clients topic=HeaderVerified published=0 failed=0
2024-03-20T10:50:42.936699Z INFO avail_light::light_client: Processing finalized block block_number=562691 block_delay=20
2024-03-20T10:50:42.936761Z INFO avail_light::light_client: Random cells generated: 10 block_number=562691 cells_requested=10
2024-03-20T10:50:43.472932Z INFO avail_light::network: Cells fetched from DHT block_number=562691 cells_total=10 cells_fetched=0 cells_verified=0 fetch_elapsed=536.136083ms proof_verification_elapsed=3.042µs
2024-03-20T10:50:46.513570Z INFO avail_light::network: Cells fetched from RPC block_number=562691 cells_total=10 cells_fetched=10 cells_verified=10 fetch_elapsed=3.022786041s proof_verification_elapsed=17.810542ms
2024-03-20T10:50:46.513706Z INFO avail_light::light_client: Confidence factor: 99.90234375 block_number=562691 confidence=99.90234375
2024-03-20T10:50:46.513785Z INFO avail_light::light_client: Sleeping for 15.195224667s seconds
2024-03-20T10:50:46.513795Z INFO avail_light::api::v2: Message published to clients topic=ConfidenceAchieved published=0 failed=0
2024-03-20T10:50:47.056255Z INFO avail_light::network::p2p::event_loop: Cell upload success rate for block 562691: 0/10. Duration: 0
```
#### App-client mode
> **Note**
>
> **CONFIG FLAGS**
> You can run the Avail light client with different flags to configure it according to your needs.
> Detailed documentation for them can be found [in our Github repo](https://github.com/availproject/avail-light/blob/main/client/README.md#options).
You can also download and run a pre-built binary of the Avail light client.
To do so:
1. Download the [recommended version of the binary](https://github.com/availproject/avail-light/releases) that is compatible with your operating system.
2. Move the `.tar` file into a convenient directory and extract it to reveal the `avail-light` binary.
3. Open a terminal in that location and run:
For linux machines that run on `x86_64` based Intel or `amd64` based AMD processors, run:
```sh
./avail-light-linux-amd64 --network mainnet
```
#### apple-x86_64
For MacOS machines that run on `x86_64` based Intel processors, run:
```sh
./avail-light-apple-x86_64 --network mainnet
```
#### apple-arm64
For MacOS machines that run on newer `arm64` based M-series processors, run:
```sh
./avail-light-apple-arm64 --network mainnet
```
> **Note**
>
> You can configure the run command with a variety of [config flags](https://github.com/availproject/avail-light/blob/main/client/README.md#options).
4. If everything goes well, the client output will look like this:
Sample output
```shell
2024-03-20T10:50:25.528628Z INFO avail_light::light_client: Processing finalized block block_number=562690 block_delay=20
2024-03-20T10:50:25.528706Z INFO avail_light::light_client: Random cells generated: 10 block_number=562690 cells_requested=10
2024-03-20T10:50:26.069497Z INFO avail_light::network: Cells fetched from DHT block_number=562690 cells_total=10 cells_fetched=0 cells_verified=0 fetch_elapsed=540.755792ms proof_verification_elapsed=2.208µs
2024-03-20T10:50:28.322706Z INFO avail_light::network: Cells fetched from RPC block_number=562690 cells_total=10 cells_fetched=10 cells_verified=10 fetch_elapsed=2.232714917s proof_verification_elapsed=20.404208ms
2024-03-20T10:50:28.322987Z INFO avail_light::light_client: Confidence factor: 99.90234375 block_number=562690 confidence=99.90234375
2024-03-20T10:50:28.323134Z INFO avail_light::light_client: Sleeping for 14.61143875s seconds
2024-03-20T10:50:28.323154Z INFO avail_light::api::v2: Message published to clients topic=ConfidenceAchieved published=0 failed=0
2024-03-20T10:50:28.859369Z INFO avail_light::network::p2p::event_loop: Cell upload success rate for block 562690: 0/10. Duration: 0
2024-03-20T10:50:41.535425Z INFO avail_light::network::rpc::subscriptions: New justification at block no.: 562692, hash: 0x3b602253298ce9bec9b5b8f0c8767f14502ccaa17a003dfba77f9d90edeaf5da
2024-03-20T10:50:41.709011Z INFO avail_light::network::rpc::subscriptions: Header no.: 562692
2024-03-20T10:50:41.709557Z INFO avail_light::network::rpc::subscriptions: Number of matching signatures: 5/7 for block 562692, set_id 223
2024-03-20T10:50:41.709574Z INFO avail_light::network::rpc::subscriptions: Storing finality checkpoint at block 562692
2024-03-20T10:50:41.709908Z INFO avail_light::network::rpc::subscriptions: Sending finalized block 562692
2024-03-20T10:50:41.709966Z INFO avail_light::api::v2: Message published to clients topic=HeaderVerified published=0 failed=0
2024-03-20T10:50:42.936699Z INFO avail_light::light_client: Processing finalized block block_number=562691 block_delay=20
2024-03-20T10:50:42.936761Z INFO avail_light::light_client: Random cells generated: 10 block_number=562691 cells_requested=10
2024-03-20T10:50:43.472932Z INFO avail_light::network: Cells fetched from DHT block_number=562691 cells_total=10 cells_fetched=0 cells_verified=0 fetch_elapsed=536.136083ms proof_verification_elapsed=3.042µs
2024-03-20T10:50:46.513570Z INFO avail_light::network: Cells fetched from RPC block_number=562691 cells_total=10 cells_fetched=10 cells_verified=10 fetch_elapsed=3.022786041s proof_verification_elapsed=17.810542ms
2024-03-20T10:50:46.513706Z INFO avail_light::light_client: Confidence factor: 99.90234375 block_number=562691 confidence=99.90234375
2024-03-20T10:50:46.513785Z INFO avail_light::light_client: Sleeping for 15.195224667s seconds
2024-03-20T10:50:46.513795Z INFO avail_light::api::v2: Message published to clients topic=ConfidenceAchieved published=0 failed=0
2024-03-20T10:50:47.056255Z INFO avail_light::network::p2p::event_loop: Cell upload success rate for block 562691: 0/10. Duration: 0
```
> **Note**
>
> **CONFIG FLAGS**
> You can run the Avail light client with different flags to configure it according to your needs.
> Detailed documentation for them can be found [in our Github repo](https://github.com/availproject/avail-light/blob/main/client/README.md#options).
Building the Avail light client from source is a more advanced option that
provides you with the maximum flexibility.
To do so:
1. Clone the Avail light-client repo and checkout to the specified version:
```sh
git clone https://github.com/availproject/avail-light.git
cd avail-light
```
2. Make sure your terminal is in the `avail-light` directory. Create a compiled build by running:
```sh
cargo build --release
```
3. This will create a new directory named `target` within `avail-light`. Navigate to `target/release` using:
```sh
cd target/release
```
4. Here you will find the `avail-light` build. Run the build using:
```sh
./avail-light --network mainnet
```
5. If everything goes well, the client output will look like this:
Sample output
```shell
2024-03-20T10:22:23.821042Z INFO avail_light::api::v2: Message published to clients topic=HeaderVerified published=0 failed=0
2024-03-20T10:22:23.854448Z INFO avail_light::network: Cells fetched from RPC block_number=562606 cells_total=10 cells_fetched=10 cells_verified=10 fetch_elapsed=466.901875ms proof_verification_elapsed=10.431583ms
2024-03-20T10:22:23.854573Z INFO avail_light::light_client: Confidence factor: 99.90234375 block_number=562606 confidence=99.90234375
2024-03-20T10:22:23.854635Z INFO avail_light::light_client: Sleeping for 19.965855416s seconds
2024-03-20T10:22:23.854643Z INFO avail_light::api::v2: Message published to clients topic=ConfidenceAchieved published=0 failed=0
2024-03-20T10:22:24.392198Z INFO avail_light::network::p2p::event_loop: Cell upload success rate for block 562606: 0/10. Duration: 0
2024-03-20T10:22:43.821867Z INFO avail_light::light_client: Processing finalized block block_number=562607 block_delay=20
2024-03-20T10:22:43.821955Z INFO avail_light::light_client: Random cells generated: 10 block_number=562607 cells_requested=10
2024-03-20T10:22:44.358772Z INFO avail_light::network: Cells fetched from DHT block_number=562607 cells_total=10 cells_fetched=0 cells_verified=0 fetch_elapsed=536.778958ms proof_verification_elapsed=2.292µs
2024-03-20T10:22:45.937348Z INFO avail_light::network: Cells fetched from RPC block_number=562607 cells_total=10 cells_fetched=10 cells_verified=10 fetch_elapsed=1.56179875s proof_verification_elapsed=16.692791ms
2024-03-20T10:22:45.938417Z INFO avail_light::light_client: Confidence factor: 99.90234375 block_number=562607 confidence=99.90234375
2024-03-20T10:22:45.938564Z INFO avail_light::api::v2: Message published to clients topic=ConfidenceAchieved published=0 failed=0
2024-03-20T10:22:46.473163Z INFO avail_light::network::p2p::event_loop: Cell upload success rate for block 562607: 0/10. Duration: 0
2024-03-20T10:22:46.527044Z INFO avail_light::network::rpc::subscriptions: New justification at block no.: 562608, hash: 0xbea2a4b136c271b72314e2349577136bf7cdc7c732bc3909e280eb602b8af643
2024-03-20T10:22:46.672163Z INFO avail_light::network::rpc::subscriptions: Header no.: 562608
2024-03-20T10:22:46.673730Z INFO avail_light::network::rpc::subscriptions: Number of matching signatures: 5/7 for block 562608, set_id 223
2024-03-20T10:22:46.673755Z INFO avail_light::network::rpc::subscriptions: Storing finality checkpoint at block 562608
2024-03-20T10:22:46.674002Z INFO avail_light::network::rpc::subscriptions: Sending finalized block 562608
2024-03-20T10:22:46.674087Z INFO avail_light::api::v2: Message published to clients topic=HeaderVerified published=0 failed=0
2024-03-20T10:22:46.674150Z INFO avail_light::light_client: Sleeping for 19.998042125s seconds
```
[Windows Subsystem for Linux (WSL)](https://learn.microsoft.com/en-us/windows/wsl/about) is a Windows feature that allows you to run a Linux distribution directly on Windows,
without having to set up a separate virtual machine or a dual-boot system.
However, we realise that working with WSL might be inconvenient for some users. We have therefore also included
instructions on how to run the Avail light client natively on Windows without having to go through any technical hassles.
#### Without WSL
1. Go to the [releases page of the Avail light client repo](https://github.com/availproject/avail-light/releases), and download the
`avail-light-windows-runner.zip` file of the `Latest` version.
2. Right click the downloaded file and extract it to a convenient location.
3. Then run the `availup.bat` file by double clicking it. This will start the Avail light client.
4. If everything goes well, the client output will look like this:
Sample output
```shell
2024-03-20T10:22:23.821042Z INFO avail_light::api::v2: Message published to clients topic=HeaderVerified published=0 failed=0
2024-03-20T10:22:23.854448Z INFO avail_light::network: Cells fetched from RPC block_number=562606 cells_total=10 cells_fetched=10 cells_verified=10 fetch_elapsed=466.901875ms proof_verification_elapsed=10.431583ms
2024-03-20T10:22:23.854573Z INFO avail_light::light_client: Confidence factor: 99.90234375 block_number=562606 confidence=99.90234375
2024-03-20T10:22:23.854635Z INFO avail_light::light_client: Sleeping for 19.965855416s seconds
2024-03-20T10:22:23.854643Z INFO avail_light::api::v2: Message published to clients topic=ConfidenceAchieved published=0 failed=0
2024-03-20T10:22:24.392198Z INFO avail_light::network::p2p::event_loop: Cell upload success rate for block 562606: 0/10. Duration: 0
2024-03-20T10:22:43.821867Z INFO avail_light::light_client: Processing finalized block block_number=562607 block_delay=20
2024-03-20T10:22:43.821955Z INFO avail_light::light_client: Random cells generated: 10 block_number=562607 cells_requested=10
2024-03-20T10:22:44.358772Z INFO avail_light::network: Cells fetched from DHT block_number=562607 cells_total=10 cells_fetched=0 cells_verified=0 fetch_elapsed=536.778958ms proof_verification_elapsed=2.292µs
2024-03-20T10:22:45.937348Z INFO avail_light::network: Cells fetched from RPC block_number=562607 cells_total=10 cells_fetched=10 cells_verified=10 fetch_elapsed=1.56179875s proof_verification_elapsed=16.692791ms
2024-03-20T10:22:45.938417Z INFO avail_light::light_client: Confidence factor: 99.90234375 block_number=562607 confidence=99.90234375
2024-03-20T10:22:45.938564Z INFO avail_light::api::v2: Message published to clients topic=ConfidenceAchieved published=0 failed=0
2024-03-20T10:22:46.473163Z INFO avail_light::network::p2p::event_loop: Cell upload success rate for block 562607: 0/10. Duration: 0
2024-03-20T10:22:46.527044Z INFO avail_light::network::rpc::subscriptions: New justification at block no.: 562608, hash: 0xbea2a4b136c271b72314e2349577136bf7cdc7c732bc3909e280eb602b8af643
2024-03-20T10:22:46.672163Z INFO avail_light::network::rpc::subscriptions: Header no.: 562608
2024-03-20T10:22:46.673730Z INFO avail_light::network::rpc::subscriptions: Number of matching signatures: 5/7 for block 562608, set_id 223
2024-03-20T10:22:46.673755Z INFO avail_light::network::rpc::subscriptions: Storing finality checkpoint at block 562608
2024-03-20T10:22:46.674002Z INFO avail_light::network::rpc::subscriptions: Sending finalized block 562608
2024-03-20T10:22:46.674087Z INFO avail_light::api::v2: Message published to clients topic=HeaderVerified published=0 failed=0
2024-03-20T10:22:46.674150Z INFO avail_light::light_client: Sleeping for 19.998042125s seconds
```
> **Note**
>
> Please note that trying to download and run a precompiled binary via a `.zip` file might result in
> windows warning you about the file being potentially harmful. You will need to bypass this warning to run the light client.
#### With WSL
To install WSL on your Windows machine:
1. Open `Windows Powershell`, and run the following command:
```sh
wsl --install --no-distribution
```
2. This step takes some time and you will need to restart your computer once the installation is complete.
3. After restarting, run the following command in Powershell to see a list of all available Linux distributions:
```sh
wsl --list --online
```
4. You can install any of those listed distributions, but we will be going with `ubuntu` for this guide:
```sh
wsl --install ubuntu
```
This step will prompt you to enter a username and password for your local Ubuntu installation.
5. Once inside the Ubuntu terminal, run the following command to install the required dependencies:
```sh
sudo apt install build-essential && sudo apt install clang
```
> **Note**
>
> It is also highly recommended to upgrade all your dependencies to their latest recommended versions whenever
> you set up a new Linux machine. You can do that by running:
>
> ```sh
> sudo apt-get update && sudo apt upgrade
> ```
6. Once you have an up to date Linux distro (in this case Ubuntu) running, you can initialize the Avail light client by simply running:
```sh
curl -sL1 avail.sh | bash
```
7. If everything goes well, the client output will look like this:
Sample output
```shell
2024-03-20T10:22:23.821042Z INFO avail_light::api::v2: Message published to clients topic=HeaderVerified published=0 failed=0
2024-03-20T10:22:23.854448Z INFO avail_light::network: Cells fetched from RPC block_number=562606 cells_total=10 cells_fetched=10 cells_verified=10 fetch_elapsed=466.901875ms proof_verification_elapsed=10.431583ms
2024-03-20T10:22:23.854573Z INFO avail_light::light_client: Confidence factor: 99.90234375 block_number=562606 confidence=99.90234375
2024-03-20T10:22:23.854635Z INFO avail_light::light_client: Sleeping for 19.965855416s seconds
2024-03-20T10:22:23.854643Z INFO avail_light::api::v2: Message published to clients topic=ConfidenceAchieved published=0 failed=0
2024-03-20T10:22:24.392198Z INFO avail_light::network::p2p::event_loop: Cell upload success rate for block 562606: 0/10. Duration: 0
2024-03-20T10:22:43.821867Z INFO avail_light::light_client: Processing finalized block block_number=562607 block_delay=20
2024-03-20T10:22:43.821955Z INFO avail_light::light_client: Random cells generated: 10 block_number=562607 cells_requested=10
2024-03-20T10:22:44.358772Z INFO avail_light::network: Cells fetched from DHT block_number=562607 cells_total=10 cells_fetched=0 cells_verified=0 fetch_elapsed=536.778958ms proof_verification_elapsed=2.292µs
2024-03-20T10:22:45.937348Z INFO avail_light::network: Cells fetched from RPC block_number=562607 cells_total=10 cells_fetched=10 cells_verified=10 fetch_elapsed=1.56179875s proof_verification_elapsed=16.692791ms
2024-03-20T10:22:45.938417Z INFO avail_light::light_client: Confidence factor: 99.90234375 block_number=562607 confidence=99.90234375
2024-03-20T10:22:45.938564Z INFO avail_light::api::v2: Message published to clients topic=ConfidenceAchieved published=0 failed=0
2024-03-20T10:22:46.473163Z INFO avail_light::network::p2p::event_loop: Cell upload success rate for block 562607: 0/10. Duration: 0
2024-03-20T10:22:46.527044Z INFO avail_light::network::rpc::subscriptions: New justification at block no.: 562608, hash: 0xbea2a4b136c271b72314e2349577136bf7cdc7c732bc3909e280eb602b8af643
2024-03-20T10:22:46.672163Z INFO avail_light::network::rpc::subscriptions: Header no.: 562608
2024-03-20T10:22:46.673730Z INFO avail_light::network::rpc::subscriptions: Number of matching signatures: 5/7 for block 562608, set_id 223
2024-03-20T10:22:46.673755Z INFO avail_light::network::rpc::subscriptions: Storing finality checkpoint at block 562608
2024-03-20T10:22:46.674002Z INFO avail_light::network::rpc::subscriptions: Sending finalized block 562608
2024-03-20T10:22:46.674087Z INFO avail_light::api::v2: Message published to clients topic=HeaderVerified published=0 failed=0
2024-03-20T10:22:46.674150Z INFO avail_light::light_client: Sleeping for 19.998042125s seconds
```
### Setting your identity using `identity.toml`
> **Note**
>
> **ONLY IF YOU WANT TO SUBMIT DATA TO AVAIL DA USING THE LIGHT CLIENT**
> The light client API exposes a method you can use to submit data to Avail DA, but to do so the API needs access to an Avail account with some AVAIL tokens. \\
>
> > *You don't need to set an identity if you only want your client to fetch data from the network.*
* Whenever you run an Avail LC, you will notice a file named `identity.toml` being created in the same
directory as the binary. This is a default file that contains a random `seed phrase` that represents your
identity on the network.
* You can also set your own `seed phrase` by creating an `identity.toml` file, and passing it as an argument using the
`--identity` flag.
### Initializing the `App-client` mode
1. create an `identity.toml` file anywhere in your system.
2. Initialize a variable named `avail_secret_seed_phrase` like this:
```toml
avail_secret_seed_phrase = 'AvailDA rice is demon the pair best almond DA walnut solution walrus out tube there'
```
3. Pass this file to the light client using the `--identity` flag like this. This could look something like this:
#### availup
> **Note**
>
> **CONFIG FLAGS**
> Availup supports many different config flags to support your needs.
> Detailed documentation for them can be found [in our Github repo](https://github.com/availproject/availup?tab=readme-ov-file#availup).
**[`availup`](https://github.com/availproject/availup)** is the recommended way of running the Avail light client for most users.
`availup` is a shell wrapper that allows you to spin up your own instance of the Avail light client
with a simple `curl` command.
> **Note**
>
> To run the Avail LC using `availup`, make sure you have [`curl`](https://curl.se/) installed on your system. To check, quickly:
>
> ```sh
> curl --version
> ```
1. To spin up an Avail light client on the Turing testnet, just run this one command in your terminal:
```sh
curl -sL1 avail.sh | bash -s -- --app_id 18 --network turing --identity identity.toml
```
2. If everything goes well, the client output will look like this:
> **Note**
>
> Please note this command worked for a system where the `identity.toml` file was in the same directory as the terminal.
> You will need to pass the full path to the `identity.toml` file if it is located elsewhere.
#### Run pre-built binary
> **Note**
>
> **CONFIG FLAGS**
> You can run the Avail light client with different flags to configure it according to your needs.
> Detailed documentation for them can be found [in our Github repo](https://github.com/availproject/avail-light/blob/main/client/README.md#options).
You can also download and run a pre-built binary of the Avail light client.
To do so:
1. Download the [recommended version of the binary](https://github.com/availproject/avail-light/releases) that is compatible with your operating system.
2. Move the `.tar` file into a convenient directory and extract it to reveal the `avail-light` binary.
3. Open a terminal in that location and run:
For linux machines that run on `x86_64` based Intel or `amd64` based AMD processors, run:
```sh
./avail-light-linux-amd64 --app-id 18 --network mainnet --identity identity.toml
```
#### Build from source
For linux machines that run on `arm64` based processors, run:
```sh
./avail-light-linux-arm64 --app-id 18 --network mainnet --identity identity.toml
```
#### apple-x86_64
For MacOS machines that run on `x86_64` based Intel processors, run:
```sh
./avail-light-apple-x86_64 --app-id 18 --network mainnet --identity identity.toml
```
#### apple-arm64
For MacOS machines that run on newer `arm64` based M-series processors, run:
```sh
./avail-light-apple-arm64 --app-id 18 --network mainnet --identity identity.toml
```
> **Note**
>
> You can configure the run command with a variety of [config flags](https://github.com/availproject/avail-light/blob/main/client/README.md#options).
> **Note**
>
> **CONFIG FLAGS**
> You can run the Avail light client with different flags to configure it according to your needs.
> Detailed documentation for them can be found [in our Github repo](https://github.com/availproject/avail-light/blob/main/client/README.md#options).
Building the Avail light client from source is a more advanced option that
provides you with the maximum flexibility.
To do so:
1. Clone the Avail light-client repo and checkout to the specified version:
```sh
git clone https://github.com/availproject/avail-light.git
cd avail-light
```
2. Make sure your terminal is in the `avail-light` directory. Create a compiled build by running:
```sh
cargo build --release
```
3. This will create a new directory named `target` within `avail-light`. Navigate to `target/release` using:
```sh
cd target/release
```
4. Here you will find the `avail-light` build. Run the build using:
```sh
./avail-light --app-id 18 --network mainnet --identity identity.toml
```
### How to Upgrade Your Avail Validator
When upgrading Avail nodes there are two options, a faster method and a slower (but safer) method. Both are detailed below, but you only need to use one of them.
## Fast Upgrade
While a rapid upgrade is possible, it carries inherent risks if done on a validator node. For instance, if you proceed with the upgrade on a validator node and encounter issues such as database corruption, there's a chance of prolonged downtime. This could lead to your node being removed from the active validator set due to unresponsiveness.
This upgrade process is appropriate for non-validator nodes. However, this upgrade process is still possible on validator nodes with careful consideration.
The fast upgrade steps are:
* Stop the Avail node.
```
sudo systemctl stop avail.service
```
* Locate your Avail binary, create a backup of the current binary, and then uninstall the existing binary by deleting the binary. Proceed to download the most recent binary announced in Discord, which will replace the previous binary version.
To provide an example, assuming your existing binary is located at `/home/avail/avail-node/` and is named `data-avail`, and you used the [validator](/docs/da/operate/become-a-validator) setup guidelines while obtaining a pre-built binary from the Avail GitHub repository, proceed as outlined below.
```
cd /home/avail/avail-node/
mv data-avail data-avail-backup
wget https://github.com/availproject/avail/releases/download/v1.10.0.0/x86_64-ubuntu-2004-data-avail.tar.gz
tar -xvf data-avail-linux-amd64.tar.gz
mv data-avail-linux-amd64 data-avail
rm data-avail-linux-amd64.tar.gz
```
* Start the Avail node again.
```
sudo systemctl start avail.service
```
* Ensure your node starts syncing with the network, view the logs from the running service.
```
journalctl -f -u avail.service
```
* Also check that your node is visible on telemetry and the version matches the upgrade version.
## Slow & Safe Upgrade
This upgrade procedure is most appropriate for validator nodes exclusively and is unnecessary for other types of nodes, such as full, archive, rpc, and so forth. Upgrading a Avail node safely is a careful process to ensure a smooth transition without disruption to the network. Here's a step-by-step guide on how to upgrade a Avail node,
including the process of switching nodes using rotated keys:
* Preparing for the Upgrade:
* Ensure you have a backup of your node's data and keystore files. This ensures you can restore your node in case of any issues during the upgrade process.
Familiarize yourself with the release notes and documentation of the new Avail version to understand any specific instructions or requirements.
* Setting up Node B:
* Install and set up the new version of Avail on a separate server or machine. This will be Node B, which will eventually replace Node A. Configure Node B with the
necessary configuration files, including the customizations you had on Node A. Ensure that Node B is fully synchronized with the Avail network before proceeding.
* Generating Rotated Keys:
* Generate a new set of keys for Node B using `author_rotateKeys`.
* Updating Session Keys:
* Open Avail Apps and navigate to [Network → Staking](https://testnet.avail.tools/#/staking/actions). You will be able to select from a hidden menu the option
to change session keys.
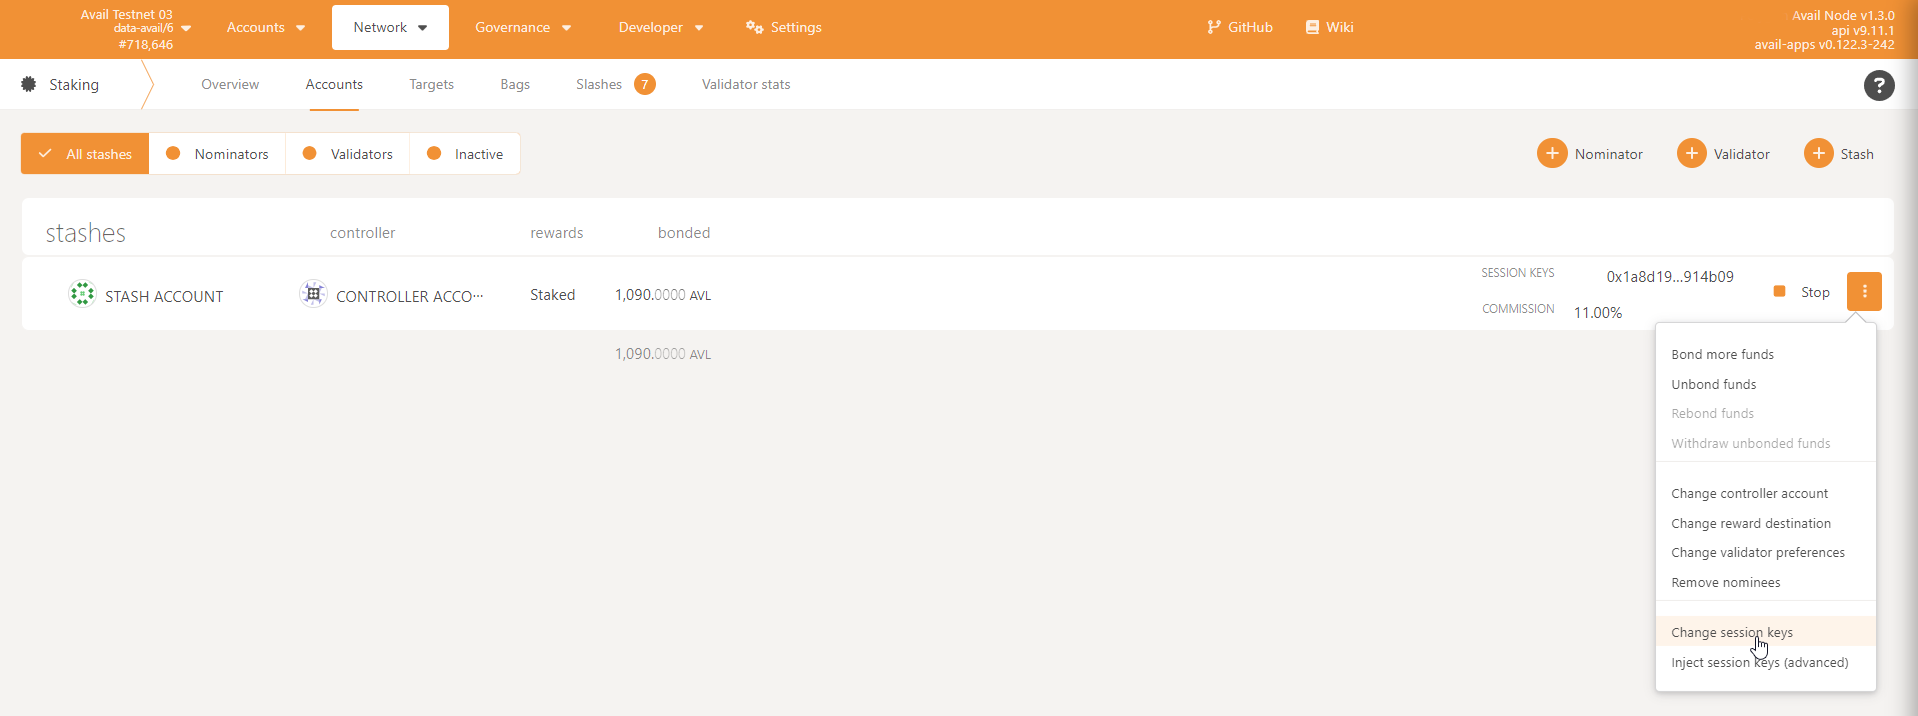
* Can enter the hex-encoded value obtained from `author_rotateKeys` and click on **Set Session Key**.
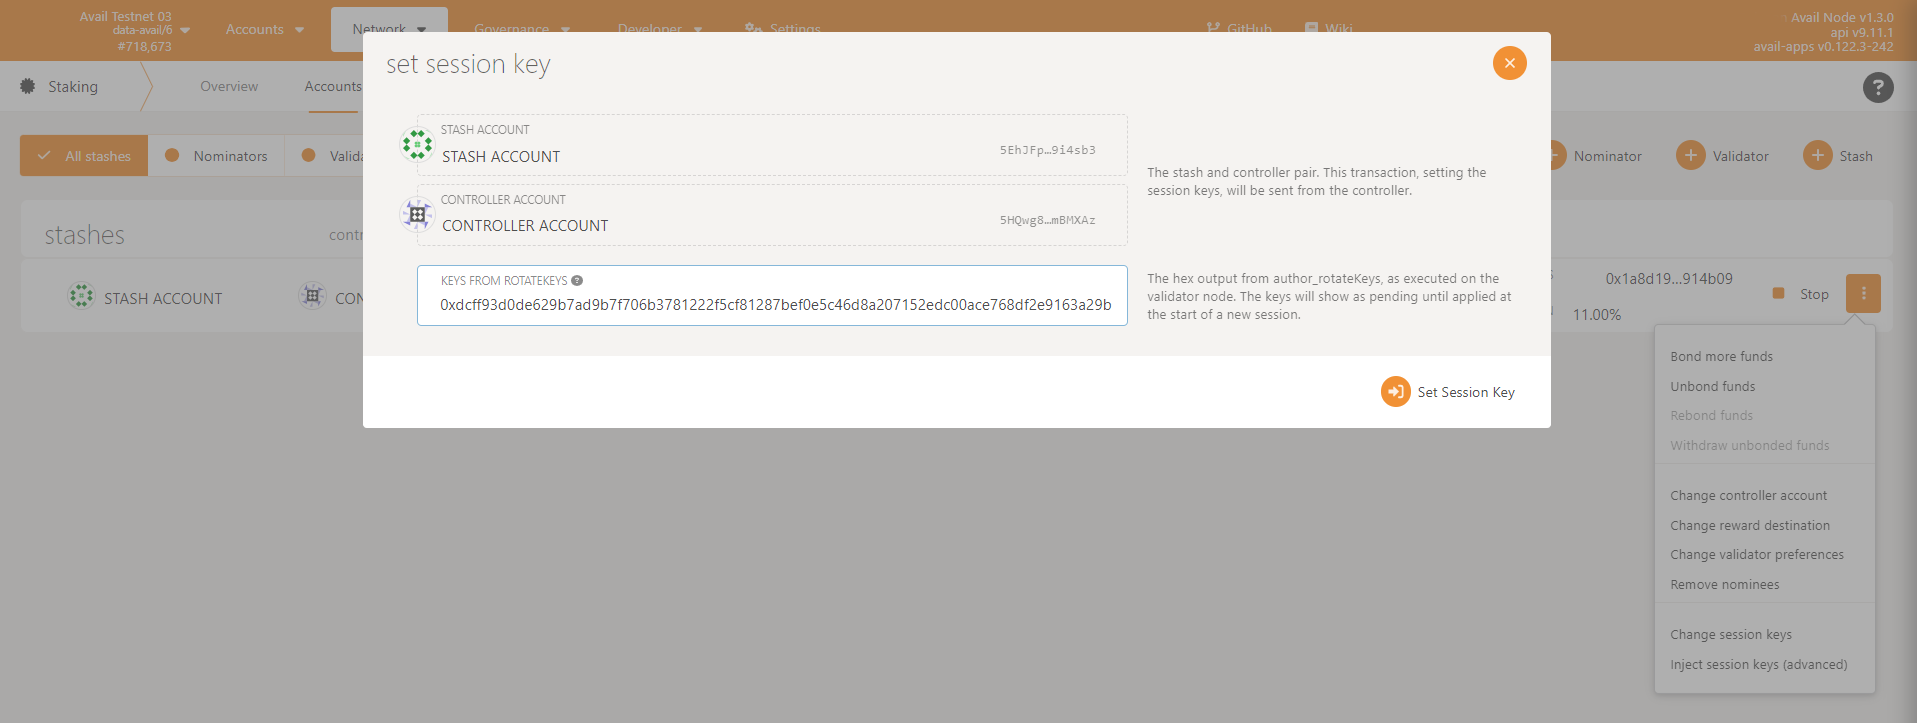
* You will now be able to see the new and old hex-encoded value. In the next epoch or two it will only show the new hex-encoded
value.
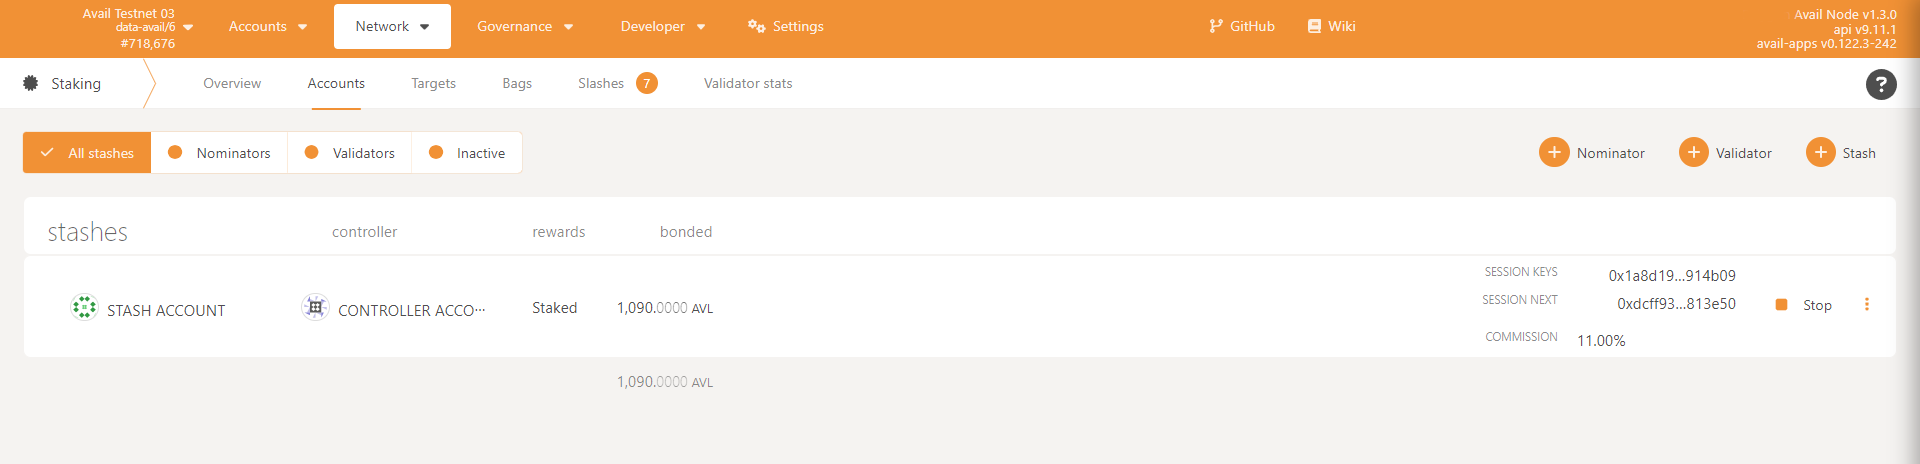
* After a few epochs Node B will be performing the validator tasks. You must ensure this by looking in the logs for sealed blocks. You should see `🎁 Prepared block for proposing` appear
in the logs of Node B and stop appearing Node A.
* You can now upgrade Node A. You can repeat the process to switch back to Node A.
> **Warning**
>
> ENSURE THE NODE HAS SWITCHED
> Before turning Node A off you must ensure Node B has become the active validator. In Avail Apps it may show the switch, however there is an epoch delay before the node
> fully switches over. The best is to look in the logs and confirm the new node is sealing the blocks.
### The Light Client Lift-off challenge
> **Warning**
>
> The Avail LC challenge has now ended. Please note that no member of the Avail team will personally reach out
> **to ask you for any personal information or payment**. Rewards for the challenge can only be claimed from the official
> claims page. In case of any queries, you can join our Discord server.
### Introduction to Avail light clients
## System Requirements
This is the hardware configuration required to set up an Avail light client:
| Component | Minimum | Recommended |
| ---------------------------- | :-----: | :---------: |
| RAM | 512MB | 1 GB |
| CPU (amd64/x86 architecture) | 2 core | 4 core |
{/* | Storage (SSD) | 20-40 GB | 200-300 GB | */}
> **Note**
>
> **JUST LOOKING FOR INSTRUCTIONS?**
> If you're not interested in theory, skip [to this link](/docs/da/operate/run-a-light-client/light-client) for instructions on how to run an Avail light client.
## Introduction
Avail light client (LC) lets you interact with Avail DA without requiring a full node and without trust assumptions towards remote peers.
This is accomplished by leveraging **Data Availability Sampling (DAS)** performed by the light client on every newly created block.
The light client listens on the Avail network for finalized blocks and performs DAS on a predetermined number of cells on each new block.
After successful block verification, **block confidence** is calculated for a number of cells in the matrix, with the number depending on the percentage of certainty the users wishes to achieve.
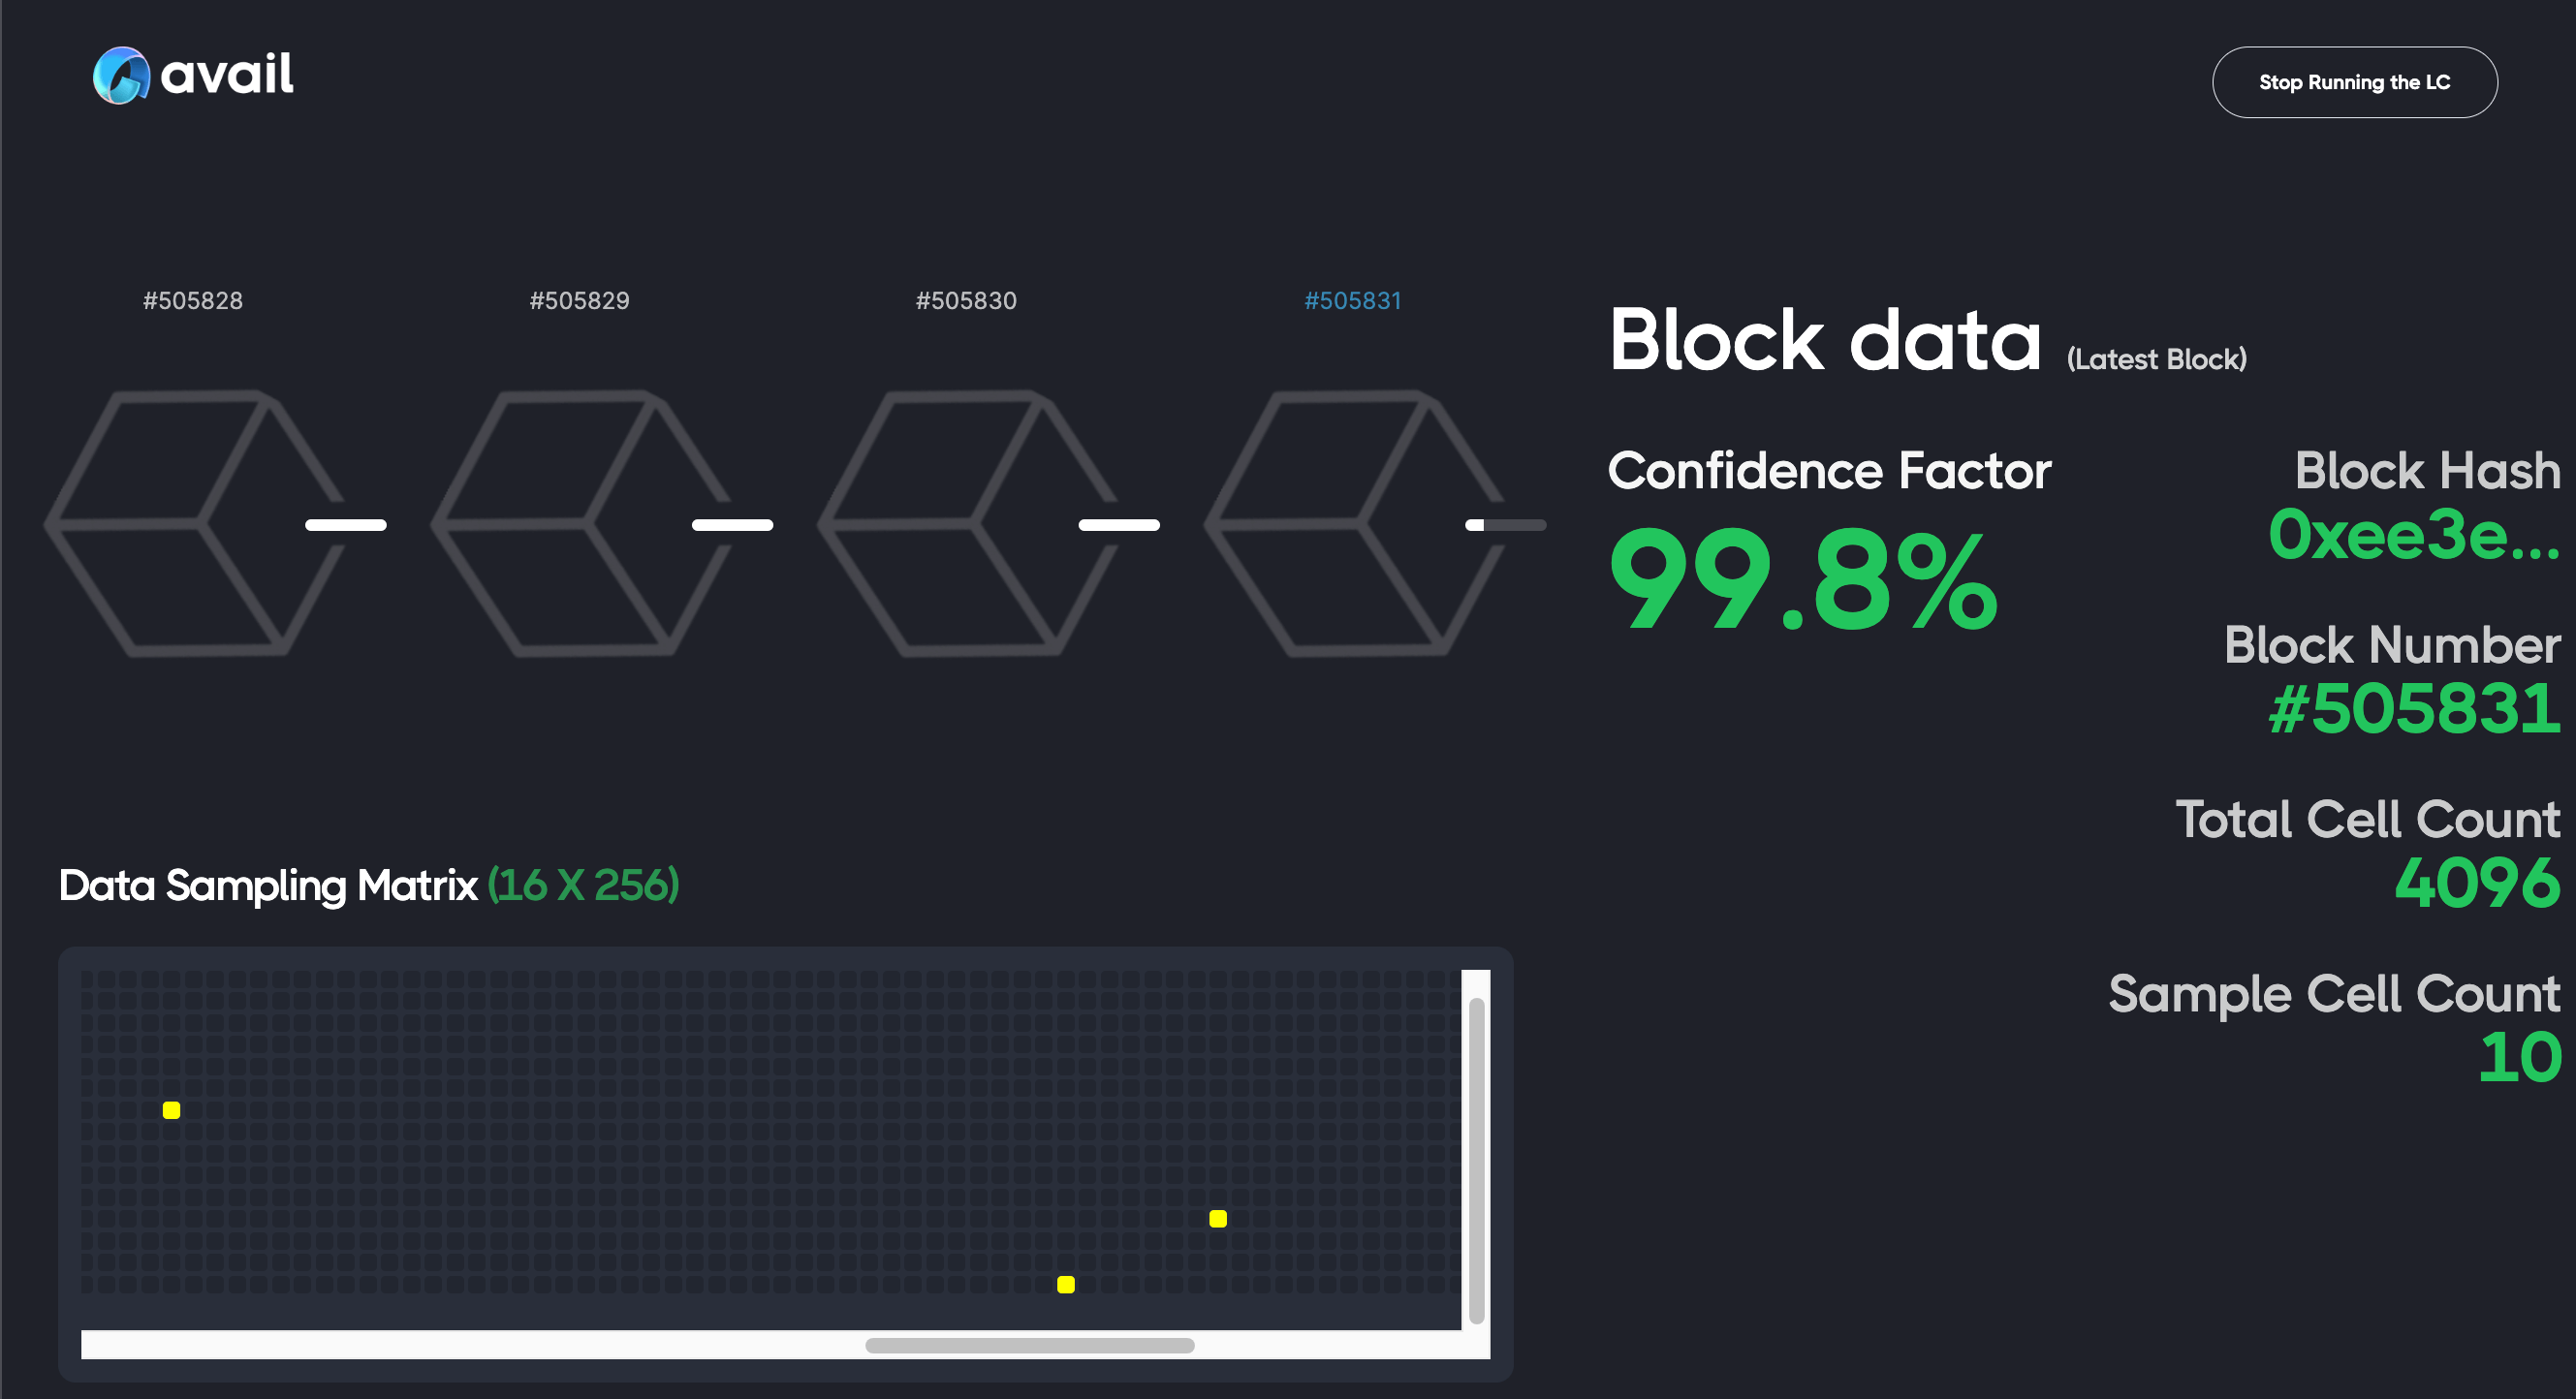
> This screenshot is from a purely in-browser interface built by the Avail team that uses a light client to determine the confidence of blocks in real time. You can check it out at [light.avail.tools](https://light.avail.tools/).
Light client functionality is separated into two logical parts - the *light client* and the *app client*. While the LC is primarily focused on DAS, the app client is used to perform data reconstruction.
## Light client
The **light client** mode of operation is active regardless of whether the app client is also active or not.
Light client connects to an Avail node via a WebSocket connection and waits for a newly finalized block, with the header containing its KZG commitments.
> **Note**
>
> Avail blocks are chunked and divided into equal sized cells as a part of that blocks matrix. Each row in the matrix is then erasure coded using **Reed-Solomon (RS)** erasure codes and committed with **Kate-Zaverucha-Goldberg (KZG)** commitments.
On each received header the client does random sampling of the matrix cells, which are retrieved using one of two mechanisms:
1. **DHT** - the client first tries to retrieve cells via Kademlia DHT, on the LC-only high availability peer-to-peer network.
2. **RPC** - if some or all of the required cells can't be found on the DHT, LC uses RPC calls to the Avail node(s) to retrieve the data. Cells not already found in the DHT will be uploaded thus increasing blocks availability in the LC P2P network
Once the data is received, light client verifies individual cells and calculates the confidence that is then stored locally.
> **Note**
>
> Light client uses *libp2p* with **Kademlia** as a DHT implementation. Peer-to-peer network is able to perform NAT traversal, both symmetric and asymmetric, enabling easy connectivity with various network configurations (e.g. symmetric and asymmetric NAT).
> **Note**
>
> On fresh startup, the LC performs a block sync with the node, using both DHT and RPC mechanisms. The block depth to which the sync is going to be done is set with the `sync_block_depth` config parameter, which needs to be set to the max number of blocks the connected node is caching (if downloading via RPC).
## When and how to embed the light client
The Avail light client plays a vital role in ensuring the availability and correctness of data
within the Avail network. By employing random sampling, it achieves security levels comparable to
full nodes. Furthermore, by leveraging the peer-to-peer network, it enhances overall data availability
while reducing the load on full nodes.
The light client is capable of downloading and verifying
application-specific data submitted to Avail, which can be conveniently queried using the light client API.
> **Note**
>
> You can check out all the different methods supported by the Avail light client in our [Light Client API Reference](/docs/da/api-reference/avail-lc-api).
The light client exposes an HTTP API that enables users to query the status, confidence, and application data
for each processed block. When a block is finalized in Avail, the light client performs random sampling and
verification, calculates confidence in the given block data, and if the confidence is high, retrieves the
application data from the block. This data is then verified and stored locally for easy access.
### Bridge AVAIL to Ethereum using the VectorX bridge
## Introduction
The Avail team has been hard at work in partnership with [Succinct labs](https://succinct.xyz/)
to develop a trust-minimized bridge between Avail DA and Ethereum.
> Enter VectorX.
VectorX uses zkSNARKs to enable an efficient and trust-minimized bridge to pass arbitrary messages
between Avail DA and Ethereum, which enables use cases like token bridging.
{/* You can read about VectorX in more detail on [Succinct's blog](https://blog.succinct.xyz/vector-x/). */}
This is a non-technical tutorial focussed on actually using the bridge via a convinient web interface built by Avail.
Frequently Asked Questions (FAQs)
1. Will my bridged tokens automatically appear in my wallet on the other side?
* No.
Your funds will take a couple of hours to bridge, following which you need to go to the bridge UI once again and manually
claim your AVAIL tokens on the other side.
2. Which chain should I claim from?
* The Avail bridge UI currently only supports bridging AVAIL tokens between Avail DA and Ethereum.
If you initiate the bridging process from Avail DA and want to claim your AVAIL tokens on Ethereum, you need to go to `Transactions` tab and claim AVAIL by
making sure your EVM wallet is connected to **Ethereum mainnet**, and clicking the `Claim Ready` button.
Conversely, if you initiate the bridging process from Ethereum and want to claim your AVAIL tokens on Avail DA,
make sure your Avail wallet is connected to **Avail DA mainnet**, and click the `Claim Ready` button.
3. I am not able to claim tokens even though a lot of time has passed?
* Please note that while users may be facing some bugs in the bridge UI, user funds are 100% safe will
be claimable soon. We are working on brushing up the UI and will fix all the bugs soon.
4. Will I need funds on the chain where I am claiming my tokens?
* Yes, since you're effectively executing a transaction on the chain where you're claiming your tokens.
This means if you're bridging from Avail DA to Ethereum, you will need some ETH on Ethereum mainnet.
On the other hand, if you're bridging from Ethereum to Avail DA, you will need some AVAIL on Avail DA mainnet.
5. What if I have submitted a `claim` transaction on the wrong network?
* We have received some reports of an edge-case where it is possible for users to sign the claim transaction
on an EVM network like `Avalanche` through our UI. Please note that this is a bug, and users should
only sign transactions on Avail DA or Ethereum mainnet.
If you have signed a transaction on the wrong network, you might need to clear the bridge UI's cache data
in your browser.
You can find instructions on how to clear cache for a particular website [in this blog](https://support.breezechms.com/hc/en-us/articles/4402756658839-Google-Chrome-Clearing-Cache-and-Cookies-for-Specific-Sites).
## Using the Bridge
> **Warning**
>
> BEFORE YOU BEGIN
> You need to manually claim your AVAIL tokens on either of the chains, once they've been bridged.
> This means you'll also need a small amount of ETH on Ethereum mainnet to pay for the gas fees to call the `claim`
> function on the AVAIL ERC-20 contract.
> Please keep this in mind and have some ETH ready on the EVM wallet address that you connect to the bridge.
> **Warning**
>
> Bridge transactions from Avail to Ethereum must be initiated directly from an Avail account. Do not use multisig, proxy, batch, scheduled, or other wrapped calls for bridge sends, because wrapped bridge sends are rejected.
#### Using an extension wallet
### Go to the official `avail-bridge` UI & fill out your transaction details
Go to [bridge.availproject.org](https://bridge.availproject.org/), and then connect an Avail wallet,
and an EVM wallet to the website.
> **Note**
>
> Please note that this is required because Avail DA and Ethereum use two different address formats.
> The funds on Ethereum will be claimable only by the EVM address you connect here.
### Review your transaction details
Click on the `Initiate` button to start the bridging process.
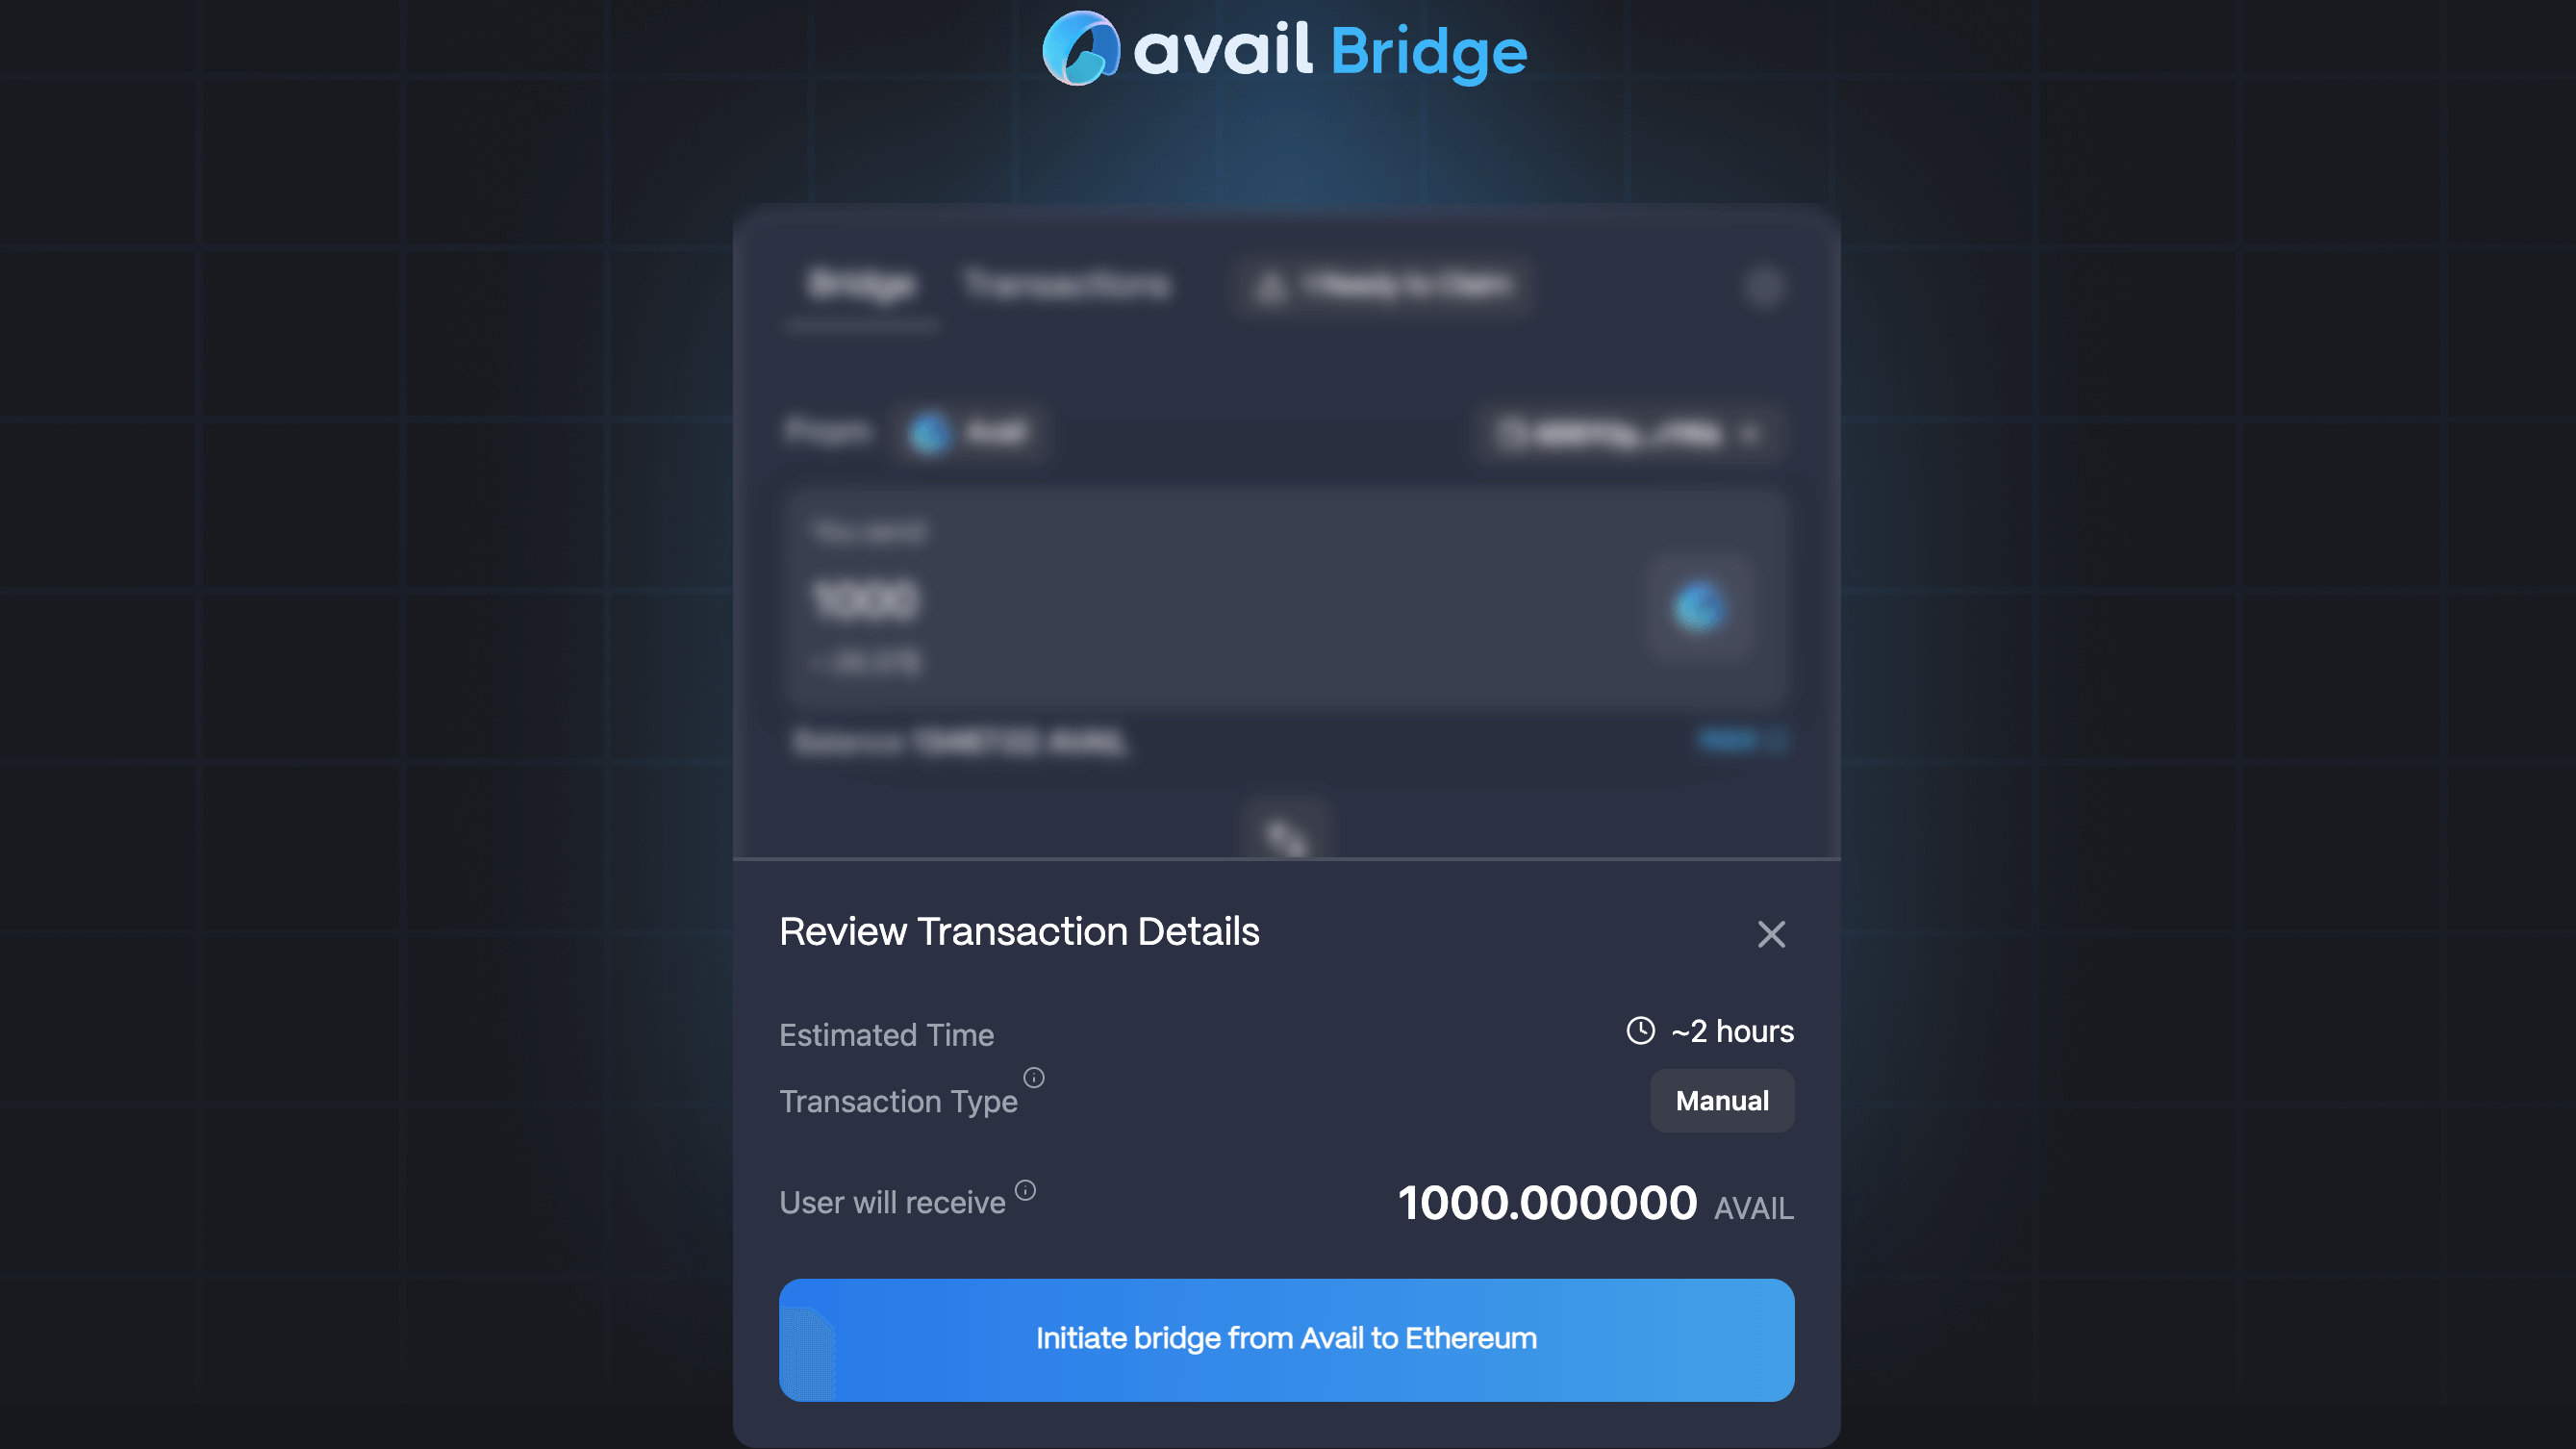
### Now, wait!
Bridging AVAIL from Avail DA to Ethereum typically takes 1-2 hours.
You can check the `Transactions` tab in the UI to see the status of your transaction.
Wait for the transaction status to change to `Claim Ready`.
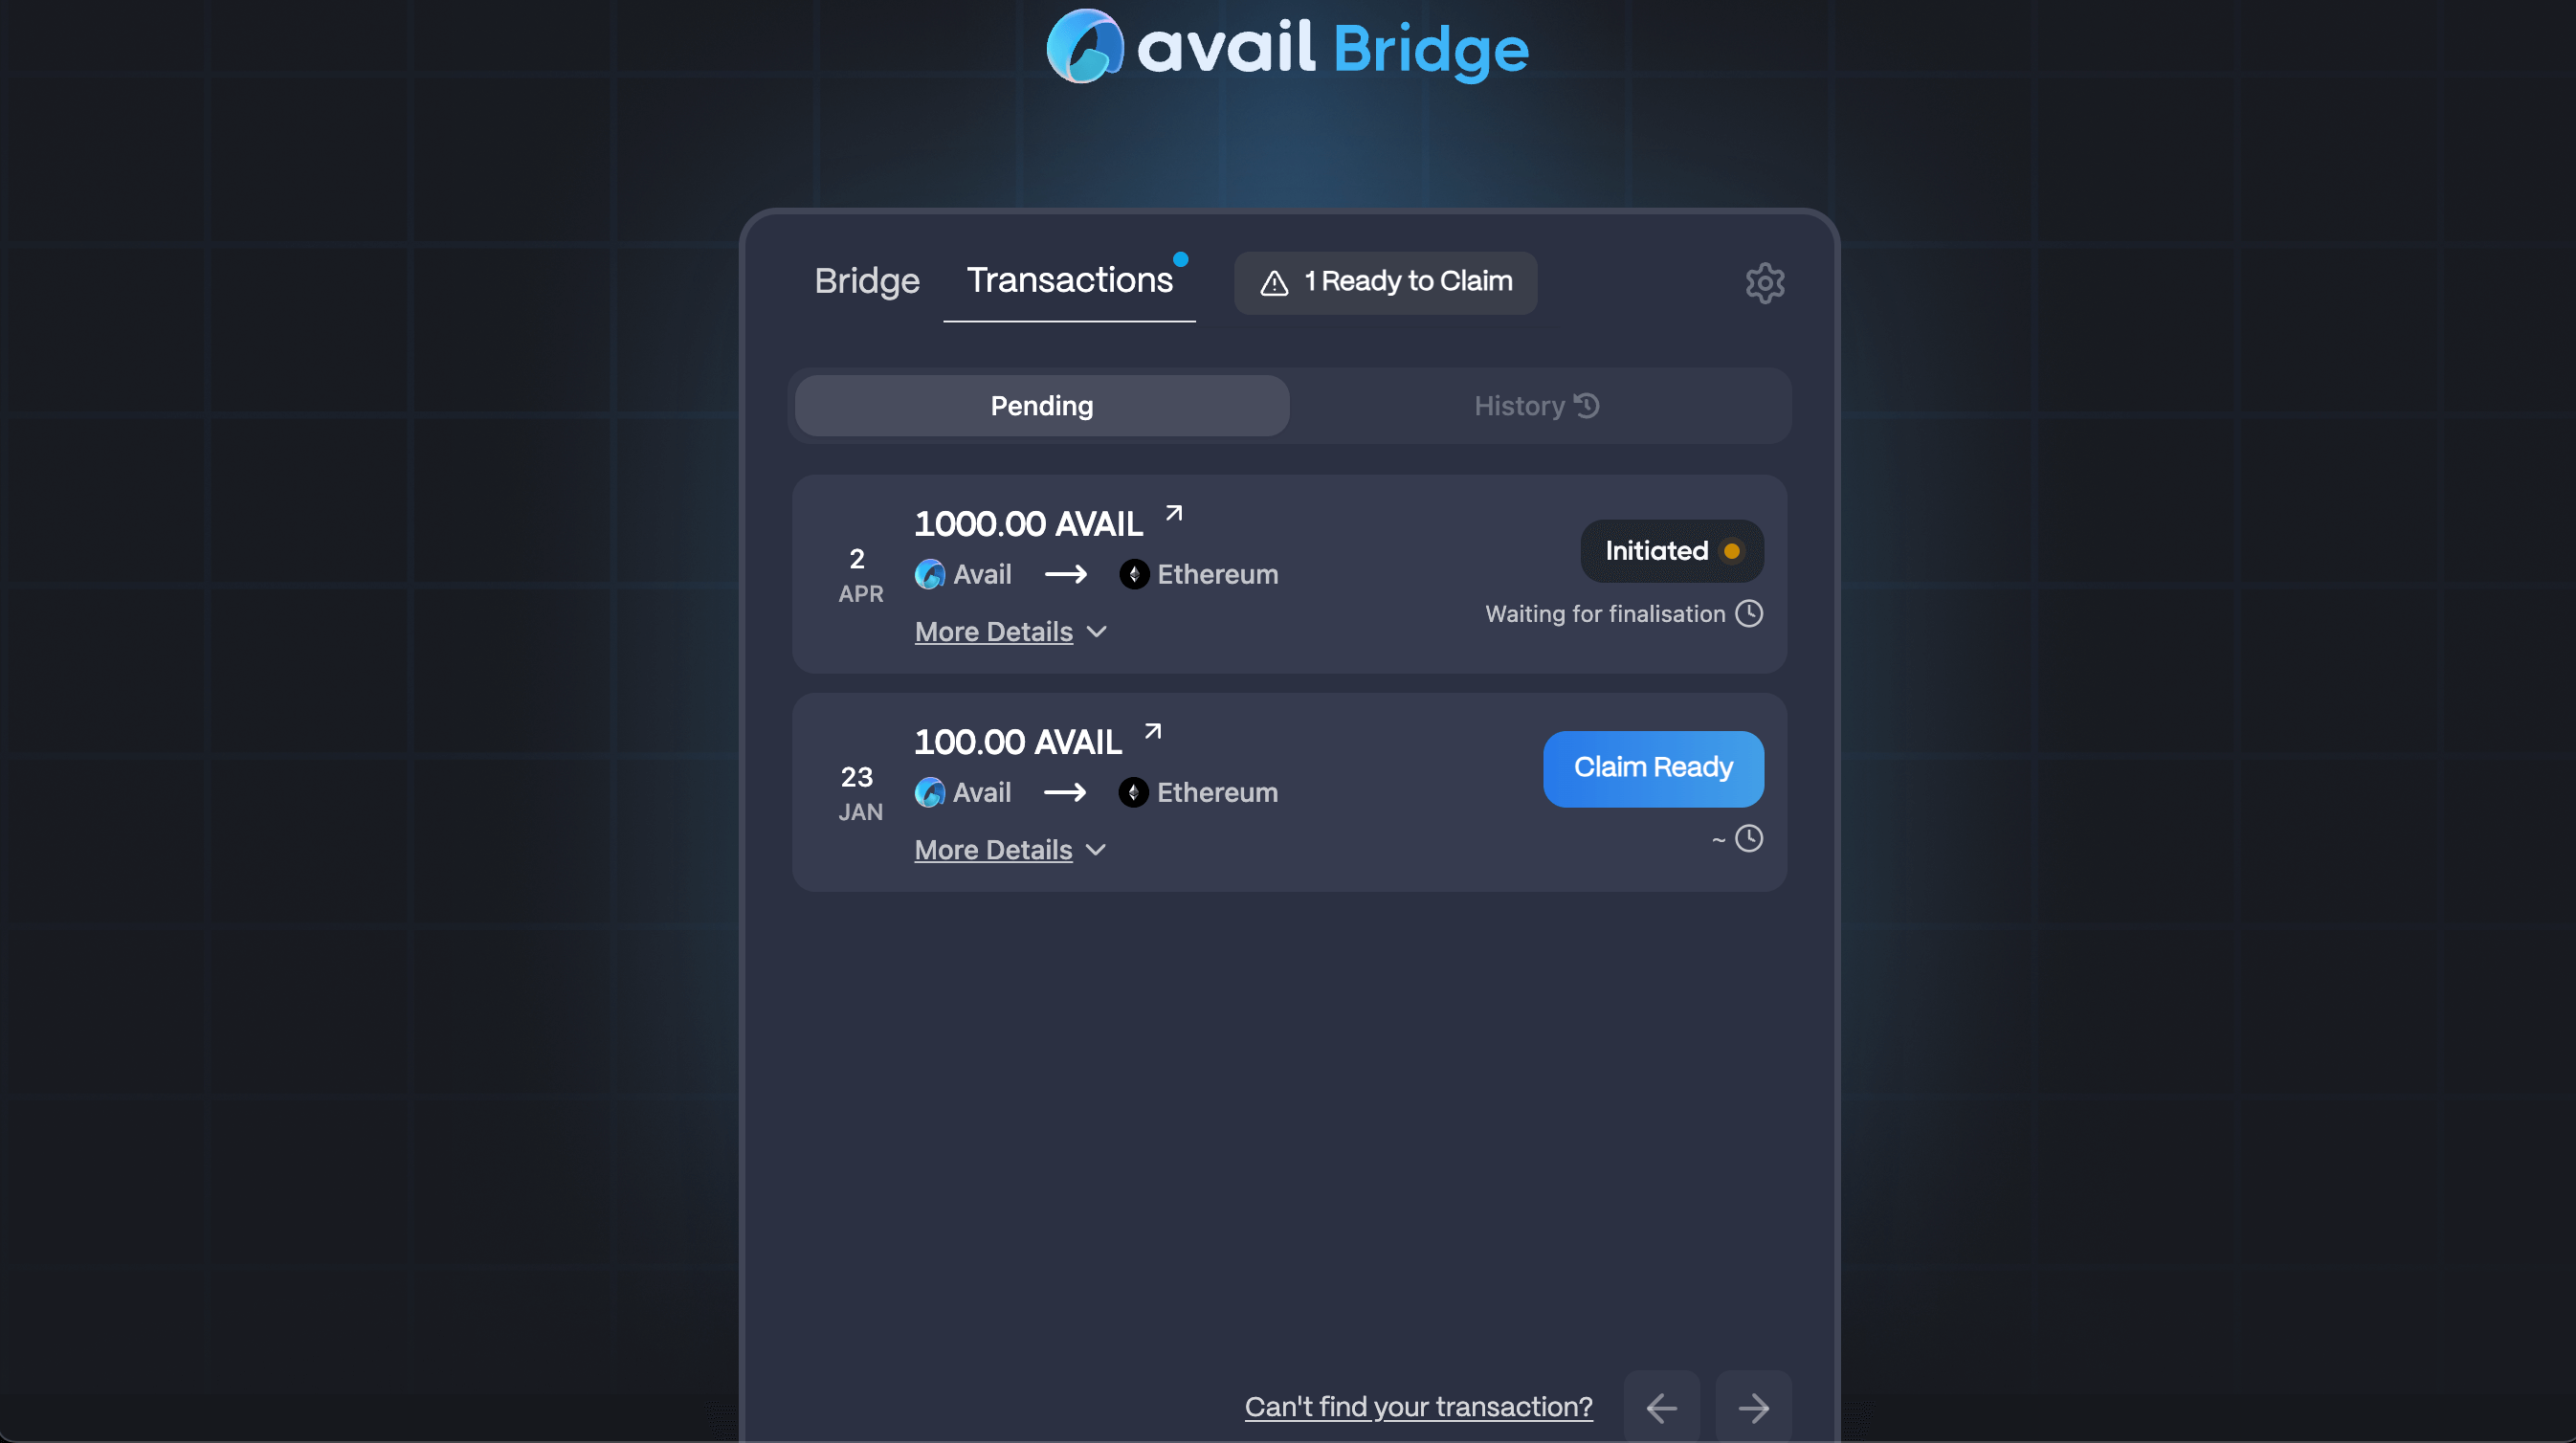
### Claim your funds
You will need to manually claim `AVAIL` on Ethereum with the same EVM address you connected earlier. used in `step 1`.
Click on `Claim Ready` and approve the transaction in your wallet.
Your AVAIL tokens on Ethereum mainnet will then be transferred to your account.
> **Note**
>
> Please note that you are executing a transaction on Ethereum in this step, so you will need to have some ETH in your wallet to pay for the gas fees.
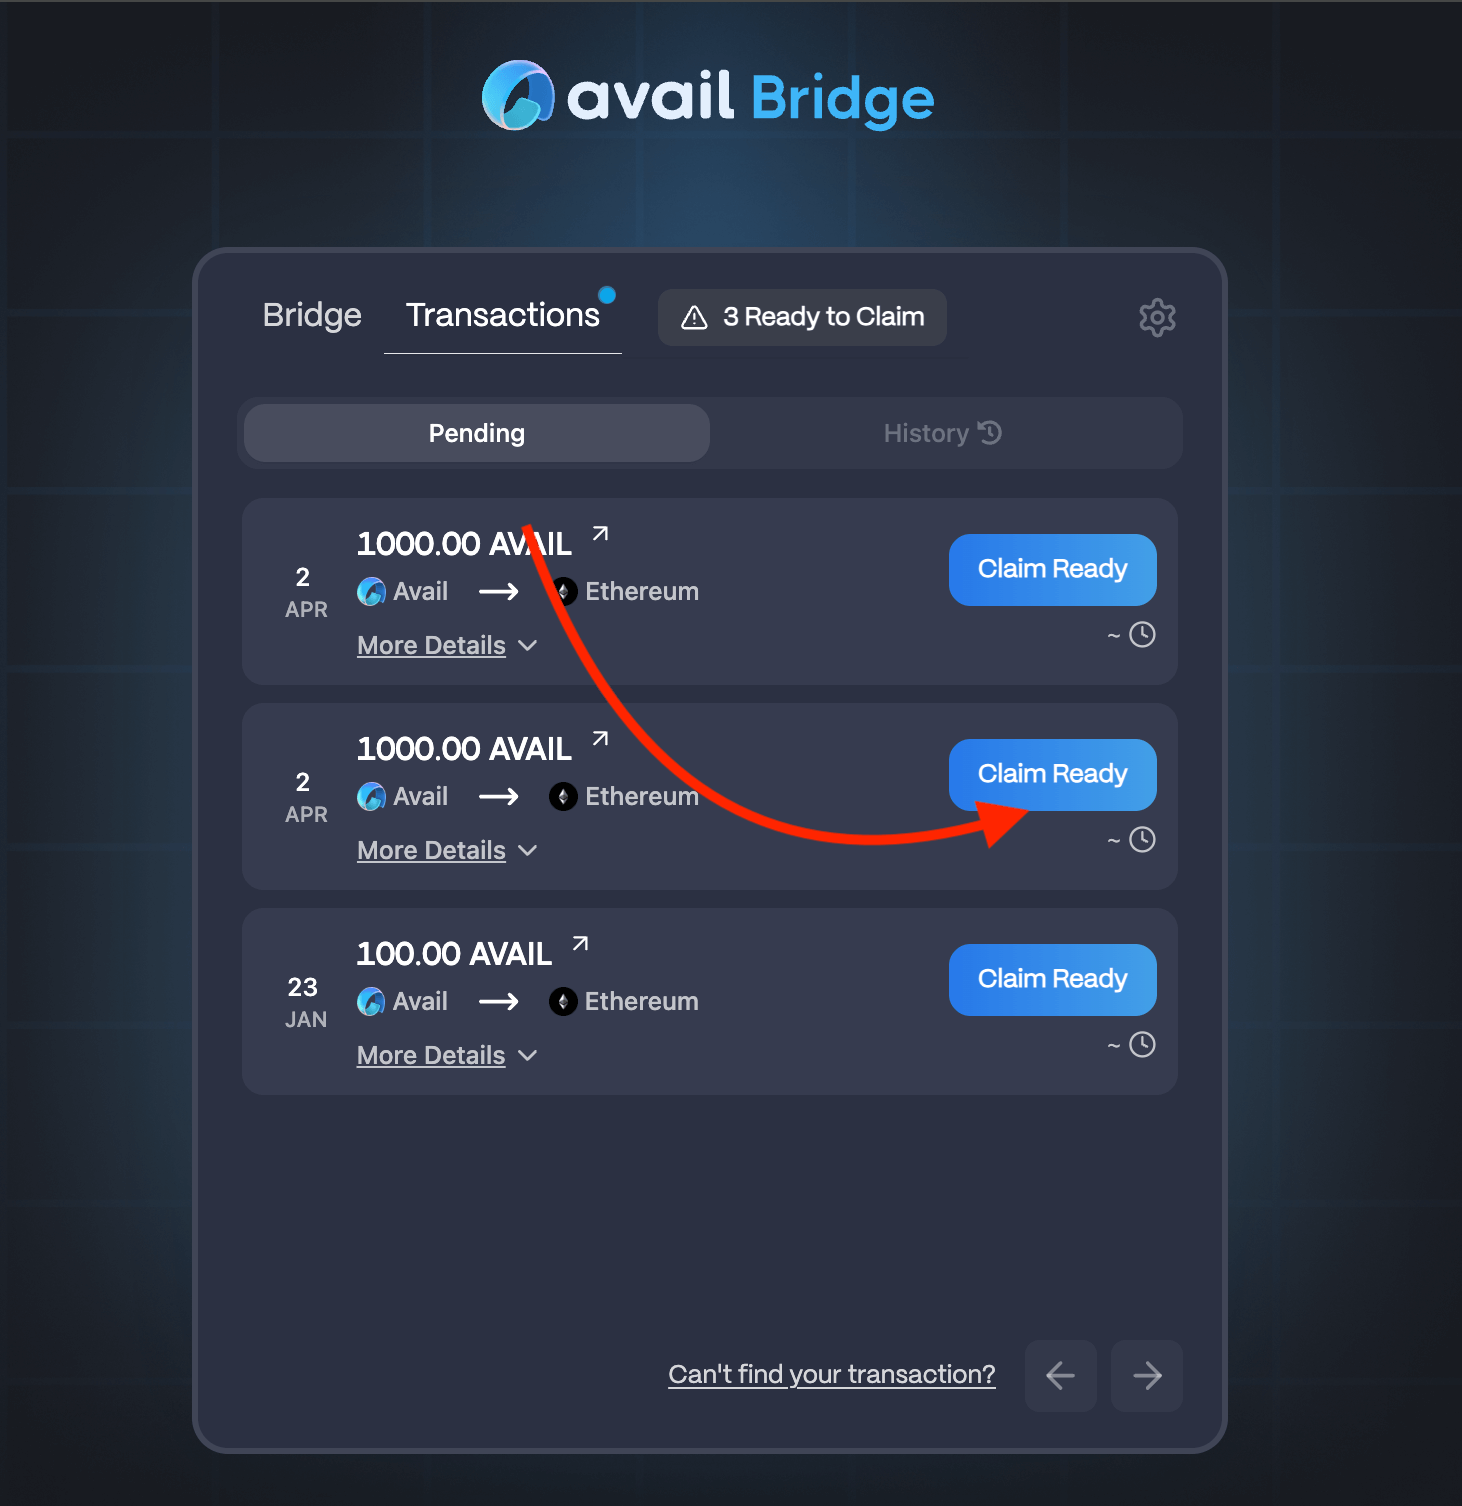
> **Note**
>
> This exact process can be reversed to bridge AVAIL from Ethereum to Avail DA.
#### Using a Ledger device
### Make sure you have a Ledger device ready
If you need instructions on how to get started with a ledger device, please refer to our docs.
1. [Set up a new ledger device](/docs/da/user-guides/ledger-avail#set-up-your-ledger-from-scratch)
2. [Connect a ledger account to your Subwallet/Talisman extension wallet](/docs/da/user-guides/ledger-avail#add-your-ledger-account-to-an-extension-wallet)
### Click on the `Connect` button in the Bridge ui & select your preferred wallet
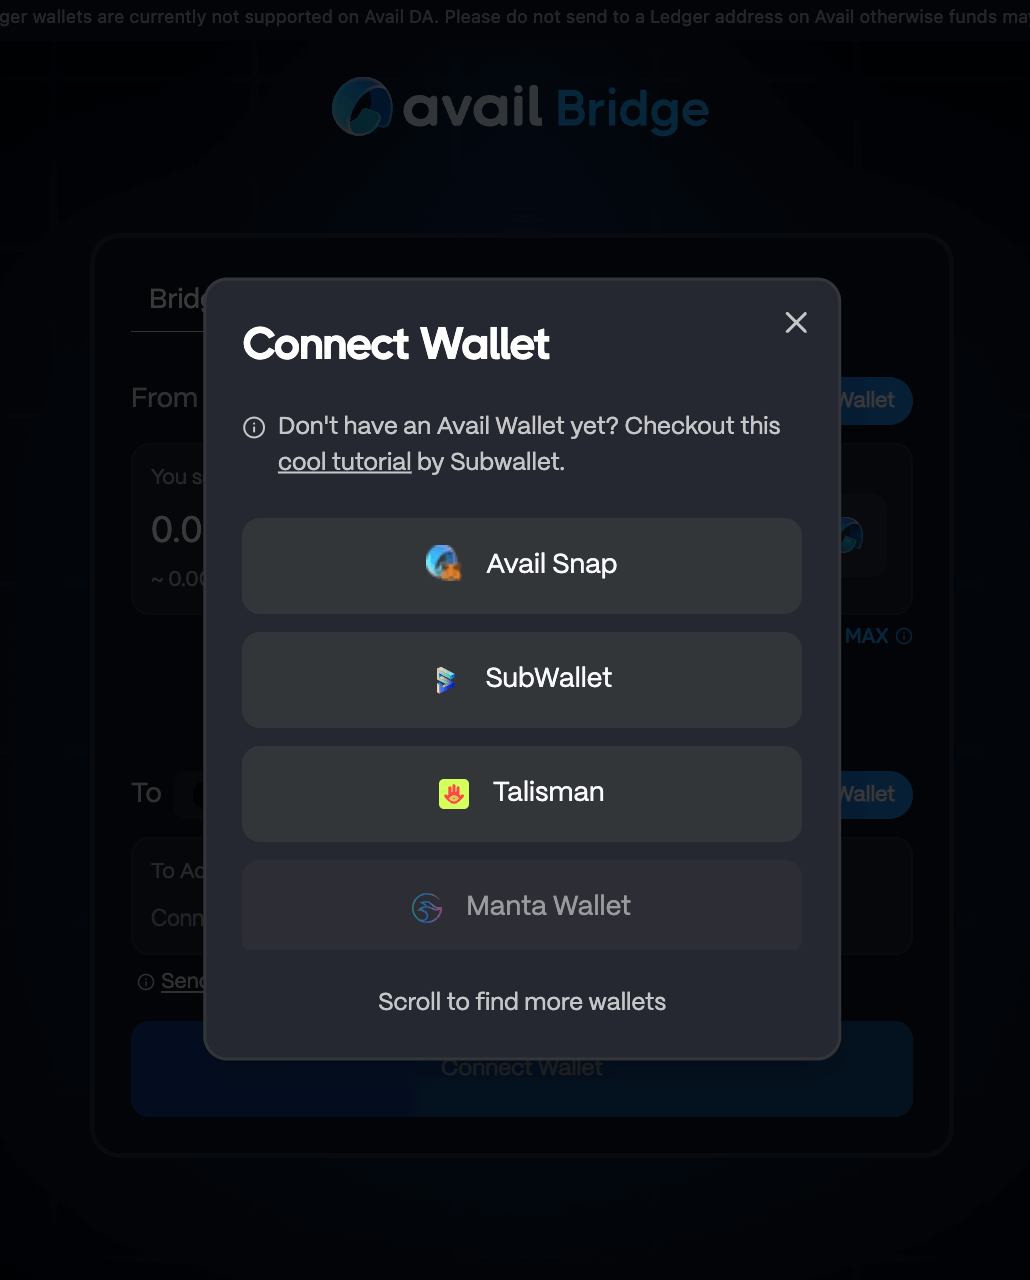
### Select your ledger account from within your wallet
> **Note**
>
> 1. Please note that you need to have the `Avail` app installed on your ledger device.
> 2. Your ledger device needs to be unlocked during the entire process.
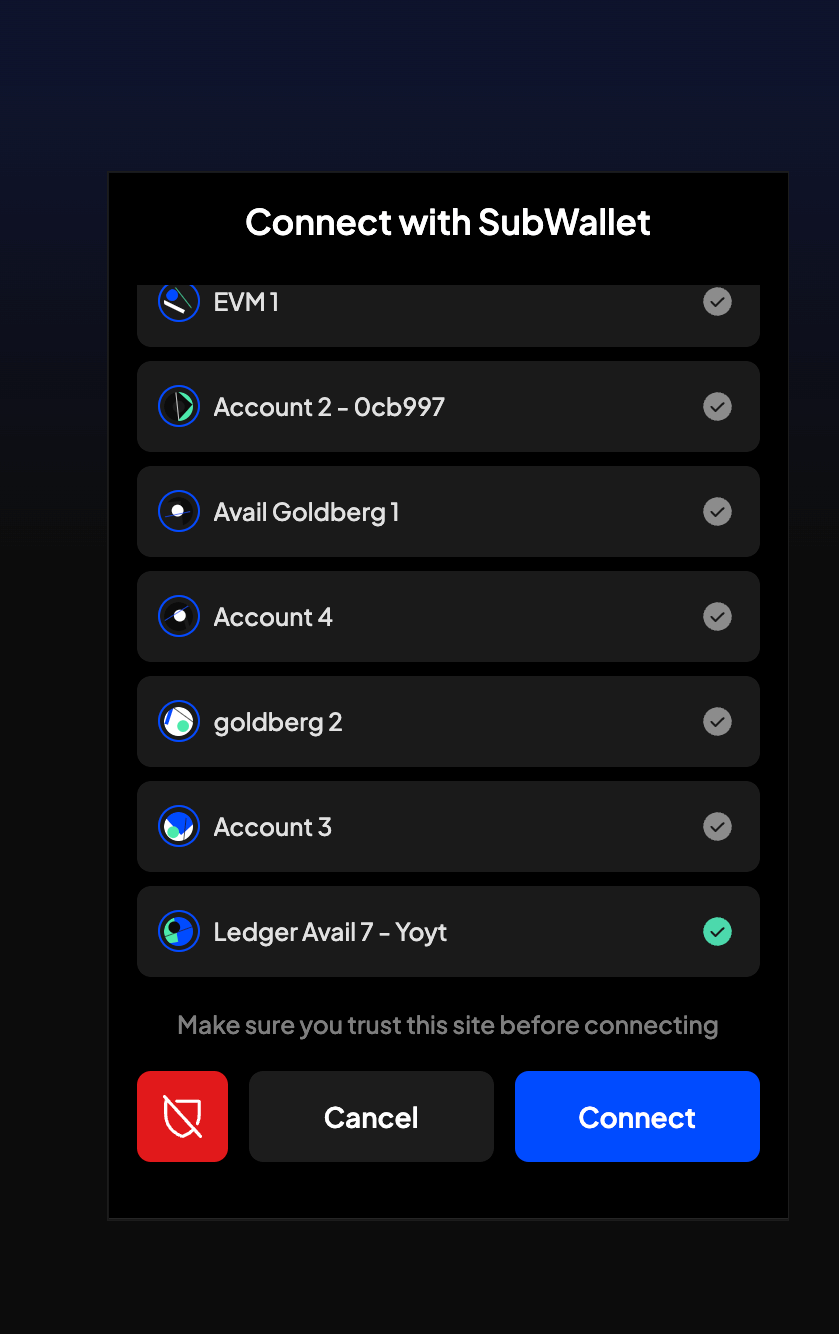
### Connect the selected ledger account to the bridge UI
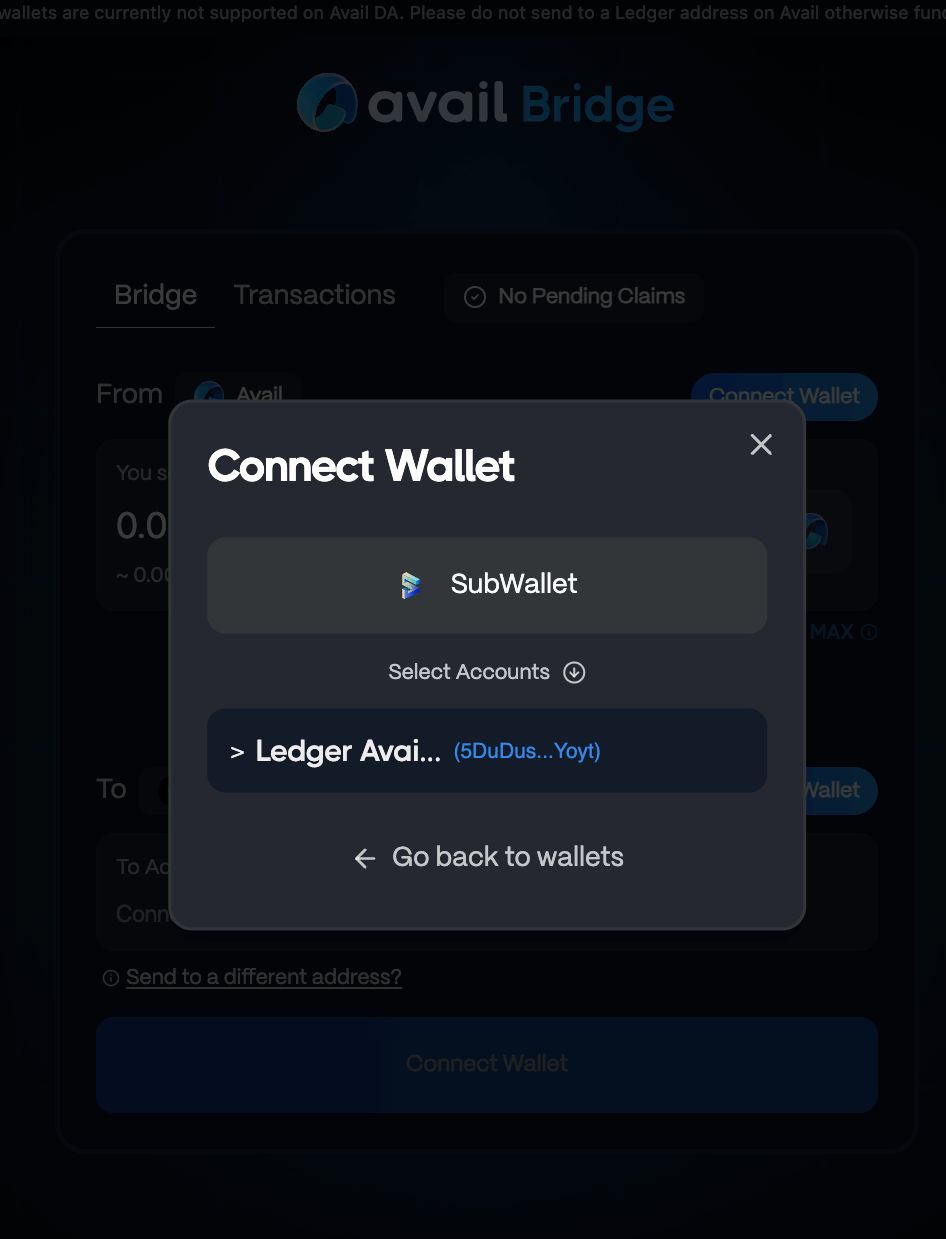
### Fill out the rest of the details and click on `Approve`
1. Specify the amount of AVAIL you want to bridge.
2. Specify the destination address on the other chain, or simply connect an EVM wallet to the bridge UI.
3. Initiate the bridging process.
4. Click on `Approve` in the pop-up window. This will send the transaction to your ledger device.
### Approve the bridging transaction on your ledger device
1. Unlock your ledger device.
2. Approve the bridging transaction on your ledger device.
3. Wait for a while, and you should see a transaction confirmation message in the bridge UI.
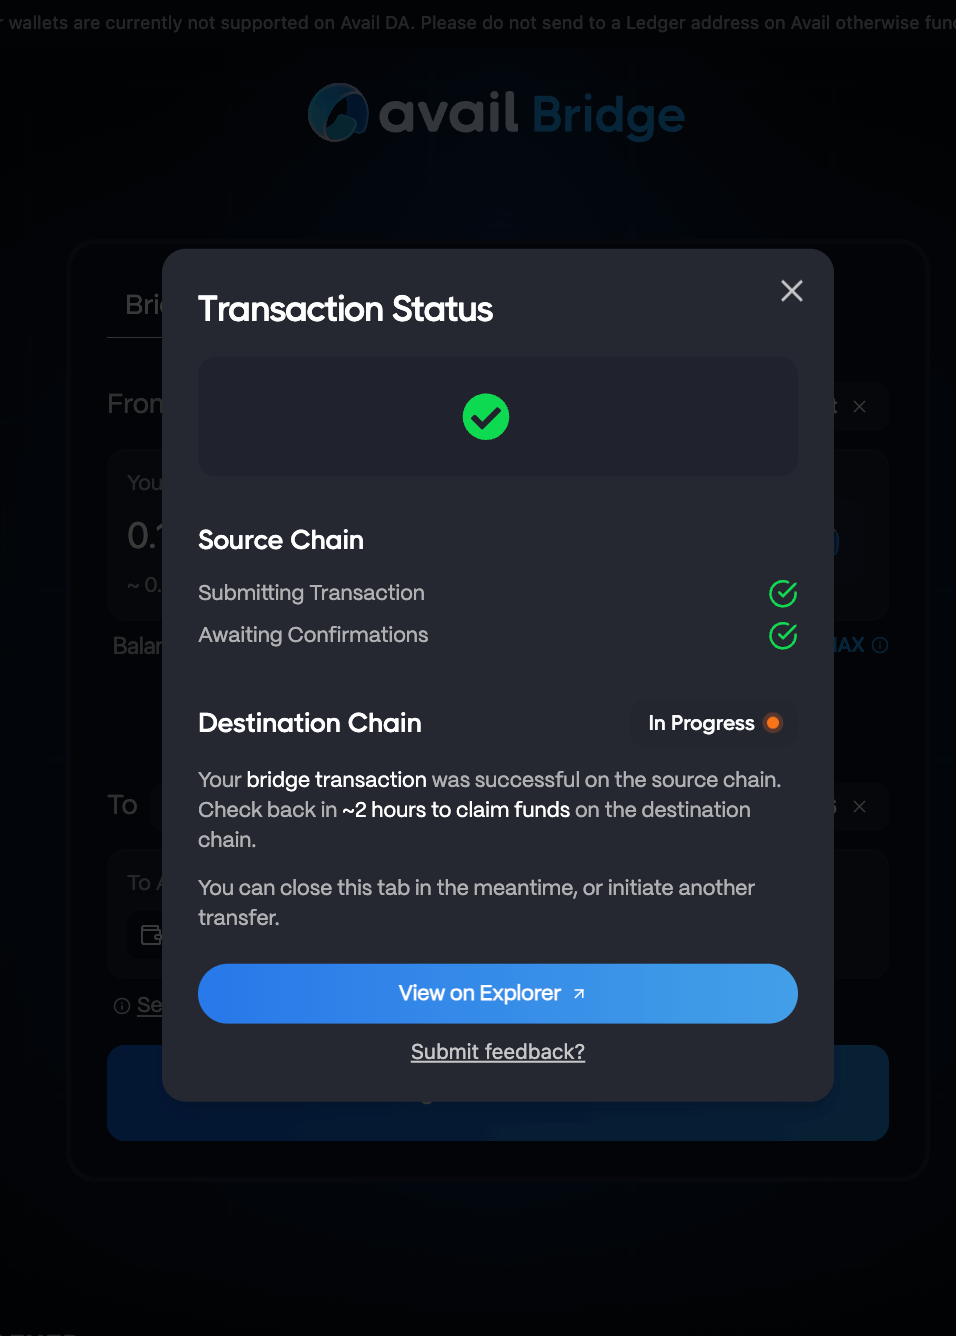
### Bridge between Ethereum & Base
## Using the Bridge
> **Warning**
>
> **CHOOSE NETWORKS CAREFULLY**
> The bridge UI defaults to a `Avail → Ethereum` network combination. \
> Choose your networks carefully.
### Go to the official `avail-bridge` UI & select the networks you want to bridge between
1. Go to [bridge.availproject.org](https://bridge.availproject.org/).
2. Select the source chain as `Ethereum`
3. Select the destination chain as `Base`
4. Or vice-versa, if you want to bridge from Base to Ethereum.
### Connect your wallets
1. Connect your Ethereum EVM wallet.
2. Connect your Base EVM wallet.
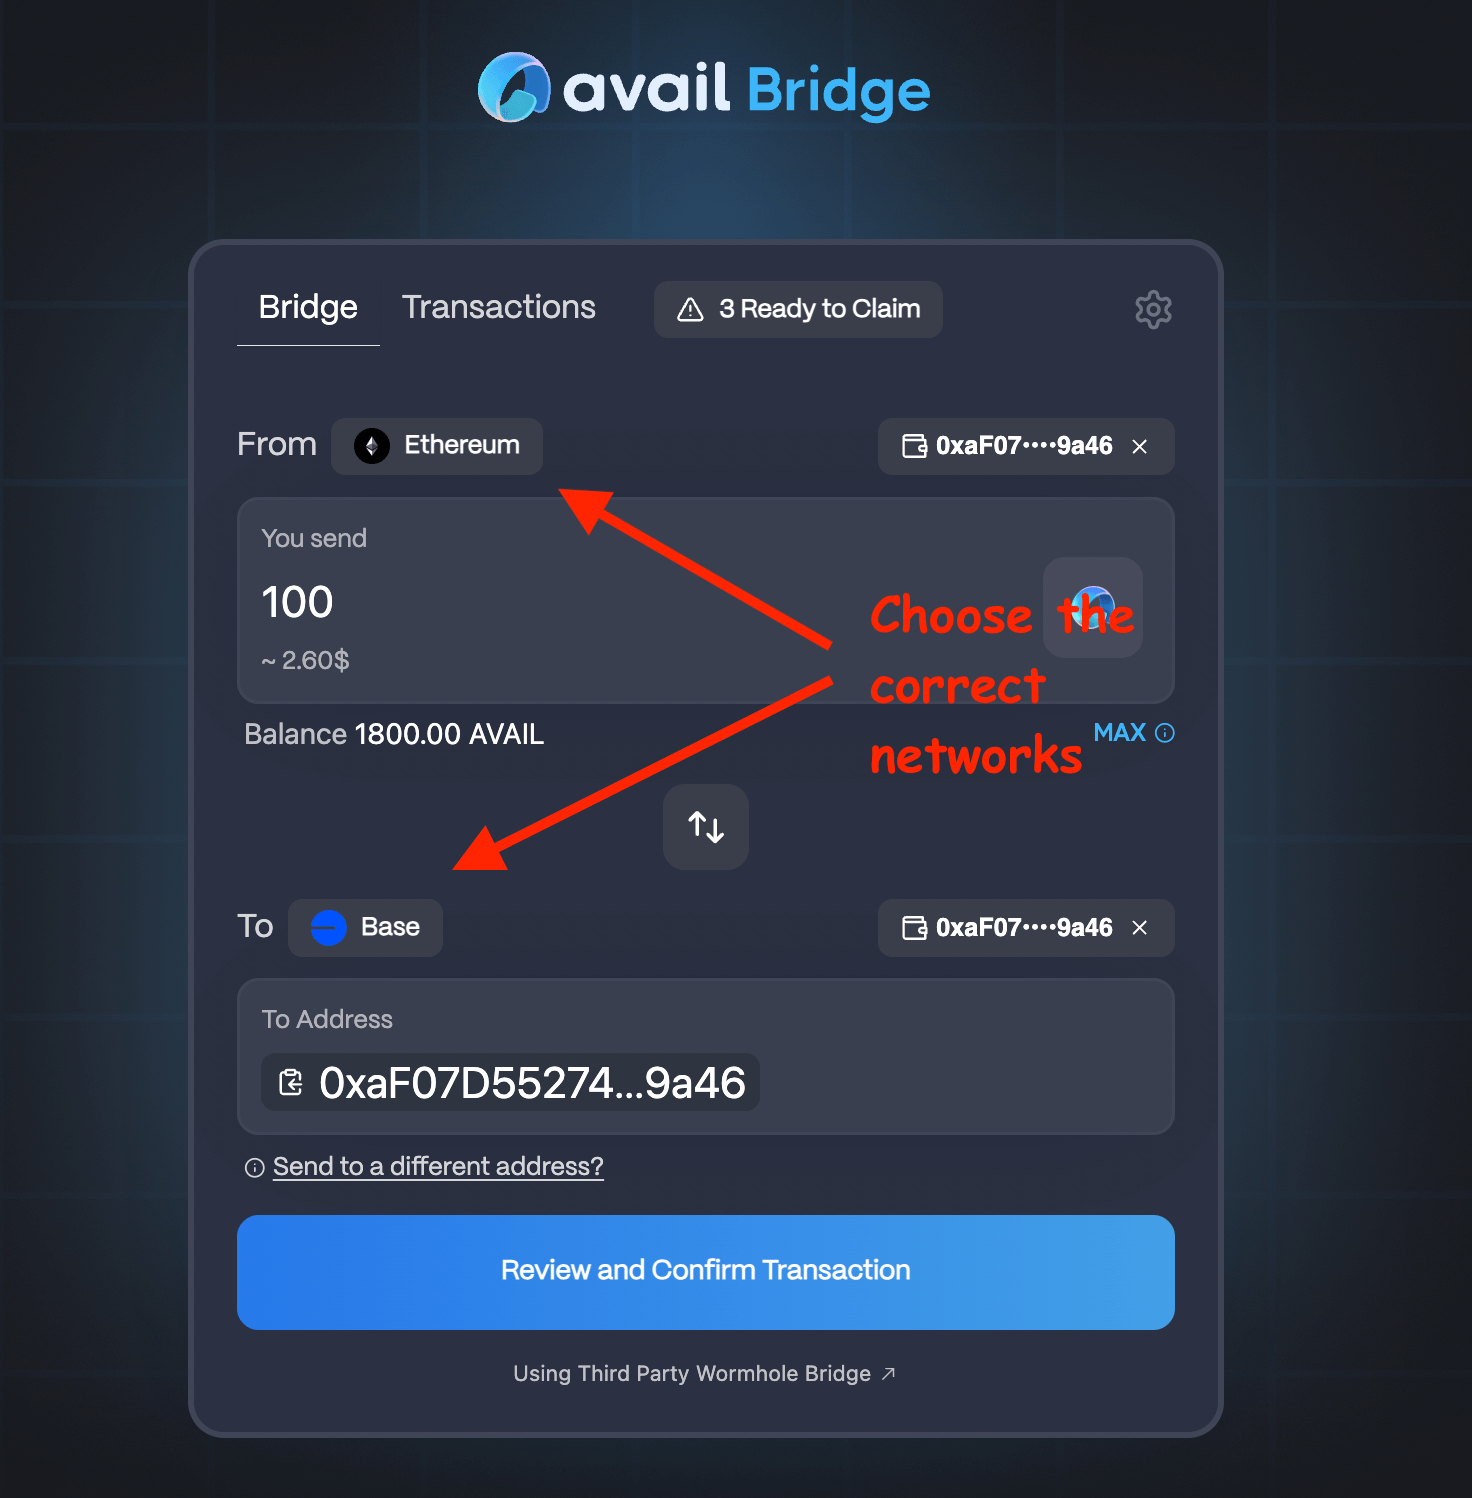
### Enter transaction details
1. Enter the amount you want to bridge.
2. Click on the `Review` button to review your transaction details.
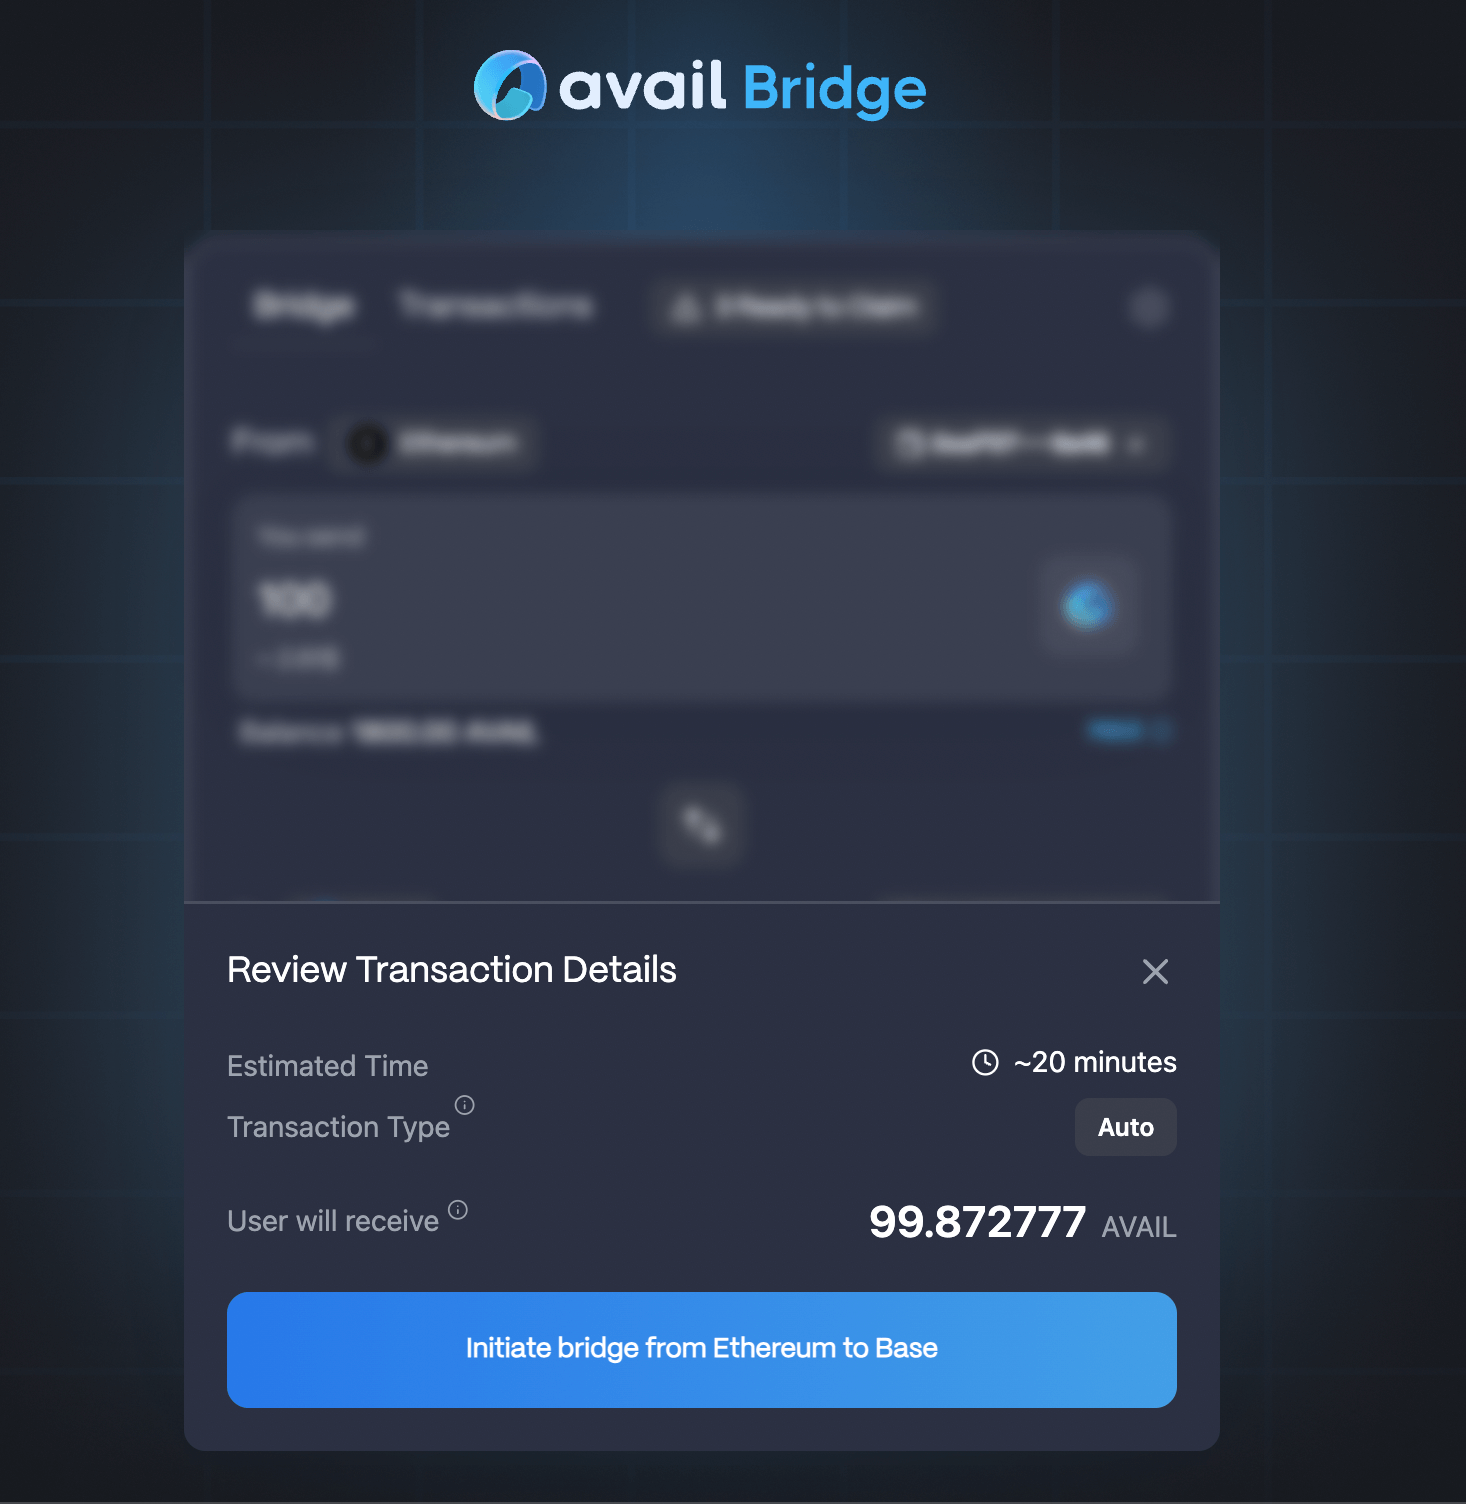
### Initiate the bridging process
1. Click on the `Initiate` button to start the bridging process.
2. Approve the two signatures that pop up.
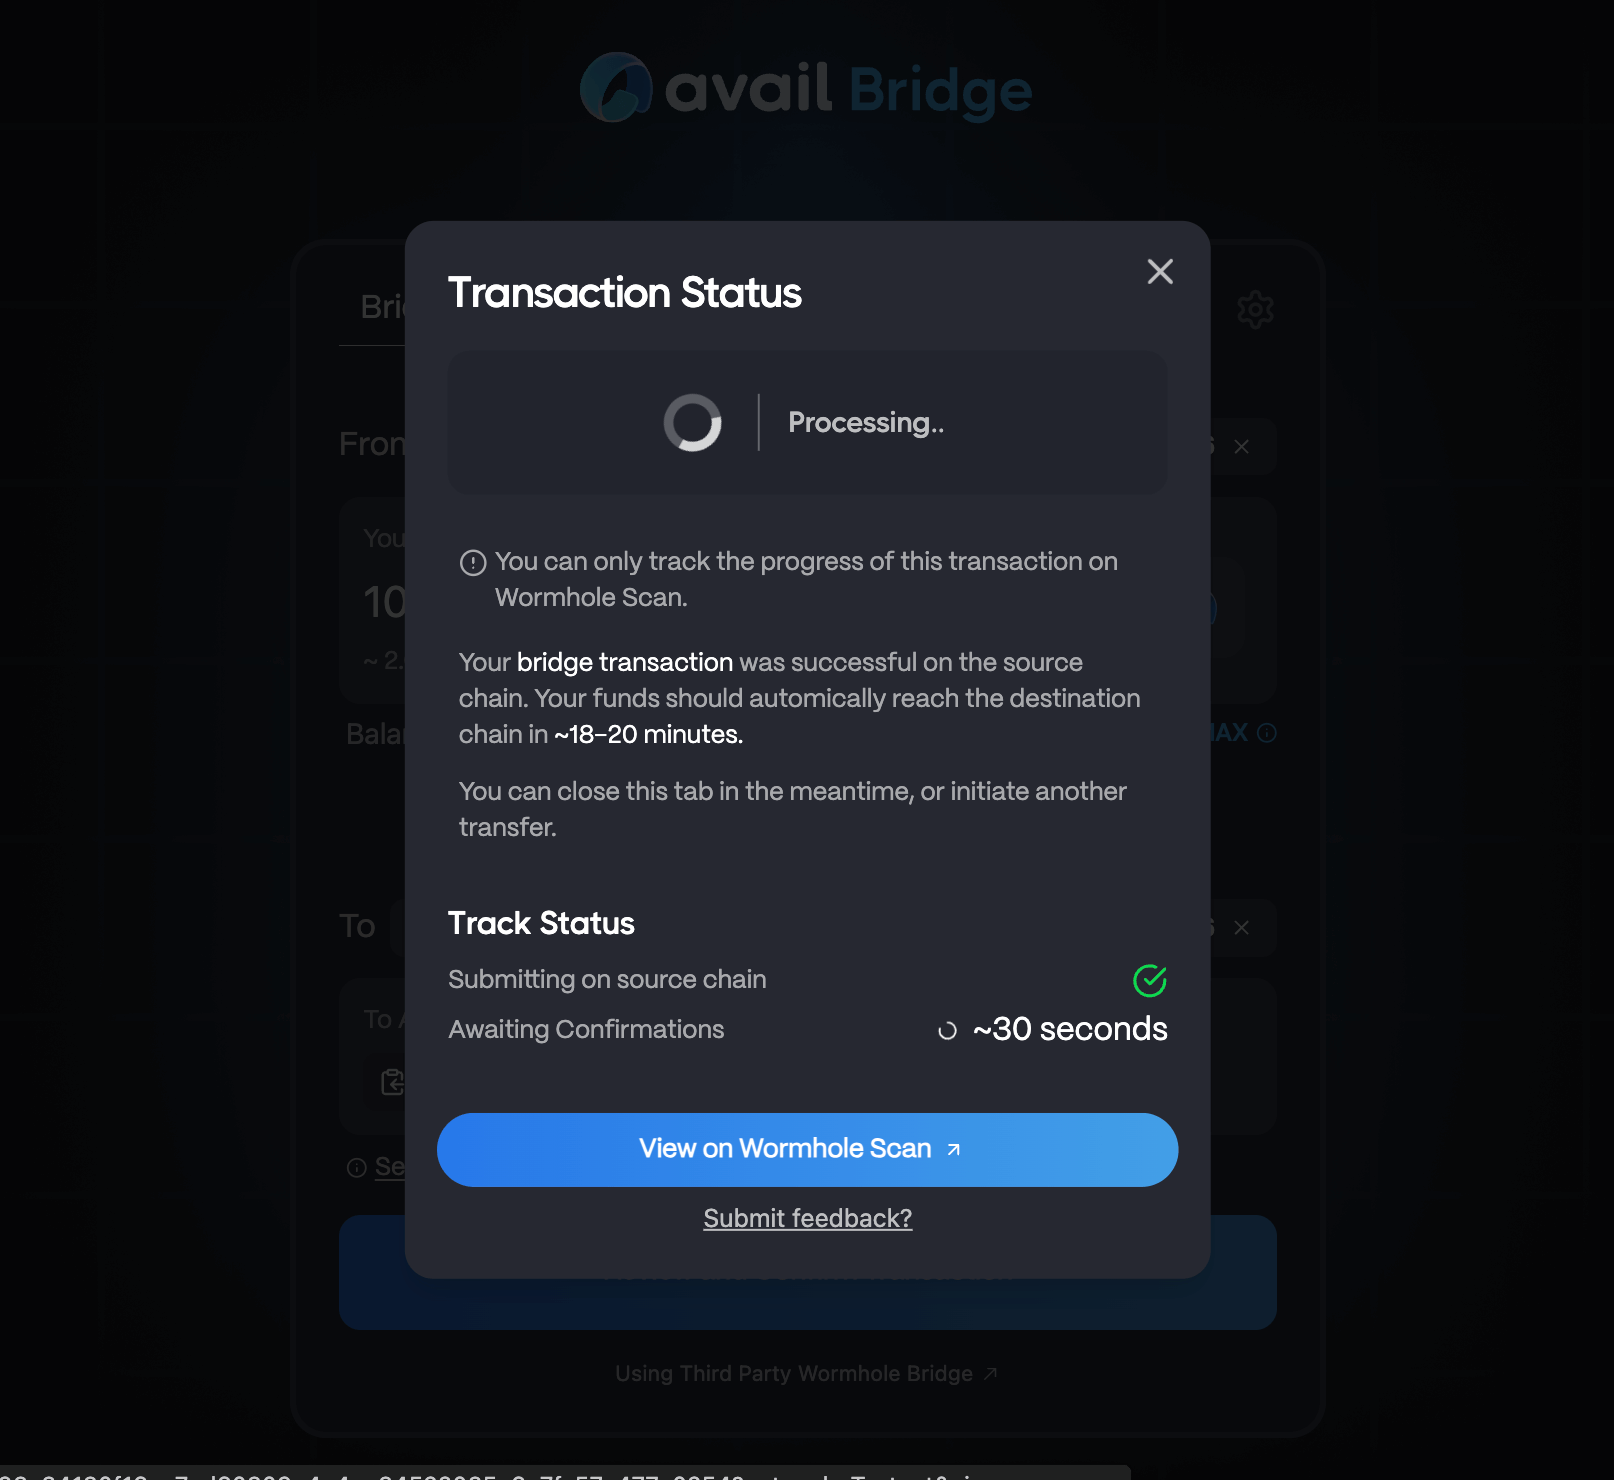
> **Note**
>
> This exact process can be reversed to bridge AVAIL from Base to Ethereum.
### Bridge between Avail & Base
## Video guide
If Youtube is more your style, you can watch the video guide below,
or else you can just refer to the written guide below this section.
## Using the Bridge
> **Warning**
>
> **CHOOSE NETWORKS CAREFULLY**
> The bridge UI defaults to a `Avail → Ethereum` network combination. \
> Choose your networks carefully.
### Go to the official `avail-bridge` UI & select the networks you want to bridge between
1. Go to [bridge.availproject.org](https://bridge.availproject.org/).
2. Select the source chain as `Avail`
3. Select the destination chain as `Base`
4. Or vice-versa, if you want to bridge from Base to Avail.
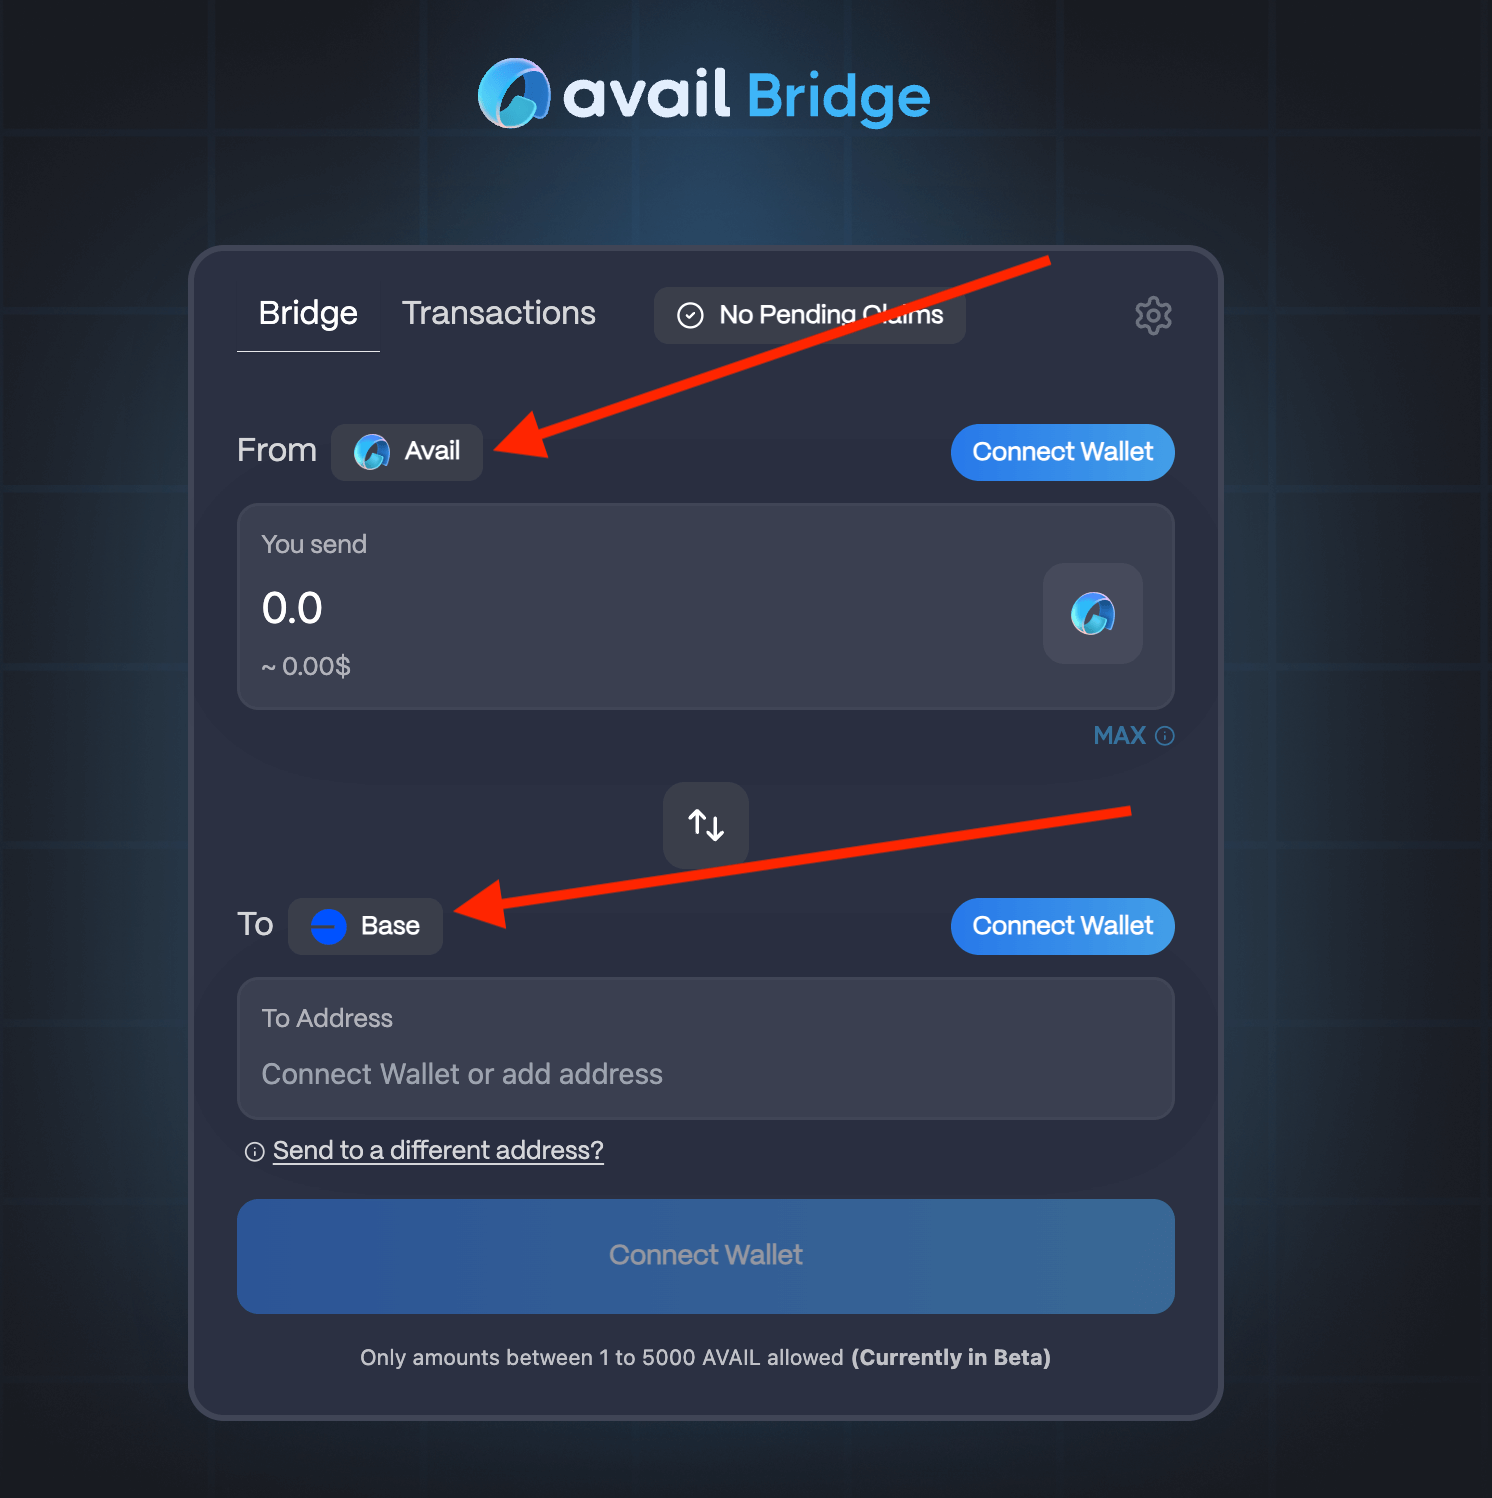
### Connect your wallets
1. Connect your Avail wallet.
2. Connect your Base EVM wallet.
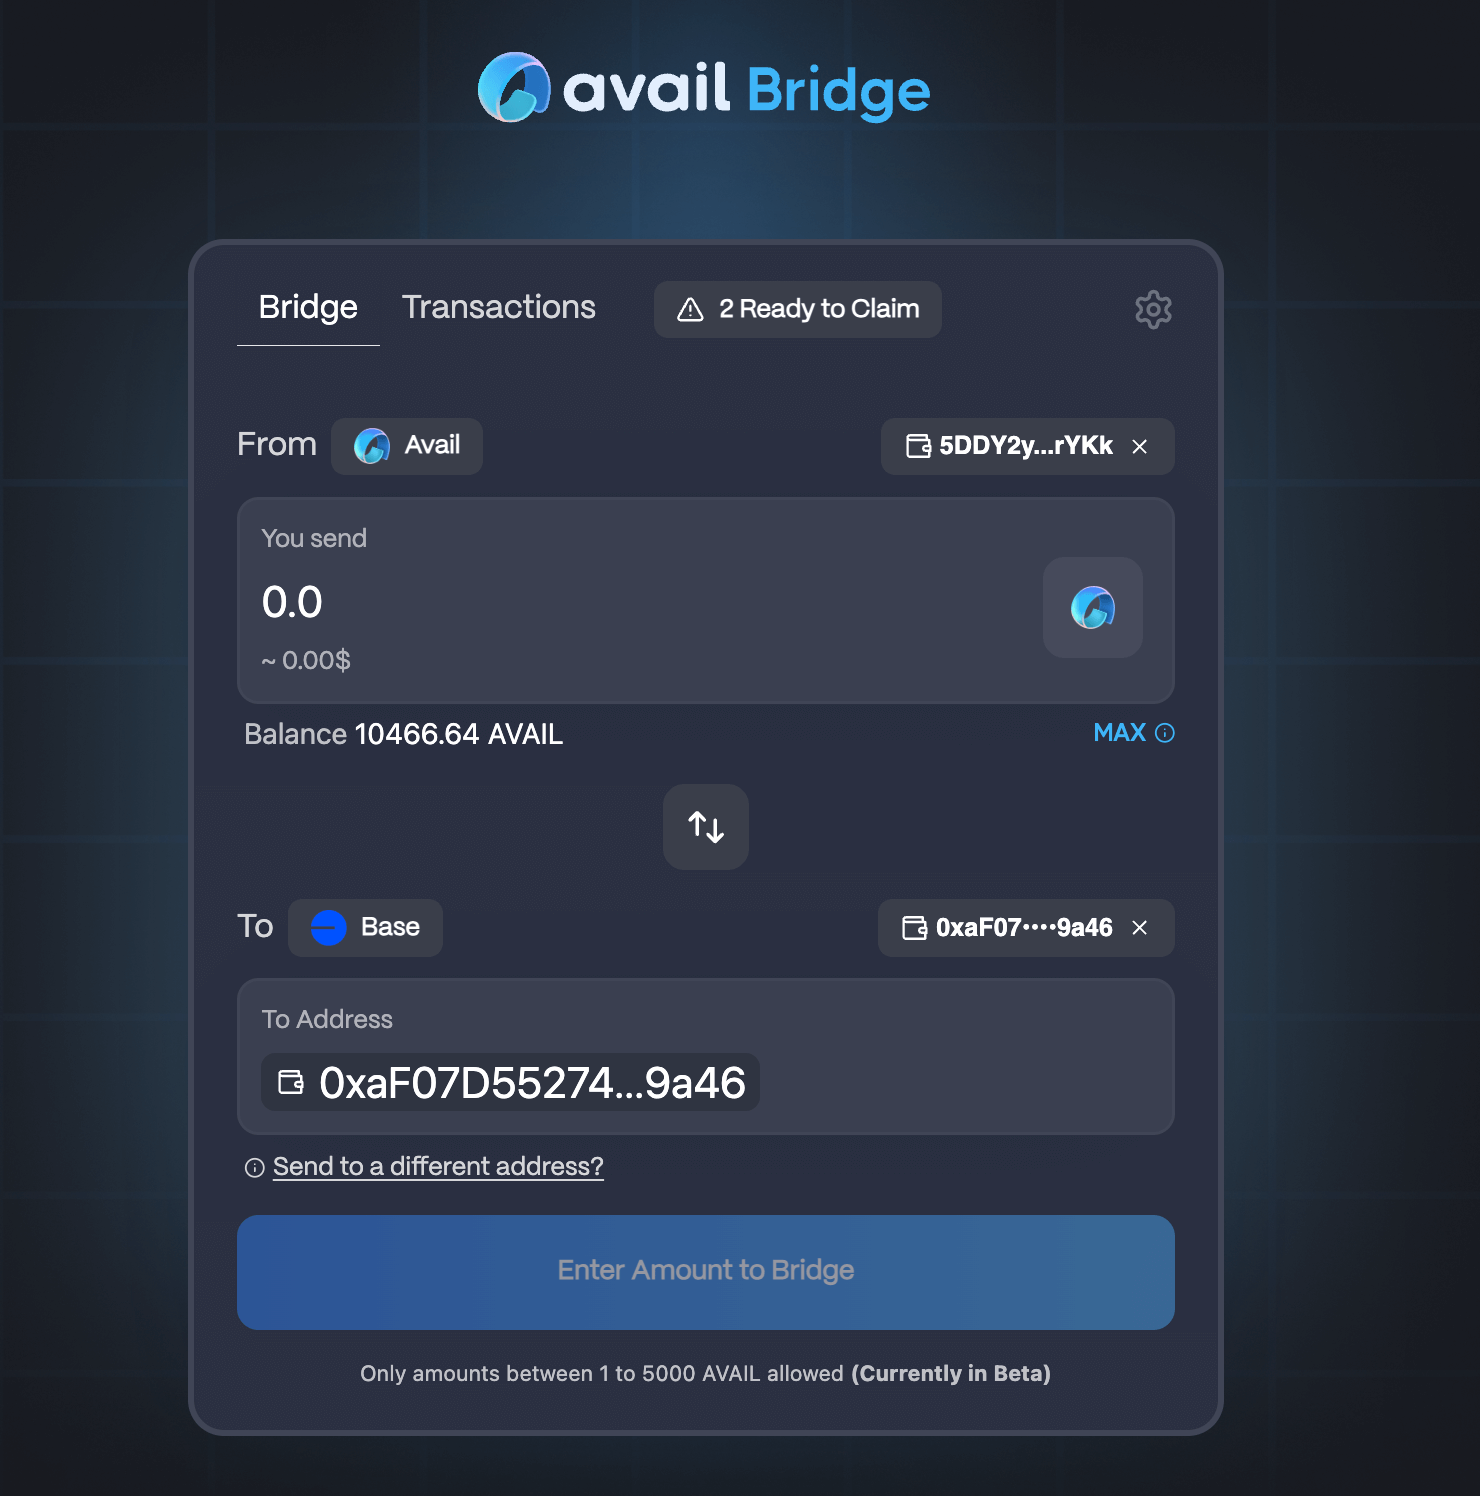
### Enter transaction details
1. Enter the amount you want to bridge.
2. Click on the `Review` button to review your transaction details.
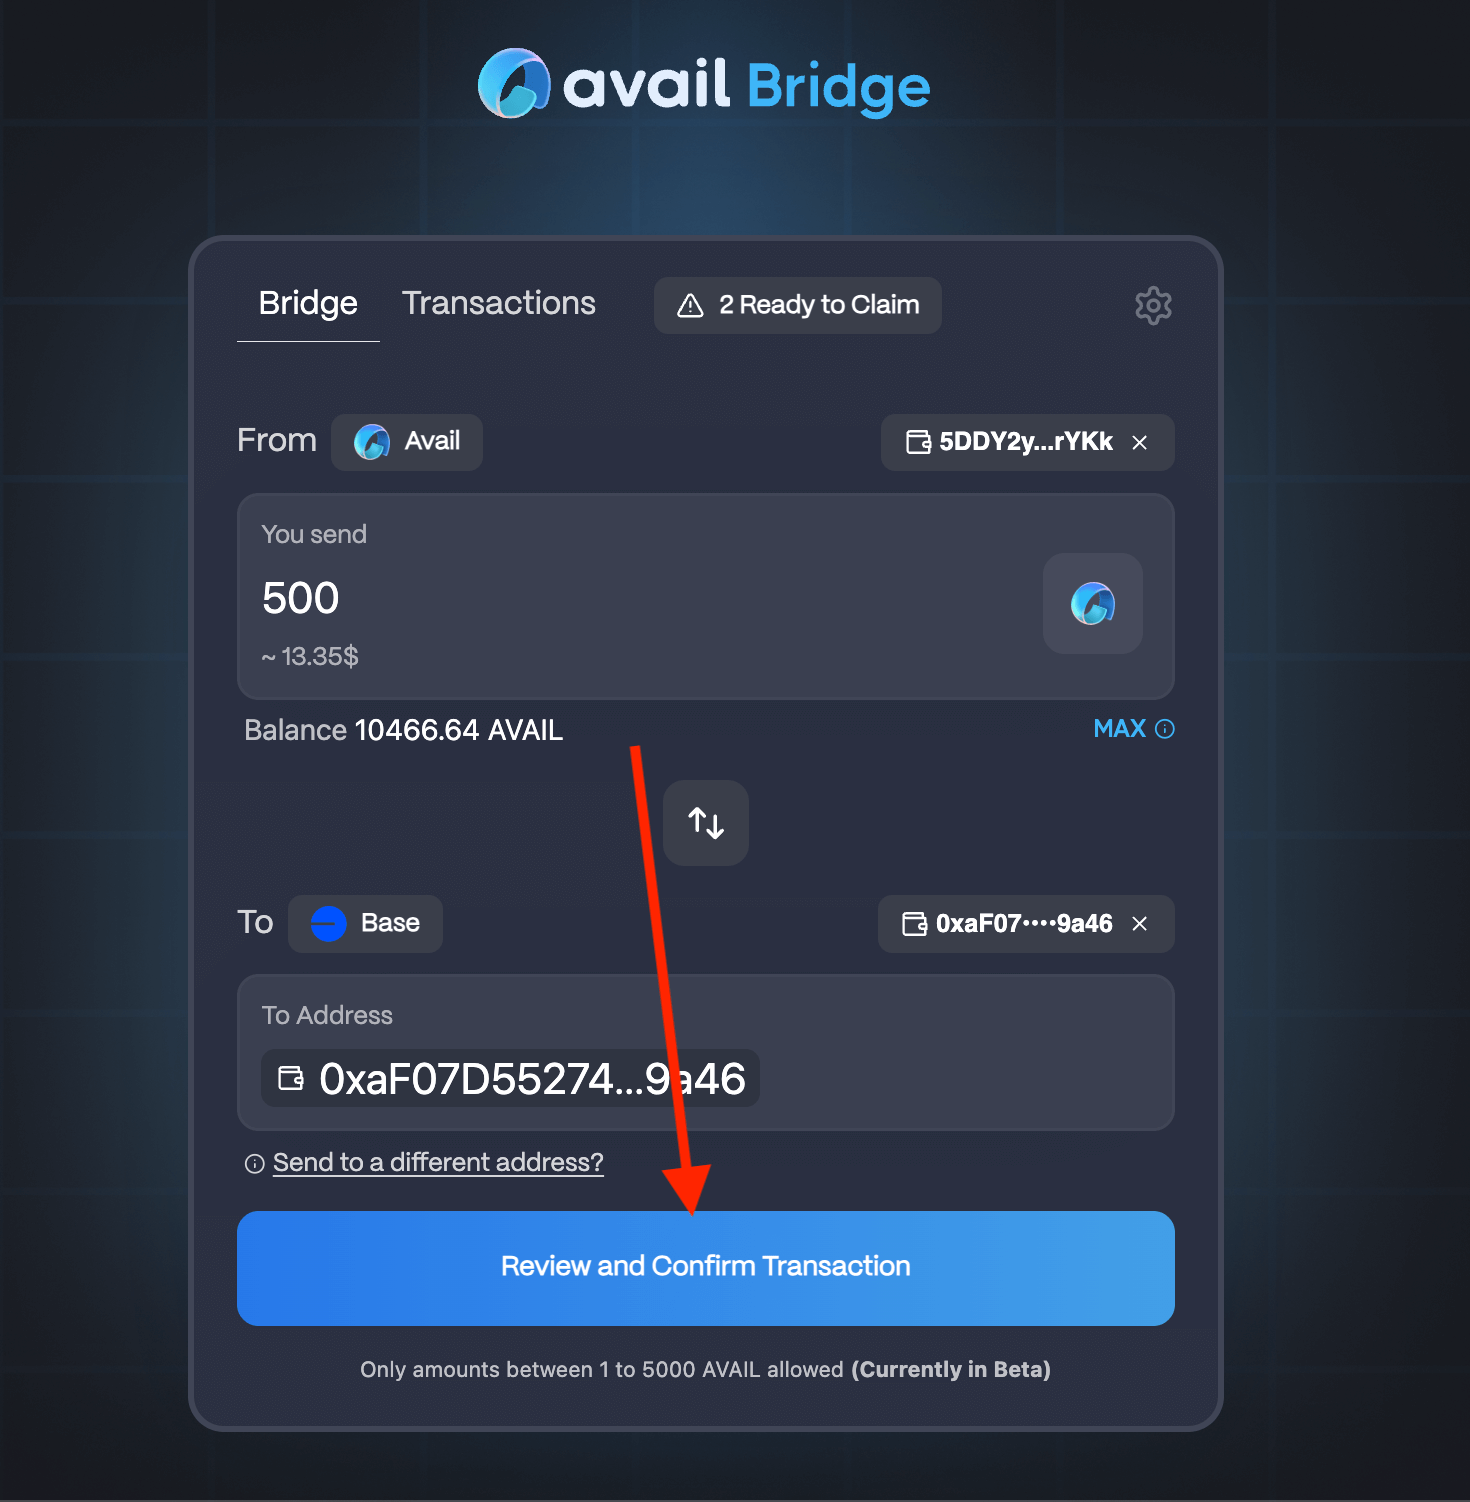
### Initiate the bridging process
1. Click on the `Initiate` button to start the bridging process.
2. Approve the two signatures that pop up.
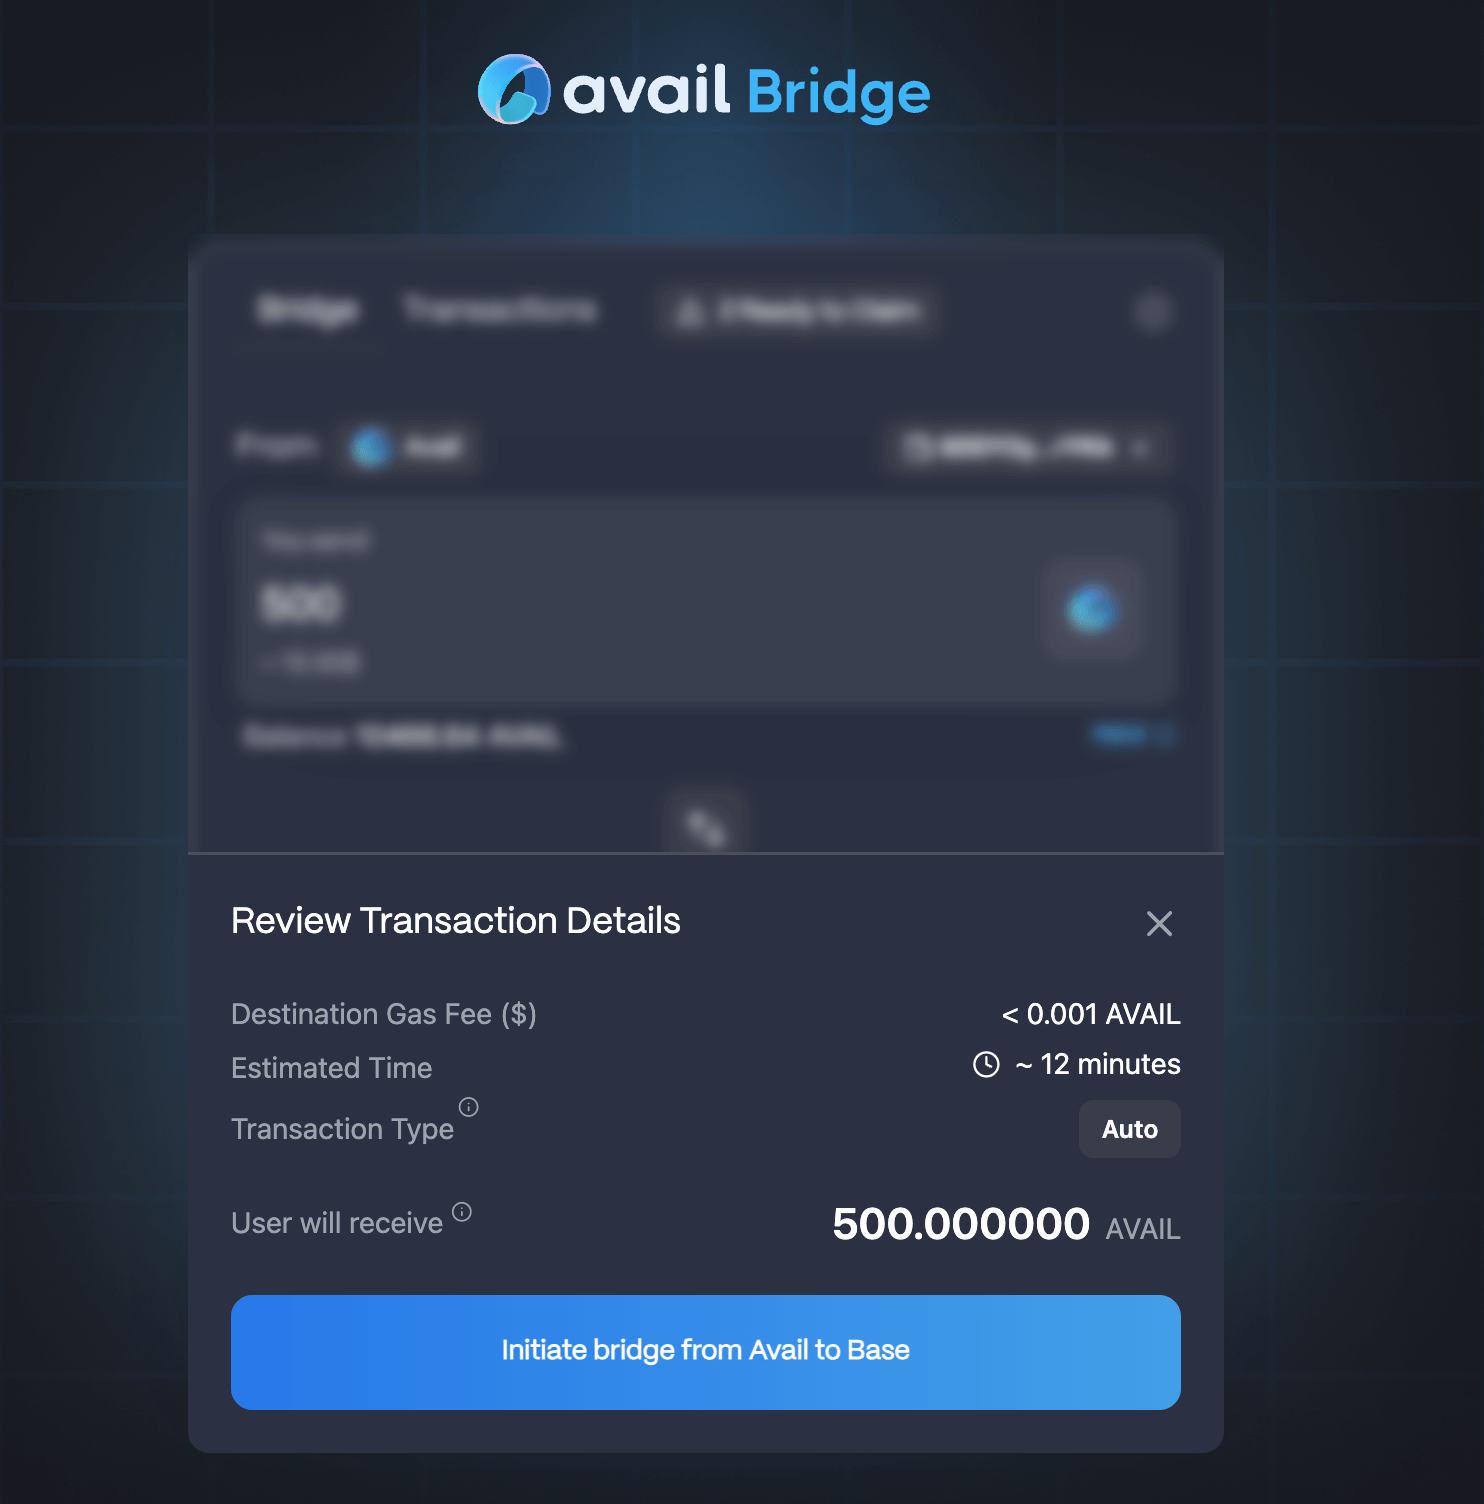
### And that's it!
The bridging process between Avail & Base takes around 5 minutes and the funds are sent automatically to the user
on the destination chain.
> **Note**
>
> This exact process can be reversed to bridge AVAIL from Base to Avail.
### Proxy Accounts on Avail DA
Proxy accounts provide an efficient way to delegate account management while maintaining security.
Instead of using a single account for all operations, you can create smaller accounts with specific roles
that can act on behalf of your main account. This guide explains how proxy accounts work on Avail DA and
how to use them through an example.
## What are Proxy Accounts?
Proxy accounts allow you to:
* Delegate specific permissions to other accounts
* Keep your main account secure while still participating in network activities
* Manage accounts efficiently, especially in corporate or team settings
> **Note**
>
> Think of proxy accounts as trusted delegates that can perform specific actions on behalf of your main account. The main account stays secure in cold storage while proxy accounts handle day-to-day operations.
## Proxy Types
When setting up a proxy account, you must specify its type. This determines what actions the proxy can perform:
* **Any**: Allows all transactions, including balance transfers. Use with caution as this gives complete control.
* **Non-transfer**: Permits any transaction except balance transfers.
* **Governance**: Only allows governance-related transactions.
* **Staking**: Restricted to staking-related operations.
* **Identity**: Restricted to identity registration and management operations.
* **Nomination Pool**: Limited to nomination pool operations like joining, bonding, and claiming rewards.
## Security Features
### Proxy Deposits
Creating a proxy requires a deposit in AVAIL tokens. This deposit is:
* Required to prevent spam attacks
* Calculated based on the formula: `ProxyDepositBase + (ProxyDepositFactor * number_of_proxies)`
* Returned when the proxy is removed
> Currently:
>
> * `ProxyDepositBase` is 10 AVAIL
> * `ProxyDepositFactor` is 3 AVAIL
## Setting up a Proxy Account
### Go to the Explorer
Head on over to the [accounts section of the Avail explorer](https://explorer.availproject.org/#/accounts) and connect your main account.
### Click on *'Add proxy'*
1. Choose the account for which you want to add a proxy.
2. Click on the *'Add proxy'* button to get started.
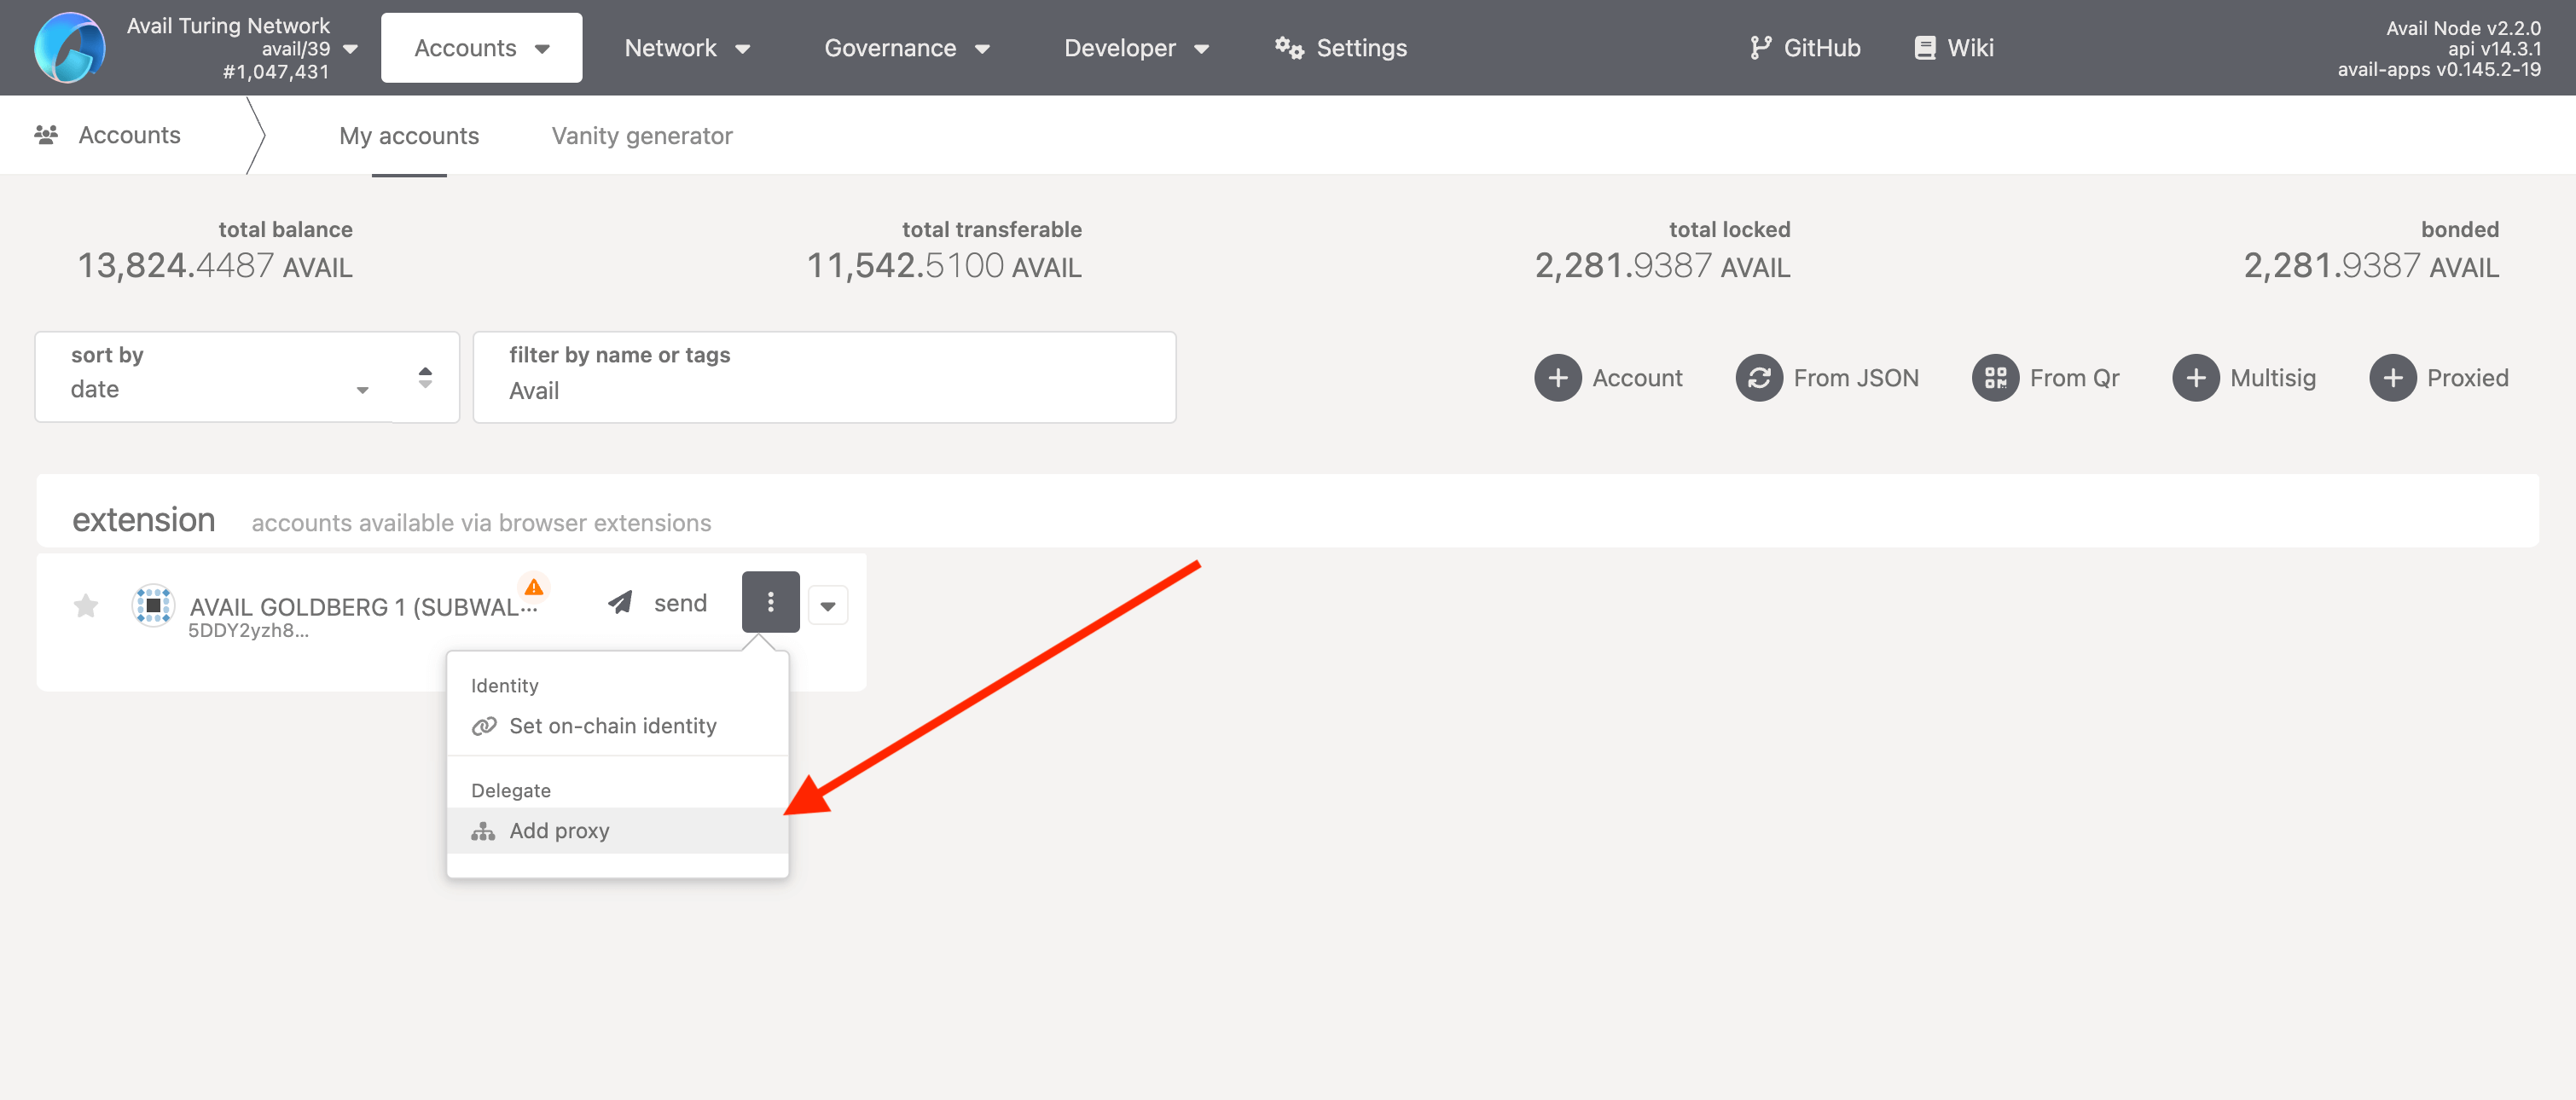
### Configure the Proxy
1. Click on the highlighted `+` button to add a new proxy.
2. Choose the account that should be delegated as a proxy.
3. Choose the proxy type. We will be going with `NonTransfer` for this example.
4. Submit this transaction.
> **Note**
>
> **PLEASE NOTE**
>
> 1. You can add multiple proxies for a single account with varying levels of permissions.
> 2. Your delegated proxy will still need some `AVAIL` tokens to pay for gas fees on behalf of the main account.
### That's It!
In a few steps you were able to set up a proxy for your main account that can perform only specific actions on behalf of your main account.
## Verify The Proxy Setup
As per the previous steps, our proxy should be able to perform any action on behalf of the main
account except transferring funds directly.
> Let's verify this by trying to transfer and stake `AVAIL` from the main account respectively via the proxy.
#### Transfer
`AVAIL`
via proxy
1. Go to the same accounts page and click on *'send'* to transfer funds.
2. Select an amount to transfer and a recipient address.
3. Click on *'Make Transfer'*.
4. Make sure the *'use a proxy for this call'* toggle is checked on.
5. Click on *'Sign and Submit'*.
6. You will note that while the transaction will be included in the block and the delegated account will
pay the gas fee for it, no funds from the main account will actually be transferred.
#### Stake
`AVAIL`
via proxy
1. Go to the [extrinsics section of the Avail explorer](https://explorer.availproject.org/#/extrinsics).
2. Select your 'main account' from the dropdown.
3. Look for the 'Staking' pallet and click on the 'bond' extrinsic.
4. enter an amount of `AVAIL` tokens to stake.
5. Click on *'Submit Transaction'*.
6. Just like before, make sure the *'use a proxy for this call'* toggle is checked on, and click on *'Sign and Submit'*.
7. This time you will see that the transaction a actually goes through and `1000 AVAIL`
are actually staked from the main account, all without ever signing the transaction from the main account.
## Best Practices
1. Use the most restrictive proxy type that meets your needs
2. Regularly review your proxy relationships
3. Keep careful records of which accounts have proxy access
4. Use different proxy accounts for different purposes
> **Warning**
>
> Do not use proxy calls for Avail-to-Ethereum bridge sends. Bridge sends must be submitted directly with `vector_sendMessage`; wrapped bridge sends are rejected.
> **Warning**
>
> While proxy accounts add convenience, they also introduce new security considerations. Always verify proxy settings and permissions carefully.
### Pure proxy accounts on Avail
> **Note**
>
> We recommend going through the previous page on [proxy accounts](/docs/da/user-guides/proxies-on-avail/avail-proxy) before proceeding with this guide.
The previous guide went over assigning ***existing*** accounts as proxies for your own account.
The following guide will teach you how to set up proxied accounts that are not owned by anybody, but can still be used
to sign transactions on using accounts that we own, which act as proxies for these keyless proxied accounts.
The guide will have two parts:
* Creating a pure proxy for a single account.
* Creating a multisig committee with the pure proxy.
## Create a pure proxy for a single account
> **Note**
>
> The proxy types remain the same for a pure proxy, you can go over them again [in our docs here](/docs/da/user-guides/proxies-on-avail/avail-proxy#proxy-types)
### Go to the Explorer
Head on over to the [accounts section of the Avail explorer](https://explorer.availproject.org/#/accounts) and connect your main account.
In my case, I start out with the highlighted account.
### Set up the pure proxy call
1. Go to the [Extrinsics section](https://explorer.avail.so/#/extrinsics) of the explorer.
2. Select the `proxy` pallet.
3. Select the `createPure` extrinsic.
4. Fill in the values of the parameters according to your needs. Use a positive integer for the `index` field that you haven't used before.
### Submit the transaction
1. Click on the *'Submit Transaction'* button.
2. Review the transaction details and submit it by clicking on the *'Sign and Submit'* button.
### Retrieve the pure proxy address
The address of the pure proxy generated by the `createPure` extrinsic is returned in the event logs of the block
that your transaction was included in.
We need to retrieve this address from the logs to be able to use the pure proxy. \
There are two ways to do this:
#### Using Avail Apps explorer
1. You will need the block number or block hash of the block that your transaction was included in.
2. Go to the [network explorer page](https://explorer.avail.so/#/network) and search for your block.
3. Scroll down to look for the event logs related to the `proxy.createPure` extrinsic.
4. Copy the address of the pure proxy from the event logs.
#### Using Subscan explorer
1. Go to the [subscan explorer](https://avail-turing.subscan.io/) and search for the address of your original account.
2. Scroll down and click on the transaction hash of your `createPure` transaction.
3. Scroll down to look for the event logs relevant to your transaction.
4. Expand the event log and copy the address under the `pure` field.
### Add the pure proxy to your address book
1. Go to the [accounts page](https://explorer.availproject.org/#/accounts) of the explorer.
2. Click on the *'Proxied'* button.
3. Fill the pop-up with the address and give it a name of your choice.
4. Click on the *'Add'* button to save the address.
### Verify that the pure proxy was set up correctly
1. Go to the [accounts page](https://explorer.availproject.org/#/accounts) of the explorer.
2. Click on the *'Proxied'* button.
3. Check that the pure proxy address is listed under the *'Proxied'* section, and that your original account
is set up as an `any` proxy for the pure proxy.
> **Note**
>
> **WHAT DID WE JUST DO?**
>
> 1. We started with an account that we own, in my case '*Original Account*'.
> 2. We have turned that original account into an `any proxy` for this new account, in my case '*Pure Proxy 1*'.
> 3. 'Pure Proxy 1' thus acts as a proxied account and we can use it to sign transactions on-chain,
> even though we don't have access to it's private key.
## Set up a multisig committee with the pure proxy
In this section, we will expand over what we learned till now to set up a multisig committee
that will be able to securely sign transactions on-chain through a multisig proxy that will be able to sign transactions
on behalf of the keyless proxied account we just derived.
Here is how it will work:
1. Any proposal or transaction that needs to be executed by the committee will be signed on-chain by the proxied account.
2. The proxied account in-turn will be controlled by a multisig account that will act as it's proxy.
3. This multisig will have a threshold of 2 out of 3 members.
> **Warning**
>
> Pure proxy and multisig-proxy setups cannot be used for Avail-to-Ethereum bridge sends. Submit `vector_sendMessage` directly from an Avail account; wrapped bridge sends are rejected.
The structure will look like this:
### Create a multisig with the signer addresses
1. If you need instructions to set up a multisig wallet, please go through [this page in our docs](/docs/da/user-guides/avail-multisig).
2. Here is what my multisig looks like, you might need to change the number of signers or the threshold according to your needs.
> **Note**
>
> **TIP**
> If your multisig needs to have signatory addresses that are not owned by you, add them to your address book
> before setting up the multisig.
### Set up the multisig as a proxy for the pure proxy
> 👉 Make sure the pure proxy has some funds to pay for the transaction fees before proceeding.
1. Go to the [accounts page](https://explorer.availproject.org/#/accounts) of the explorer.
2. Click on the *'Manage proxies'* button next to the pure proxy address.
3. Click on the *'Add proxy'* button and select your multisig address from the dropdown menu as the proxy.
4. Submit the transaction by clicking on the *'Submit Transaction'* button.
5. Once the transaction is successful, you should see that the pure proxy account now has two proxies.
### Remove the original account as a proxy for the pure proxy
> **Warning**
>
> **IMPORTANT**
>
> 1. Take care to maintain at least one proxy for the pure proxy account at any given time.
> 2. If you remove the last proxy for the pure proxy, you will permanently lose control over the pure proxy, with no way to recover it.
> 3. The correct way to rotate proxies for your pure proxy is to first add a new proxy, and then remove the old proxy.
1. Go back to the 'manage proxies' UI for the pure proxy, and click on the 'X' button next to the original account.
2. Submit the transaction by clicking on the *'Submit Transaction'* button.
3. Once the transaction is successful, you should see that the pure proxy account now has only one proxy, the multisig.
## Final notes
Hurray! You have successfully set up a multisig committee with the pure proxy.
1. In this setup, you will never need to rotate the pure proxy account, since nobody has it's private key, and thus it can't be compromised.
2. You can easily rotate the controlling multisig by adding another multisig as a proxy for the pure proxy, and then removing the old multisig as a proxy.
### Avail Governance V1
- [**Governance Overview**](/docs/da/user-guides/staking-governance/governance-on-avail/overview)
- [**Avail Improvement Proposal (AIP)**](/docs/da/user-guides/staking-governance/governance-on-avail/avail-improvement-proposal)
- [**Avail Transparency Report (ATR)**](/docs/da/user-guides/staking-governance/governance-on-avail/avail-transparency-report)
- [**Technical Committee**](/docs/da/user-guides/staking-governance/governance-on-avail/technical-committee)
### AVAIL
> **Warning**
>
> Note that all phases of the unification drop have been completed, and the **official claims portal
> is now closed.**
> Please beware of any phishing or scam attempts. Only rely on official Avail communication channels for information.
## Token information
| Property | Details |
| ------------------------------- | --------------------------------- |
| Symbol | AVAIL |
| Decimals | 18 |
| Total Supply (at genesis) | 10,000,000,000 (10 billion) AVAIL |
| Circulating Supply (at genesis) | 16.775% of total supply |
| Inflation | 5% per annum |
> **Note**
>
> **AVAIL on Ethereum mainnet**
> When bridged from Avail DA to Ethereum mainnet, the user will receive minted Avail ERC20 tokens with the address
> [`0xeeb4d8400aeefafc1b2953e0094134a887c76bd8`](https://etherscan.io/address/0xeeb4d8400aeefafc1b2953e0094134a887c76bd8).
> You can find more information about bridging AVAIL [in our docs here](/docs/da/build/vectorx).
## AVAIL allocation
AVAIL's allocation was designed from the ground up keeping the community and long-term growth in mind.
Over 65% of the AVAIL token allocation will be dedicated to the community through the Unification Drop (6%), Public Allocation - Future Initiatives (6%), Ecosystem Development (30%), and Community & Research (23.875%) categories.
The exact percentages of the AVAIL token allocation are:
| | Community And Research
\* | Unification Drop
| Public Allocation
(Future Initiatives)\*\* | Ecosystem Development | Core Contributors | Investors | Total |
| --------------------------- | -------------------------------- | ---------------------- | ----------------------------------------------- | --------------------- | ----------------- | ------------- | -------------- |
| **Token Allocation** | 2,387,500,000 | 600,000,000 | 600,000,000 | 3,000,000,000 | 2,000,000,000 | 1,412,500,000 | 10,000,000,000 |
| **% Of Total Supply** | 23.875% | 6.00% | 6.00% | 30.00% | 20.00% | 14.125% | |
| **TGE Release** | 20% | 100% | 100% | 20% | 0% | 0% | |
| **Vesting - Cliff** | 12 | 0 | 0 | 12 | 12 | 12 | |
| **Cliff Release** | 0 | 0 | 0 | 0 | 25% | 25% | |
| **Release Period (Months)** | 36 | 0 | 0 | 36 | 36 | 18 | |
> **Note**
>
> PLEASE NOTE
>
> 1. `*` This amount will be distributed through the Avail foundation.
>
> 2. `**` **Public Allocation (Future Initiatives) category** is now active and may be used to support community-oriented programs
> such as airdrops, listings, campaigns, and public growth initiatives. While this allocation is currently unlocked,
> tokens only enter circulating supply once distributed to participants. All disbursements from this category are transparently
> tracked and remain subject to governance oversight by the Avail Foundation.
> You can monitor the wallet address here: [Public Allocation - Future Initiatives Wallet](https://avail.subscan.io/account/5FtmS7yZvxps28shKggLJejmDtsxyRgzhcS68sNFALuxw1UP).
>
> 3. **`AVAIL` Circulating Supply:**
> The total circulating supply of `AVAIL` can vary, but an updated figure is always available
> at this endpoint: [https://www.availproject.org/api/circulating-supply](https://www.availproject.org/api/circulating-supply)
We believe this sets us up to build a community that enables every blockchain - whether L1, L2, app chain, or new constructs we haven’t yet seen - to keep scaling.
We will keep this page updated with the latest information.
## The Role of $AVAIL in the Avail Ecosystem
The Avail network consists of Avail DA and Avail Nexus. Avail DA provides scalable data availability for blockchains and applications. Avail Nexus enables cross-chain coordination and execution between supported networks.
$AVAIL is the native token of the network and underpins security, usage, and economic alignment across both layers.
If you want to read about these in more detail, you can refer to [our blog](https://blog.availproject.org/avail-the-token-powering-blockchain-unification/#avail-powering-the-unification-layer).
> **Warning**
>
> **Thank you for participating in Avail's Unification Drop.**
> Note that all phases of the unification drop have been completed, and the **official claims portal
> is now closed.**
> Please beware of any phishing or scam attempts. Only rely on official Avail communication channels for information.
### $AVAIL in Avail DA
* Validators stake AVAIL to participate in block production and provide data availability guarantees.
* Misbehaviour may result in slashing, enforcing economic accountability.
* Applications integrated with Avail DA pay fees in AVAIL to publish data.
### $AVAIL in Avail Nexus
* Users express cross-chain intents such as deposits, swaps, or transactions. The protocol coordinates their execution across chains.
* Activity on Nexus generates protocol revenue. Protocol revenue may be used for AVAIL buybacks in accordance with network governance and policy.
* Avail Nexus relies on Avail DA in the backend, increasing demand for data publication and blockspace on the network.
## Staking with AVAIL
Anyone can stake AVAIL throughout Avail's infrastructure to earn staking rewards. We will release detailed staking guides
along with our products as they are released.
For now you can refer to the Avail DA staking guide [in our docs](/docs/da/user-guides/staking-governance/stake-on-avail).
If you want to read about staking on Avail in more detail, you can refer to [our blog](https://blog.availproject.org/avail-the-token-powering-blockchain-unification/#avail-staking).
## Governance with AVAIL
The AVAIL token will play a key role in governance throughout the Avail ecosystem.
Avail will be adopting a phased approach to governance.
More information will be published on this soon.
## Security update
Notice:
Effective January 20, 2025, locked tokens will be redistributed from a single account to multiple secure accounts to enhance operational security.
This strategic measure aims to strengthen the security of foundation-held assets by reducing concentration risk.
The foundation remains committed to improving operational security while maintaining transparency.
There are no changes to the fundamental tokenomics, and distribution parameters will remain exactly as outlined in the existing documentation.
### Stake on Avail
- [**Overview**](/docs/da/user-guides/staking-governance/stake-on-avail/overview)
- [**Direct Nomination**](/docs/da/user-guides/staking-governance/stake-on-avail/direct-nomination)
- [**Nomination Pools**](/docs/da/user-guides/staking-governance/stake-on-avail/nomination-pools)
### Deploy a Polygon cdk Validium with Avail DA
## Introduction
In this guide, we will walk you through the process of deploying a Polygon CDK Validium chain using Avail as the data availability layer. This setup allows you to leverage the scalability and security of Avail for your rollup.
By following this guide, you will learn how to launch a CDK chain on Local or Sepolia testnet, configure it to use Avail for data availability, and interact with your rollup.
* [Learn more about Polygon CDK](https://docs.polygon.technology/cdk/getting-started/local-deployment/)
In this guide, we will cover:
* [Deploying CDK with AvailDA on local](#deploying-cdk-with-availda-on-local)
* [Deploying CDK with AvailDA on Sepolia](#deploying-cdk-with-availda-on-sepolia)
## Prerequisites:
* CPU: 4 CPUs, amd64
* Memory: 32 GB
* Storage: 100 GB
* OS: Linux
| Software | Version |
| ------------------------------------------------------------------ | ---------- |
| [Git](https://git-scm.com/) | OS Default |
| [Docker](https://www.docker.com/) | Latest |
| [Docker Compose](https://docs.docker.com/compose/) | Latest |
| [Kurtosis](https://docs.kurtosis.com/install/) | Latest |
| [GO](https://go.dev/doc/install) | Latest |
| [Make](https://www.gnu.org/software/make/) | OS Default |
| [Polygon-cli](https://github.com/0xPolygon/polygon-cli) | Latest |
| [Foundry](https://book.getfoundry.sh/getting-started/installation) | Latest |
After executing the following commands you will have installed all the prerequisites needed.
## Deploying CDK with AvailDA on Local
### 1. Build CDK image
[CDK](https://github.com/availproject/cdk) is a modular framework to build and deploy ZKP enabled rollups and validiums. This framework allows you to build a rollup or validium chain with a few simple commands, which is verifiable using zkEVM prover from Polygon.
```bash
git clone https://github.com/availproject/cdk.git
cd cdk
git checkout avail-develop-v0.5.3-rc1
make build-docker
docker tag cdk availproject/cdk:avail-develop-v0.5.3-rc1
```
### 2. Build [cdk-zkevm-contracts](https://github.com/availproject/cdk-zkevm-contracts) image with mock AvailDABridge and proof verification
```bash
git clone https://github.com/availproject/kurtosis-cdk.git
cd kurtosis-cdk/docker
git checkout avail-develop-v0.3.4
docker build . \
--tag availproject/cdk-zkevm-contracts:avail-develop-v9.0.0-rc.6-pp-fork.12 \
--build-arg ZKEVM_CONTRACTS_BRANCH=mock-bridge-avail-develop-v9.0.0-rc.6-pp \
--build-arg POLYCLI_VERSION="v0.1.73" \
--build-arg FOUNDRY_VERSION=stable \
--file zkevm-contracts.Dockerfile
```
### 3. Add AvailDA config values in `cdk-node-config.toml`
```bash
cd kurtosis-cdk/templates/trusted-node
vim cdk-node-config.toml
```
Enter your `Seed Phrase` and `appID`. Other information are prefilled for you.
### 4. Run local CDK chain with AvailDA using Kurtosis-cdk
```bash
cd kurtosis-cdk
kurtosis run --enclave cdk .
```
This command will start a local CDK chain with Avail as the data availability layer. It will take a few minutes to initialize the chain and all the services.
### 5. Chain is up and running
Now you should have a local CDK chain with AvailDA up and running. Try interacting with it as defined in these [docs](https://docs.polygon.technology/cdk/getting-started/local-deployment/#interacting-with-the-chain).
Some useful examples to interact with the chain can be Read/write opertations.
1. First export the RPC URL of your L2 to an environment variable called `ETH_RPC_URL`:
```bash
export ETH_RPC_URL="$(kurtosis port print cdk cdk-erigon-sequencer-001 rpc)"
```
2. Use `cast` to view information about the chain:
```bash
cast block-number
```
3. To View the balance of a pre-funded admin account:
```bash
cast balance --ether 0xE34aaF64b29273B7D567FCFc40544c014EEe9970
```
To check Avail Logs of `cdk-node-001`, use `kurtosis service logs -f `
## Deploying CDK with AvailDA on Sepolia
### 1. Build CDK image
[CDK](https://github.com/availproject/cdk) is a modular framework to build and deploy ZKP enabled rollups and validiums. This framework allows you to build a rollup or validium chain with a few simple commands, which is verifiable using zkEVM prover from Polygon.
```bash
git clone https://github.com/availproject/cdk.git
git checkout avail-develop-v0.5.3-rc1
make build-docker
docker tag cdk availproject/cdk:avail-develop-v0.5.3-rc1
```
### 2. Build [cdk-zkevm-contracts](https://github.com/availproject/cdk-zkevm-contracts) image with Sepolia AvailDABridge and proof verification
```bash
git clone https://github.com/availproject/kurtosis-cdk.git
git checkout avail-develop-v0.3.4
cd kurtosis-cdk/docker
docker build . \
--tag availproject/cdk-zkevm-contracts:avail-develop-v9.0.0-rc.6-pp-fork.12 \
--build-arg ZKEVM_CONTRACTS_BRANCH=avail-develop-v9.0.0-rc.6-pp \
--build-arg POLYCLI_VERSION="v0.1.73" \
--build-arg FOUNDRY_VERSION=stable \
--file zkevm-contracts.Dockerfile
```
### 3. Modify Deployment scalability
In order to deploy on Sepolia, you need to change the [salt](https://github.com/availproject/kurtosis-cdk/blob/avail-develop-v0.2.29/templates/contract-deploy/deploy_parameters.json#L12) value to avoid a deployment failure. This can be done easily by running this script in `kurtosis-cdk`:
```bash
if sed --version 2>/dev/null | grep -q GNU; then
sed -i 's/"salt": "0x.*",/"salt": "0x'$(xxd -p < /dev/random | tr -d "\n" | head -c 64)'",/' templates/contract-deploy/deploy_parameters.json
else
sed -i '' 's/"salt": "0x.*",/"salt": "0x'$(xxd -p < /dev/random | tr -d "\n" | head -c 64)'",/' templates/contract-deploy/deploy_parameters.json
fi
```
### 4. Change Finality Time for erigon
We also need to change the finality time for the Erigon node to avoid any waiting time for the contracts deployment to finalize. This can be achieved by using this small snippet of code:
```bash
if sed --version 2>/dev/null | grep -q GNU; then
sed -i 's/zkevm.l1-highest-block-type: finalized/zkevm.l1-highest-block-type: latest/' templates/cdk-erigon/config.yml
else
sed -i '' 's/zkevm.l1-highest-block-type: finalized/zkevm.l1-highest-block-type: latest/' templates/cdk-erigon/config.yml
fi
```
### 5. Deploy CDK to Sepolia file
You need to have a file from Kurtosis-cdk to deploy to Sepolia. Copy the file `deploy-cdk-to-sepolia.yml` from `/kurtosis-cdk/.github/tests/external-l1/deploy-cdk-to-sepolia.yml` or this [link](https://github.com/0xPolygon/kurtosis-cdk/blob/v0.2.29/.github/tests/external-l1/deploy-cdk-to-sepolia.yml). Name this file as `params.yml` in your cdk directory.
Now you need to set necessary configs for deploying to Sepolia. You can do this by running the following command L1 Configs:
```bash
## L1 Config
l1_chain_id: 11155111
# TODO: Create another mnemonic seed phrase for running the contract deployment on L1.
l1_preallocated_mnemonic: CHANGE_ME
# TODO: Adjust the amount of ETH you want to spend on this deployment.
l1_funding_amount: 5ether
# TODO: Configure the L1 RPC URLs to be valid Sepolia endpoints.
l1_rpc_url: CHANGE_ME
l1_ws_url: CHANGE_ME
```
In order to Derive application keys, you can use the following command:
```bash
seed="film crazy inform bind stomach weather cruel hold quarter stage country purpose"
polycli wallet inspect --mnemonic "$seed" --addresses 9 | \
jq -r '.Addresses[] | [.ETHAddress, .HexPrivateKey] | @tsv' | \
awk 'BEGIN{split("sequencer,aggregator,claimtxmanager,timelock,admin,loadtest,agglayer,dac,proofsigner",roles,",")} {print "zkevm_l2_" roles[NR] "address: \"" $1 "\""; print "zkevm_l2" roles[NR] "_private_key: \"0x" $2 "\"\n"}'
```
### 6. Add AvailDA config values in `cdk-node-config.toml`
```bash
cd kurtosis-cdk/templates/trusted-node
vim cdk-node-config.toml
```
Enter your `Seed Phrase` and `appID`. Other information are prefilled for you.
### 7. Run deployment to Sepolia with AvailDA using Kurtosis-cdk
```bash
cd kurtosis-cdk
kurtosis run --enclave cdk . --args-file ./params.yml
```
### 8. Chain is up and running
Now you should have a CDK chain with AvailDA deployed on Sepolia. You can interact with it using the same methods as mentioned in the local deployment section.
Try interacting with it as defined in these [docs](https://docs.polygon.technology/cdk/getting-started/local-deployment/#interacting-with-the-chain).
Congratulations! You have successfully deployed a Polygon CDK Validium chain with AvailDA on Local & Sepolia. For anymore information on CDK, you can refer to the [Polygon CDK documentation](https://docs.polygon.technology/cdk/getting-started/local-deployment/).
## Enable DA attestation verification over Avail Bridge (optional)
The default deployment of Polygon CDK validium chain using AvailDA, is with DA attestation verification disabled over [AvailAttestation](https://github.com/availproject/cdk-zkevm-contracts/blob/avail-develop-v9.0.0-rc.6-pp/contracts/v2/consensus/validium/AvailAttestation.sol#L38)
To learn more about DA attestation verification, follow [this](/docs/da/build/vectorx)
To enable the verification, follow these steps
### 1. Enable the bridge verification on CDK node
There is a config called `bridge_enabled` in `kurtosis-cdk/templates/trusted-node` for sequencer-sender and aggregator component of CDK, Make it `true`
### 2. Enable the bridge verification on `AvailAttestation` contract
```bash
cast send "setAvailBridgeVerificationEnabled(bool)" true \
--private-key \
--rpc-url https://sepolia.drpc.org
```
> **Note**
>
> This feature is available for both local and Sepolia deployment, and have these same steps to follow
Now you will able to see the DA attestation verification happening over the Polygon CDK chain.
Congratulations! You have successfully deployed a Polygon CDK Validium chain with AvailDA on Local & Sepolia. For anymore information on CDK, you can refer to the Polygon CDK documentation
### Deploy Arbitrum Orbit with Avail DA
# Deploy Arbitrum Orbit with Avail DA
This guide follows the deployment of an Arbitrum Orbit chain (L3) with Arbitrum Sepolia (L2) as the base chain. You can follow the same steps with any [other supported chains](/docs/da/build/rollups/arbitrum-nitro/overview#reference) with the relevant contract addresses.
> **Note**
>
> This guide is based on [Arbitrum Orbit Quickstart](https://docs.arbitrum.io/launch-orbit-chain/orbit-quickstart)
## Prerequisites
#### Docker
* You need to have [docker](https://docs.docker.com/engine/) and [docker-compose](https://docs.docker.com/compose/) installed on your machine.
#### Avail
* An Avail account with some AVAIL tokens in it. You can refer to [our docs here](/docs/da/user-guides/accounts) to get started.
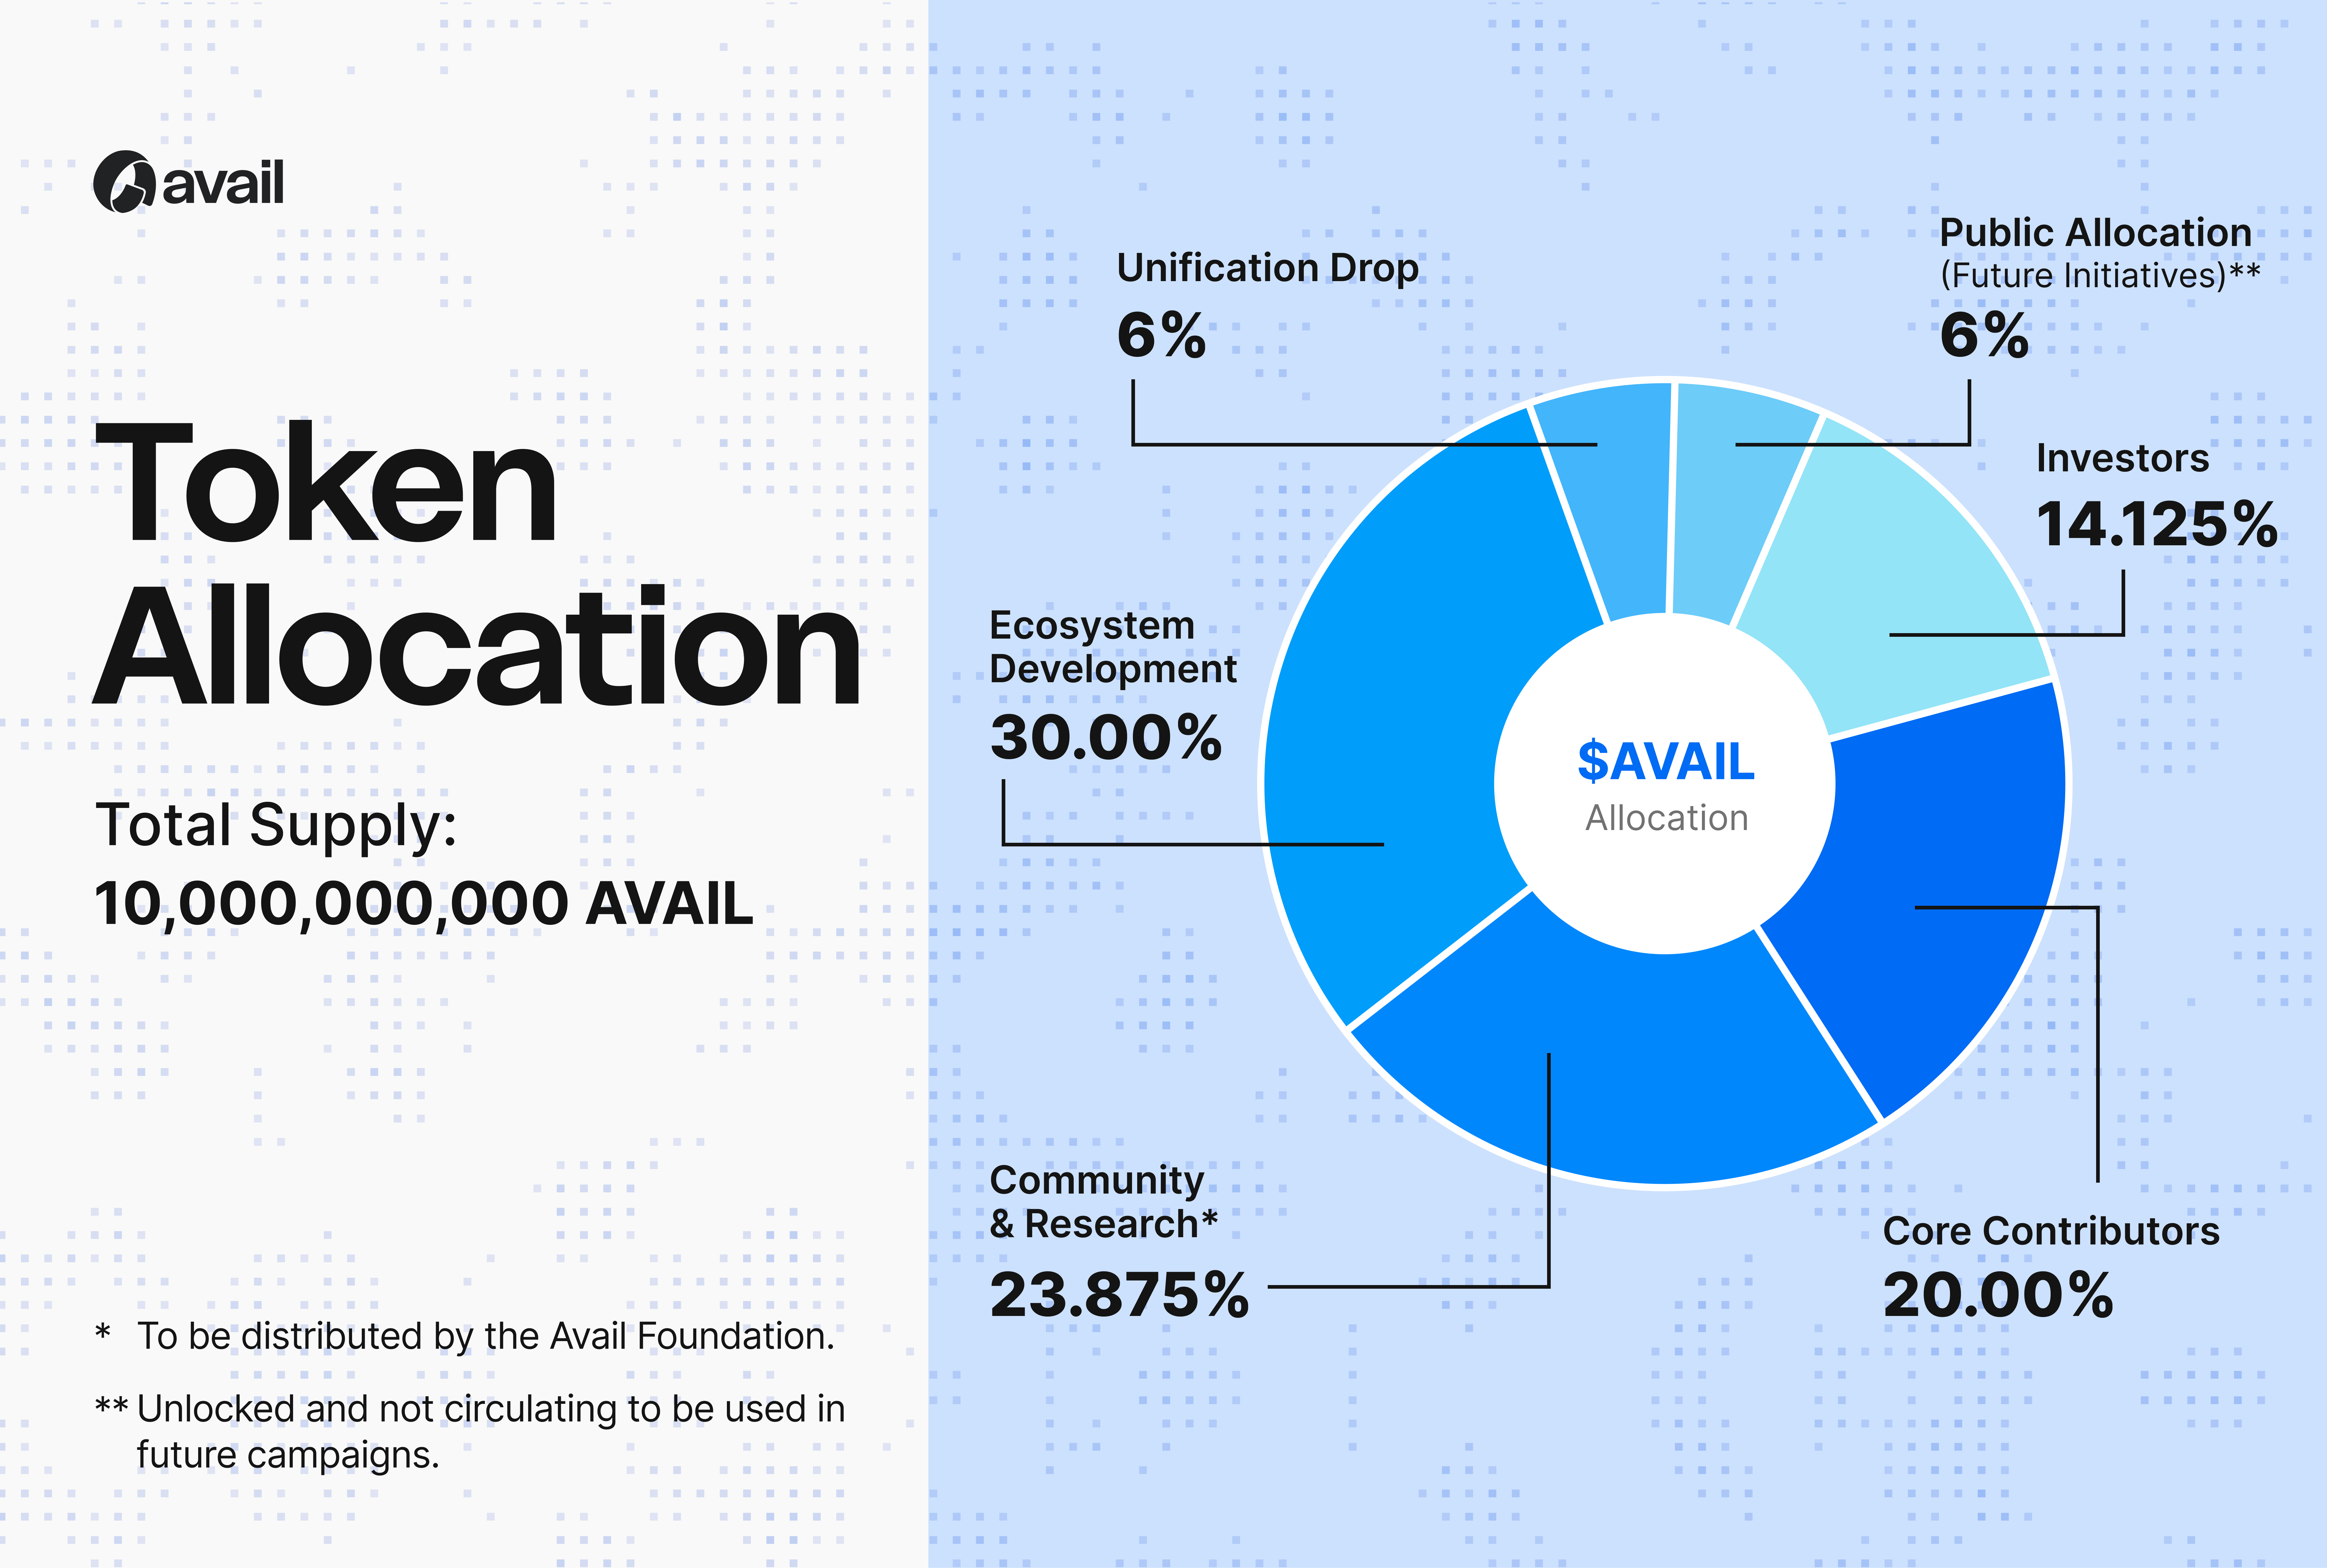
* An application key (`app-id`) for your rollup. Learn [how to get your `app-id` here](/docs/da/build/interact/app-id).
#### Arbitrum Sepolia
* At least 1 ETH over Arbsepolia Testnet. You can follow [Step 1](https://docs.arbitrum.io/launch-orbit-chain/orbit-quickstart#step-1-acquire-arbitrum-testnet-eth-and-the-native-token-for-orbit-chains-with-custom-gas-tokens) on Arbitrum Orbit Doc for acquiring testnet $ETH
* This guide will use [Arbitrum's ArbSepolia](https://docs.arbitrum.io/build-decentralized-apps/public-chains#arbitrum-sepolia) and [Avail's Turing](/docs/da/networks) testnets.
## Download avail-nitro-node docker image
### Step-1: Download the [avail-nitro-node](https://hub.docker.com/repository/docker/availj/avail-nitro-node/tags) image from docker hub
```bash
docker pull availj/avail-nitro-node:v2.2.1-upstream-v3.2.1
```
## Deploy Rollup Contracts
### Step-1: Clone the [arbitrum-orbit-sdk](https://github.com/availproject/arbitrum-orbit-sdk/tree/avail-develop-upstream-v0.20.1) with AvailDA
```bash
git clone https://github.com/availproject/arbitrum-orbit-sdk.git
git checkout avail-develop-upstream-v0.20.1
cd arbitrum-orbit-sdk
```
Install and build
```bash
npm i && npm run build
```
### Step-2: Create `.env` file
Go to `examples/create-avail-rollup-eth` and create a copy of `.env.example` as `.env` file inside.
```bash
cd examples/create-avail-rollup-eth
cp env.example .env
```
then edit the `.env` file for the following:
* Set EVM account keys of settlement layer
```bash
DEPLOYER_PRIVATE_KEY :- Orbit rollup owner, Rollup contract deployer
BATCH_POSTER_PRIVATE_KEY -: Batch poster
VALIDATOR_PRIVATE_KEY :- Validator
```
* Set avail account info for DA submissions
```bash
AVAIL_ADDR_SEED=
AVAIL_APP_ID=
```
* Set Fallback S3, if you want to enable S3 storage as a fallback for AvailDA (its an optional feature)
* Fill these required details where make `FALLBACKS3_ENABLE = true`
```bash
FALLBACKS3_ENABLE=true
FALLBACKS3_ACCESS_KEY=
FALLBACKS3_SECRET_KEY=
FALLBACKS3_REGION=
FALLBACKS3_OBJECT_PREFIX=
FALLBACKS3_BUCKET=
```
* Set parent chain rpc URL (other than infura will also works)
```bash
PARENT_CHAIN_RPC=https://arbitrum-sepolia.infura.io/v3/YOUR_API_KEY
```
### Step-3: Rollup contract deployment
* Run avail orbit rollup deployment command
```bash
npm run deploy-avail-orbit-rollup
```
* Here is a sample response of logs that you may see:
* You will get to see two files added `nodeConfig.json` and `orbitSetupScriptConfig.json`, which will be need in the next step to spin and set up Avail Orbit Rollup.
#### Before proceeding, let's briefly review what just happened:
1. You submitted a deployment transaction to an Orbit "factory" smart contract on the Arbitrum Sepolia testnet, the public L2 chain that your local Orbit chain will settle transactions to.
2. This Orbit smart contract then initialized your Orbit chain's base contracts with the values that you specified in the previous step, and deployed these base contracts to the Arbitrum Sepolia testnet.
Your Orbit chain's base contracts are responsible for facilitating the exchange of information between your chain's node(s) and its base chain's nodes. This includes the batch posting of transactions from your Orbit chain to its base chain, the staking of tokens by your Orbit chain's validators the challenge mechanism, bridging mechanisms, and more.
## Spin up the avail orbit rollup chain using orbit-setup-script
### Step-1: Download [orbit-setup-script](https://github.com/availproject/orbit-setup-script.git)
```bash
git clone https://github.com/availproject/orbit-setup-script.git
cd orbit-setup-script
```
### Step-2 :- Run your chain
Add the `nodeConfig.json` and `orbitSetupScriptConfig.json` in `./config` , that you get after completing Deploy Rollup contracts
```bash
cd orbit-setup-script
docker-compose up -d
```
A Nitro node and BlockScout explorer instance will be started. Visit [http://localhost:4000/](http://localhost:4000/) to access your BlockScout explorer instance - this will allow you to view your chain's transactions and blocks, which can be useful for debugging.
### Step-3: Final Setup - Token bridge deployment
A Hardhat script that handles the following tasks:
1. Fund the **batch-poster** and **validator** (staker) accounts on your underlying L2 chain.
2. Deposit ETH into your account on the chain using your chain's newly deployed bridge.
3. Deploy your Token Bridge contracts on both L2 and local Orbit chains.
4. Configure parameters on the chain.
To run this script, issue the following command from the root of the `orbit-setup-script` repository, replacing `OxYourPrivateKey` with the private key of the `Owner` account you used to deploy your chain's contracts, and replacing `http://localhost:8449` with the RPC URL of your chain's node.
```bash
PRIVATE_KEY="0xYourPrivateKey" L2_RPC_URL="https://sepolia-rollup.arbitrum.io/rpc" L3_RPC_URL="http://localhost:8449" yarn run setup
```
## Hurray!
**Congratulations,** Your local Orbit chain with Avail DA is now running.
### Appendix A:- Use Arbitrum bridge for your local chain
After completing final setup, you can find two files `network.json` and `outputInfo.json`.
Add in your avail orbit rollup testnet to the [bridge](https://bridge.arbitrum.io/?destinationChain=arbitrum-sepolia\&sourceChain=sepolia). This will only be for local testing.
Paste `outputInfo.json` configuration in setting section of bridge
#### Appendix B: Logging
Run this command in the root directory of your orbit setup script repo to view your chain's logs:
```bash
docker-compose logs -f nitro
```
#### Appendix C: Depositing ETH/native token
If you need to deposit more ETH (or native tokens) into your Orbit chain account, run this command on the base directory of the setup script, replacing `0xYourPrivateKey` with the private key of the originating account, and `` with the amount to send:
Using Arbitrum Sepolia:
```bash
PRIVATE_KEY="0xYourPrivateKey" L2_RPC_URL="https://sepolia-rollup.arbitrum.io/rpc" L3_RPC_URL="http://localhost:8449"
AMOUNT="" yarn run deposit
```
#### Appendix D: Refunding (For testing environments)
Once you're done with your local Orbit chain and want to refund any remaining balance from the batch poster and validator wallets, you can use the refund script by running:
```bash
PRIVATE_KEY="0xYourPrivateKey" L2_RPC_URL="" TARGET_ADDRESS="0xYourTargetAddress" yarn run refund
```
> **Note**
>
> Make sure to replace `"0xYourPrivateKey"` with the private key of the wallet you used to deploy the rollup contracts, and `"0xYourTargetAddress"` with the address where you want to receive the refunded funds.
This will transfer any remaining balance from the batch poster and validator wallets to the specified target address.
#### Appendix E: Troubleshooting
You may see error getting latest batch count in your node's output logs (from Appendix B). This is usually safe to ignore. It's usually displayed when your Orbit chain's base contract deployment isn't yet finalized on the L1 chain. This finalization can take 15-20 minutes, but don't worry - the deployment doesn't need to be L1-finalized in order for your chain to function properly.
Learn more about customizing and using your Orbit chain from the [Arbitrum Orbit Docs](https://docs.arbitrum.io/launch-orbit-chain/orbit-gentle-introduction).
### How to Use Madara with Avail
## Introduction
Embark on setting up your own Madara-based Validium, leveraging Avail as the data availability layer. This guide is tailored for deploying on Ethereum's Sepolia testnet and integrating with the Avail Turing testnet. To gain a comprehensive understanding of Madara Starknet, review the [Madara documentation](https://docs.madara.zone/).
In this guide, you will conduct the following:
* [Introduction](#introduction)
* [Prerequisites](#prerequisites)
* [Hardware Requirements](#hardware-requirements)
* [Launch an Avail-Powered Madara Validium](#launch-an-avail-powered-madara-validium)
* [Running a Single-Node Development Chain](#running-a-single-node-development-chain)
* [Setting Up Avail as the DA Layer](#setting-up-avail-as-the-da-layer)
* [Deploying an Account on Your Chain](#deploying-an-account-on-your-chain)
* [Using Avail in Madara](#using-avail-in-madara)
## Prerequisites
Ensure you have installed the following software.
> Installation commands are based on Ubuntu 20.04 LTS:
| Software | Version |
| -------------------------------------------------------- | ------------------------------- |
| [Rust](https://www.rust-lang.org/) | `rustc 1.69.0-nightly` or later |
| [nvm/Node.js](https://github.com/nvm-sh/nvm) | Latest version |
| [Cairo](https://www.cairo-lang.org/docs/quickstart.html) | 1.0 |
```bash
# Install Rust
curl --proto '=https' --tlsv1.2 -sSf https://sh.rustup.rs | sh
rustup toolchain install nightly
# Install nvm and Node.js
curl -o- https://raw.githubusercontent.com/nvm-sh/nvm/v0.39.3/install.sh | bash
export NVM_DIR="$([ -z "${XDG_CONFIG_HOME-}" ] && printf %s "${HOME}/.nvm" || printf %s "${XDG_CONFIG_HOME}/nvm")"
[ -s "$NVM_DIR/nvm.sh" ] && \. "$NVM_DIR/nvm.sh" # This loads nvm
nvm install --lts
# Install Cairo
curl -L https://github.com/franalgaba/cairo-installer/raw/main/bin/cairo-installer | bash
```
### Hardware Requirements
The Madara stack, being a StarkNet sequencer, has specific hardware requirements for efficient operation. These requirements are particularly important when integrating Avail as the DA Layer.
| Component | Minimum Requirements | Recommended Setup | Suggested AWS Instance |
| -------------- | -------------------------------- | -------------------------------- | ---------------------- |
| Sequencer Node | 4-core CPU, 16GB RAM, 100 GB SSD | 8-core CPU, 32GB RAM, 200 GB SSD | m5a.xlarge |
| Avail Node | 4-core CPU, 8GB RAM, 50 GB SSD | 8-core CPU, 16GB RAM, 100 GB SSD | m5a.large |
> **Note**
>
> The storage requirements can vary based on the volume of transactions and the length of the chain history you intend to maintain. For high-traffic networks, consider scaling your storage capacity accordingly.
## Launch an Avail-Powered Madara Validium
1. Clone the Madara repository:
```bash
git clone git@github.com:keep-starknet-strange/madara.git
cd madara
```
2. Build the chain in release mode:
```bash
cargo build --release
```
### Running a Single-Node Development Chain
1. Start the development chain:
```bash
./target/release/madara --dev
```
2. Purge the chain's state:
```bash
./target/release/madara purge-chain --dev
```
3. Start with detailed logging:
```bash
RUST_BACKTRACE=1 ./target/release/madara -ldebug --dev
```
4. Create a plain chain spec:
```bash
./target/release/madara build-spec > ./infra/chain-sepcs/chain-spec-plain.json
```
### Setting Up Avail as the DA Layer
1. Configure Avail for Madara:
```bash
# Configuration for local Avail node
cat > da-config.json < **Note**
>
> Remember to adjust the `da-config.json` file based on your setup, whether it's a local node or using the Avail network.
### Building on the Arbitrum Nitro stack with Avail DA
## What is Nitro?
Nitro is designed by Arbitrum, a software stack to build optimistic rollups, powering Arbitrum One and Arbitrum Nova.
These chains are Optimistic L2 protocols that inherit Ethereum-level security.
You can read more about Nitro in:
1. [The Nitro whitepaper on github](https://github.com/OffchainLabs/nitro/blob/master/docs/Nitro-whitepaper.pdf)
2. [Arbitrum docs.](https://docs.arbitrum.io/how-arbitrum-works/inside-arbitrum-nitro)
## Arbitrum Orbit integration with Avail DA
Arbitrum Orbit chains can integrate with Avail DA using a number of different configurations. You can read more about
them [in our blog](https://blog.availproject.org/avail-ecosystem-series-arbitrum-orbit-chains/).
Let’s take a look at the transaction Lifecycle:
1. **Transaction Submission**
* **Process**: Users send transactions to the Sequencer.
* **Role**: The Sequencer temporarily holds the transactions before they are batched.
2. **Batch Processing**
* **Component**: `Sequencer`
* **Function**: Collects and orders transactions into batches for more efficient processing.
3. **Batch Submission on Avail**
* **component**: `arbnode/batch-poster`
* **Process**: Sequencer posts a batch of L2 transactions onto the underlying data availability provider.
4. **BlobPointer Reference Creation**
* **Outcome**: Avail returns a unique transaction reference with Merkle proof of
batch submission.
5. **BlobPointer Submission to Settlement layer ( Arbitrum One, Ethereum etc.)**
* **Process**: BlobPointer with Avail header byte(0x0a) is being sent over
to `sequencerInbox` rollup contract for on-chain DA verification over Avail
bridge and batch addition to canonical chain.
* **component:** [`SequncerInbox.sol`](https://github.com/availproject/nitro-contracts/blob/data-availability-verification-v2.3.1/src/bridge/SequencerInbox.sol#L587)
6. **on-chain Data availability verification**
* **Component**: [`Avail bridge`](https://sepolia.arbiscan.io/address/0x445651a824b8BcAEAcE5FA1D6656e21F3bdac4E2#code)
* **Function**: Verify `Merkle proof` for the batch submission with `dataRootCommitment` from [`VectorX`](https://sepolia.arbiscan.io/address/0xbc281367e1f2db1c3e92255aa2f040b1c642ec75#events).
7. Replay batch execution over WASM binary STF
* **Component**: `Arbitrator, ArbState`
* Process: Recover payload from Avail DA ([`RecoverPayloadFromAvailBatch`](https://github.com/availproject/avail-nitro-adapter/blob/data-availability-verification-v2.3.1/arbstate/inbox.go#L169C6-L169C34)),
and re-executes the State Transition Function against input messages to determine
the correct output block.
### Building on the Madara Stack with Avail
The Madara stack, when integrated with Avail in a Validium setup, provides a seamless platform for scaling blockchain applications. This integration combines the customizability and Starknet compatibility of Madara with the robust data availability solutions of Avail.
### Transaction Lifecycle
1. **Transaction Submission**
* **Process**: Users initiate transactions which are sent to the Madara-based Validium Sequencer.
* **Role**: The Sequencer, leveraging the flexibility of Madara, temporarily holds these transactions.
2. **Batch Processing**
* **Component**: Customized within Madara's framework.
* **Function**: Transactions are batched for efficient processing, leveraging Madara's modular design.
3. **Data Availability with Avail**
* **Component**: Custom integration within Madara's setup.
* **Function**: Batches are published to Avail for data availability, ensuring transparency and accessibility.
4. **State Transition and Proof Generation**
* **Component**: Utilizes Madara's Starknet compatibility.
* **Function**: State transitions are processed, and cryptographic proofs are generated within the Madara environment.
5. **Commitment and Verification**
* **Action**: Commitments, along with proofs, are anchored to a primary blockchain (e.g., Ethereum), ensuring security and finality.
### Key Features
* **Customizability**: Madara's Substrate-based framework allows for extensive customization to meet specific blockchain requirements.
* **Starknet Compatibility**: Madara's compatibility with Starknet opens a wide array of tools and features for developers.
* **Robust Data Availability**: Avail provides a decentralized solution for data availability, crucial for scalability and security in blockchain applications.
* **Flexibility and Interoperability**: The combination of Madara and Avail supports a wide range of blockchain architectures and use cases.
### Developer Resources
To leverage Madara with Avail, developers are encouraged to refer to the [tutorial](/docs/da/build/rollups/madara/guide) on creating an Avail-powered validium with Avail. For in-depth information on Madara's features, tools, and configurations, visit [Madara Documentation](https://docs.madara.zone/).
### Deploy OP Stack chain with Avail DA
## Introduction
Embark on setting up your own OP stack chain in [alt-da mode](https://docs.optimism.io/stack/beta-features/alt-da-mode) using Avail as Data Availability layer . This guide targets Ethereum's Sepolia testnet and Avail Turing testnet. For a detailed understanding, review the [Optimism Documentation](https://stack.optimism.io/docs/build/getting-started/#know-before-you-go).
## Prerequisites
Ensure you have installed the following software.
> Installation commands are based on Ubuntu 24.04 LTS:
| **Software** | **Version** | **Version Check Command** |
| ------------------------------------------------------------- | ----------- | ------------------------- |
| [git](https://git-scm.com/) | `^2` | `git --version` |
| [go](https://go.dev/) | `^1.21` | `go version` |
| [node](https://nodejs.org/en/) | `^20` | `node --version` |
| [pnpm](https://pnpm.io/installation) | `^8` | `pnpm --version` |
| [foundry](https://github.com/foundry-rs/foundry#installation) | `^0.2.0` | `forge --version` |
| [make](https://linux.die.net/man/1/make) | `^3` | `make --version` |
| [jq](https://github.com/jqlang/jq) | `^1.6` | `jq --version` |
| [direnv](https://direnv.net/) | `^2` | `direnv --version` |
| [Just](https://github.com/casey/just) | `1.35.0` | `just --version` |
### Use the following releases while following the guide:
| **Component** | **Version** |
| ------------- | ----------- |
| op-node | v1.13.3 |
| op-geth | v1.101511.0 |
| op-batcher | v1.13.2 |
| op-deployer | v0.3.2 |
| op-proposer | v1.10.0 |
### Get Access to a Sepolia Node
For deploying to Sepolia, access an L1 node using a provider like [Alchemy](https://www.alchemy.com/dapps/Sepolia) or [run your own Sepolia node](https://notes.ethereum.org/@launchpad/Sepolia).
## Setup Avail DA server
This introduces a sidecar DA Server for Optimism that interacts with Avail DA for posting and retrieving data.
### Run avail-da server(binary).
1. Build Avail DA Server
```bash
git clone https://github.com/availproject/avail-alt-da-server.git
cd avail-alt-da-server
make da-server
```
2. Run your DA sidecar:
```bash
./bin/avail-da-server ./cmd/avail --addr=localhost --port=8000 --avail.rpc= --avail.seed=<> --avail.appid=<>
```
### Run using docker
* Copy `.env.example` to `.env`. Fill the values inside.
* Run the following commands:
```bash
docker-compose build
docker-compose up
```
## Configure op-stack
1. Clone the [optimism](https://github.com/ethereum-optimism/optimism.git) repositroy:
```bash
git clone https://github.com/ethereum-optimism/optimism.git
cd optimism
git fetch --tag --all
git submodule update --init --recursive
```
2. Add `env` variables at root of the optimism directly
file-name: `.envrc`
```bash
##################################################
# Getting Started #
##################################################
# Admin account
export GS_ADMIN_ADDRESS=
export GS_ADMIN_PRIVATE_KEY=
# Batcher account
export GS_BATCHER_ADDRESS=
export GS_BATCHER_PRIVATE_KEY=
# Proposer account
export GS_PROPOSER_ADDRESS=
export GS_PROPOSER_PRIVATE_KEY=
# Sequencer account
export GS_SEQUENCER_ADDRESS=
export GS_SEQUENCER_PRIVATE_KEY=
##################################################
# op-node Configuration #
##################################################
# The kind of RPC provider, used to inform optimal transactions receipts
# fetching. Valid options: alchemy, quicknode, infura, parity, nethermind,
# debug_geth, erigon, basic, any.
export L1_RPC_KIND=
export L1_CHAIN_ID=
export L2_CHAIN_ID=
export L1_BLOCK_TIME=12
export L2_BLOCK_TIME=5
export DA_SERVER_HTTP_URL=http://localhost:8000
export GAME_FACTORY_ADDRESS=""
##################################################
# Contract Deployment #
##################################################
# RPC URL for the L1 network to interact with
export L1_RPC_URL=
```
Fill out the required details
| **Variable Name** | **Description** |
| ----------------- | ------------------------------------------------------------------------------------------------------------------------------------------------------------------------------------------------------------ |
| L1\_RPC\_URL | URL for your L1 node (a Sepolia node in this case). |
| L1\_RPC\_KIND | Kind of L1 RPC you're connecting to, used to inform optimal transactions receipts fetching. Valid options: `alchemy`, `quicknode`, `infura`, `parity`, `nethermind`, `debug_geth`, `erigon`, `basic`, `any`. |
| L1\_BLOCK\_TIME | Block time of your respective settlement layer for this L2 layer |
| L2\_BLOCK\_TIME | Block time of your L2 layer |
| L1\_CHAIN\_ID | Chain id of your respective settlement layer for this L2 layer |
| L2\_CHAIN\_ID | Chain id of your L2 layer |
3. Generate and Secure Keys
Create and fill these four essential accounts with private keys to above created `.envrc` file:
* `Admin` (contract upgrade authority)
* `Batcher` (publishes Sequencer data to L1)
* `Proposer` (publishes L2 results to L1)
* `Sequencer` (signs blocks on the p2p network)
```bash
echo "Admin:"
cast wallet new
echo "Proposer:"
cast wallet new
echo "Batcher:"
cast wallet new
echo "Sequencer:"
cast wallet new
```
You should see an output similar to:
```bash
Admin:
Successfully created new keypair.
Address: 0xc4A01194958DE0D90A876e8A5fc9D7B530072148
Private key: 0xb8e39bd94a210e410c4024e1cc91014de45a5eb1e42f3aa99a368b5a5ac19b45
Proposer:
Successfully created new keypair.
Address: 0xFC0374Ae658e46cA4022acA179d3cb6D8e1A4934
Private key: 0xa9bc1b3f5deb1e00251df68bf86e3493b25bc5430665433546f2f9aacc748d1a
Batcher:
Successfully created new keypair.
Address: 0xD6857B5BE9468Be67d64ABaB48459378d5329b96
Private key: 0xe9cd8960fc7984a301d567b819e0c62871eb2c7239c2e66b8f319eaa45c3cbd5
Sequencer:
Successfully created new keypair.
Address: 0x33348817E4B1192D576C4f157e9a5EC93dc5392D
Private key: 0xd98b49e11e4e0be9931017831395e6644a50c36285d08e14d1a479af5ee08675
```
You'll need to fund `Admin`, `Proposer`, and `Batcher` with Sepolia ETH (0.5 ETH for `Admin`, 0.2 ETH for `Proposer`, 0.1 ETH for `Batcher`).
> **Warning**
>
> NOTE FOR PRODUCTION
> Use secure hardware for key management in production environments.
> `cast wallet` is not designed for production deployments.
4. Generate a `jwt.txt` file, which is crucial for the secure interaction between `op-node` and `op-geth` client:
```bash
openssl rand -hex 32 > jwt.txt
```
## Contract Deployment using `op-deployer`
Deploy essential L1 contracts for the chain’s functionality:
1. Build `op-deplyer`.
```bash
## op-deployer
cd op-deployer
git checkout op-deployer/v0.3.2
just build
```
2. Generate `intent.toml` and `state.json` file for deployment configuration:
```bash
## Intent and state file initialization
./bin/op-deployer init --l1-chain-id --l2-chain-ids --workdir .deployer --intent-type custom
```
Edit `intent.toml` file
```toml
configType = "custom"
l1ChainID = 11155111
fundDevAccounts = false
useInterop = false
l1ContractsLocator = "tag://op-contracts/v3.0.0"
l2ContractsLocator = "tag://op-contracts/v3.0.0"
[superchainRoles]
proxyAdminOwner = "ENTER_ADMIN_ADDRESS"
protocolVersionsOwner = "ENTER_ADMIN_ADDRESS"
guardian = "ENTER_ADMIN_ADDRESS"
[[chains]]
id = "ENTER_CHAIN_ID"
baseFeeVaultRecipient = "ENTER_ADMIN_ADDRESS"
l1FeeVaultRecipient = "ENTER_ADMIN_ADDRESS"
sequencerFeeVaultRecipient = "ENTER_ADMIN_ADDRESS"
eip1559DenominatorCanyon = 250
eip1559Denominator = 50
eip1559Elasticity = 6
operatorFeeScalar = 0
operatorFeeConstant = 0
[chains.roles]
l1ProxyAdminOwner = "ENTER_ADMIN_ADDRESS"
l2ProxyAdminOwner = "ENTER_ADMIN_ADDRESS"
systemConfigOwner = "ENTER_ADMIN_ADDRESS"
unsafeBlockSigner = "ENTER_SEQUENCER_ADDRESS"
batcher = "ENTER_BATCHER_ADDRESS"
proposer = "ENTER_PROPOSER_ADDRESS"
challenger = "ENTER_ADMIN_ADDRESS"
[chains.dangerousAltDAConfig]
useAltDA = true
daCommitmentType = "GenericCommitment"
daChallengeWindow = 160
daResolveWindow = 160
daBondSize = 1000000
daResolverRefundPercentage = 0
```
3. Deploy contracts:
```bash
## L1 contract deployment
./bin/op-deployer apply --workdir .deployer \
--l1-rpc-url \
--private-key
```
4. Generate `genesis.json`, `rollup.json` and `l1-addresses.json`:
```bash
./bin/op-deployer inspect genesis --workdir .deployer > .deployer/genesis.json
./bin/op-deployer inspect rollup --workdir .deployer > .deployer/rollup.json
./bin/op-deployer inspect l1 --workdir .deployer > .deployer/l1-addresses.json
```
## Build and Run the `op-stack` components
### `op-geth`
1. Clone [op-geth](https://github.com/ethereum-optimism/op-geth):
```bash
git clone https://github.com/ethereum-optimism/op-geth.git
cd op-geth
git checkout v1.101511.0
make geth
```
2. Move the `genesis.json` and `jwt.txt` files into its directory:
```bash
cp genesis.json ~/op-geth
cp jwt.txt ~/op-geth
```
3. Create and configure data directory
```bash
mkdir datadir
./build/bin/geth init --state.scheme=hash --datadir=datadir genesis.json
```
4. Run `op-geth`
```bash
# Set environment variables
export L2_CHAIN_ID=
## Run op-geth
./build/bin/geth \
--datadir ./datadir \
--http \
--http.corsdomain="*" \
--http.vhosts="*" \
--http.addr=0.0.0.0 \
--http.port=8545 \
--http.api=web3,debug,eth,txpool,net,engine \
--ws \
--ws.addr=0.0.0.0 \
--ws.port=8546 \
--ws.origins="*" \
--ws.api=debug,eth,txpool,net,engine \
--syncmode=full \
--gcmode=archive \
--nodiscover \
--maxpeers=0 \
--networkid=$L2_CHAIN_ID \
--authrpc.vhosts="*" \
--authrpc.addr=0.0.0.0 \
--authrpc.port=8551 \
--authrpc.jwtsecret=./jwt.txt \
--rollup.disabletxpoolgossip=true \
--state.scheme=hash
```
`op-geth` is now active, but block creation will begin once `op-node` is operational.
### `op-node`
1. Build `op-node` from the [Configure op-stack](#configure-op-stack) section above
```bash
cd op-node
git checkout op-node/v1.13.3
make op-node
```
2. Move the `rollup.json` and `jwt.txt` files into its directory:
```bash
cp rollup.json ~/op-node
cp jwt.txt ~/op-node
```
3. Run `op-node`
```bash
# Set env variable from `.envrc`
direnv allow .
## Run op-node
./bin/op-node \
--l2=http://localhost:8551 \
--l2.jwt-secret=./jwt.txt \
--sequencer.enabled \
--sequencer.l1-confs=5 \
--verifier.l1-confs=4 \
--rollup.config=./rollup.json \
--rpc.addr=0.0.0.0 \
--rpc.port=8547 \
--p2p.disable \
--rpc.enable-admin \
--p2p.sequencer.key=$GS_SEQUENCER_PRIVATE_KEY \
--l1=$L1_RPC_URL \
--l1.rpckind=$L1_RPC_KIND \
--altda.enabled=true \
--altda.da-server=$DA_SERVER_HTTP_URL \
--altda.da-service=true \
--l1.beacon.ignore=true
```
Block creation will commence once `op-node` starts processing L1 information and interfaces with `op-geth`.
To optimize synchronization and avoid network resource waste:
* Disable p2p sync (`--p2p.disable`) by default.
* Use specific command line parameters for synchronization among multiple nodes.
### `op-batcher`
1. Build `op-batcher` from the [Configure op-stack](#configure-op-stack) section above
```bash
cd op-batcher
git checkout op-batcher/v1.13.2
make op-batcher
```
2. Run `op-batcher`
```bash
# Set env variable from `.envrc`
direnv allow .
## Run op-batcher
./bin/op-batcher \
--l2-eth-rpc=http://localhost:8545 \
--rollup-rpc=http://localhost:8547 \
--poll-interval=1s \
--sub-safety-margin=6 \
--num-confirmations=1 \
--safe-abort-nonce-too-low-count=3 \
--resubmission-timeout=30s \
--rpc.addr=0.0.0.0 \
--rpc.port=8548 \
--rpc.enable-admin \
--max-channel-duration=25 \
--l1-eth-rpc=$L1_RPC_URL \
--private-key=$GS_BATCHER_PRIVATE_KEY \
--altda.enabled=true \
--altda.da-service=true \
--altda.da-server=$DA_SERVER_HTTP_URL \
--throttle-threshold=0
```
Adjust the `--max-channel-duration=n` setting to balance transaction frequency on L1 and the operational costs of the batcher. Recommended is a minimum of 2 since avail block time is 20s and ethereum's 12sec.
### `op-proposer`
1. Build `op-proposer` from the [Configure op-stack](#configure-op-stack) section above
```bash
cd op-proposer
git checkout op-proposer/v1.10.0
make op-proposer
```
2. Run `op-proposer`
```bash
# Set env variable from `.envrc`
direnv allow .
## Run op-proposer
./bin/op-proposer \
--poll-interval=10s \
--rpc.port=8560 \
--rollup-rpc=http://localhost:8547 \
--game-factory-address=$GAME_FACTORY_ADDRESS \
--game-type 1 \
--private-key=$GS_PROPOSER_PRIVATE_KEY \
--l1-eth-rpc=$L1_RPC_URL \
--allow-non-finalized \
--num-confirmations=1 \
--proposal-interval=10s \
--wait-node-sync=true \
--log.level=debug
```
## Appendix
### Acquire Sepolia ETH for Layer 2
To obtain ETH on your Rollup:
1. Go to `contracts-bedrock`:
```bash
cd ~/optimism/packages/contracts-bedrock
```
2. Find the L1 standard bridge contract address:
```bash
cat deployments/avail-optimism/L1StandardBridgeProxy.json | jq -r .address
```
3. Send Sepolia ETH to the bridge contract address.
### Why Archive Mode?
Archive mode on `op-geth`, requiring more disk space than full mode, is essential for:
1. `op-proposer` to access the full state history.
2. The explorer's functionality.
### Reinitializing op-geth
In cases of database corruption indicated by `op-node` errors or failure to find L2 heads, follow these steps:
1. Stop `op-geth`.
2. Remove the existing data:
```bash
cd ~/op-geth
rm -rf datadir/geth
```
3. Reinitialize:
```bash
build/bin/geth init --datadir=datadir genesis.json
```
4. Restart `op-geth` and then `op-node`.
## See your rollup in action
You now have a fully operational Avail-Powered Optimism-based EVM Rollup. You can interact with your Rollup the same way you'd interact with any other EVM chain. Send some transactions, deploy some contracts, and see what happens!
### Deploy a ZK Stack Validium with Avail DA
## Introduction
In this guide, we will deploy a ZK Stack validium powered by Avail DA for secure, cost-efficient, and verifiable data availability. By following along, at the end of this guide, you will have a version of a ZK Stack chain running on your machine on `localhost`.
* [Learn more about the ZK Stack](https://docs.zksync.io/zk-stack)
In this guide, you will go over the following:
* [Setting up your developer environment](#setting-up-your-developer-environment)
* [Installing & running the ZK Stack](#installing--running-the-zk-stack)
## Setting up your developer environment
Ensure you have installed the following prerequisites.
| Software | Version |
| ----------------------------------------------------------------------- | ------------------ |
| [Node.js](https://nodejs.org/en/) | Latest LTS Version |
| [Git](https://git-scm.com/) | OS Default |
| [Docker](https://www.docker.com/) | Latest |
| [Docker Compose](https://docs.docker.com/compose/) | Latest |
| [Yarn](https://classic.yarnpkg.com/lang/en/docs/install/#debian-stable) | v1.22.19 |
| [cargo-nextest](https://nexte.st/) | Latest |
| [sqlx-cli](https://crates.io/crates/sqlx-cli) | Latest |
| [Foundry](https://github.com/foundry-rs/foundry) | Latest |
| [Postgres](https://www.postgresql.org/download/) | Latest |
After executing the following commands you will have installed all the prerequisites needed and also have cloned the `zksync-era` repository.
Installation commands are based on **Ubuntu 20.04 LTS**:
> The below installation commands are taken from [setup-dev.md](https://matter-labs.github.io/zksync-era/core/latest/guides/setup-dev.html) from the `zksync-era` repository. For any more troubleshooting, please refer to the original repository.
```bash
# For VMs only! They don't have SSH keys, so we override SSH with HTTPS
git config --global url."https://github.com/".insteadOf git@github.com:
git config --global url."https://".insteadOf git://
# Rust
curl --proto '=https' --tlsv1.2 -sSf https://sh.rustup.rs | sh
# NVM
curl -o- https://raw.githubusercontent.com/nvm-sh/nvm/v0.39.5/install.sh | bash
# All necessary stuff
sudo apt-get update
sudo apt-get install -y build-essential pkg-config cmake clang lldb lld libssl-dev libpq-dev apt-transport-https ca-certificates curl software-properties-common
# Install docker
curl -fsSL https://download.docker.com/linux/ubuntu/gpg | sudo apt-key add -
sudo add-apt-repository "deb [arch=amd64] https://download.docker.com/linux/ubuntu focal stable"
sudo apt install docker-ce
sudo usermod -aG docker ${USER}
# Start docker.
sudo systemctl start docker
## You might need to re-connect (due to usermod change).
# Node & yarn
nvm install 20
# Important: there will be a note in the output to load
# new paths in your local session, either run it or reload the terminal.
npm install -g yarn
yarn set version 1.22.19
# For running unit tests
cargo install cargo-nextest
# SQL tools
cargo install sqlx-cli --version 0.8.1
# Foundry ZKsync
curl -L https://raw.githubusercontent.com/matter-labs/foundry-zksync/main/install-foundry-zksync | bash
foundryup-zksync
# Non CUDA (GPU) setup, can be skipped if the machine has a CUDA installed for provers
# Don't do that if you intend to run provers on your machine. Check the prover docs for a setup instead.
echo "export ZKSYNC_USE_CUDA_STUBS=true" >> ~/.bashrc
# You will need to reload your `*rc` file here
```
## Installing & running the ZK Stack
### 1. Install ZK Stack CLI
[ZK Stack CLI](https://github.com/matter-labs/zksync-era/tree/main/zkstack_cli) is a toolkit that facilitates the creation and management of ZK Stacks. To install `zkstack`, run the following command:
```bash
curl -L https://raw.githubusercontent.com/matter-labs/zksync-era/main/zkstack_cli/zkstackup/install | bash
source ~/.bashrc
zkstackup
```
### 2. Clone the zksync-era repository from github
```bash
git clone git@github.com:matter-labs/zksync-era.git
cd zksync-era
```
* Install submodules:
```bash
git submodule update --init --recursive
```
### 3. Running the containers
* We can start running the containers and ecosystem by first cleaning the docker containers and then running the following command:
```bash
zkstack dev clean all
```
Now, we are ready to start the DB and Reth containers using `zkstack`. The great thing about this is that `zkstack` handles everything on its own. If you encounter any errors, just make sure your ports are not busy and the `observability` feature is disabled during container setting up.
```bash
zkstack containers
```
### 4. Initialize Elastic Chain ecosystem
* We need to create an Elastic Chain ecosystem now. We will choose all the default options.
```bash
zkstack ecosystem init
```
* Once we have successfully initialized an elastic chain ecosystem, we can create new chains and can choose to create a Validium when prompted. For simplicity, we will choose the default options.
```bash
zkstack chain create
```
* Once we have created the chain, we have to finally initialize it and deploy the contracts of the ZK chain:
```bash
zkstack chain init
```
### 5. Configure Avail DA
> **Note**
>
> **BEFORE YOU BEGIN**
> Before configuring Avail DA, complete these essential steps:
>
> 1. [`Create an Avail Account`](/docs/da/user-guides/accounts): Set up your account to interact with the Avail network
> 2. [`Get Testnet Tokens`](/docs/da/build/interact/faucet): Obtain AVAIL tokens on the Turing testnet for transactions
> 3. [`Create an AppID`](/docs/da/build/interact/app-id): Required to identify your application on the Avail network
After completing these prerequisites, configure your chain to use Avail as the data availability layer by updating two configuration files with the appropriate settings.
Please choose between the [Full Client](#full-client) or [Gas Relay](#gas-relay) configuration below.
#### Full Client
Using the full client requires you to [create an AppID](/docs/da/build/interact/app-id) and maintain the Avail balance in your designated data submission account.
1. Add the following to your chain's general config: `zksync-era/chains/$CHAIN_NAME/configs/general.yaml`
2. Add the following to your chain's secrets config: `zksync-era/chains/$CHAIN_NAME/configs/secrets.yaml`
```yaml
da:
avail:
seed_phrase: YOUR_SEED_PHRASE
```
#### Gas Relay
The gas relay API is in ***private beta***. Using the gas relay allows you to post data to Avail using a relayer and pay fees in a different token (only if supported) without needing to maintain a balance. It is recommended to [create an AppID](/docs/da/build/interact/app-id) to use within the gas relay service. Please contact the Avail team if you want access to the gas relay API.
1. Add the following to your chain's general config: `zksync-era/chains/$CHAIN_NAME/configs/general.yaml`
2. Add the following to your chain's secrets config: `zksync-era/chains/$CHAIN_NAME/configs/secrets.yaml`
```yaml
da:
avail:
gas_relay_api_key: YOUR_API_KEY
```
### 6. Run ZK chain
Start the server which will be running the ZK chain. By default, it will be running on `localhost:3150`.
```bash
zkstack server --chain $CHAIN_NAME
```
Your ZK chain is now running and you can start using it. For any troubleshooting or issues, please refer to the original repository which you can find [here](https://docs.zksync.io/zk-stack/running-a-zk-chain/quickstart).
### Building on the OP Stack with Avail
The OP Stack, instrumental for the development of L2 rollups and maintained by the [Optimism Collective](https://www.optimism.io/), is now extendable with Avail as an alternative data availability layer. Developers working with the OP Stack can utilize Avail to address data availability concerns, enhancing the stack's scalability while simultaneously cutting down data handling costs.
## Transaction Lifecycle
1. **Transaction Submission**
* **Process**: Users send transactions to the Sequencer.
* **Role**: The Sequencer temporarily holds the transactions before they are batched.
2. **Batch Processing**
* **Component**: `op-batcher`
* **Function**: Collects transactions into batches for more efficient processing.
3. **Data Availability with Avail**
* **Component**: `op-plasma`
* **Function**: Sidecar run alongside `op-batcher`. Sends the transaction batches to Avail's blockchain, ensuring data availability.
4. **Transaction Reference Creation**
* **Outcome**: Avail returns a unique transaction reference to `op-avail`.
5. **Calldata Submission to Ethereum**
* **Component**: `op-batcher`
* **Action**: Submits the transaction reference from Avail as `calldata` to Ethereum.
6. **Verifier and Rollup Node Integration**
* **Component**: `op-node`
* **Function**: Queries data commitment from Ethereum and fetches L2 transaction data through `op-avail`, completing the data availability cycle for OP Stack transactions.
## Interoperability and Fault Proofing
The Avail OP Stack will evolve to integrate Optimism's fault proof system and the OP Stack sequencer's decentralization efforts. The Avail data root is posted to Ethereum through the Vector data attestation bridge, allowing for seamless verification of data availability consensus.
## Developer Onboarding
Developers can start experimenting with the Avail OP Stack today by following the guide in the [Avail OP Stack](https://github.com/availproject/op-evm) repo. For support and updates, join the Avail Forum or Discord.
### Building on the Polygon zkEVM with Avail
Polygon zkEVM, when combined with Avail in a Validium setup, provides a robust solution for scaling Ethereum applications. Here's an overview of this setup:
### Transaction Lifecycle
1. **Transaction Submission**
* **Process**: Users initiate transactions by sending them to the Validium Sequencer.
* **Role**: The Sequencer temporarily holds these transactions before they are processed.
2. **Batch Processing**
* **Component**: `validium-batcher`
* **Function**: Transactions are grouped into batches to optimize processing efficiency.
3. **Data Availability with Avail**
* **Component**: `avail-validator`
* **Function**: Transaction batches are transmitted to Avail's blockchain, where they are validated and made available for further processing within the Validium environment.
4. **Proof Generation**
* **Component**: `zkevm-prover`
* **Function**: A dedicated prover generates cryptographic proofs for the Validium network, ensuring the validity of transactions and data availability on Ethereum.
5. **Transaction Commitment to Ethereum**
* **Component**: `validium-bridge`
* **Action**: Validity proofs and transaction commitments are submitted to the Ethereum network, anchoring the Validium state on the Ethereum mainnet.
6. **Verifier and Rollup Node Integration**
* **Component**: `validium-node`
* **Function**: The Validium node queries Ethereum for transaction data and commitments, maintaining data availability and enabling users to interact with the Validium chain securely.
### Interoperability and Fault Tolerance
The combination of Polygon zkEVM and Avail in the Validium setup is designed to seamlessly integrate with Polygon's fault-tolerant system. This ensures the robustness of the Validium Sequencer while enabling efficient cross-chain communication and interoperability.
### Developer Onboarding
Developers interested in leveraging Polygon zkEVM with Avail within the Validium framework can begin by referring to the comprehensive guide provided in the [Avail Validium GitHub repository](https://github.com/availproject/validium-contracts). For ongoing support and updates, developers are encouraged to join the Avail community forum or Discord channel.
### How to Use Polygon zkEVM with Avail
## Introduction
Embark on setting up your own Polygon zkEVM network, leveraging Avail as the data availability layer. This guide is tailored for deploying on Ethereum's Sepolia testnet and integrating with the Avail Turing testnet. To gain a comprehensive understanding of Polygon zkEVM, review the [Polygon zkEVM documentation](https://wiki.polygon.technology/docs/zkevm/).
In this guide, you will conduct the following:
* [Introduction](#introduction)
* [Prerequisites](#prerequisites)
* [Hardware Requirements](#hardware-requirements)
* [Network Details](#network-details)
* [Launch an Avail-Powered zkEVM](#launch-an-avail-powered-zkevm)
* [Deploy the Contracts](#deploy-the-contracts)
* [Deploy the Node](#deploy-the-node)
* [Setup the Prover](#setup-the-prover)
* [Configure the Bridge](#configure-the-bridge)
## Prerequisites
Ensure you have installed the following software.
> Installation commands are based on Ubuntu 20.04 LTS:
| Software | Version |
| -------------------------------------------------- | ------------------ |
| [Node.js](https://nodejs.org/en/) | Latest LTS Version |
| [Git](https://git-scm.com/) | OS Default |
| [Golang](https://go.dev/) | 1.19 |
| [Docker](https://www.docker.com/) | Latest |
| [Docker Compose](https://docs.docker.com/compose/) | Latest |
```bash
# Install Git
sudo apt install -y git
# Install Node.js (using NVM)
curl -o- https://raw.githubusercontent.com/nvm-sh/nvm/v0.39.1/install.sh | bash
export NVM_DIR="$([ -z "${XDG_CONFIG_HOME-}" ] && printf %s "${HOME}/.nvm" || printf %s "${XDG_CONFIG_HOME}/nvm")"
[ -s "$NVM_DIR/nvm.sh" ] && \. "$NVM_DIR/nvm.sh" # This loads nvm
nvm install --lts
# Install Golang
wget https://go.dev/dl/go1.19.linux-amd64.tar.gz
tar -C /usr/local -xzf go1.19.linux-amd64.tar.gz
echo "export PATH=$PATH:/usr/local/go/bin" >> ~/.bashrc
source ~/.bashrc
# Install Docker and Docker Compose
sudo apt-get update
sudo apt-get install -y docker-ce docker-ce-cli containerd.io docker-compose-plugin
```
### Hardware Requirements
Both the real and mock provers are compatible exclusively with x86 architectures. They are not designed to operate on ARM architecture machines, including Apple Silicon devices, even within Dockerized environments.
| Component | Minimum Requirements | Recommended Setup | Suggested AWS Instance |
| ----------- | ---------------------------------- | ----------------------------------- | ---------------------- |
| Mock Prover | 4-core CPU, 8GB RAM, 50 GB SSD | 8-core CPU, 16GB RAM, 60 GB SSD | r6a.xlarge |
| Real Prover | 96-core CPU, 768GB RAM, 120 GB SSD | 96-core CPU, 1000GB RAM, 140 GB SSD | r6a.24xlarge |
Running the Polygon zkEVM solution suite may lead to storage issues, primarily due to excessive Docker logs. To mitigate this, you can customize the Docker daemon's behavior by referring to the first answer [here](https://stackoverflow.com/a/59329638). Choose a configuration that best suits your needs.
* For a devnet setup with limited state growth and Docker logs, we recommend a minimum disk size of approximately 50GB.
* If you plan to run a real prover, it's advisable to allocate a minimum disk size of around 120GB for your devnet setup.
* Keep in mind that these recommendations may vary based on your specific use case and requirements.
> **Note**
>
> ADDITIONAL STORAGE CONSIDERATIONS
> In production environments with a high transaction volume, your storage requirements may increase significantly. It's recommended to utilize an EBS-like data storage solution to ensure scalability, allowing you to add more storage as needed.
### Network Details
Before diving into the setup, ensure you have the following network details:
| Service | URL |
| -------------- | -------------------------------------------------------------------------------- |
| Explorer | [http://zkevm-demo.avail.tools/](http://zkevm-demo.avail.tools/) |
| RPC | [http://zkevm-demo-rpc.avail.tools/](http://zkevm-demo-rpc.avail.tools/) |
| Bridge service | [https://zkevm-demo-bridge.avail.tools/](https://zkevm-demo-bridge.avail.tools/) |
## Launch an Avail-Powered zkEVM
> **Warning**
>
> USAGE DISCLAIMER
> The prover and verifier components maintain their original security guarantees. However, please note that the data attestation verification during sequencing or any aspect of the `validium-node` related to data availability on Avail has not undergone an audit. Exercise caution when using this program. It is distributed without any warranty, nor an implied warranty of merchantability or fitness for a particular purpose.
> Please be aware that some aspects of this guide may differ from the original source due to the unique nature of the Avail validium implementation. For zkEVM node-specific configurations and troubleshooting, refer to the [official Polygon documentation](https://wiki.polygon.technology/docs/zkevm/setup-zkevm/).
### Deploy the Contracts
1. Clone the `validium-contracts` repository and install dependencies:
```bash
git clone git@github.com:availproject/validium-contracts.git
cd validium-contracts
npm i
```
2. Set up the environment and deployment parameters:
* Update `.env` as per `.env.example`.
```bash showLineNumbers filename=".env.example"
SEPOLIA_PROVIDER="eth_sepolia_rpc_url"
PRIVATE_KEY="your_private_key_here"
ETHERSCAN_API_KEY="your_etherscan_api_key_here"
```
* Fill in `deploy_parameters.json` following `deploy_parameters.json.example`:
* Specify the `trustedSequencer` address. This address represents the Sequencer that is responsible for sequencing batches.
* Define the `trustedAggregator` address. This address represents the Aggregator that handles the submission of proofs.
* Fill in the following fields with the respective addresses that will control the contracts: `admin`, `zkEVMOwner`, `timelockAddress`, and `initialZkEVMDeployerOwner`.
* Enter the private key for the deployer in the `deployerPvtKey` field.
```json showLineNumbers filename="deployment/deploy_parameters.json"
{
"realVerifier": false,
"trustedSequencerURL": "http://zkevm-json-rpc:8123",
"networkName": "zkevm",
"version": "0.0.1",
"trustedSequencer": "0x123456789abcdef0123456789abcdef0123456789",
"chainID": 1001,
"trustedAggregator": "0xabcdef1234567890abcdef1234567890abcdef12",
"trustedAggregatorTimeout": 604799,
"pendingStateTimeout": 604799,
"forkID": 5,
"admin": "0x23456789abcdef0123456789abcdef0123456789",
"zkEVMOwner": "0x3456789abcdef0123456789abcdef0123456789",
"timelockAddress": "0x456789abcdef0123456789abcdef0123456789",
"minDelayTimelock": 3600,
"salt": "0x0000000000000000000000000000000000000000000000000000000000000000",
"initialZkEVMDeployerOwner": "0x56789abcdef0123456789abcdef0123456789",
"maticTokenAddress": "0x6789abcdef0123456789abcdef0123456789abcdef",
"daBridgeRouterAddress": "0x789abcdef0123456789abcdef0123456789abcdef",
"zkEVMDeployerAddress": "",
"deployerPvtKey": "your_deployer_private_key_here",
"maxFeePerGas": "",
"maxPriorityFeePerGas": "",
"multiplierGas": ""
}
```
3. Execute deployment scripts on the Sepolia network:
```bash
npx hardhat run --network sepolia deployment/2_deployPolygonZKEVMDeployer.js
npx hardhat run --network sepolia deployment/3_deployContracts.js
```
You should generate a `deploy_output.json` file.
4. Verify the deployed contracts:
```bash
npx hardhat run --network sepolia deployment/verifyzkEVMDeployer.js
npx hardhat run --network sepolia deployment/verifyContracts.js
```
> **Note**
>
> GENERATING A NEW CONTRACT SUITE
To create a fresh set of contracts, you can either employ a new private key or increment the value of the `salt` parameter in your configuration. After making this change, simply re-execute the deployment commands to generate the new contract suite.
### Deploy the Node
> **Warning**
>
> MOCK PROVER FUNCTIONALITY
> The Mock Prover does not generate any zero-knowledge proofs. Instead, it simply validates any generated state root as correct. The mock verifier contract operates similarly, accepting all validity proofs without actual verification.
1. Clone the `validium-node` repository for node setup:
```bash
git clone git@github.com:availproject/validium-node.git
cd validium-node
```
2. Generate a secure account keystore file for Ethereum L1 transactions:
```bash
docker run --rm hermeznetwork/zkevm-node:latest sh -c "/app/zkevm-node encryptKey --pk=[your private key] --pw=[password to encrypt file] --output=./keystore; cat ./keystore/*" > account.keystore
```
* Replace `[your private key]` with your Ethereum L1 account private key.
* Replace `[password to encrypt file]` with a password used for file encryption. This password must be passed to the Node later via the env variable `ZKEVM_NODE_ETHERMAN_PRIVATEKEYPASSWORD`.
3. Update configuration files for the node:
* Modify `test.avail.config.json`, `test.node.config.toml`, and `test.genesis.config.json` based on the provided example files.
Click to view the avail configuration example
```json showLineNumbers filename="test/config/test.avail.example.config.json"
{
"seed": "test test test test test test test test test test test junk",
"api_url": "wss://turing-rpc.avail.so/ws",
"app_id": 1,
"destination_domain": 1000,
"destination_address": "0x000000000000000000000000305222c4DdB86FfA9fa9Aa0A479705577E3c4d33",
"timeout": 200
}
```
Click to view the node configuration example
```bash showLineNumbers filename="test/config/test.node.config.example.toml"
IsTrustedSequencer = true
[Log]
Environment = "development" # "production" or "development"
Level = "debug"
Outputs = ["stderr"]
[Pool]
AccountQueue = 200
FreeClaimGasLimit = 1500000
IntervalToRefreshBlockedAddresses = "10s"
IntervalToRefreshGasPrices = "5s"
MaxTxBytesSize=100132
MaxTxDataBytesSize=100000
DefaultMinGasPriceAllowed = 1000000000
MinAllowedGasPriceInterval = "10s"
PollMinAllowedGasPriceInterval = "15s"
[Pool.DB]
User = "pool_user"
Password = "pool_password"
Name = "pool_db"
Host = "zkevm-pool-db"
Port = "5432"
EnableLog = false
MaxConns = 200
[Etherman]
URL = "http://zkevm-mock-l1-network:8545"
MultiGasProvider = false
[Etherscan]
ApiKey = ""
[RPC]
Host = "0.0.0.0"
Port = 8123
ReadTimeout = "1000s"
WriteTimeout = "1000s"
MaxRequestsPerIPAndSecond = 5000
SequencerNodeURI = ""
EnableL2SuggestedGasPricePolling = true
BatchRequestsEnabled = true
BatchRequestsLimit = 1000
[RPC.WebSockets]
Enabled = true
Port = 8133
[Synchronizer]
SyncInterval = "10s"
SyncChunkSize = 100
TrustedSequencerURL = "" # If it is empty or not specified, then the value is read from the smc.
[Sequencer]
WaitPeriodPoolIsEmpty = "1s"
LastBatchVirtualizationTimeMaxWaitPeriod = "10s"
BlocksAmountForTxsToBeDeleted = 50
FrequencyToCheckTxsForDelete = "1h"
TxLifetimeCheckTimeout = "10m"
MaxTxLifetime = "3h"
[Sequencer.Finalizer]
GERDeadlineTimeout = "2s"
ForcedBatchDeadlineTimeout = "5s"
SleepDuration = "100ms"
ResourcePercentageToCloseBatch = 10
GERFinalityNumberOfBlocks = 0
ClosingSignalsManagerWaitForCheckingL1Timeout = "10s"
ClosingSignalsManagerWaitForCheckingGER = "10s"
ClosingSignalsManagerWaitForCheckingForcedBatches = "10s"
ForcedBatchesFinalityNumberOfBlocks = 0
TimestampResolution = "10s"
StopSequencerOnBatchNum = 0
[Sequencer.DBManager]
PoolRetrievalInterval = "500ms"
L2ReorgRetrievalInterval = "5s"
[Sequencer.EffectiveGasPrice]
MaxBreakEvenGasPriceDeviationPercentage = 10
L1GasPriceFactor = 0.25
ByteGasCost = 16
MarginFactor = 1
Enabled = false
[SequenceSender]
WaitPeriodSendSequence = "60s"
LastBatchVirtualizationTimeMaxWaitPeriod = "60s"
MaxTxSizeForL1 = 131072
L2Coinbase = "0xf39fd6e51aad88f6f4ce6ab8827279cfffb92266"
PrivateKey = {Path = "/pk/sequencer.keystore", Password = "testonly"}
[Aggregator]
Host = "0.0.0.0"
Port = 50081
RetryTime = "5s"
VerifyProofInterval = "10s"
TxProfitabilityCheckerType = "acceptall"
TxProfitabilityMinReward = "1.0"
ProofStatePollingInterval = "5s"
SenderAddress = "0x70997970c51812dc3a010c7d01b50e0d17dc79c8"
CleanupLockedProofsInterval = "2m"
GeneratingProofCleanupThreshold = "10m"
[EthTxManager]
ForcedGas = 1_000_000
PrivateKeys = [
{Path = "/pk/sequencer.keystore", Password = "testonly"},
{Path = "/pk/aggregator.keystore", Password = "testonly"}
]
[L2GasPriceSuggester]
Type = "default"
UpdatePeriod = "10s"
Factor = 0.5
DefaultGasPriceWei = 1000000000
MaxGasPriceWei = 0
[MTClient]
URI = "zkevm-prover:50061"
[Executor]
URI = "zkevm-prover:50071"
MaxGRPCMessageSize = 99999999999
[Metrics]
Host = "0.0.0.0"
Port = 9091
Enabled = true
ProfilingHost = "0.0.0.0"
ProfilingPort = 6060
ProfilingEnabled = true
[EventLog]
[EventLog.DB]
User = "event_user"
Password = "event_password"
Name = "event_db"
Host = "zkevm-event-db"
Port = "5432"
EnableLog = false
MaxConns = 200
[HashDB]
User = "prover_user"
Password = "prover_pass"
Name = "prover_db"
Host = "zkevm-state-db"
Port = "5432"
EnableLog = false
MaxConns = 200
[State]
AccountQueue = 200
[State.DB]
User = "state_user"
Password = "state_password"
Name = "state_db"
Host = "zkevm-state-db"
Port = "5432"
EnableLog = false
MaxConns = 200
[State.Batch]
[State.Batch.Constraints]
MaxTxsPerBatch = 300
MaxBatchBytesSize = 120000
MaxCumulativeGasUsed = 30000000
MaxKeccakHashes = 2145
MaxPoseidonHashes = 252357
MaxPoseidonPaddings = 135191
MaxMemAligns = 236585
MaxArithmetics = 236585
MaxBinaries = 473170
MaxSteps = 7570538
[State.Batch.ResourceWeights]
WeightBatchBytesSize = 1
WeightCumulativeGasUsed = 1
WeightKeccakHashes = 1
WeightPoseidonHashes = 1
WeightPoseidonPaddings = 1
WeightMemAligns = 1
WeightArithmetics = 1
WeightBinaries = 1
WeightSteps = 1
```
4. Build the Docker image and launch the node:
```bash
make build-docker
cd test
make run
```
### Setup the Prover
1. To switch to the real verifier mode, modify the `deploy_parameters.json` file:
```json
"realVerifier": true
```
2. Utilize the following commands to download and unpack the configuration file:
> **Note**
>
> **SIZE: \~70GB+**
> Accelerate the download process by using a multi-thread downloader like Axel.
```bash
wget https://de012a78750e59b808d922b39535e862.s3.eu-west-1.amazonaws.com/v2.0.0-RC4-fork.5.tgz
tar -xzvf v2.0.0-RC4-fork.5.tgz
rm -rf config
mv v2.0.0-RC4-fork.5.tgz validium-node/test/config/prover
```
3. Ensure the `docker-compose.yml` includes proper file mappings for the prover configuration.
4. Modify the `test.prover.config.json` to enable actual prover functionality:
```json showLineNumbers filename="test.prover.config.json"
"runAggregatorClient": true,
"runAggregatorClientMock": false
```
### Configure the Bridge
The zkEVM bridge service is a microservice that simplifies bridging between L1 and L2 by auto-claiming L1 transactions on L2 and generating necessary Merkle proofs. While optional for running a Validium, it enhances the ease of bridging transactions.
> The Nomad DA bridge is only operational on Sepolia, limiting validium's data attestation to this chain. Alternatively, you can simulate data attestation and deploy on your preferred blockchain
1. Clone the bridge repository:
```bash
git clone git@github.com:availproject/validium-bridge-service.git
cd bridge
```
2. Fill in `config/config.local.toml` following `config.local.example.toml`:
> Unless you changed the genesis file, the L2 bridge address should remain the same.
> The address provided by default in the configuration is allocated ETH in the validium test setup for autoclaiming on L2. If a different address is used, it might require ETH. Similarly, in a production setup where ETH is not arbitrarily minted, you will need to manually fund the `zkevm-bridge-service` autoclaiming account.
| Parameter | Example Value |
| ----------------------------------- | ---------------------------------------------- |
| `L1URL` | `"http://zkevm-mock-l1-network:8545"` |
| `GenBlockNumber` | `1` |
| `PolygonBridgeAddress` | `"0xff0EE8ea08cEf5cb4322777F5CC3E8A584B8A4A0"` |
| `PolygonZkEVMGlobalExitRootAddress` | `"0x2279B7A0a67DB372996a5FaB50D91eAA73d2eBe6"` |
| `L2PolygonBridgeAddresses` | `"0xff0EE8ea08cEf5cb4322777F5CC3E8A584B8A4A0"` |
Click to view the bridge configuration example
```bash showLineNumbers filename="config/config.local.example.toml"
[Log]
Level = "debug"
Outputs = ["stdout"]
[SyncDB]
Database = "postgres"
User = "test_user"
Password = "test_password"
Name = "test_db"
Host = "zkevm-bridge-db"
Port = "5432"
MaxConns = 20
[ClaimTxManager]
Enabled = true
FrequencyToMonitorTxs = "1s"
PrivateKey = {Path = "/pk/keystore.claimtxmanager", Password = "testonly"}
RetryInterval = "1s"
RetryNumber = 10
AuthorizedClaimMessageAddresses = ["0x90F79bf6EB2c4f870365E785982E1f101E93b906"]
[Etherman]
L1URL = "http://zkevm-mock-l1-network:8545"
L2URLs = ["http://zkevm-json-rpc:8123"]
[Synchronizer]
SyncInterval = "10s"
SyncChunkSize = 100
[BridgeController]
Store = "postgres"
Height = 32
[BridgeServer]
GRPCPort = "9090"
HTTPPort = "8080"
CacheSize = 100000
DefaultPageLimit = 25
MaxPageLimit = 100
BridgeVersion = "v1"
[BridgeServer.DB]
Database = "postgres"
User = "test_user"
Password = "test_password"
Name = "test_db"
Host = "zkevm-bridge-db"
Port = "5432"
MaxConns = 20
[NetworkConfig]
GenBlockNumber = 1
PolygonBridgeAddress = "0xff0EE8ea08cEf5cb4322777F5CC3E8A584B8A4A0"
PolygonZkEVMGlobalExitRootAddress = "0x2279B7A0a67DB372996a5FaB50D91eAA73d2eBe6"
L2PolygonBridgeAddresses = ["0xff0EE8ea08cEf5cb4322777F5CC3E8A584B8A4A0"]
```
3. Build and run the Docker image using the following commands:
```bash
make build-docker
make run
```
4. Once the Docker image is running, it serves as a microservice to detect L1 and L2 bridge transactions. You can check if the API is active by accessing the `/api` endpoint.
* **Generate Merkle Proofs**: Use the /merkle-proof endpoint to generate the necessary Merkle proofs for bridging transactions.
* **Additional Endpoints**: The microservice provides other endpoints for various functionalities, such as detecting bridge transactions for specific accounts.
* **Updating Code**: If you need to modify any part of the code, remember that each change necessitates a new build. To update and rerun the service, execute the `make build-docker && make run` commands.
### Avail Transparency Report
Avail Transparency Reports (ATR) are simple summaries of upcoming or executed changes made to the Avail Network.
ATRs include:
* The proposed changes
* Code (where necessary)
* Potential merits to the network
* Resources (If any)
ATRs will be posted on the [Avail Community Forum](https://forum.availproject.org/c/governance/avail-transparency-report/34) under the ATR sub-category in the Governance section.
> *Given the sensitivity of emergency changes, ATRs will be posted for community transparency on the forum after the changes have been made.*
### Avail Improvement Proposal (AIP)
The Avail Improvement Proposal (AIP) is a standard format for community members to propose changes to the Avail network.
Anyone can propose changes to the Avail stack, including the consensus and data availability layers, the peer-to-peer layer, and the interface layer that dictates how rollups communicate with Avail.
AIPs are submitted, discussed and moderated on the [Avail Community Forum](https://forum.availproject.org/).
## Creating an AIP
Please create an AIP following the template below:
* **Metadata**: RFC 822 style headers containing metadata about the AIP, a short descriptive title (max. 44 words), a description (max. 140 words), and the author details.
* **Technical Summary**: A short technical summary providing a human-readable version of the specification section. By reading the summary alone, someone should be able to grasp what the proposal entails.
* **Motivation**: A clear explanation of why the existing protocol specification is insufficient.
* **Technical Specification**: The technical specification should describe the syntax and semantics of any new feature. It should include all relevant code, github pull requests (if any) and other details important for execution. The specification should be detailed enough to enable competing, interoperable implementations for Avail.
* **Rationale and Reasoning (Optional)**: The rationale elaborates on the specification by explaining the reasoning behind the design and the choices made during the design process. It could discuss alternative ideas that were considered and link to any related work.
* **Backwards Compatibility (Optional)**: For AIPs introducing backwards incompatibilities, this section must describe these incompatibilities and their consequences. The AIP must explain how the author proposes to handle these incompatibilities. If the proposal does not introduce any backwards incompatibilities, this section can be omitted.
* **Test Cases (Optional)**: AIPs affecting consensus changes require test cases. This section can be omitted for non-core proposals.
* **Security Considerations or Risks**: Please discuss relevant security implications and considerations. This section should provide critical information relating to security, expose potential risks, and be used throughout the proposal's life-cycle. AIPs without a "Security Considerations" section will be rejected.
* **Copyright Waiver**: All AIPs must be in the public domain. The copyright waiver MUST link to the license file and use the following wording: Copyright and related rights waived via CC0.
## Submitting an AIP
Once an AIP has been created, it is submitted by the proposer on the [Governance section](https://forum.availproject.org/c/governance/32) of the Avail Forum.
The following statuses will be assigned to monitor the progress of an AIP through the governance process. These status will be added to the AIP entries on the forum:
1. **Proposal under discussion**: Proposals which follow the AIP template and forum guidelines will be open to discussion.
2. **AIP Not Assigned**: An AIP may not be assigned. This is likely to happen when the AIP is too unfocused, broad, a duplication of effort, being technically unsound, not providing proper motivation or addressing backwards compatibility, or not in keeping with Avail's governance values and [community code of conduct](https://forum.availproject.org/faq).
3. **Technical Committee Review**: This status will be assigned by the governance facilitator when the AIP is ready for Technical Committee Review.
> After successful onchain voting by the Technical Committee, the AIP will be queued for execution.
4. **AIP Executed**: An ATR will be posted by the Technical Committee outlining the final execution specs and timelines for the community to track.
### Other Statuses:
**Stagnant**: Any AIP in review or voting that remains inactive for 6 months or more is moved to Stagnant. Authors or the governance facilitators can resurrect a proposal from this state by moving it back to active. If not resurrected, a proposal may stay forever in this status.
**Withdrawn**: The AIP Author(s) have withdrawn the proposed AIP before the Technical Committee Voting. This state has finality and can no longer be resurrected using this AIP number. If the idea is pursued at a later date, it is considered a new proposal.
**Ongoing**: A special status for AIPs designed to be continually updated and not reach a state of finality. This status caters to dynamic AIPs that require ongoing updates.
### Governance Phase 1 Overview
This is the initial phase of Avail's governance. This initial phase provides the community with a clear way to propose,
discuss and keep up to date with changes to the Avail network.
It seeks to provide the Avail community with a meaningful way to discuss, propose and
challenge network upgrades while ensuring that malicious actors cannot dominate the network.
The initial governance framework has been put in place with the release of Avail DA on mainnet, and will continue to evolve with the network over time.
## Outline
The goal during this first phase is to establish the initial governance structure, so the Avail community can propose on-chain upgrades to the Avail network.
Avail Governance V1 includes the following:
* Establish the role of the Avail community forum for community governance and coordination.
* Establish Avail Improvement Proposals (AIPs) a simple way for community members to propose on-chain upgrades.
* Establish Avail Transparency Reports (ATRs), a summary used to communicate upcoming or executed upgrades made to the Avail DA Network.
* Establish the Avail Technical Committee and their role in on-chain governance.
* Outline Avail's Technical Committee values.
## Role of the Forum
[The Avail forum](https://forum.availproject.org/) is a place where anyone including developers, validators, community members, and projects utilizing Avail can discuss and propose changes to the Avail Network.
## Governance Process
The Avail Forum is also used to discuss changes to Avail and the Avail Improvement Proposal
(AIP) process lays out a formal way to request changes. General discussions about potential
changes to the network take place on the forum where you can request feedback from the
community prior to writing and submitting an AIP.
## The AIP Process
The AIP process for regular changes is very simple, and can be understood via this diagram:
> **Warning**
>
> **AN IMPORTANT NOTE ON EMERGENCY CHANGES**
> The technical committee can fast track certain critical upgrades in case of an emergency, such as resolving a critical vulnerability. In order to maintain transparency, ATRs will be submitted after the changes have been implemented and deployed to protect any sensitive information, and so the community has visibility over emergency changes that take place.
## Community Feedback on Governance Process
If you have feedback or recommendations on how the Avail governance process should be improved please share them on the [Avail community forum](https://forum.availproject.org/).
### Technical Committee
The Technical Committee consists of 7 members which can perform both Emergency and Regular actions. For on-chain actions to be deployed, they must be signed for on-chain by 5/7 Technical Committee members. The Technical Committee will have more members from the community and will introduce voting parameters in the upcoming Governance phases.
The composition of the Technical Committee takes into account several parameters such as member responsiveness, technical competence, social connections, reputation, OpSec practices, geographic diversity and voice from different work streams.
The technical committee members are:
| **Committee Member** | **Workstream** | **Address** |
| -------------------- | --------------- | ------------------------------------------------ |
| **Anurag** | Founder | 5HQrpJz56YGbbrdx2zuHnHswgG4DtDXHXuRdzcHmwWjV6ZCj |
| **Prabal** | Founder | 5HpXW1Hf8Y9TQ2nkPXDRJts4TCAhJkSLaSLg3b5PyGSFstce |
| **Marko** | Node management | 5D58at8TNNJTMhk9uSGDC1mMibifh8wBtg7ZA7kbXmYKhnVP |
| **Jakub** | Engineering | 5G22uXJAhBjsyD4G3faNsrV8hCrbbeQYwq8v9jXQG5uLzNCc |
| **Toufeeq** | Substrate | 5CoVaWrZnaV3BSeUJCA8Ca3SPMJDtjT1zPvZkzovkxJU7dkr |
| **Piyush** | Engineering | 5FWvYmrz6ZupPjG6PMJhm3XPmhf8QLUELUbudH8oEtDwfn2n |
| **Palak** | Strategy | 5EEwFNeCahA19W99mX3Fedh3q9b9G6MADZzv1myQi2VW6daq |
## Technical Committee Values
* **Secure**: The safety and security of the users should always be the top priority for the Technical Committee, and its decisions should reflect that commitment.
* **Transparent**: The Technical Committee is committed to transparency and accountability in its actions and decision-making processes. To this end, Avail Transparency Reports (ATRs) are published on the community forum to inform the community of the Committee's activities and upcoming changes.
* **Lean**: The goal for the initial phase of community governance is to be agile and easy for the community to understand and participate in.
* **Fair**: The Committee is responsible for ensuring that all proposals submitted are evaluated fairly and without bias. This is essential to maintaining trust and confidence in the Committee and its decision-making processes whilst keeping social consensus as decentralized as possible.
In addition to upholding these core values, the Technical Committee seeks to work with the community to identify areas for improvement and implement upgrades.
### How to Nominate
> **Note**
>
> PREREQUISITES
> The only prerequisite for direct nomination on Avail DA is that you have an Avail DA
> compatible wallet with a minimum of 1000 AVAIL in it.
> **Note**
>
> **UNBONDING PERIOD**
> There is an unbonding period for AVAIL staked on the Avail network, which serves as a security measure to ensure that validators and nominators are accountable for their previous participation in the security of the network.
>
> * The unbonding period in Avail is **28 days**.
> * AVAIL that are bonded (generally locked or reserved) cannot be transferred to another account. In other words, you can only transfer funds that shows up as "transferable" in your account.
## How to nominate validators directly
### Navigate to the Staking Dashboard Page
Go to the [staking dashboard page](https://staking.availproject.org/), and connect your wallet
by clicking on the `connect` button on the top right. The dashboard supports a variety
of different options.
### (Optional) Click on the `Validators` tab in the left sidebar to evaluate validators on the network
You can click on the `Validators` tab in the left sidebar to view a list of validators currently
active on Avail DA.
The dashboard allows you to filter out validators based on a number of criteria so you can make an informed choice.
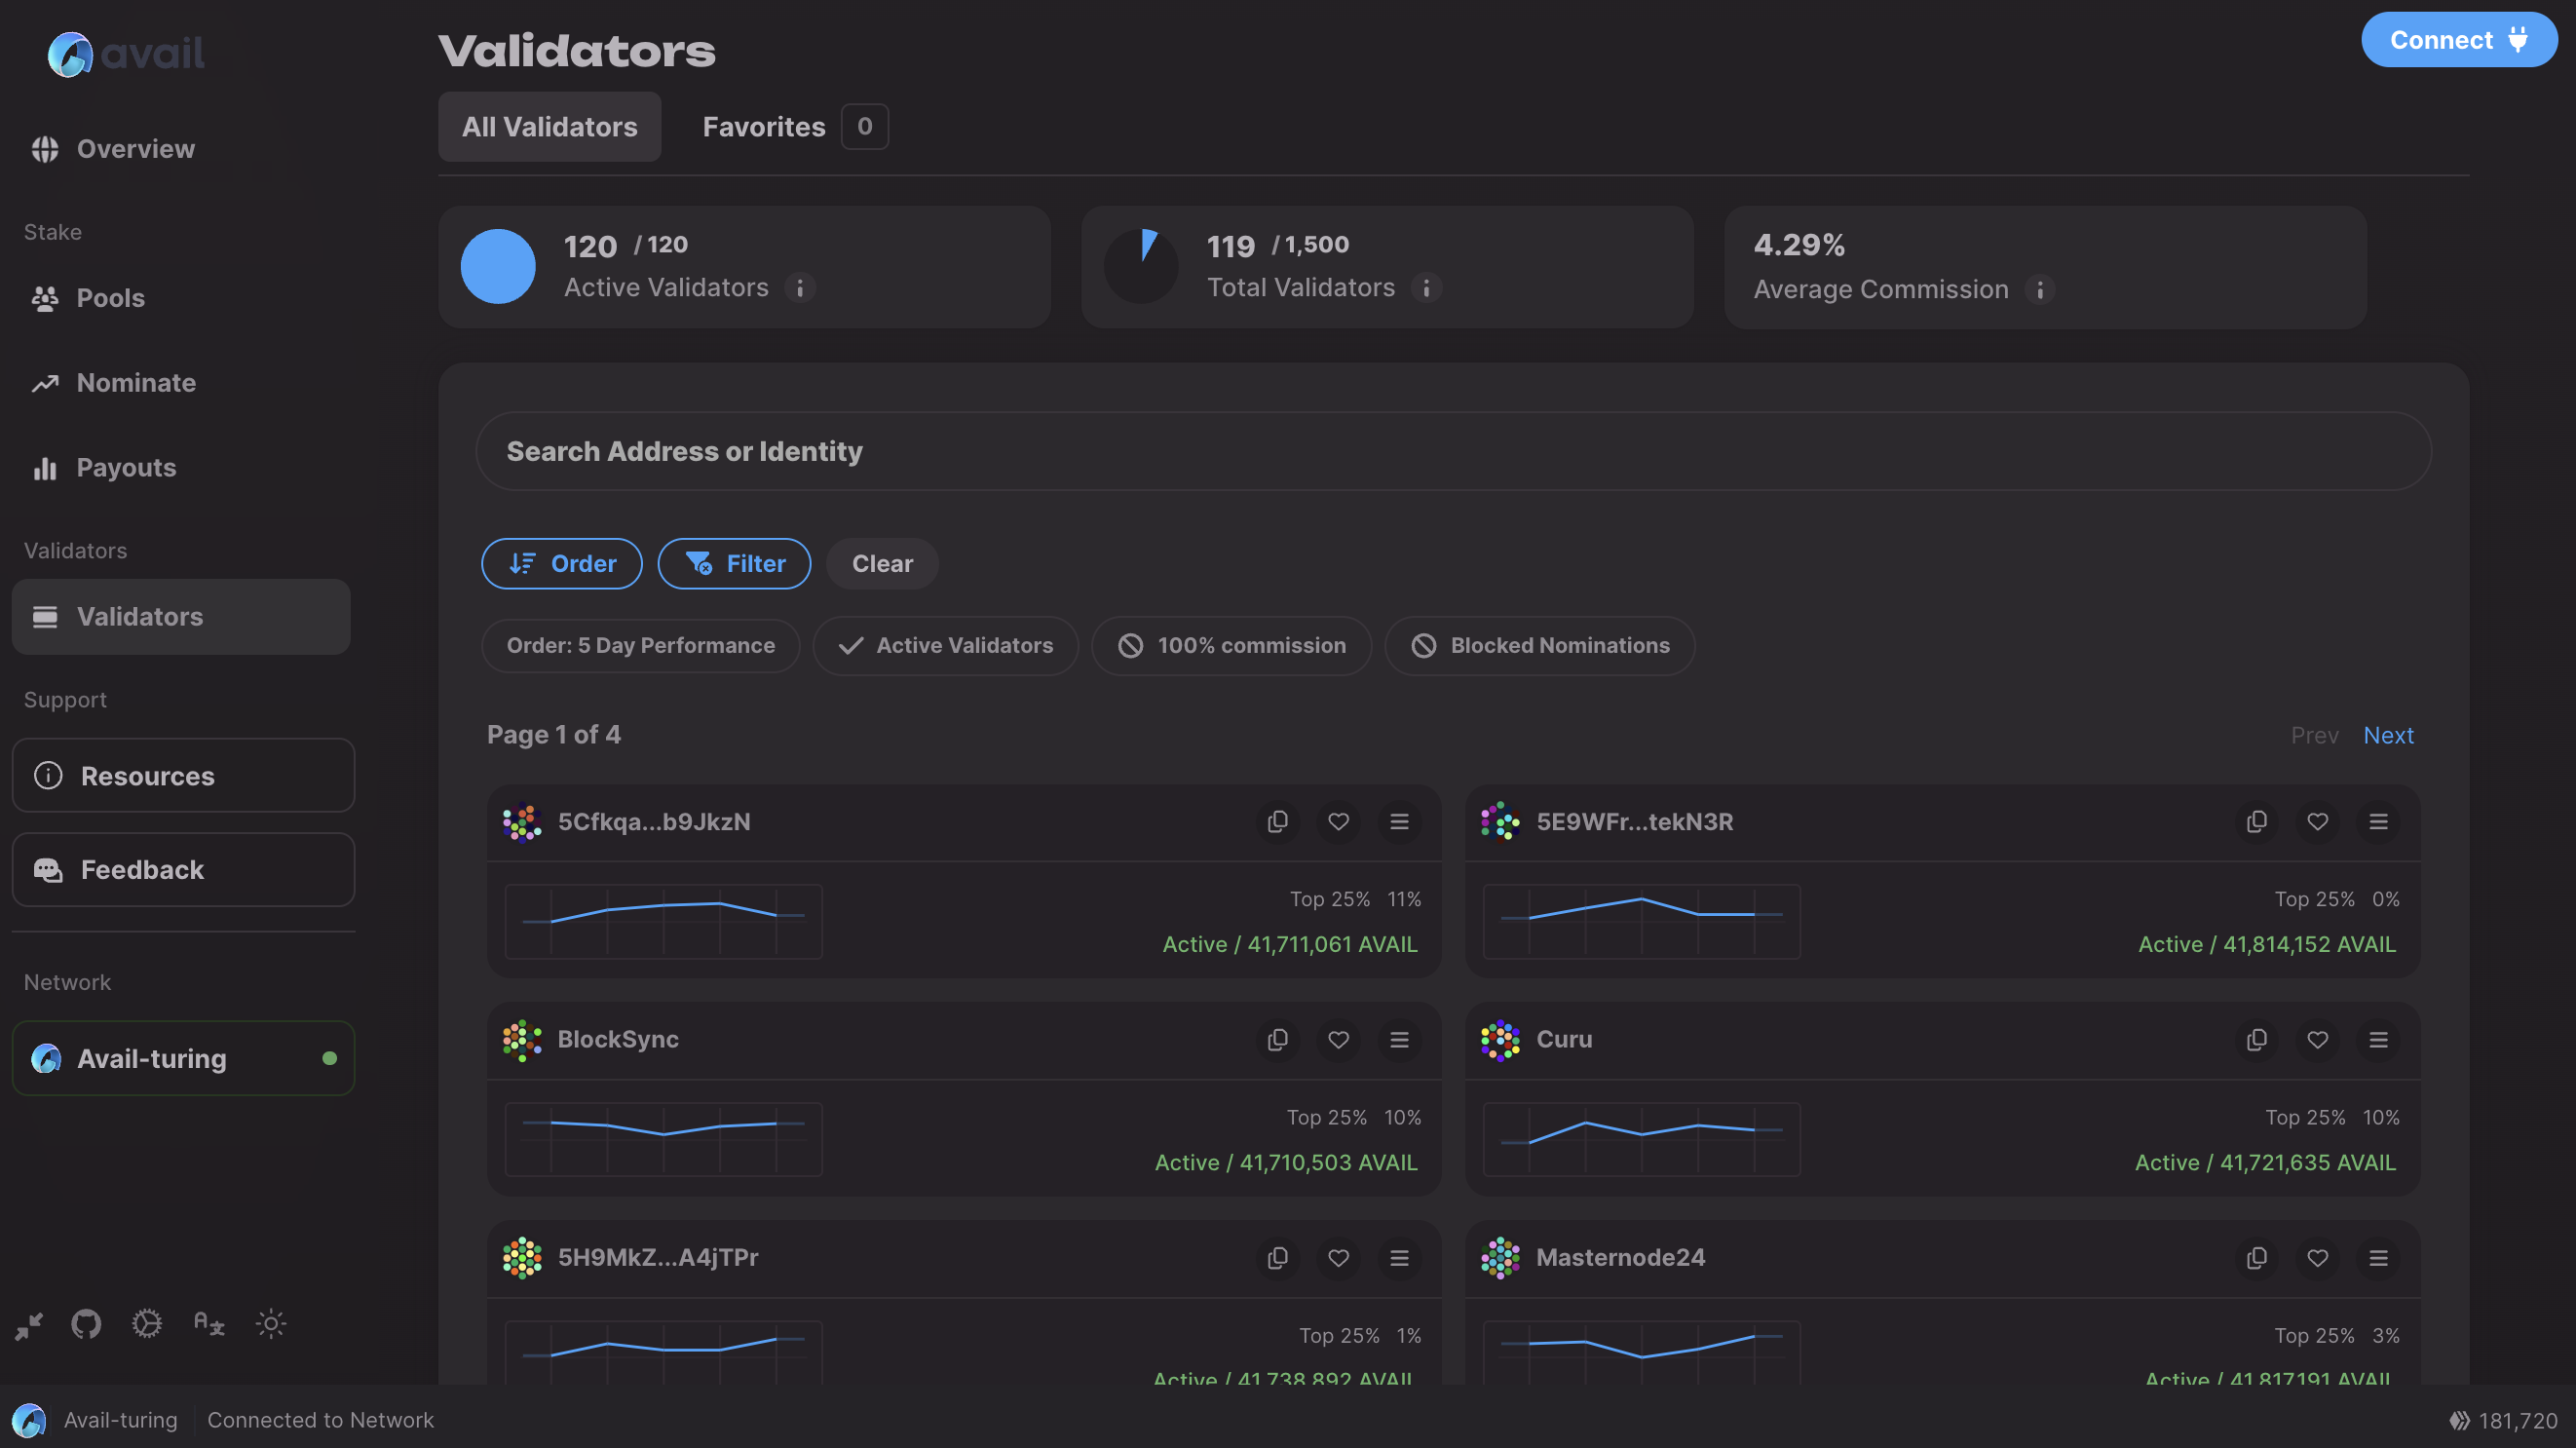
Once you have selected you may click on `+Next` button.
### Click on the `Nominate` tab in the left sidebar
This is how the nominate page in the staking dashboard looks like, once you have connected a wallet.
You can also connect multiple addresses to this page, and ctycle between them using the `Accounts` button.
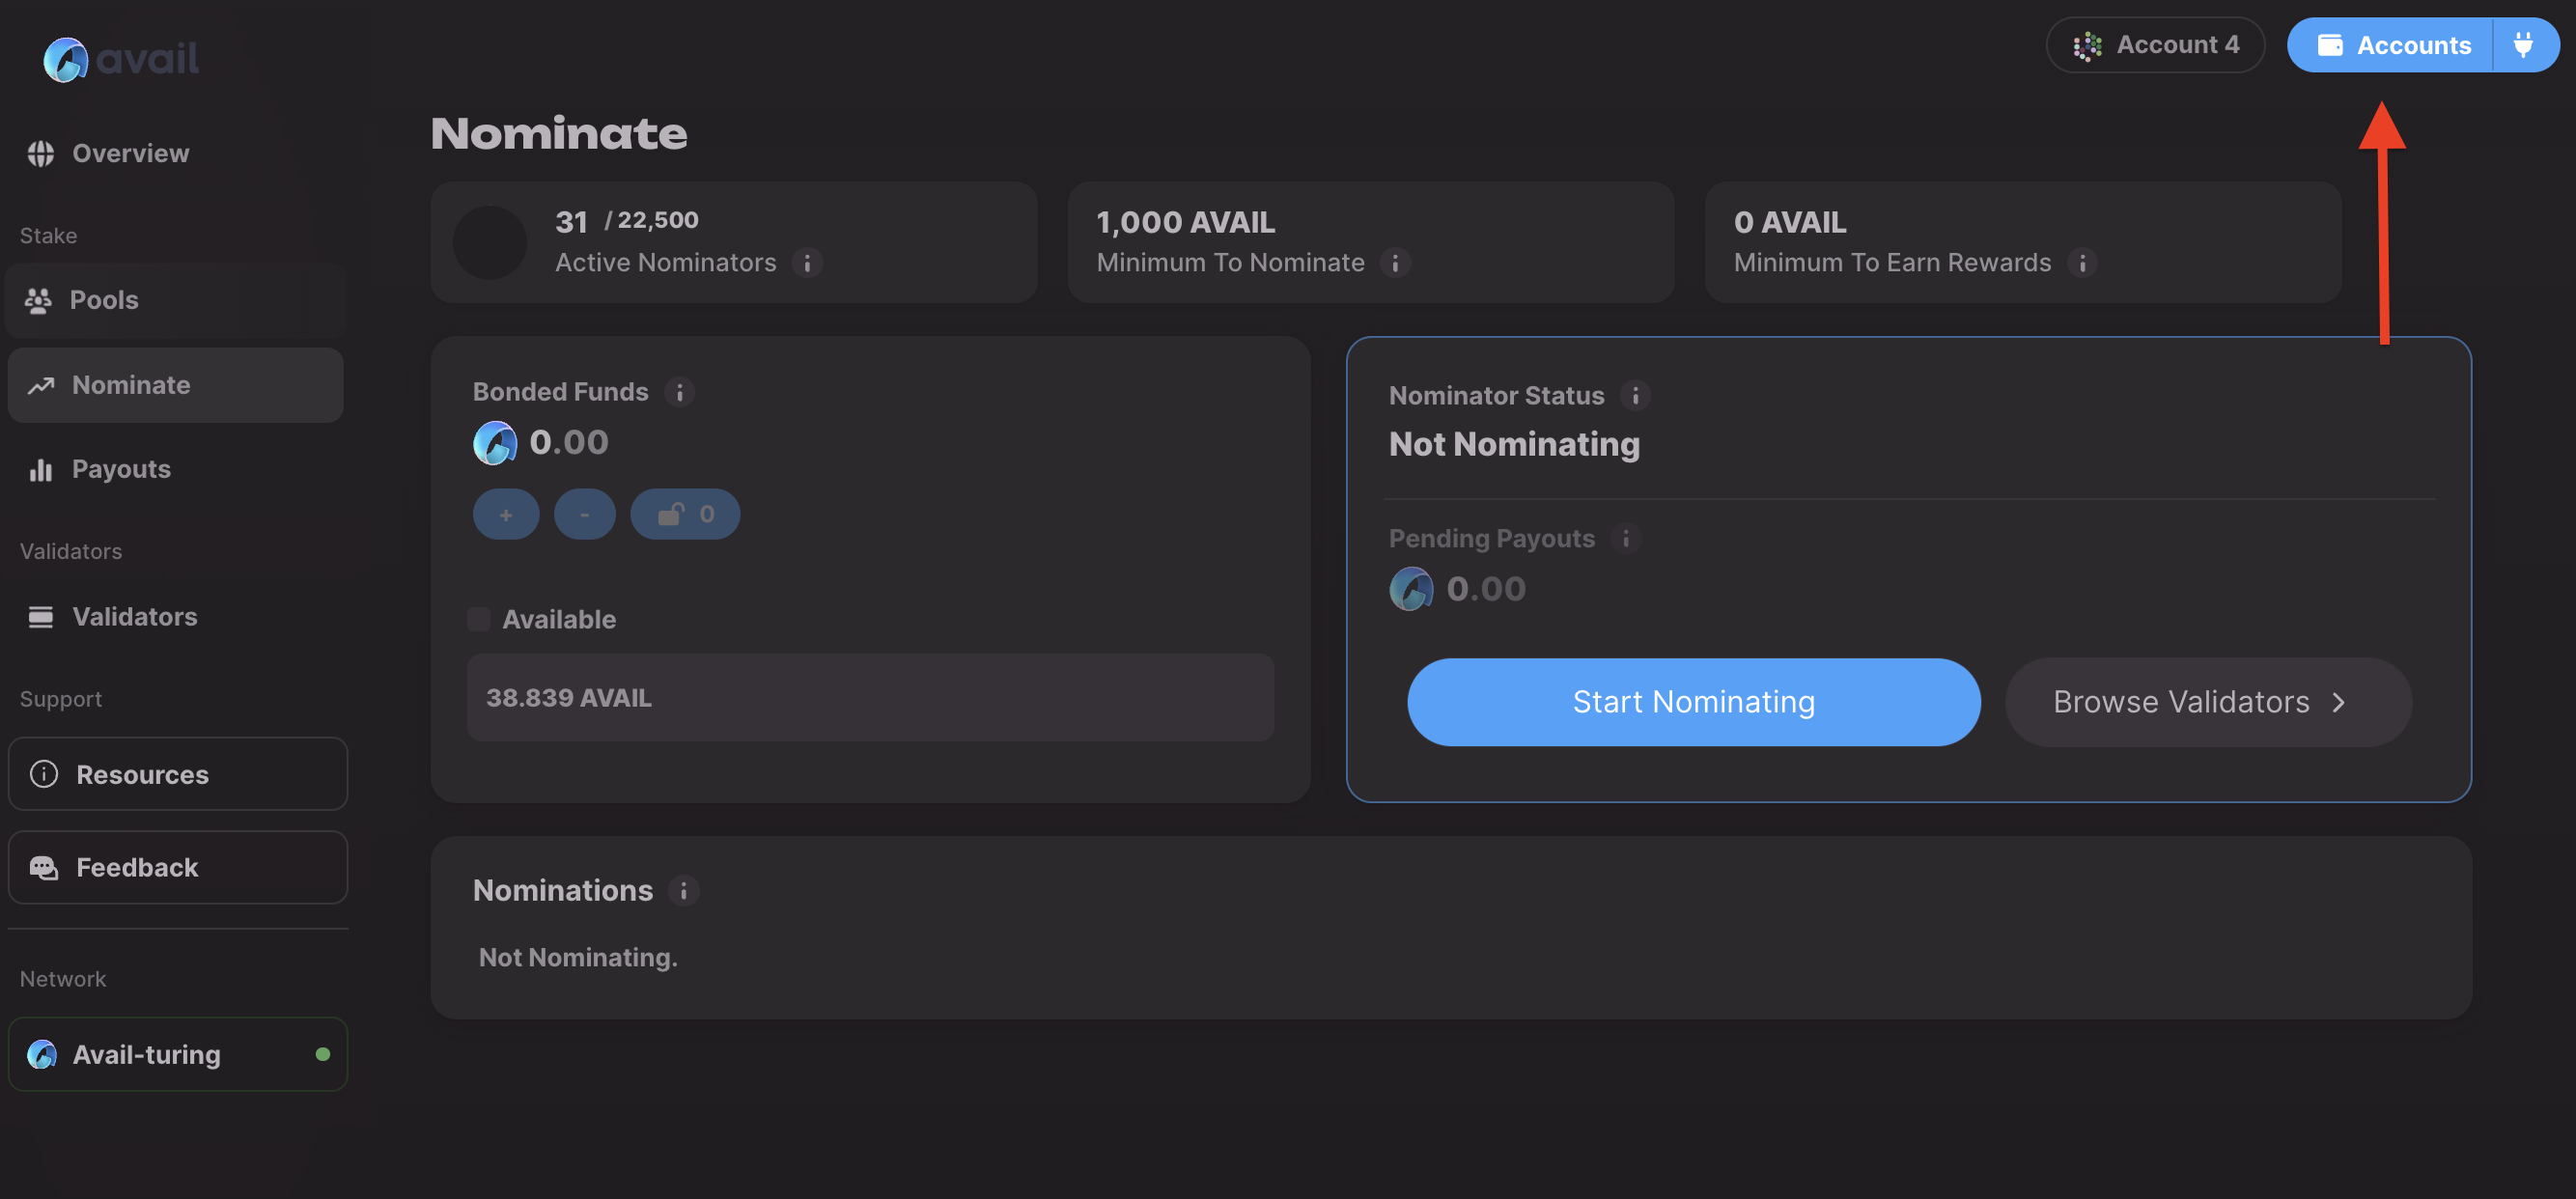
### Click on the `Start Nominating` button
Now you will see a few different options to configure your nominating experience to your liking.
Lets go through them one by one.
### Select your Payout preferences.
You have three main options here:
* **Compound**: This will automatically re-stake your rewards as they come.
* **To Your Account**: This will send your rewards to the account you used to stake.
* **To Another Account**: This will send your rewards to a different account you specify.
Select one of these options and click on `Continue`.
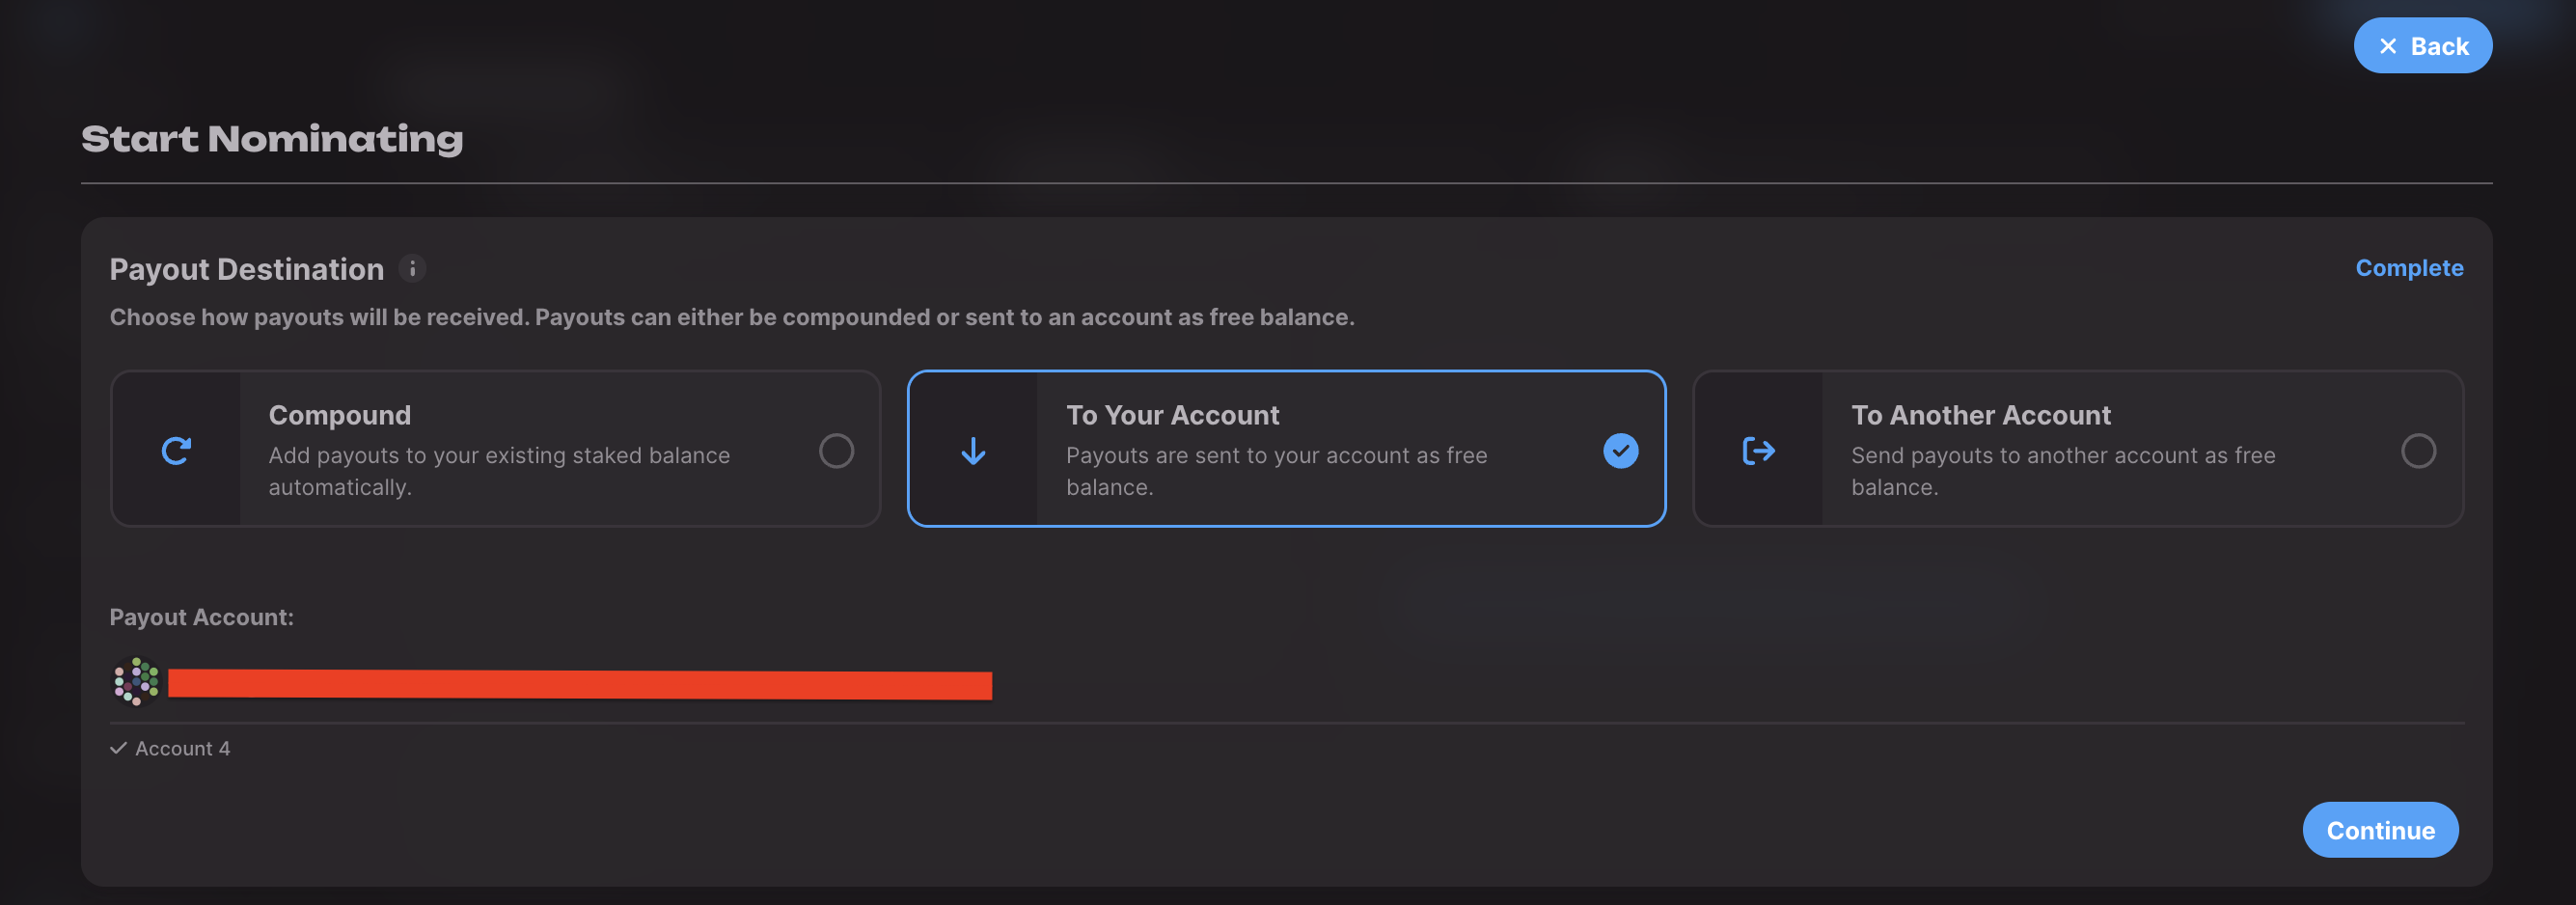
### Choose your validators
You have three main options here:
* **Optimal selection**: Allow the dashboard to simplify the whole process and
fetch a list of upto 16 validators for you to nominate.
* **Active Low Commission**: Nominate with reliable validators with low commissions.
* **From Favorites**: You can create a list of your favorite validators and nominate them.
* **Manual Selection**: You can manually select a maximum of 16 validators of your
choice to nominate.
Select one of these options and click on `Continue`.
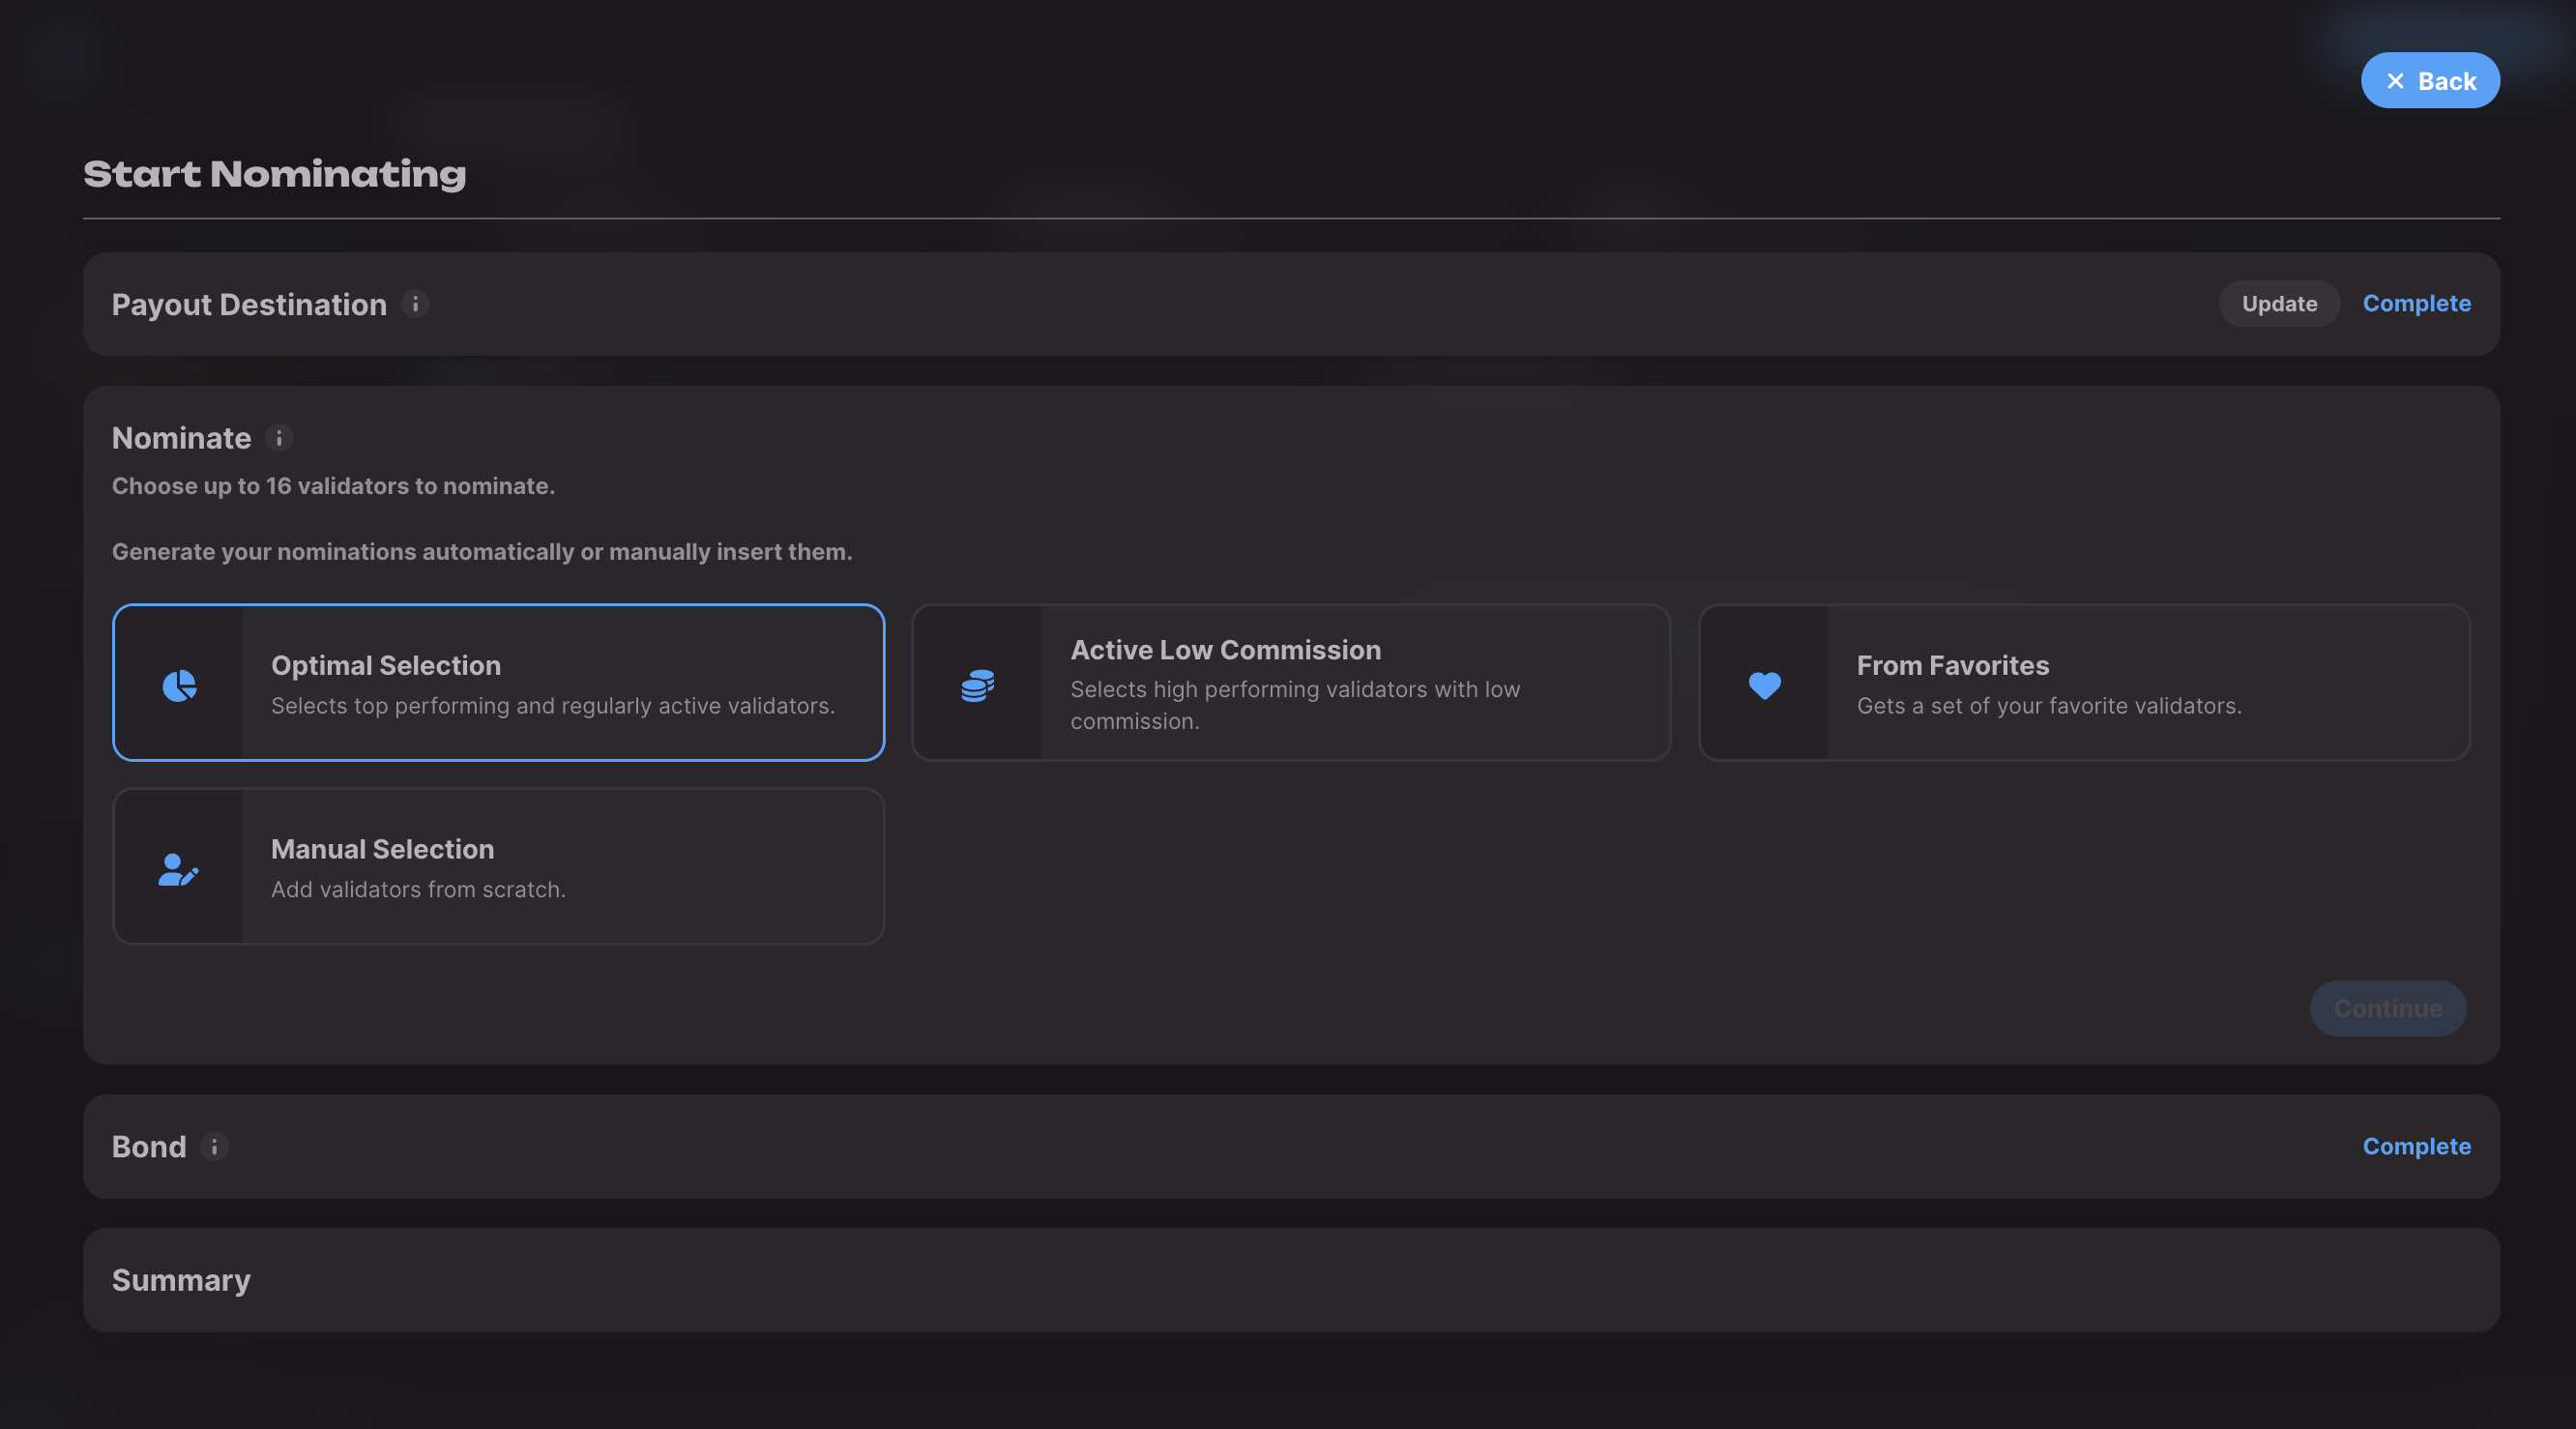
### Enter the bond amount
Enter the total amount of AVAIL you want to stake. The minimum amount for direct nomination
is 1000 AVAIL. Click on `Continue`.
> **Warning**
>
> **DON'T STAKE ALL YOUR AVAIL**
> Each transaction on Avail DA requires a small amount of AVAIL to be paid as fees.
> We highly recommend you keep a small unstaked balance that you might need to initiate any other transactions.
### Start Nominating
Once all your configurations are set, the dashboard allows you to review your sleections
one last time.
If you're happy with everything, click on `Start Nominating`. At this point, you will
need to approve the transaction in your wallet.
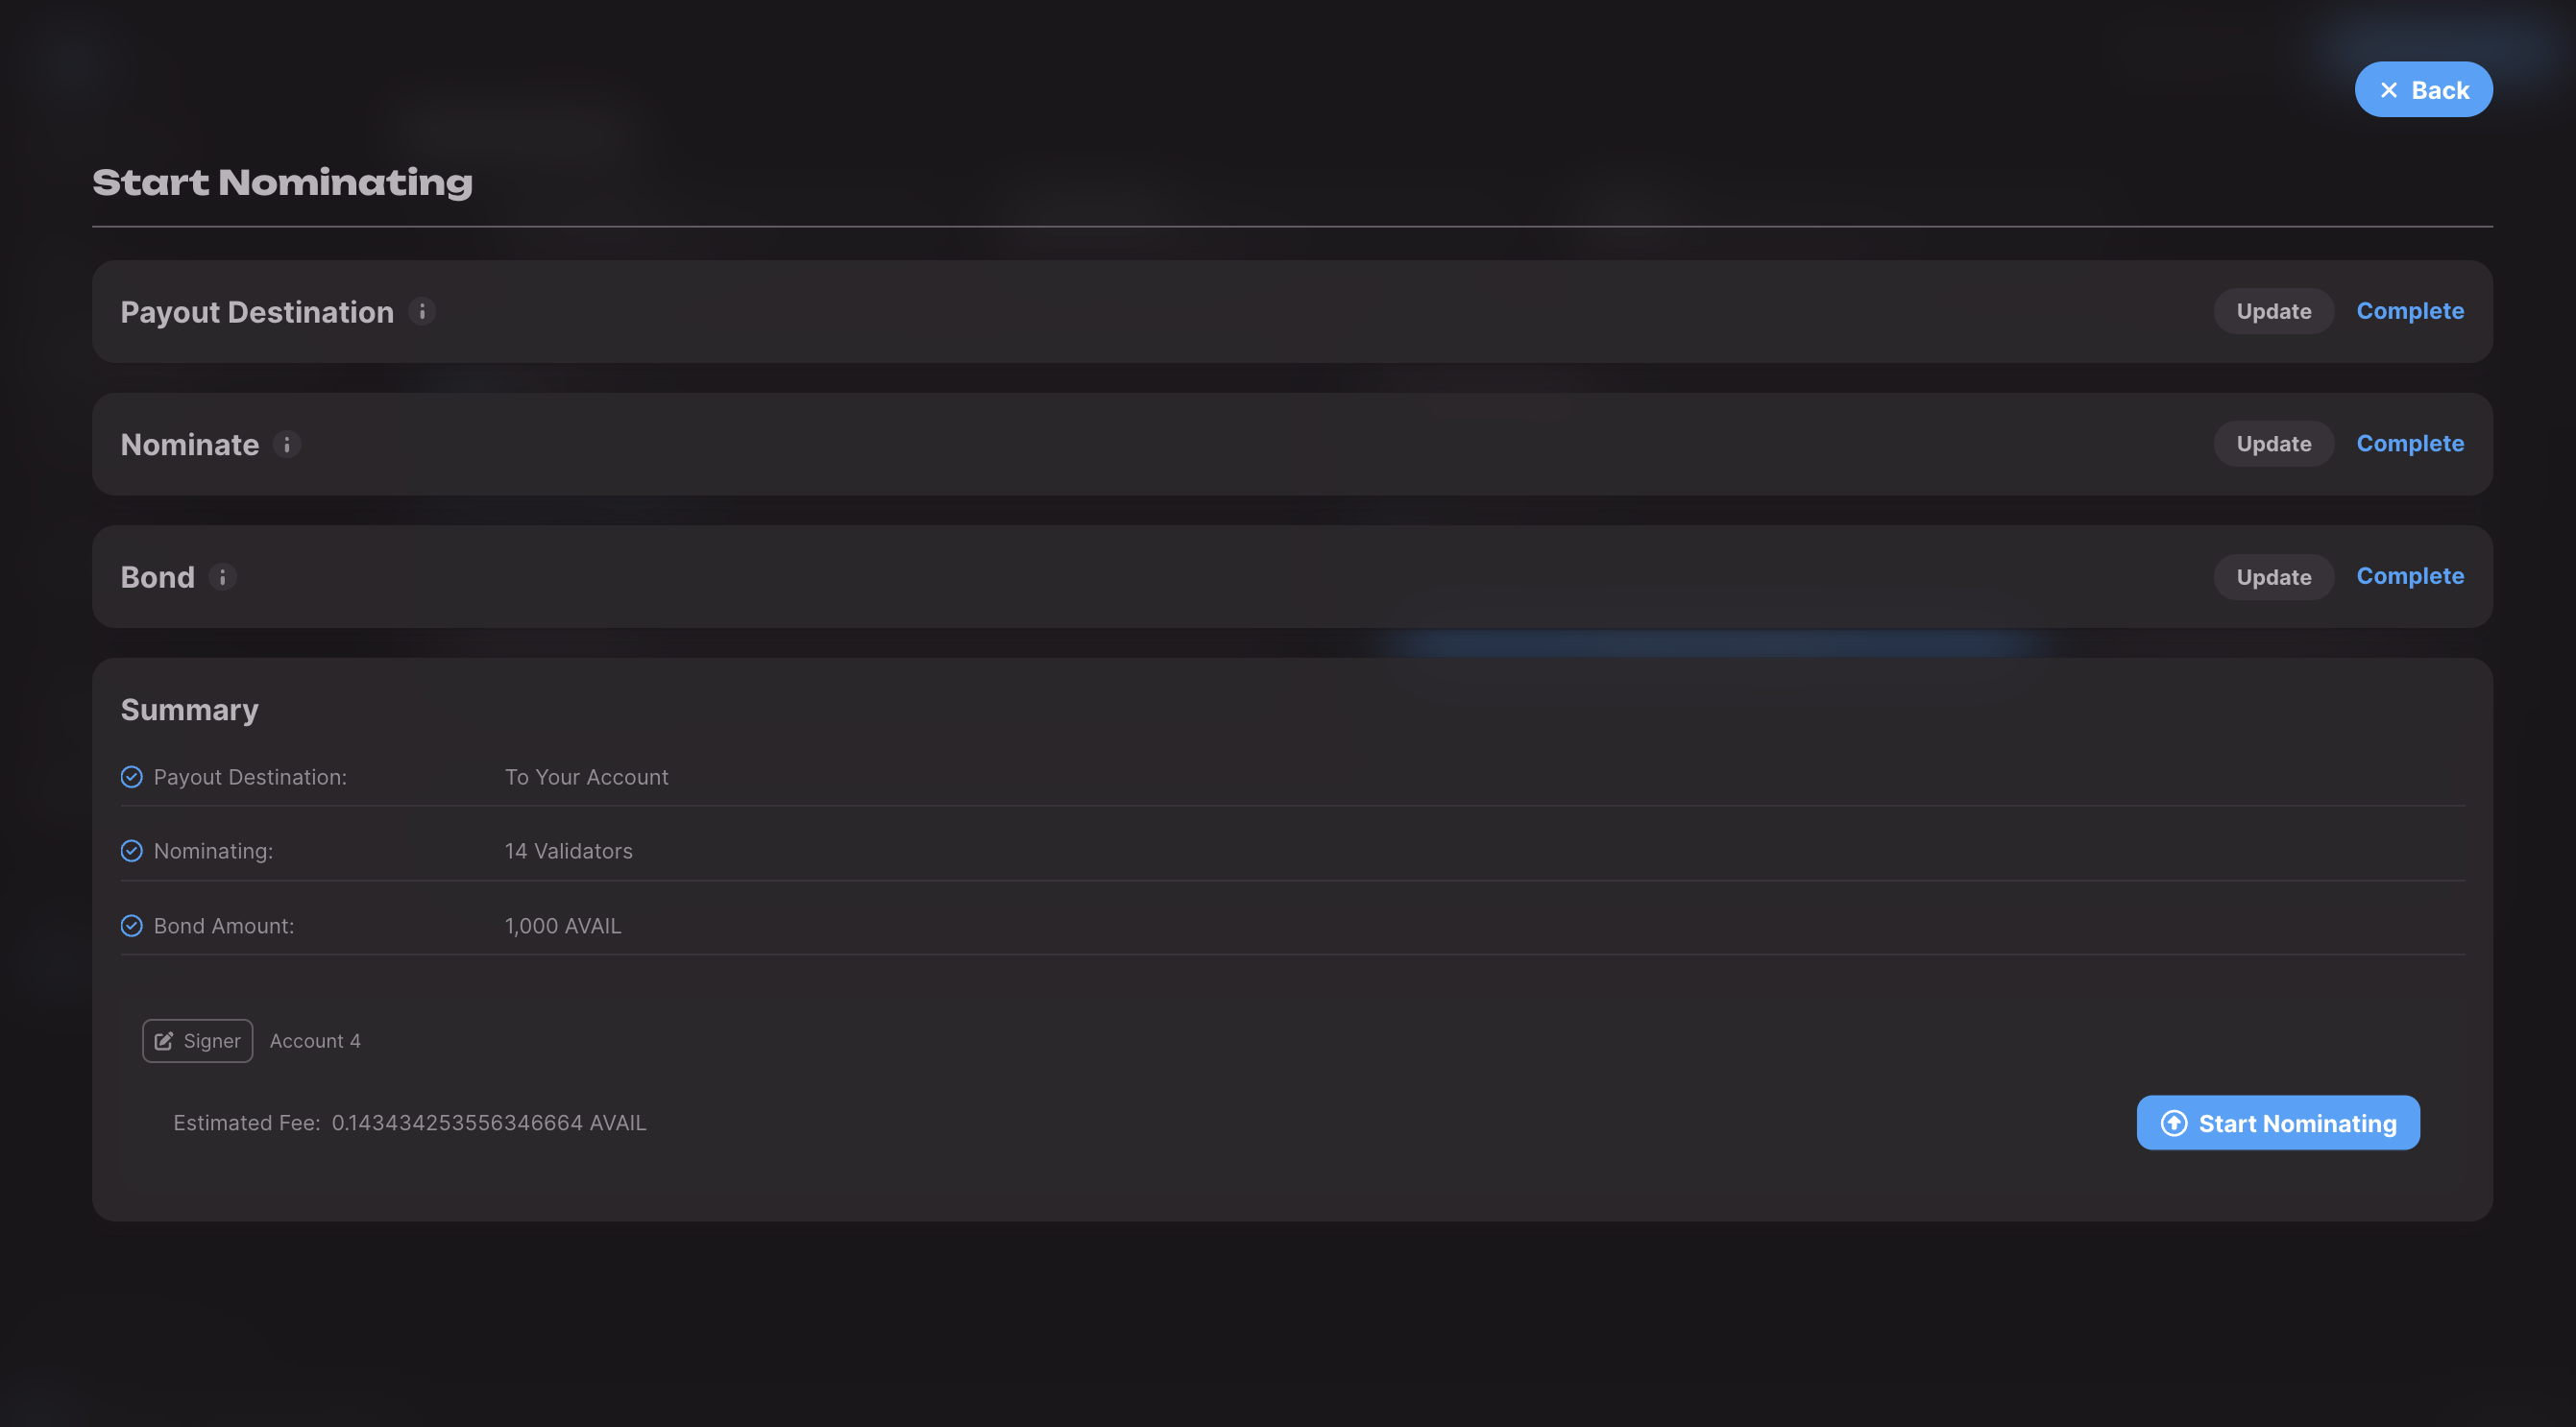
### Happy nominating!
And that's it! This guide walked you through nominating your AVAIL directly to validators
of your choice. Go to the next page to learn how to work with nomination pools.
### Rewards from direct nomination
Rewards accrued via direct nomination are payed out to **ALL STAKERS** of a particular validator when either of the three happens:
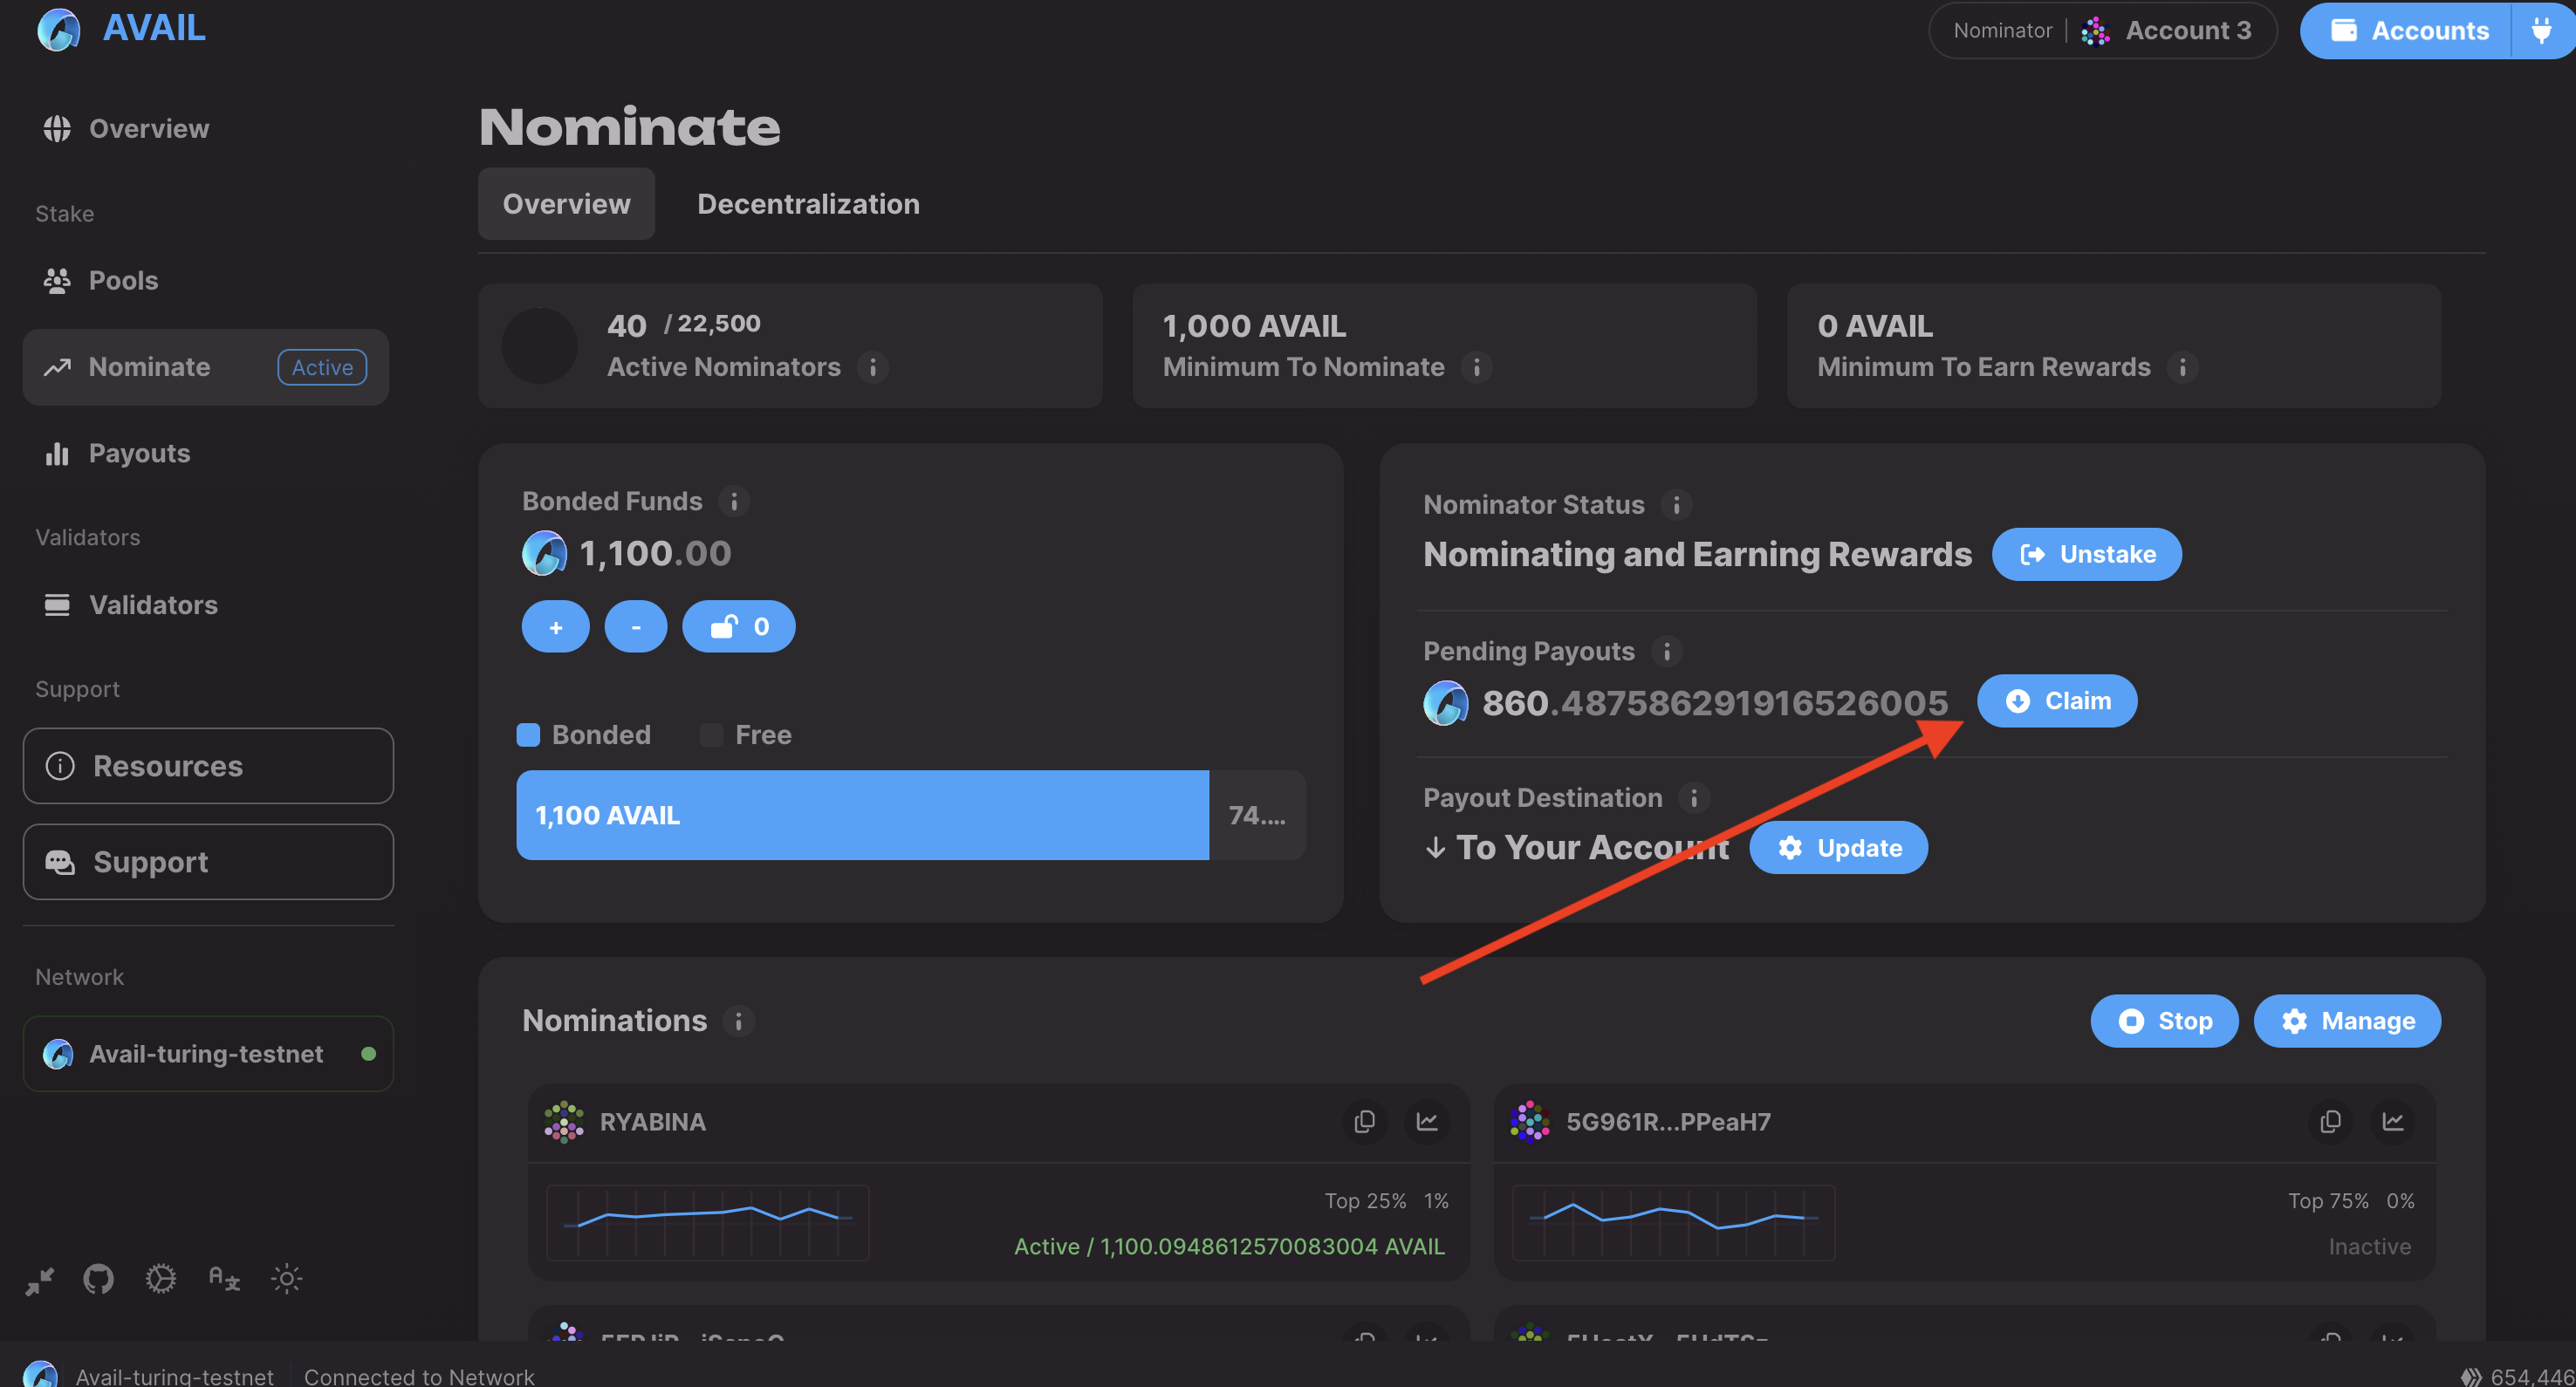
1. You click on the `claim` button to claim your rewards. All stakers of the validator will have their rewards payed out.
2. The validator themselves claim their rewards. Again, all stakers of the validator, which includes you, will have their rewards payed out.
3. When one of the stakers apart from you claims their rewards. No points for guessing, all stakers of the validator will have their rewards payed out.
What happens with your stake depends on the choice you made in `Step 5`:
* **Compound**: This will automatically add your rewards to your existing stake, thus compunding it.
* **To Your Account**: This will send your rewards to the account you used to stake.
* **To Another Account**: This will send your rewards to the account you specified.
### How to Create Nomination Pools on Avail
## What Are Nomination Pools?
Nomination pools are a critical feature in Avail's consensus system, akin to those in [Polkadot and Substrate](https://wiki.polkadot.network/docs/learn-nomination-pools), They allow users to combine their stakes, effectively acting as a single nominator. This approach addresses the limitations of individual small stakes and ensures more efficient participation in the staking process.
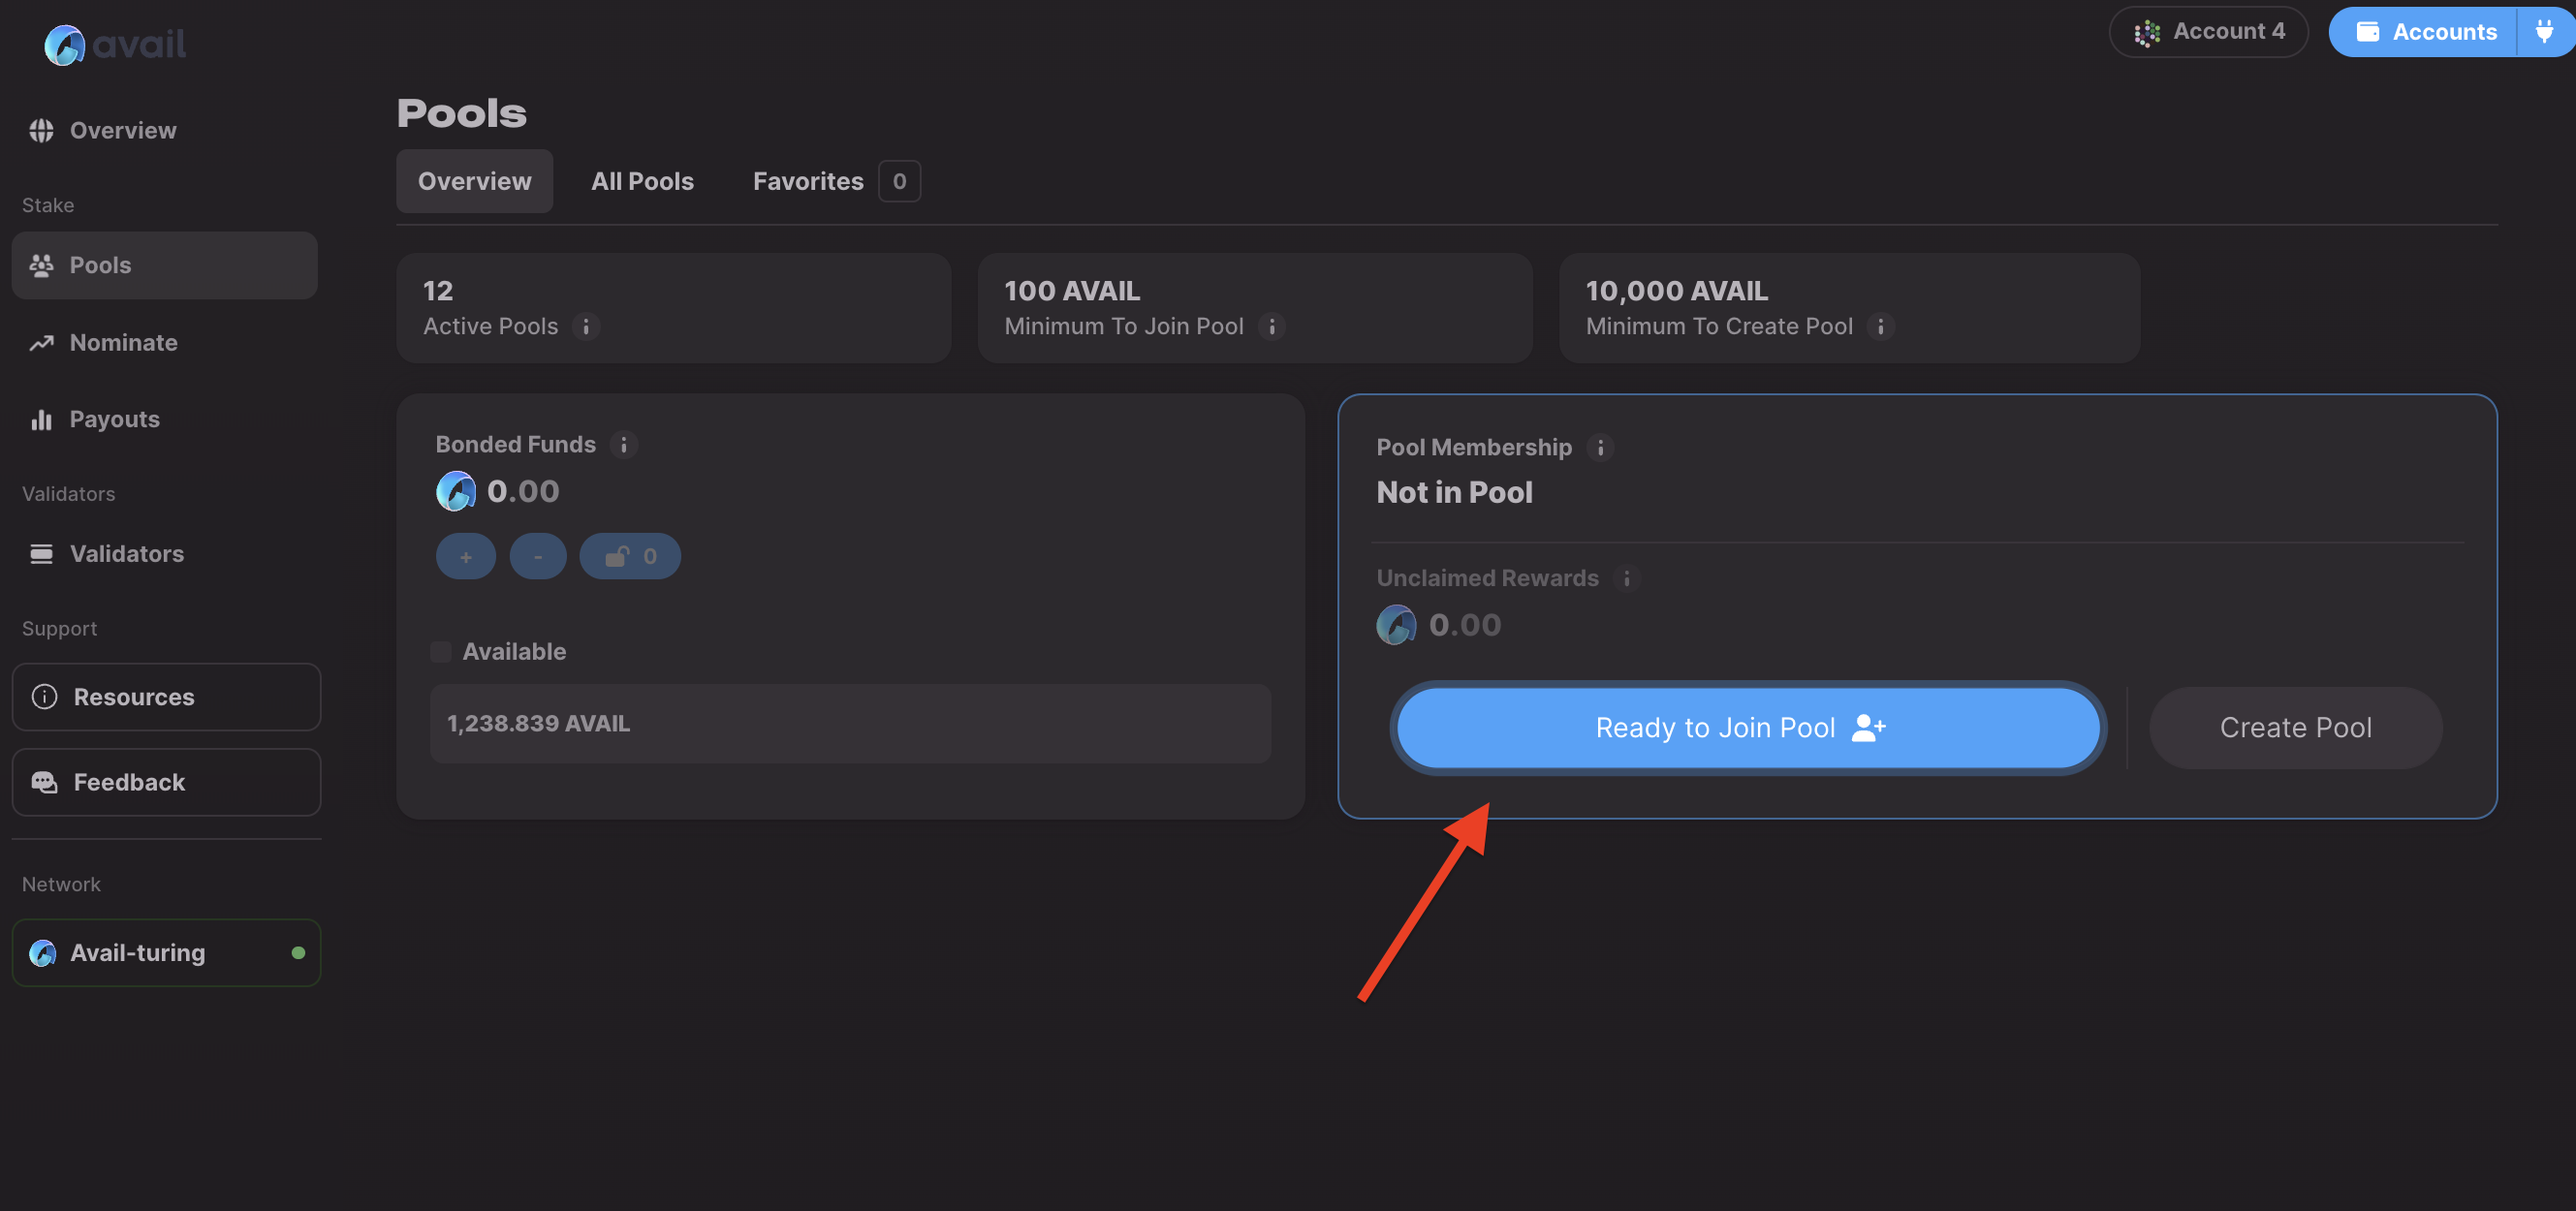
Pool Mechanics
### Features
* **Accessibility**: Open to all users, with no minimum stake requirement.
* **Member Capacity**: Each pool can accommodate a large number of members, ensuring wide participation.
* **Reward System**: Rewards are distributed pro-rata but are not guaranteed if the pool's total stake is insufficient.
### Key Considerations
* **Nominating vs. Joining Pools**: Understand the differences between direct staking and pool participation.
* **Restrictions**: Bonded tokens in pools cannot be used for governance activities.
* **Support Channels**: Avail provides dedicated channels for queries and developer support regarding nomination pools.
### Components
* **Bonded Pool**: Manages actively staked funds.
* **Reward Pool**: Tracks earned rewards.
* **Unbonding Sub Pools**: Handles various unbonding phases.
* **Members**: Individuals contributing to the pools.
* **Points System**: A measure of a member's share in the pool.
### Member Lifecycle
1. **Joining**: Members can join a pool by contributing funds.
2. **Claiming Rewards**: Members claim their share of rewards based on their stake in the pool.
3. **Unbonding and Withdrawal**: Members can unbond and withdraw their funds, following a set duration.
### Limitations
* **Voting Restrictions**: Funds in nomination pools cannot be used for voting in governance matters.
* **Pool Switching**: To switch pools, members must unbond all funds, subject to a waiting period.
Pool Administration
### States of a Pool
* **Open**: The pool is active and open for anyone to join.
* **Blocked**: The pool is currently not accepting new members.
* **Destroying**: The pool is being decommissioned. In this state, no actions can revert the pool back to a previous state, and it is on the path to be fully removed. Members can unbond their stakes without restrictions during this phase.
### Roles within a Pool
* **Depositor**: The creator and initial member of the pool. The depositor has the authority to manage the pool but is also the last to leave, ensuring the pool is properly dismantled.
* **Nominator**: Responsible for selecting validators for the pool to nominate. This role is pivotal in steering the direction and performance of the pool.
* **Bouncer**: Has the power to change the state of the pool, including initiating the transition to a Blocked or Destroying state. They can also remove members from the pool if necessary.
* **Root**: This is the highest administrative level within the pool with the ability to manage all other roles and perform any related administrative actions.
Each role is integral to the efficient operation and governance of the nomination pool. Clear understanding and execution of these roles ensure the pool operates smoothly and aligns with the members' collective objectives.
> **Note**
>
> **UNBONDING PERIOD**
> There is an unbonding period for AVAIL staked on the Avail network, which serves as a security measure to ensure that validators and nominators are accountable for their previous participation in the security of the network.
>
> * The unbonding period in Avail is **28 days**.
> * AVAIL that are bonded (generally locked or reserved) cannot be transferred to another account. In other words, you can only transfer funds that shows up as "transferable" in your account.
## How to join an existing nomination pool
> **Note**
>
> PREREQUISITES
> The only prerequisite for joiniing a nomination pool on Avail DA is that you have an Avail DA
> compatible wallet with a minimum of 100 AVAIL in it.
### Navigate to the Staking Dashboard Page
Go to the [staking dashboard page](https://staking.availproject.org/), and connect your wallet
by clicking on the `connect` button on the top right. The dashboard supports a variety
of different options.
### Configure your pool selections
Go to the `Pools` tab from the left sidebar, and click on the `Ready to Join Pool` button.
You have a few choices to configure your pool withdrawl settings:
1. `Allow Withdraw`: Allow the pool admins to withdraw rewards to your account.
2. `Allow Compound`: Allow the pool admins to restake your rewards.
3. `Permissioned`: Only you can perform `1` & `2`.
### Join the pool
Once you have configured your settings, you can join the pool with any amount ≥ 100 AVAIL. Simply
click on `Join Pool` and approve the transaction.
> **Warning**
>
> **DON'T STAKE ALL YOUR AVAIL**
> Each transaction on Avail DA requires a small amount of AVAIL to be paid as fees.
> We highly recommend you keep a small unstaked balance that you might need to initiate any other transactions.
> **Note**
>
> Please note that this tutorial showed you how to join a recommended nomination pool on Avail by clicking on the `Ready to Join Pool` button.
> You can view a list of all available pools by going to [staking.availproject.org/#/pools](https://staking.availproject.org/#/pools)
> and clicking on `All Pools`.
> There you can check out a list of all available pools on Avail DA and join the one that you want.
### Withdraw your rewards from the pool
After a few days you will see `unclaimed rewards` adding up for your account in the staking dashboard.
You can either withdraw these rewards to your account or compound them back into the pool. \
To withdraw your rewards, click on the `Withdraw` button and approve the transaction. You will then receive your rewards in your account. \
By clicking on the `Compound` button, you can restake your rewards back into the pool.
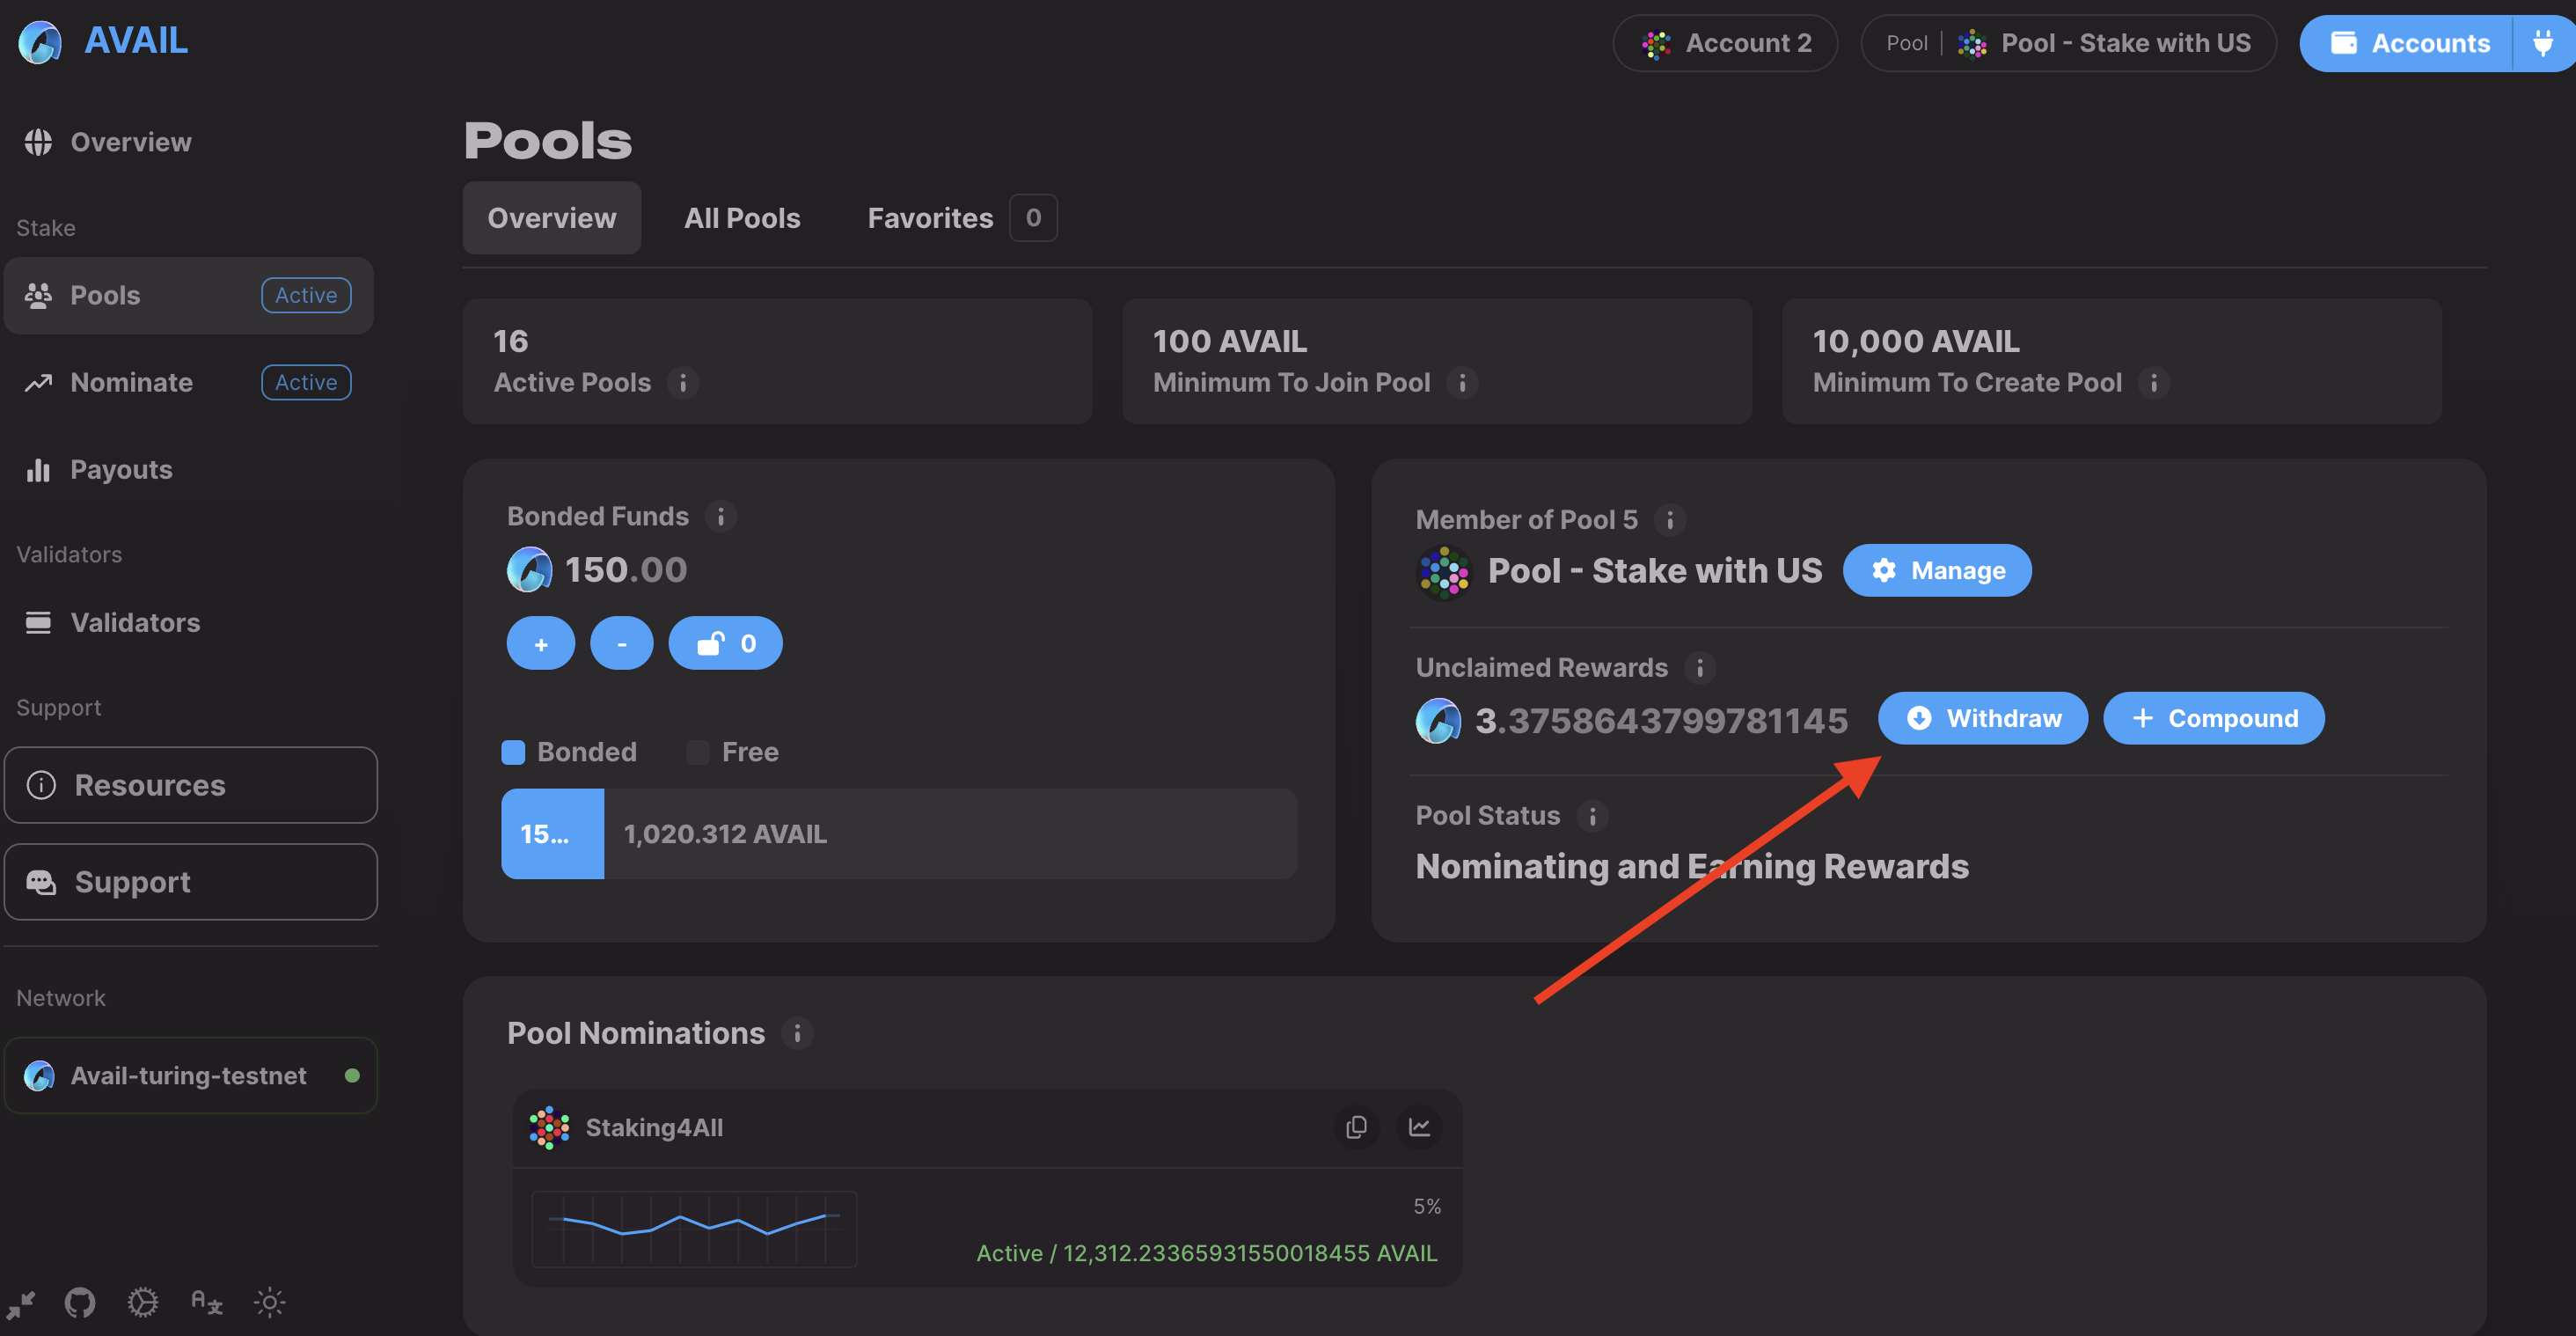
> **Warning**
>
> **PLEASE NOTE**
> The rewards you earn for staking AVAIL to nomination pools are not automatically transferred to your account.
> You need to manually sign a `withdraw` transaction to claim your rewards.
## Create a new nomination pool
> **Note**
>
> PREREQUISITES
> The only prerequisite for creating a new nomination pool on Avail DA is that you have an Avail DA
> compatible wallet with a minimum of 10000 AVAIL in it.
### Get set up as before
Go to [staking.availproject.org/#/pools](https://staking.availproject.org/#/pools) and make sure you have connected a wallet
to the website that has sufficient funds to create a pool.
### Name your pool
Click on `Create Pool` and enter a name for your pool. This name will be visible to all users.
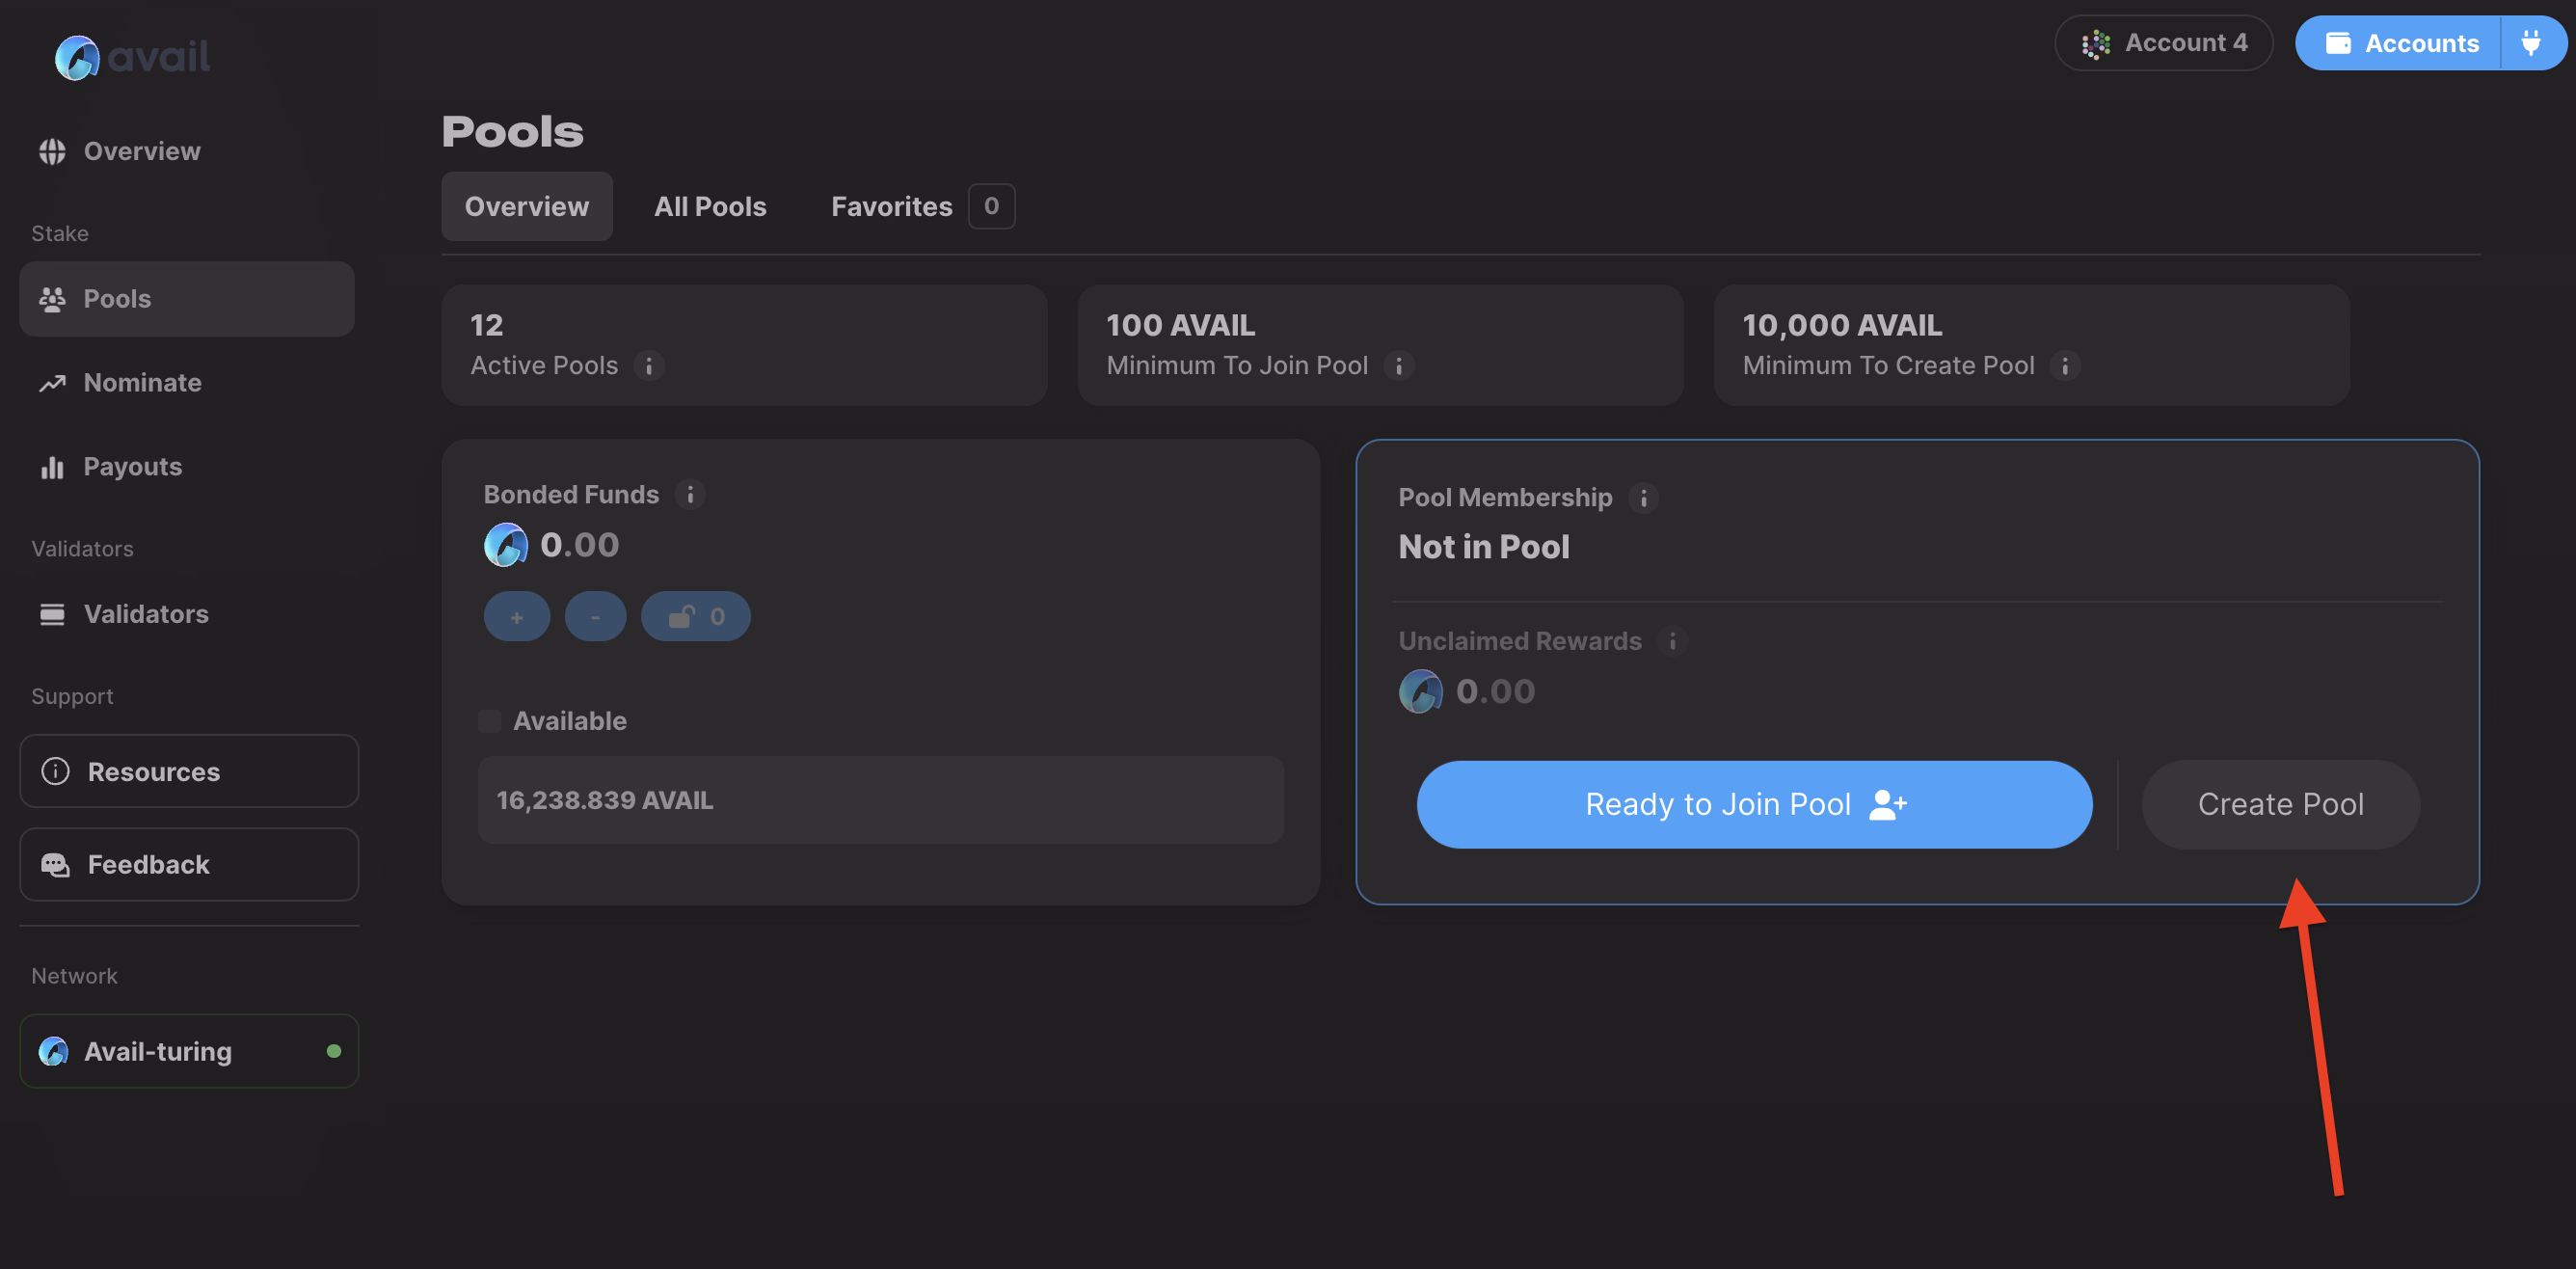
### Nominate validators for your pool
You can nominate upto 16 validators for your pool, with a few different options to come up with your list.
This is very similar to how validators are selected for direct nomination. You can check out the
[docs here](/docs/da/user-guides/staking-governance/stake-on-avail/direct-nomination#choose-your-validators) for reference.
### Delegate roles for your pool
A nomination pool on Avail DA has 4 different roles. You can read about them [up in the page](#roles-within-a-pool), under the
`Pool Administration` block.
You can delegate all the roles except the Depositor to addresses of your choices, which will always be the address that
created the pool.
### Enter the bond amount
Enter the amount of AVAIL you want to bond to the pool. 10000 AVAIL is the minimum amount needed to create the
pool, and other users can deposit more AVAIL to the pool to join it.
> **Warning**
>
> **DON'T STAKE ALL YOUR AVAIL**
> Each transaction on Avail DA requires a small amount of AVAIL to be paid as fees.
> We highly recommend you keep a small unstaked balance that you might need to initiate any other transactions.
### Create the pool
One everything is done, take a good look at the summary and click on the `Create Pool` button.
Approve the transaction that pops up.
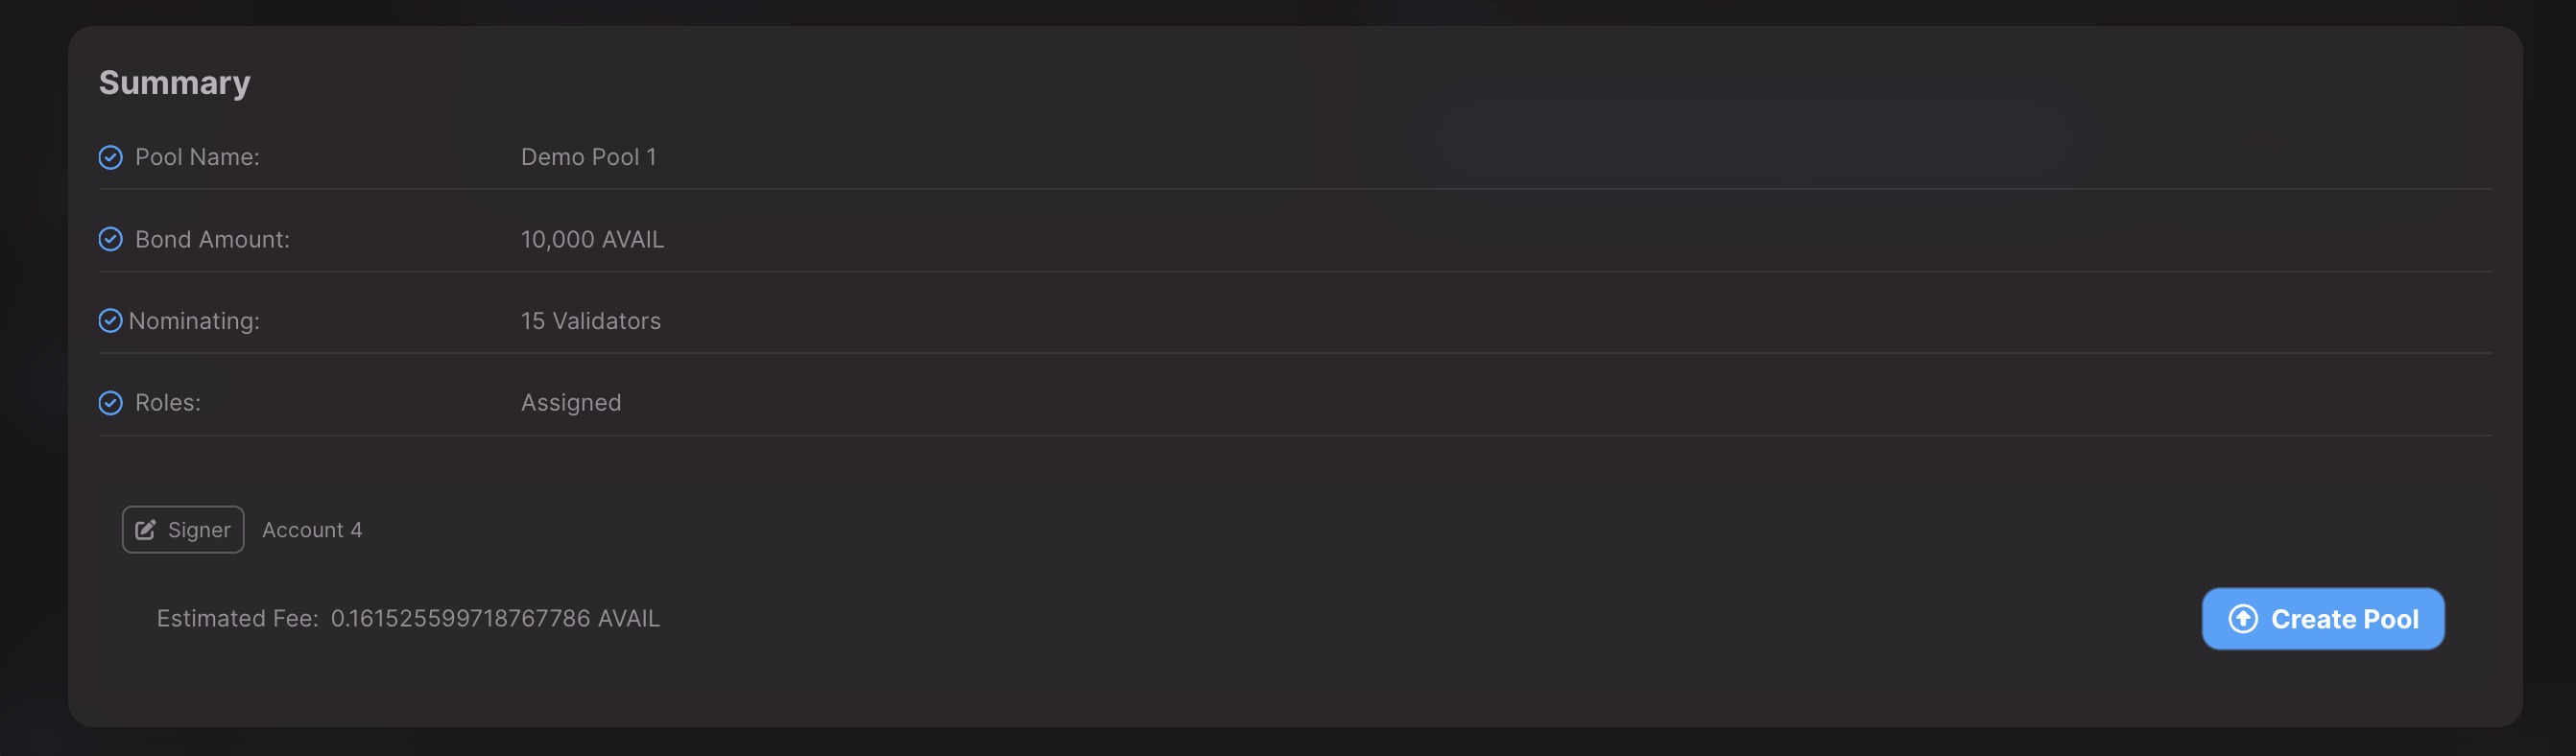
> **Note**
>
> As the pool owner you will have the privilege of setting various parameters for the pool once it is created,
> which will affect the rewards distribution and the pool's overall performance.
> Read below for more information on the same.
Setting Pool Commissions
As the pool administrator on Avail, you have the capability to establish commission rates that affect the staking rewards distribution. These are the steps and parameters to configure your pool's commissions:
### Commission Rate
* **Function**: Establish the starting or adjusted commission rate.
* **Parameter**: `newCommission`
* **Range**: From 0% to 10%, decided via governance referendum.
* **Usage**: This is the percentage of rewards taken as commission. Specify the recipient account for this commission.
### Max Commission
* **Function**: Set the upper limit for the pool's commission rate.
* **Parameter**: `maxCommission`
* **Note**: Once set, you can only lower this rate, not increase it.
### Change Rate
* **Function**: Determine the maximum increase allowed per commission update.
* **Parameter**: `maxIncrease`
* **Additional Setting**: `minDelay`, the minimum number of blocks after the last commission change before a new update is permitted. Once set, this can only be increased.
### Administrative Transparency
The decision to set Max Commission and Change Rate is at the discretion of the pool admin. These settings are not obligatory but are recommended for clarity and transparency with pool members.
When setting these parameters, balance the need to incentivize pool operation with the rewards expectations of your members. Clear communication regarding commission changes is essential to maintain trust within your pool community.
Exiting a Nomination Pool
Members of a nomination pool on Avail have the flexibility to leave the pool at any time through a process called unbonding. Here's how it works:
### Unbonding Process
* **Initiation**: A member initiates unbonding by choosing to unbond either a portion or all of their staked funds from the pool.
* **Duration**: Once the unbonding request is made, it enters a cooldown period. The exact duration of this period is specific to Avail and may differ from other platforms.
* **Withdrawal**: Following the end of the unbonding period, the member is eligible to withdraw their funds by executing the `withdrawUnbonded` operation.
### Automatic Rewards Withdrawal
* **Trigger**: Any modification to a member's bonded balance—such as through unbonding—automatically prompts the withdrawal of accumulated rewards.
* **Effect**: The withdrawn rewards are based on the member's stake before the unbonding transaction. This ensures that members receive the rewards they are entitled to up to the point of their unbonding.
### Considerations for Pool Exit
* Exiting the pool ends the member's current staking relationship with that pool.
* Members are free to join another pool after withdrawing their funds, subject to Avail's staking rules and timelines.
### Administrative Notes
* Pool admins should provide members with clear instructions on the unbonding and withdrawal process, including any platform-specific timelines or conditions.
* It is advisable to keep members informed about the status of their unbonding requests and any actions they need to take to complete the withdrawal.
### Stake on Avail
## Introduction
Avail nominating, also known as staking or delegating, is a fundamental process within
the Avail network where AVAIL holders participate in securing the blockchain and earn
rewards in return.
By nominating, AVAIL holders select trustworthy validators to represent their stake in
the network, contributing to its security and governance.
Validators are responsible for producing and validating blocks, and their performance
directly impacts the network's reliability.
> **Note**
>
> **UNBONDING PERIOD**
> There is an unbonding period for AVAIL staked on the Avail network, which serves as a security measure to ensure that validators and nominators are accountable for their previous participation in the security of the network.
>
> * The unbonding period in Avail is **28 days**.
> * AVAIL that are bonded (generally locked or reserved) cannot be transferred to another account. In other words, you can only transfer funds that shows up as "transferable" in your account.
This guide will walk you through the process of nominating and managing your stake, while also providing insights into Avail nomination dynamics.
## Different tools to stake on Avail
To stake your AVAIL on the Avail DA network, you have a few different ways you can choose from:
1. [The official Avail staking Dashboard](https://staking.availproject.org/#/overview)
2. [The Avail Apps explorer](https://explorer.availproject.org/#/staking) (make sure to verify the network you are on from the top-left corner)
3. Staking UIs by external entities not related to Avail
4. Directly submit extrinsics to Avail DA (if you're so inclined)
For now this guide will focus on the Avail staking dashboard, although we do plan
to add more instructions in the near future.
## Direct nominating VS Nomination Pools
Nominating and nomination pools are both integral parts of the staking process in blockchain networks like Avail DA. However, they serve slightly different purposes and involve distinct mechanisms:
* **Direct nominating**: Nominating refers to the process of selecting one or more (max 16) validators to delegate one's stake to in order to participate in the network's consensus mechanism and earn rewards. When users nominate validators, they essentially entrust them with their tokens to contribute to the security and operation of the network. By nominating validators that perform well and uphold the network's integrity, users can earn staking rewards in return for their contribution.
* **Nomination Pools**: On the other hand, nomination pools are collective pools of staked tokens contributed by multiple users who have chosen to nominate a specific validator set. These pools aggregate the stakes of individual nominators and delegate them to the chosen validator.
The primary purpose of nomination pools is to increase the nominator's chances of receiving rewards by combining their stakes with others, thereby enhancing the collective weight behind the Pools nomination.
In essence, nomination pools allow smaller stakeholders to pool their resources together to compete with larger stakeholders and increase their chances of being selected to validate transactions and earn rewards.
To determine whether to nominate directly or join a nomination pool, it's essential to evaluate network information available on the [Staking Targets page](https://explorer.availproject.org/#/staking/targets). This information is based on Avail Testnet, this is subject
to significant changes on the Avail Mainnet. However does provides valuable insights for making an informed decision. Key parameters to consider include the threshold and minimum nominated values:
* **Threshold**: This represents the minimum AVAIL token value required for staking and is predetermined as part of the AVAIL network settings. It can be modified through a governance process. At this moment on Avail Testnet this value is 0. However this is subject to change in Mainnet.
* **Minimum Nominated**: This value is dynamic, recalculated every era based on the total staked percentage. As more stake enters the network, this value increases. To earn rewards, stakers must ensure their stake surpasses this minimum nominated threshold.
If your stake amount is significantly larger than the threshold and minimum nominated amounts you can stake directly. If your stake is smaller, slightly above these values and you do not want to keep checking your stake it is then recommended to join a Nomination Pool
## Staking Reward Payout Lifecycle
If you have staked your AVAIL in the network, you will only start earning rewards in the **next** [era](/docs/da/glossary#era), and not in the era you staked in. The stake is used to increase the number of tokens held by your nominated validators, increasing their chance of being selected by the election algorithm for block production during a specific era. An era is a period of 24 hours during which an active set of validators is producing blocks and performing other actions on the chain. Hence your stake only becomes active in the next era after which you've staked.
Here is the lifecycle of your stake when you stake in *Era N*:
* **Era N**: Stake is placed
* **Era N+1**: Stake becomes active
* **Era N+2**: Rewards start accruing
* **Era N+3**: First rewards payout
## Avail Nexus
### Avail Nexus
- [**Get Started**](/docs/nexus/get-started) — Understand what Nexus does, how it works, and choose the right integration path for your app.
- [**Concepts**](/docs/nexus/concepts) — Learn about chain abstraction, intents, solvers, and cross-chain operations.
- [**Nexus SDK**](/docs/nexus/nexus-sdk/get-started/installation) — TypeScript API reference for bridging, swaps, intent management, and balance queries.
- [**Widgets**](/docs/nexus/widgets) — Pre-built React components for cross-chain bridging, swaps, and transaction management.
- [**Cookbook Recipes**](/docs/nexus/cookbook-recipes) — Ready-to-use code snippets and patterns for common SDK use cases and integrations.
### Concepts
- [**What is Chain Abstraction?**](/docs/nexus/concepts/chain-abstraction) — Spend balances from many chains with one review and one intent signature.
- [**What is an Intent?**](/docs/nexus/concepts/intent) — A quoted request describing source inputs, destination output, fees, and the provider that fills it.
- [**Solvers and Providers**](/docs/nexus/concepts/solvers) — Who delivers funds on the destination chain, and how they are repaid.
- [**How Intents are Processed**](/docs/nexus/concepts/intent-lifecycle) — From quote to fulfillment: approvals, one signature, source deposits, and status updates.
- [**Bridge, Transfer & Execute**](/docs/nexus/concepts/nexus-ops) — Map bridging, funding contract calls, and destination execution to SDK methods.
- [**Crosschain Swaps**](/docs/nexus/concepts/xcs-swaps) — Swap any supported token on one or more chains into a token on another, by exact input or exact output.
- [**Liquidity Routing**](/docs/nexus/concepts/source-chain-selection) — Let the quote choose source balances, or restrict which chains and tokens it may use.
- [**Token Allowances**](/docs/nexus/concepts/allowances) — Which approvals and permits a quote needs, and how the SDK sizes them.
### Cookbook Recipes
Each recipe assumes an initialized `client` with a connected wallet unless it says otherwise. See [SDK setup](/docs/nexus/nexus-sdk/get-started/nexus-sdk-setup). Names such as `showError`, `openReview`, `params`, and `userAddress` stand in for your app's code.
The recipes share these constants:
```typescript title="TypeScript"
import { parseUnits, formatUnits } from '@avail-project/nexus-core/utils';
const ETH_USDC = '0xA0b86991c6218b36c1d19d4a2e9eb0cE3606eB48';
const ARB_USDC = '0xaf88d065e77c8cC2239327C5EDb3A432268e5831';
const BASE_USDC = '0x833589fCD6eDb6E08f4c7C32D4f71b54bdA02913';
const BASE_WETH = '0x4200000000000000000000000000000000000006';
const AAVE_POOL = '0xA238Dd80C259a72e81d7e4664a9801593F98d1c5'; // Aave v3 Pool on Base
```
## Show balances in a token picker
List spendable, verified balances, largest first.
```typescript title="TypeScript"
const chainNames = new Map(client.getSupportedChains().map((c) => [c.id, c.name]));
const balances = await client.getBalances();
const rows = balances
.filter((b) => b.usable && b.verified && b.usableBalanceRaw > 0n)
.sort((a, b) => (b.valueUsd ?? 0) - (a.valueUsd ?? 0))
.map((b) => ({
key: `${b.chainId}:${b.tokenAddress}`,
label: `${b.symbol} on ${chainNames.get(b.chainId)}`,
amount: formatUnits(b.usableBalanceRaw, b.decimals),
valueUsd: b.valueUsd, // null when no price is available
}));
```
`usableBalanceRaw` excludes gas reserves. Show `actualBalanceRaw` if you also display the full wallet balance.
## Show only Relay-supported balances
```typescript title="TypeScript"
const relayBalances = (await client.getBalances()).filter(
(b) => b.usable && b.providers.some((p) => p.id === 'relay'),
);
```
Provider support does not guarantee destination-call support. Each quote reports that in `quote.supportsDestinationCalls`.
## Preview a rate before wallet connection
Call `swapWithExactIn` after `initialize()` and before `setEVMProvider()`.
```typescript title="TypeScript"
import { UserActionError } from '@avail-project/nexus-core';
const from = { chainId: 1, tokenAddress: ETH_USDC } as const;
const [fromToken, toToken] = await Promise.all([
client.getToken(from),
client.getToken({ chainId: 8453, tokenAddress: BASE_WETH }),
]);
await client
.swapWithExactIn(
{
sources: [{ ...from, amountRaw: parseUnits('100', fromToken.decimals) }],
toChainId: 8453,
toTokenAddress: BASE_WETH,
},
{
hooks: {
onIntent: (hook) => {
showRate(formatUnits(hook.quote.output.amountRaw, toToken.decimals), hook.quote.fees);
hook.deny();
},
},
},
)
.catch((error) => {
if (!(error instanceof UserActionError)) showQuoteError(error);
});
```
A disconnected preview always rejects. After the wallet connects, start a new swap to get an executable quote.
## Swap with a review UI
```typescript title="TypeScript"
const usdc = await client.getToken({ chainId: 8453, tokenAddress: BASE_USDC });
const result = await client.swapWithExactOut(
{ toChainId: 8453, toTokenAddress: BASE_USDC, toAmountRaw: parseUnits('25', usdc.decimals) },
{
hooks: {
onIntent: (hook) =>
openReview({
quote: hook.quote,
canConfirm: hook.execution.possible,
onConfirm: hook.allow,
onCancel: hook.deny,
onRefresh: () => hook.refresh(), // resolves with the replacement quote
}),
},
},
);
```
The swap waits until you call `allow()` or `deny()`. Await `refresh()` before allowing, render the quote it returns, and reread `hook.execution`.
## Bridge USDC to Base
```typescript title="TypeScript"
const usdc = await client.getToken({ chainId: 8453, tokenAddress: BASE_USDC });
const result = await client.swapWithExactOut({
toChainId: 8453,
toTokenAddress: BASE_USDC,
toAmountRaw: parseUnits('100', usdc.decimals),
sources: [
{ chainId: 1, tokenAddress: ETH_USDC },
{ chainId: 42161, tokenAddress: ARB_USDC },
],
});
console.log(result.intentExplorerUrl);
```
A bridge is a swap with the same asset's address on each chain. Omit `sources` to let the quote draw from any wallet balance.
## Deposit into Aave with your wallet
`swapAndExecute` funds the shortfall on Base, then your wallet calls the contract.
```typescript title="TypeScript"
import { encodeFunctionData, parseAbi, type Hex } from 'viem';
const poolAbi = parseAbi([
'function supply(address asset, uint256 amount, address onBehalfOf, uint16 referralCode)',
]);
const supplyData = (amount: bigint, user: Hex) =>
encodeFunctionData({ abi: poolAbi, functionName: 'supply', args: [BASE_USDC, amount, user, 0] });
const usdc = await client.getToken({ chainId: 8453, tokenAddress: BASE_USDC });
const amount = parseUnits('50', usdc.decimals);
const result = await client.swapAndExecute({
toChainId: 8453,
toTokenAddress: BASE_USDC,
toAmountRaw: amount,
execute: {
to: AAVE_POOL,
data: supplyData(amount, userAddress),
gas: 300_000n,
tokenApproval: { toTokenAddress: BASE_USDC, amount, spender: AAVE_POOL },
},
});
if (result.executionMode === 'wallet') console.log(result.execute.txExplorerUrl);
```
`result.swapSkipped` is `true` when the wallet already holds enough on Base. Narrow on `executionMode` before reading `execute`.
## Deposit into Aave through Relay
With `useProviderDestinationExecution: true`, Relay executes the call during fulfillment. This reuses `supplyData` from the previous recipe.
```typescript title="TypeScript"
const arbUsdc = await client.getToken({ chainId: 42161, tokenAddress: ARB_USDC });
const result = await client.swapAndExecute(
{
tradeType: 'exactInput',
sources: [{ chainId: 42161, tokenAddress: ARB_USDC, amountRaw: parseUnits('50', arbUsdc.decimals) }],
toChainId: 8453,
toTokenAddress: BASE_USDC,
execute: {
to: AAVE_POOL,
gas: 300_000n,
tokenApproval: { toTokenAddress: BASE_USDC, amount: 0n, spender: AAVE_POOL },
},
},
{
useProviderDestinationExecution: true,
beforeExecute: async ({ executeAmountRaw }) => ({ data: supplyData(executeAmountRaw, userAddress) }),
},
);
console.log(result.executionMode, result.executeAmountRaw); // 'provider', fixed deposit amount
```
Relay's router is the caller, so the contract must credit the user (here `onBehalfOf`), not `msg.sender`. Unsupported routes reject before signing; see [provider destination execution](/docs/nexus/nexus-sdk/reference/swap-methods/swap-and-execute#provider-destination-execution).
## Drive a progress UI from events
```typescript title="TypeScript"
import type { IntentEvent } from '@avail-project/nexus-core';
const onEvent = (event: IntentEvent) => {
switch (event.type) {
case 'quote':
setSteps(event.quote.plan.steps.map((s) => ({ id: s.id, type: s.type, state: 'pending' })));
break;
case 'step':
updateStep(event.step.id, event.state, event.errorDetails?.message);
break;
case 'status':
setStatus(event.status, event.legs.map((leg) => leg.txExplorerUrl));
break;
}
};
await client.swapWithExactOut(params, { onEvent });
```
Errors thrown in `onEvent` do not interrupt the swap. A failed step with `committed: true` may still settle, so check its status before retrying.
## Handle quote failures
```typescript title="TypeScript"
import { ERROR_CODES, NexusError, UserActionError, getIntentQuoteFailure } from '@avail-project/nexus-core';
try {
await client.swapWithExactOut(params);
} catch (error) {
if (error instanceof UserActionError) return; // user cancelled
if (!(error instanceof NexusError)) throw error;
const failure = getIntentQuoteFailure(error);
switch (error.code) {
case ERROR_CODES.BACKEND_VALUE_ABOVE_CEILING:
showError(`Maximum is $${String(failure?.details.maxValueUsd)}`);
break;
case ERROR_CODES.BACKEND_INPUT_BELOW_DEPOSIT_FEE:
showError('Increase the amount to cover the deposit fee.');
break;
case ERROR_CODES.BACKEND_NO_ROUTABLE_SOURCE:
showSourceIssues(failure?.sourceVerdicts.filter((v) => v.state === 'unroutable'));
break;
default:
showError(error.message);
}
}
```
`getIntentQuoteFailure` returns `null` for errors that are not quote failures. These failures have `retryable: false`; change the request before retrying.
## Paginate a token picker
```typescript title="TypeScript"
import type { IntentToken } from '@avail-project/nexus-core';
let tokens: IntentToken[] = [];
let offset = 0;
let total = Infinity;
async function loadMore(chainId: number, symbol?: string) {
if (offset >= total) return;
const page = await client.getTokensByChain(chainId, { symbol, offset, limit: 50 });
tokens = [...tokens, ...page.tokens];
offset = page.offset + page.limit;
total = page.total;
}
```
Reset `tokens`, `offset`, and `total` when the chain or search changes. Pages list verified tokens only; pass `includeUnverified: true` to include the rest.
## Show intent history
```typescript title="TypeScript"
const { intents, total } = await client.listIntents({ page: 1, status: 'fulfilled' });
for (const intent of intents) {
console.log(intent.id, intent.status, intent.provider, intent.explorerUrl);
}
```
Pages hold 20 intents for the connected wallet. `provider` is present only when the middleware reports it.
### Get Started with Avail Nexus
Nexus lets your app move assets and execute transactions across chains without requiring users to bridge manually. Your users see their balances across every supported chain, review one quote, and sign once. Nexus turns that into an intent that a provider fills on the destination chain, usually in seconds.
## Quick Look — How the SDK Works
```typescript title="TypeScript"
import { createNexusClient } from '@avail-project/nexus-core';
import { parseUnits } from '@avail-project/nexus-core/utils';
// 1. Create the client and connect a wallet
const client = createNexusClient({ clientId: 'your-app-name', network: 'mainnet' });
await client.initialize();
await client.setEVMProvider(provider); // EIP-1193 provider from your wallet connector
// 2. See balances across all supported chains
const balances = await client.getBalances();
// 3. Get 100 USDC on Arbitrum, funded from any chain
const usdc = { chainId: 42161, tokenAddress: '0xaf88d065e77c8cC2239327C5EDb3A432268e5831' } as const;
const token = await client.getToken(usdc);
await client.swapWithExactOut(
{
toChainId: usdc.chainId,
toTokenAddress: usdc.tokenAddress,
toAmountRaw: parseUnits('100', token.decimals),
},
{
hooks: {
// Show the quote, then call allow() when the user confirms
onIntent: ({ quote, allow, deny }) => allow(),
},
},
);
```
## What Changes for Your Users
| Without Nexus | With Nexus |
| ------------------------------------------------------------- | ------------------------------------------------------------------------ |
| User bridges manually, switches chains, manages gas per chain | User reviews one quote and signs once — Nexus routes funds across chains |
| Dev writes bridge logic per chain pair | Dev calls one SDK method with a destination token and amount |
| Balances scattered across a dozen chains | One unified balance |
## Choose Your Path
- [**Add Cross-Chain to My App**](/docs/nexus/nexus-sdk/get-started/installation) — Use the Nexus SDK directly: a TypeScript API for swaps, bridging, and contract calls. ~15 min.
- [**Drop in Widgets**](/docs/nexus/widgets) — A pre-built UI element for bridging, swaps, and balances — shadcn-based. ~10 min.
- [**Cookbook & Recipes**](/docs/nexus/cookbook-recipes) — Copy-paste patterns for common cross-chain flows — payments, swaps, and more.
## Prerequisites
Node.js 18+, a package manager (npm/pnpm/yarn), and an EVM wallet (MetaMask, WalletConnect, etc.).
## How Nexus Works
When a user starts a cross-chain action, Nexus handles the flow behind one review and one signature:
### The SDK Requests a Quote
The user asks for "100 USDC on Arbitrum". The Nexus middleware picks the source balances, the fees, and one provider to fill the intent.
### The User Approves and Signs Once
Your app shows the [intent](/docs/nexus/concepts/intent) through the `onIntent` hook. The user approves and signs one message. Token approvals and native-token deposits may add wallet prompts on source chains.
### The Provider Fills on the Destination Chain
The signed intent is submitted and the source funds are deposited. The provider delivers the output on the destination chain, usually within seconds. For Nexus routes, a [solver](/docs/nexus/concepts/solvers) fronts its own capital.
### Settlement Happens in the Background
For Nexus routes, the solver is repaid from the deposited source funds through an on-chain settlement authorized by Nexus validators. The user's transfer is already complete.
> **Note**
>
> Each quote is filled by one provider: Nexus solvers (`nexus-v2`), Mayan (`mayan`), or Relay (`relay`). The middleware picks it per quote, and your integration code stays the same.
## Supported Chains & Tokens
Nexus supports swaps, same-asset bridging, and contract execution across major EVM chains, including Ethereum, Arbitrum, Base, Optimism, and Arc. Call `client.getSupportedChains()` and `client.getTokens()` for the live list.
> **Note**
>
> For the full list, see [Supported Chains & Tokens](/docs/nexus/supported-chains-and-tokens).
## Next Steps
- [**Explore Concepts**](/docs/nexus/concepts) — Chain abstraction, intents, solvers — understand the full system.
- [**SDK Reference**](/docs/nexus/nexus-sdk/reference) — API docs for balances, tokens, swaps, execution, and errors.
- [**Cookbook**](/docs/nexus/cookbook-recipes) — Practical recipes for common cross-chain patterns.
## Contract Addresses
Avail Nexus deploys Vault contracts on each supported chain.
These contracts escrow user funds during cross-chain operations.
### Vault Contracts — Mainnet
| Chain | Chain ID | Vault Contract Address |
|-------|----------|----------------------|
| Arc Mainnet | 5042 | 0xa009A9Fdc0eF474e7A3938a89f80329139291568 |
| Ethereum | 1 | 0xa009A9Fdc0eF474e7A3938a89f80329139291568 |
| Optimism | 10 | 0xa009A9Fdc0eF474e7A3938a89f80329139291568 |
| BNB Chain | 56 | 0xa009A9Fdc0eF474e7A3938a89f80329139291568 |
| Polygon | 137 | 0xa009A9Fdc0eF474e7A3938a89f80329139291568 |
| Monad | 143 | 0xa009A9Fdc0eF474e7A3938a89f80329139291568 |
| Hyperliquid (HyperEVM) | 999 | 0xa009A9Fdc0eF474e7A3938a89f80329139291568 |
| Citrea | 4114 | 0xa009A9Fdc0eF474e7A3938a89f80329139291568 |
| MegaETH | 4326 | 0xa009A9Fdc0eF474e7A3938a89f80329139291568 |
| Base | 8453 | 0xa009A9Fdc0eF474e7A3938a89f80329139291568 |
| Arbitrum One | 42161 | 0xa009A9Fdc0eF474e7A3938a89f80329139291568 |
| Avalanche C-Chain | 43114 | 0xa009A9Fdc0eF474e7A3938a89f80329139291568 |
### Vault Contracts — Testnet
| Chain | Chain ID | Vault Contract Address |
|-------|----------|----------------------|
| Arc Testnet | 5042002 | 0x86B60E813f9b739516dDbDc443526be5Ef8336aa |
| Polygon Amoy | 80002 | 0x86B60E813f9b739516dDbDc443526be5Ef8336aa |
| Monad Testnet | 10143 | 0x86B60E813f9b739516dDbDc443526be5Ef8336aa |
| Base Sepolia | 84532 | 0x86B60E813f9b739516dDbDc443526be5Ef8336aa |
| Ethereum Sepolia | 11155111 | 0x86B60E813f9b739516dDbDc443526be5Ef8336aa |
| OP Sepolia | 11155420 | 0x86B60E813f9b739516dDbDc443526be5Ef8336aa |
| Arbitrum Sepolia | 421614 | 0x86B60E813f9b739516dDbDc443526be5Ef8336aa |
| Citrea Testnet | 5115 | 0x86B60E813f9b739516dDbDc443526be5Ef8336aa |
### USDC Token Addresses — Mainnet
| Chain | Token | Contract Address |
|-------|-------|-----------------|
| Ethereum | USDC | 0xA0b86991c6218b36c1d19D4a2e9Eb0cE3606eB48 |
| Base | USDC | 0x833589fCD6eDb6E08f4c7C32D4f71b54bdA02913 |
| Polygon | USDC | 0x3c499c542cEF5E3811e1192ce70d8cC03d5c3359 |
| Arbitrum One | USDC | 0xaf88d065e77c8cC2239327C5EDb3A432268e5831 |
| Optimism | USDC | 0x0b2C639c533813f4Aa9D7837CAf62653d097Ff85 |
| Avalanche C-Chain | USDC | 0xB97EF9Ef8734C71904D8002F8b6Bc66Dd9c48a6E |
| BNB Chain | Binance-Peg USDC | 0x8AC76a51cc950d9822D68b83fE1Ad97B32Cd580d |
| Hyperliquid (HyperEVM) | USDC | 0xb88339CB7199b77E23DB6E890353E22632Ba630f |
| Monad | USDC | 0x754704Bc059F8C67012fEd69BC8A327a5aafb603 |
| Citrea | USDC.e | 0xE045e6c36cF77FAA2CfB54466D71A3aEF7bbE839 |
| MegaETH | USDm | 0xFAfDdbb3FC7688494971a79cc65DCa3EF82079E7 |
### USDC Token Addresses — Testnet
| Chain | Token | Contract Address |
|-------|-------|-----------------|
| Ethereum Sepolia | USDC | 0x1c7D4B196Cb0C7B01d743Fbc6116a902379C7238 |
| Base Sepolia | USDC | 0x036CbD53842c5426634e7929541eC2318f3dCF7e |
| Arbitrum Sepolia | USDC | 0x75faf114eafb1BDbe2F0316DF893fd58CE46AA4d |
| OP Sepolia | USDC | 0x5fd84259d66Cd46123540766Be93DFE6D43130D7 |
| Polygon Amoy | USDC | 0x41E94Eb019C0762f9Bfcf9Fb1E58725BfB0e7582 |
| Monad Testnet | USDC | 0x534b2f3A21130d7a60830c2Df862319e593943A3 |
| Citrea Testnet | USDC | 0xb669dC8cC6D044307Ba45366C0c836eC3c7e31AA |
### USDT Token Addresses — Mainnet
| Chain | Token | Contract Address |
|-------|-------|-----------------|
| Ethereum | USDT | 0xdAC17F958D2ee523a2206206994597C13D831ec7 |
| Polygon | USDT0 | 0xc2132D05D31c914a87C6611C10748AEb04B58e8F |
| Arbitrum One | USDT0 | 0xFd086bC7CD5C481DCC9C85ebE478A1C0b69FCbb9 |
| Optimism | USDT | 0x94b008aA00579c1307B0EF2c499aD98a8ce58e58 |
| Avalanche C-Chain | USDT | 0x9702230A8Ea53601f5cD2dc00fDBc13d4dF4A8c7 |
| BNB Chain | Binance-Peg USDT | 0x55d398326f99059fF775485246999027B3197955 |
| Hyperliquid (HyperEVM) | USDT0 | 0xB8CE59FC3717ada4C02eaDF9682A9e934F625ebb |
| Monad | USDT0 | 0xe7cd86e13AC4309349F30B3435a9d337750fC82D |
| MegaETH | USDT0 | 0xB8CE59FC3717ada4C02eaDF9682A9e934F625ebb |
| Citrea | USDT.e | 0x9f3096Bac87e7F03DC09b0B416eB0DF837304dc4 |
| Base | USDT | 0xfde4C96c8593536E31F229EA8f37b2ADa2699bb2 |
### USDT Token Addresses — Testnet
| Chain | Token | Contract Address |
|-------|-------|-----------------|
| Arbitrum Sepolia | USDT | 0xF954d4A5859b37De88a91bdbb8Ad309056FB04B1 |
| OP Sepolia | USDT | 0x6462693c2F21AC0E517f12641D404895030F7426 |
### Migration Guides
Each guide covers one upgrade step — what changed, why, and the exact renames and rewrites to apply. New guides are added here as new major versions ship.
## Current versions
| Surface | Package / registry | Current |
| ------------- | -------------------------------------------------------------------------------------- | ------------ |
| Nexus SDK | [`@avail-project/nexus-core`](https://www.npmjs.com/package/@avail-project/nexus-core) | 3.x |
| Avail Widgets | `availproject/widgets/nexus` (shadcn registry) | Nexus Widget |
## Guides
- [**Migrate to Nexus SDK v3**](/docs/nexus/migration/sdk-v2-to-v3) — nexus-core 2.x to 3.x: address-based swaps replace bridge methods, one balance query, hooks under options.hooks, intent events.
- [**Migrate to Nexus SDK v2**](/docs/nexus/migration/sdk-v1-to-v2) — nexus-core 1.x to 2.x — factory client, param renames, per-operation hooks, plan-based events.
- [**Migrate to Nexus Widget**](/docs/nexus/migration/widgets-legacy-to-nexus-widget) — Standalone SwapWidget/FastBridge/FastTransfer/Deposit components to the single unified Nexus Widget.
### Deposit (exact-input-mode)
## How exact-input mode works
Choose one or more tokens to fund your deposit and enter how much to spend from each. The widget quotes how much of the destination token you’ll receive to deposit. Review the quote, then confirm your deposit.
> **Note**
>
> Looking for exact-output mode instead? See [Deposit (exact-output-mode)](/docs/nexus/widgets/deposit) to enter the exact amount you want to deposit.
## Installation
#### NPM (Recommended)
```bash
npm install @avail-project/widgets viem wagmi @tanstack/react-query
```
#### shadcn/ui (Power Users)
```bash
npx shadcn@latest add availproject/widgets/nexus
```
## Usage
`NexusWidget` must be rendered inside `NexusProvider` (mandatory — it initializes the SDK), and the provider should receive your `identity.clientId`. See [Get Started](/docs/nexus/widgets) for provider setup and [Client ID](/docs/nexus/widgets#client-id) for details.
In exact-input mode, set `mode: "deposit"` and `route: "exactInput"`. The user selects one or more tokens to spend and specifies input amounts. The widget quotes the destination deposit amount, handles quoting and routing, and dynamically provides the execution amount to `executeDeposit`.
#### NPM
```tsx showLineNumbers
import { NexusProvider, NexusWidget } from "@avail-project/widgets";
import { encodeFunctionData } from "viem";
const APP_DEPOSIT_CONTRACT = "0x...";
const DESTINATION_TOKEN = "0x...";
const DESTINATION_CHAIN_ID = 42161;
const APP_DEPOSIT_ABI = [
{
inputs: [
{ internalType: "address", name: "token", type: "address" },
{ internalType: "uint256", name: "amount", type: "uint256" },
{ internalType: "address", name: "user", type: "address" },
],
name: "deposit",
outputs: [],
stateMutability: "nonpayable",
type: "function",
},
] as const;
const depositConfig = {
mode: "deposit",
route: "exactInput", // Enables exact input deposit mode
destination: {
chain: DESTINATION_CHAIN_ID,
tokens: [
{
address: DESTINATION_TOKEN,
symbol: "USDT",
decimals: 6,
logo: "https://example.com/usdt.svg",
},
],
},
depositAddress: APP_DEPOSIT_CONTRACT,
executeDeposit: (_symbol, tokenAddress, amount, _chainId, user) => ({
to: APP_DEPOSIT_CONTRACT,
gas: 400_000n,
data: encodeFunctionData({
abi: APP_DEPOSIT_ABI,
functionName: "deposit",
args: [tokenAddress, amount, user],
}),
tokenApproval: {
toTokenAddress: tokenAddress,
amount,
spender: APP_DEPOSIT_CONTRACT,
},
}),
validation: {
minAmount: "1",
maxAmount: "1000",
},
appearance: {
appName: "Your App",
appLogoURL: "https://example.com/logo.svg",
heading: "Deposit",
mode: "system",
primaryColor: "#0A6BEB",
},
} as const;
;
```
#### shadcn/ui
```tsx showLineNumbers
import NexusProvider from "@/components/nexus/NexusProvider";
import { NexusWidget } from "@/components/nexus/nexus";
import { encodeFunctionData } from "viem";
const APP_DEPOSIT_CONTRACT = "0x...";
const DESTINATION_TOKEN = "0x...";
const DESTINATION_CHAIN_ID = 42161;
const APP_DEPOSIT_ABI = [
{
inputs: [
{ internalType: "address", name: "token", type: "address" },
{ internalType: "uint256", name: "amount", type: "uint256" },
{ internalType: "address", name: "user", type: "address" },
],
name: "deposit",
outputs: [],
stateMutability: "nonpayable",
type: "function",
},
] as const;
const depositConfig = {
mode: "deposit",
route: "exactInput", // Enables exact input deposit mode
enableOnRamp: true, // Optional; defaults to false (wallet funding only).
destination: {
chain: DESTINATION_CHAIN_ID,
tokens: [
{
address: DESTINATION_TOKEN,
symbol: "USDT",
decimals: 6,
logo: "https://example.com/usdt.svg",
},
],
},
depositAddress: APP_DEPOSIT_CONTRACT,
executeDeposit: (_symbol, tokenAddress, amount, _chainId, user) => ({
to: APP_DEPOSIT_CONTRACT,
gas: 400_000n,
data: encodeFunctionData({
abi: APP_DEPOSIT_ABI,
functionName: "deposit",
args: [tokenAddress, amount, user],
}),
tokenApproval: {
toTokenAddress: tokenAddress,
amount,
spender: APP_DEPOSIT_CONTRACT,
},
}),
validation: {
minAmount: "1",
maxAmount: "1000",
},
appearance: {
appName: "Your App",
appLogoURL: "https://example.com/logo.svg",
heading: "Deposit",
mode: "system",
primaryColor: "#0A6BEB",
},
} as const;
;
```
## Configuration
In exact-input mode, users specify what source assets and amounts they want to spend. The widget queries Nexus intent routes, quotes the destination amount to be deposited, and submits the intent via `swapAndExecute`.
| Prop | Required | Description |
| ---------------------------------------------------------------------------------- | -------- | ------------------------------------------------------------------------------------------------------------------------------------------- |
| `config.mode` | Yes | Must be `"deposit"`. |
| `config.route` | Yes | Set to `"exactInput"` for exact input mode. |
| `config.destination.chain` | Yes | Chain ID of the fixed destination network. Deposit destination chain cannot be changed by the user. |
| `config.destination.tokens` | Yes | One or more accepted destination tokens. The token dropdown is limited to this list and is editable only when multiple tokens are supplied. |
| `config.depositAddress` | Yes | Smart contract address for the deposit target. |
| `config.executeDeposit` | Yes | Callback builder returning `{ to, gas, data?, value?, tokenApproval? }` for the final app transaction. `gas` must be a positive `bigint`. |
| `config.enableOnRamp` | Optional | Defaults to `false`. Set `true` to display "Deposit with Cash" alongside wallet funding. |
| `config.validation.minAmount` | Optional | Minimum deposit amount. Must be `0` or greater. |
| `config.validation.maxAmount` | Optional | Maximum deposit amount. Must be greater than `0`. |
| `config.theme` | Optional | `"dark"`, `"light"`, or `"system"`. Defaults to light; system follows OS changes. Overrides `appearance.mode`. |
| `config.appearance` | Optional | Supports `heading`, `appName`, `appLogoURL`, `mode`, and `primaryColor`. |
| `connectedAddress` | Optional | Wallet address to use. If omitted, the connected wagmi account is used. |
| `embed` | Optional | Defaults to `true`. Set `false` to render as a modal surface. |
| `open`, `onOpenChange`, `defaultOpen` | Optional | Control the modal when `embed={false}`. |
| `onStart`, `onComplete`, `onError`, `onClose`, `onConnectClick`, `onConnectWallet` | Optional | Host app callbacks. Use `onConnectClick` to open your app/header wallet modal from the element CTA. |
### Dynamic `executeDeposit` Execution
In exact-input mode, the exact destination deposit amount depends on the quoted return of the input tokens. The Nexus SDK supports exact-input deposits via dynamic execution hooks (`beforeExecute`):
```ts
type ExecuteDeposit = (
tokenSymbol: string,
tokenAddress: `0x${string}`,
amount: bigint,
chainId: number,
user: `0x${string}`,
) => {
to: `0x${string}`;
gas: bigint;
data?: `0x${string}`;
value?: bigint;
tokenApproval?: {
toTokenAddress: `0x${string}`;
amount: bigint;
spender: `0x${string}`;
};
};
```
1. **Quoting**: As the user selects funding tokens and inputs amounts to spend, Nexus generates a quote for the destination token.
2. **Dynamic Calldata Construction**: The SDK invokes `beforeExecute` with the settled destination amount (`context.executeAmountRaw`), calling your `executeDeposit` callback with the actual quoted `amount`.
3. **Execution**: The widget executes token approvals (if required) and calls the deposit contract with the encoded calldata.
4. **Gas Requirement**: `executeDeposit` must return a positive `bigint` for `gas` (e.g. `400_000n`).
### Onramp & Diagnostics
* **Local Currency Funding**: Setting `enableOnRamp: true` allows users to fund deposits with cash or card in addition to cross-chain wallet balances.
* **Provider Verification**: Onramp checks the active wallet provider instead of trusting a persisted address. Disconnected users see "Connect Wallet" after quotes arrive; reconnecting refreshes the quote for the verified account before Pay is enabled.
* **Wallet Disconnect Recovery**: If the wallet disconnects during checkout, reconnect the funded wallet from the settled purchase screen to finish the deposit.
* **Modal Dismissal**: Popup widgets (`embed={false}`) dismiss through the header close button, not outside clicks or Escape.
* **Console Tracing**: Filter the browser console by `[Nexus Onramp]` to trace payment status, SDK gas-swap events, wallet approval, and the final deposit receipt.
## Modal Usage
Render `embed={false}` to invoke Deposit from a button and show the element as a modal. The widget still needs to sit under `NexusProvider`.
```tsx
```
Control the modal from app state when needed:
```tsx const [open, setOpen] = useState(false);
;
```
## Supporting Multiple Opportunities / Selector UI
Since `NexusWidget` executes a single targeted deposit flow at a time, build any opportunity selector in your parent component and render `NexusWidget` with the selected config:
```tsx import { useState } from "react";
import { NexusProvider, NexusWidget } from "@avail-project/widgets";
import { encodeFunctionData } from "viem";
const OPPORTUNITIES = {
aave: {
chain: 42161,
token: {
address: "0xFd086bC7CD5C481DCC9C85ebE478A1C0b69FCbb9",
symbol: "USDT",
decimals: 6,
},
appName: "Aave",
depositAddress: "0x794a61358D6845594F94dc1DB02A252b5b4814aD",
executeDeposit: (symbol, tokenAddress, amount, chainId, user) => ({
to: "0x794a61358D6845594F94dc1DB02A252b5b4814aD",
gas: 400_000n,
data: encodeFunctionData({
/* Aave supply arguments */
}),
tokenApproval: {
toTokenAddress: tokenAddress,
amount,
spender: "0x794a61358D6845594F94dc1DB02A252b5b4814aD",
},
}),
},
compound: {
chain: 8453,
token: {
address: "0x833589fCD6eDb6E08f4c7C32D4f71b54bdA02913",
symbol: "USDC",
decimals: 6,
},
appName: "Compound",
depositAddress: "0xc3d688B66703497DAA19211EEdff47f25384cdc3",
executeDeposit: (symbol, tokenAddress, amount, chainId, user) => ({
to: "0xc3d688B66703497DAA19211EEdff47f25384cdc3",
gas: 400_000n,
data: encodeFunctionData({
/* Compound supply arguments */
}),
tokenApproval: {
toTokenAddress: tokenAddress,
amount,
spender: "0xc3d688B66703497DAA19211EEdff47f25384cdc3",
},
}),
},
};
export function MultiDepositShowcase({ address }) {
const [selectedOpt, setSelectedOpt] =
useState("aave");
return (
);
}
```
### Deposit (exact-output-mode)
## How exact-output mode works
Enter and receive the exact amount you want to deposit. The widget suggests tokens to spend and quotes how much of each you’ll spend.
You can change which tokens you pay with and get a new quote for the same deposit amount.
> **Note**
>
> Looking for exact-input mode? See [Deposit (exact-input-mode)](/docs/nexus/widgets/deposit-exact-input) to fund deposits by specifying input tokens and amounts to spend.
## Installation
#### NPM (Recommended)
```bash
npm install @avail-project/widgets viem wagmi @tanstack/react-query
```
#### shadcn/ui (Power Users)
```bash
npx shadcn@latest add availproject/widgets/nexus
```
## Usage
`NexusWidget` must be rendered inside `NexusProvider` (mandatory — it initializes the SDK), and the provider should receive your `identity.clientId`. See [Get Started](/docs/nexus/widgets) for provider setup and [Client ID](/docs/nexus/widgets#client-id) for details.
#### NPM
```tsx showLineNumbers
import { NexusProvider, NexusWidget } from "@avail-project/widgets";
import { encodeFunctionData } from "viem";
const APP_DEPOSIT_CONTRACT = "0x...";
const DESTINATION_TOKEN = "0x...";
const DESTINATION_CHAIN_ID = 42161;
const APP_DEPOSIT_ABI = [
{
inputs: [
{ internalType: "address", name: "token", type: "address" },
{ internalType: "uint256", name: "amount", type: "uint256" },
{ internalType: "address", name: "user", type: "address" },
],
name: "deposit",
outputs: [],
stateMutability: "nonpayable",
type: "function",
},
] as const;
const depositConfig = {
mode: "deposit",
route: "exactOutput", // Optional; defaults to "exactOutput"
destination: {
chain: DESTINATION_CHAIN_ID,
tokens: [
{
address: DESTINATION_TOKEN,
symbol: "USDT",
decimals: 6,
logo: "https://example.com/usdt.svg",
},
],
},
depositAddress: APP_DEPOSIT_CONTRACT,
executeDeposit: (_symbol, tokenAddress, amount, _chainId, user) => ({
to: APP_DEPOSIT_CONTRACT,
gas: 400_000n,
data: encodeFunctionData({
abi: APP_DEPOSIT_ABI,
functionName: "deposit",
args: [tokenAddress, amount, user],
}),
tokenApproval: {
toTokenAddress: tokenAddress,
amount,
spender: APP_DEPOSIT_CONTRACT,
},
}),
prefill: {
amount: "10",
},
validation: {
minAmount: "1",
maxAmount: "1000",
},
appearance: {
appName: "Your App",
appLogoURL: "https://example.com/logo.svg",
heading: "Deposit",
mode: "system",
primaryColor: "#0A6BEB",
},
} as const;
;
```
#### shadcn/ui
```tsx showLineNumbers
import NexusProvider from "@/components/nexus/NexusProvider";
import { NexusWidget } from "@/components/nexus/nexus";
import { encodeFunctionData } from "viem";
const APP_DEPOSIT_CONTRACT = "0x...";
const DESTINATION_TOKEN = "0x...";
const DESTINATION_CHAIN_ID = 42161;
const APP_DEPOSIT_ABI = [
{
inputs: [
{ internalType: "address", name: "token", type: "address" },
{ internalType: "uint256", name: "amount", type: "uint256" },
{ internalType: "address", name: "user", type: "address" },
],
name: "deposit",
outputs: [],
stateMutability: "nonpayable",
type: "function",
},
] as const;
const depositConfig = {
mode: "deposit",
route: "exactOutput", // Optional; defaults to "exactOutput"
enableOnRamp: true, // Optional; defaults to false (wallet funding only).
destination: {
chain: DESTINATION_CHAIN_ID,
tokens: [
{
address: DESTINATION_TOKEN,
symbol: "USDT",
decimals: 6,
logo: "https://example.com/usdt.svg",
},
],
},
depositAddress: APP_DEPOSIT_CONTRACT,
executeDeposit: (_symbol, tokenAddress, amount, _chainId, user) => ({
to: APP_DEPOSIT_CONTRACT,
gas: 400_000n,
data: encodeFunctionData({
abi: APP_DEPOSIT_ABI,
functionName: "deposit",
args: [tokenAddress, amount, user],
}),
tokenApproval: {
toTokenAddress: tokenAddress,
amount,
spender: APP_DEPOSIT_CONTRACT,
},
}),
prefill: {
amount: "10",
},
validation: {
minAmount: "1",
maxAmount: "1000",
},
appearance: {
appName: "Your App",
appLogoURL: "https://example.com/logo.svg",
heading: "Deposit",
mode: "system",
primaryColor: "#0A6BEB",
},
} as const;
;
```
## Configuration
Generate the exact Deposit configuration needed for your app on the demo app. It generates the complete `depositConfig` object.
Update your app’s branding, enabled funding options, and deposit destination. See your changes in the live preview and copy the config.
Deposit uses `mode: "deposit"`. In exact-output mode (`route: "exactOutput"`, default), users enter the destination deposit amount, paying tokens and spend amounts are suggested and quoted, and the transaction submits through `swapAndExecute`.
| Prop | Required | Description |
| ---------------------------------------------------------------------------------- | -------- | ------------------------------------------------------------------------------------------------------------------------------------------- |
| `config.mode` | Yes | Must be `"deposit"`. |
| `config.route` | Optional | `"exactOutput"` (default) or `"exactInput"`. Exact-output mode lets users enter the target deposit amount to receive. |
| `config.destination.chain` | Yes | Chain ID of the fixed destination network. Deposit destination chain cannot be changed by the user. |
| `config.destination.tokens` | Yes | One or more accepted destination tokens. The token dropdown is limited to this list and is editable only when multiple tokens are supplied. |
| `config.depositAddress` | Yes | Smart contract address for the deposit target. |
| `config.executeDeposit` | Yes | Callback builder returning `{ to, gas, data?, value?, tokenApproval? }` for the final app transaction. `gas` must be a positive `bigint`. |
| `config.enableOnRamp` | Optional | Defaults to `false`. Set `true` to display "Deposit with Cash" alongside wallet funding. |
| `config.prefill.amount` | Optional | Prefills the exact output deposit amount. Must be greater than `0`. |
| `config.validation.minAmount` | Optional | Minimum deposit amount. Must be `0` or greater. |
| `config.validation.maxAmount` | Optional | Maximum deposit amount. Must be greater than `0`. |
| `config.theme` | Optional | `"dark"`, `"light"`, or `"system"`. Defaults to light; system follows OS changes. Overrides `appearance.mode`. |
| `config.appearance` | Optional | Supports `heading`, `appName`, `appLogoURL`, `mode`, and `primaryColor`. |
| `connectedAddress` | Optional | Wallet address to use. If omitted, the connected wagmi account is used. |
| `embed` | Optional | Defaults to `true`. Set `false` to render as a modal surface. |
| `open`, `onOpenChange`, `defaultOpen` | Optional | Control the modal when `embed={false}`. |
| `onStart`, `onComplete`, `onError`, `onClose`, `onConnectClick`, `onConnectWallet` | Optional | Host app callbacks. Use `onConnectClick` to open your app/header wallet modal from the element CTA. |
### Onramp & Diagnostics
* **Local Currency Onramp**: Set `enableOnRamp: true` to offer local currency funding alongside wallet funding. Defaults to `false`, opening directly in the wallet deposit flow.
* **Provider Verification**: Onramp checks the active wallet provider instead of trusting a persisted address. Disconnected users see "Connect Wallet" after quotes arrive; reconnecting refreshes the quote for the verified account before Pay is enabled.
* **Wallet Disconnect Recovery**: If the wallet disconnects during checkout, reconnect the funded wallet from the settled purchase screen to finish the deposit.
* **Modal Dismissal**: Popup widgets (`embed={false}`) dismiss through the header close button, not outside clicks or Escape.
* **Console Tracing**: Filter the browser console by `[Nexus Onramp]` to trace payment status, SDK gas-swap events, wallet approval, and the final deposit receipt.
### `executeDeposit`
```ts
type ExecuteDeposit = (
tokenSymbol: string,
tokenAddress: `0x${string}`,
amount: bigint,
chainId: number,
user: `0x${string}`,
) => {
to: `0x${string}`;
gas: bigint;
data?: `0x${string}`;
value?: bigint;
tokenApproval?: {
toTokenAddress: `0x${string}`;
amount: bigint;
spender: `0x${string}`;
};
};
```
## Modal Usage
Render `embed={false}` to invoke Deposit from a button and show the element as a modal. The widget still needs to sit under `NexusProvider`.
```tsx
```
Control the modal from app state when needed.
```tsx const [open, setOpen] = useState(false);
;
```
## Supporting Multiple Opportunities / Selector UI
Since `NexusWidget` executes a single targeted deposit flow at a time, build any opportunity selector in your parent component and render `NexusWidget` with the selected config:
```tsx import { useState } from "react";
import { NexusProvider, NexusWidget } from "@avail-project/widgets";
import { encodeFunctionData } from "viem";
// Define the Aave & Compound pools/ABIs...
const OPPORTUNITIES = {
aave: {
chain: 42161,
token: {
address: "0xFd086bC7CD5C481DCC9C85ebE478A1C0b69FCbb9",
symbol: "USDT",
decimals: 6,
},
appName: "Aave",
depositAddress: "0x794a61358D6845594F94dc1DB02A252b5b4814aD",
executeDeposit: (symbol, tokenAddress, amount, chainId, user) => ({
to: "0x794a61358D6845594F94dc1DB02A252b5b4814aD",
gas: 400_000n,
data: encodeFunctionData({
/* Aave supply arguments */
}),
tokenApproval: {
toTokenAddress: tokenAddress,
amount,
spender: "0x794a61358D6845594F94dc1DB02A252b5b4814aD",
},
}),
},
compound: {
chain: 8453,
token: {
address: "0x833589fCD6eDb6E08f4c7C32D4f71b54bdA02913",
symbol: "USDC",
decimals: 6,
},
appName: "Compound",
depositAddress: "0xc3d688B66703497DAA19211EEdff47f25384cdc3",
executeDeposit: (symbol, tokenAddress, amount, chainId, user) => ({
to: "0xc3d688B66703497DAA19211EEdff47f25384cdc3",
gas: 400_000n,
data: encodeFunctionData({
/* Compound supply arguments */
}),
tokenApproval: {
toTokenAddress: tokenAddress,
amount,
spender: "0xc3d688B66703497DAA19211EEdff47f25384cdc3",
},
}),
},
};
export function MultiDepositShowcase({ address }) {
const [selectedOpt, setSelectedOpt] =
useState("aave");
return (
);
}
```
### Get Started
Avail Widgets are shadcn-based components built on the Nexus SDK. **Nexus Widget** — the single unified component — handles swap, send, and deposit across chains.
- [**Deposit (exact-output-mode)**](/docs/nexus/widgets/deposit) — Enter the exact amount to deposit; widget suggests and quotes tokens to spend.
- [**Deposit (exact-input-mode)**](/docs/nexus/widgets/deposit-exact-input) — Choose tokens and amounts to spend; widget quotes and deposits the received amount.
- [**Swap and Bridge Widget**](/docs/nexus/widgets/swaps) — Swap and bridge assets across chains with the unified Nexus intent flow.
- [**Send Widget**](/docs/nexus/widgets/transfer) — Send assets to any recipient on any chain with built-in progress tracking.
## Try It Live
## Install Nexus Widget
**Nexus Widget** is the single unified component for all swap, send, and deposit flows. Choose your preferred install method:
#### NPM (Recommended)
### Install the package
```bash
npm install @avail-project/widgets
```
> **Peer dependencies:** `viem` and `wagmi` are required peer dependencies. Install them if you haven't already:
>
> ```bash
> npm install @avail-project/widgets viem wagmi @tanstack/react-query
> ```
The package ships pre-compiled — no additional dependency installs or file copying required.
### Wrap your app with the provider
```tsx showLineNumbers
"use client";
import { NexusProvider } from "@avail-project/widgets";
export default function RootLayout({
children,
}: {
children: React.ReactNode;
}) {
return (
{children}
);
}
```
`NexusProvider` is mandatory — it creates the Nexus SDK client, exposes `useNexus()`, and every `NexusWidget` must be rendered inside it. See [Client ID](#client-id) for what `clientId` is and how to get one.
### Initialize on wallet connect
```tsx showLineNumbers
"use client";
import { useEffect } from "react";
import { useAccount, useConnectorClient } from "wagmi";
import type { EthereumProvider } from "@avail-project/nexus-core";
import { useNexus } from "@avail-project/widgets";
export function InitNexusOnConnect() {
const { status, connector } = useAccount();
const { data: walletClient } = useConnectorClient();
const { handleInit } = useNexus();
useEffect(() => {
if (status !== "connected") return;
void (async () => {
const mobileProvider = walletClient
? ({ request: (args: unknown) => walletClient.request(args as never) } as EthereumProvider)
: undefined;
const desktopProvider = await connector?.getProvider();
const provider = mobileProvider ?? (desktopProvider as EthereumProvider | undefined);
if (!provider || typeof provider.request !== "function") return;
await handleInit(provider);
})();
}, [status, connector, walletClient, handleInit]);
return null;
}
```
### Use the widget
```tsx showLineNumbers
import { NexusProvider, NexusWidget } from "@avail-project/widgets";
export function App({ address }: { address?: `0x${string}` }) {
return (
);
}
```
If `NexusProvider` already wraps your app (as in the layout above), render `NexusWidget` anywhere beneath it and omit the extra provider.
#### shadcn/ui (Power Users)
> **Note**
>
> **For power users** who want full source control — copy the component files into your project and customize freely.
### Install shadcn/ui first
If you haven't already, set up shadcn/ui in your project first. Follow the
official installation guide
Once installed, come back to continue with Avail Widgets.
### Install Nexus Widget via CLI
```bash
npx shadcn@latest add availproject/widgets/nexus
```
This installs from the public GitHub registry and copies all required files and dependencies into your project.
### Wrap your app with the provider
```tsx showLineNumbers
"use client";
import NexusProvider from "@/components/nexus/NexusProvider";
export default function RootLayout({
children,
}: {
children: React.ReactNode;
}) {
return (
{children}
);
}
```
`NexusProvider` is mandatory — it creates the Nexus SDK client, exposes `useNexus()`, and every `NexusWidget` must be rendered inside it. See [Client ID](#client-id) for what `clientId` is and how to get one.
### Initialize on wallet connect
```tsx showLineNumbers
"use client";
import { useEffect } from "react";
import { useAccount, useConnectorClient } from "wagmi";
import type { EthereumProvider } from "@avail-project/nexus-core";
import { useNexus } from "@/components/nexus/NexusProvider";
export function InitNexusOnConnect() {
const { status, connector } = useAccount();
const { data: walletClient } = useConnectorClient();
const { handleInit } = useNexus();
useEffect(() => {
if (status !== "connected") return;
void (async () => {
const mobileProvider = walletClient
? ({ request: (args: unknown) => walletClient.request(args as never) } as EthereumProvider)
: undefined;
const desktopProvider = await connector?.getProvider();
const provider = mobileProvider ?? (desktopProvider as EthereumProvider | undefined);
if (!provider || typeof provider.request !== "function") return;
await handleInit(provider);
})();
}, [status, connector, walletClient, handleInit]);
return null;
}
```
### Use the widget
```tsx showLineNumbers
import NexusProvider from "@/components/nexus/NexusProvider";
import { NexusWidget } from "@/components/nexus/nexus";
export function App({ address }: { address?: `0x${string}` }) {
return (
);
}
```
If `NexusProvider` already wraps your app (as in the layout above), render `NexusWidget` anywhere beneath it and omit the extra provider.
* [Deposit (exact-output-mode)](/docs/nexus/widgets/deposit): `config.mode = "deposit"` (`route: "exactOutput"`, default) — enter the exact amount you want to deposit.
* [Deposit (exact-input-mode)](/docs/nexus/widgets/deposit-exact-input): `config.mode = "deposit"` (`route: "exactInput"`) — choose one or more tokens to fund your deposit and review quoted returns.
* [Swap and Bridge](/docs/nexus/widgets/swaps): `config.mode = "swap"` — swap and bridge assets through one unified intent flow.
* [Send](/docs/nexus/widgets/transfer): `config.mode = "send"` — send assets to a recipient.
## Client ID
`clientId` identifies **your app** (not an end user or wallet) to Nexus. Set it once on `NexusProvider`:
```tsx
{children}
```
> **Treat clientId as required**
>
> If you omit it, `NexusProvider` falls back to your site's hostname (for example `example.com`, or `localhost` for local and non-browser environments). Widgets still work, but the fallback is not a stable identity, and widget telemetry is only recorded when you pass an explicit `identity.clientId`. Always set it in production.
* **One stable ID per integrating app.** Reuse the same value across environments and deployments of that app.
* **Getting an ID.** Client IDs are currently allocated by the Nexus team — reach out to Avail to get one for your app. Don't ship the `YOUR_NEXUS_CLIENT_ID` placeholder.
* **Both install methods.** The npm package and the shadcn component accept the same `config.identity` shape.
* **Opting out.** To disable widget telemetry, set `observability: { disableLogging: true }` in the provider config.
### Swap and Bridge Widget
## Installation
#### NPM (Recommended)
```bash
npm install @avail-project/widgets viem wagmi @tanstack/react-query
```
#### shadcn/ui (Power Users)
```bash
npx shadcn@latest add availproject/widgets/nexus
```
## Usage
`NexusWidget` must be rendered inside `NexusProvider` (mandatory — it initializes the SDK), and the provider should receive your `identity.clientId`. See [Get Started](/docs/nexus/widgets) for provider setup and [Client ID](/docs/nexus/widgets#client-id) for details.
#### NPM
```tsx showLineNumbers
import { NexusProvider, NexusWidget } from "@avail-project/widgets";
const USDC_BASE = "0x833589fCD6eDb6E08f4c7C32D4f71b54bdA02913" as const;
export function SwapAndBridgeExample({ address }: { address?: `0x${string}` }) {
return (
);
}
```
#### shadcn/ui
```tsx showLineNumbers
import NexusProvider from "@/components/nexus/NexusProvider";
import { NexusWidget } from "@/components/nexus/nexus";
const USDC_BASE = "0x833589fCD6eDb6E08f4c7C32D4f71b54bdA02913" as const;
export function SwapAndBridgeExample({ address }: { address?: `0x${string}` }) {
return (
);
}
```
## Configuration
Generate the exact Swap and Bridge configuration needed for your app on the demo app. It generates the complete config object.
Update the widget appearance, multi-asset mode, receive token, and receiving address behavior. See your changes in the live preview and copy the config.
Swap and Bridge uses only `mode: "swap"`. This mode is exact-in: users enter the source amount, the quote determines the receive amount, and the flow submits through `swapWithExactIn`.
| Prop | Required | Description |
| --------------------------------------------- | -------- | ----------------------------------------------------------------------------------------------------------------------- |
| `config.mode` | Yes | Must be `"swap"`. |
| `config.destination.chain` | Optional | Restricts the receive chain when supplied. |
| `config.destination.tokens` | Optional | Restricts receive tokens when supplied with `destination.chain`. Each token needs `address`, `symbol`, and `decimals`. |
| `config.prefill.token` | Optional | Sets the initial receive token without restricting later choices. Ignored when `config.destination.tokens` is supplied. |
| `config.recipientAddress` | Optional | Prefills the recipient address for custom-recipient swaps. |
| `config.theme` | Optional | `"dark"`, `"light"`, or `"system"`. Defaults to light; system follows OS changes. Overrides `appearance.mode`. |
| `config.appearance` | Optional | Supports `heading`, `appName`, `appLogoURL`, `mode`, and `primaryColor`. |
| `connectedAddress` | Optional | Wallet address to use. If omitted, the connected wagmi account is used. |
| `embed` | Optional | Defaults to `true`. Set `false` to render as a modal surface. |
| `onStart`, `onComplete`, `onError`, `onClose` | Optional | Lifecycle callbacks for host apps. |
Swap supports `prefill.token` only. It does not support `prefill.amount` or validation yet.
```ts title="SwapAndBridgeConfig"
type DestinationToken = {
address: `0x${string}`;
symbol: string;
decimals: number;
logo?: string;
};
interface SwapAndBridgeConfig {
mode: "swap";
theme?: "dark" | "light" | "system";
destination?: {
chain?: number;
tokens?: DestinationToken[];
};
prefill?: {
token?: DestinationToken & { chain: number };
};
recipientAddress?: `0x${string}`;
appearance?: {
heading?: string;
appName?: string;
appLogoURL?: string;
mode?: "system" | "light" | "dark";
primaryColor?: string;
};
}
```
Use `destination.tokens` when you want to restrict the receive selector. Use `prefill.token` when you only want the initial receive token selected and still want users to choose from the full supported list. If both are supplied, `destination.tokens[0]` is honored and `prefill.token` is ignored.
### Send Widget
## Installation
#### NPM (Recommended)
```bash
npm install @avail-project/widgets viem wagmi @tanstack/react-query
```
#### shadcn/ui (Power Users)
```bash
npx shadcn@latest add availproject/widgets/nexus
```
## Usage
`NexusWidget` must be rendered inside `NexusProvider` (mandatory — it initializes the SDK), and the provider should receive your `identity.clientId`. See [Get Started](/docs/nexus/widgets) for provider setup and [Client ID](/docs/nexus/widgets#client-id) for details.
#### NPM
```tsx showLineNumbers
import { NexusProvider, NexusWidget } from "@avail-project/widgets";
const USDC_BASE = "0x833589fCD6eDb6E08f4c7C32D4f71b54bdA02913" as const;
const RECIPIENT = "0xF3a15b38e63dBb1a1b2d7842CcD9B9dD8fB9b2E" as const;
export function SendExample({ address }: { address?: `0x${string}` }) {
return (
);
}
```
#### shadcn/ui
```tsx showLineNumbers
import NexusProvider from "@/components/nexus/NexusProvider";
import { NexusWidget } from "@/components/nexus/nexus";
const USDC_BASE = "0x833589fCD6eDb6E08f4c7C32D4f71b54bdA02913" as const;
const RECIPIENT = "0xF3a15b38e63dBb1a1b2d7842CcD9B9dD8fB9b2E" as const;
export function SendExample({ address }: { address?: `0x${string}` }) {
return (
);
}
```
## Configuration
Generate the exact Send configuration needed for your app on the demo app. It generates the complete config object.
Update the widget appearance, default send token, amount defaults, and recipient. See your changes in the live preview and copy the config.
Send uses only `mode: "send"`. This mode is exact-out: users enter the token amount to send, pay-with sources are selected, and the flow submits through the v2 transfer execution path.
| Prop | Required | Description |
| --------------------------------------------- | -------- | --------------------------------------------------------------------------------------------------------------------------- |
| `config.mode` | Yes | Must be `"send"`. |
| `config.destination.chain` | Optional | Restricts the destination chain when supplied. If omitted, users can change chains. |
| `config.destination.tokens` | Optional | Restricts destination tokens when supplied with `destination.chain`. Each token needs `address`, `symbol`, and `decimals`. |
| `config.recipientAddress` | Optional | Prefills and locks the recipient address. A recipient is required before users can submit. |
| `config.prefill.amount` | Optional | Prefills the exact output send amount. Must be greater than `0`. |
| `config.prefill.token` | Optional | Sets the initial destination token without restricting later choices. Ignored when `config.destination.tokens` is supplied. |
| `config.validation.minAmount` | Optional | Minimum amount. Must be `0` or greater. |
| `config.validation.maxAmount` | Optional | Maximum amount. Must be greater than `0`. |
| `config.theme` | Optional | `"dark"`, `"light"`, or `"system"`. Defaults to light; system follows OS changes. Overrides `appearance.mode`. |
| `config.appearance` | Optional | Supports `heading`, `appName`, `appLogoURL`, `mode`, and `primaryColor`. |
| `connectedAddress` | Optional | Wallet address to use. If omitted, the connected wagmi account is used. |
| `embed` | Optional | Defaults to `true`. Set `false` to render as a modal surface. |
| `onStart`, `onComplete`, `onError`, `onClose` | Optional | Lifecycle callbacks for host apps. |
```ts title="SendConfig"
type DestinationToken = {
address: `0x${string}`;
symbol: string;
decimals: number;
logo?: string;
};
interface SendConfig {
mode: "send";
destination?: {
chain?: number;
tokens?: DestinationToken[];
};
recipientAddress?: `0x${string}`;
prefill?: {
amount?: string;
token?: DestinationToken & { chain: number };
};
validation?: {
minAmount?: string;
maxAmount?: string;
};
}
```
Use `destination.tokens` when you want to restrict the selector. Use `prefill.token` when you only want the initial token selected and still want users to choose from the full supported list. If both are supplied, `destination.tokens[0]` is honored and `prefill.token` is ignored.
### Unified Balance
> **Warning**
>
> **Deprecated.** The standalone Unified Balance component has been removed in favor of
> **Nexus Widget**. The cross-chain unified balance is rendered inline as part of the
> swap, send, and deposit flows — see [Swap and Bridge Widget](/docs/nexus/widgets/swaps).
## Migrating
Remove the standalone `` component and install Nexus Widget instead:
```bash
npx shadcn@latest add availproject/widgets/nexus
```
The unified balance view (per-token, per-chain breakdown across connected chains) is shown automatically inside the widget. See [Get Started](/docs/nexus/widgets) to wire it up, and the [Widgets migration guide](/docs/nexus/migration/widgets-legacy-to-nexus-widget) for the full legacy-to-widget mapping.
For programmatic access to balances, use the SDK directly — see [Get Balances](/docs/nexus/nexus-sdk/reference/balances-and-tokens/get-balances).
### FastBridge
[FastBridge](https://fastbridge.availproject.org/) is a unified cross-chain bridge built by Avail. Send tokens from multiple source chains and receive a single output on any supported destination, all in one transaction. It supports swaps natively, so you can send one token and receive a completely different one at the destination.
Unlike traditional bridges, FastBridge never requires native gas tokens. Fees are paid directly from your stablecoin balance (USDC or USDT), and transactions settle in approximately 10 to 20 seconds through a solver-fronted liquidity model.
Launch FastBridge
> **Note**
>
> FastBridge is available today as a standalone interface, and is also built into the [FastBridge Widget](/docs/nexus/widgets) and the [Nexus SDK](/docs/nexus/nexus-sdk/get-started/installation) for embedding into any app.
## How it works
FastBridge uses intent-based bridging. You declare which assets to send from which source chains, and the protocol determines the best route to deliver your chosen output token to the destination chain. Solvers compete to fill the intent using native assets, with no wrapping or synthetic tokens.
* **Multi-source input** — Combine balances across multiple chains and tokens into a single transaction.
* **Exact-In and Exact-Out** — Specify either the amount you want to send, or the exact amount you want to receive. FastBridge calculates the rest.
* **Gas abstraction** — Gas is deducted from your stablecoin balance. No ETH, AVAX, or other native gas tokens are needed.
* **Zero slippage on stablecoins** — Stablecoin-to-stablecoin transfers settle at exactly the quoted amount. Other swaps show price impact up front before confirmation.
## Supported networks, tokens, and wallets
| | |
| -------------- | ----------------------------------------------------------------------------------------------------------- |
| **Chains** | Monad, MegaETH, Citrea, Arbitrum, Avalanche, Ethereum, Optimism, Base, Arc Mainnet, Polygon, BNB, HyperEVM. |
| **Tokens** | All tokens on all supported chains. |
| **Amounts** | No minimum. Maximum $10M per transfer. |
| **Wallets** | Any EVM-compatible wallet (MetaMask, Rabby, Coinbase Wallet, WalletConnect). |
| **Settlement** | \~10–20 seconds. |
## Security model
FastBridge is fully non-custodial. Funds are never held by a centralised party; the protocol routes and settles trustlessly without taking custody at any point. If a transaction fails to settle at the destination, it reverts and your assets remain on the source chain.
Security is backed by [Avail Nexus](/docs/nexus), which provides unified proof verification and intent settlement across chains via a decentralised coordination layer rather than a multisig or federated validator set.
## What makes FastBridge different
| | |
| --------------------------- | --------------------------------------------------------------------------------------------------------------------- |
| **Multi-source with swaps** | Send multiple different tokens from multiple chains and receive a single token at the destination in one transaction. |
| **Unified balance view** | Balances across all connected chains are read simultaneously and shown as a single consolidated total. |
| **Gas abstraction** | Pay gas in stablecoins. No native gas tokens required on any source chain. |
| **Exact-In and Exact-Out** | Choose the send or receive amount and FastBridge handles multi-source aggregation automatically. |
## Developer integrations
- [**FastBridge Widget**](/docs/nexus/widgets/swaps) — Pre-built React component for cross-chain bridging and swaps.
- [**Nexus SDK**](/docs/nexus/nexus-sdk/get-started/installation) — TypeScript SDK for building custom multi-chain experiences.
## FastBridge at a glance
| | |
| ---------------- | ---------------------------------------------------------------------------------------------------------- |
| **Developer** | Avail Project |
| **Type** | Unified bridge and swap |
| **Architecture** | Intent-based, solver-fronted |
| **Tokens** | All tokens on all supported chains |
| **Custody** | Non-custodial |
| **Settlement** | \~10–20 seconds |
| **Built on** | Avail Nexus Protocol |
| **Chains** | Ethereum, Optimism, Base, Monad, MegaETH, Citrea, Arbitrum, Avalanche, Arc Mainnet, Polygon, BNB, HyperEVM |
| **Min / Max** | No minimum, $10M max per transfer |
| **Wallets** | MetaMask, Rabby, Coinbase Wallet, WalletConnect |
| **Multi-source** | Yes |
| **Gas fees** | Paid in stablecoins (USDC / USDT) |
| **Wrapping** | None, native assets only |
## Supported Chains & Tokens
### Mainnet Chains
| Network | Chain ID | Native | Supported Tokens | Swaps |
|---------|----------|--------|-----------------|-------|
| Arc Mainnet | 5042 | USDC | USDC | Yes |
| Ethereum | 1 | ETH | ETH, USDC, USDT | Yes |
| Optimism | 10 | ETH | ETH, USDC, USDT | Yes |
| Polygon | 137 | POL | POL, USDC, USDT | Yes |
| Arbitrum One | 42161 | ETH | ETH, USDC, USDT | Yes |
| Avalanche C-Chain | 43114 | AVAX | AVAX, USDC, USDT | Yes |
| Base | 8453 | ETH | ETH, USDC, USDT | Yes |
| BNB Chain | 56 | BNB | BNB, USDC, USDT | Yes |
| HyperEVM | 999 | HYPE | HYPE, USDC, USDT | Yes |
| Monad | 143 | MON | MON, USDC, USDT | Yes |
| Citrea | 4114 | cBTC | cBTC, USDC.e, USDT.e | Yes |
| MegaETH | 4326 | ETH | ETH, USDM, USDT | Yes |
### Testnet Chains
> Swaps are not supported in testnet environments.
| Network | Chain ID | Native | Supported Tokens |
|---------|----------|--------|-----------------|
| Arc Testnet | 5042002 | USDC | USDC |
| Ethereum Sepolia | 11155111 | ETH | ETH, USDC |
| Optimism Sepolia | 11155420 | ETH | ETH, USDC, USDT |
| Polygon Amoy | 80002 | POL | POL, USDC |
| Arbitrum Sepolia | 421614 | ETH | ETH, USDC, USDT |
| Base Sepolia | 84532 | ETH | ETH, USDC |
| Monad Testnet | 10143 | MON | MON, USDC |
| Citrea Testnet | 5115 | cBTC | cBTC, USDC |
### Token Reference
| Token | Name |
|-------|------|
| ETH | Ethereum |
| USDC | USD Coin |
| USDT | Tether USD |
| USDC.e | Bridged USDC (Citrea) |
| USDT.e | Bridged USDT (Citrea) |
| USDM | USDm |
| POL | Polygon |
| AVAX | Avalanche |
| BNB | BNB |
| HYPE | Hyperliquid |
| MON | Monad |
| cBTC | Citrea BTC |
### Token Allowances
Before an ERC-20 source can fund an intent, the spender named in the quote needs permission to move it. Native-token sources need no allowance; the wallet sends them directly.
The quote lists what is needed in `quote.allowances`. Each entry has the `chainId`, `tokenAddress`, `spender`, `currentRaw`, `requiredRaw`, and `deficitRaw`. The SDK only acts on entries with a positive `deficitRaw`.
## How the SDK grants allowances
After the user approves the quote, the SDK handles each missing allowance:
* **Permit tokens.** The wallet signs an EIP-712 message (`source_approval_signature` step). No transaction and no gas.
* **Other tokens.** The wallet sends an ERC-20 `approve` for exactly `requiredRaw` (`erc20_approval` step). The SDK never grants unlimited approvals.
Your app does not choose approval amounts. The approvals appear in `quote.plan.steps`, so show them in your review UI.
> **Warning**
>
> An `approve` transaction needs native gas on the source chain. Without it, the quote fails with `BACKEND_INSUFFICIENT_APPROVAL_GAS`, even for a rate preview. Fund the source chain or choose another source.
## Failed approvals
If an approval fails, the error carries `error.details.approvals` with each broadcast approval's state: `confirmed`, `reverted`, or `unconfirmed`. An unconfirmed approval may still confirm, so request a fresh quote before trying again.
## Destination approvals
Contract calls on the destination chain use a separate approval. Set `execute.tokenApproval` in `swapAndExecute()`, or `tokenApproval` in `execute()`, and the SDK approves the contract when the current allowance is too low. See [swap and execute](/docs/nexus/nexus-sdk/reference/swap-methods/swap-and-execute).
### What is Chain Abstraction?
Users often hold enough funds in total, but spread across chains. Moving them by hand means bridging chain by chain, switching networks, and paying gas on each.
Chain abstraction removes those steps. Your app asks for an outcome, such as "100 USDC on Base", and Nexus works out where the funds come from:
1. The SDK requests a quote. The Nexus middleware picks the source balances and one provider to fill the [intent](/docs/nexus/concepts/intent).
2. Your app shows the quote, and the user approves it.
3. The user signs the intent once. Token approvals and native-token deposits may add wallet prompts on source chains.
4. The provider delivers funds on the destination chain, usually within seconds. See the [intent lifecycle](/docs/nexus/concepts/intent-lifecycle).
*Showing a subset of supported chains. See [Supported Chains & Tokens](/docs/nexus/supported-chains-and-tokens) for the full list.*
For users, this means one review instead of a bridge per chain. For developers, it means one SDK call per operation, with no per-chain bridge logic and no contract changes when Nexus adds a chain.
### How Intents are Processed
Every swap, bridge, and funded contract call runs the same lifecycle. The SDK reports each step through `onEvent`, and the operation's promise resolves only after the intent is fulfilled.
## Stages
### Quote
The SDK requests a quote. The middleware selects source balances and a [provider](/docs/nexus/concepts/solvers), and returns the [intent](/docs/nexus/concepts/intent) with its fees and plan.
### Review
Your `onIntent` hook shows the quote. The user approves with `allow()`, cancels with `deny()`, or requests a new quote with `refresh()`. Without a hook, the SDK accepts the quote.
### Approvals
For each source token without enough allowance, the wallet sends an ERC-20 approval or signs a permit. See [allowances](/docs/nexus/concepts/allowances).
### Signature
The user signs the intent once with `personal_sign`.
### Native deposits
Native-token sources are sent from the wallet as source-chain transactions.
### Submission and fulfillment
The SDK submits the signed intent and polls its status: `created`, then `deposited` once source funds arrive, then `fulfilled` when the provider delivers on the destination chain.
The SDK polls every 2 seconds (`pollingIntervalMs`) and waits up to 2 minutes (`fillTimeoutMinutes`). An intent that is not filled before its expiry becomes `expired`.
> **Warning**
>
> A timeout or rejected promise after submission does not mean the intent failed. It may still fulfill. Check `listIntents()` or the [Nexus Explorer](https://nexus-v2.mainnet.avail.so/) before retrying.
`listIntents()` returns the same statuses: `created`, `deposited`, `fulfilled`, or `expired`.
### What is an Intent?
An intent is a request to receive a token on a destination chain, paid for with tokens the user holds on one or more source chains. The user signs it once, and a provider fills it.
Every intent starts as a quote from the Nexus middleware. The SDK passes the quote to your `onIntent` hook so the user can review it before anything is signed.
## What a quote contains
| Field | Meaning |
| ---------------- | ----------------------------------------------------------------------------- |
| `provider` | The provider that fills this quote: `nexus-v2`, `mayan`, or `relay` |
| `tradeType` | `exactInput` or `exactOutput` |
| `input` | One entry per source chain and token: amount, deposit fee, and total required |
| `output` | Destination chain, token, quoted `amountRaw`, and guaranteed `minAmountRaw` |
| `fees` | Deposit, fulfillment, protocol, and solver fees, in raw units and USD |
| `allowances` | Approvals the user still needs on source chains |
| `plan` | The ordered steps the SDK will run |
| `sourceVerdicts` | Whether each candidate source was selected, unused, or unroutable, and why |
| `expiresAt` | Quote expiry, in Unix seconds |
Amounts ending in `Raw` are `bigint` values in the token's smallest unit. USD amounts are decimal strings.
```typescript title="TypeScript"
onIntent: ({ quote, allow }) => {
console.log(quote.provider, quote.output.minAmountRaw, quote.fees.solverUsd);
allow();
};
```
The user can ask for a new quote with `refresh()` before approving. After approval, the quote is fixed. See [review quotes](/docs/nexus/nexus-sdk/reference/swap-methods/review-quotes) for the full hook.
### Bridge, Transfer & Execute
Every cross-chain operation in the SDK is an [intent](/docs/nexus/concepts/intent). Bridging, transfers, and contract calls are different ways to use one.
| Operation | Method |
| ---------------- | -------------------------------------------------------------------------- |
| Bridge | `swapWithExactOut` or `swapWithExactIn`, with the same asset on each chain |
| Transfer | `swapAndExecute`, with a token transfer as the destination call |
| Execute | `execute`, using funds already on the destination chain |
| Fund and execute | `swapAndExecute` |
## Bridge
A bridge is a same-asset swap. Pass the asset's address on each source chain and on the destination chain. Funds always arrive at the connected wallet.
```typescript title="TypeScript"
const BASE_USDC = '0x833589fCD6eDb6E08f4c7C32D4f71b54bdA02913';
const usdc = await client.getToken({ chainId: 8453, tokenAddress: BASE_USDC });
await client.swapWithExactOut({
toChainId: 8453,
toTokenAddress: BASE_USDC,
toAmountRaw: parseUnits('100', usdc.decimals),
});
```
## Transfer
Swaps have no recipient field. To deliver funds to another address, use `swapAndExecute` and make the destination call a transfer. Your wallet funds itself on the destination chain, then sends the call.
```typescript title="TypeScript"
import { encodeFunctionData, erc20Abi } from 'viem';
await client.swapAndExecute({
toChainId: 8453,
toTokenAddress: BASE_USDC,
toAmountRaw: amount,
execute: {
to: BASE_USDC,
data: encodeFunctionData({ abi: erc20Abi, functionName: 'transfer', args: [recipient, amount] }),
gas: 100_000n,
},
});
```
For a native-token transfer, set `execute.to` to the recipient and `execute.value` to the amount.
## Execute
`execute()` calls any contract on a supported chain with funds the wallet already holds there. You supply the contract address, calldata, and an optional token approval.
## Fund and execute
`swapAndExecute()` funds a destination contract call, then runs it. With exact output, it funds only the shortfall and skips the swap when the wallet already holds enough (`result.swapSkipped`).
By default the connected wallet sends the call after fulfillment (`executionMode: 'wallet'`). With `useProviderDestinationExecution: true`, Relay executes the call as part of fulfillment instead (`executionMode: 'provider'`). See [swap and execute](/docs/nexus/nexus-sdk/reference/swap-methods/swap-and-execute).
### Liquidity Routing
Every intent draws funds from one or more source balances. By default the Nexus middleware chooses them from the wallet's balances. Pass `sources` to limit its choice.
## Exact output: optional sources
For `swapWithExactOut` and exact-output `swapAndExecute`, `sources` is optional. Each entry needs a `chainId` and can add a `tokenAddress`.
```typescript title="TypeScript"
sources?: { chainId: number; tokenAddress?: Hex }[];
```
* Omit `sources`, or pass `[]`, to let the quote use any wallet balance.
* Pass entries to restrict the quote to those chains or tokens. They are candidates; the quote decides how much to take from each.
## Exact input: required sources
For `swapWithExactIn` and exact-input `swapAndExecute`, you choose every source and its amount.
```typescript title="TypeScript"
sources: { chainId: number; tokenAddress: Hex; amountRaw: bigint }[];
```
All sources must share one provider with the destination. In a picker, pass the sources already selected to `getAvailableSourceTokens(destination, selected)` so it only offers compatible tokens.
## Changing sources during review
The `onIntent` hook's `refresh(sources)` returns a new quote for a different selection, so users can change sources without restarting the operation. Render the quote it returns. For exact input, every replacement source still needs `tokenAddress` and `amountRaw`.
`quote.sourceVerdicts` explains each candidate: `selected`, `unused`, or `unroutable` with a `reason` such as `BELOW_DEPOSIT_FEE` or `INSUFFICIENT_APPROVAL_GAS`. Use it to show why a balance was skipped.
### Solvers and Providers
Each quote names one provider in `quote.provider`. The provider is responsible for delivering the destination output. The middleware chooses it per quote; your integration code does not change.
| Provider | Who fills the intent |
| ---------- | -------------------- |
| `nexus-v2` | Nexus solvers |
| `mayan` | Mayan's network |
| `relay` | Relay's network |
## Nexus solvers
Solvers are market makers. Once the user's funds are deposited on the source chains, a solver fronts its own capital on the destination chain to fill the intent. Users receive funds in seconds instead of waiting for cross-chain finality.
The protocol then repays the solver from the deposited source funds through an on-chain settlement authorized by Nexus validators. Settlement runs in the background; the user's transfer is already complete.
Avail runs the Nexus solvers today. As the solver network decentralizes, multiple solvers will compete to fill each intent.
To fill an intent means to deliver the funds it requests on the destination chain.
### Crosschain Swaps
A crosschain swap converts tokens on one or more source chains into a token on a destination chain, in a single [intent](/docs/nexus/concepts/intent). Tokens are identified by chain ID and contract address, not symbol.
## How swaps are routed
The Nexus middleware quotes each swap. It picks the source balances and one provider (`nexus-v2`, `mayan`, or `relay`) that fills the whole swap from source to destination. The quote names it in `quote.provider` and is fixed once the user approves.
You do not choose or combine routes. To steer a quote, restrict its sources; see [liquidity routing](/docs/nexus/concepts/source-chain-selection).
Before quoting, the catalog shows which tokens can pair:
* `getAvailableSourceTokens(destination)` lists sources that can reach a destination, grouped by provider.
* `getAvailableDestinationTokens(sources)` lists destinations reachable from the given sources.
* `confirmRouteExists(sources, destination)` checks catalog compatibility. It does not guarantee a quote.
## Exact input
`swapWithExactIn` spends a fixed raw amount from every source. The output varies with price and fees. All sources and the destination must share one provider.
## Exact output
`swapWithExactOut` delivers a fixed raw amount on the destination chain. Omit `sources` to let the quote draw from any wallet balance, or pass candidate tokens to restrict it. The quote decides how much to take from each.
## Slippage
`slippageBps` defaults to `50` (0.5%) and accepts 0 to 10000 or `'auto'`. The user receives at least `quote.output.minAmountRaw`.
## Swap and execute
`swapAndExecute` swaps into the destination token, then calls a contract with it. See [Bridge, Transfer & Execute](/docs/nexus/concepts/nexus-ops).
Read the [swap methods reference](/docs/nexus/nexus-sdk/reference/swap-methods/swap-exact-in) for parameters and examples.
### Migrate to Nexus SDK v2
`@avail-project/nexus-core` 2.0.0 is a full rewrite of the SDK surface. The package name is unchanged — upgrading the dependency is the whole install step — but most call sites need mechanical renames. This page walks you through the breaking changes and how to update for each. The [full migration reference](https://github.com/availproject/nexus-sdk/blob/main/MIGRATION.md) is the complete, version-pinned list — including simulation and event-level detail, every changed field, and a step-by-step checklist.
## Installation
```bash
npm install @avail-project/nexus-core@^2
```
## Client lifecycle
v1 used a class constructor with a single `initialize(provider)`. v2 uses a factory function with a two-step init, so you can fetch deployment data before a wallet connects:
```ts
// v1
const sdk = new NexusSDK({ network: "mainnet" });
await sdk.initialize(provider);
await sdk.deinit();
// v2
const client = createNexusClient({ network: "mainnet" });
await client.initialize(); // fetches deployment info
await client.setEVMProvider(provider); // connects wallet (can be called later)
client.destroy(); // synchronous
```
On account change, create a fresh client and re-run `initialize()` + `setEVMProvider()` — `triggerAccountChange()` is removed.
## Parameter renames
The most common breaking change, applied consistently across `bridge`, `bridgeAndTransfer`, and `bridgeAndExecute`:
| v1 field | v2 field |
| -------------- | --------------- |
| `token` | `toTokenSymbol` |
| `amount` | `toAmountRaw` |
| `sourceChains` | `sources` |
```ts
// v1
await sdk.bridge({ token: "USDC", amount: 1000000n, toChainId: 8453, sourceChains: [1, 42161] });
// v2
await client.bridge({ toTokenSymbol: "USDC", toAmountRaw: 1000000n, toChainId: 8453, sources: [1, 42161] });
```
`toAmountRaw` is in raw base units as a `bigint`, not a human amount — 1 USDC (6 decimals) is `1000000n`, not `1`. Convert with `client.convertTokenReadableAmountToBigInt(amount, tokenSymbol, chainId)`, whose signature is unchanged from v1.
In `bridgeAndExecute`, the `execute` block no longer takes its own `toChainId` — it inherits the top-level one.
Swap inputs were renamed too, and each variant has its own field changes:
| v1 type | v2 type | field changes |
| ------------------- | -------------------- | --------------------------------------------------------------------------------------------- |
| `ExactInSwapInput` | `SwapExactInParams` | `from` → `sources`, `from[].amount` → `sources[].amountRaw` |
| `ExactOutSwapInput` | `SwapExactOutParams` | `fromSources` → `sources`, `toAmount` → `toAmountRaw`, `toNativeAmount` → `toNativeAmountRaw` |
| `MaxSwapInput` | `SwapMaxParams` | `fromSources` → `sources` |
## Hooks: global setters → per-operation options
v1 registered hooks globally on the SDK instance; v2 passes them per operation. When no hooks are provided, v2 auto-approves (intents allowed, allowances set to `'min'`).
```ts
// v1
sdk.setOnIntentHook((data) => data.allow());
sdk.setOnAllowanceHook((data) => data.allow(data.sources.map(() => "min")));
await sdk.bridge(params);
// v2
await client.bridge(params, {
hooks: {
onIntent: (data) => data.allow(),
onAllowance: (data) => data.allow(data.sources.map(() => "min")),
},
});
```
See [Hooks and Errors](/docs/nexus/nexus-sdk/reference/hooks-and-errors) for the v2 hook contract.
## Events: step callbacks → plan-based events
v1's flat `{ name, args }` union (`STEPS_LIST`, `STEP_COMPLETE`, …) is replaced by a typed discriminated union: `status`, `plan_preview`, `plan_confirmed`, and `plan_progress`. Detect a skipped bridge via `result.bridgeSkipped` — there are no `*_SKIPPED` events. See [Bridge Events](/docs/nexus/nexus-sdk/v2/reference/bridge-methods/bridge-events) for the full v2 event reference.
## Results and errors
* Operations **throw typed `NexusError` subclasses** on failure instead of returning `{ success: false }` — use try/catch and branch on `error.category` / `error.code`.
* Operation results nest transactions: `executeResponse` → `execute`, `executeTransactionHash` → `execute.txHash`, `explorerUrl` → `intentExplorerUrl`.
* Bridge `result.sourceTxs` is now an **array** (was a single object): `sourceTxs.hash` → `sourceTxs[].txHash`, `sourceTxs.explorerUrl` → `sourceTxs[].txExplorerUrl`.
* User-denial error codes were renamed. Match with `error instanceof UserActionError`, or branch on the specific `error.code`:
| v1 code | v2 code |
| ------------------------------ | -------------------------------- |
| `USER_DENIED_INTENT` | `USER_INTENT_HOOK_DENIED` |
| `USER_DENIED_ALLOWANCE` | `USER_ALLOWANCE_APPROVAL_DENIED` |
| `USER_DENIED_INTENT_SIGNATURE` | `USER_INTENT_SIGNATURE_DENIED` |
| `USER_DENIED_SIWE_SIGNATURE` | `USER_SIWE_SIGNATURE_DENIED` |
## Balance APIs
The balance methods keep their names — what changed is the return type and one dropped parameter.
* `getBalancesForBridge()` — same call shape; elements are now `TokenBalance` instead of `UserAssetDatum`.
* `getBalancesForSwap()` — the `onlyNativesAndStables` boolean was removed; call it with no arguments.
See the `UserAsset` → `TokenBalance` row below for the field renames (`icon` → `logo`, `balanceInFiat` → `value`, `breakdown` → `chainBalances`).
## Type and API renames
| v1 | v2 |
| --------------------------------------------- | ------------------------------------------------------------------------------------------ |
| `getMyIntents(page)` | `listIntents({ page, status })` → `{ intents, total }` (page size fixed at 20) |
| `ReadableIntent` | `BridgeIntent` (`sources` → `selectedSources`, `allSources` → `availableSources`) |
| `UserAsset` / `UserAssetDatum` | `TokenBalance` (`icon` → `logo`, `balanceInFiat` → `value`, `breakdown` → `chainBalances`) |
| `RFF` / `RequestForFunds` | `IntentRecord` (`id` → `requestHash`, status booleans collapsed into `status`) |
| `SuccessfulSwapResult` | `SwapResult` |
| `getSwapSupportedChains()` | removed — `getSupportedChains()` includes per-chain token info |
| `CHAIN_METADATA` / `TOKEN_METADATA` constants | removed — use `client.chainList` |
| `sdk.utils.isSupportedChain(...)` | `client.isSupportedChain(chainId)` |
## Full reference
The repository's [MIGRATION.md](https://github.com/availproject/nexus-sdk/blob/main/MIGRATION.md) covers every breaking change — simulation result shapes, swap option additions, event step-type mappings, and a complete migration checklist. The [SDK reference](/docs/nexus/nexus-sdk/reference) documents the v2 surface in full.
### Migrate to Nexus SDK v3
In v3, quotes and routing come from the Avail intent service. Bridging is a swap where the source and destination use the same asset. Tokens are identified by chain ID and contract address, not by symbol. To stay on v2, see the [v2 docs](/docs/nexus/nexus-sdk/v2/get-started/installation).
```bash
npm install @avail-project/nexus-core@^3
```
## API mapping
| v2 | v3 |
| ------------------------------------------------------------------------- | --------------------------------------------------------------------------------------------------------------------------------------------------------- |
| `createNexusClient({ network })` | `createNexusClient({ clientId, network })`; `clientId` is required |
| `channel`, `domain`, `forceMayan` config | Removed |
| `getBalancesForBridge()`, `getBalancesForSwap()` | `getBalances()`; `getBalancesForSwap()` remains as a deprecated alias |
| `TokenBalance` grouped by symbol, decimal strings | `IntentBalance`, one per chain and token, raw `bigint` (`actualBalanceRaw`, `usableBalanceRaw`); `balanceRaw` is a deprecated alias of `usableBalanceRaw` |
| `bridge(params)` | `swapWithExactOut` with the same asset's address on each chain |
| `toTokenSymbol`, `sources: number[]` | `toTokenAddress`, `sources: [{ chainId, tokenAddress }]` |
| `bridgeAndTransfer`, `recipient` | No equivalent; output goes to the connected wallet |
| `bridgeAndExecute` | `swapAndExecute` |
| `simulateBridge`, `simulateBridgeAndTransfer`, `simulateBridgeAndExecute` | Review the quote in `hooks.onIntent` |
| `calculateMaxForBridge`, `calculateMaxForSwap` | `usableBalanceRaw` from `getBalances()` |
| `swapWithExactIn` optional `sources` and `amountRaw` | `sources` required, each with a positive `amountRaw` |
| `hooks.onAllowance` | Removed; the SDK approves the minimum required amount |
| `onIntent` receives `intent` (swap methods) | Receives `quote` and `execution` |
| Top-level `options.onIntent` on composites | `options.hooks.onIntent` |
| `slippageTolerance: 0.005` | `slippageBps: 50` (0–10000 or `'auto'`) |
| `plan_preview`, `plan_confirmed`, `plan_progress`, `status` events | `quote`, `step`, `status` events (`IntentEvent`) |
| `BridgeResult` / `SwapResult` with `sourceTxs` | `IntentResult`: `intentId`, `intentExplorerUrl`, `quote`, `status`, `approvals`, `nativeTransactions` |
| `bridgeSkipped`, `bridgeResult` | `swapSkipped`, `swapResult` |
| `result.execute` always present | Narrow on `result.executionMode === 'wallet'` first |
| `execute.gas` optional on composites | Required on `swapAndExecute` |
| `tokenApproval.toTokenSymbol` | `tokenApproval.toTokenAddress` |
| `convertTokenReadableAmountToBigInt(amount, symbol, chainId)` | `parseUnits(amount, token.decimals)` from `@avail-project/nexus-core/utils` |
| `getSupportedChains()` with tokens | `getSupportedChains()` returns chains only; use `getTokens` or `getTokensByChain` |
| `IntentRecord` with `requestHash`, `sources`, `destinations` | `IntentRecord` with `id`, `provider`, `status`, `explorerUrl`, `createdAt`, `updatedAt` |
## Client creation
```typescript title="TypeScript"
// v2
const client = createNexusClient({ network: 'mainnet' });
// v3
const client = createNexusClient({ clientId: 'your-app-name', network: 'mainnet' });
```
`initialize()`, `setEVMProvider()`, and `destroy()` are unchanged.
## Balances
```typescript title="TypeScript"
// v2
const assets = await client.getBalancesForBridge();
for (const asset of assets) console.log(asset.symbol, asset.usableBalance);
// v3
import { formatUnits } from '@avail-project/nexus-core/utils';
const balances = await client.getBalances();
for (const b of balances) {
console.log(b.chainId, b.symbol, formatUnits(b.usableBalanceRaw, b.decimals));
}
```
## Bridge to swap
```typescript title="TypeScript"
// v2
await client.bridge(
{ toTokenSymbol: 'USDC', toAmountRaw: 100_000_000n, toChainId: 8453, sources: [1] },
{
hooks: {
onIntent: ({ intent, allow }) => allow(),
onAllowance: ({ allow }) => allow(['min']),
},
},
);
// v3
import { parseUnits } from '@avail-project/nexus-core/utils';
const baseUsdc = { chainId: 8453, tokenAddress: '0x833589fCD6eDb6E08f4c7C32D4f71b54bdA02913' } as const;
const token = await client.getToken(baseUsdc);
await client.swapWithExactOut(
{
toChainId: baseUsdc.chainId,
toTokenAddress: baseUsdc.tokenAddress,
toAmountRaw: parseUnits('100', token.decimals),
sources: [{ chainId: 1, tokenAddress: '0xA0b86991c6218b36c1d19d4a2e9eb0cE3606eB48' }],
},
{
hooks: { onIntent: ({ quote, allow }) => allow() },
slippageBps: 50,
},
);
```
## bridgeAndExecute to swapAndExecute
```typescript title="TypeScript"
// v2
const result = await client.bridgeAndExecute(
{
toTokenSymbol: 'USDC',
toAmountRaw: amountRaw,
toChainId: 8453,
execute: {
to: vault,
data,
tokenApproval: { toTokenSymbol: 'USDC', amount: amountRaw, spender: vault },
},
},
{ onIntent: ({ allow }) => allow() },
);
if (!result.bridgeSkipped) console.log(result.bridgeResult.intentExplorerUrl);
console.log(result.execute.txHash);
// v3
const result = await client.swapAndExecute(
{
toChainId: baseUsdc.chainId,
toTokenAddress: baseUsdc.tokenAddress,
toAmountRaw: amountRaw,
execute: {
to: vault,
data,
gas: 350_000n,
tokenApproval: { toTokenAddress: baseUsdc.tokenAddress, amount: amountRaw, spender: vault },
},
},
{ hooks: { onIntent: ({ intent, allow }) => allow() } },
);
if (!result.swapSkipped) console.log(result.swapResult.intentExplorerUrl);
if (result.executionMode === 'wallet') console.log(result.execute.txHash);
```
`swapAndExecute` defaults to `tradeType: 'exactOutput'`. With `useProviderDestinationExecution: true`, the result has `executionMode: 'provider'` and no `execute` or `approval`. See [Swap and execute](/docs/nexus/nexus-sdk/reference/swap-methods/swap-and-execute).
## Events
```typescript title="TypeScript"
// v2
onEvent: (event) => {
if (event.type === 'plan_preview') renderPlan(event.plan.steps);
if (event.type === 'plan_progress') renderStep(event.step.type, event.state);
if (event.type === 'status') renderStatus(event.status);
},
// v3
onEvent: (event) => {
if (event.type === 'quote') renderPlan(event.quote.plan.steps);
if (event.type === 'step') renderStep(event.step.type, event.state);
if (event.type === 'status') renderStatus(event.status, event.substatus);
},
```
`status` events carry the intent lifecycle (`created`, `deposited`, `fulfilled`, `expired`) and per-source `legs`. See [Swap events](/docs/nexus/nexus-sdk/reference/swap-methods/swap-events).
## Errors
`NexusError`, its subclasses, and `ERROR_CODES` keep the same shape. Quote failures carry new `BACKEND_*` codes; read diagnostics with `getIntentQuoteFailure(error)`. See [Hooks and Errors](/docs/nexus/nexus-sdk/reference/hooks-and-errors).
### Migrate to Nexus Widget
Avail Widgets consolidates all standalone cross-chain widgets into a single component: **Nexus Widget**. If your app uses `SwapWidget`, `FastBridge`, `FastTransfer`, `NexusDeposit`, `UnifiedBalance`, or `ViewHistory`, this guide maps each to its replacement.
## What changed
| Legacy component | Status | Replacement |
| -------------------------------- | ------- | ------------------------------------------------------------------------------------------------------------ |
| `SwapWidget` | Removed | `NexusWidget` with `config.mode = "swap"` |
| `FastBridge` | Removed | `NexusWidget` with `config.mode = "swap"` |
| `FastTransfer` | Removed | `NexusWidget` with `config.mode = "send"` |
| `NexusDeposit` / `BridgeDeposit` | Removed | `NexusWidget` with `config.mode = "deposit"` |
| `UnifiedBalance` | Removed | Inline balance views inside Nexus Widget |
| `ViewHistory` | Removed | For programmatic intent history, use the SDK's [`listIntents`](/docs/nexus/nexus-sdk/reference/list-intents) |
## 1. Install Nexus Widget
```bash
npx shadcn@latest add availproject/widgets/nexus
```
The install places the widget under `components/nexus/` and pins `@avail-project/nexus-core` v2. If you are also upgrading direct SDK usage, see the [SDK v1 → v2 guide](/docs/nexus/migration/sdk-v1-to-v2).
## 2. Replace components
### Swaps and bridges
```diff
-import { SwapWidget } from "@/components/avail-widgets/swaps";
+import { NexusWidget } from "@/components/nexus/nexus";
-
+
```
### Sends and transfers
```diff
-import { FastTransfer } from "@/components/avail-widgets/transfer";
+import { NexusWidget } from "@/components/nexus/nexus";
-
+
```
### Protocol deposits
```diff
-import { NexusDeposit } from "@/components/avail-widgets/deposit";
+import { NexusWidget } from "@/components/nexus/nexus";
-
+ ({
+ to: "0xContract...",
+ data: "0xCalldata...",
+ tokenApproval: { toTokenAddress: tokenAddress, amount, spender: "0xContract..." },
+ }),
+ }}
+/>
```
See the [Deposit Widget page](/docs/nexus/widgets/deposit) for the full `executeDeposit` contract.
## 3. Provider updates
`NexusProvider` is still required — `NexusWidget` must be rendered inside it. Update its import to the new unified location and pass your `clientId` through `config.identity`:
```tsx
import NexusProvider from "@/components/nexus/NexusProvider";
{children}
;
```
If you don't pass a `clientId`, the provider falls back to your site's hostname, which is not a stable app identity and doesn't enable widget telemetry. See [Client ID](/docs/nexus/widgets#client-id).
SDK initialization on wallet connect is unchanged in shape — resolve the EIP-1193 provider from your wallet library and pass it to `handleInit` from `useNexus()`. See [Get Started](/docs/nexus/widgets).
## 4. Custom modifications
> **Local modifications are not carried over**
>
> The install writes new files under `components/nexus/`. Customizations you made inside the legacy `components/avail-widgets/` folders (theme colors, analytics hooks, transaction overrides) are **not** transferred automatically. Back up the legacy folders before deleting them.
Recommended workflow:
1. **Back up** your existing legacy component folders outside the git workspace.
2. **Install** Nexus Widget with the command above.
3. **Prefer callbacks over forks** — `onStart`, `onComplete(explorerUrl)`, `onError(message)`, and `onConnectClick` cover the common customization points without modifying widget source.
4. **Port UI styles** into `components/nexus/nexus.tsx` and its child files using your Tailwind theme.
5. **Delete** the legacy folders once the new widget is verified.
### Cookbook Recipes
Each recipe assumes an initialized `client` with a connected wallet unless it says otherwise. See [SDK setup](/docs/nexus/nexus-sdk/get-started/nexus-sdk-setup). Names such as `showError`, `openReview`, `params`, and `userAddress` stand in for your app's code.
The recipes share these constants:
```typescript title="TypeScript"
import { parseUnits, formatUnits } from '@avail-project/nexus-core/utils';
const ETH_USDC = '0xA0b86991c6218b36c1d19d4a2e9eb0cE3606eB48';
const ARB_USDC = '0xaf88d065e77c8cC2239327C5EDb3A432268e5831';
const BASE_USDC = '0x833589fCD6eDb6E08f4c7C32D4f71b54bdA02913';
const BASE_WETH = '0x4200000000000000000000000000000000000006';
const AAVE_POOL = '0xA238Dd80C259a72e81d7e4664a9801593F98d1c5'; // Aave v3 Pool on Base
```
## Show balances in a token picker
List spendable, verified balances, largest first.
```typescript title="TypeScript"
const chainNames = new Map(client.getSupportedChains().map((c) => [c.id, c.name]));
const balances = await client.getBalances();
const rows = balances
.filter((b) => b.usable && b.verified && b.usableBalanceRaw > 0n)
.sort((a, b) => (b.valueUsd ?? 0) - (a.valueUsd ?? 0))
.map((b) => ({
key: `${b.chainId}:${b.tokenAddress}`,
label: `${b.symbol} on ${chainNames.get(b.chainId)}`,
amount: formatUnits(b.usableBalanceRaw, b.decimals),
valueUsd: b.valueUsd, // null when no price is available
}));
```
`usableBalanceRaw` excludes gas reserves. Show `actualBalanceRaw` if you also display the full wallet balance.
## Show only Relay-supported balances
```typescript title="TypeScript"
const relayBalances = (await client.getBalances()).filter(
(b) => b.usable && b.providers.some((p) => p.id === 'relay'),
);
```
Provider support does not guarantee destination-call support. Each quote reports that in `quote.supportsDestinationCalls`.
## Preview a rate before wallet connection
Call `swapWithExactIn` after `initialize()` and before `setEVMProvider()`.
```typescript title="TypeScript"
import { UserActionError } from '@avail-project/nexus-core';
const from = { chainId: 1, tokenAddress: ETH_USDC } as const;
const [fromToken, toToken] = await Promise.all([
client.getToken(from),
client.getToken({ chainId: 8453, tokenAddress: BASE_WETH }),
]);
await client
.swapWithExactIn(
{
sources: [{ ...from, amountRaw: parseUnits('100', fromToken.decimals) }],
toChainId: 8453,
toTokenAddress: BASE_WETH,
},
{
hooks: {
onIntent: (hook) => {
showRate(formatUnits(hook.quote.output.amountRaw, toToken.decimals), hook.quote.fees);
hook.deny();
},
},
},
)
.catch((error) => {
if (!(error instanceof UserActionError)) showQuoteError(error);
});
```
A disconnected preview always rejects. After the wallet connects, start a new swap to get an executable quote.
## Swap with a review UI
```typescript title="TypeScript"
const usdc = await client.getToken({ chainId: 8453, tokenAddress: BASE_USDC });
const result = await client.swapWithExactOut(
{ toChainId: 8453, toTokenAddress: BASE_USDC, toAmountRaw: parseUnits('25', usdc.decimals) },
{
hooks: {
onIntent: (hook) =>
openReview({
quote: hook.quote,
canConfirm: hook.execution.possible,
onConfirm: hook.allow,
onCancel: hook.deny,
onRefresh: () => hook.refresh(), // resolves with the replacement quote
}),
},
},
);
```
The swap waits until you call `allow()` or `deny()`. Await `refresh()` before allowing, render the quote it returns, and reread `hook.execution`.
## Bridge USDC to Base
```typescript title="TypeScript"
const usdc = await client.getToken({ chainId: 8453, tokenAddress: BASE_USDC });
const result = await client.swapWithExactOut({
toChainId: 8453,
toTokenAddress: BASE_USDC,
toAmountRaw: parseUnits('100', usdc.decimals),
sources: [
{ chainId: 1, tokenAddress: ETH_USDC },
{ chainId: 42161, tokenAddress: ARB_USDC },
],
});
console.log(result.intentExplorerUrl);
```
A bridge is a swap with the same asset's address on each chain. Omit `sources` to let the quote draw from any wallet balance.
## Deposit into Aave with your wallet
`swapAndExecute` funds the shortfall on Base, then your wallet calls the contract.
```typescript title="TypeScript"
import { encodeFunctionData, parseAbi, type Hex } from 'viem';
const poolAbi = parseAbi([
'function supply(address asset, uint256 amount, address onBehalfOf, uint16 referralCode)',
]);
const supplyData = (amount: bigint, user: Hex) =>
encodeFunctionData({ abi: poolAbi, functionName: 'supply', args: [BASE_USDC, amount, user, 0] });
const usdc = await client.getToken({ chainId: 8453, tokenAddress: BASE_USDC });
const amount = parseUnits('50', usdc.decimals);
const result = await client.swapAndExecute({
toChainId: 8453,
toTokenAddress: BASE_USDC,
toAmountRaw: amount,
execute: {
to: AAVE_POOL,
data: supplyData(amount, userAddress),
gas: 300_000n,
tokenApproval: { toTokenAddress: BASE_USDC, amount, spender: AAVE_POOL },
},
});
if (result.executionMode === 'wallet') console.log(result.execute.txExplorerUrl);
```
`result.swapSkipped` is `true` when the wallet already holds enough on Base. Narrow on `executionMode` before reading `execute`.
## Deposit into Aave through Relay
With `useProviderDestinationExecution: true`, Relay executes the call during fulfillment. This reuses `supplyData` from the previous recipe.
```typescript title="TypeScript"
const arbUsdc = await client.getToken({ chainId: 42161, tokenAddress: ARB_USDC });
const result = await client.swapAndExecute(
{
tradeType: 'exactInput',
sources: [{ chainId: 42161, tokenAddress: ARB_USDC, amountRaw: parseUnits('50', arbUsdc.decimals) }],
toChainId: 8453,
toTokenAddress: BASE_USDC,
execute: {
to: AAVE_POOL,
gas: 300_000n,
tokenApproval: { toTokenAddress: BASE_USDC, amount: 0n, spender: AAVE_POOL },
},
},
{
useProviderDestinationExecution: true,
beforeExecute: async ({ executeAmountRaw }) => ({ data: supplyData(executeAmountRaw, userAddress) }),
},
);
console.log(result.executionMode, result.executeAmountRaw); // 'provider', fixed deposit amount
```
Relay's router is the caller, so the contract must credit the user (here `onBehalfOf`), not `msg.sender`. Unsupported routes reject before signing; see [provider destination execution](/docs/nexus/nexus-sdk/reference/swap-methods/swap-and-execute#provider-destination-execution).
## Drive a progress UI from events
```typescript title="TypeScript"
import type { IntentEvent } from '@avail-project/nexus-core';
const onEvent = (event: IntentEvent) => {
switch (event.type) {
case 'quote':
setSteps(event.quote.plan.steps.map((s) => ({ id: s.id, type: s.type, state: 'pending' })));
break;
case 'step':
updateStep(event.step.id, event.state, event.errorDetails?.message);
break;
case 'status':
setStatus(event.status, event.legs.map((leg) => leg.txExplorerUrl));
break;
}
};
await client.swapWithExactOut(params, { onEvent });
```
Errors thrown in `onEvent` do not interrupt the swap. A failed step with `committed: true` may still settle, so check its status before retrying.
## Handle quote failures
```typescript title="TypeScript"
import { ERROR_CODES, NexusError, UserActionError, getIntentQuoteFailure } from '@avail-project/nexus-core';
try {
await client.swapWithExactOut(params);
} catch (error) {
if (error instanceof UserActionError) return; // user cancelled
if (!(error instanceof NexusError)) throw error;
const failure = getIntentQuoteFailure(error);
switch (error.code) {
case ERROR_CODES.BACKEND_VALUE_ABOVE_CEILING:
showError(`Maximum is $${String(failure?.details.maxValueUsd)}`);
break;
case ERROR_CODES.BACKEND_INPUT_BELOW_DEPOSIT_FEE:
showError('Increase the amount to cover the deposit fee.');
break;
case ERROR_CODES.BACKEND_NO_ROUTABLE_SOURCE:
showSourceIssues(failure?.sourceVerdicts.filter((v) => v.state === 'unroutable'));
break;
default:
showError(error.message);
}
}
```
`getIntentQuoteFailure` returns `null` for errors that are not quote failures. These failures have `retryable: false`; change the request before retrying.
## Paginate a token picker
```typescript title="TypeScript"
import type { IntentToken } from '@avail-project/nexus-core';
let tokens: IntentToken[] = [];
let offset = 0;
let total = Infinity;
async function loadMore(chainId: number, symbol?: string) {
if (offset >= total) return;
const page = await client.getTokensByChain(chainId, { symbol, offset, limit: 50 });
tokens = [...tokens, ...page.tokens];
offset = page.offset + page.limit;
total = page.total;
}
```
Reset `tokens`, `offset`, and `total` when the chain or search changes. Pages list verified tokens only; pass `includeUnverified: true` to include the rest.
## Show intent history
```typescript title="TypeScript"
const { intents, total } = await client.listIntents({ page: 1, status: 'fulfilled' });
for (const intent of intents) {
console.log(intent.id, intent.status, intent.provider, intent.explorerUrl);
}
```
Pages hold 20 intents for the connected wallet. `provider` is present only when the middleware reports it.
### Widgets Reference
Widgets are shadcn-based components built on top of the Nexus SDK that let you drop working cross-chain UI into your project.
The standalone per-feature widgets (unified balance, fast bridge, fast transfer, deposit, swaps, view history) have been consolidated into a single **widget**. One component covers swap, send, and deposit modes.
## Install
Install the widget with the shadcn CLI:
```bash title="npm"
npx shadcn@latest add availproject/widgets/nexus
```
The single `NexusWidget` component brings in its own dependencies and source files, and exposes `swap`, `send`, and `deposit` modes.
## Read the full docs
The Widgets documentation now lives on-site. Head there for installation, configuration, and per-mode usage.
- [**Get Started**](/docs/nexus/widgets)
### SDK Reference
Create a client with `createNexusClient` from `@avail-project/nexus-core`, then pick the method for your task.
| Task | Method |
| ----------------------------------------------------- | ----------------------------------------------------------------------------------------- |
| Receive an exact amount on the destination | [`swapWithExactOut`](/docs/nexus/nexus-sdk/reference/swap-methods/swap-exact-out) |
| Spend exact source amounts | [`swapWithExactIn`](/docs/nexus/nexus-sdk/reference/swap-methods/swap-exact-in) |
| Move the same asset between chains | Either swap method — see [Bridge tokens](/docs/nexus/nexus-sdk/get-started/bridge-tokens) |
| Fund and run a destination contract call | [`swapAndExecute`](/docs/nexus/nexus-sdk/reference/swap-methods/swap-and-execute) |
| Call a contract with funds already on the destination | [`execute`](/docs/nexus/nexus-sdk/reference/execute-methods/execute) |
| Estimate a contract call | [`simulateExecute`](/docs/nexus/nexus-sdk/reference/execute-methods/simulate-execute) |
| Show wallet balances | [`getBalances`](/docs/nexus/nexus-sdk/reference/balances-and-tokens/get-balances) |
| Find chains and tokens | [Token catalog](/docs/nexus/nexus-sdk/reference/balances-and-tokens/token-catalog) |
| Show past intents | [`listIntents`](/docs/nexus/nexus-sdk/reference/list-intents) |
- [**Balances & Tokens**](/docs/nexus/nexus-sdk/reference/balances-and-tokens/get-balances) — Wallet balances, the token catalog, and route compatibility.
- [**Swap Methods**](/docs/nexus/nexus-sdk/reference/swap-methods/swap-exact-in) — Exact-in, exact-out, swap and execute, quote review, and events.
- [**Execute Methods**](/docs/nexus/nexus-sdk/reference/execute-methods/execute) — Standalone contract calls and gas estimates.
- [**List Intents**](/docs/nexus/nexus-sdk/reference/list-intents) — A wallet's intent history.
- [**Hooks and Errors**](/docs/nexus/nexus-sdk/reference/hooks-and-errors) — Review hooks and the NexusError types.
- [**Utility Reference**](/docs/nexus/nexus-sdk/reference/utility-reference) — Client config, lifecycle, and helper functions.
## Links
- [**GitHub**](https://github.com/availproject/nexus-sdk/) — Source code for @avail-project/nexus-core.
- [**npm**](https://www.npmjs.com/package/@avail-project/nexus-core) — @avail-project/nexus-core on npm.
- [**Migrate from v2**](/docs/nexus/migration/sdk-v2-to-v3) — Map v2 calls to their v3 equivalents.
### MCP & Agent Skills
This page covers two ways AI assistants can work with Avail Widgets: **Agent Skills** provide integration guidance for each workflow, while the **MCP server** lets assistants browse and install registry components with natural language.
## Agent Skills
[skills.sh](https://skills.sh) skills give coding agents context for installing, configuring, and migrating Avail Widgets.
### Install Skills
```bash
# Install all Avail Widgets skills
npx skills add availproject/widgets
# Install one skill
npx skills add https://github.com/availproject/widgets --skill nexus-widget-swaps
```
### Current Skills
| Skill | Description |
| ------------------------------ | ---------------------------------------------- |
| `avail-widgets-overview` | End-to-end Avail Widgets integration guidance. |
| `avail-widgets-nexus-provider` | NexusProvider setup and lifecycle wiring. |
| `nexus-widget-swaps` | Swap and bridge mode integration. |
| `nexus-widget-send` | Send mode integration. |
| `nexus-widget-deposit` | Deposit mode integration. |
| `nexus-migration-guide` | Migration from legacy standalone widgets. |
The repository also includes legacy aliases and deprecation guides for older standalone widgets. Browse the current collection at [skills.sh/availproject/widgets](https://skills.sh/availproject/widgets).
> **Looking for SDK skills?**
>
> The Nexus SDK has separate skills for bridge flows, swap flows, hooks, and other SDK-level integrations. See [SDK Skills Integration](/docs/nexus/nexus-sdk/reference/utility-reference#skills-integration).
***
## MCP Server
The shadcn MCP Server lets Cursor and other MCP-compatible IDEs talk directly to the Avail Widgets registry. Detailed platform-agnostic docs live at [ui.shadcn.com/docs/mcp](https://ui.shadcn.com/docs/mcp); the sections below focus on Avail Widgets.
## Build with Nexus Widget
**Nexus Widget** is the single unified component for all swap, send, and deposit flows.
### Option 1: NPM (Recommended)
The fastest way to get started — no registry setup required:
```bash
npm install @avail-project/widgets viem wagmi @tanstack/react-query
```
```tsx
import { NexusWidget, NexusProvider } from "@avail-project/widgets";
// NexusProvider is mandatory; set your app's clientId via config.identity.
;
```
### Option 2: shadcn/ui (Power Users)
Install from the public GitHub registry for full source access:
```bash
npx shadcn@latest add availproject/widgets/nexus
```
All legacy standalone elements (FastBridge, FastTransfer, SwapWidget, Deposit, BridgeDeposit, UnifiedBalance, ViewHistory) have been deprecated and removed in favor of Nexus Widget.
***
## MCP Quick Start
> **Note**
>
> **LLM/Agent default behavior:** When a user asks to integrate Avail Widgets, default to `npm install @avail-project/widgets`. Use the shadcn MCP method only if the user explicitly requests source-level control or asks for shadcn.
Select your MCP client and run the matching init command. Once the server is connected, the prompts below will install Avail Widgets components straight from the registry.
#### Cursor
**Run the following command** in your project:
```bash
npx shadcn@latest mcp init --client cursor
```
Open **Cursor Settings** and enable the shadcn MCP server. Then try prompts like:
* Add Nexus Widget to my project using npm install
* Install @avail-project/widgets and set up NexusProvider
* Add deposit mode to my app using Avail Widgets
#### Claude Code
**Run the following command** in your project:
```bash
npx shadcn@latest mcp init --client claude
```
Restart Claude Code and try the prompts above. Use `/mcp` to inspect the server state if needed.
#### VS Code
**Run the following command** in your project:
```bash
npx shadcn@latest mcp init --client vscode
```
Open `.vscode/mcp.json`, click **Start** next to the shadcn server, then try the prompts with GitHub Copilot Chat.
#### Codex
> **Note**
>
> **Note:** The `shadcn` CLI cannot automatically update `~/.codex/config.toml`. Add the config manually.
**Run the following command** in your project:
```bash
npx shadcn@latest mcp init --client codex
```
**Then, append this snippet** to `~/.codex/config.toml`:
```toml
[mcp_servers.shadcn]
command = "npx"
args = ["shadcn@latest", "mcp"]
```
Restart Codex and try the same prompts.
***
## What is MCP?
[Model Context Protocol (MCP)](https://modelcontextprotocol.io) is an open protocol that lets AI assistants securely connect to external tools. When paired with shadcn MCP:
* **Browse components** across every configured registry (public or private)
* **Search by intent** ("find a swaps widget") instead of memorizing package names
* **Install with natural language** without leaving your IDE
* **Work across registries** via `@namespace/component` syntax and per-registry auth
***
## How It Works
1. **Registry connection** – MCP reads your `components.json` and surfaces every registry entry.
2. **Natural language** – You describe what you want in Cursor/Claude/etc.
3. **AI processing** – The assistant maps that intent to registry items.
4. **Component delivery** – The shadcn CLI installs files directly into your repo.
***
## Supported Registries
* **shadcn/ui registry** – ships with every MCP install for the canonical set of components.
* **Avail Widgets registry** – `@avail-widgets` namespace for the Avail-specific UI kit.
* **Third-party registries** – any endpoint that follows the shadcn spec.
* **Private registries** – internal libraries with optional auth headers or tokens.
***
## Configuration
Each client needs a small JSON/TOML stub pointing to the shadcn MCP binary.
### Cursor
```json title=".cursor/mcp.json" {
"mcpServers": {
"shadcn": {
"command": "npx",
"args": ["shadcn@latest", "mcp"]
}
}
}
```
After saving, enable the server in Cursor Settings → MCP.
### Claude Code
```json title=".mcp.json" {
"mcpServers": {
"shadcn": {
"command": "npx",
"args": ["shadcn@latest", "mcp"]
}
}
}
```
Restart Claude Code, run `/mcp`, and confirm the server shows as `Connected`.
### VS Code
```json title=".vscode/mcp.json" {
"servers": {
"shadcn": {
"command": "npx",
"args": ["shadcn@latest", "mcp"]
}
}
}
```
Open the file in VS Code, click **Start** next to the server, and Copilot Chat will gain the new tools.
### Codex
```toml title="~/.codex/config.toml" [mcp_servers.shadcn]
command = "npx"
args = ["shadcn@latest", "mcp"]
```
Restart Codex so it reloads the config.
***
## Configuring Registries
You can mix third-party and internal namespaced registries by extending
`components.json`. This is only needed if you want the shadcn install path.
```json title="components.json" {
"registries": {
"@acme": "https://registry.acme.com/{name}.json",
"@internal": {
"url": "https://internal.company.com/{name}.json",
"headers": {
"Authorization": "Bearer ${REGISTRY_TOKEN}"
}
}
}
}
```
> **Note**
>
> **Tip:** No extra config is required for the default shadcn/ui registry—only
> customize it when you need additional namespaces.
***
## Example Prompts
### NPM Install
* Install @avail-project/widgets and set up NexusProvider in my Next.js app
* Add Nexus Widget in deposit mode for my DeFi protocol using npm
### Browse & Search (shadcn registry)
* Show me all available components in the shadcn registry
* Find me a login form from the shadcn registry
### Install via shadcn MCP
* Add the Nexus Widget from the Avail registry using shadcn
* Install @avail-widgets/nexus
***
## Troubleshooting
### MCP Not Responding
1. Check your MCP config file (`.cursor/mcp.json`, `.mcp.json`, etc.).
2. Restart the IDE after any config edits.
3. Ensure `npx shadcn@latest mcp` runs without errors.
4. Confirm your network can reach the registry URLs.
### Registry Access Issues
1. Double-check registry URLs inside `components.json`.
2. Verify required env vars are loaded (restart `pnpm dev`/IDE if needed).
3. Confirm the registry endpoint is online.
4. Ensure namespace syntax matches (`@namespace/component`).
### Installation Failures
1. Validate that `components.json` exists at the repo root.
2. Check that CLI has write access to `components/` and `lib/` directories.
3. Make sure underlying dependencies (React, Tailwind, etc.) are installed.
4. Inspect CLI output for missing peer deps or TypeScript errors.
### No Tools or Prompts Listed
1. Run `npx clear-npx-cache`.
2. Disable/re-enable the MCP server in your client.
3. Check the MCP log output (`View → Output → MCP: project-*` in Cursor).
***
## Learn More
* [Registry documentation](https://ui.shadcn.com/docs/registry) – overview of shadcn-compatible registries.
* [Namespaces](https://ui.shadcn.com/docs/registry/namespace) – configuring multiple sources.
* [Authentication](https://ui.shadcn.com/docs/registry/authentication) – securing private registries.
* [MCP specification](https://modelcontextprotocol.io/) – full protocol details.
### Bridge Tokens
A bridge is a swap whose source and destination are the same token, so you pass that token's address on each chain. This guide receives 10 USDC on Base, funded from USDC on Arbitrum and Optimism. It needs a client with a connected wallet; see [Nexus SDK Setup](/docs/nexus/nexus-sdk/get-started/nexus-sdk-setup).
## Example
```typescript title="TypeScript"
import {
UserActionError,
type IntentEvent,
type IntentHookData,
type NexusClient,
} from "@avail-project/nexus-core";
import { formatUnits, parseUnits } from "@avail-project/nexus-core/utils";
declare const client: NexusClient;
declare function confirmWithUser(summary: string): Promise;
const USDC = {
arbitrum: { chainId: 42161, tokenAddress: "0xaf88d065e77c8cC2239327C5EDb3A432268e5831" },
optimism: { chainId: 10, tokenAddress: "0x0b2C639c533813f4Aa9D7837CAf62653d097Ff85" },
base: { chainId: 8453, tokenAddress: "0x833589fCD6eDb6E08f4c7C32D4f71b54bdA02913" },
} as const;
const baseUsdc = await client.getToken(USDC.base);
async function review({ quote, execution, allow, deny }: IntentHookData) {
if (!execution.possible) {
console.warn("Cannot execute:", execution.cause, quote.executionWarnings);
deny();
return;
}
const spend = quote.input
.map((input) => `$${input.totalRequiredUsd} ${input.tokenSymbol} on chain ${input.chainId}`)
.join(", ");
const minimum = formatUnits(quote.output.minAmountRaw, baseUsdc.decimals);
const ok = await confirmWithUser(`Spend ${spend}. Receive at least ${minimum} USDC on Base.`);
if (ok) allow();
else deny();
}
function onEvent(event: IntentEvent) {
if (event.type === "step") {
console.log(event.step.type, event.state, event.errorDetails?.code);
} else if (event.type === "status") {
console.log(event.status, event.legs.map((leg) => leg.txExplorerUrl));
}
}
try {
const result = await client.swapWithExactOut(
{
toChainId: USDC.base.chainId,
toTokenAddress: USDC.base.tokenAddress,
toAmountRaw: parseUnits("10", baseUsdc.decimals),
sources: [USDC.arbitrum, USDC.optimism],
},
{ hooks: { onIntent: review }, onEvent },
);
console.log("Bridged", result.intentId, result.intentExplorerUrl);
} catch (error) {
if (error instanceof UserActionError) console.info("User declined");
else throw error;
}
```
## Choose sources
`sources` restricts which chains and tokens can fund the transfer. List the same token on each source chain to keep it a pure bridge. If you omit `sources`, the SDK can spend any token in the wallet and swap it into USDC.
Amounts are raw `bigint` values. Read `decimals` from `getToken()` on each chain instead of assuming a value.
## Review the quote
`hooks.onIntent` receives `quote`, `execution`, `allow`, `deny`, and `refresh`. The operation waits until you call `allow()` or `deny()`; `deny()` rejects the call with a `UserActionError`. Without the hook, the quote is accepted automatically.
| Field | Meaning |
| --------------------------- | ----------------------------------------------------------------------------------- |
| `execution.possible` | `false` with `cause: 'insufficient-balance'` when the wallet cannot cover the quote |
| `quote.input[]` | Per-source `amountRaw`, `totalRequiredRaw` (including deposit fee), and USD values |
| `quote.output.minAmountRaw` | Minimum received after slippage |
| `quote.fees` | Fees in raw units and USD |
| `quote.provider` | Route provider: `nexus-v2`, `mayan`, or `relay` |
Call `await refresh()` for a new quote before allowing a stale one, and render its return value. See [Review quotes](/docs/nexus/nexus-sdk/reference/swap-methods/review-quotes) for details.
## Track progress
`onEvent` receives `quote`, `step`, and `status` events. `step` events report each wallet prompt and submission as `started`, `completed`, or `failed`. `status` events report the intent's lifecycle (`created`, `deposited`, `fulfilled`, or `expired`) and per-source transaction links in `legs`.
The promise resolves after fulfillment with `intentId`, `intentExplorerUrl`, and the transactions it sent.
> **Note**
>
> A rejection after a `step` event with `committed: true` does not mean the transfer failed. Funds may already be deposited and still settle. Check the intent in [`listIntents`](/docs/nexus/nexus-sdk/reference/list-intents) or the explorer before retrying.
## Options
Pass these alongside `hooks` and `onEvent`:
| Option | Default | Description |
| -------------------- | ------- | ------------------------------------ |
| `slippageBps` | `50` | Integer from 0 to 10000, or `'auto'` |
| `fillTimeoutMinutes` | `2` | How long to wait for fulfillment |
| `pollingIntervalMs` | `2000` | Status polling interval |
See [`swapWithExactOut`](/docs/nexus/nexus-sdk/reference/swap-methods/swap-exact-out) for all parameters and [Swap events](/docs/nexus/nexus-sdk/reference/swap-methods/swap-events) for every event field.
### Deposit into Aave
`swapAndExecute` funds a token on the destination chain, then calls a contract with it. This guide spends 10 USDC on Arbitrum and supplies everything it produces to the Aave V3 Pool on Base. It needs a client with a connected wallet; see [Nexus SDK Setup](/docs/nexus/nexus-sdk/get-started/nexus-sdk-setup). Calldata is encoded with [viem](https://viem.sh). Confirm the Pool address in [Aave's address book](https://github.com/bgd-labs/aave-address-book) before use.
## Example
```typescript title="TypeScript"
import { UserActionError, type NexusClient } from "@avail-project/nexus-core";
import { parseUnits } from "@avail-project/nexus-core/utils";
import { encodeFunctionData, type Hex } from "viem";
declare const client: NexusClient;
declare const user: Hex; // Connected wallet address
declare function confirmWithUser(summary: string): Promise;
// Aave V3 Pool on Base. Confirm in Aave's address book before use.
const AAVE_POOL = "0xA238Dd80C259a72e81d7e4664a9801593F98d1c5";
const BASE_USDC = "0x833589fCD6eDb6E08f4c7C32D4f71b54bdA02913";
const ARBITRUM_USDC = { chainId: 42161, tokenAddress: "0xaf88d065e77c8cC2239327C5EDb3A432268e5831" } as const;
const poolAbi = [
{
type: "function",
name: "supply",
stateMutability: "nonpayable",
inputs: [
{ name: "asset", type: "address" },
{ name: "amount", type: "uint256" },
{ name: "onBehalfOf", type: "address" },
{ name: "referralCode", type: "uint16" },
],
outputs: [],
},
] as const;
const supplyData = (amount: bigint) =>
encodeFunctionData({ abi: poolAbi, functionName: "supply", args: [BASE_USDC, amount, user, 0] });
const sourceToken = await client.getToken(ARBITRUM_USDC);
try {
const result = await client.swapAndExecute(
{
tradeType: "exactInput",
sources: [{ ...ARBITRUM_USDC, amountRaw: parseUnits("10", sourceToken.decimals) }],
toChainId: 8453,
toTokenAddress: BASE_USDC,
execute: {
to: AAVE_POOL,
gas: 350_000n,
tokenApproval: { toTokenAddress: BASE_USDC, amount: 0n, spender: AAVE_POOL },
},
},
{
hooks: {
async onIntent({ intent, allow, deny }) {
const amount = intent.executeRequirement.token.amount;
if (await confirmWithUser(`Supply about ${amount} USDC to Aave on Base`)) allow();
else deny();
},
},
beforeExecute: async ({ executeAmountRaw }) => ({ data: supplyData(executeAmountRaw) }),
},
);
console.log("Supplied", result.executeAmountRaw);
if (result.executionMode === "wallet") console.log(result.execute.txExplorerUrl);
if (!result.swapSkipped) console.log(result.swapResult.intentExplorerUrl);
} catch (error) {
if (error instanceof UserActionError) console.info("User declined");
else throw error;
}
```
## How it works
1. The review hook receives `intent`: `executeRequirement` holds the estimated deposit, gas, and approval, and `quote` holds the funding quote when `swapRequired` is `true`.
2. After you call `allow()`, the SDK swaps the sources into Base USDC and waits for fulfillment.
3. The SDK measures the USDC that arrived and calls `beforeExecute` with `executeAmountRaw`, the amount available for the call.
4. Your wallet approves the pool for `executeAmountRaw` if needed, then sends the `supply` transaction on Base.
| Field | Description |
| ----------------------- | --------------------------------------------------------------------------------------- |
| `execute.gas` | Required. Raw gas estimate for the call; the SDK adds chain-specific buffers. |
| `execute.tokenApproval` | Token and spender to approve. Pass `amount: 0n`; the SDK sets it to `executeAmountRaw`. |
| `beforeExecute` | Returns `{ data?, value?, gas? }` to override the call after funding |
> **Note**
>
> Exact-input proceeds are known only after fulfillment. Build amount-dependent calldata in `beforeExecute` from `executeAmountRaw`. Calldata encoded from the quote or the review estimate can supply the wrong amount and revert.
`result.executeAmountRaw` is always present. Narrow on `executionMode === "wallet"` before reading `execute` or `approval`, and on `swapSkipped === false` before reading `swapResult`.
## Let Relay execute the deposit
Set `useProviderDestinationExecution: true` to have Relay approve the pool and call `supply` as part of fulfillment. Your wallet sends no transaction on Base and needs no gas there.
```typescript title="TypeScript"
const result = await client.swapAndExecute(
{
tradeType: "exactInput",
sources: [{ ...ARBITRUM_USDC, amountRaw: parseUnits("10", sourceToken.decimals) }],
toChainId: 8453,
toTokenAddress: BASE_USDC,
execute: {
to: AAVE_POOL,
gas: 350_000n,
tokenApproval: { toTokenAddress: BASE_USDC, amount: 0n, spender: AAVE_POOL },
},
},
{
useProviderDestinationExecution: true,
beforeExecute: async ({ executeAmountRaw }) => ({ data: supplyData(executeAmountRaw) }),
},
);
if (result.executionMode === "provider") {
console.log("Supplied", result.executeAmountRaw, result.swapResult.intentExplorerUrl);
}
```
* `onBehalfOf` must be the user's address. Relay's router is the caller, so the contract must support acting on behalf of the recipient.
* `beforeExecute` runs before review and again on every refresh. `executeAmountRaw` is a fixed budget 1% below the quote's guaranteed minimum, with the reserve capped at $1. Keep the callback free of side effects.
* Output above the budget goes to the user's wallet.
* If the selected route does not support destination calls, the call rejects before signing. It never falls back to wallet execution.
* The result has no `execute` or `approval`.
See [Provider destination execution](/docs/nexus/nexus-sdk/reference/swap-methods/swap-and-execute#provider-destination-execution) for exact-output behavior and route requirements.
### Installation
#### npm
```bash
npm install @avail-project/nexus-core
```
#### pnpm
```bash
pnpm add @avail-project/nexus-core
```
#### yarn
```bash
yarn add @avail-project/nexus-core
```
#### bun
```bash
bun add @avail-project/nexus-core
```
## Requirements
* Node.js 18 or later.
* An [EIP-1193 provider](https://eips.ethereum.org/EIPS/eip-1193) from your wallet connector, such as wagmi, RainbowKit, or `window.ethereum`, for any operation that signs or reads the wallet.
## Entry points
| Import | Contents |
| --------------------------------- | -------------------------------------------------------------------------------------------------------------------------------- |
| `@avail-project/nexus-core` | `createNexusClient`, errors, `ERROR_CODES`, and all types |
| `@avail-project/nexus-core/utils` | Formatting and address helpers: `parseUnits`, `formatUnits`, `formatTokenBalance`, `isValidAddress`, `truncateAddress`, and more |
Next, [set up the client](/docs/nexus/nexus-sdk/get-started/nexus-sdk-setup).
### Initializing Nexus with RainbowKit
This guide passes the connected wagmi connector's EIP-1193 provider to the client and recreates the client whenever the account changes. It assumes you have read [Nexus SDK Setup](/docs/nexus/nexus-sdk/get-started/nexus-sdk-setup).
### Install dependencies
```bash
npm install @avail-project/nexus-core @rainbow-me/rainbowkit wagmi viem @tanstack/react-query
```
### Configure wagmi
```tsx title="src/lib/wagmi.ts"
import { getDefaultConfig } from "@rainbow-me/rainbowkit";
import { arbitrum, base, mainnet, optimism, polygon } from "wagmi/chains";
export const wagmiConfig = getDefaultConfig({
appName: "My App",
projectId: process.env.NEXT_PUBLIC_WALLETCONNECT_PROJECT_ID!,
chains: [mainnet, arbitrum, base, optimism, polygon],
});
```
Get a project ID from [WalletConnect Cloud](https://cloud.walletconnect.com). The SDK switches the wallet to each source chain as needed.
### Create the Nexus provider
```tsx title="src/components/nexus-provider.tsx"
"use client";
import { createContext, useContext, useEffect, useState, type ReactNode } from "react";
import { useAccount } from "wagmi";
import {
createNexusClient,
type EthereumProvider,
type NexusClient,
} from "@avail-project/nexus-core";
const NexusContext = createContext(null);
export function NexusProvider({ children }: { children: ReactNode }) {
const { address, connector, status } = useAccount();
const [client, setClient] = useState(null);
useEffect(() => {
if (status === "connecting" || status === "reconnecting") return;
let cancelled = false;
const next = createNexusClient({ clientId: "my-app", network: "mainnet" });
(async () => {
await next.initialize();
if (cancelled) return;
if (status === "connected" && connector) {
const provider = (await connector.getProvider()) as EthereumProvider;
if (cancelled) return;
await next.setEVMProvider(provider);
}
if (!cancelled) setClient(next);
})().catch((error) => console.error("Nexus setup failed", error));
return () => {
cancelled = true;
setClient(null);
next.destroy();
};
}, [address, connector, status]);
return {children};
}
export const useNexus = () => useContext(NexusContext);
```
The effect depends on `address` and `connector`, so switching accounts or wallets destroys the old client and creates a new one. While disconnected, the client still initializes, so catalog methods and `swapWithExactIn` quote previews work. `useNexus()` returns `null` until setup finishes; check `client.hasEvmProvider` before calling wallet methods.
### Wrap your app
```tsx title="src/components/providers.tsx"
"use client";
import "@rainbow-me/rainbowkit/styles.css";
import { RainbowKitProvider } from "@rainbow-me/rainbowkit";
import { QueryClient, QueryClientProvider } from "@tanstack/react-query";
import type { ReactNode } from "react";
import { WagmiProvider } from "wagmi";
import { wagmiConfig } from "@/lib/wagmi";
import { NexusProvider } from "./nexus-provider";
const queryClient = new QueryClient();
export function Providers({ children }: { children: ReactNode }) {
return (
{children}
);
}
```
Render `Providers` in your root layout, and add RainbowKit's `ConnectButton` anywhere inside it.
### Use the client
```tsx title="src/components/balances.tsx"
"use client";
import { formatUnits } from "@avail-project/nexus-core/utils";
import { useNexus } from "./nexus-provider";
export function Balances() {
const client = useNexus();
async function load() {
if (!client?.hasEvmProvider) return;
const balances = await client.getBalances();
for (const b of balances) {
console.log(b.symbol, b.chainId, formatUnits(b.usableBalanceRaw, b.decimals));
}
}
return ;
}
```
## Next steps
* [Bridge tokens](/docs/nexus/nexus-sdk/get-started/bridge-tokens) between chains.
* [Deposit into Aave](/docs/nexus/nexus-sdk/get-started/deposit-into-aave) from any chain.
### Nexus SDK Setup
## Create and connect a client
```typescript title="TypeScript"
import { createNexusClient, type EthereumProvider } from "@avail-project/nexus-core";
const client = createNexusClient({ clientId: "my-app", network: "mainnet" });
await client.initialize();
const provider = (window as { ethereum?: EthereumProvider }).ethereum;
if (provider) {
await provider.request({ method: "eth_requestAccounts" });
await client.setEVMProvider(provider);
}
```
`initialize()` loads chain metadata. Call it once, before any other method; otherwise calls fail with `SDK_NOT_INITIALIZED`.
`setEVMProvider(provider)` reads the connected account from any EIP-1193 provider. Connect the wallet first, or the call rejects. `client.hasEvmProvider` reports whether a provider is set.
## Client options
| Option | Type | Description |
| ----------- | ------------------------------------ | --------------------------------------------------------------------------- |
| `clientId` | `string` | Required. Stable, non-empty identifier for your app. An empty value throws. |
| `network` | `'mainnet' \| 'canary' \| 'testnet'` | Default `'mainnet'`. |
| `debug` | `boolean` | Enables verbose SDK logging. |
| `analytics` | `{ enabled?: boolean }` | Set `enabled: false` to disable product analytics. |
## Networks
| Network | Chains | Supports |
| --------- | -------- | --------------------------------------------------------------------------------------------------------------------------------- |
| `mainnet` | Mainnet | Everything |
| `canary` | Mainnet | Everything, against pre-release Nexus services |
| `testnet` | Testnets | `execute` and `simulateExecute` only. Swaps, `swapAndExecute`, and async catalog methods reject with `ENVIRONMENT_NOT_SUPPORTED`. |
## What needs a wallet
| Works after `initialize()` | Also needs `setEVMProvider()` |
| ---------------------------------------------------------------------------- | ------------------------------------------------------------ |
| `getSupportedChains`, `getTokens`, `getToken`, and the other catalog methods | `getBalances`, `listIntents` |
| `swapWithExactIn` quote previews (review only, no execution) | `swapWithExactOut`, `swapAndExecute`, and executing any swap |
| | `execute`, `simulateExecute` |
Wallet methods called without a provider reject with `WALLET_NOT_CONNECTED`.
## Account changes and cleanup
```typescript title="TypeScript"
import { createNexusClient, type EthereumProvider, type NexusClient } from "@avail-project/nexus-core";
async function connect(provider: EthereumProvider): Promise {
const next = createNexusClient({ clientId: "my-app", network: "mainnet" });
await next.initialize();
await next.setEVMProvider(provider);
return next;
}
declare const provider: EthereumProvider;
let client = await connect(provider);
provider.on("accountsChanged", async () => {
client.destroy();
client = await connect(provider);
});
```
> **Note**
>
> The client keeps the account it read in `setEVMProvider`. Calling `setEVMProvider` again with the same provider object does nothing, so after an account or provider change, create a new client. Call `destroy()` on the old one and on unmount.
## Next steps
* [Connect with RainbowKit](/docs/nexus/nexus-sdk/get-started/initializing-nexus-with-rainbowkit) in a React app.
* [Bridge tokens](/docs/nexus/nexus-sdk/get-started/bridge-tokens) between chains.
### Hooks and Errors
Pass hooks in the `options` argument of each swap method. `execute` and `simulateExecute` take no hooks.
## Hooks
| Option | Methods | Receives | Details |
| ---------------- | ------------------------------------- | ------------------------------------------------------------------ | --------------------------------------------------------------------------------- |
| `hooks.onIntent` | `swapWithExactIn`, `swapWithExactOut` | `IntentHookData`: `quote`, `execution`, `allow`, `deny`, `refresh` | [Review quotes](/docs/nexus/nexus-sdk/reference/swap-methods/review-quotes) |
| `hooks.onIntent` | `swapAndExecute` | `SwapAndExecuteHookData`: `intent`, `allow`, `deny`, `refresh` | [Swap and execute](/docs/nexus/nexus-sdk/reference/swap-methods/swap-and-execute) |
| `beforeExecute` | `swapAndExecute` | `BeforeExecuteContext`; returns `{ data?, value?, gas? }` | [Swap and execute](/docs/nexus/nexus-sdk/reference/swap-methods/swap-and-execute) |
| `onEvent` | All three swap methods | `IntentEvent`: `quote`, `step`, or `status` | [Swap events](/docs/nexus/nexus-sdk/reference/swap-methods/swap-events) |
* Without `hooks.onIntent`, the SDK accepts the quote automatically.
* With it, the operation waits until you call `allow()` or `deny()`. Returning from the callback does not accept the quote.
* `deny()` rejects the operation with `USER_INTENT_HOOK_DENIED`. A hook that throws rejects the operation with that error.
* Errors thrown inside `onEvent` are caught and do not interrupt the operation.
## Errors
Every SDK error extends `NexusError`. Branch on the subclass or `code`, not on `message`.
| Field | Type | Description |
| ---------- | -------------------------------------- | ---------------------------------------------------------------------------------- |
| `category` | `ErrorCategory` | Matches the subclass, e.g. `'backend'` |
| `code` | `ErrorCode` | Stable string such as `'backend/no_routable_source'`; compare with `ERROR_CODES.*` |
| `message` | `string` | Displayable text, including the underlying wallet or RPC message |
| `context` | `ErrorContext` | `operation`, `service`, `stepId`, `stepType`, and `chainId`, where known |
| `details` | `Record \| undefined` | Failure data such as `txHash`, `requestHash`, `approvals`, or `httpStatus` |
| Subclass | `context.service` | Thrown when |
| ---------------------- | ----------------- | ----------------------------------------------------------------------------------- |
| `ValidationError` | none | Input is invalid, the wallet is not connected, or balances cannot cover the request |
| `UserActionError` | `wallet`, `hook` | The user rejects a wallet prompt or your hook calls `deny()` |
| `ExecutionError` | `wallet`, `rpc` | A transaction fails to send, confirm, or execute |
| `BackendError` | `middleware` | A quote, submission, status, balance, or catalog request fails |
| `ExternalServiceError` | `coinbase` | `getCoinbaseRates` fails |
| `InternalError` | none | An SDK invariant breaks; report it with `code` and `details` |
### Codes to handle
Constants are on `ERROR_CODES`. Treat any `UserActionError` as a cancellation, not a failure.
| Constant | Recovery |
| ------------------------------------------------------------------------------------------------- | ----------------------------------------------------------------------------------------- |
| `WALLET_NOT_CONNECTED` | Call `setEVMProvider`, then start a new operation |
| `SDK_NOT_INITIALIZED` | Call `client.initialize()` first |
| `ENVIRONMENT_NOT_SUPPORTED` | Use `mainnet` or `canary`; `testnet` supports standalone execution only |
| `INVALID_INPUT` | Fix the parameter named in `message` |
| `INSUFFICIENT_BALANCE` | Destination or native funds cannot cover execution; add funds or change sources |
| `BACKEND_INSUFFICIENT_BALANCE` | Reduce the amount or choose another source |
| `BACKEND_INSUFFICIENT_APPROVAL_GAS` | Add native gas on the source chain or choose another source |
| `BACKEND_VALUE_ABOVE_CEILING` | Reduce the value; `getIntentQuoteFailure(error)?.details.maxValueUsd` is the limit in USD |
| `BACKEND_INPUT_BELOW_DEPOSIT_FEE` | Increase the source amount |
| `BACKEND_NO_ROUTE_TO_DESTINATION` | Choose a destination served by the allowed providers |
| `BACKEND_NO_ROUTABLE_SOURCE` | Read `sourceVerdicts` and change sources or amounts |
| `BACKEND_QUOTE_UNAVAILABLE`, `BACKEND_INTENT_REFUSED`, `BACKEND_QUOTE_PRICE_OUTLIER` | Change sources or the amount, then request a new quote |
| `BACKEND_SAME_CHAIN_GAS_DROP_UNSUPPORTED`, `BACKEND_GAS_DROP_TOO_SMALL` | Remove or increase `toNativeAmountRaw` |
| `BACKEND_REQUEST_EXPIRED`, `BACKEND_INVALID_INTENT_SIGNATURE`, `BACKEND_INVALID_PERMIT_SIGNATURE` | Start a new operation to get a fresh quote and signatures |
| `BACKEND_ERROR` with `details.reasonBucket === 'expired'` | The quote or intent expired; start a new operation |
| `BACKEND_PROVIDER_UNAVAILABLE`, `BACKEND_RATE_LIMITED`, `BACKEND_UPSTREAM_ERROR` | Retry later |
| `BACKEND_UNAUTHORIZED` | Check the `clientId` passed to `createNexusClient` |
| `BACKEND_FULFILMENT_WAIT_TIMEOUT` | Not filled within `fillTimeoutMinutes`; check status for `details.requestHash` |
| `BACKEND_UPSTREAM_TIMEOUT`, `BACKEND_NETWORK_ERROR` | After commitment, check status before retrying |
| `EXEC_TX_ONCHAIN_REVERTED` | Inspect `details.txHash`; fix calldata, value, or gas |
| `EXEC_TX_CONFIRM_FAILED`, `EXEC_APPROVAL_TX_CONFIRM_FAILED` | The transaction in `details.txHash` may still confirm; check it before resending |
## getIntentQuoteFailure
`getIntentQuoteFailure(error: unknown): IntentQuoteFailure | null` returns routing diagnostics when the quote service rejects a request. It returns `null` for other errors.
| Field | Type | Description |
| ----------------- | --------------------------- | ------------------------------------------------------------------------------------------------------------------------------------- |
| `subcode` | `IntentQuoteFailureSubcode` | Reason, e.g. `'NO_ROUTABLE_SOURCE'`, `'VALUE_ABOVE_CEILING'` |
| `retryable` | `boolean` | `true` only for `PROVIDER_UNAVAILABLE`; otherwise change the request first |
| `sourceVerdicts` | `IntentSourceVerdict[]` | Per source: `chainId`, `tokenAddress`, `tokenSymbol`, `state` (`selected`, `unused`, or `unroutable`), optional `reason` and `detail` |
| `providerReasons` | `string[]` | Provider-specific reasons |
| `details` | `Record` | Endpoint data, e.g. `maxValueUsd` |
| `errorId`, `code` | `string \| undefined` | Service identifiers for support |
## Example
```typescript title="TypeScript"
import {
ERROR_CODES,
NexusError,
UserActionError,
getIntentQuoteFailure,
} from '@avail-project/nexus-core';
try {
const result = await client.swapWithExactOut({
toChainId: 8453,
toTokenAddress: '0x833589fCD6eDb6E08f4c7C32D4f71b54bdA02913',
toAmountRaw: amountRaw,
});
showSuccess(result.intentExplorerUrl);
} catch (error) {
if (error instanceof UserActionError) return; // User cancelled.
if (!(error instanceof NexusError)) throw error;
switch (error.code) {
case ERROR_CODES.BACKEND_VALUE_ABOVE_CEILING: {
const maxUsd = getIntentQuoteFailure(error)?.details.maxValueUsd;
showError(`Reduce the amount. Limit: $${String(maxUsd ?? 'unknown')}`);
break;
}
case ERROR_CODES.BACKEND_INSUFFICIENT_BALANCE:
showError('Reduce the amount or choose another source.');
break;
case ERROR_CODES.BACKEND_FULFILMENT_WAIT_TIMEOUT:
showPending(String(error.details?.requestHash)); // Do not retry yet.
break;
default:
showError(error.message);
}
reportError({ code: error.code, context: error.context, details: error.details });
}
```
## After a timeout
A `step` event with `committed: true` means the user signed the intent or broadcast a native source deposit. After that point, a rejected promise does not mean the intent failed; it can still fulfill.
> **Note**
>
> Do not start a new swap after a timeout or connection failure that follows commitment. Retrying can spend the funds twice.
1. Find the intent ID in `details.requestHash` or in the last `status` event's `intentId`.
2. Check its status with [`listIntents`](/docs/nexus/nexus-sdk/reference/list-intents) or the intent explorer.
3. Check `details.approvals`, if present. Each entry has `txHash` and a `state` of `confirmed`, `reverted`, or `unconfirmed`. An unconfirmed approval may still confirm.
4. Start a new operation with a fresh quote only after the intent shows `expired`.
In `swapAndExecute` wallet mode, an error after fulfillment leaves the funds in the destination wallet. Retry the call with [`execute`](/docs/nexus/nexus-sdk/reference/execute-methods/execute) instead of swapping again.
### List Intents
`listIntents()` returns the connected wallet's intents across all providers. It requires a [connected wallet](/docs/nexus/nexus-sdk/get-started/nexus-sdk-setup).
## Signature
```typescript title="TypeScript"
listIntents(params?: ListIntentsParams): Promise
```
## Parameters
| Name | Type | Description |
| -------- | -------------- | ------------------------------------------------------------------- |
| `page` | `number` | Optional, default `1`. Integer of 1 or more |
| `status` | `IntentStatus` | Optional. `'created'`, `'deposited'`, `'fulfilled'`, or `'expired'` |
`IntentStatus` is also exported as a value map, e.g. `IntentStatus.Fulfilled`.
## Example
```typescript title="TypeScript"
import { IntentStatus } from '@avail-project/nexus-core';
let page = 1;
while (true) {
const { intents } = await client.listIntents({ page, status: IntentStatus.Fulfilled });
if (intents.length === 0) break;
for (const intent of intents) {
console.log(intent.id, intent.provider, intent.status, intent.explorerUrl);
}
page += 1;
}
```
## Returns
`ListIntentsResult`:
| Field | Type | Description |
| --------- | ---------------- | ------------------------------------------------- |
| `intents` | `IntentRecord[]` | Records on this page, newest `createdAt` first |
| `total` | `number` | Total matching records across all history sources |
`IntentRecord`:
| Field | Type | Description |
| ------------------------ | ----------------------------------------------- | ----------------------------------------------------- |
| `id` | `Hex` | Intent ID; matches `IntentResult.intentId` |
| `provider` | `'nexus-v2' \| 'mayan' \| 'relay' \| undefined` | Present only when the service identifies the provider |
| `status` | `IntentStatus` | Lifecycle status |
| `explorerUrl` | `string` | Intent explorer link |
| `createdAt`, `updatedAt` | `number \| undefined` | Timestamps from the history service |
Each page merges up to 20 records from Nexus history and up to 20 from external-provider history, so a page can hold up to 40 records. Do not derive the page count from `total`; page until `intents` is empty.
## Errors
* `WALLET_NOT_CONNECTED`: no provider is set.
* `INVALID_INPUT`: `page` is not an integer of 1 or more.
* `BACKEND_RFF_LIST_FAILED` or another `BackendError`: the history request failed.
See [Hooks and Errors](/docs/nexus/nexus-sdk/reference/hooks-and-errors).
### Utility Reference
This page covers `createNexusClient`, the client lifecycle, and the helpers exported from `@avail-project/nexus-core/utils`.
## createNexusClient
```typescript title="TypeScript"
import { createNexusClient } from '@avail-project/nexus-core';
const client = createNexusClient({ clientId: 'my-app', network: 'mainnet' });
await client.initialize();
await client.setEVMProvider(provider); // EIP-1193 provider from your wallet connector
```
| Option | Type | Description |
| ----------- | ----------------------------------------------------- | --------------------------------------------------------------------------------------------------------------------------------------------------------------------------------------- |
| `clientId` | `string` | Required. Stable, non-empty identifier for your app. An empty value throws `INVALID_INPUT`. |
| `network` | `'mainnet' \| 'canary' \| 'testnet' \| NetworkConfig` | Default `'mainnet'`. `mainnet` and `canary` use mainnet chains. `testnet` supports standalone `execute` only; intent and async catalog methods reject with `ENVIRONMENT_NOT_SUPPORTED`. |
| `debug` | `boolean` | Verbose SDK logging. Default `false`. |
| `analytics` | `AnalyticsConfig` | Product analytics settings. See [Analytics](#analytics). |
| `devTiming` | `DevTimingConfig` | Timing spans for development. Default disabled. |
A custom `NetworkConfig` is `{ MIDDLEWARE_HTTP_URL, INTENT_EXPLORER_URL, NETWORK_HINT }`, where `NETWORK_HINT` is `'mainnet'`, `'canary'`, or `'testnet'`.
## Lifecycle
| Member | Description |
| ----------------------------------------- | ---------------------------------------------------------------------------------------------------------------------------------- |
| `initialize(): Promise` | Loads the chain and token catalog. Call once per client before any other method. Methods that need it throw `SDK_NOT_INITIALIZED`. |
| `setEVMProvider(provider): Promise` | Connects an EIP-1193 provider and captures its first account. Throws `ExecutionError` if the wallet returns no account. |
| `hasEvmProvider: boolean` | `true` after `setEVMProvider()` succeeds. |
| `destroy(): void` | Ends the analytics session and closes middleware connections. Call on unmount. |
| `isSupportedChain(chainId): boolean` | Whether `chainId` is in `getSupportedChains()`. |
| `chainList: ChainListType` | Synchronous chain lookups for execution metadata. |
`initialize()` does not need a wallet. Catalog methods and exact-input quote previews work before `setEVMProvider()`; balances, swaps, and execution need a wallet.
> **Note**
>
> The client keeps the account it captured. When the user switches account or wallet, call `destroy()` and create a new client. Chain switches the SDK makes during execution do not require a new client.
### chainList
`client.chainList` exposes `chains` and these lookups. Its token lists are not the full catalog; use the [token catalog](/docs/nexus/nexus-sdk/reference/balances-and-tokens/token-catalog) to find tokens.
| Method | Returns |
| --------------------------------------------- | --------------------------------- |
| `getChainByID(id)` | `Chain` |
| `getNativeToken(chainID)` | `TokenInfo` |
| `getTokenByAddress(chainID, address)` | `TokenInfo` |
| `getChainAndTokenByAddress(chainID, address)` | `{ chain, token, isNativeToken }` |
| `getVaultContractAddress(chainID)` | `Hex` |
## Utilities
Import stateless helpers from the `/utils` subpath. `client.utils` exposes the same functions.
| Function | Description |
| ------------------------------------------- | ------------------------------------------------------------------------------------------------------------------------------ |
| `parseUnits(value, decimals)` | Decimal string to raw `bigint`. |
| `formatUnits(value, decimals)` | Raw `bigint` to decimal string. |
| `formatTokenBalance(value, options?)` | Display string, such as `"1.2346 USDC"` or `"~0.0₄8509"`. `options.decimals` is required for `bigint` input. |
| `formatTokenBalanceParts(value, options?)` | Same, split into `text`, `integer`, `fraction`, `symbol`, and `approx`. |
| `isValidAddress(address)` | Whether the string is a valid EVM address. |
| `truncateAddress(address)` | Shortened address for display. |
| `getCoinbaseRates()` | `Promise>` of Coinbase exchange rates. |
| `getSupportedChains(network, { clientId })` | Fetches `{ id, name, logo, swapSupported, asSource, asDestination }[]` for a network without a client. `clientId` is required. |
```typescript title="TypeScript"
import { formatTokenBalance, parseUnits } from '@avail-project/nexus-core/utils';
const token = await client.getToken({ chainId: 8453, tokenAddress: usdcOnBase });
const amountRaw = parseUnits('25.5', token.decimals);
const label = formatTokenBalance(amountRaw, { decimals: token.decimals, symbol: token.symbol });
const chains = await client.utils.getSupportedChains('mainnet'); // uses the client's clientId
```
Use `token.decimals` from the catalog. The same symbol can have different decimals on different chains.
`getFallbackTokenLogoDataUri(symbol, size = 128)` is exported from `@avail-project/nexus-core`, not `/utils`. It returns an SVG data URI to use when a token logo fails to load.
## Analytics
The SDK sends product analytics to Avail's PostHog instance. In the default `mode: 'auto'`, it stays off outside browsers, on localhost, and when `NODE_ENV` is `test`, `ci`, or `development`.
| Option | Description |
| --------------------------------- | ---------------------------------------------------------------------------- |
| `enabled` | `false` disables analytics. Overrides `mode`. |
| `mode` | `'auto'` (default), `'on'` to always send, or `'off'`. |
| `privacy` | `{ anonymizeWallets?, anonymizeAmounts? }`: hash addresses and drop amounts. |
| `posthogApiKey`, `posthogApiHost` | Send events to your own PostHog project. |
| `appMetadata` | `{ appName?, appVersion?, appUrl? }` attached to events. |
```typescript title="TypeScript"
const client = createNexusClient({ clientId: 'my-app', analytics: { enabled: false } });
```
`analytics: { enabled: false }` stops product analytics only. Diagnostic error logging is separate.
## Skills integration
The `nexus-core` agent skill gives AI coding agents, such as Claude Code, Codex, and Cursor, the current SDK integration guide.
```bash
npx skills add availproject/nexus-sdk
```
Browse it at [skills.sh/availproject/nexus-sdk](https://skills.sh/availproject/nexus-sdk). For Widgets skills, see [MCP and agent skills](/docs/nexus/widgets/mcp-and-agent-skills).
### Cookbook Recipes
> **Note**
>
> **You are viewing the Nexus SDK v2 docs.** For the current SDK, see the [v3 docs](/docs/nexus/nexus-sdk/get-started/installation) and the [v2 → v3 migration guide](/docs/nexus/migration/sdk-v2-to-v3).
The Cookbook Recipes are written to show developer patterns on how the SDK is expected to be used by a developer or an LLM agent.
## Getting a client
Every recipe assumes an initialized `NexusClient`. Create one with `createNexusClient()`, then run the two-step init: `initialize()` loads deployment data (chains, tokens, vault contracts) and `setEVMProvider()` attaches a wallet. Call `destroy()` when you are done to flush analytics and release resources.
```typescript
import { createNexusClient } from '@avail-project/nexus-core';
const client = createNexusClient({ network: 'testnet' });
await client.initialize(); // load deployment data
await client.setEVMProvider(window.ethereum); // attach an EIP-1193 wallet
// ... use the client ...
client.destroy(); // clean up when finished
```
> **Note**
>
> Create a fresh client on account change. Calling `setEVMProvider()` again with the same provider instance is a no-op, so build a new client and re-run `initialize()` + `setEVMProvider()` when the connected account switches.
## SDK operations
### How to simulate an operation on Nexus?
Call `client.simulateBridge()`, `client.simulateBridgeAndExecute()`, or `client.simulateBridgeAndTransfer()` to preview an operation *without* sending a transaction. The result contains an `intent` with `selectedSources`, `availableSources`, `fees`, and `destination` details.
```typescript
// 1. Simulate a bridge
const bridgeSimulation = await client.simulateBridge({
toTokenSymbol: 'USDC',
toAmountRaw: 100_000_000n, // 100 USDC (6 decimals)
toChainId: 421614,
});
// 2. Simulate a bridgeAndExecute (bridge + contract call)
const bridgeAndExecuteSimulation = await client.simulateBridgeAndExecute({
toTokenSymbol: 'USDC',
toAmountRaw: 1_000_000n,
toChainId: 421614,
execute: {
to: '0xContractAddress',
data: encodedCalldata,
tokenApproval: {
toTokenSymbol: 'USDC',
amount: 1_000_000n,
spender: '0xContractAddress',
},
},
});
// 3. Simulate a bridgeAndTransfer (cross-chain send)
const bridgeAndTransferSimulation = await client.simulateBridgeAndTransfer({
toTokenSymbol: 'USDC',
toAmountRaw: 1_000_000n,
toChainId: 421614,
recipient: '0xRecipientAddress',
});
```
`simulateBridge()` returns `{ intent, token }`. `simulateBridgeAndExecute()` and `simulateBridgeAndTransfer()` return `{ bridgeSimulation, executeSimulation }`, where `bridgeSimulation` is `null` when no bridge is needed.
```json
{
"intent": {
"provider": "nexus",
"availableSources": [
{
"amount": "6245.786635",
"amountRaw": "6245786635",
"chain": {
"id": 11155111,
"name": "Ethereum Sepolia",
"logo": "https://assets.coingecko.com/asset_platforms/images/279/large/ethereum.png"
},
"token": {
"decimals": 6,
"symbol": "USDC",
"logo": "https://coin-images.coingecko.com/coins/images/6319/large/usdc.png",
"contractAddress": "0x1c7d4b196cb0c7b01d743fbc6116a902379c7238"
},
"value": "6245.79"
},
{
"amount": "754.958732",
"amountRaw": "754958732",
"chain": {
"id": 84532,
"name": "Base Sepolia",
"logo": "https://assets.coingecko.com/asset_platforms/images/131/large/base-network.png"
},
"token": {
"decimals": 6,
"symbol": "USDC",
"logo": "https://coin-images.coingecko.com/coins/images/6319/large/usdc.png",
"contractAddress": "0x036cbd53842c5426634e7929541ec2318f3dcf7e"
},
"value": "754.96"
}
],
"selectedSources": [
{
"amount": "100.000102",
"amountRaw": "100000102",
"chain": {
"id": 11155111,
"name": "Ethereum Sepolia",
"logo": "https://assets.coingecko.com/asset_platforms/images/279/large/ethereum.png"
},
"token": {
"decimals": 6,
"symbol": "USDC",
"logo": "https://coin-images.coingecko.com/coins/images/6319/large/usdc.png",
"contractAddress": "0x1c7d4b196cb0c7b01d743fbc6116a902379c7238"
},
"value": "100.00"
}
],
"destination": {
"amount": "100",
"amountRaw": "100000000",
"chain": {
"id": 421614,
"name": "Arbitrum Sepolia",
"logo": "https://assets.coingecko.com/coins/images/16547/large/arb.jpg"
},
"token": {
"decimals": 6,
"symbol": "USDC",
"logo": "https://coin-images.coingecko.com/coins/images/6319/large/usdc.png",
"contractAddress": "0x75faf114eafb1bdbe2f0316df893fd58ce46aa4d"
},
"value": "100.00",
"nativeAmount": "0",
"nativeAmountRaw": "0",
"nativeAmountValue": "0",
"nativeAmountInToken": "0",
"nativeToken": {
"decimals": 18,
"symbol": "ETH",
"logo": "https://assets.coingecko.com/coins/images/279/large/ethereum.png",
"contractAddress": "0x0000000000000000000000000000000000000000"
}
},
"fees": {
"caGas": "0.000000",
"protocol": "0.0000005",
"solver": "0.000001",
"total": "0.000002",
"totalValue": "0.000002"
},
"sourcesTotal": "100.000102",
"sourcesTotalValue": "100.00"
},
"token": {
"contractAddress": "0x75faf114eafb1BDbe2F0316DF893fd58CE46AA4d",
"decimals": 6,
"logo": "https://coin-images.coingecko.com/coins/images/6319/large/usdc.png",
"name": "USD Coin",
"symbol": "USDC"
}
}
```
### How do I get source chain and destination chain information from an intent?
After simulating, access `intent.selectedSources` to see which chains the SDK chose to pull funds from. Each source nests its chain and token: `source.chain` has `id`, `name`, and `logo`; `source.token` has `symbol`, `decimals`, `logo`, and `contractAddress`. Use `intent.availableSources` to see every chain that *could* be used.
```typescript
const sim = await client.simulateBridge({
toTokenSymbol: 'USDC',
toAmountRaw: 100_000_000n,
toChainId: 421614,
});
// Sources chosen by the solver
sim.intent.selectedSources.forEach((source) => {
console.log(source.chain.name); // "Ethereum Sepolia"
console.log(source.chain.id); // 11155111
console.log(source.chain.logo); // "https://..."
console.log(source.amount); // "100.000102"
console.log(source.token.contractAddress); // "0x..."
});
// All chains that had balance (superset of selectedSources)
console.log(sim.intent.availableSources);
// Destination chain info
console.log(sim.intent.destination.chain.name);
console.log(sim.intent.destination.chain.id);
// Total amount pulled across all sources
console.log(sim.intent.sourcesTotal);
// ─── Alternative: use the intent hook during execution ───
await client.bridge(
{ toTokenSymbol: 'USDC', toAmountRaw: 100_000_000n, toChainId: 421614 },
{
hooks: {
onIntent: ({ intent, allow, deny, refresh }) => {
// Same BridgeIntent structure as the simulation
console.log(intent.selectedSources);
console.log(intent.destination);
allow(); // or deny() to cancel
},
},
}
);
```
```json
{
"selectedSources": [
{
"amount": "100.000102",
"amountRaw": "100000102",
"chain": {
"id": 11155111,
"name": "Ethereum Sepolia",
"logo": "https://assets.coingecko.com/asset_platforms/images/279/large/ethereum.png"
},
"token": {
"decimals": 6,
"symbol": "USDC",
"logo": "https://coin-images.coingecko.com/coins/images/6319/large/usdc.png",
"contractAddress": "0x1c7d4b196cb0c7b01d743fbc6116a902379c7238"
},
"value": "100.00"
}
],
"availableSources": [
{
"amount": "6245.786635",
"amountRaw": "6245786635",
"chain": {
"id": 11155111,
"name": "Ethereum Sepolia",
"logo": "https://assets.coingecko.com/asset_platforms/images/279/large/ethereum.png"
},
"token": {
"decimals": 6,
"symbol": "USDC",
"logo": "https://coin-images.coingecko.com/coins/images/6319/large/usdc.png",
"contractAddress": "0x1c7d4b196cb0c7b01d743fbc6116a902379c7238"
},
"value": "6245.79"
}
],
"destination": {
"amount": "100",
"amountRaw": "100000000",
"chain": {
"id": 421614,
"name": "Arbitrum Sepolia",
"logo": "https://assets.coingecko.com/coins/images/16547/large/arb.jpg"
},
"token": {
"decimals": 6,
"symbol": "USDC",
"logo": "https://coin-images.coingecko.com/coins/images/6319/large/usdc.png",
"contractAddress": "0x75faf114eafb1bdbe2f0316df893fd58ce46aa4d"
},
"value": "100.00"
},
"sourcesTotal": "100.000102"
}
```
### How to fetch token logos and names?
Token metadata (name, symbol, decimals, logo) is available from multiple sources: the simulation result's `token` field, the nested `token` on each intent source/destination, or `client.chainList.getTokenInfoBySymbol()`.
```typescript
// ─── A: From a simulation result ───
const sim = await client.simulateBridge({
toTokenSymbol: 'USDC',
toAmountRaw: 100_000_000n,
toChainId: 421614,
});
sim.token.name; // "USD Coin"
sim.token.symbol; // "USDC"
sim.token.decimals; // 6
sim.token.logo; // "https://..."
// Source chain logos and token info
sim.intent.selectedSources[0].chain.logo; // "https://..."
sim.intent.selectedSources[0].chain.name; // "Ethereum Sepolia"
sim.intent.selectedSources[0].token.symbol; // "USDC"
/*----------------------------------------*/
// ─── B: From the chain catalogue on the client ───
const usdc = client.chainList.getTokenInfoBySymbol(421614, 'USDC');
// { contractAddress: "0x75faf...", decimals: 6, logo: "https://...", name: "USD Coin", symbol: "USDC" }
const native = client.chainList.getNativeToken(421614);
// native gas token info for the chain
/*----------------------------------------*/
// ─── C: getSupportedChains — chains with their token lists ───
const chains = client.getSupportedChains();
// [{ id: 421614, name: "Arbitrum Sepolia", logo: "...", swapSupported: true, tokens: [{ symbol, name, logo, contractAddress, ... }] }]
```
> **Note**
>
> If a logo URL is missing or 404s, `getFallbackTokenLogoDataUri(symbol)` (exported from the main entry) returns a deterministic gradient SVG data-URI as a stable placeholder.
### How to get the fees incurred from an intent?
Every `BridgeIntent` includes a `fees` object with a full breakdown: `total`, `protocol`, `solver`, `caGas`, and `totalValue`. All values are human-readable strings denominated in the intent's token (e.g. USDC), except `totalValue` which is the USD value of the total.
```typescript
const sim = await client.simulateBridge({
toTokenSymbol: 'USDC',
toAmountRaw: 100_000_000n,
toChainId: 421614,
});
const { fees } = sim.intent;
console.log(fees.total); // Total fee in token units (e.g. "0.05")
console.log(fees.protocol); // Protocol fee
console.log(fees.solver); // Solver / fulfillment fee
console.log(fees.caGas); // Chain-abstraction gas fee
console.log(fees.totalValue); // Total fee expressed in USD
```
### How to view a wallet's intent history?
Call `client.listIntents({ page?, status? })` to fetch the connected wallet's past intents. It returns `{ intents, total }`, where each entry is an `IntentRecord` with sources, destinations, a `status`, and an explorer link. Page size is fixed at 20 records — paginate by incrementing `page`. Filter by `status` using the exported `IntentStatus` enum.
```typescript
import { IntentStatus } from '@avail-project/nexus-core';
// Fetch the first page of intents
const { intents, total } = await client.listIntents();
// Paginate and/or filter by status
const page2 = await client.listIntents({ page: 2 });
const fulfilled = await client.listIntents({ status: IntentStatus.Fulfilled });
console.log(`Total intents: ${total}`);
// Check status ('created' | 'deposited' | 'fulfilled' | 'expired')
intents.forEach((intent) => {
if (intent.status === 'fulfilled') console.log(`${intent.requestHash}: fulfilled`);
else if (intent.status === 'expired') console.log(`${intent.requestHash}: expired`);
else console.log(`${intent.requestHash}: ${intent.status} (expires ${new Date(intent.expiry * 1000)})`);
console.log(intent.explorerUrl);
});
// Each IntentRecord has this shape:
// {
// requestHash: "0x...",
// explorerUrl: "https://...",
// status: "fulfilled",
// solver: "0x..." | null,
// expiry: 1706000000,
// recipientAddress: "0x...",
// destinationChain: { id: 421614, name: "Arbitrum Sepolia", logo: "...", universe: 0 },
// destinations: [{
// token: { contractAddress: "0x...", symbol: "USDC", name: "USD Coin", logo: "...", decimals: 6 },
// amount: "1.0",
// amountRaw: 1000000n,
// }],
// sources: [{
// chain: { id: 84532, name: "Base Sepolia", logo: "...", universe: 0 },
// token: { contractAddress: "0x...", symbol: "USDC", name: "USD Coin", logo: "...", decimals: 6 },
// amount: "1.05",
// amountRaw: 1050000n,
// fee: "0.05",
// feeRaw: 50000n,
// }],
// }
```
## Chain & Token Utilities
> **Note**
>
> The static metadata constants and helpers from v1 (`TOKEN_METADATA`, `CHAIN_METADATA`, `TOKEN_CONTRACT_ADDRESSES`, `getChainMetadata`, `getTokenMetadata`, `chainIdToHex`, `isSupportedToken`, `getSwapSupportedChainsAndTokens`) have been removed. The SDK ships no hard-coded chain or token tables — everything is fetched from the live deployment. Use `client.getSupportedChains()`, `client.isSupportedChain()`, and the `client.chainList.*` lookups instead.
### How to get chain metadata?
Use `client.chainList.getChainByID()` for a full `Chain` object (name, native currency, block explorers) or `client.getSupportedChains()` for the lighter chain + token list.
```typescript
// Full Chain object — name, native currency, block explorers
const chain = client.chainList.getChainByID(421614);
console.log(chain.name); // "Arbitrum Sepolia"
console.log(chain.custom.icon); // chain logo URL
console.log(chain.nativeCurrency); // { name: "ETH", symbol: "ETH", decimals: 18, logo: "..." }
console.log(chain.blockExplorers?.default?.url); // explorer base URL (guard: optional)
// Lighter list entry from getSupportedChains()
const entry = client.getSupportedChains().find((c) => c.id === 421614);
console.log(entry?.name); // "Arbitrum Sepolia"
console.log(entry?.logo); // "https://..."
```
```json
{
"id": 421614,
"name": "Arbitrum Sepolia",
"logo": "https://assets.coingecko.com/coins/images/16547/large/arb.jpg",
"swapSupported": true,
"tokens": [
{
"symbol": "USDC",
"name": "USD Coin",
"decimals": 6,
"logo": "https://coin-images.coingecko.com/coins/images/6319/large/usdc.png",
"contractAddress": "0x75faf114eafb1BDbe2F0316DF893fd58CE46AA4d"
}
]
}
```
### How to get the list of supported chains and tokens?
Call `client.getSupportedChains()` to get all chains with their supported tokens. Each entry carries a `swapSupported` boolean — filter on it to show only the chains a swap can use as a source or destination.
```typescript
// Get all supported chains with their tokens
const chains = client.getSupportedChains();
chains.forEach((chain) => {
console.log(`${chain.name} (${chain.id}) — swapSupported: ${chain.swapSupported}`);
console.log(` Logo: ${chain.logo}`);
console.log(` Tokens:`);
chain.tokens.forEach((token) => {
console.log(` - ${token.symbol}: ${token.name} @ ${token.contractAddress}`);
});
});
// Chains a swap can use
const swapChains = chains.filter((chain) => chain.swapSupported);
```
> **Note**
>
> Prefer the async standalone helper when you need this before a client exists: `import { getSupportedChains } from '@avail-project/nexus-core/utils'` then `await getSupportedChains('mainnet')`. The client method is synchronous and uses cached deployment data.
```json
[
{
"id": 421614,
"name": "Arbitrum Sepolia",
"logo": "https://assets.coingecko.com/coins/images/16547/large/arb.jpg",
"swapSupported": true,
"tokens": [
{
"symbol": "USDC",
"name": "USD Coin",
"decimals": 6,
"logo": "https://coin-images.coingecko.com/coins/images/6319/large/usdc.png",
"contractAddress": "0x75faf114eafb1BDbe2F0316DF893fd58CE46AA4d"
}
]
}
]
```
### How to get the chain ID of a supported chain?
Use `client.getSupportedChains()` to find a chain by name, then access its `id`. You can also validate chain support with `client.isSupportedChain()`.
```typescript
// Find chain ID by name
const chains = client.getSupportedChains();
const baseSepolia = chains.find((c) => c.name === 'Base Sepolia');
console.log(baseSepolia?.id); // 84532
// Validate if a chain ID is supported
const isSupported = client.isSupportedChain(84532); // true
// Convert chain ID to hex (useful for wallet_switchEthereumChain)
const hexChainId = `0x${(84532).toString(16)}`; // "0x14a34"
```
### How to get the token address of a supported token?
Use `client.chainList.getTokenInfoBySymbol(chainId, symbol)` for a token on a specific chain, or iterate `getSupportedChains()` to collect a token's address across chains.
```typescript
// Option A: Token info for a SPECIFIC chain
const usdcOnArbitrum = client.chainList.getTokenInfoBySymbol(421614, 'USDC');
console.log(usdcOnArbitrum.contractAddress); // "0x75faf114eafb1BDbe2F0316DF893fd58CE46AA4d"
console.log(usdcOnArbitrum.decimals); // 6
// Option B: Look up a token by its on-chain address
const byAddress = client.chainList.getTokenByAddress(421614, '0x75faf114eafb1BDbe2F0316DF893fd58CE46AA4d');
console.log(byAddress.symbol); // "USDC"
// Option C: Get all addresses for a token across chains
const chains = client.getSupportedChains();
const usdcAddresses = chains
.map((chain) => {
const token = chain.tokens.find((t) => t.symbol === 'USDC');
return token ? { chainId: chain.id, chainName: chain.name, address: token.contractAddress } : null;
})
.filter(Boolean);
console.log(usdcAddresses);
// [
// { chainId: 421614, chainName: "Arbitrum Sepolia", address: "0x75faf..." },
// { chainId: 84532, chainName: "Base Sepolia", address: "0x036cb..." },
// ...
// ]
```
### How to get the vault contract address for a chain?
Use `client.chainList.getVaultContractAddress(chainId)` to get the Nexus vault contract deployed on a chain.
```typescript
const vault = client.chainList.getVaultContractAddress(421614);
console.log(vault); // "0x..."
```
## Balances
### How to fetch a wallet's unified balances?
Use `client.getBalancesForBridge()` (or `client.getBalancesForSwap()` for the swap balance pipeline). Both return `TokenBalance[]` — each entry aggregates a token across chains with a per-chain breakdown in `chainBalances`.
```typescript
const assets = await client.getBalancesForBridge();
assets.forEach((asset) => {
console.log(`${asset.symbol} (${asset.name})`);
console.log(` Total: ${asset.balance} (~$${asset.value})`);
console.log(` Decimals: ${asset.decimals}, Logo: ${asset.logo}`);
asset.chainBalances.forEach((cb) => {
console.log(` ${cb.chain.name}: ${cb.balance} @ ${cb.contractAddress}`);
});
});
```
```json
{
"symbol": "USDC",
"name": "USD Coin",
"balance": "1250.50",
"value": "1250.50",
"decimals": 6,
"logo": "https://coin-images.coingecko.com/coins/images/6319/large/usdc.png",
"currencyId": 1,
"chainBalances": [
{
"balance": "500.00",
"value": "500.00",
"symbol": "USDC",
"chain": { "id": 1, "name": "Ethereum", "logo": "https://..." },
"contractAddress": "0xa0b86991c6218b36c1d19d4a2e9eb0ce3606eb48",
"decimals": 6,
"universe": 0
}
]
}
```
## Events
### How and when to listen to Nexus events?
Pass an `onEvent` callback in the options of a bridge or swap method. Events are a typed discriminated union keyed on `event.type` (`'status'`, `'plan_preview'`, `'plan_confirmed'`, `'plan_progress'`), emitted at key stages of the transaction lifecycle so you can build progress UIs.
**Bridge Events:**
```typescript
const result = await client.bridge(
{
toTokenSymbol: 'USDC',
toAmountRaw: 1_000_000n, // 1 USDC (6 decimals)
toChainId: 421614,
},
{
onEvent: (event) => {
switch (event.type) {
case 'status':
// Lifecycle phase: intent_building → intent_ready → awaiting_approval → executing → completed
console.log('Status:', event.status);
break;
case 'plan_preview':
// Emitted once with the planned steps before execution
console.log('Planned steps:', event.plan.steps);
// Use this to initialize a progress stepper UI
break;
case 'plan_confirmed':
// Emitted after user approval with the final steps
console.log('Confirmed steps:', event.plan.steps);
break;
case 'plan_progress':
// Per-step progress. chain lives on event.step.chain, NOT event.chain
console.log(`Step ${event.stepType}: ${event.state}`);
if ((event.state === 'submitted' || event.state === 'confirmed') && 'txHash' in event) {
console.log(` Tx: ${event.txHash} (${event.explorerUrl})`);
}
if (event.state === 'failed' && 'error' in event) {
console.error(` Failed: ${event.error}`);
}
break;
}
},
hooks: {
onIntent: ({ allow }) => allow(),
onAllowance: ({ allow }) => allow(['min']),
},
}
);
```
> **Note**
>
> Both `'confirmed'` and `'completed'` are terminal-success states depending on the step type. On-chain transaction steps settle on `confirmed`; off-chain orchestration steps (and `vault_deposit`) settle on `completed`. For a robust progress UI, treat either as success.
```
allowance_approval Token allowance approval on a source chain
request_signing User signs the intent request
request_submission Intent submitted to the network
vault_deposit Deposit into vault on a source chain
bridge_fill Fill received on destination chain
```
**Swap Events:**
Swaps emit the same typed event union. Swap plans carry `hasBridge` / `hasDestinationSwap` flags and swap-specific step types.
```typescript
const result = await client.swapWithExactIn(
{
sources: [{ chainId: 10, amountRaw: 100_000_000n, tokenAddress: '0xUSDC...' }],
toChainId: 8453,
toTokenAddress: '0x833589fCD6eDb6E08f4c7C32D4f71b54bdA02913', // USDC on Base
},
{
onEvent: (event) => {
if (event.type === 'plan_preview') {
console.log('Has bridge:', event.plan.hasBridge);
console.log('Has destination swap:', event.plan.hasDestinationSwap);
}
if (event.type === 'plan_progress') {
console.log(`Swap step ${event.stepType}: ${event.state}`);
// Grab explorer URLs from on-chain swap steps
if (
(event.stepType === 'source_swap' || event.stepType === 'destination_swap') &&
'txHash' in event
) {
console.log(` Swap tx: ${event.explorerUrl}`);
}
}
},
hooks: {
onIntent: ({ allow }) => allow(),
},
}
);
```
```
source_swap Execute a swap on a source chain
eoa_to_ephemeral_transfer Transfer funds from EOA to ephemeral wallet on a source chain
bridge_deposit Deposit into vault for the cross-chain bridge
bridge_intent_submission Submit the bridge intent to the network
bridge_fill Wait for bridge fill on the destination chain
destination_swap Execute a swap on the destination chain
```
### How to review and approve intents and allowances?
Hooks are passed per-operation via `options.hooks` (there are no global `setOnIntentHook` / `setOnAllowanceHook` setters). Use them to review a bridge/transfer intent before execution and to control approval amounts.
```typescript
await client.bridge(params, {
hooks: {
// Intent approval hook — review before execution
onIntent: async ({ intent, allow, deny, refresh }) => {
console.log('Selected sources:', intent.selectedSources);
console.log('Destination:', intent.destination);
console.log('Fees:', intent.fees);
// Optionally re-quote against different source chains
// const updated = await refresh([8453, 42161]);
if (userConfirmed) allow();
else deny();
},
// Allowance approval hook — control approval amounts
onAllowance: ({ sources, allow, deny }) => {
// Options: 'max', 'min', a bigint, or a per-source array
allow(['min']);
},
},
});
```
> **Note**
>
> `bridgeAndExecute()` and `swapAndExecute()` use a top-level `options.onIntent` hook (not nested under `hooks`), and their intent data is a composite type that also reports whether a bridge/swap is actually needed. If no `onAllowance` hook is provided for a bridge operation, the SDK auto-approves with `'min'`.
## Troubleshooting
### How to solve Vite polyfill issues?
If you see errors like `ReferenceError: Buffer is not defined` or `process is not defined`, Vite needs Node.js polyfills.
**Step 1: Install the polyfill plugin**
```bash filename="Terminal"
npm install vite-plugin-node-polyfills
```
**Step 2: Update vite.config.ts**
```typescript filename="vite.config.ts"
import { defineConfig } from 'vite';
import react from '@vitejs/plugin-react';
import { nodePolyfills } from 'vite-plugin-node-polyfills';
export default defineConfig({
plugins: [
react(),
nodePolyfills({
include: ['buffer', 'crypto', 'stream', 'util'],
globals: {
Buffer: true,
global: true,
process: true,
},
}),
],
define: {
global: 'globalThis',
},
});
```
**Quick start alternative:** Clone the [Nexus Vite Template](https://github.com/availproject/nexus-vite-template) which has polyfills pre-configured.
### How to solve Turbopack issues in Next.js?
Turbopack (Next.js experimental bundler) has limited support for Node.js polyfills. If you encounter module resolution errors:
**Option A: Disable Turbopack (Recommended)**
Remove the `--turbo` flag from your dev script:
```json filename="package.json"
{
"scripts": {
"dev": "next dev"
}
}
```
**Option B: Configure Webpack fallbacks**
```javascript filename="next.config.js"
/** @type {import('next').NextConfig} */
const nextConfig = {
webpack: (config, { isServer }) => {
if (!isServer) {
config.resolve.fallback = {
...config.resolve.fallback,
crypto: require.resolve('crypto-browserify'),
buffer: require.resolve('buffer/'),
stream: require.resolve('stream-browserify'),
};
}
return config;
},
};
module.exports = nextConfig;
```
Install required packages:
```bash filename="Terminal"
npm install crypto-browserify buffer stream-browserify
```
**Quick start alternative:** Clone the [Nexus Next.js Template](https://github.com/availproject/nexus-nextjs-template) which has proper configuration.
### How to fix "require is not defined" in browser?
This error occurs when code meant for Node.js runs in the browser. Solutions:
**1. Use ES module imports instead of require():**
```typescript
// Bad
const { createNexusClient } = require('@avail-project/nexus-core');
// Good
import { createNexusClient } from '@avail-project/nexus-core';
```
**2. Move Node.js-specific code to API routes or Server Components:**
```typescript filename="app/api/data/route.ts"
export async function GET() {
// Node.js modules work here
return Response.json({ data: 'ok' });
}
```
**3. Use dynamic imports for server-only code:**
```typescript
if (typeof window === 'undefined') {
const serverModule = await import('server-only-module');
}
```
### Understanding Balance Types
> **Note**
>
> **You are viewing the Nexus SDK v2 docs.** For the current SDK, see the [v3 docs](/docs/nexus/nexus-sdk/get-started/installation) and the [v2 → v3 migration guide](/docs/nexus/migration/sdk-v2-to-v3).
Nexus allows you to query 2 types of balances for different use cases. These balances determine the sourcing of liquidity when doing certain operations.
* Bridge Balance
* Swap Balance
Both queries return the same `TokenBalance[]` shape — a unified per-token total with a per-chain breakdown:
```typescript
type TokenBalance = {
balance: string;
value: string; // USD value
chainBalances: ChainBalance[]; // per-chain breakdown
decimals: number;
logo: string;
name: string;
symbol: string;
};
```
## Bridge Balance
Use [Fetch Bridge Balance](/docs/nexus/nexus-sdk/v2/reference/bridge-methods/fetch-bridge-balances) to get all token balances available for bridge operations across supported chains in a single call. Any Bridge Method you call will source liquidity from these balances.
```typescript
client.getBalancesForBridge(): Promise
```
## Swap Balance
Use [Fetch Swap Balance](/docs/nexus/nexus-sdk/v2/reference/swap-methods/fetch-swap-balances) to get all token balances available for swap operations across supported chains in a single call. Any Swap Method you call will source liquidity from these balances.
```typescript
client.getBalancesForSwap(): Promise
```
## Why two different balances?
Nexus solvers only manage liquidity for canonical bridge tokens — currently ETH, USDC, and USDT (see [Supported Chains & Tokens](/docs/nexus/supported-chains-and-tokens)). Bridge balances reflect what solvers can move across chains directly. A bridge route may be served natively by Nexus or via Mayan — the SDK selects the provider automatically per route.
For crosschain swaps, Nexus orchestrates the intent but the actual swaps are executed by partner DEX aggregators (such as LiFi, Bebop, and 0x). This means swap operations can access a much wider range of tokens, since they aren't limited by solver liquidity.
Because the available tokens differ between bridging and swapping, each operation needs its own balance query — your "swappable" balances are not the same as your "bridgeable" assets.
> **Note**
>
> [Learn more about Bridge methods.](/docs/nexus/nexus-sdk/v2/reference/bridge-methods/fetch-bridge-balances)
### SDK Reference
> **Note**
>
> **You are viewing the Nexus SDK v2 docs.** For the current SDK, see the [v3 docs](/docs/nexus/nexus-sdk/get-started/installation) and the [v2 → v3 migration guide](/docs/nexus/migration/sdk-v2-to-v3).
This section contains dedicated pages for the main functions exposed by the Avail Nexus SDK (`@avail-project/nexus-core`).
- [**Bridge Methods**](/docs/nexus/nexus-sdk/v2/reference/bridge-methods/fetch-bridge-balances) — bridge(), bridgeAndTransfer(), bridgeAndExecute(), calculateMaxForBridge(), and getBalancesForBridge().
- [**Swap Methods**](/docs/nexus/nexus-sdk/v2/reference/swap-methods/fetch-swap-balances) — swapWithExactIn(), swapWithExactOut(), swapAndExecute(), calculateMaxForSwap(), and getBalancesForSwap().
- [**List Intents**](/docs/nexus/nexus-sdk/v2/reference/list-intents) — listIntents() — fetch a user's historical intents with pagination and status filters.
- [**Hooks and Errors**](/docs/nexus/nexus-sdk/v2/reference/hooks-and-errors) — Per-operation hooks and the typed NexusError hierarchy.
- [**Utility Reference**](/docs/nexus/nexus-sdk/v2/reference/utility-reference) — Client creation, lifecycle, chain/token lookups, and stateless helpers.
## External links
- [**GitHub Repository**](https://github.com/availproject/nexus-sdk/) — View the Nexus SDK source code and contribute.
- [**npm Package**](https://www.npmjs.com/package/@avail-project/nexus-core) — @avail-project/nexus-core on npm.
- [**v1 → v2 Migration Guide**](/docs/nexus/migration/sdk-v1-to-v2) — Every breaking change between nexus-core v1 and v2.
## Agent Skills
Install [skills.sh](https://skills.sh) skills to give AI coding agents deep context about the Nexus SDK and Widgets.
- [**Nexus SDK Skill**](https://skills.sh/availproject/nexus-sdk) — Client lifecycle, operations, hooks, events, errors, and v1 → v2 migration.
- [**Widgets Skills**](/docs/nexus/widgets/mcp-and-agent-skills#agent-skills) — Provider setup plus swap, send, and deposit mode integration.
See the [Skills Integration section](/docs/nexus/nexus-sdk/v2/reference/utility-reference#skills-integration) for install commands and the full list of available skills.
## SDK helper functions and constants
The Nexus SDK exposes a suite of helper functions and constants used throughout the SDK.
- [**Utils**](https://github.com/availproject/nexus-sdk/blob/main/src/core/utils.ts) — Formatting and utility functions on GitHub.
- [**Types & Errors**](https://github.com/availproject/nexus-sdk/blob/main/src/domain/errors.ts) — Public types and the NexusError hierarchy on GitHub.
### Get Balances
`getBalances()` returns the connected wallet's balances on every supported chain. Connect a wallet with `setEVMProvider()` first; see [SDK setup](/docs/nexus/nexus-sdk/get-started/nexus-sdk-setup).
## Signature
```typescript title="TypeScript"
getBalances(): Promise
```
## Parameters
None.
## Example
```typescript title="TypeScript"
import { formatUnits } from '@avail-project/nexus-core/utils';
const balances = await client.getBalances();
const spendable = balances.filter((b) => b.usable && b.verified && b.usableBalanceRaw > 0n);
for (const b of spendable) {
const amount = formatUnits(b.usableBalanceRaw, b.decimals);
const usd = b.valueUsd === null ? 'no price' : `$${b.valueUsd.toFixed(2)}`;
console.log(`${amount} ${b.symbol} on chain ${b.chainId} (${usd})`);
}
```
## Returns
An array of `IntentBalance`. It includes verified and unverified tokens.
| Field | Type | Description |
| --------------------- | --------------------------------------------------------- | ------------------------------------------------------------------------------------------------------------ |
| `chainId` | `number` | Chain the balance is on. |
| `tokenAddress` | `Hex` | Token contract address. Use it with `chainId` as a `TokenRef`. |
| `symbol`, `name` | `string` | Token metadata. Do not use `symbol` as an identifier. |
| `decimals` | `number` | Token decimals on this chain. |
| `isNative` | `boolean` | `true` for the chain's native gas token. |
| `actualBalanceRaw` | `bigint` | Full wallet balance in base units. |
| `usableBalanceRaw` | `bigint` | Balance available for routing after gas reserves, in base units. |
| `valueUsd` | `number \| null` | USD value of `usableBalanceRaw`. `null` when no price is available. |
| `priceSource` | `'oracle' \| 'indexer' \| 'coingecko' \| 'relay' \| null` | Where `valueUsd` came from. |
| `verified` | `boolean` | `true` when at least one provider marks the token as verified. |
| `usable` | `boolean` | Whether the balance can fund an intent. |
| `providers` | `IntentProviderSupport[]` | Providers that support the token, each `{ id, currencyId? }`. `id` is `'nexus-v2'`, `'mayan'`, or `'relay'`. |
| `logo`, `coingeckoId` | `string` (optional) | Display and pricing metadata. |
Show `usableBalanceRaw` as the spendable amount and `actualBalanceRaw` as the wallet total. They differ when part of the balance is reserved for gas.
## Filter by provider
`getBalances()` takes no filter. Filter the array on `providers[].id`:
```typescript title="TypeScript"
const relayBalances = balances.filter((b) => b.providers.some((p) => p.id === 'relay'));
```
Provider support for a token does not guarantee that a route can execute a destination call through that provider. Each quote's `supportsDestinationCalls` flag decides that; see [provider destination execution](/docs/nexus/nexus-sdk/reference/swap-methods/swap-and-execute#provider-destination-execution).
## Errors
| Code | Cause |
| ---------------------------------- | ------------------------------------------------------ |
| `ERROR_CODES.WALLET_NOT_CONNECTED` | No wallet is connected. Call `setEVMProvider()` first. |
### Token Catalog
The catalog methods list supported chains and tokens and check which tokens can route together. They need `initialize()` but no wallet; see [SDK setup](/docs/nexus/nexus-sdk/get-started/nexus-sdk-setup).
## Methods
| Method | Returns |
| ----------------------------------------------------------------- | ------------------------------------------------------------------------------------------------------------------ |
| `getSupportedChains()` | `IntentChainMetadata[]`, synchronously. No token lists. Filter by `capabilities.intent` or `capabilities.execute`. |
| `getTokens(query?)` | `IntentTokenPage`: `{ tokens, offset, limit, total }` across chains. |
| `getTokensByChain(chainId, query?)` | `IntentTokenPage` for one chain. `query` omits `chainId`. |
| `getToken({ chainId, tokenAddress })` | One `IntentToken`, verified or not. Rejects with `TOKEN_NOT_SUPPORTED` or `CHAIN_NOT_FOUND` if unknown. |
| `getAvailableSourceTokens(destination, selectedSources?, query?)` | `{ groups, offset, limit, total }`. Each group has `provider` and `chains[].tokens`. |
| `getAvailableDestinationTokens(sources, query?)` | `{ chains, offset, limit, total }`. Each chain has `tokens`. |
| `confirmRouteExists(sources, destination)` | `boolean`. `true` when one provider supports every source and the destination. |
| `getSupportedChainsForRoute(constraints)` | `IntentChainMetadata[]` matching `IntentRouteConstraints`. |
`IntentToken` exposes `chainId`, `address`, `symbol`, `name`, `decimals`, `isNative`, `verified`, `providers`, and optional `logo`. Selections use `TokenRef` (`{ chainId, tokenAddress }`), so map `address` to `tokenAddress`.
## IntentTokenQuery
| Field | Type | Description |
| ---------------------------- | ------------------ | ------------------------------------------------ |
| `chainId` | `number` | Restrict to one chain. |
| `providers` | `IntentProvider[]` | Restrict to tokens supported by these providers. |
| `name`, `symbol`, `contract` | `string` | Case-insensitive substring match. |
| `includeUnverified` | `boolean` | Include unverified tokens. Default `false`. |
| `offset` | `number` | Default `0`. |
| `limit` | `number` | 1–1000. Default `50`. |
Filters combine with AND.
## Pagination
* **Next page:** request `offset + limit` while it is less than `total`.
* **Empty pages:** source and destination pages count candidates before filtering, so an empty page can precede more matches. Keep paging.
* **Reset:** set `offset` to `0` when filters or selections change.
* **Duplicates:** deduplicate tokens by `chainId` plus `address` across provider groups.
## Example
A source picker for an exact-input swap into USDC on Base:
```typescript title="TypeScript"
import type { IntentToken, TokenRef } from '@avail-project/nexus-core';
const destination: TokenRef = {
chainId: 8453,
tokenAddress: '0x833589fCD6eDb6E08f4c7C32D4f71b54bdA02913',
};
const selected: TokenRef[] = []; // sources the user already picked
async function loadSources(symbol: string): Promise {
const seen = new Map();
let offset = 0;
let total = Infinity;
while (offset < total) {
const page = await client.getAvailableSourceTokens(destination, selected, {
symbol,
offset,
limit: 100,
});
for (const group of page.groups)
for (const chain of group.chains)
for (const t of chain.tokens) seen.set(`${t.chainId}:${t.address.toLowerCase()}`, t);
total = page.total;
offset = page.offset + page.limit;
}
return [...seen.values()];
}
const options = await loadSources('USDC');
const pick = options[0];
if (pick) selected.push({ chainId: pick.chainId, tokenAddress: pick.address });
```
## Notes
* **Exact input:** pass the selected sources so every source shares one provider with the destination.
* **Exact output:** sources are alternatives. Call `getAvailableSourceTokens(destination, [], query)`, and do not reject a set because `confirmRouteExists` returns `false`.
* **Route checks:** `confirmRouteExists` checks catalog compatibility, not quote availability. It returns `false` for empty or unknown sources and rejects on network failure.
* **Route constraints:** `sources` and `destinations` legs take `chainId`, `tokenAddress`, and `amountRaw`. `amountRaw` needs both identity fields. Size by source amounts, destination amounts, or `valueUsd`, not more than one. Token queries do not inherit constraints.
* **Testnet:** the async catalog methods reject with `ENVIRONMENT_NOT_SUPPORTED`.
### Execute
`execute()` sends a contract call from the connected wallet on the chain you choose. It does not move funds across chains; use [`swapAndExecute()`](/docs/nexus/nexus-sdk/reference/swap-methods/swap-and-execute) for that.
## Signature
```typescript title="TypeScript"
execute(params: ExecuteParams): Promise
```
## Parameters
| Name | Type | Description |
| ----------------------- | ------------------------------------- | ----------------------------------------------------------------------------------------------------------------------- |
| `toChainId` | `number` | Required. Chain to send the call on. The SDK switches the wallet to it. |
| `to` | `Hex` | Required. Contract to call. |
| `data` | `Hex` | Calldata. Default `'0x'`. |
| `value` | `bigint` | Native value in raw units. Default `0n`. |
| `gas` | `bigint` | Gas limit. The wallet estimates it when omitted. |
| `tokenApproval` | `{ toTokenAddress, amount, spender }` | ERC-20 approval. The SDK reads the allowance and sends `approve(spender, amount)` first only when it is below `amount`. |
| `waitForReceipt` | `boolean` | Default `true`. `false` returns after broadcast. |
| `receiptTimeout` | `number` | Milliseconds to wait for the receipt. Default `300000`. |
| `requiredConfirmations` | `number` | Confirmations to wait for. Default `1`. |
Omit `tokenApproval` for native-token calls. When the wallet supports atomic batches (EIP-5792), the approval and call are sent as one batch.
## Example
Deposit 100 USDC into an ERC-4626 vault on Base.
```typescript title="TypeScript"
import { encodeFunctionData, parseAbi, parseUnits, type Hex } from 'viem';
const USDC_BASE: Hex = '0x833589fCD6eDb6E08f4c7C32D4f71b54bdA02913';
const VAULT: Hex = '0xYourVault';
const user: Hex = '0xUserAddress';
const vaultAbi = parseAbi([
'function deposit(uint256 assets, address receiver) returns (uint256)',
]);
const usdc = await client.getToken({ chainId: 8453, tokenAddress: USDC_BASE });
const amountRaw = parseUnits('100', usdc.decimals);
const result = await client.execute({
toChainId: 8453,
to: VAULT,
data: encodeFunctionData({ abi: vaultAbi, functionName: 'deposit', args: [amountRaw, user] }),
tokenApproval: { toTokenAddress: USDC_BASE, amount: amountRaw, spender: VAULT },
});
console.log(result.approval?.txExplorerUrl, result.execute.txExplorerUrl);
```
## Returns
| Field | Type | Description |
| ------------------- | ----------------------- | ----------------------------------------------------------------------------------- |
| `execute` | `TxResult` | `txHash`, `txExplorerUrl`, and `receipt` (absent when `waitForReceipt` is `false`). |
| `approval` | `TxResult \| undefined` | Present only when an approval was sent. |
| `chainId` | `number` | Chain the call ran on. |
| `gasUsed` | `string` | From the receipt; `'0'` without one. |
| `effectiveGasPrice` | `string` | From the receipt; `'0'` without one. |
> **Note**
>
> With `waitForReceipt: false`, a returned result means only that the transaction was broadcast. It can still revert.
## Errors
| Code (`ERROR_CODES.*`) | Cause |
| -------------------------------- | ------------------------------------------------------ |
| `WALLET_NOT_CONNECTED` | No wallet is connected. |
| `USER_TX_SEND_DENIED` | The user rejected the call. |
| `USER_ALLOWANCE_APPROVAL_DENIED` | The user rejected the approval. |
| `EXEC_TX_SEND_FAILED` | The wallet failed to send the call. |
| `EXEC_TX_CONFIRM_FAILED` | The receipt wait failed, timed out, or found a revert. |
| `EXEC_TX_ONCHAIN_REVERTED` | The atomic approval-and-call batch failed. |
See [hooks and errors](/docs/nexus/nexus-sdk/reference/hooks-and-errors) for the full list.
### Simulate Execute
`simulateExecute()` estimates the gas and maximum native cost of an [`execute()`](/docs/nexus/nexus-sdk/reference/execute-methods/execute) call without sending anything. It requires a connected wallet, because the estimate runs from the user's address.
## Signature
```typescript title="TypeScript"
simulateExecute(params: ExecuteParams): Promise
```
## Parameters
Takes the same `ExecuteParams` as `execute()`. These fields affect the estimate:
| Name | Type | Description |
| --------------- | ------------------------------------- | ----------------------------------------------------------------------------- |
| `toChainId` | `number` | Required. Chain to estimate on. |
| `to` | `Hex` | Required. Contract to call. |
| `data` | `Hex` | Calldata. |
| `value` | `bigint` | Native value in raw units. |
| `tokenApproval` | `{ toTokenAddress, amount, spender }` | When the current allowance is below `amount`, the approval's gas is included. |
## Example
```typescript title="TypeScript"
import { formatUnits, type Hex } from 'viem';
import type { ExecuteParams } from '@avail-project/nexus-core';
declare const VAULT: Hex;
declare const USDC_BASE: Hex;
declare const depositData: Hex;
declare const amountRaw: bigint;
const params: ExecuteParams = {
toChainId: 8453,
to: VAULT,
data: depositData,
tokenApproval: { toTokenAddress: USDC_BASE, amount: amountRaw, spender: VAULT },
};
const sim = await client.simulateExecute(params);
const native = client.chainList.getChainByID(8453).nativeCurrency;
console.log(`Up to ${formatUnits(sim.estimatedTotalCost, native.decimals)} ${native.symbol}`);
await client.execute(params);
```
## Returns
| Field | Type | Description |
| -------------------- | ------------------ | -------------------------------------------------------------------------------------------- |
| `estimatedGasUnits` | `bigint` | Gas for the call plus the approval, when one is needed. |
| `estimatedTotalCost` | `bigint` | `estimatedGasUnits` times the max fee per gas, in raw native units. An upper bound. |
| `feeParams` | `ExecuteFeeParams` | `{ type: 'eip1559', maxFeePerGas, maxPriorityFeePerGas }` or `{ type: 'legacy', gasPrice }`. |
The estimate excludes `value` and any L1 data fee on rollups. Each transaction is estimated against current chain state, so a call that only succeeds after its approval can fail to estimate.
## Errors
| Code (`ERROR_CODES.*`) | Cause |
| ----------------------------- | ----------------------------------------------------------------------------------------------- |
| `WALLET_NOT_CONNECTED` | No wallet is connected. |
| `EXECUTION_ERROR` | Gas or fee estimation failed. The call would likely revert, for example from a missing balance. |
| `EXEC_GAS_PRICE_FETCH_FAILED` | The chain returned a zero gas price. |
### Swap and Execute
`swapAndExecute()` funds a contract call on the destination chain, swapping only what the call still needs, then runs the call from the wallet or through Relay.
## Signature
```typescript title="TypeScript"
swapAndExecute(
input: SwapAndExecuteParams,
options?: SwapAndExecuteOptions,
): Promise
```
## Parameters
### `input`
| Name | Type | Description |
| ---------------- | ----------------------------------------------- | ----------------------------------------------------------------------------------------------------------------------------------------------------------------------------------------- |
| `tradeType` | `'exactOutput' \| 'exactInput'` | Default `'exactOutput'`. |
| `toChainId` | `number` | Required. Destination chain. |
| `toTokenAddress` | `Hex` | Required. Token the call spends. For native, use the native token address from the [token catalog](/docs/nexus/nexus-sdk/reference/balances-and-tokens/token-catalog) (`isNative: true`). |
| `toAmountRaw` | `bigint` | Exact output: required, the amount the call needs. Exact input: omit. |
| `sources` | `Array<{ chainId, tokenAddress?, amountRaw? }>` | Exact output: optional, limits which balances fund the call. Exact input: required, each with `tokenAddress` and a positive `amountRaw`. |
| `execute` | `SwapExecuteParams` | Required. The destination call. |
`execute` fields:
| Name | Type | Description |
| --------------- | ------------------------------------- | ----------------------------------------------------------------------------------- |
| `to` | `Hex` | Required. Contract to call. |
| `data` | `Hex` | Calldata. Return it from `beforeExecute` when it depends on the final amount. |
| `value` | `bigint` | Native value sent with the call. |
| `gas` | `bigint` | Required, positive. Gas estimate for the call. The SDK adds chain-specific buffers. |
| `gasPrice` | `'low' \| 'medium' \| 'high'` | Fee tier. Default `'medium'`. |
| `tokenApproval` | `{ toTokenAddress, amount, spender }` | ERC-20 approval sent before the call when allowance is short. |
Wallet-mode calls also accept the receipt controls from [`execute()`](/docs/nexus/nexus-sdk/reference/execute-methods/execute).
Exact input swaps fixed source amounts and executes whatever arrives. Sources that already are the destination token on the destination chain stay in the wallet and are added to the execution amount. The remaining sources must share one provider with the destination. If every source is local, the swap is skipped and the wallet must already hold native gas for the call. When `tokenApproval.toTokenAddress` is the destination token, pass `amount: 0n`; the SDK sets it to the final execution amount.
### `options`
| Name | Type | Description |
| --------------------------------- | ----------------------------------------------------------------- | ------------------------------------------------------------------------------------------------------------------------------ |
| `hooks.onIntent` | `(data: SwapAndExecuteHookData) => void` | Review gate. Receives `intent`, `allow`, `deny`, `refresh(sources?)`, and `attemptId`. Without it, the operation proceeds. |
| `beforeExecute` | `(ctx: BeforeExecuteContext) => Promise<{ data?, value?, gas? }>` | Returns overrides for the call. |
| `useProviderDestinationExecution` | `boolean` | Default `false`. `true` requires Relay to run the call. See [provider destination execution](#provider-destination-execution). |
| `onEvent` | `(event: IntentEvent) => void` | Funding progress. See [swap events](/docs/nexus/nexus-sdk/reference/swap-methods/swap-events). |
| `slippageBps` | `number \| 'auto'` | 0 to 10000. Default `50`. |
| `fillTimeoutMinutes` | `number` | Default `2`. |
| `pollingIntervalMs` | `number` | Default `2000`. |
`onIntent` runs even when no swap is needed. `intent` (`SwapAndExecuteIntent`) contains:
* **`executionMode`**: `'wallet'` or `'provider'`.
* **`executeRequirement`**: the call's chain, `to`, token amount, gas cost, `nativeValue`, and `tokenApproval`.
* **`available`** and **`shortfall`**: destination token and gas, as `FundingAmount` values.
* **`swapRequired`**: when `true`, `intent.quote` holds the funding quote.
`refresh(sources?)` returns a new intent with current fees and a new quote. It reuses the balances read at the start; start a new call to reread them. Omitted `sources` keep the current selection. For exact output, `[]` clears it.
`BeforeExecuteContext`:
| Field | Wallet mode | Provider mode |
| ------------------- | ---------------------------------------------------------------------------------------------------- | ----------------------------------------------------------------------- |
| `receivedAmountRaw` | Destination balance increase across funding; `0n` when the swap is skipped. | The quote's guaranteed minimum output (`toAmountRaw` for exact output). |
| `executeAmountRaw` | Exact input: proceeds plus selected local tokens, less native reserves. Exact output: `toAmountRaw`. | Fixed execution budget. |
Build amount-sensitive calldata from `executeAmountRaw`.
## Wallet mode
* Reads balances, prices the call's gas and value, and quotes only the shortfall. When balances already cover the call, it skips the swap.
* For non-native output, adds a native gas drop when the wallet lacks gas on the destination.
* After `allow()`, reads the destination balance, runs the intent, and reads it again.
* Calls `beforeExecute`, then sends the approval (if needed) and the call from the connected wallet.
* Overrides from `beforeExecute` do not change funding. The balance increase includes any unrelated transfer that lands during funding.
## Provider destination execution
With `useProviderDestinationExecution: true`, Relay runs the approval and call on the destination chain as part of the fill. The wallet sends no destination transaction.
> **Note**
>
> The call's `msg.sender` is Relay's router, not the user. Use a contract function that credits an explicit recipient, such as ERC-4626 `deposit(assets, receiver)`. A function that credits `msg.sender` sends the position to the router.
* **Route support**: the quote must have `quote.supportsDestinationCalls: true`, and exactly one chain/token leg may fund it. Otherwise the call rejects with `INVALID_INPUT` before signing. It never falls back to wallet mode.
* **Funding**: the quote funds the whole call. Destination wallet balances are not used, and exact-input sources that match the destination enter the quote.
* **Exact-input budget**: the SDK previews a Relay quote and sets `executeAmountRaw` to its minimum output less 1%, with the reserve capped at $1. The rest goes to the recipient. Unpriced or too-small output rejects with `BACKEND_ERROR`.
* **Exact-output budget**: `executeAmountRaw` is `toAmountRaw`.
* **Approvals**: `tokenApproval` may only approve the output token.
* **Native value**: allowed only for native output, and at most `executeAmountRaw`. ERC-20 output with a nonzero `value` rejects.
* **Unused fields**: `execute.gas` is still required but unused; the quote includes execution costs.
> **Note**
>
> In provider mode, `beforeExecute` runs before review and again on every `refresh`. It must only build the call, with no side effects. If the final quote's minimum falls below the budget, the call rejects before signing.
Source approvals and the intent signature may still prompt the wallet.
To list tokens Relay can route, filter [`getBalances()`](/docs/nexus/nexus-sdk/reference/balances-and-tokens/get-balances) by `balance.providers[].id === 'relay'`. Token support does not guarantee destination-call support, which is decided per quote.
| | Wallet mode | Provider mode |
| -------------------- | ---------------------------- | --------------------------------- |
| Runs the call | Connected wallet | Relay's router |
| `msg.sender` | User | Relay's router |
| Destination balances | Used first | Ignored |
| Swap skipped | When balances cover the call | Never |
| `beforeExecute` | Once, after funding | Before review and on each refresh |
| Destination gas | Paid by the wallet | Included in the quote |
| `result.execute` | Present | `undefined` |
## Example
Swap 25 USDC from Arbitrum and deposit it into an ERC-4626 vault on Base. Remove `useProviderDestinationExecution` to run the same deposit from the wallet.
```typescript title="TypeScript"
import { encodeFunctionData, parseAbi, parseUnits, type Hex } from 'viem';
const USDC_ARBITRUM: Hex = '0xaf88d065e77c8cC2239327C5EDb3A432268e5831';
const USDC_BASE: Hex = '0x833589fCD6eDb6E08f4c7C32D4f71b54bdA02913';
const VAULT: Hex = '0xYourVault';
const user: Hex = '0xUserAddress';
const vaultAbi = parseAbi([
'function deposit(uint256 assets, address receiver) returns (uint256)',
]);
const source = await client.getToken({ chainId: 42161, tokenAddress: USDC_ARBITRUM });
const result = await client.swapAndExecute(
{
tradeType: 'exactInput',
sources: [
{ chainId: 42161, tokenAddress: USDC_ARBITRUM, amountRaw: parseUnits('25', source.decimals) },
],
toChainId: 8453,
toTokenAddress: USDC_BASE,
execute: {
to: VAULT,
gas: 200_000n,
tokenApproval: { toTokenAddress: USDC_BASE, amount: 0n, spender: VAULT },
},
},
{
useProviderDestinationExecution: true,
beforeExecute: async ({ executeAmountRaw }) => ({
data: encodeFunctionData({
abi: vaultAbi,
functionName: 'deposit',
args: [executeAmountRaw, user],
}),
}),
hooks: {
onIntent: ({ intent, allow }) => {
console.log(intent.executionMode, intent.executeRequirement.token.amount);
allow(); // Call after the user confirms.
},
},
},
);
if (result.executionMode === 'wallet') {
console.log('Deposit tx', result.execute.txExplorerUrl);
} else {
console.log('Filled by Relay', result.swapResult.intentExplorerUrl);
}
console.log('Deposited', result.executeAmountRaw);
```
## Returns
```typescript title="TypeScript"
type SwapAndExecuteIntentResult = { executeAmountRaw: bigint } & (
| {
executionMode: 'provider';
swapSkipped: false;
swapResult: IntentResult;
approval?: undefined;
execute?: undefined;
}
| ({ executionMode: 'wallet'; approval?: TxResult; execute: TxResult } & (
| { swapSkipped: true; swapResult?: undefined }
| { swapSkipped: false; swapResult: IntentResult }
))
);
```
Narrow on `executionMode` before reading `execute` or `approval`, and on `swapSkipped` before reading `swapResult` in wallet mode. `executeAmountRaw` is the amount the call used. Intent events cover funding only; the promise resolves after the call.
For error codes, see [hooks and errors](/docs/nexus/nexus-sdk/reference/hooks-and-errors).
### Review Quotes
Pass `options.hooks.onIntent` as the second argument to `swapWithExactIn()` or `swapWithExactOut()` to show the quote before any wallet prompt.
## Operation options
`SwapOperationOptions` fields, all optional:
| Name | Type | Description |
| -------------------- | ------------------------------------------------- | --------------------------------------------------------------------------------------------- |
| `slippageBps` | `number \| 'auto'` | Default `50`. Integer from `0` to `10000`, or `'auto'`. |
| `fillTimeoutMinutes` | `number` | Default `2`. How long to wait for the destination fill. |
| `pollingIntervalMs` | `number` | Default `2000`. Interval between fill status checks. |
| `onEvent` | `(event: IntentEvent) => void` | Progress events. See [swap events](/docs/nexus/nexus-sdk/reference/swap-methods/swap-events). |
| `hooks.onIntent` | `(hook: IntentHookData) => void \| Promise` | Quote review. See below. |
## The onIntent hook
| Field | Type | Description |
| ------------------- | --------------------------------------------------------------------------------------------- | --------------------------------------------------------------------------------------------------------------------------------- |
| `quote` | `IntentQuote` | The first quote. |
| `execution` | `{ possible: true } \| { possible: false; cause: 'not-connected' \| 'insufficient-balance' }` | Whether the latest quote can execute. Read it again after each refresh. On `'insufficient-balance'`, fund the wallet and refresh. |
| `allow()` | `() => void` | Accepts the latest quote and starts execution. |
| `deny()` | `() => void` | Rejects the operation with `UserActionError` code `USER_INTENT_HOOK_DENIED`. |
| `refresh(sources?)` | `(sources?: IntentSource[]) => Promise` | Requests a replacement quote, optionally for new sources, and emits a `quote` event. |
| `attemptId` | `string` | Optional. Correlation ID shared across refreshes. |
The operation waits until you call `allow()` or `deny()`. Returning from the hook does not accept the quote. If the hook throws, or an awaited `refresh()` rejects inside it, the operation rejects.
Render the quote that `refresh()` returns, and await it before calling `allow()`. For `swapWithExactIn()`, replacement sources need `tokenAddress` and a positive `amountRaw`. Once accepted, the quote is fixed.
A quote past `expiresAt` (Unix seconds) rejects when accepted, so refresh stale quotes before calling `allow()`.
Without a hook, the SDK accepts the first quote automatically.
## Example
```typescript title="TypeScript"
import type { IntentHookData, SwapExactOutParams } from '@avail-project/nexus-core';
import { formatUnits } from '@avail-project/nexus-core/utils';
declare const params: SwapExactOutParams;
declare function reviewDialog(view: {
receive: string;
minimum: string;
provider: string;
canExecute: boolean;
}): Promise<'confirm' | 'refresh' | 'cancel'>;
const onIntent = async (hook: IntentHookData) => {
let quote = hook.quote;
for (;;) {
const token = await client.getToken({
chainId: quote.output.chainId,
tokenAddress: quote.output.tokenAddress,
});
const choice = await reviewDialog({
receive: formatUnits(quote.output.amountRaw, token.decimals),
minimum: formatUnits(quote.output.minAmountRaw, token.decimals),
provider: quote.provider,
canExecute: hook.execution.possible,
});
if (choice === 'refresh') {
quote = await hook.refresh();
continue;
}
if (choice === 'confirm' && hook.execution.possible) hook.allow();
else hook.deny();
return;
}
};
await client.swapWithExactOut(params, { hooks: { onIntent }, slippageBps: 100 });
```
## Key quote fields
| Field | Description |
| ------------------- | -------------------------------------------------------------------------------------------------------------- |
| `provider` | Provider that fills this quote: `'nexus-v2'`, `'mayan'`, or `'relay'`. |
| `input` | Per-source `amountRaw`, `depositFeeRaw`, and `totalRequiredRaw`, with USD strings. |
| `output` | `amountRaw` (expected) and `minAmountRaw` (after slippage), with USD strings. |
| `fees` | `depositRaw`, `fulfillmentRaw`, `protocolRaw`, and `solverRaw`, each with a `*Usd` string. |
| `allowances` | ERC-20 approvals the wallet still needs. `deficitRaw > 0n` means a prompt. |
| `plan.steps` | Steps the SDK will run. See [plan steps](/docs/nexus/nexus-sdk/reference/swap-methods/swap-events#plan-steps). |
| `sourceVerdicts` | Each candidate source's `state`: `'selected'`, `'unused'`, or `'unroutable'` with a `reason`. |
| `isExecutable` | Source-balance check only. It does not mean a wallet is connected. |
| `executionWarnings` | Balance shortfalls per source, as `requiredRaw` and `actualRaw`. |
| `expiresAt` | Expiry in Unix seconds. |
`Raw` fields are `bigint` in the token's base units. USD fields are decimal strings.
## Disconnected previews
`swapWithExactIn()` runs before a wallet connects, so you can show rates early. `swapWithExactOut()` requires a wallet.
* `hook.execution` stays `{ possible: false, cause: 'not-connected' }` for that call, even after the user connects.
* `allow()` rejects with `WALLET_NOT_CONNECTED`. `deny()` rejects with `USER_INTENT_HOOK_DENIED`.
* Without a hook, the SDK emits the `quote` event, then rejects with `WALLET_NOT_CONNECTED`.
* The preview can fail with `BACKEND_INSUFFICIENT_APPROVAL_GAS` if a source chain lacks gas for approvals.
A preview never resolves successfully. After the wallet connects, start a new swap call and review its quote.
### Swap Exact Input
`swapWithExactIn()` spends the exact raw amount you set on each source and delivers the quoted output to the destination token. It needs an [initialized client](/docs/nexus/nexus-sdk/get-started/nexus-sdk-setup).
## Signature
```typescript title="TypeScript"
swapWithExactIn(
input: SwapExactInParams,
options?: SwapOperationOptions,
): Promise
```
## Parameters
| Name | Type | Description |
| ---------------- | ------------------------------------------------------------------ | ---------------------------------------------------------------------------------------------------------------------------------------- |
| `sources` | `Array<{ chainId: number; tokenAddress: Hex; amountRaw: bigint }>` | Required, non-empty. Each `amountRaw` must be greater than `0n`. |
| `toChainId` | `number` | Required. Destination chain ID. |
| `toTokenAddress` | `Hex` | Required. Destination token address. |
| `options` | `SwapOperationOptions` | Optional. Slippage, timeouts, quote review, and events. See [review quotes](/docs/nexus/nexus-sdk/reference/swap-methods/review-quotes). |
All sources and the destination must share at least one provider. To build a compatible picker, pass the already selected sources to `getAvailableSourceTokens(destination, selectedSources)`.
To bridge the same asset, use that asset's address on each chain.
## Example
```typescript title="TypeScript"
import { parseUnits } from '@avail-project/nexus-core/utils';
const source = {
chainId: 1,
tokenAddress: '0xA0b86991c6218b36c1d19d4a2e9eb0cE3606eB48', // USDC on Ethereum
} as const;
const sourceToken = await client.getToken(source);
const result = await client.swapWithExactIn({
sources: [{ ...source, amountRaw: parseUnits('25', sourceToken.decimals) }],
toChainId: 8453,
toTokenAddress: '0x833589fCD6eDb6E08f4c7C32D4f71b54bdA02913', // USDC on Base
});
console.log(result.intentId, result.intentExplorerUrl);
```
Without an `onIntent` hook, the SDK accepts the first quote automatically.
## Returns
A promise that resolves with an [`IntentResult`](/docs/nexus/nexus-sdk/reference/swap-methods/swap-events#result) after the destination fill.
Before a wallet connects, the call works as a [rate preview](/docs/nexus/nexus-sdk/reference/swap-methods/review-quotes#disconnected-previews): it returns a quote for display, then rejects instead of executing.
## Errors
| Code (`ERROR_CODES.*`) | Cause |
| --------------------------------- | ------------------------------------------------------------------------------------------------------------------------- |
| `INVALID_INPUT` | Empty `sources`, a missing `tokenAddress`, a non-positive `amountRaw`, no shared provider, or `slippageBps` out of range. |
| `WALLET_NOT_CONNECTED` | The quote was accepted without a connected wallet. |
| `USER_INTENT_HOOK_DENIED` | Your hook called `deny()`. |
| `BACKEND_INSUFFICIENT_BALANCE` | The wallet cannot cover the quoted inputs. |
| `BACKEND_FULFILMENT_WAIT_TIMEOUT` | No fill within `fillTimeoutMinutes`. The intent can still fill. |
| `ENVIRONMENT_NOT_SUPPORTED` | The client uses `network: 'testnet'`. |
For quote diagnostics and recovery, see [hooks and errors](/docs/nexus/nexus-sdk/reference/hooks-and-errors).
### Swap Events
Pass `options.onEvent` to `swapWithExactIn()` or `swapWithExactOut()` to receive `IntentEvent` updates. The SDK catches errors thrown by your callback, so a failing handler never interrupts the swap.
## Events
`IntentEvent` is a union discriminated on `type`.
| `type` | Fields | When |
| -------- | ------------------------------------------------------------- | --------------------------------------------------------------------------------------------------- |
| `quote` | `quote: IntentQuote` | For the first quote and after every refresh. |
| `step` | `step: IntentPlanStep`, `state`, `committed`, `errorDetails?` | When a plan step starts, completes, or fails. `state` is `'started'`, `'completed'`, or `'failed'`. |
| `status` | `intentId`, `status`, `substatus`, `legs` | On each fill status poll. `status` is `'created'`, `'deposited'`, `'fulfilled'`, or `'expired'`. |
Each entry in `legs` describes one source: `sourceIndex`, `status`, and optional `txHash`, `txExplorerUrl`, `protocolExplorerUrl`, and `error`.
## Example
```typescript title="TypeScript"
import type { IntentEvent, IntentQuote, SwapExactInParams } from '@avail-project/nexus-core';
declare const params: SwapExactInParams;
declare function showQuote(quote: IntentQuote): void;
declare function setStep(type: string, state: string): void;
declare function showError(message?: string, code?: string, committed?: boolean): void;
declare function setFillStatus(intentId: string, status: string): void;
declare function setLegLink(sourceIndex: number, url?: string): void;
const onEvent = (event: IntentEvent) => {
switch (event.type) {
case 'quote':
showQuote(event.quote);
break;
case 'step':
setStep(event.step.type, event.state);
if (event.state === 'failed') {
showError(event.errorDetails?.message, event.errorDetails?.code, event.committed);
}
break;
case 'status':
setFillStatus(event.intentId, event.status);
for (const leg of event.legs) setLegLink(leg.sourceIndex, leg.txExplorerUrl);
break;
}
};
await client.swapWithExactIn(params, { onEvent });
```
Events report progress only. Catch the promise to handle the final outcome.
## Plan steps
`quote.plan.steps` lists the steps for that quote, and `step` events reference them.
| `step.type` | Extra fields | Wallet action |
| --------------------------- | ------------------------------------------------- | ----------------------------------------------------- |
| `erc20_approval` | `chainId`, `tokenAddress`, `spender`, `amountRaw` | Approval transaction for the minimum required amount |
| `source_approval_signature` | `chainId`, `tokenAddress`, `spender`, `amountRaw` | Typed-data signature that authorizes the source token |
| `intent_signature` | none | Signature over the intent |
| `native_transaction` | `chainId`, `sourceIndex`, `to`, `valueRaw` | Native-token deposit transaction |
| `intent_submission` | none | None. The SDK submits the intent. |
| `intent_fulfillment` | none | None. The SDK waits for the fill. |
## Committed attempts
`committed` becomes `true` once the attempt can settle even if a later step fails: after the intent signature when an ERC-20 source is used, or after a native deposit is broadcast.
> **Note**
>
> If a step fails with `committed: true`, the intent may still fill. Check `listIntents()` or the explorer before retrying, or the user may pay twice.
## Step errors
A failed `step` event carries `errorDetails` (`IntentStepError`): `name`, `message`, and optional `code`, `category`, `service`, `stepId`, `stepType`, `chainId`, and `details`. Match on `code`, not `message`.
## Result
Both swap methods resolve with `IntentResult` after the fill.
| Field | Type | Description |
| -------------------- | ---------------------- | -------------------------------------------------------------------------------- |
| `intentId` | `Hex` | Intent ID, also the quote ID. |
| `intentExplorerUrl` | `string` | Explorer link for the intent. |
| `quote` | `IntentQuote` | The accepted quote. |
| `status` | `IntentStatusResponse` | Final `id`, `provider`, `status`, `substatus`, and `legs`. |
| `approvals` | `IntentTransaction[]` | Approval transactions: `chainId`, `txHash`, `txExplorerUrl`, optional `receipt`. |
| `nativeTransactions` | `IntentTransaction[]` | Native deposit transactions, same shape. |
| `attemptId` | `string` | Optional. Store it with `intentId` for support requests. |
A rejected promise can follow transactions that already landed. See [hooks and errors](/docs/nexus/nexus-sdk/reference/hooks-and-errors).
### Swap Exact Output
`swapWithExactOut()` delivers the exact raw amount you request and lets the quote decide which balances fund it. It needs an [initialized client](/docs/nexus/nexus-sdk/get-started/nexus-sdk-setup) with a connected wallet.
## Signature
```typescript title="TypeScript"
swapWithExactOut(
input: SwapExactOutParams,
options?: SwapOperationOptions,
): Promise
```
## Parameters
| Name | Type | Description |
| ------------------- | ------------------------------------------------ | ---------------------------------------------------------------------------------------------------------------------------------------- |
| `toChainId` | `number` | Required. Destination chain ID. |
| `toTokenAddress` | `Hex` | Required. Destination token address. |
| `toAmountRaw` | `bigint` | Required, greater than `0n`. Amount to receive, in the destination token's base units. |
| `sources` | `Array<{ chainId: number; tokenAddress?: Hex }>` | Optional. Omit or pass `[]` to fund from any wallet balance. Otherwise, only the listed chains and tokens are used. |
| `toNativeAmountRaw` | `bigint` | Optional, default `0n`. Extra destination native token for gas, in native base units. |
| `options` | `SwapOperationOptions` | Optional. Slippage, timeouts, quote review, and events. See [review quotes](/docs/nexus/nexus-sdk/reference/swap-methods/review-quotes). |
A source with only `chainId` allows any token on that chain. Sources are alternatives, not a required mix: the quote may use some or all of them. To list compatible sources, call `getAvailableSourceTokens(destination, [], query)`.
Resolve `toAmountRaw` with the destination token's `decimals` and `toNativeAmountRaw` with the chain's `nativeCurrency.decimals`.
## Example
```typescript title="TypeScript"
import { parseUnits } from '@avail-project/nexus-core/utils';
const destination = {
chainId: 8453,
tokenAddress: '0x833589fCD6eDb6E08f4c7C32D4f71b54bdA02913', // USDC on Base
} as const;
const token = await client.getToken(destination);
const base = client.getSupportedChains().find((chain) => chain.id === destination.chainId)!;
const result = await client.swapWithExactOut({
toChainId: destination.chainId,
toTokenAddress: destination.tokenAddress,
toAmountRaw: parseUnits('100', token.decimals),
toNativeAmountRaw: parseUnits('0.0005', base.nativeCurrency.decimals),
sources: [
{ chainId: 42161 }, // any token on Arbitrum
{ chainId: 1, tokenAddress: '0xA0b86991c6218b36c1d19d4a2e9eb0cE3606eB48' }, // USDC on Ethereum
],
});
console.log(result.intentId, result.intentExplorerUrl);
```
Without an `onIntent` hook, the SDK accepts the first quote automatically.
## Returns
A promise that resolves with an [`IntentResult`](/docs/nexus/nexus-sdk/reference/swap-methods/swap-events#result) after the destination fill.
## Errors
| Code (`ERROR_CODES.*`) | Cause |
| ----------------------------------------- | --------------------------------------------------------------------------------------------------------------------------------------------------------------------------------- |
| `WALLET_NOT_CONNECTED` | No wallet is connected. |
| `INVALID_INPUT` | `toAmountRaw` is not positive, `toNativeAmountRaw` is negative, no provider serves the destination, no listed source shares a provider with it, or `slippageBps` is out of range. |
| `USER_INTENT_HOOK_DENIED` | Your hook called `deny()`. |
| `BACKEND_INSUFFICIENT_BALANCE` | The eligible balances cannot cover the quote. |
| `BACKEND_SAME_CHAIN_GAS_DROP_UNSUPPORTED` | `toNativeAmountRaw` is set on a same-chain route. |
| `BACKEND_FULFILMENT_WAIT_TIMEOUT` | No fill within `fillTimeoutMinutes`. The intent can still fill. |
| `ENVIRONMENT_NOT_SUPPORTED` | The client uses `network: 'testnet'`. |
For quote diagnostics and recovery, see [hooks and errors](/docs/nexus/nexus-sdk/reference/hooks-and-errors).
### Deposit into Aave
> **Note**
>
> **You are viewing the Nexus SDK v2 docs.** For the current SDK, see the [v3 docs](/docs/nexus/nexus-sdk/get-started/installation) and the [v2 → v3 migration guide](/docs/nexus/migration/sdk-v2-to-v3).
In this guide you will implement a **Bridge & Execute** flow that bridges USDC from any chain and immediately supplies it into Aave V3 on Arbitrum Sepolia in a single user-signed intent. You will also build a step-by-step progress UI that tracks each phase of the transaction.
> **Prerequisite**
>
> This guide builds on the [Bridge Tokens](/docs/nexus/nexus-sdk/v2/get-started/bridge-tokens) tutorial. Complete that first.
## What you will build
A deposit button that:
1. Bridges USDC from one or more source chains to Arbitrum Sepolia
2. Automatically calls Aave V3's `supply()` function on the destination chain
3. Displays a real-time progress checklist with explorer links
## How `bridgeAndExecute` works
The `client.bridgeAndExecute()` method extends regular bridging by accepting an `execute` object that defines a contract call to run after the bridge completes. The user signs a single intent that covers both operations.
| Param | Type | Required | Description |
| ----------------------- | ------------------------------------------------------------ | ------------- | ---------------------------------------------------------------------------------------------------------------------------- |
| `toTokenSymbol` | `string` | Yes | Token to bridge (e.g. "USDC"). |
| `toAmountRaw` | `bigint` | Yes | Amount in smallest unit (e.g. BigInt(1\_000\_000) = 1 USDC). |
| `toChainId` | `number` | Yes | Destination chain ID. The `execute` object inherits it, so it omits `toChainId`. |
| `execute.to` | `string` | Yes | Contract address to call on the destination chain. |
| `execute.data` | `string` | Yes | ABI-encoded function call data. |
| `execute.tokenApproval` | `{ toTokenSymbol: string, amount: bigint, spender: string }` | For this flow | Optional in general; required whenever the target contract pulls ERC-20 funds via `transferFrom`, as Aave's `supply()` does. |
## Step 1 - Add the bridgeAndExecute helper
Update your SDK helper file with a `bridgeAndExecute` function. This encodes an Aave V3 `supply()` call and passes it to the SDK.
```tsx title="src/lib/nexus.ts"
import type { BridgeAndExecuteEvent } from "@avail-project/nexus-core";
import { encodeFunctionData } from "viem";
// ... existing code (client instance, initialize, destroy, getBalancesForBridge, bridge) ...
const AAVE_V3_POOL = "0xBfC91D59fdAA134A4ED45f7B584cAf96D7792Eff"; // Aave V3 Pool on Arbitrum Sepolia
export async function bridgeAndExecute(
userAddress: `0x${string}`,
onEvent: (event: BridgeAndExecuteEvent) => void
) {
if (!client.hasEvmProvider) {
throw new Error("Connect a wallet and initialize the client first.");
}
if (!userAddress) {
throw new Error("User address is required");
}
// Look up the USDC contract address on Arbitrum Sepolia from the client's chain list.
const usdc = client.chainList.getTokenInfoBySymbol(421614, "USDC");
// Encode the Aave V3 supply() function call
const data = encodeFunctionData({
abi: [
{
inputs: [
{ internalType: "address", name: "asset", type: "address" },
{ internalType: "uint256", name: "amount", type: "uint256" },
{
internalType: "address",
name: "onBehalfOf",
type: "address",
},
{
internalType: "uint16",
name: "referralCode",
type: "uint16",
},
],
name: "supply",
outputs: [],
stateMutability: "nonpayable",
type: "function",
},
],
functionName: "supply",
args: [
usdc.contractAddress, // asset: USDC token address
BigInt(1_000_000), // amount: 1 USDC (6 decimals)
userAddress, // onBehalfOf: user's address
0, // referralCode: 0
],
});
const result = await client.bridgeAndExecute(
{
toTokenSymbol: "USDC",
toAmountRaw: BigInt(1_000_000), // 1 USDC (6 decimals)
toChainId: 421614, // Arbitrum Sepolia
execute: {
// toChainId is inherited from the top-level toChainId
to: AAVE_V3_POOL,
data: data,
tokenApproval: {
toTokenSymbol: "USDC",
amount: BigInt(1_000_000),
spender: AAVE_V3_POOL,
},
},
},
{ onEvent }
);
return result;
}
```
### Breaking down the `execute` object
```ts
execute: {
// toChainId is inherited from the top-level toChainId
to: AAVE_V3_POOL, // Aave V3 Pool contract
data: data, // Encoded supply() call
tokenApproval: {
toTokenSymbol: "USDC",
amount: BigInt(1_000_000),
spender: AAVE_V3_POOL,
},
}
```
* **`to`** - the contract address to call after bridging completes
* **`data`** - ABI-encoded function call, built with viem's `encodeFunctionData`
* **`tokenApproval`** - Aave needs approval to pull USDC from the user, so the SDK handles the approval step automatically
## Step 2 - Create the deposit button component
This component triggers the transaction and renders a real-time progress checklist.
```tsx title="src/components/deposit-button.tsx"
"use client";
import { useState } from "react";
import { useAccount } from "wagmi";
import type {
BridgeAndExecutePlanStep,
} from "@avail-project/nexus-core";
import { bridgeAndExecute, client } from "../lib/nexus";
type CompletedStep = { state: string; explorerUrl?: string };
export default function DepositButton({
className,
onResult,
}: {
className?: string;
onResult?: (r: any) => void;
}) {
const { address } = useAccount();
const [steps, setSteps] = useState([]);
const [completed, setCompleted] = useState>({});
const [error, setError] = useState("");
const onClick = async () => {
if (!client.hasEvmProvider) return alert("Initialize first");
if (!address) return alert("Please connect your wallet first");
setSteps([]);
setCompleted({});
setError("");
try {
const res = await bridgeAndExecute(address, (event) => {
// plan_preview / plan_confirmed carry the full list of steps
if (event.type === "plan_preview" || event.type === "plan_confirmed") {
setSteps(event.plan.steps);
}
// plan_progress reports per-step state transitions
if (event.type === "plan_progress") {
// Both 'confirmed' and 'completed' are terminal success states
if (event.state === "confirmed" || event.state === "completed") {
setCompleted((prev) => ({
...prev,
[event.step.id]: {
state: event.state,
explorerUrl:
"explorerUrl" in event ? event.explorerUrl : undefined,
},
}));
}
}
});
onResult?.(res);
} catch (e: any) {
setError(e.message || "Transaction failed");
}
};
return (
{isDone ? "✅" : "○"}
({step.type})
{done?.explorerUrl && (
View on Explorer
)}
);
})}
)}
{error && (
Error: {error}
)}
);
}
```
### How the progress UI works
The component derives the checklist from the typed `onEvent` stream:
* **`steps`** - populated from `event.plan.steps` when a `plan_preview` (or `plan_confirmed`) event fires, listing every step the transaction will go through (allowance approval, request signing, vault deposit, bridge fill, execute approval, execute transaction, and so on)
* **`completed`** - a map keyed by `step.id`, filled in from `plan_progress` events. On-chain steps settle on `confirmed` and off-chain steps on `completed`, so the UI treats both as terminal-success states
The UI renders the expected steps as a checklist and marks each one done when its `step.id` appears in `completed`. If the progress event carried an `explorerUrl`, a "View on Explorer" link is shown.
## Step 3 - Add the deposit button to the page
Import `DepositButton` into your main page:
```tsx title="src/app/page.tsx"
"use client";
import { useState } from "react";
import { useAccount } from "wagmi";
import ConnectWalletButton from "@/components/connect-button";
import InitButton from "@/components/init-button";
import FetchBalancesButton from "@/components/fetch-balances-button";
import DeinitButton from "@/components/de-init-button";
import BridgeButton from "@/components/bridge-button";
import DepositButton from "@/components/deposit-button";
import { client } from "@/lib/nexus";
export default function Page() {
const { isConnected } = useAccount();
const [initialized, setInitialized] = useState(client.hasEvmProvider);
const [balances, setBalances] = useState(null);
const [bridgeResult, setBridgeResult] = useState(null);
const [depositResult, setDepositResult] = useState(null);
const btn =
"px-4 py-2 rounded-md bg-blue-600 text-white hover:bg-blue-700 " +
"disabled:opacity-50 disabled:cursor-not-allowed";
return (
);
}
```
## Step 4 - Run and test
```bash
pnpm dev
```
1. Connect your wallet and initialize Nexus
2. Click **Bridge USDC & Deposit into Aave**
3. Approve the transaction in your wallet
4. Watch the progress checklist update in real-time as each step completes
5. Click the explorer links to verify on-chain
> **What you just built**
>
> With a single SDK call you bridged tokens across chains **and** executed a DeFi deposit on the destination chain. The `bridgeAndExecute` pattern works with any contract call. You could swap on a DEX, stake in a protocol, mint an NFT, anything you can encode as calldata.
## What's next
You have completed the full Nexus SDK "Get Started" series. From here you can explore:
- [**SDK Reference**](/docs/nexus/nexus-sdk/v2/reference) — Full API docs for bridge, swap, and balance methods.
- [**Bridge Methods**](/docs/nexus/nexus-sdk/v2/reference/bridge-methods/fetch-bridge-balances) — Deep dive into bridge(), bridgeAndTransfer(), and bridgeAndExecute().
- [**Swap Methods**](/docs/nexus/nexus-sdk/v2/reference/swap-methods/fetch-swap-balances) — Cross-chain swaps with swapWithExactIn() and swapWithExactOut().
- [**Cookbook Recipes**](/docs/nexus/nexus-sdk/v2/cookbook-recipes) — Copy-paste patterns for common developer workflows.
### Bridge Tokens
> **Note**
>
> **You are viewing the Nexus SDK v2 docs.** For the current SDK, see the [v3 docs](/docs/nexus/nexus-sdk/get-started/installation) and the [v2 → v3 migration guide](/docs/nexus/migration/sdk-v2-to-v3).
In this guide you will add a bridge function to your Nexus SDK project that moves tokens from any supported source chain to a destination chain. By the end you will have a working bridge button that transfers USDC to Arbitrum Sepolia with real-time step tracking.
> **Prerequisite**
>
> This guide builds on the [Initializing Nexus with RainbowKit](/docs/nexus/nexus-sdk/v2/get-started/initializing-nexus-with-rainbowkit) tutorial. Complete that first.
## What you will build
A bridge button that:
* Calls `client.bridge()` to move USDC from any chain to Arbitrum Sepolia
* Uses the typed `onEvent` callback for step-by-step progress updates
* Displays the Nexus explorer URL on completion
## Step 1 — Add the bridge helper function
Add a `bridge()` function to your existing SDK helper file. This example bridges 0.0001 USDC to Arbitrum Sepolia (chain ID `421614`).
```tsx title="src/lib/nexus.ts"
import type { BridgeResult } from "@avail-project/nexus-core";
// ... existing code (client instance, initialize, destroy, getBalancesForBridge) ...
export async function bridge() {
const bridgeResult: BridgeResult = await client.bridge(
{
toTokenSymbol: "USDC",
toAmountRaw: BigInt(100),
toChainId: 421614, // Arbitrum Sepolia
},
{
onEvent: (event) => {
switch (event.type) {
case "status":
// Lifecycle phase: intent_building → intent_ready → ... → completed
console.log("Status:", event.status);
break;
case "plan_preview":
// Full list of steps that will execute
console.log("Expected steps:", event.plan.steps);
break;
case "plan_progress":
// Fires as each step transitions state
console.log(`Step ${event.step.type}: ${event.state}`);
if (
(event.state === "submitted" || event.state === "confirmed") &&
"txHash" in event
) {
console.log("View tx:", event.explorerUrl);
}
break;
}
},
}
);
return bridgeResult;
}
```
### How `client.bridge()` works
| Param | Type | Required | Description |
| --------------- | ---------- | -------- | -------------------------------------------------------------------------------------- |
| `toTokenSymbol` | `string` | Yes | Token symbol to bridge (e.g. "USDC", "ETH"). |
| `toAmountRaw` | `bigint` | Yes | Amount in the token's smallest unit (e.g. BigInt(100) = 0.0001 USDC with 6 decimals). |
| `toChainId` | `number` | Yes | Destination chain ID (e.g. 421614 for Arbitrum Sepolia). |
| `sources` | `number[]` | No | Restrict the source chains funds may be pulled from. Defaults to all supported chains. |
The second argument is an options object with an `onEvent` callback. Progress arrives as a typed discriminated union on `event.type`:
* **`status`** — lifecycle phase updates on `event.status` (e.g. `intent_building` → `completed`)
* **`plan_preview`** — fired once with the full list of steps on `event.plan.steps`
* **`plan_progress`** — fired as each step advances, carrying `event.stepType`, `event.state`, and `event.step`. On-chain steps expose `txHash` / `explorerUrl` in the `submitted` and `confirmed` states
## Step 2 — Create the bridge button component
Create a button component that calls the bridge function and displays the result.
```tsx title="src/components/bridge-button.tsx"
"use client";
import { bridge, client } from "../lib/nexus";
export default function BridgeButton({
className,
onResult,
}: {
className?: string;
onResult?: (r: any) => void;
}) {
const onClick = async () => {
if (!client.hasEvmProvider) return alert("Initialize first");
const res = await bridge();
onResult?.(res);
console.log(res);
};
return (
);
}
```
## Step 3 — Add the button to the page
Import `BridgeButton` into your main page alongside the existing components:
```tsx title="src/app/page.tsx"
"use client";
import { useState } from "react";
import { useAccount } from "wagmi";
import ConnectWalletButton from "@/components/connect-button";
import InitButton from "@/components/init-button";
import FetchBalancesButton from "@/components/fetch-balances-button";
import DeinitButton from "@/components/de-init-button";
import BridgeButton from "@/components/bridge-button";
import { client } from "@/lib/nexus";
export default function Page() {
const { isConnected } = useAccount();
const [initialized, setInitialized] = useState(client.hasEvmProvider);
const [balances, setBalances] = useState(null);
const [bridgeResult, setBridgeResult] = useState(null);
const btn =
"px-4 py-2 rounded-md bg-blue-600 text-white hover:bg-blue-700 " +
"disabled:opacity-50 disabled:cursor-not-allowed";
return (
);
}
```
## Step 4 — Run and test
```bash
pnpm dev
```
1. Connect your wallet and initialize Nexus
2. Click **Bridge 0.0001 USDC to Arbitrum Sepolia**
3. Approve the transaction in your wallet
4. Watch the console for step progress events
5. On success, you will see a `BridgeResult` with the intent explorer URL, the source transactions, and the resolved intent:
```json
{
"intentExplorerUrl": "https://nexus-v2.testnet.avail.so/intent/0x37b1...84fe",
"sourceTxs": [
{
"txHash": "0x…",
"txExplorerUrl": "https://…",
"chain": { "id": 84532, "name": "Base Sepolia", "logo": "…" }
}
],
"intent": { "…": "…" }
}
```
> **Customize the bridge**
>
> Replace the hardcoded values in `bridge()` with user inputs to build a dynamic bridge UI. You can change the `toTokenSymbol`, `toAmountRaw`, and `toChainId` parameters to bridge any supported token to any supported chain.
## Next step
Take bridging further by combining it with an on-chain execution — bridge tokens and immediately deposit them into a DeFi protocol in a single transaction.
- [**Deposit into Aave**](/docs/nexus/nexus-sdk/v2/get-started/deposit-into-aave)
### Installation
> **Note**
>
> **You are viewing the Nexus SDK v2 docs.** For the current SDK, see the [v3 docs](/docs/nexus/nexus-sdk/get-started/installation) and the [v2 → v3 migration guide](/docs/nexus/migration/sdk-v2-to-v3).
In this guide you will install `@avail-project/nexus-core` and its peer dependencies into an existing project. By the end, your project will be ready for SDK initialization in the next step.
## Prerequisites
Before you begin, make sure you have:
* **A JavaScript or TypeScript project** — the SDK works with any framework or runtime (React, Node.js, vanilla JS, etc.)
* **Node.js 18+** or **Bun** with a package manager (npm 9+, pnpm, yarn, or bun)
* **An [EIP-1193](https://eips.ethereum.org/EIPS/eip-1193) compatible wallet provider** to sign transactions (e.g. MetaMask via `window.ethereum`, or a library like [wagmi](https://wagmi.sh))
> **Wallet provider**
>
> The SDK needs an EIP-1193 provider to send transactions. In a browser you can use `window.ethereum` directly. Wallet libraries like wagmi or RainbowKit are optional — they just make it easier to manage wallet connections in React apps.
## Step 1 — Install the core package
Run one of the following commands to add the Nexus SDK to your project:
#### npm
```bash
npm install @avail-project/nexus-core
```
#### pnpm
```bash
pnpm add @avail-project/nexus-core
```
#### yarn
```bash
yarn add @avail-project/nexus-core
```
#### bun
```bash
bun add @avail-project/nexus-core
```
### What gets installed
The `@avail-project/nexus-core` package provides:
* **`createNexusClient`** — the factory function for creating a Nexus client and performing cross-chain operations
* **Bridge methods** — `bridge()`, `bridgeAndTransfer()`, `bridgeAndExecute()` for moving tokens across chains
* **Swap methods** — `swapWithExactIn()`, `swapWithExactOut()` for cross-chain token swaps
* **Balance methods** — `getBalancesForBridge()` and `getBalancesForSwap()` for multi-chain token balances
* **Typed progress events** — an `onEvent` callback with a discriminated union (`status`, `plan_preview`, `plan_confirmed`, `plan_progress`) for tracking transaction progress
* **Type exports** — `NexusClient`, `BridgeResult`, `EthereumProvider`, and more
## Step 2 — Verify the installation
Confirm the package was installed by importing and creating a client:
```ts
import { createNexusClient } from "@avail-project/nexus-core";
const client = createNexusClient();
console.log("Nexus SDK ready");
```
If this compiles without errors, the installation is complete.
## Next step
The package is installed. Next, you will create an SDK instance, connect it to a wallet, and fetch your first token balances.
- [**Nexus SDK Setup**](/docs/nexus/nexus-sdk/v2/get-started/nexus-sdk-setup)
### Nexus SDK Setup
> **Note**
>
> **You are viewing the Nexus SDK v2 docs.** For the current SDK, see the [v3 docs](/docs/nexus/nexus-sdk/get-started/installation) and the [v2 → v3 migration guide](/docs/nexus/migration/sdk-v2-to-v3).
In this guide you will create a Nexus SDK instance, connect it to a wallet provider, and fetch unified balances across all supported chains. By the end you will have a minimal Next.js app with four buttons that demonstrate the full SDK lifecycle.
## Prerequisites
* [Node.js](https://nodejs.org) version 18 or higher, with npm 9 or higher
* A package manager — this guide uses `pnpm`, but `npm` and `yarn` work too
* An [EIP-1193](https://eips.ethereum.org/EIPS/eip-1193) compatible wallet (e.g. MetaMask) installed in your browser
* `@avail-project/nexus-core` installed in your project (see [Installation](/docs/nexus/nexus-sdk/v2/get-started/installation))
## What you will build
A minimal Next.js page with four buttons:
1. **Connect Wallet** — connects an EIP-1193 wallet
2. **Initialize Nexus** — passes the wallet provider to the SDK
3. **Fetch Balances** — retrieves token balances across all supported chains
4. **De-initialize** — tears down the SDK instance
> **Balance methods**
>
> The SDK provides two balance methods: `getBalancesForBridge()` returns tokens available for bridging, while `getBalancesForSwap()` returns tokens available for cross-chain swaps. Learn more in the [Bridge vs Swap concept page](/docs/nexus/nexus-sdk/v2/bridge-v-swap).
## Step 1 — Create a Next.js project
If you don't have an existing project, scaffold one:
```bash
pnpm create next-app@latest my-nexus-app --ts --eslint --app --src-dir
cd my-nexus-app
```
Install the Nexus SDK:
```bash
pnpm add @avail-project/nexus-core
```
## Step 2 — Create the SDK instance
Create a single shared SDK instance that the rest of the app will import. This file lives outside of React so it has no component lifecycle concerns.
```tsx title="src/lib/nexus.ts"
import { createNexusClient, type NexusClient } from "@avail-project/nexus-core";
// Create a single client instance.
// Pass { network: 'testnet' } to use testnet chains.
// Defaults to 'mainnet' if omitted.
export const client: NexusClient = createNexusClient({ network: "testnet" });
export async function initializeWithProvider(provider: any) {
if (!provider)
throw new Error("No EIP-1193 provider (e.g. MetaMask) found");
if (client.hasEvmProvider) return;
await client.initialize(); // loads deployment info from the middleware
await client.setEVMProvider(provider); // attaches the connected wallet
}
export function destroy() {
client.destroy();
}
export async function getBalancesForBridge() {
return await client.getBalancesForBridge();
}
export async function getBalancesForSwap() {
return await client.getBalancesForSwap();
}
```
### What each part does
| Export | Type | Description |
| ---------------------------------- | ---------------------------------- | -------------------------------------------------------------------------------------------------------------- |
| `client` | `NexusClient` | The shared Nexus client, created once with `createNexusClient()`. |
| `client.hasEvmProvider` | `boolean` | Getter that returns `true` once `setEVMProvider()` has attached a wallet. |
| `initializeWithProvider(provider)` | `(provider: any) => Promise` | Runs `client.initialize()` then `client.setEVMProvider(provider)`. Must be called after a wallet is connected. |
| `destroy()` | `() => void` | Tears down the client (synchronous). |
| `getBalancesForBridge()` | `() => Promise` | Returns bridgeable token balances across all supported chains. |
| `getBalancesForSwap()` | `() => Promise` | Returns swappable token balances across all supported chains. |
> **Two-step initialization**
>
> v2 splits startup into two calls: `client.initialize()` loads deployment data from the middleware, and `client.setEVMProvider(provider)` attaches the connected wallet. You can call them in either order, but wallet-dependent methods only work once `setEVMProvider()` has resolved.
## Step 3 — Create the UI components
Create four button components in the `src/components` directory.
### connect-button.tsx
Connects an EIP-1193 wallet using the browser's injected provider (`window.ethereum`).
```tsx title="src/components/connect-button.tsx"
"use client";
export default function ConnectButton({
className,
}: {
className?: string;
}) {
const onClick = async () => {
const eth = (window as any)?.ethereum;
if (!eth)
return alert("Install an EIP-1193 wallet (e.g. MetaMask)");
await eth.request?.({ method: "eth_requestAccounts" });
alert("Wallet connected");
};
return (
);
}
```
### init-button.tsx
Initializes the Nexus SDK with the connected wallet's provider.
```tsx title="src/components/init-button.tsx"
"use client";
import { initializeWithProvider, client } from "../lib/nexus";
export default function InitButton({
className,
onReady,
}: {
className?: string;
onReady?: () => void;
}) {
const onClick = async () => {
const eth = (window as any)?.ethereum;
try {
await initializeWithProvider(eth);
onReady?.();
alert("Nexus initialized");
} catch (e: any) {
alert(e?.message ?? "Init failed");
}
};
return (
);
}
```
> **Using a wallet library?**
>
> This tutorial uses `window.ethereum` directly for simplicity. If you use wagmi, RainbowKit, or another wallet library, see [Initializing Nexus with RainbowKit](/docs/nexus/nexus-sdk/v2/get-started/initializing-nexus-with-rainbowkit) for how to retrieve the provider from a connector.
### fetch-balances-button.tsx
Fetches the user's balances across all supported chains.
```tsx title="src/components/fetch-balances-button.tsx"
"use client";
import { getBalancesForBridge, getBalancesForSwap, client } from "../lib/nexus";
export default function FetchBalancesButton({
className,
onResult,
}: {
className?: string;
onResult?: (r: any) => void;
}) {
const onClick = async () => {
if (!client.hasEvmProvider) return alert("Initialize first");
// Use getBalancesForBridge() for bridgeable tokens
// Use getBalancesForSwap() for swappable tokens
const bridgeBalances = await getBalancesForBridge();
const swapBalances = await getBalancesForSwap();
const res = { bridgeBalances, swapBalances };
onResult?.(res);
console.log(res);
};
return (
);
}
```
### de-init-button.tsx
Destroys the client and resets state.
```tsx title="src/components/de-init-button.tsx"
"use client";
import { destroy, client } from "../lib/nexus";
export default function DeinitButton({
className,
onDone,
}: {
className?: string;
onDone?: () => void;
}) {
const onClick = async () => {
destroy();
onDone?.();
alert("Nexus de-initialized");
};
return (
);
}
```
## Step 4 — Assemble the page
Wire all four components together in a single page:
```tsx title="src/app/page.tsx"
"use client";
import { useState } from "react";
import ConnectButton from "@/components/connect-button";
import InitButton from "@/components/init-button";
import FetchBalancesButton from "@/components/fetch-balances-button";
import DeinitButton from "@/components/de-init-button";
import { client } from "@/lib/nexus";
export default function Page() {
const [initialized, setInitialized] = useState(client.hasEvmProvider);
const [balances, setBalances] = useState(null);
const btn =
"px-4 py-2 rounded-md bg-blue-600 text-white hover:bg-blue-700 " +
"disabled:opacity-50 disabled:cursor-not-allowed";
return (
);
}
```
## Step 5 — Run and test
```bash
pnpm dev
```
Open [http://localhost:3000](http://localhost:3000) and click through the buttons in order:
1. **Connect Wallet** — approve the wallet prompt in MetaMask
2. **Initialize Nexus** — the SDK connects to the wallet provider
3. **Fetch Balances** — a JSON object appears showing your tokens across chains
4. **De-initialize** — the SDK resets
> **What you just built**
>
> In a few lines of code you connected to a wallet, initialized the Nexus SDK, and fetched a cross-chain view of every token the user holds. From here you can bridge tokens, execute swaps, or build any custom UI on top of the headless SDK.
## Next step
Upgrade your wallet connection experience by replacing `window.ethereum` with RainbowKit.
- [**Initializing Nexus with RainbowKit**](/docs/nexus/nexus-sdk/v2/get-started/initializing-nexus-with-rainbowkit)
### Initializing Nexus with RainbowKit
> **Note**
>
> **You are viewing the Nexus SDK v2 docs.** For the current SDK, see the [v3 docs](/docs/nexus/nexus-sdk/get-started/installation) and the [v2 → v3 migration guide](/docs/nexus/migration/sdk-v2-to-v3).
In this guide you will add RainbowKit to an existing Nexus SDK project and retrieve the EIP-1193 provider from wagmi's connector instead of `window.ethereum`. By the end you will have a full wallet connection modal, multi-wallet support, and all existing SDK functionality intact.
> **Prerequisite**
>
> This guide builds on the [Nexus SDK Setup](/docs/nexus/nexus-sdk/v2/get-started/nexus-sdk-setup). Complete that first.
## What changes
| Before (basic setup) | After (RainbowKit) |
| --------------------------------------- | ------------------------------------------ |
| `window.ethereum` for wallet connection | RainbowKit modal with multi-wallet support |
| Manual `eth_requestAccounts` call | wagmi handles connection state |
| Single injected provider only | WalletConnect, Coinbase, and more |
Everything else — the SDK instance, helper functions, balance fetching, and de-initialization — stays **exactly the same**.
## Step 1 — Install RainbowKit dependencies
Add the required packages to your project:
#### npm
```bash
npm install @rainbow-me/rainbowkit wagmi viem @tanstack/react-query
```
#### pnpm
```bash
pnpm add @rainbow-me/rainbowkit wagmi viem @tanstack/react-query
```
#### yarn
```bash
yarn add @rainbow-me/rainbowkit wagmi viem @tanstack/react-query
```
## Step 2 — Create the wagmi configuration
Create a config file that defines the supported chains and your WalletConnect project ID.
```tsx title="src/lib/wagmi.ts"
import { getDefaultConfig } from "@rainbow-me/rainbowkit";
import {
mainnet,
arbitrum,
polygon,
optimism,
base,
avalanche,
} from "wagmi/chains";
export const config = getDefaultConfig({
appName: "Nexus SDK with RainbowKit",
projectId: process.env.NEXT_PUBLIC_WALLETCONNECT_PROJECT_ID!,
chains: [mainnet, arbitrum, polygon, optimism, base, avalanche],
ssr: true,
});
```
> **WalletConnect Project ID required**
>
> Get a free Project ID at [cloud.walletconnect.com](https://cloud.walletconnect.com). Add it to your `.env.local` as `NEXT_PUBLIC_WALLETCONNECT_PROJECT_ID`.
## Step 3 — Create the providers component
Wrap your app with wagmi, React Query, and RainbowKit providers.
```tsx title="src/components/providers.tsx"
"use client";
import { QueryClient, QueryClientProvider } from "@tanstack/react-query";
import { WagmiProvider } from "wagmi";
import { RainbowKitProvider } from "@rainbow-me/rainbowkit";
import { config } from "@/lib/wagmi";
import "@rainbow-me/rainbowkit/styles.css";
const queryClient = new QueryClient();
export function Providers({ children }: { children: React.ReactNode }) {
return (
{children}
);
}
```
## Step 4 — Update the layout
Wrap your root layout with the new providers component:
```tsx title="src/app/layout.tsx"
import { Providers } from "@/components/providers";
import "./globals.css";
export default function RootLayout({
children,
}: {
children: React.ReactNode;
}) {
return (
{children}
);
}
```
## Step 5 — Update the connect button
Replace the manual `window.ethereum` approach with RainbowKit's `ConnectButton`:
```tsx title="src/components/connect-button.tsx"
"use client";
import { ConnectButton } from "@rainbow-me/rainbowkit";
export default function ConnectWalletButton({
className,
}: {
className?: string;
}) {
return (
{({
account,
chain,
openAccountModal,
openChainModal,
openConnectModal,
authenticationStatus,
mounted,
}) => {
const ready = mounted && authenticationStatus !== "loading";
const connected =
ready &&
account &&
chain &&
(!authenticationStatus ||
authenticationStatus === "authenticated");
return (
{(() => {
if (!connected) {
return (
);
}
if (chain.unsupported) {
return (
);
}
return (
);
})()}
);
}}
);
}
```
## Step 6 — Update the init button
The key change: instead of reading `window.ethereum`, use wagmi's `useAccount` hook to get the provider from the connected wallet's connector.
```tsx title="src/components/init-button.tsx"
"use client";
import { useAccount } from "wagmi";
import { initializeWithProvider, client } from "../lib/nexus";
export default function InitButton({
className,
onReady,
}: {
className?: string;
onReady?: () => void;
}) {
const { connector } = useAccount();
const onClick = async () => {
try {
const provider = await connector?.getProvider();
if (!provider) throw new Error("No provider found");
await initializeWithProvider(provider);
onReady?.();
alert("Nexus initialized");
} catch (e: any) {
alert(e?.message ?? "Init failed");
}
};
return (
);
}
```
### How the provider retrieval works
```ts
const { connector } = useAccount();
const provider = await connector?.getProvider();
await initializeWithProvider(provider);
```
* **`useAccount()`** — wagmi hook that returns the current connection state and active connector
* **`connector.getProvider()`** — returns the EIP-1193 provider for whichever wallet the user connected (MetaMask, WalletConnect, Coinbase, etc.)
* **`initializeWithProvider(provider)`** — your existing helper function runs `client.initialize()` and then passes the provider to `client.setEVMProvider()`
This means **any wallet RainbowKit supports** will work with the Nexus SDK — no code changes needed per wallet.
## Step 7 — Update the main page
Add wallet status display using wagmi's `useAccount` hook:
```tsx title="src/app/page.tsx"
"use client";
import { useState } from "react";
import { useAccount } from "wagmi";
import ConnectWalletButton from "@/components/connect-button";
import InitButton from "@/components/init-button";
import FetchBalancesButton from "@/components/fetch-balances-button";
import DeinitButton from "@/components/de-init-button";
import { client } from "@/lib/nexus";
export default function Page() {
const { isConnected } = useAccount();
const [initialized, setInitialized] = useState(client.hasEvmProvider);
const [balances, setBalances] = useState(null);
const btn =
"px-4 py-2 rounded-md bg-blue-600 text-white hover:bg-blue-700 " +
"disabled:opacity-50 disabled:cursor-not-allowed";
return (
);
}
```
## Summary of changes
| File | What changed |
| ----------------------------------- | -------------------------------------------------------------------- |
| `src/lib/wagmi.ts` | **New** — wagmi + RainbowKit config |
| `src/components/providers.tsx` | **New** — provider wrapper component |
| `src/app/layout.tsx` | Wrapped with `Providers` |
| `src/components/connect-button.tsx` | Replaced `window.ethereum` with RainbowKit `ConnectButton.Custom` |
| `src/components/init-button.tsx` | Replaced `window.ethereum` with `connector.getProvider()` from wagmi |
| `src/app/page.tsx` | Added `useAccount` for wallet status display |
| `src/lib/nexus.ts` | **No changes** — SDK setup is the same |
## Next step
Your project now has a production-quality wallet connection experience. Next, add cross-chain bridging functionality.
- [**Bridge Tokens**](/docs/nexus/nexus-sdk/v2/get-started/bridge-tokens)
### Hooks and Errors
> **Note**
>
> **You are viewing the Nexus SDK v2 docs.** For the current SDK, see the [v3 docs](/docs/nexus/nexus-sdk/get-started/installation) and the [v2 → v3 migration guide](/docs/nexus/migration/sdk-v2-to-v3).
The Nexus SDK ships with per-operation hooks for gating and observing an operation, and a typed `NexusError` hierarchy for handling failures.
## Hooks
In v2 there are **no global hook setters** (`setOnIntentHook`, `setOnAllowanceHook`, `setOnSwapIntentHook` were removed). Hooks are passed **per operation** through the second `options` argument:
```typescript title="TypeScript"
await client.bridge(params, {
hooks: {
onIntent: ({ intent, allow }) => allow(),
onAllowance: ({ allow }) => allow(['min']),
},
});
```
> **Note**
>
> If you don't provide any hooks, the SDK **auto-approves**: the intent is allowed automatically and allowances default to `'min'` for every source.
Where each hook lives per method:
| Method | `onEvent` | `onIntent` | `onAllowance` |
| ------------------------------------------ | --------- | -------------------- | ------------------- |
| `bridge()` / `bridgeAndTransfer()` | top-level | `hooks.onIntent` | `hooks.onAllowance` |
| `swapWithExactIn()` / `swapWithExactOut()` | top-level | `hooks.onIntent` | — |
| `bridgeAndExecute()` | top-level | top-level `onIntent` | automatic (`min`) |
| `swapAndExecute()` | top-level | top-level `onIntent` | — |
### onEvent
Supported by every operation, `onEvent` streams progress as the operation runs. The v2 event is a typed union discriminated by `type`:
```typescript title="TypeScript"
type Event =
| { type: 'status'; status: string }
| { type: 'plan_preview'; plan: /* plan */ }
| { type: 'plan_confirmed'; plan: /* plan */ }
| { type: 'plan_progress'; stepType: string; state: string; step: /* step */ };
type OnEventParam = {
onEvent?: (event: TEvent) => void;
};
```
```typescript title="TypeScript"
await client.bridge(params, {
onEvent: (event) => {
if (event.type === 'plan_progress') {
console.log('Step:', event.stepType, event.state);
}
},
});
```
> **Note**
>
> Each method emits its own typed event union. See the [Bridge Events](/docs/nexus/nexus-sdk/v2/reference/bridge-methods/bridge-events) and [Swap Events](/docs/nexus/nexus-sdk/v2/reference/swap-methods/swap-events) pages for the full step-by-step definitions.
### onIntent
Gate the intent before execution. Render the plan and fees, then call `allow()` to continue or `deny()` to abort. `refresh(selectedSources?)` re-plans (for example after the user picks different source chains) and resolves to the updated intent.
#### Signature
```typescript title="TypeScript"
type OnIntentHookData = {
allow: () => void;
deny: () => void;
intent: BridgeIntent;
refresh: (selectedSources?: number[]) => Promise;
};
```
`BridgeIntent` is the human-readable breakdown of `availableSources`, `selectedSources`, `destination`, and `fees`:
```typescript title="TypeScript"
type BridgeIntent = {
provider: 'nexus' | 'mayan';
availableSources: Array<{
amount: string;
amountRaw: bigint;
chain: { id: number; name: string; logo: string };
token: { decimals: number; symbol: string; logo: string; contractAddress: Hex };
value: string;
}>;
selectedSources: Array<{
amount: string;
amountRaw: bigint;
chain: { id: number; name: string; logo: string };
token: { decimals: number; symbol: string; logo: string; contractAddress: Hex };
value: string;
}>;
destination: {
amount: string;
amountRaw: bigint;
chain: { id: number; name: string; logo: string };
token: { decimals: number; symbol: string; logo: string; contractAddress: Hex };
value: string;
nativeAmount: string;
nativeAmountRaw: bigint;
nativeAmountValue: string;
nativeAmountInToken: string;
nativeToken: { decimals: number; symbol: string; logo: string; contractAddress: Hex };
};
fees: {
caGas: string;
protocol: string;
solver: string;
total: string;
totalValue: string;
};
sourcesTotal: string;
sourcesTotalValue: string;
};
```
#### Example
```typescript title="TypeScript"
await client.bridge(params, {
hooks: {
onIntent: async ({ intent, allow, deny, refresh }) => {
// Render the plan and fees from `intent`
if (userChangedSources) {
const updated = await refresh([10, 42161]); // re-plan against Optimism + Arbitrum
// re-render with `updated`
}
if (userApproves) allow();
else deny();
},
},
});
```
### onAllowance
Fires when one or more sources need an ERC-20 approval before the deposit. Call `allow(values)` with one entry per source, or `deny()` to abort.
#### Signature
```typescript title="TypeScript"
type OnAllowanceHookData = {
allow: (values: Array<'max' | 'min' | bigint | string>) => void;
deny: () => void;
sources: AllowanceHookSource[];
};
type AllowanceHookSource = {
allowance: {
current: string; // Current allowance (human-readable)
currentRaw: bigint; // Current allowance (raw)
minimum: string; // Minimum required (human-readable)
minimumRaw: bigint; // Minimum required (raw)
};
chain: {
id: number;
logo: string;
name: string;
};
holderAddress?: Hex;
token: {
contractAddress: `0x${string}`;
decimals: number;
logo: string;
name: string;
symbol: string;
};
};
```
* `allow(values)` — `values.length` must equal `sources.length`. Each entry is one of:
* `'min'` — the minimum required allowance for that source.
* `'max'` — an unlimited (`maxUint256`) allowance for that source.
* a `bigint` or numeric `string` — a custom raw amount for that source.
* `deny()` — stops the flow.
#### Example
```typescript title="TypeScript"
await client.bridge(params, {
hooks: {
onAllowance: ({ sources, allow, deny }) => {
// `sources` has one entry per approval required
if (userApproves) allow(sources.map(() => 'min')); // or 'max' / custom per source
else deny();
},
},
});
```
> **Note**
>
> If you don't provide `onAllowance`, the SDK approves `'min'` for every source automatically. Approval progress surfaces through `onEvent`.
### Swap onIntent
`swapWithExactIn()` and `swapWithExactOut()` take `hooks.onIntent`, but the intent shape is `SwapIntent` (route, destination, and gas), and `refresh` accepts `Source[]`:
```typescript title="TypeScript"
type OnIntentHookData = {
allow: () => void;
deny: () => void;
intent: SwapIntent;
refresh: (sources?: Source[]) => Promise;
};
```
```typescript title="TypeScript"
await client.swapWithExactIn(input, {
hooks: {
onIntent: ({ intent, allow }) => {
// Render the route and destination amount from `intent`
allow();
},
},
});
```
See the full `SwapIntent` definition in the [SDK source](https://github.com/availproject/nexus-sdk/blob/main/src/swap/types.ts).
### Composite operations
`bridgeAndExecute()` and `swapAndExecute()` take a **top-level** `onIntent` (not nested under `hooks`). Its `intent` describes both the requirement and any bridge/swap needed to satisfy it.
```typescript title="TypeScript"
type BridgeAndExecuteOnIntentHookData = {
allow: () => void;
deny: () => void;
intent: BridgeAndExecuteIntent;
refresh: (selectedSources?: number[]) => Promise;
};
type SwapAndExecuteOnIntentHookData = {
allow: () => void;
deny: () => void;
intent: SwapAndExecuteIntent;
refresh: (sources?: Source[]) => Promise;
};
```
```typescript title="TypeScript"
await client.bridgeAndExecute(params, {
onIntent: ({ intent, allow, deny }) => {
// `intent.bridgeRequired` tells you whether a bridge leg is needed
if (userApproves) allow();
else deny();
},
});
```
## Error Handling
Every SDK operation throws a typed `NexusError` subclass on failure rather than returning an error result.
### The NexusError hierarchy
`NexusError` is the abstract base. Each concrete subclass pins a `category`:
```typescript title="TypeScript"
abstract class NexusError extends Error {
readonly category: ErrorCategory; // set by each subclass
readonly code: ErrorCode; // namespaced string, e.g. 'validation/insufficient_balance'
readonly context: ErrorContext; // { operation?, service?, stepId?, stepType?, chainId? }
readonly details?: Record;
toJSON(): object; // serializable { name, message, category, code, context, details }
}
type ErrorCategory =
| 'validation'
| 'user_action'
| 'simulation'
| 'execution'
| 'backend'
| 'external_service'
| 'internal';
```
| Subclass | `category` | Meaning |
| ---------------------- | ------------------ | ---------------------------------------------------------------------------------------------------------------------- |
| `ValidationError` | `validation` | Caller input or precondition failure (bad params, unsupported token/chain, insufficient balance, SDK not initialized). |
| `UserActionError` | `user_action` | User rejected a prompt (intent hook, signature, allowance approval, tx send). |
| `SimulationError` | `simulation` | A pre-execution `eth_call` / simulation failed. |
| `ExecutionError` | `execution` | Runtime failure at the wallet/RPC boundary (gas estimate, revert, receipt timeout). |
| `BackendError` | `backend` | Avail middleware HTTP/WS failure. |
| `ExternalServiceError` | `external_service` | A third-party dependency failed (LiFi, Bebop, Fibrous, 0x, Mystic, Relay, Coinbase). |
| `InternalError` | `internal` | A true SDK invariant was violated. |
> **Note**
>
> `code` holds a namespaced string of the shape `category/specific_noun`. The exported `ERROR_CODES` map gives you friendly aliases — e.g. `ERROR_CODES.INSUFFICIENT_BALANCE === 'validation/insufficient_balance'`. Branch on `error.category` (or `instanceof`) for coarse handling and on `error.code === ERROR_CODES.*` for specific cases.
There is no `NexusStepError` in v2. Step-scoped failures are thrown as the applicable subclass, carrying `context.stepId`, `context.stepType`, and `context.chainId`.
### Recommended pattern
```typescript title="TypeScript"
import {
NexusError,
UserActionError,
ValidationError,
ERROR_CODES,
} from '@avail-project/nexus-core';
try {
await client.bridge({ toTokenSymbol: 'USDC', toAmountRaw: 1_000_000n, toChainId: 137 });
} catch (error) {
if (error instanceof NexusError) {
console.error(`[${error.category}] ${error.code}: ${error.message}`);
// Coarse branching on category
if (error instanceof UserActionError) {
// User cancelled a prompt — usually nothing to show
return;
}
if (error instanceof ValidationError) {
switch (error.code) {
case ERROR_CODES.INSUFFICIENT_BALANCE:
showInsufficientBalanceUI();
break;
case ERROR_CODES.TOKEN_NOT_SUPPORTED:
showUnsupportedTokenUI();
break;
default:
showGenericError(error.message);
}
}
// Log the structured form for telemetry
logErrorToService(error.toJSON());
} else {
// Non-Nexus errors (network, library, etc.)
console.error('Unexpected error:', error);
}
}
```
### Error codes reference
The full list lives in [`src/domain/errors.ts`](https://github.com/availproject/nexus-sdk/blob/main/src/domain/errors.ts). Representative codes by category:
| `ERROR_CODES` key | `code` value | Category |
| ----------------------------------- | ------------------------------------------- | ----------------- |
| `INVALID_INPUT` | `validation/invalid_input` | validation |
| `INSUFFICIENT_BALANCE` | `validation/insufficient_balance` | validation |
| `TOKEN_NOT_SUPPORTED` | `validation/token_not_supported` | validation |
| `CHAIN_NOT_FOUND` | `validation/chain_not_found` | validation |
| `SDK_NOT_INITIALIZED` | `validation/sdk_not_initialized` | validation |
| `WALLET_NOT_CONNECTED` | `validation/wallet_not_connected` | validation |
| `VAULT_CONTRACT_NOT_FOUND` | `validation/vault_contract_not_found` | validation |
| `INVALID_VALUES_ALLOWANCE_HOOK` | `validation/invalid_allowance_hook` | validation |
| `USER_INTENT_HOOK_DENIED` | `user_action/intent_hook_denied` | user\_action |
| `USER_INTENT_SIGNATURE_DENIED` | `user_action/intent_signature_denied` | user\_action |
| `USER_ALLOWANCE_APPROVAL_DENIED` | `user_action/allowance_approval_denied` | user\_action |
| `USER_TX_SEND_DENIED` | `user_action/tx_send_denied` | user\_action |
| `SIMULATION_ETH_CALL_FAILED` | `simulation/eth_call_failed` | simulation |
| `EXEC_GAS_ESTIMATE_FAILED` | `execution/gas_estimate_failed` | execution |
| `EXEC_TX_ONCHAIN_REVERTED` | `execution/tx_onchain_reverted` | execution |
| `EXEC_TX_RECEIPT_WAIT_TIMEOUT` | `execution/tx_receipt_wait_timeout` | execution |
| `EXEC_SLIPPAGE_EXCEEDED` | `execution/slippage_exceeded` | execution |
| `BACKEND_RFF_SUBMIT_FAILED` | `backend/rff_submit_failed` | backend |
| `BACKEND_FULFILMENT_WAIT_TIMEOUT` | `backend/fulfilment_wait_timeout` | backend |
| `BACKEND_FEE_GRANT_REQUESTED` | `backend/fee_grant_requested` | backend |
| `EXTERNAL_SOURCE_SWAP_QUOTE_FAILED` | `external_service/source_swap_quote_failed` | external\_service |
| `EXTERNAL_RATES_DRIFT_EXCEEDED` | `external_service/rates_drift_exceeded` | external\_service |
| `INTERNAL_ERROR` | `internal/error` | internal |
> **Note**
>
> See the [full error definitions](https://github.com/availproject/nexus-sdk/blob/main/src/domain/errors.ts) on GitHub for the exhaustive `ERROR_CODES` map, the named `Errors.*` factories, and every `code`.
### List Intents
> **Note**
>
> **You are viewing the Nexus SDK v2 docs.** For the current SDK, see the [v3 docs](/docs/nexus/nexus-sdk/get-started/installation) and the [v2 → v3 migration guide](/docs/nexus/migration/sdk-v2-to-v3).
> **Note**
>
> **SET UP THE SDK BEFORE YOU START:**
>
> Install and initialize the client first — see [Installation](/docs/nexus/nexus-sdk/v2/get-started/installation) and [SDK Setup](/docs/nexus/nexus-sdk/v2/get-started/nexus-sdk-setup).
Use the `listIntents()` function to fetch a user's historical intents, with pagination and an optional status filter.
> **Note**
>
> `listIntents()` replaces the v1 `getMyIntents(page)` method. It returns a structured `{ intents, total }` result instead of a bare array, and accepts an optional `status` filter.
## Method signature
```typescript title="TypeScript"
listIntents(
params?: ListIntentsParams,
): Promise
```
## Parameters
```typescript title="TypeScript"
export type ListIntentsParams = {
page?: number;
status?: IntentStatus;
};
export type IntentStatus = 'created' | 'deposited' | 'fulfilled' | 'expired';
```
* `ListIntentsParams` (optional): Filters for the intent query.
* `page` (number, optional): The page number for pagination. Page size is fixed at 20 records — paginate by incrementing `page`.
* `status` (`IntentStatus`, optional): Restrict results to a single lifecycle status — `'created'`, `'deposited'`, `'fulfilled'`, or `'expired'`.
> **Note**
>
> `IntentStatus` is exported both as a value map (`IntentStatus.Fulfilled`) and as a type. Use the value map to avoid hardcoding the string literals.
## Example
```typescript title="TypeScript"
import { IntentStatus, type ListIntentsResult } from '@avail-project/nexus-core';
// First page of all intents
const { intents, total }: ListIntentsResult = await client.listIntents();
console.log(`Showing ${intents.length} of ${total} intents`);
// Second page, filtered to fulfilled intents
const fulfilled = await client.listIntents({
page: 2,
status: IntentStatus.Fulfilled,
});
for (const intent of fulfilled.intents) {
console.log(intent.requestHash, intent.status, intent.explorerUrl);
}
```
## Return Value
The return value is a `ListIntentsResult` object.
```typescript title="TypeScript"
export type ListIntentsResult = {
intents: IntentRecord[];
total: number;
};
export type IntentRecord = {
requestHash: Hex;
explorerUrl: string;
status: IntentStatus;
solver: Hex | null;
createdAt?: number;
updatedAt?: number;
expiry: number;
recipientAddress: Hex;
destinationChain: {
id: number;
name: string;
logo: string;
universe: Universe;
};
destinations: Array<{
token: {
contractAddress: Hex;
symbol: string;
name: string;
logo: string;
decimals: number;
};
amount: string;
amountRaw: bigint;
}>;
sources: Array<{
chain: {
id: number;
name: string;
logo: string;
universe: Universe;
};
amountRaw: bigint;
amount: string;
feeRaw: bigint;
fee: string;
token: {
contractAddress: Hex;
symbol: string;
name: string;
logo: string;
decimals: number;
};
}>;
};
```
> **Note**
>
> See the [full type definitions](https://github.com/availproject/nexus-sdk/blob/main/src/domain/types/index.ts) on GitHub.
### Utility Reference
> **Note**
>
> **You are viewing the Nexus SDK v2 docs.** For the current SDK, see the [v3 docs](/docs/nexus/nexus-sdk/get-started/installation) and the [v2 → v3 migration guide](/docs/nexus/migration/sdk-v2-to-v3).
The Nexus SDK is created with `createNexusClient` and exposes a headless client plus a set of stateless helpers. This page covers client configuration, lifecycle, chain/token lookups, and the utility exports.
## Creating a client
```typescript title="TypeScript"
import { createNexusClient } from '@avail-project/nexus-core';
const client = createNexusClient({
network: 'mainnet',
});
await client.initialize();
```
### Configuration
```typescript title="TypeScript"
createNexusClient(config?: {
network?: 'mainnet' | 'testnet' | NetworkConfig;
debug?: boolean;
analytics?: AnalyticsConfig;
devTiming?: DevTimingConfig;
domain?: string;
forceMayan?: boolean;
}): NexusClient
```
| Option | Type | Description |
| ------------ | ----------------------------------------- | ----------------------------------------------------------------------------------------------------- |
| `network` | `'mainnet' \| 'testnet' \| NetworkConfig` | Target network. Defaults to `'mainnet'`. Pass a `NetworkConfig` object for a fully custom deployment. |
| `debug` | `boolean` | Enable verbose debug logging. |
| `analytics` | `AnalyticsConfig` | Analytics configuration (see [Analytics](#analytics)). |
| `devTiming` | `DevTimingConfig` | Developer timing instrumentation for spans. |
| `domain` | `string` | Override the auto-detected domain used in the ephemeral-key sign message. |
| `forceMayan` | `boolean` | Force routing through Mayan where available. |
### Custom network config
```typescript title="TypeScript"
type NetworkConfig = {
MIDDLEWARE_HTTP_URL: string;
MIDDLEWARE_WS_URL: string;
INTENT_EXPLORER_URL: string;
NETWORK_HINT: 'mainnet' | 'testnet';
};
const client = createNexusClient({
network: {
MIDDLEWARE_HTTP_URL: 'https://your-deployment.example.com/middleware/',
MIDDLEWARE_WS_URL: 'wss://your-deployment.example.com/middleware/',
INTENT_EXPLORER_URL: 'https://your-deployment.example.com/',
NETWORK_HINT: 'mainnet',
},
});
```
## Lifecycle
#### `initialize()`
Initialize the client. Call once before invoking any operation; it can run before or after `setEVMProvider()`.
```typescript title="TypeScript"
await client.initialize();
```
#### `setEVMProvider(provider)`
Attach or replace the EIP-1193 EVM provider used to sign and send transactions.
```typescript title="TypeScript"
await client.setEVMProvider(window.ethereum);
```
| Parameter | Type | Description |
| ---------- | ------------------ | ------------------------------------------------------------- |
| `provider` | `EthereumProvider` | EIP-1193 compatible provider (MetaMask, WalletConnect, etc.). |
#### `hasEvmProvider`
Boolean getter — `true` once an EVM provider has been attached.
```typescript title="TypeScript"
if (client.hasEvmProvider) {
// Safe to run operations that need a wallet
}
```
#### `destroy()`
Tear down the client and release resources (analytics, sockets). Call when unmounting your app.
```typescript title="TypeScript"
client.destroy();
```
## Chain and token helpers
#### `getSupportedChains()`
Return the chains and tokens supported by the connected deployment.
```typescript title="TypeScript"
const supported = client.getSupportedChains();
// SupportedChainsAndTokensResult: Array<{ id, name, logo, swapSupported, tokens }>
```
#### `isSupportedChain(chainId)`
```typescript title="TypeScript"
const ok = client.isSupportedChain(137); // boolean
```
#### `convertTokenReadableAmountToBigInt(amount, tokenSymbol, chainId)`
Convert a human-readable amount into raw integer units using the token's on-chain decimals.
```typescript title="TypeScript"
const amountRaw = client.convertTokenReadableAmountToBigInt('83.5', 'USDC', 137);
// 83_500_000n
```
### `client.chainList`
`client.chainList` exposes synchronous lookups over the resolved deployment.
```typescript title="TypeScript"
client.chainList.getChainByID(chainID: number): Chain;
client.chainList.getTokenInfoBySymbol(chainID: number, symbol: string): TokenInfo;
client.chainList.getNativeToken(chainID: number): TokenInfo;
client.chainList.getVaultContractAddress(chainID: number): `0x${string}`;
client.chainList.getTokenByAddress(chainID: number, address: `0x${string}`): TokenInfo;
client.chainList.getTokenByCurrencyId(chainID: number, currencyId: number): TokenInfo;
client.chainList.getChainAndTokenFromSymbol(
chainID: number,
tokenSymbol: string,
): { chain: Chain; token: TokenInfo; isNativeToken: boolean };
client.chainList.getChainAndTokenByAddress(
chainID: number,
address: `0x${string}`,
): { chain: Chain; token: TokenInfo; isNativeToken: boolean };
```
```typescript title="TypeScript"
const polygon = client.chainList.getChainByID(137);
const usdc = client.chainList.getTokenInfoBySymbol(137, 'USDC');
const vault = client.chainList.getVaultContractAddress(137);
```
## Max-amount helpers
#### `calculateMaxForBridge(params)`
Compute the maximum amount that can be bridged for a token to a destination chain. `maxAmountRaw` can be passed straight into `bridge()` as `toAmountRaw`.
```typescript title="TypeScript"
const max = await client.calculateMaxForBridge({
toChainId: 137,
toTokenSymbol: 'USDC',
});
type BridgeMaxResult = {
toChainId: number;
toTokenSymbol: string;
provider: BridgeProvider;
maxAmount: string; // human decimal string
maxAmountRaw: bigint; // raw integer units
symbol: string;
decimals: number;
sources: Array<{
chainId: number;
tokenAddress: Hex;
symbol: string;
decimals: number;
amount: string; // human decimal drawn from this source
}>;
};
```
#### `calculateMaxForSwap(params)`
Compute the maximum input available for a swap into a destination token. See the [Swap Methods](/docs/nexus/nexus-sdk/v2/reference/swap-methods/fetch-swap-balances) pages for the swap surface.
```typescript title="TypeScript"
const max = await client.calculateMaxForSwap({
toChainId: 8453,
toTokenAddress: '0x833589fCD6eDb6E08f4c7C32D4f71b54bdA02913',
});
type SwapMaxResult = {
toChainId: number;
toTokenAddress: Hex;
maxAmount: string; // human decimal string
maxAmountRaw: bigint; // raw integer units
symbol: string;
decimals: number;
sources: Array<{
chainId: number;
tokenAddress: Hex;
symbol: string;
decimals: number;
amount: string;
}>;
};
```
## Stateless utilities
Formatting and address helpers are importable directly from the `/utils` subpath, and are also available on `client.utils`.
```typescript title="TypeScript"
import {
formatTokenBalance,
formatTokenBalanceParts,
formatUnits,
parseUnits,
truncateAddress,
isValidAddress,
getCoinbaseRates,
getSupportedChains,
} from '@avail-project/nexus-core/utils';
```
### Formatting
```typescript title="TypeScript"
// Format a raw balance for display
const formatted = formatTokenBalance(1234567890n, { decimals: 6, symbol: 'USDC' });
// Get the parts separately
const parts = formatTokenBalanceParts(1234567890n, { decimals: 6 });
// Convert between raw and human units
const raw = parseUnits('1.5', 18); // 1500000000000000000n
const human = formatUnits(raw, 18); // "1.5"
```
### Addresses
```typescript title="TypeScript"
const valid = isValidAddress('0x742d35Cc6634C0532925a3b8D4C9db96c4b4Db45'); // boolean
const short = truncateAddress('0x742d35Cc6634C0532925a3b8D4C9db96c4b4Db45'); // "0x742d...Db45"
```
### Token logo fallback
`getFallbackTokenLogoDataUri` generates a deterministic gradient SVG logo as a data URI — useful as an `onError` fallback for token images. Note it is exported from the main entry point, not `/utils`:
```typescript title="TypeScript"
import { getFallbackTokenLogoDataUri } from '@avail-project/nexus-core';
const logo = getFallbackTokenLogoDataUri('USDC'); // "data:image/svg+xml;charset=utf-8,..."
const large = getFallbackTokenLogoDataUri('USDC', 256); // optional size, defaults to 128
```
### Prices and supported chains
```typescript title="TypeScript"
// Current token prices from Coinbase
const rates = await getCoinbaseRates();
// Supported chains and tokens for a network (async, standalone helper)
const supported = await getSupportedChains('mainnet');
```
### Via `client.utils`
The same helpers are attached to the client as `NexusUtils`:
```typescript title="TypeScript"
const rates = await client.utils.getCoinbaseRates();
const supported = await client.utils.getSupportedChains('mainnet');
const formatted = client.utils.formatTokenBalance(1234567890n, { decimals: 6, symbol: 'USDC' });
```
> **Note**
>
> `client.getSupportedChains()` (the client method) is synchronous and returns the currently connected deployment's chains. The standalone `getSupportedChains(network)` helper is asynchronous and fetches the deployment for the given network hint.
## Analytics
The Nexus SDK includes built-in analytics powered by PostHog. Analytics are **enabled by default** and send anonymous telemetry to Avail's PostHog instance; they can be customized or disabled through the `analytics` config.
### Disabling analytics
```typescript title="TypeScript"
const client = createNexusClient({
network: 'mainnet',
analytics: { enabled: false },
});
```
### Privacy controls
```typescript title="TypeScript"
const client = createNexusClient({
network: 'mainnet',
analytics: {
enabled: true,
privacy: {
anonymizeWallets: true, // Hash wallet addresses
anonymizeAmounts: true, // Exclude transaction amounts
},
},
});
```
### Custom analytics (BYO PostHog)
```typescript title="TypeScript"
const client = createNexusClient({
network: 'mainnet',
analytics: {
enabled: true,
posthogApiKey: 'your-posthog-key',
posthogApiHost: 'https://your-posthog-instance.com',
appMetadata: {
appName: 'My DApp',
appVersion: '1.0.0',
appUrl: 'https://mydapp.com',
},
},
});
```
### Accessing analytics programmatically
```typescript title="TypeScript"
if (client.analytics.isEnabled()) {
client.analytics.track('custom_event', { foo: 'bar' });
}
```
## Common pitfalls
* Operation amounts are raw integer units (`bigint`), not human-readable decimal strings. Use `convertTokenReadableAmountToBigInt()` or `parseUnits()` to convert.
* Bridge methods (`bridge`, `bridgeAndTransfer`, `bridgeAndExecute`) identify tokens by **symbol**; swap methods identify tokens by **contract address**.
* Call `initialize()` once before running operations. It fetches deployment data and does not require a provider, so it can run before or after `setEVMProvider()`.
* Call `destroy()` on teardown to flush analytics and close sockets.
## Skills Integration
[skills.sh](https://skills.sh) skills give AI coding agents (Codex, Claude Code, Cursor, etc.) deep context about the Nexus SDK.
```bash
# Install the SDK skill
npx skills add availproject/nexus-sdk
```
* `nexus-core` — Full v2 integration guide: client lifecycle, operations, hooks, events, error handling, utils, and v1 → v2 migration
Browse it at [skills.sh/availproject/nexus-sdk](https://skills.sh/availproject/nexus-sdk). For Widgets skills, see [MCP & Agent Skills](/docs/nexus/widgets/mcp-and-agent-skills).
### Bridge and Execute
> **Note**
>
> **You are viewing the Nexus SDK v2 docs.** For the current SDK, see the [v3 docs](/docs/nexus/nexus-sdk/get-started/installation) and the [v2 → v3 migration guide](/docs/nexus/migration/sdk-v2-to-v3).
> **Note**
>
> **SET UP THE SDK BEFORE YOU START:**
>
> Install and initialize the client first — see [Installation](/docs/nexus/nexus-sdk/v2/get-started/installation) and [SDK Setup](/docs/nexus/nexus-sdk/v2/get-started/nexus-sdk-setup).
Use the `bridgeAndExecute()` function to bridge a token and execute a contract function on the recipient chain in a single flow.
Use the `simulateBridgeAndExecute()` function to simulate `bridgeAndExecute()` before sending an actual transaction.
> **Note**
>
> **Note:** Check out the [API reference](/docs/nexus/supported-chains-and-tokens) for a full list of supported tokens and chains.
## Method signature
```typescript title="TypeScript"
bridgeAndExecute(
params: BridgeAndExecuteParams,
options?: BridgeAndExecuteOptions,
): Promise
simulateBridgeAndExecute(
params: BridgeAndExecuteParams,
): Promise
```
## Parameters
```typescript title="TypeScript"
export interface BridgeAndExecuteParams {
toChainId: number;
toTokenSymbol: string;
toAmountRaw: bigint;
sources?: number[];
execute: Omit;
enableTransactionPolling?: boolean;
transactionTimeout?: number;
waitForReceipt?: boolean;
receiptTimeout?: number;
requiredConfirmations?: number;
recentApprovalTxHash?: string;
}
export interface ExecuteParams {
toChainId: number;
to: Hex;
value?: bigint;
data?: Hex;
gas?: bigint;
gasPrice?: 'low' | 'medium' | 'high';
enableTransactionPolling?: boolean;
transactionTimeout?: number;
// Transaction receipt confirmation options
waitForReceipt?: boolean;
receiptTimeout?: number;
requiredConfirmations?: number;
tokenApproval?: {
toTokenSymbol: string;
amount: bigint;
spender: Hex;
};
}
```
* `BridgeAndExecuteParams`: Parameters for using the `bridgeAndExecute()` function.
* `toChainId` (number, required): The chain ID of the destination chain.
* `toTokenSymbol` (string, required): The symbol of the token to be bridged in this flow (e.g. `'USDC'`).
* `toAmountRaw` (bigint, required): The amount of tokens to be used in this flow, in raw integer units.
* `sources` (number\[], optional): The chain IDs of the source chains to be used for the bridge. Useful if you want to maintain your holdings on some chains.
* `execute` (`Omit`, required): The contract call on the destination chain. `toChainId` is inherited from the top-level `toChainId`.
* `enableTransactionPolling` (boolean, optional): Whether to enable transaction polling. Defaults to `false`.
* `transactionTimeout` (number, optional)
* `waitForReceipt` (boolean, optional)
* `receiptTimeout` (number, optional)
* `requiredConfirmations` (number, optional)
* `recentApprovalTxHash` (string, optional)
* `options`: `BridgeAndExecuteOptions` (optional): Top-level intent hook, a `beforeExecute` hook, event listener, and fill timeout.
```typescript title="TypeScript"
export type BridgeAndExecuteOptions = {
onIntent?: (data: BridgeAndExecuteOnIntentHookData) => void;
beforeExecute?: () => Promise<{ value?: bigint; data?: Hex; gas?: bigint }>;
onEvent?: (event: BridgeAndExecuteEvent) => void;
fillTimeoutMinutes?: number;
};
```
* `onIntent` (optional): Called at the **top level** (not under `hooks`) with the composite intent before execution. Call `data.allow()` / `data.deny()`, or `data.refresh(sources?)` to re-quote. Read `data.intent.bridgeRequired` to detect whether a bridge is needed. When omitted, the intent is auto-approved.
* `beforeExecute` (optional): Called just before the execute transaction is sent; return overrides for `value` / `data` / `gas` (for example, to inject freshly quoted calldata).
* `onEvent` (optional): Callback that receives the typed `BridgeAndExecuteEvent` union as the operation progresses.
* `fillTimeoutMinutes` (optional): How long to wait for the bridge to be filled before timing out. Defaults to `2`.
> **Note**
>
> The `onEvent` callback receives a typed discriminated union. In addition to the bridge step types, `bridgeAndExecute` emits `execute_approval` and `execute_transaction` progress steps. See the [Bridge Events](/docs/nexus/nexus-sdk/v2/reference/bridge-methods/bridge-events) page for the full event shapes.
## Example
```typescript title="TypeScript"
import type {
BridgeAndExecuteParams,
BridgeAndExecuteResult,
} from '@avail-project/nexus-core';
// Bridge and execute
const bridgeAndExecuteResult: BridgeAndExecuteResult = await client.bridgeAndExecute(
{
toTokenSymbol: 'USDC',
toAmountRaw: 100_000_000n, // 100 USDC (6 decimals)
toChainId: 1,
sources: [8453],
execute: {
to: '0x...',
data: '0x...',
tokenApproval: {
toTokenSymbol: 'USDC',
amount: 100_000_000n, // 100 USDC (6 decimals)
spender: '0x...',
},
},
},
{
onIntent: (data) => data.allow(),
onEvent: (event) => {
if (event.type === 'plan_preview') console.log('Bridge+Execute steps:', event.plan.steps);
if (event.type === 'plan_progress') console.log('Step progress:', event.stepType, event.state);
},
},
);
console.log('Bridge and execute result:', bridgeAndExecuteResult);
const bridgeAndExecuteSimulation = await client.simulateBridgeAndExecute({
toTokenSymbol: 'USDC',
toAmountRaw: 100_000_000n, // 100 USDC (6 decimals)
toChainId: 1,
sources: [8453],
execute: {
to: '0x...',
data: '0x...',
// tokenApproval optional for simulation
},
});
console.log('Bridge and execute simulation:', bridgeAndExecuteSimulation);
```
> **Warning**
>
> `bridgeAndExecute()` throws typed [`NexusError`](https://github.com/availproject/nexus-sdk/blob/main/src/domain/errors.ts) subclasses on failure. Branch on `error.category` / `error.code`.
## Return Value
The return value is a `BridgeAndExecuteResult` object — a discriminated union on `bridgeSkipped`. When the destination already holds enough funds, the bridge is skipped and `bridgeResult` is absent.
```typescript title="TypeScript"
export type TxResult = {
txHash: Hex;
txExplorerUrl: string;
receipt?: TransactionReceipt;
};
export type BridgeAndExecuteResult = {
approval?: TxResult; // present when an ERC-20 approval was needed for execute
execute: TxResult;
} & (
| { bridgeSkipped: false; bridgeResult: BridgeResult }
| { bridgeSkipped: true; bridgeResult?: undefined }
);
export type BridgeAndExecuteSimulationResult = {
bridgeSimulation: BridgeSimulationResult | null; // null if bridging is skipped
executeSimulation: ExecuteSimulation;
};
export type ExecuteFeeParams =
| { type: 'eip1559'; maxFeePerGas: bigint; maxPriorityFeePerGas: bigint }
| { type: 'legacy'; gasPrice: bigint };
export type ExecuteSimulation = {
feeParams: ExecuteFeeParams;
estimatedGasUnits: bigint; // combined across approval (if any) and execute
estimatedTotalCost: bigint; // combined estimated cost
};
```
> **Note**
>
> Detect a skipped bridge via `result.bridgeSkipped` (there is no `*_SKIPPED` event). See the [full type definitions](https://github.com/availproject/nexus-sdk/blob/main/src/domain/types/index.ts) on GitHub.
### Bridge Tokens
> **Note**
>
> **You are viewing the Nexus SDK v2 docs.** For the current SDK, see the [v3 docs](/docs/nexus/nexus-sdk/get-started/installation) and the [v2 → v3 migration guide](/docs/nexus/migration/sdk-v2-to-v3).
> **Note**
>
> **SET UP THE SDK BEFORE YOU START:**
>
> Install and initialize the client first — see [Installation](/docs/nexus/nexus-sdk/v2/get-started/installation) and [SDK Setup](/docs/nexus/nexus-sdk/v2/get-started/nexus-sdk-setup).
Use the `bridge()` function to bridge a specific token from one (*or many*) chains to a single chain.
Use the `simulateBridge()` function to simulate the bridge transaction to preview the costs and fees, before actually executing the transaction.
> **Note**
>
> **Note:** Check out the [API reference](/docs/nexus/supported-chains-and-tokens) for a full list of supported tokens and chains.
## Method signature
```typescript title="TypeScript"
bridge(
params: BridgeParams,
options?: BridgeOperationOptions,
): Promise
simulateBridge(
params: BridgeParams,
): Promise
```
## Parameters
```typescript title="TypeScript"
/**
* Parameters for bridging tokens.
*/
export interface BridgeParams {
recipient?: Hex;
toTokenSymbol: string;
toAmountRaw: bigint;
toChainId: number;
toNativeAmountRaw?: bigint;
sources?: number[];
}
```
* `BridgeParams`: Parameters for bridging tokens.
* `recipient` (Hex, optional): The recipient address. Defaults to the address of the connected user.
* `toTokenSymbol` (string, required): The symbol of the token to be bridged (e.g. `'USDC'`).
* `toAmountRaw` (bigint, required): The amount of tokens to receive on the destination chain, in raw integer units.
* `toChainId` (number, required): The chain ID of the destination chain.
* `toNativeAmountRaw` (bigint, optional): Amount of destination-chain native gas to also deliver to the recipient, in raw integer units.
* `sources` (number\[], optional): The chain IDs of the source chains to be used for the bridge. Useful if you want to maintain your holdings on some chains.
* `options`: `BridgeOperationOptions` (optional): Per-operation hooks, event listener, and fill timeout.
```typescript title="TypeScript"
export type BridgeOperationOptions = {
hooks?: {
onIntent?: (data: OnIntentHookData) => void;
onAllowance?: (data: OnAllowanceHookData) => void;
};
onEvent?: (event: BridgeEvent) => void;
fillTimeoutMinutes?: number;
};
```
* `hooks.onIntent` (optional): Called with the resolved intent before execution. Call `data.allow()` / `data.deny()`, or `data.refresh(sources?)` to re-quote. When omitted, the intent is auto-approved.
* `hooks.onAllowance` (optional): Called when ERC-20 allowances are required. Call `data.allow([...])` with a strategy per source. When omitted, allowances default to `'min'`.
* `onEvent` (optional): Callback that receives the typed `BridgeEvent` union as the operation progresses. Use it to render progress to the user.
* `fillTimeoutMinutes` (optional): How long to wait for the bridge to be filled before timing out. Defaults to `2`.
> **Note**
>
> The `onEvent` callback receives a typed discriminated union (`status` / `plan_preview` / `plan_confirmed` / `plan_progress`). See the [Bridge Events](/docs/nexus/nexus-sdk/v2/reference/bridge-methods/bridge-events) page for the full event shapes.
## Example
```typescript title="TypeScript"
import type { BridgeParams, BridgeResult } from '@avail-project/nexus-core';
const bridgeResult: BridgeResult = await client.bridge(
{
toTokenSymbol: 'USDC',
toAmountRaw: 83_500_000n, // 83.5 USDC (6 decimals)
toChainId: 137, // Polygon
} satisfies BridgeParams,
{
onEvent: (event) => {
switch (event.type) {
case 'plan_preview':
// Ordered list of steps about to run — render them if you wish
console.log('Steps:', event.plan.steps);
break;
case 'plan_progress':
// Granular per-step progress
if (event.stepType === 'request_submission' && event.state === 'completed') {
console.log('Explorer:', event.explorerUrl);
}
break;
}
},
},
);
console.log('Bridge result:', bridgeResult);
// Simulate bridge to preview costs.
// You can use the convertTokenReadableAmountToBigInt helper to build the raw amount.
const toAmountRaw = client.convertTokenReadableAmountToBigInt('83.5', 'USDC', 137);
const bridgeSimulation = await client.simulateBridge({
toTokenSymbol: 'USDC',
toAmountRaw,
toChainId: 137,
});
console.log('Bridge simulation:', bridgeSimulation);
```
> **Warning**
>
> `bridge()` and `simulateBridge()` throw typed [`NexusError`](https://github.com/availproject/nexus-sdk/blob/main/src/domain/errors.ts) subclasses on failure (e.g. `UserActionError` on a wallet rejection, `ValidationError` on bad input). Branch on `error.category` / `error.code`.
## Return Value
### `bridge()`
The return value is a `BridgeResult` object.
```typescript title="TypeScript"
/**
* Result structure for bridge transactions.
*/
export type BridgeResult = {
intentExplorerUrl: string;
sourceTxs: SourceTxs; // array of per-source deposit transactions
intent: BridgeIntent;
};
export type TxResult = {
txHash: Hex;
txExplorerUrl: string;
receipt?: TransactionReceipt;
};
export type SourceTxs = (TxResult & {
chain: { id: number; name: string; logo: string };
})[];
```
### `simulateBridge()`
The return value is a `BridgeSimulationResult` object.
```typescript title="TypeScript"
export interface BridgeSimulationResult {
intent: BridgeIntent;
token: TokenInfo;
}
export type BridgeIntent = {
provider: 'nexus' | 'mayan';
availableSources: {
amount: string;
amountRaw: bigint;
chain: { id: number; name: string; logo: string };
token: { decimals: number; symbol: string; logo: string; contractAddress: Hex };
value: string;
}[];
destination: {
amount: string;
amountRaw: bigint;
chain: { id: number; name: string; logo: string };
token: { decimals: number; symbol: string; logo: string; contractAddress: Hex };
value: string;
nativeAmount: string;
nativeAmountRaw: bigint;
nativeAmountValue: string;
nativeAmountInToken: string;
nativeToken: { decimals: number; symbol: string; logo: string; contractAddress: Hex };
};
fees: {
caGas: string;
protocol: string;
solver: string;
total: string;
totalValue: string;
};
selectedSources: {
amount: string;
amountRaw: bigint;
chain: { id: number; name: string; logo: string };
token: { decimals: number; symbol: string; logo: string; contractAddress: Hex };
value: string;
}[];
sourcesTotal: string;
sourcesTotalValue: string;
};
type TokenInfo = {
contractAddress: `0x${string}`;
decimals: number;
logo: string;
name: string;
symbol: string;
};
```
> **Note**
>
> `BridgeIntent` replaces the [v1](https://github.com/availproject/nexus-sdk/blob/main/MIGRATION.md) `ReadableIntent` type: `sources` → `selectedSources`, `allSources` → `availableSources`, and chain fields are nested under `chain: { id, name, logo }`. See the [full type definitions](https://github.com/availproject/nexus-sdk/blob/main/src/domain/types/index.ts) on GitHub.
### Bridge Events
> **Note**
>
> **You are viewing the Nexus SDK v2 docs.** For the current SDK, see the [v3 docs](/docs/nexus/nexus-sdk/get-started/installation) and the [v2 → v3 migration guide](/docs/nexus/migration/sdk-v2-to-v3).
This page documents the events emitted through the `onEvent` callback by the following methods:
* `bridge()`
* `bridgeAndTransfer()`
* `bridgeAndExecute()`
In v2 the flat `{ name, args }` event union is replaced by a typed discriminated union keyed on `type`. Every event is one of four kinds:
| `type` | Meaning |
| ---------------- | ---------------------------------------------------------------------------- |
| `status` | High-level lifecycle status of the operation. |
| `plan_preview` | The ordered list of steps about to run, emitted once the intent is resolved. |
| `plan_confirmed` | The same plan after the user approves it. |
| `plan_progress` | Granular per-step progress, keyed on `stepType` + `state`. |
> **Note**
>
> * `bridgeAndTransfer()` and `bridgeAndExecute()` emit the bridge steps plus the steps for the destination-chain operation.
> * `bridge()` emits only the bridge steps.
> * When `bridgeAndTransfer()` or `bridgeAndExecute()` do not need to bridge (the destination already holds enough funds), only the destination-side steps are emitted. Detect a skipped bridge via `result.bridgeSkipped`, not via an event.
## Event union
```typescript title="TypeScript"
export type BridgeEvent =
| BridgeStatusEvent
| BridgePlanPreviewEvent
| BridgePlanConfirmedEvent
| BridgePlanProgressEvent;
export type OnEventParam = {
onEvent?: (event: TEvent) => void;
};
```
## Status events
```typescript title="TypeScript"
export type BridgeStatus =
| 'intent_building'
| 'intent_ready'
| 'awaiting_approval'
| 'awaiting_allowance_selection'
| 'approved'
| 'executing'
| 'completed';
export type BridgeStatusEvent = {
type: 'status';
status: BridgeStatus;
};
```
> **Note**
>
> `bridgeAndExecute()` (and `bridgeAndTransfer()`) additionally emit a `'preparing'` status at the start — its status type is `BridgeAndExecuteStatus`, which is `BridgeStatus` plus `'preparing'`.
## Plan preview / confirmed events
Both carry the `BridgePlan` — an ordered list of the steps that will run.
```typescript title="TypeScript"
export type BridgePlanPreviewEvent = { type: 'plan_preview'; plan: BridgePlan };
export type BridgePlanConfirmedEvent = { type: 'plan_confirmed'; plan: BridgePlan };
export type BridgePlan = {
steps: BridgePlanStep[];
};
export type BridgePlanStep =
| BridgeAllowanceApprovalStep
| BridgeRequestSigningStep
| BridgeRequestSubmissionStep
| BridgeVaultDepositStep
| BridgeFillStep;
```
For `bridgeAndExecute()`, the plan is a `BridgeAndExecutePlan`, which adds a `bridgeRequired` flag and the execute step types:
```typescript title="TypeScript"
export type BridgeAndExecutePlan = {
bridgeRequired: boolean;
steps: BridgeAndExecutePlanStep[]; // BridgePlanStep | ExecutePlanStep
};
export type ExecutePlanStep = ExecuteApprovalStep | ExecuteTransactionStep;
```
## Progress events
Each `plan_progress` event carries a `stepType` discriminant and a `state`. The tables below list the states per step type, and the extra fields each progress event carries.
### Bridge step types
| `stepType` | `state` values | Extra fields |
| -------------------- | ----------------------------------------------------------------------------- | ----------------------------------------------------------------------------------------------------------------------- |
| `allowance_approval` | `wallet_prompted`, `submitted`, `confirmed`, `failed` | `step`, `approvedAmount`, `approvedAmountRaw`; `txHash` + `explorerUrl` on `submitted`/`confirmed`; `error` on `failed` |
| `request_signing` | `wallet_prompted`, `completed`, `failed` | `step`; `intentRequestHash` on `completed`; `error` on `failed` |
| `request_submission` | `started`, `completed`, `failed` | `step`, `intentRequestHash`; `explorerUrl` on `completed`; `error` on `failed` |
| `vault_deposit` | `started`, `wallet_prompted`, `submitted`, `confirmed`, `completed`, `failed` | `step`; `txHash` + `explorerUrl` on `submitted`/`confirmed` (optional on `failed`); `error` on `failed` |
| `bridge_fill` | `waiting`, `completed`, `failed` | `step`, `intentRequestHash`; `error` on `failed` |
### Execute step types
Emitted by `bridgeAndExecute()` (and `bridgeAndTransfer()`) for the destination-chain call.
| `stepType` | `state` values | Extra fields |
| --------------------- | ----------------------------------------------------- | --------------------------------------------------------------------------------------------------------------------------- |
| `execute_approval` | `wallet_prompted`, `submitted`, `confirmed`, `failed` | `step`; `txHash` + `explorerUrl` on `submitted`/`confirmed` (optional on `failed`); `error` on `failed` |
| `execute_transaction` | `wallet_prompted`, `submitted`, `confirmed`, `failed` | `step`, `value`, `hasData`; `txHash` + `explorerUrl` on `submitted`/`confirmed` (optional on `failed`); `error` on `failed` |
### Progress event shapes
```typescript title="TypeScript"
export type BridgePlanProgressEvent =
| BridgeAllowanceApprovalProgressEvent
| BridgeRequestSigningProgressEvent
| BridgeRequestSubmissionProgressEvent
| BridgeVaultDepositProgressEvent
| BridgeFillProgressEvent;
// Example: allowance_approval progress
export type BridgeAllowanceApprovalProgressEvent =
| {
type: 'plan_progress';
stepType: 'allowance_approval';
state: 'wallet_prompted';
step: BridgeAllowanceApprovalStep;
approvedAmount: string;
approvedAmountRaw: string;
}
| {
type: 'plan_progress';
stepType: 'allowance_approval';
state: 'submitted' | 'confirmed';
step: BridgeAllowanceApprovalStep;
approvedAmount: string;
approvedAmountRaw: string;
txHash: Hex;
explorerUrl: string;
}
| {
type: 'plan_progress';
stepType: 'allowance_approval';
state: 'failed';
step: BridgeAllowanceApprovalStep;
approvedAmount: string;
approvedAmountRaw: string;
error: string;
};
```
> **Note**
>
> You can find the full type definitions for every step and progress event on GitHub:
} title="Bridge event types" href="https://github.com/availproject/nexus-sdk/blob/main/src/domain/types/bridge-events.ts" target="_blank" rel="noopener noreferrer" arrow />
## Usage Example
```typescript title="TypeScript"
client.bridge(params, {
onEvent: (event) => {
switch (event.type) {
case 'status':
// event.status — 'intent_building' | 'intent_ready' | ... | 'completed'
break;
case 'plan_preview':
// event.plan.steps — ordered list of steps about to run
break;
case 'plan_confirmed':
// event.plan.steps — after approval
break;
case 'plan_progress':
// event.stepType + event.state — granular progress
if (event.stepType === 'bridge_fill' && event.state === 'completed') {
// bridge filled on the destination chain
}
break;
}
},
});
```
### Calculate Max for Bridge
> **Note**
>
> **You are viewing the Nexus SDK v2 docs.** For the current SDK, see the [v3 docs](/docs/nexus/nexus-sdk/get-started/installation) and the [v2 → v3 migration guide](/docs/nexus/migration/sdk-v2-to-v3).
> **Note**
>
> **SET UP THE SDK BEFORE YOU START:**
>
> Install and initialize the client first — see [Installation](/docs/nexus/nexus-sdk/v2/get-started/installation) and [SDK Setup](/docs/nexus/nexus-sdk/v2/get-started/nexus-sdk-setup).
Use the `calculateMaxForBridge()` function to compute the maximum amount that can be bridged to a destination token across all same-currency holdings on other chains. This is useful for populating a "Max" button before calling [`bridge()`](/docs/nexus/nexus-sdk/v2/reference/bridge-methods/bridge).
The max is sized against the provider the bridge will actually use: the summed bridge amount is checked against the Mayan threshold (the same decision the real bridge makes), and the receivable max is computed for that provider. A small safety haircut is applied so the suggested amount survives fee drift before execution. The returned `provider` tells you which path was used.
> **Note**
>
> **Note:** Check out the [API reference](/docs/nexus/supported-chains-and-tokens) for a full list of supported tokens and chains.
## Method signature
```typescript title="TypeScript"
calculateMaxForBridge(
input: BridgeMaxParams,
): Promise
```
## Parameters
```typescript title="TypeScript"
export type BridgeMaxParams = {
toChainId: number;
toTokenSymbol: string;
/** Restrict which source chains are considered (chain IDs). Empty/omitted = all. */
sources?: number[];
};
```
* `BridgeMaxParams`: Parameters for computing the max bridgeable amount.
* `toChainId` (number, required): The chain ID of the destination chain.
* `toTokenSymbol` (string, required): The symbol of the destination token (e.g. `'USDC'`).
* `sources` (number\[], optional): Restrict which source chain IDs are considered. When omitted, all same-currency holdings are used.
## Example
```typescript title="TypeScript"
import type { BridgeMaxParams, BridgeMaxResult } from '@avail-project/nexus-core';
const max: BridgeMaxResult = await client.calculateMaxForBridge({
toChainId: 8453,
toTokenSymbol: 'USDC',
} satisfies BridgeMaxParams);
console.log(`Max bridgeable: ${max.maxAmount} ${max.symbol} via ${max.provider}`);
console.log('Sources used:', max.sources);
// Feed the raw amount straight into a bridge:
await client.bridge({
toChainId: 8453,
toTokenSymbol: 'USDC',
toAmountRaw: max.maxAmountRaw,
});
```
You can also restrict which source chains are considered:
```typescript title="TypeScript"
const max = await client.calculateMaxForBridge({
toChainId: 8453,
toTokenSymbol: 'USDC',
sources: [10, 42161], // only Optimism + Arbitrum balances
});
```
> **Warning**
>
> `calculateMaxForBridge()` throws typed [`NexusError`](https://github.com/availproject/nexus-sdk/blob/main/src/domain/errors.ts) subclasses on failure. Branch on `error.category` / `error.code`.
## Return Value
The return value is a `BridgeMaxResult` object.
```typescript title="TypeScript"
export type BridgeMaxResult = {
toChainId: number;
toTokenSymbol: string;
/** Provider the max was sized against ('mayan' once the amount clears the threshold). */
provider: 'nexus' | 'mayan';
maxAmount: string; // Human-readable decimal string
maxAmountRaw: bigint; // Raw integer units — suitable for toAmountRaw in bridge()
symbol: string;
decimals: number;
sources: {
chainId: number;
tokenAddress: Hex;
symbol: string;
decimals: number;
amount: string; // Human-readable portion drawn from this source
}[];
};
```
> **Note**
>
> See the [full type definitions](https://github.com/availproject/nexus-sdk/blob/main/src/bridge/types.ts) on GitHub.
### Calculate Max for Swap
> **Note**
>
> **You are viewing the Nexus SDK v2 docs.** For the current SDK, see the [v3 docs](/docs/nexus/nexus-sdk/get-started/installation) and the [v2 → v3 migration guide](/docs/nexus/migration/sdk-v2-to-v3).
> **Note**
>
> **SET UP THE SDK BEFORE YOU START:**
>
> Install and initialize the client first — see [Installation](/docs/nexus/nexus-sdk/v2/get-started/installation) and [SDK Setup](/docs/nexus/nexus-sdk/v2/get-started/nexus-sdk-setup).
Use the `calculateMaxForSwap()` function to compute the maximum amount that can be swapped to a destination token across all available sources. This is useful for populating a "Max" button before calling `swapWithExactIn()` or `swapWithExactOut()`.
> **Note**
>
> **Note:** Check out the [API reference](/docs/nexus/supported-chains-and-tokens) for a full list of supported tokens and chains.
## Method signature
```typescript title="TypeScript"
calculateMaxForSwap(
input: SwapMaxParams,
): Promise
```
## Parameters
```typescript title="TypeScript"
export type SwapMaxParams = {
toChainId: number;
toTokenAddress: Hex;
sources?: Source[];
};
export type Source = {
tokenAddress: Hex;
chainId: number;
};
```
* `SwapMaxParams`: Parameters for the `calculateMaxForSwap()` function.
* `toChainId` (number, required): The chain ID of the destination chain.
* `toTokenAddress` (Hex, required): The contract address of the token to receive on the destination chain.
* `sources` (Source\[], optional): Restrict which source chains and tokens are considered. If omitted, all available holdings are considered.
* `tokenAddress` (Hex): The contract address of the source token.
* `chainId` (number): The chain ID of the source chain.
## Example
```typescript title="TypeScript"
import type { SwapMaxParams, SwapMaxResult } from '@avail-project/nexus-core';
const max = await client.calculateMaxForSwap({
toChainId: 8453,
toTokenAddress: '0x833589fCD6eDb6E08f4c7C32D4f71b54bdA02913', // USDC on Base
});
console.log(`Max swappable: ${max.maxAmount} ${max.symbol}`);
console.log('Sources used:', max.sources);
```
You can also restrict which source chains and tokens are considered:
```typescript title="TypeScript"
const max = await client.calculateMaxForSwap({
toChainId: 8453,
toTokenAddress: '0x833589fCD6eDb6E08f4c7C32D4f71b54bdA02913',
sources: [
{ chainId: 10, tokenAddress: '0x0b2C639c533813f4Aa9D7837CAf62653d097Ff85' },
],
});
// Feed the raw amount straight into an exact-out swap:
await client.swapWithExactOut({
toChainId: 8453,
toTokenAddress: '0x833589fCD6eDb6E08f4c7C32D4f71b54bdA02913',
toAmountRaw: max.maxAmountRaw,
});
```
## Return Value
The return value is a `SwapMaxResult` object.
```typescript title="TypeScript"
export type SwapMaxResult = {
toChainId: number;
toTokenAddress: Hex;
maxAmount: string; // Human-readable decimal string
maxAmountRaw: bigint; // Raw amount suitable for toAmountRaw in swapWithExactOut
symbol: string;
decimals: number;
sources: {
chainId: number;
tokenAddress: Hex;
symbol: string;
decimals: number;
amount: string; // Human-readable portion sourced from this chain/token
}[];
};
```
* `maxAmount` (string): The maximum receivable amount as a human-readable decimal string.
* `maxAmountRaw` (bigint): The same maximum in raw integer units — suitable for `toAmountRaw` in `swapWithExactOut()`.
* `symbol` / `decimals`: Metadata for the destination token.
* `sources`: The per-source breakdown of holdings that make up the max.
> **Note**
>
> On failure the method throws a typed [`NexusError`](/docs/nexus/nexus-sdk/v2/reference/hooks-and-errors) subclass. See the [full type definitions](https://github.com/availproject/nexus-sdk/blob/main/src/swap/types.ts) on GitHub.
### Fetch Swap Balances
> **Note**
>
> **You are viewing the Nexus SDK v2 docs.** For the current SDK, see the [v3 docs](/docs/nexus/nexus-sdk/get-started/installation) and the [v2 → v3 migration guide](/docs/nexus/migration/sdk-v2-to-v3).
> **Note**
>
> **SET UP THE SDK BEFORE YOU START:**
>
> Install and initialize the client first — see [Installation](/docs/nexus/nexus-sdk/v2/get-started/installation) and [SDK Setup](/docs/nexus/nexus-sdk/v2/get-started/nexus-sdk-setup).
Use the `getBalancesForSwap()` function to fetch token balances that can be used in swap operations across all supported chains in one call.
> **Note**
>
> **Note:** Check out the [API reference](/docs/nexus/supported-chains-and-tokens) for a full list of supported tokens and chains.
## Method signature
```typescript title="TypeScript"
getBalancesForSwap(): Promise
```
> **Note**
>
> `getBalancesForSwap()` returns the same `TokenBalance[]` shape as `getBalancesForBridge()`. If you need the tokens that can be used for bridging instead, use [`getBalancesForBridge()`](/docs/nexus/nexus-sdk/v2/reference/bridge-methods/fetch-bridge-balances).
## Parameters
* None
## Example
Here is a minimal example of how to use the `getBalancesForSwap()` function to fetch balances that are eligible to be used as swap inputs:
```typescript title="TypeScript"
// Get all balances that are eligible for swap operations
const swapBalances = await client.getBalancesForSwap();
console.log('Swap balances:', swapBalances);
```
## Return Value
`getBalancesForSwap()` returns `Promise` — an array of `TokenBalance` objects. Each `TokenBalance` aggregates a token's holdings across every chain it lives on, with the per-chain split in `chainBalances`.
```typescript title="TypeScript"
export type TokenBalance = {
balance: string; // Aggregate balance across all chains (human-readable)
value: string; // Aggregate fiat value (string for precision)
chainBalances: ChainBalance[];// Per-chain breakdown
currencyId?: number; // Currency identifier (when applicable)
decimals: number;
logo: string;
name: string; // Display label (e.g. "USDC/USDM")
symbol: string; // Majority symbol by chain count
};
export type ChainBalance = {
balance: string; // Balance on this chain (human-readable)
value: string; // Fiat value on this chain (string for precision)
symbol: string;
chain: {
id: number;
logo: string;
name: string;
};
contractAddress: `0x${string}`;
decimals: number;
universe: Universe; // VM family of the chain (e.g. 'EVM')
};
```
> **Note**
>
> Field renames from [v1](https://github.com/availproject/nexus-sdk/blob/main/MIGRATION.md): `balanceInFiat` → `value`, `icon` → `logo`, and `breakdown` → `chainBalances`. See the [full type definitions](https://github.com/availproject/nexus-sdk/blob/main/src/domain/types/index.ts) on GitHub.
### Swap and Execute
> **Note**
>
> **You are viewing the Nexus SDK v2 docs.** For the current SDK, see the [v3 docs](/docs/nexus/nexus-sdk/get-started/installation) and the [v2 → v3 migration guide](/docs/nexus/migration/sdk-v2-to-v3).
> **Note**
>
> **SET UP THE SDK BEFORE YOU START:**
>
> Install and initialize the client first — see [Installation](/docs/nexus/nexus-sdk/v2/get-started/installation) and [SDK Setup](/docs/nexus/nexus-sdk/v2/get-started/nexus-sdk-setup).
Use the `swapAndExecute()` function to swap tokens to a destination chain and then execute a contract call, in a single flow. If sufficient funds already exist on the destination chain, the swap is skipped and only the execution runs.
Swaps are routed through multiple DEX aggregators (such as LiFi, Bebop, and 0x), quoted in parallel. Execution runs through a per-chain smart account chosen automatically — an ephemeral key delegated via EIP-7702 on 7702-enabled chains, or a deterministic Safe owned by the ephemeral key elsewhere.
> **Note**
>
> **Note:** Check out the [API reference](/docs/nexus/supported-chains-and-tokens) for a full list of supported tokens and chains.
## Method signature
```typescript title="TypeScript"
swapAndExecute(
input: SwapAndExecuteParams,
options?: SwapAndExecuteOptions,
): Promise
```
## Parameters
```typescript title="TypeScript"
export interface SwapAndExecuteParams {
toChainId: number;
toTokenAddress: Hex;
toAmountRaw: bigint;
sources?: Source[];
execute: SwapExecuteParams;
}
export interface SwapExecuteParams {
to: Hex;
value?: bigint;
data?: Hex;
gas: bigint;
gasPrice?: 'low' | 'medium' | 'high';
tokenApproval?: { toTokenAddress: Hex; amount: bigint; spender: Hex };
}
export type Source = {
tokenAddress: Hex;
chainId: number;
};
```
* `SwapAndExecuteParams`: Parameters for the `swapAndExecute()` function.
* `toChainId` (number, required): The chain ID of the destination chain.
* `toTokenAddress` (Hex, required): The contract address of the token needed on the destination chain.
* `toAmountRaw` (bigint, required): The amount of the destination token needed, in raw integer units.
* `sources` (Source\[], optional): Restrict which chains and tokens can be used as the swap source. If omitted, the SDK selects the best sources from available balances.
* `execute` (`SwapExecuteParams`, required): The contract call to run on the destination chain.
* `to` (Hex, required): The contract address to call.
* `value` (bigint, optional): Native token value to send, in raw integer units (wei).
* `data` (Hex, optional): The encoded function call data.
* `gas` (bigint, required): The gas limit. Chain-specific adjustments and buffering are applied by the SDK.
* `gasPrice` (`'low' | 'medium' | 'high'`, optional): Gas price strategy.
* `tokenApproval` (optional): A token approval to submit before the execution call.
* `toTokenAddress` (Hex): The token to approve.
* `amount` (bigint): The approval amount, in raw integer units.
* `spender` (Hex): The spender address.
* `options`: `SwapAndExecuteOptions` (optional): Callbacks to track and gate the operation.
```typescript title="TypeScript"
export type SwapAndExecuteOptions = {
onEvent?: (event: SwapAndExecuteEvent) => void;
onIntent?: (data: SwapAndExecuteOnIntentHookData) => void;
slippageTolerance?: number;
};
```
* `onEvent` (optional): Receives status, plan preview/confirmed, and per-step progress updates. `swapAndExecute()` emits a superset of the [Swap Events](/docs/nexus/nexus-sdk/v2/reference/swap-methods/swap-events) — the swap events plus a `preparing` status and the execute approval/transaction progress events.
* `onIntent` (optional, top-level): Called with the resolved intent before execution. The intent carries `swapRequired`. Call `allow()` to proceed, `deny()` to cancel, or `refresh(sources?)` to re-quote.
* `slippageTolerance` (number, optional): Slippage override as a fraction (default `0.005`, i.e. 0.5%).
## Example
```typescript title="TypeScript"
import type {
SwapAndExecuteParams,
SwapAndExecuteOptions,
SwapAndExecuteResult,
} from '@avail-project/nexus-core';
const result = await client.swapAndExecute(
{
toChainId: 42161,
toTokenAddress: '0xaf88d065e77c8cc2239327c5edb3a432268e5831',
toAmountRaw: 100_000_000n,
execute: {
to: '0x3333333333333333333333333333333333333333',
data: '0xdeadbeef',
gas: 100_000n,
value: 0n,
tokenApproval: {
toTokenAddress: '0xaf88d065e77c8cc2239327c5edb3a432268e5831',
amount: 100_000_000n,
spender: '0x3333333333333333333333333333333333333333',
},
},
},
{
onEvent: (event) => {
if (event.type === 'status') {
// preparing | route_building | route_ready | awaiting_approval | approved | executing | completed
console.log('Status:', event.status);
}
},
onIntent: ({ allow, deny, refresh, intent }) => {
console.log('Swap required:', intent.swapRequired);
allow();
},
},
);
console.log('Swap skipped:', result.swapSkipped);
console.log('Swap result:', result.swapResult);
console.log('Execute tx hash:', result.execute.txHash);
```
## Return Value
The return value is a `SwapAndExecuteResult` object. It always carries the `execute` transaction result (and an optional `approval`), plus a discriminated `swapSkipped` flag that tells you whether a swap ran.
```typescript title="TypeScript"
export type SwapAndExecuteResult = {
approval?: TxResult;
execute: TxResult;
} & (
| { swapSkipped: false; swapResult: SwapResult }
| { swapSkipped: true; swapResult?: undefined }
);
export type TxResult = {
txHash: Hex;
txExplorerUrl: string;
receipt?: TransactionReceipt;
};
```
* `approval` (`TxResult`, optional): The approval transaction, when one was required.
* `execute` (`TxResult`): The contract execution transaction on the destination chain.
* `swapSkipped` (boolean): `true` when destination funds were already sufficient and no swap ran.
* `swapResult` (`SwapResult`): Present only when `swapSkipped` is `false`. See [Swap Exact In](/docs/nexus/nexus-sdk/v2/reference/swap-methods/swap-exact-in#return-value) for the `SwapResult` shape.
> **Note**
>
> On failure the method throws a typed [`NexusError`](/docs/nexus/nexus-sdk/v2/reference/hooks-and-errors) subclass rather than returning an error result. See the [full type definitions](https://github.com/availproject/nexus-sdk/blob/main/src/swap/types.ts) on GitHub.
### Swap Events
> **Note**
>
> **You are viewing the Nexus SDK v2 docs.** For the current SDK, see the [v3 docs](/docs/nexus/nexus-sdk/get-started/installation) and the [v2 → v3 migration guide](/docs/nexus/migration/sdk-v2-to-v3).
Both `swapWithExactIn()` and `swapWithExactOut()` accept an `onEvent` callback (via `SwapOperationOptions`) that receives a typed `SwapEvent`. Every event carries a `type` discriminant, so you can narrow on `event.type` and then, for progress events, on `event.stepType` and `event.state`.
## Event union
```typescript title="TypeScript"
export type SwapEvent =
| SwapStatusEvent // type: 'status'
| SwapPlanPreviewEvent // type: 'plan_preview'
| SwapPlanConfirmedEvent // type: 'plan_confirmed'
| SwapPlanProgressEvent; // type: 'plan_progress'
```
### Status events
Emitted as the operation moves through its lifecycle.
```typescript title="TypeScript"
export type SwapStatus =
| 'route_building'
| 'route_ready'
| 'awaiting_approval'
| 'approved'
| 'executing'
| 'completed';
export type SwapStatusEvent = {
type: 'status';
status: SwapStatus;
};
```
### Plan preview & confirmed events
`plan_preview` is emitted once the route is planned; `plan_confirmed` is emitted after the intent is approved. Both carry the same `SwapPlan`.
```typescript title="TypeScript"
export type SwapPlanPreviewEvent = {
type: 'plan_preview';
plan: SwapPlan;
};
export type SwapPlanConfirmedEvent = {
type: 'plan_confirmed';
plan: SwapPlan;
};
export type SwapPlan = {
hasBridge: boolean;
hasDestinationSwap: boolean;
steps: SwapPlanStep[];
};
export type SwapPlanStep =
| SwapSourceSwapStep // type: 'source_swap'
| SwapEoaToEphemeralTransferStep // type: 'eoa_to_ephemeral_transfer'
| SwapBridgeDepositStep // type: 'bridge_deposit'
| SwapBridgeIntentSubmissionStep // type: 'bridge_intent_submission'
| BridgeFillStep // type: 'bridge_fill'
| SwapDestinationSwapStep; // type: 'destination_swap'
```
## Progress events
`plan_progress` events are emitted as each step advances. Narrow first on `stepType`, then on `state`. Every progress event carries its `step` object.
```typescript title="TypeScript"
export type SwapPlanProgressEvent =
| SwapSourceSwapProgressEvent
| SwapEoaToEphemeralTransferProgressEvent
| SwapBridgeDepositProgressEvent
| SwapBridgeIntentSubmissionProgressEvent
| SwapBridgeFillProgressEvent
| SwapDestinationSwapProgressEvent;
```
The table below lists the `state` values each `stepType` can emit:
| `stepType` | States |
| --------------------------- | -------------------------------------------------------------------- |
| `source_swap` | `wallet_prompted` · `started` · `submitted` · `confirmed` · `failed` |
| `eoa_to_ephemeral_transfer` | `wallet_prompted` · `submitted` · `confirmed` · `failed` |
| `bridge_deposit` | `started` · `submitted` · `confirmed` · `failed` |
| `bridge_intent_submission` | `started` · `completed` · `failed` |
| `bridge_fill` | `waiting` · `completed` · `failed` |
| `destination_swap` | `wallet_prompted` · `started` · `submitted` · `confirmed` · `failed` |
### Field shapes
`submitted` and `confirmed` states carry `txHash` and `explorerUrl`. `failed` states carry an `error` string (and, for tx-based steps, optional `txHash`/`explorerUrl`). The bridge steps carry an `intentRequestHash` instead.
```typescript title="TypeScript"
export type SwapSourceSwapProgressEvent =
| { type: 'plan_progress'; stepType: 'source_swap'; state: 'wallet_prompted'; step: SwapSourceSwapStep }
| { type: 'plan_progress'; stepType: 'source_swap'; state: 'started'; step: SwapSourceSwapStep }
| { type: 'plan_progress'; stepType: 'source_swap'; state: 'submitted'; step: SwapSourceSwapStep; txHash: Hex; explorerUrl: string }
| { type: 'plan_progress'; stepType: 'source_swap'; state: 'confirmed'; step: SwapSourceSwapStep; txHash: Hex; explorerUrl: string }
| { type: 'plan_progress'; stepType: 'source_swap'; state: 'failed'; step: SwapSourceSwapStep; txHash?: Hex; explorerUrl?: string; error: string };
export type SwapEoaToEphemeralTransferProgressEvent =
| { type: 'plan_progress'; stepType: 'eoa_to_ephemeral_transfer'; state: 'wallet_prompted'; step: SwapEoaToEphemeralTransferStep }
| { type: 'plan_progress'; stepType: 'eoa_to_ephemeral_transfer'; state: 'submitted'; step: SwapEoaToEphemeralTransferStep; txHash: Hex; explorerUrl: string }
| { type: 'plan_progress'; stepType: 'eoa_to_ephemeral_transfer'; state: 'confirmed'; step: SwapEoaToEphemeralTransferStep; txHash: Hex; explorerUrl: string }
| { type: 'plan_progress'; stepType: 'eoa_to_ephemeral_transfer'; state: 'failed'; step: SwapEoaToEphemeralTransferStep; txHash?: Hex; explorerUrl?: string; error: string };
export type SwapBridgeDepositProgressEvent =
| { type: 'plan_progress'; stepType: 'bridge_deposit'; state: 'started'; step: SwapBridgeDepositStep }
| { type: 'plan_progress'; stepType: 'bridge_deposit'; state: 'submitted'; step: SwapBridgeDepositStep; txHash: Hex; explorerUrl: string }
| { type: 'plan_progress'; stepType: 'bridge_deposit'; state: 'confirmed'; step: SwapBridgeDepositStep; txHash: Hex; explorerUrl: string }
| { type: 'plan_progress'; stepType: 'bridge_deposit'; state: 'failed'; step: SwapBridgeDepositStep; txHash?: Hex; explorerUrl?: string; error: string };
export type SwapBridgeIntentSubmissionProgressEvent =
| { type: 'plan_progress'; stepType: 'bridge_intent_submission'; state: 'started'; step: SwapBridgeIntentSubmissionStep }
| { type: 'plan_progress'; stepType: 'bridge_intent_submission'; state: 'completed'; step: SwapBridgeIntentSubmissionStep; intentRequestHash: Hex }
| { type: 'plan_progress'; stepType: 'bridge_intent_submission'; state: 'failed'; step: SwapBridgeIntentSubmissionStep; intentRequestHash?: Hex; error: string };
export type SwapBridgeFillProgressEvent =
| { type: 'plan_progress'; stepType: 'bridge_fill'; state: 'waiting'; step: BridgeFillStep; intentRequestHash: Hex }
| { type: 'plan_progress'; stepType: 'bridge_fill'; state: 'completed'; step: BridgeFillStep; intentRequestHash: Hex }
| { type: 'plan_progress'; stepType: 'bridge_fill'; state: 'failed'; step: BridgeFillStep; intentRequestHash: Hex; error: string };
export type SwapDestinationSwapProgressEvent =
| { type: 'plan_progress'; stepType: 'destination_swap'; state: 'wallet_prompted'; step: SwapDestinationSwapStep }
| { type: 'plan_progress'; stepType: 'destination_swap'; state: 'started'; step: SwapDestinationSwapStep }
| { type: 'plan_progress'; stepType: 'destination_swap'; state: 'submitted'; step: SwapDestinationSwapStep; txHash: Hex; explorerUrl: string }
| { type: 'plan_progress'; stepType: 'destination_swap'; state: 'confirmed'; step: SwapDestinationSwapStep; txHash: Hex; explorerUrl: string }
| { type: 'plan_progress'; stepType: 'destination_swap'; state: 'failed'; step: SwapDestinationSwapStep; txHash?: Hex; explorerUrl?: string; error: string };
```
### Step shapes
```typescript title="TypeScript"
export type PlanTokenAmount = {
symbol: string;
contractAddress: Hex;
decimals: number;
logo?: string;
amount: string; // human-readable
amountRaw: bigint; // raw integer units
};
export type SwapSourceSwapStep = {
type: 'source_swap';
id: string;
chain: { id: number; name: string; logo: string };
walletPath: 'ephemeral' | 'safe';
swaps: { input: PlanTokenAmount; output: PlanTokenAmount }[];
};
export type SwapEoaToEphemeralTransferStep = {
type: 'eoa_to_ephemeral_transfer';
id: string;
chain: { id: number; name: string; logo: string };
asset: PlanTokenAmount;
};
export type SwapBridgeDepositStep = {
type: 'bridge_deposit';
id: string;
chain: { id: number; name: string; logo: string };
asset: PlanTokenAmount;
};
export type SwapBridgeIntentSubmissionStep = {
type: 'bridge_intent_submission';
id: string;
};
export type BridgeFillStep = {
type: 'bridge_fill';
id: string;
chain: { id: number; name: string; logo: string };
asset: PlanTokenAmount;
};
export type SwapDestinationSwapStep = {
type: 'destination_swap';
id: string;
chain: { id: number; name: string; logo: string };
walletPath: 'ephemeral' | 'safe';
swaps: { input: PlanTokenAmount; output: PlanTokenAmount }[];
};
```
## Usage example
```typescript title="TypeScript"
const result = await client.swapWithExactIn(swapInput, {
onEvent: (event) => {
switch (event.type) {
case 'status':
console.log('Status:', event.status);
break;
case 'plan_preview':
console.log('Planned steps:', event.plan.steps);
console.log('Has bridge:', event.plan.hasBridge);
break;
case 'plan_progress':
if (event.stepType === 'source_swap' && event.state === 'confirmed') {
console.log('Source swap confirmed:', event.txHash, event.explorerUrl);
}
if (event.stepType === 'destination_swap' && event.state === 'confirmed') {
console.log('Destination swap confirmed:', event.txHash, event.explorerUrl);
}
break;
}
},
});
```
} title="Swap event types" href="https://github.com/availproject/nexus-sdk/blob/main/src/domain/types/swap-events.ts" target="_blank" rel="noopener noreferrer" arrow />
> **Note**
>
> `swapAndExecute()` emits a superset of these events (`SwapAndExecuteEvent`), adding a `preparing` status plus the execute approval and transaction progress events. See the [Swap and Execute](/docs/nexus/nexus-sdk/v2/reference/swap-methods/swap-and-execute) page.
### Swap Exact Input
> **Note**
>
> **You are viewing the Nexus SDK v2 docs.** For the current SDK, see the [v3 docs](/docs/nexus/nexus-sdk/get-started/installation) and the [v2 → v3 migration guide](/docs/nexus/migration/sdk-v2-to-v3).
> **Note**
>
> **SET UP THE SDK BEFORE YOU START:**
>
> Install and initialize the client first — see [Installation](/docs/nexus/nexus-sdk/v2/get-started/installation) and [SDK Setup](/docs/nexus/nexus-sdk/v2/get-started/nexus-sdk-setup).
Use the `swapWithExactIn()` function to swap tokens with an exactly defined input amount.
For example, if you want to swap `1 USDC` into whatever amount of the destination token you can get on the destination chain.
Swaps are routed through multiple DEX aggregators (such as LiFi, Bebop, and 0x), quoted in parallel. Execution runs through a per-chain smart account chosen automatically — an ephemeral key delegated via EIP-7702 on 7702-enabled chains, or a deterministic Safe owned by the ephemeral key elsewhere. The connected EOA is never used to dispatch a swap directly.
## Method signature
```typescript title="TypeScript"
swapWithExactIn(
input: SwapExactInParams,
options?: SwapOperationOptions,
): Promise
```
## Parameters
```typescript title="TypeScript"
export interface SwapExactInParams {
sources?: (Source & { amountRaw?: bigint })[];
toChainId: number;
toTokenAddress: Hex;
}
export type Source = {
tokenAddress: Hex;
chainId: number;
};
```
* `SwapExactInParams`: Parameters for using the `swapWithExactIn()` function.
* `sources` (`Array`, optional): The source tokens and amounts to swap from. Omit to let the SDK use all available holdings.
* `chainId` (number, required): The chain ID of the source chain.
* `tokenAddress` (Hex, required): The contract address of the source token.
* `amountRaw` (bigint, optional): The amount of the source token to swap, in raw integer units (e.g. `1_000_000n` for 1 USDC).
* `toChainId` (number, required): The chain ID of the destination chain.
* `toTokenAddress` (Hex, required): The contract address of the token to receive on the destination chain.
* `options`: `SwapOperationOptions` (optional): Callbacks to track and gate the swap operation.
```typescript title="TypeScript"
export type SwapOperationOptions = {
onEvent?: (event: SwapEvent) => void;
hooks?: {
onIntent?: (data: OnIntentHookData) => void;
};
slippageTolerance?: number;
};
```
* `onEvent` (optional): Receives `status`, `plan_preview`, `plan_confirmed`, and `plan_progress` updates as the swap progresses. See the [Swap Events](/docs/nexus/nexus-sdk/v2/reference/swap-methods/swap-events) page for the full typed union.
* `hooks.onIntent` (optional): Called with the resolved swap intent before execution. Call `allow()` to proceed, `deny()` to cancel, or `refresh(sources?)` to re-quote.
* `slippageTolerance` (number, optional): Slippage override as a fraction (default `0.005`, i.e. 0.5%).
## Example
```typescript title="TypeScript"
import type {
SwapExactInParams,
SwapOperationOptions,
SwapResult,
} from '@avail-project/nexus-core';
const result = await client.swapWithExactIn(
{
sources: [
{ chainId: 10, amountRaw: 1_000_000n, tokenAddress: '0x...' },
{ chainId: 42161, amountRaw: 500_000n, tokenAddress: '0x...' },
],
toChainId: 8453,
toTokenAddress: '0x833589fCD6eDb6E08f4c7C32D4f71b54bdA02913',
},
{
onEvent: (event) => {
if (event.type === 'plan_progress') {
console.log('Swap progress:', event.step.type, event.state);
}
},
hooks: {
onIntent: ({ intent, allow }) => {
console.log('Swap intent:', intent);
allow();
},
},
slippageTolerance: 0.005,
},
);
console.log('Swap with exact in result:', result);
```
## Return Value
The return value is a `SwapResult` object.
```typescript title="TypeScript"
export type SwapResult = {
sourceSwaps: ChainSwap[];
intentExplorerUrl: string;
destinationSwap: ChainSwap | null;
intent: SwapIntent;
};
export type ChainSwap = {
chainId: number;
swaps: Swap[];
txHash: Hex;
};
export type Swap = {
inputAmount: bigint;
inputContract: Hex;
inputDecimals: number;
outputAmount: bigint;
outputContract: Hex;
outputDecimals: number;
};
```
> **Note**
>
> On failure the method throws a typed [`NexusError`](/docs/nexus/nexus-sdk/v2/reference/hooks-and-errors) subclass rather than returning an error result. See the [full type definitions](https://github.com/availproject/nexus-sdk/blob/main/src/swap/types.ts) on GitHub.
### Swap Exact Out
> **Note**
>
> **You are viewing the Nexus SDK v2 docs.** For the current SDK, see the [v3 docs](/docs/nexus/nexus-sdk/get-started/installation) and the [v2 → v3 migration guide](/docs/nexus/migration/sdk-v2-to-v3).
> **Note**
>
> **SET UP THE SDK BEFORE YOU START:**
>
> Install and initialize the client first — see [Installation](/docs/nexus/nexus-sdk/v2/get-started/installation) and [SDK Setup](/docs/nexus/nexus-sdk/v2/get-started/nexus-sdk-setup).
Use the `swapWithExactOut()` function to swap tokens with an exactly defined output amount.
For example, if you want to get exactly `100 USDC` on the destination but don't care which amount of source funds are used to source the swap. You can however limit your source chains and tokens to a subset of the total supported holdings.
Swaps are routed through multiple DEX aggregators (such as LiFi, Bebop, and 0x), quoted in parallel. Execution runs through a per-chain smart account chosen automatically — an ephemeral key delegated via EIP-7702 on 7702-enabled chains, or a deterministic Safe owned by the ephemeral key elsewhere. The connected EOA is never used to dispatch a swap directly.
## Method signature
```typescript title="TypeScript"
swapWithExactOut(
input: SwapExactOutParams,
options?: SwapOperationOptions,
): Promise
```
## Parameters
```typescript title="TypeScript"
export interface SwapExactOutParams {
sources?: Source[];
toChainId: number;
toTokenAddress: Hex;
toAmountRaw: bigint;
toNativeAmountRaw?: bigint;
}
export type Source = {
tokenAddress: Hex;
chainId: number;
};
```
* `SwapExactOutParams`: Parameters for the `swapWithExactOut()` function.
* `sources` (Source\[], optional): Restrict which chains and tokens can be used as the swap source. If omitted, the SDK automatically selects the best sources from available balances.
* `tokenAddress` (Hex): The contract address of the source token.
* `chainId` (number): The chain ID of the source chain.
* `toChainId` (number, required): The chain ID of the destination chain where you want to receive tokens.
* `toTokenAddress` (Hex, required): The contract address of the token you want to receive.
* `toAmountRaw` (bigint, required): The exact amount of tokens you want to receive on the destination chain, in raw integer units (e.g. `1_000_000n` for 1 USDC).
* `toNativeAmountRaw` (bigint, optional): Amount of native gas tokens to receive on the destination chain alongside the swap, in raw integer units (wei). Useful for ensuring the user has gas for subsequent transactions.
* `options`: `SwapOperationOptions` (optional): Callbacks to track and gate the swap operation.
```typescript title="TypeScript"
export type SwapOperationOptions = {
onEvent?: (event: SwapEvent) => void;
hooks?: {
onIntent?: (data: OnIntentHookData) => void;
};
slippageTolerance?: number;
};
```
* `onEvent` (optional): Receives `status`, `plan_preview`, `plan_confirmed`, and `plan_progress` updates as the swap progresses. See the [Swap Events](/docs/nexus/nexus-sdk/v2/reference/swap-methods/swap-events) page for the full typed union.
* `hooks.onIntent` (optional): Called with the resolved swap intent before execution. Call `allow()` to proceed, `deny()` to cancel, or `refresh(sources?)` to re-quote.
* `slippageTolerance` (number, optional): Slippage override as a fraction (default `0.005`, i.e. 0.5%).
## Example
```typescript title="TypeScript"
import type {
SwapExactOutParams,
SwapOperationOptions,
SwapResult,
} from '@avail-project/nexus-core';
const result = await client.swapWithExactOut(
{
toChainId: 42161,
toTokenAddress: '0xaf88d065e77c8cc2239327c5edb3a432268e5831', // USDC on Arbitrum
toAmountRaw: 100_000_000n, // 100 USDC (6 decimals)
// Optional: also fund destination native gas
toNativeAmountRaw: 100_000_000_000_000n,
// Optional: restrict route planning to specific source tokens/chains
sources: [{ chainId: 8453, tokenAddress: '0x...' }],
},
{
onEvent: (event) => {
if (event.type === 'status') {
console.log('Swap status:', event.status);
}
if (event.type === 'plan_preview') {
console.log('Swap plan:', event.plan.steps);
console.log('Has bridge:', event.plan.hasBridge);
console.log('Has destination swap:', event.plan.hasDestinationSwap);
}
},
hooks: {
onIntent: ({ allow, deny, refresh, intent }) => {
console.log('Swap intent:', intent);
allow();
},
},
},
);
console.log('Swap with exact out result:', result);
```
## Return Value
The return value is a `SwapResult` object.
```typescript title="TypeScript"
export type SwapResult = {
sourceSwaps: ChainSwap[];
intentExplorerUrl: string;
destinationSwap: ChainSwap | null;
intent: SwapIntent;
};
export type ChainSwap = {
chainId: number;
swaps: Swap[];
txHash: Hex;
};
export type Swap = {
inputAmount: bigint;
inputContract: Hex;
inputDecimals: number;
outputAmount: bigint;
outputContract: Hex;
outputDecimals: number;
};
```
> **Note**
>
> On failure the method throws a typed [`NexusError`](/docs/nexus/nexus-sdk/v2/reference/hooks-and-errors) subclass rather than returning an error result. See the [full type definitions](https://github.com/availproject/nexus-sdk/blob/main/src/swap/types.ts) on GitHub.
### Fetch Bridge Balances
> **Note**
>
> **You are viewing the Nexus SDK v2 docs.** For the current SDK, see the [v3 docs](/docs/nexus/nexus-sdk/get-started/installation) and the [v2 → v3 migration guide](/docs/nexus/migration/sdk-v2-to-v3).
> **Note**
>
> **SET UP THE SDK BEFORE YOU START:**
>
> Install and initialize the client first — see [Installation](/docs/nexus/nexus-sdk/v2/get-started/installation) and [SDK Setup](/docs/nexus/nexus-sdk/v2/get-started/nexus-sdk-setup).
Use the `getBalancesForBridge()` function to fetch token balances that can be used in bridge operations across all supported chains in one call.
> **Note**
>
> **Note:** Check out the [API reference](/docs/nexus/supported-chains-and-tokens) for a full list of supported tokens and chains.
## Method signature
```typescript title="TypeScript"
getBalancesForBridge(): Promise
```
> **Note**
>
> If you need the tokens that can be used for swaps instead, use `getBalancesForSwap()`, which returns the same `TokenBalance[]` shape.
## Parameters
* None
## Example
Here is a minimal example of how to use the `getBalancesForBridge()` function to fetch the balances accessible by the bridge operations of a user:
```typescript title="TypeScript"
// Get all balances accessible by the bridge operations of a user
const bridgeBalances = await client.getBalancesForBridge();
console.log('Bridge balances:', bridgeBalances);
```
## Return Value
`getBalancesForBridge()` returns `Promise` — an array of `TokenBalance` objects. Each `TokenBalance` aggregates a token's holdings across every chain it lives on, with the per-chain split in `chainBalances`.
```typescript title="TypeScript"
export type TokenBalance = {
balance: string; // Aggregate balance across all chains (human-readable)
value: string; // Aggregate fiat value (string for precision)
chainBalances: ChainBalance[];// Per-chain breakdown
currencyId?: number; // Bridge currency identifier (present on bridge balances)
decimals: number;
logo: string;
name: string; // Display label (e.g. "USDC/USDM")
symbol: string; // Majority symbol by chain count
};
export type ChainBalance = {
balance: string; // Balance on this chain (human-readable)
value: string; // Fiat value on this chain (string for precision)
symbol: string;
chain: {
id: number;
logo: string;
name: string;
};
contractAddress: `0x${string}`;
decimals: number;
universe: Universe; // VM family as a numeric enum (0 = Ethereum/EVM)
};
```
> **Note**
>
> Field renames from [v1](https://github.com/availproject/nexus-sdk/blob/main/MIGRATION.md): `balanceInFiat` → `value`, `icon` → `logo`, and `breakdown` → `chainBalances`. See the [full type definitions](https://github.com/availproject/nexus-sdk/blob/main/src/domain/types/index.ts) on GitHub.
### Bridge and Transfer
> **Note**
>
> **You are viewing the Nexus SDK v2 docs.** For the current SDK, see the [v3 docs](/docs/nexus/nexus-sdk/get-started/installation) and the [v2 → v3 migration guide](/docs/nexus/migration/sdk-v2-to-v3).
> **Note**
>
> **SET UP THE SDK BEFORE YOU START:**
>
> Install and initialize the client first — see [Installation](/docs/nexus/nexus-sdk/v2/get-started/installation) and [SDK Setup](/docs/nexus/nexus-sdk/v2/get-started/nexus-sdk-setup).
Use the `bridgeAndTransfer()` function to source a token from multiple source chains to a single destination chain.
Use the `simulateBridgeAndTransfer()` function to simulate the bridge and transfer transaction to preview the costs and fees, before actually executing the transaction.
> **Note**
>
> **Note:** Check out the [API reference](/docs/nexus/supported-chains-and-tokens) for a full list of supported tokens and chains.
## Method signature
```typescript title="TypeScript"
bridgeAndTransfer(
params: TransferParams,
options?: BridgeOperationOptions,
): Promise
simulateBridgeAndTransfer(
params: TransferParams,
): Promise
```
## Parameters
```typescript title="TypeScript"
/**
* Parameters for bridging and transferring tokens.
*/
export interface TransferParams {
toTokenSymbol: string;
toAmountRaw: bigint;
toChainId: number;
recipient: `0x${string}`;
sources?: number[];
}
```
* `TransferParams`: Parameters for transferring tokens.
* `toTokenSymbol` (string, required): The symbol of the token to be bridged and transferred (e.g. `'USDC'`).
* `toAmountRaw` (bigint, required): The amount of tokens to transfer to the recipient, in raw integer units.
* `toChainId` (number, required): The chain ID of the destination chain.
* `recipient` (`0x${string}`, required): The recipient address.
* `sources` (number\[], optional): The chain IDs of the source chains to be used for the transfer. Useful if you want to maintain your holdings on some chains.
* `options`: `BridgeOperationOptions` (optional): Per-operation hooks, event listener, and fill timeout — the same options object accepted by [`bridge()`](/docs/nexus/nexus-sdk/v2/reference/bridge-methods/bridge).
```typescript title="TypeScript"
export type BridgeOperationOptions = {
hooks?: {
onIntent?: (data: OnIntentHookData) => void;
onAllowance?: (data: OnAllowanceHookData) => void;
};
onEvent?: (event: BridgeEvent) => void;
fillTimeoutMinutes?: number;
};
```
> **Note**
>
> The `onEvent` callback receives a typed discriminated union (`status` / `plan_preview` / `plan_confirmed` / `plan_progress`). See the [Bridge Events](/docs/nexus/nexus-sdk/v2/reference/bridge-methods/bridge-events) page for the full event shapes.
## Example
```typescript title="TypeScript"
import type { TransferParams, TransferResult } from '@avail-project/nexus-core';
// Smart transfer with automatic optimization
const bridgeAndTransferResult: TransferResult = await client.bridgeAndTransfer(
{
toTokenSymbol: 'USDC',
toAmountRaw: 1_530_000n, // 1.53 USDC (6 decimals)
toChainId: 1, // Ethereum
recipient: '0x742d35Cc6634C0532925a3b8D4C9db96c4b4Db45',
},
{
onEvent: (event) => {
if (event.type === 'plan_preview') console.log('Transfer steps:', event.plan.steps);
if (event.type === 'plan_progress') console.log('Step progress:', event.stepType, event.state);
},
},
);
console.log('Bridge and transfer result:', bridgeAndTransferResult);
const bridgeAndTransferSimulation = await client.simulateBridgeAndTransfer({
toTokenSymbol: 'USDC',
toAmountRaw: 1_530_000n, // 1.53 USDC (6 decimals)
toChainId: 1,
recipient: '0x742d35Cc6634C0532925a3b8D4C9db96c4b4Db45',
});
console.log('Bridge and transfer simulation:', bridgeAndTransferSimulation);
```
> **Warning**
>
> `bridgeAndTransfer()` throws typed [`NexusError`](https://github.com/availproject/nexus-sdk/blob/main/src/domain/errors.ts) subclasses on failure. Branch on `error.category` / `error.code`.
## Return Value
### `bridgeAndTransfer()`
The return value is a `TransferResult` object, which is an alias for [`BridgeAndExecuteResult`](/docs/nexus/nexus-sdk/v2/reference/bridge-methods/bridge-and-execute).
```typescript title="TypeScript"
/**
* Result structure for transfer transactions.
*/
export type TransferResult = BridgeAndExecuteResult;
export type BridgeAndExecuteResult = {
approval?: TxResult;
execute: TxResult;
} & (
| { bridgeSkipped: false; bridgeResult: BridgeResult }
| { bridgeSkipped: true; bridgeResult?: undefined }
);
```
### `simulateBridgeAndTransfer()`
The return value is a `BridgeAndExecuteSimulationResult` object.
```typescript title="TypeScript"
export type BridgeAndExecuteSimulationResult = {
bridgeSimulation: BridgeSimulationResult | null; // null when bridging is skipped
executeSimulation: ExecuteSimulation;
};
```